When you click on links to various merchants on this site and make a purchase, this can result in this site earning a commission. Affiliate programs and affiliations include, but are not limited to, the eBay Partner Network.
Regarding fitment of the Bronco rear swaybar, consider one-inch spacers on each end of the endlinks instead of a single two-inch spacer. That would reduce the lever action on the hardware... or a fabricated mount projecting from the frame and a single one-inch spacer at the other end.
Regarding fitment of the Bronco rear swaybar, consider one-inch spacers on each end of the endlinks instead of a single two-inch spacer. That would reduce the lever action on the hardware... or a fabricated mount projecting from the frame and a single one-inch spacer at the other end.
We're on the same wavelength, as that's exactly the same thing I had thought about.
I've never seen icicles in Baja, but you are right.. they do look like that. Thatched palm roofs are quite common here though. The palm leaves (fronds), are plentiful, cheap, light, last about 20 years, and since the stem is nailed, and the fronds are not, they lift, and let the wind blow through, during a hurricane... Mine have been up for 9 years now..
I've been a member of Mustang Steve's forum since June, 2001. I've been to more than half the birthday bashes/Mustang get together he's had, annually, since 2004. I've even been to his house a couple of times.
This is a Duraspark wiring schematic Steve Wilkes (Mustang Steve) produced. You can find this drawing all over the internet.
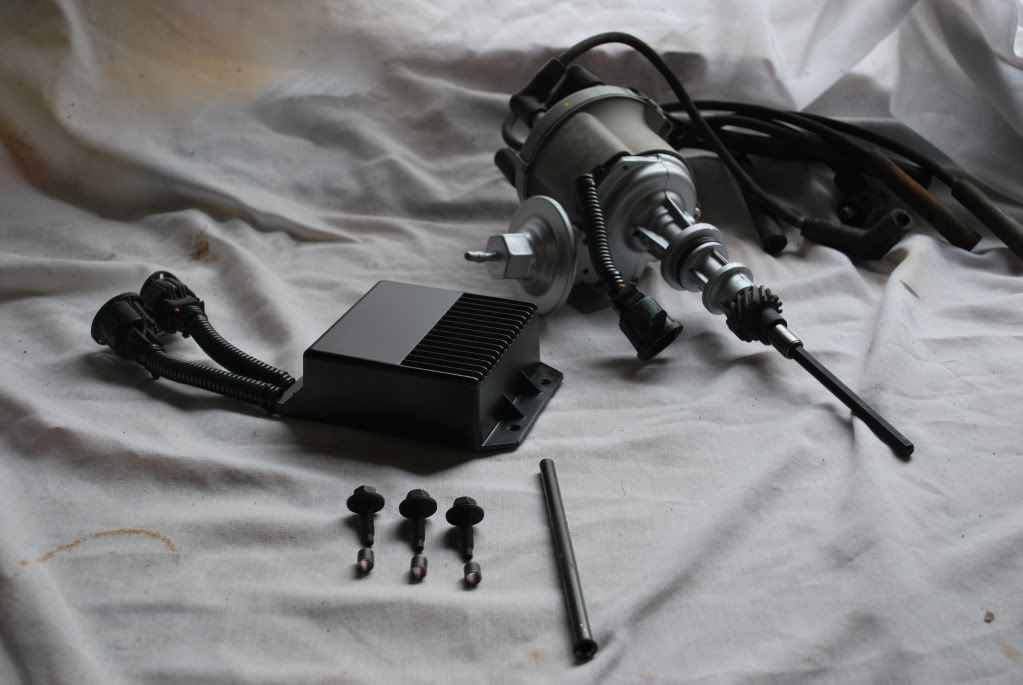
One problem with the DS module is heat soak and the lack of air circulation to keep it cool to prevent it from melting the potting, of the electronics, out of the module case.
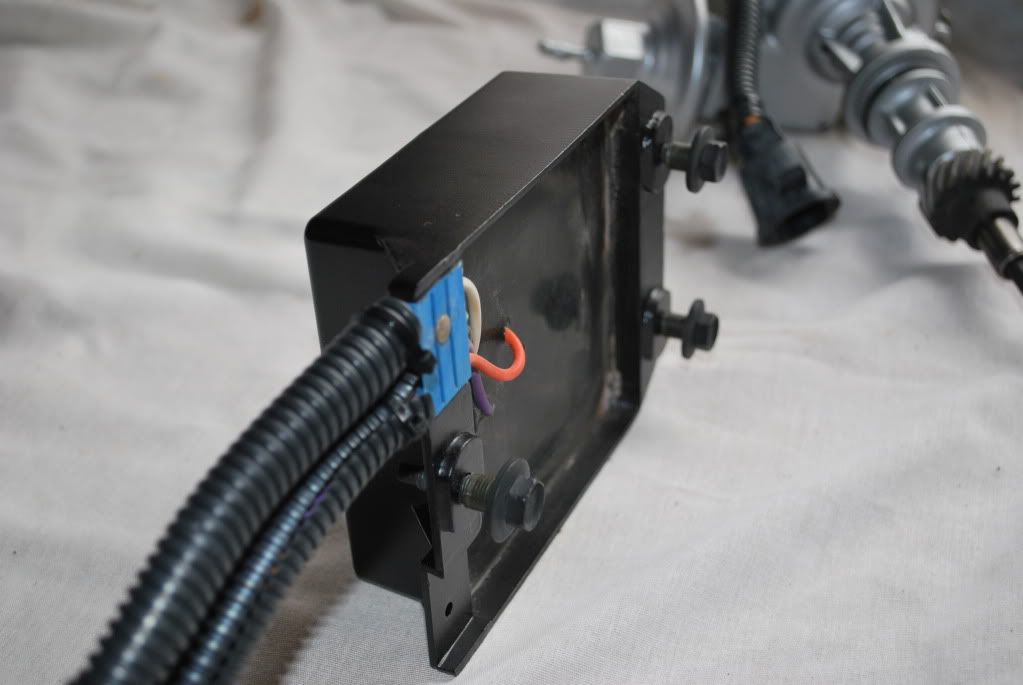
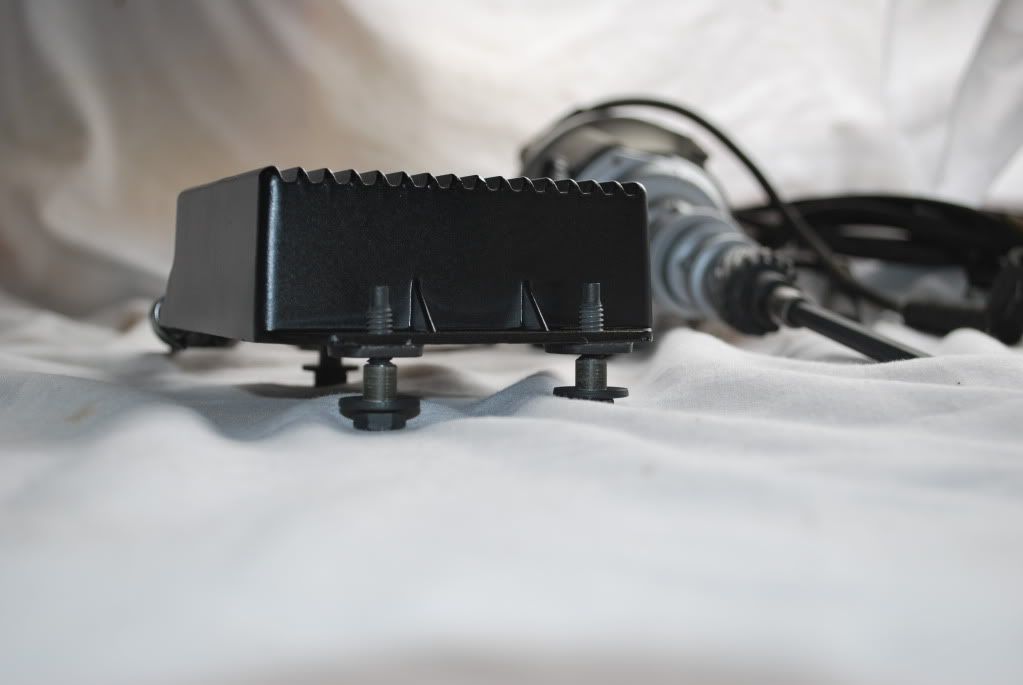
While my DS module/distributor aren't installed yet, I took some 5/16" diameter fuel hard line and cut three pieces 3/8" long. They will be used as stand-offs between the bottom of the module to the surface of the inner fender apron.
This will keep the bottom of the module from being mounted flat to the panel. With it spaced off the panel, air will be able to circulate ALL the way around it, not just partially around it.
When I get it installed, I can say my old '69 has a 'black' box in it.
I copied your idea for spacing this morning when mounting my box on the inner fender. Might be overkill but simple enough to do for some peace of mind. One thing I added though was some star washers. I read somewhere that the box gets its ground through contact with the metal fender.
I copied your idea for spacing this morning when mounting my box on the inner fender. Might be overkill but simple enough to do for some peace of mind. One thing I added though was some star washers. I read somewhere that the box gets its ground through contact with the metal fender.
Roger that. Glad if I had a useful idea you could use.
What's this? I didn't order a Ford replacement tailgate??
....Oh, it's a rear sway bar assembly for a 9-inch rear end!
I already bead blasted the U-bolts and attaching brackets. I'm trying to break the 1/2"-13 bolts/nuts loose that attach the end links to the bar but, they aren't budging.
I sprayed them down with penetrating oil and will let it soak for a while but, if they won't break loose, I'll just have to cut them off and get new 1/2"-13 x 2-1/2" grade-8 bolts and some 1/2"-13 grade-8 flanged prevailing torque lock nuts to replace them with. --gotta do what ya gotta do.
I really hope I can get this rear sway bar to work on the old F-shorty. (fingers crossed).
The '79 Bronco rear sway bar I bought came from up north (Nebraska to be exact --salty roads). There isn't really any rusted or pitted items on the assembly, except for the sway bar-to-housing brackets.
They had some pitting where the sway bar bushings mate up against the top of the brackets, because water would get trapped between the bushing and bracket and obviously stay there for a long time. This is because there are two depressions (low spots) stamped into the middle in each of the two brackets.
Before I bead blasted them, I noticed the pits and thought I would drill a small hole in the lowest part of each depression as a water relief. While I was bead blasting one of them, the media punched through a thin place in the metal of one of the brackets and made a small hole in it. --Now, it was DEFINITE I was going to drill them.
I found the centerline of the brackets, drilled a 1/8" pilot hole in the lowest portion of the two depressions in each bracket and then drilled the holes out to 9/32".
This should allow any water that gets between the bushing and bracket to drain out and will allow air to get to this area to insure it stays dried out.
Maybe I'm all wet here (yes,on purpose!) but I was thinking the opposite. I'd be more worried about that part of the brackets too thin now from the rust. We don't want the bushings and bar poking through. How 'bout welding a plate in each from underneath then drilling your holes (and/or trails)?
Tip of the Day: If the bushings are one-piece then they are really hard to slide on and off and would likely mar the finish unless powdercoated.
I simply moved the bushings over and painted those areas where the bushings would be positioned. When those areas were dry, I wrapped the swaybar with Teflon (plumbing) tape and then slid the bushings over the taped areas to provide lubricity since they are likely not greasable rubber bushings. Then I painted the areas where the bushings were temporarily positioned.
Huh? What? Not gonna mildly countersink the holes to promote drainage???
.. my OCD is rampant.
Doesn't show in the previous photos but, I took a chamfering/counter sink bit and tapered the openings of the holes (both sides). So, yes I did and yes, we still think a lot alike on many things.
Picture showing the same chamfering/counter sink bit that I used on the water passage of my thermostat housing. --I also opened up the passage of the thermostat casting to 27/64".
I don't like sharp edges in freshly drilled (or existing) bolt holes or on brackets, etc. I also filed the sharp edges off the rear sway bar bracket stampings before bead blasting them.
It really pisses me off to be working on something, a wrench slips and I get sliced on a sharp bracket edge or object on a vehicle.
Maybe I'm all wet here (yes,on purpose!) but I was thinking the opposite. I'd be more worried about that part of the brackets too thin now from the rust. We don't want the bushings and bar poking through. How 'bout welding a plate in each from underneath then drilling your holes (and/or trails)?
I think the integrity of the brackets will be fine. The brackets/sway bar also aren't supporting the weight of the truck. They're just holding the sway bar, and the bar will only be controlling body lean. --well, IF it turns out the rear sway bar will actually bolt up under the truck. LOL
If it should turn out the brackets are not "fine," I'll improvise at such time.
The sway bar assembly looks a little different now than it did when I took it out of the box yesterday. I got everything bead blasted and primed this evening.
My frame rails are 34" to the outside. This '79 Bronco rear sway bar had two spacers on the inboard sides, at the upper end of the end links. --originally went between the Broncos frame rails and the inboard sides of the upper end of the end links.
I moved the two spacers over to the driver side of the bar and put one of the spacers between the lower end of the end link/sway bar and the other spacer to the inboard side of the upper end of the end link.
On the passenger side, I stacked as many 1/2" flat washers as I had, in the same configuration as the stock, solid spacers. Between the inboard sides of the upper end links, I'm currently sitting at 34-1/4" (currently within 1/8" per side getting the span down to the needed 34"). Looks like I will be able to get there on this part.
Now, IF the rest of the bar will fit under the truck without interference, that'll be a big thumbs up on this working out.
This Hennessey Takes the Expedition Tremor's Off-Roading Capability to the Next Level
Slideshow: The VelociRaptor Expedition gains a lift, upgraded suspension, Brembo brakes, and trail-ready equipment while retaining the stock 440-horsepower EcoBoost V6.
Rezvani's Latest Post-Apocalyptic Monster Is a Ford F-150 Raptor Underneath
Slideshow: Called the Fortress, the 850-horsepower pickup combines Raptor underpinnings with military-inspired features, survival equipment, and a starting price of $285,000.