


Power Door Locks FIXED!!!!
Tuned

Joined: Mar 2005
Posts: 493
Likes: 13
From: Aurora, Iliinois
Thanks for the great info, this really works well! I took mine apart today and now they work like new. Here are some pics to help out with the fix, the are resized for dial-up (hey get high speed, I am in a third world country and have it!). I put this back a little different. I used that plastic epoxy stuff around the edges, I held the two halves together with vice grips until it was hard.
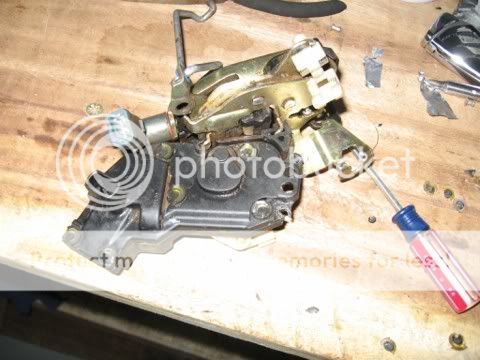
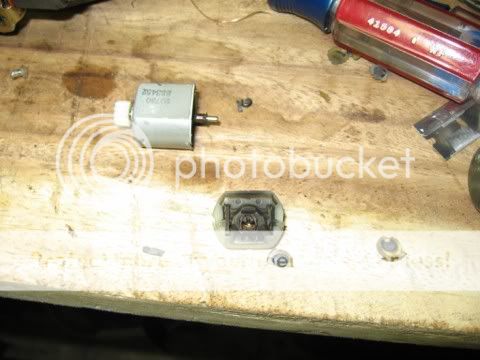
Pic one is the unit after the two rivits were removed
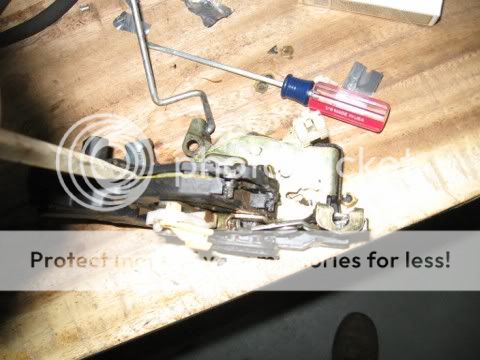
Prying the unit apart
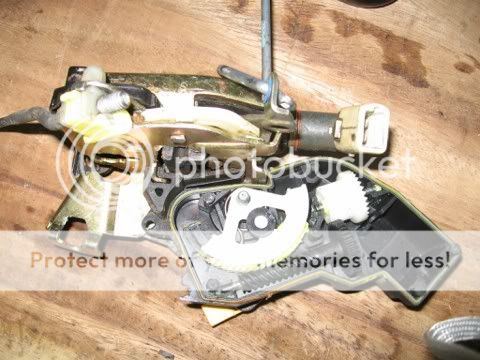
The open unit minus the motor
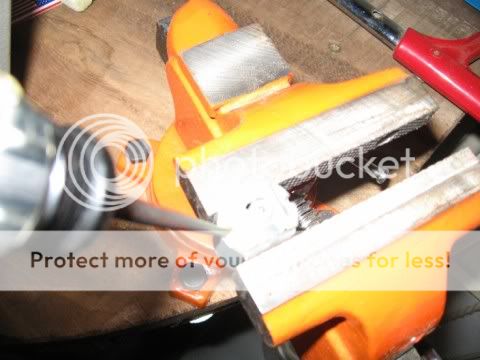
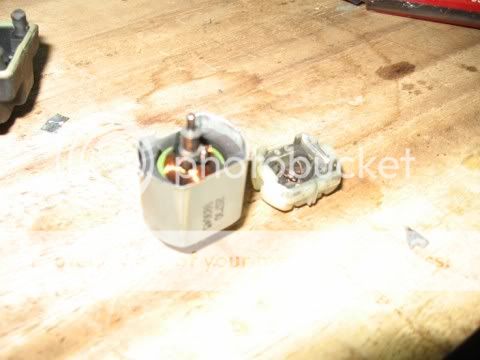
Prying the two tabs open on the motor
The opened motor the little metal piece to wrap in tin foil is on the left side of the cap
Now the motor getting ready to be put back together the part is wraped in foil on the right side in this pic.
Hope this helps
Scott
Pic one is the unit after the two rivits were removed
Prying the unit apart
The open unit minus the motor
Prying the two tabs open on the motor
The opened motor the little metal piece to wrap in tin foil is on the left side of the cap
Now the motor getting ready to be put back together the part is wraped in foil on the right side in this pic.
Hope this helps
Scott

Anyways, thanks for the post...I doubt I could have done it without the pics !

FTE Leadership Emeritus
Joined: Jul 2002
Posts: 42,561
Likes: 423
From: Long Island USA

Did both of mine yesterday. I drilled out the two metal rivets, just so I had the assembly completely open. I used two short (3/8"?) 6/32 machine screws with nuts to replace the rivets, works like a charm. Used a soldering iron to melt the plastic rivets again, and used a tie-wrap on the motor end just to make sure it wouldn't come apart.
I used thick copper foil to wrap the resistor.
Both sides work GREAT!
Kudos to all who contributed such great information to this thread
I used thick copper foil to wrap the resistor.
Both sides work GREAT!
Kudos to all who contributed such great information to this thread

New User
Joined: Apr 2010
Posts: 2
Likes: 0
back door panel removal for access to actuator
Can someone tell me how to remobe the back door window trim panel for access to the door lock actuator? on a 2000 excursion. not the rea doors but the very back door. please post pics if possible. i dont want to break the window trim and if it has those plastic rivets, it feels like if i pull any harder ill break the panel. im having the same problem as in this thread. i can unlock the back door with the remote, but i have to lock it everytime with the key as it wont lock with the remote. thanks, you can also PM me. any help would be greatly appreciated.
Molon Labe

Joined: Dec 2006
Posts: 5,272
Likes: 1
From: Alaska

I did the two front today.The wrok great, but what a p.i.t.a......I must have bent the window track on the pass door the window moves real slow now??????
I'll do the rears some other day. I dread fixing the window, cant figure what I did wrong
I'll do the rears some other day. I dread fixing the window, cant figure what I did wrong

New User
Joined: Jan 2010
Posts: 5
Likes: 0
From: easthartford c.t.
window tracks
try using wd40 i did same thing
Molon Labe
Joined: Dec 2006
Posts: 5,272
Likes: 1
From: Alaska
Cool, I'll give it a try. I was about to take the track out of one of my extra doors, and tear into it again.
FTE Stories
Ford Trucks for Ford Truck Enthusiasts

Top 10 Fords at 2026 Carlisle Ford Nationals
Joe Kucinski
3 Best / 3 Worst Parts of Modern Ford Ownership
Brett Foote
10 Amazing Upgrades That Solve Common Ford Truck Owner Headaches
Pouria Savadkouei
Every 2026 Ford Engine Explained
Brett Foote
10 Ugly Ford Trucks That We Still Kinda Love
Joe Kucinski
10 Things Every Truck Owner NEEDS (2026 Edition)
Michael S. Palmer
Rezvani's Latest Post-Apocalyptic Monster Is a Ford F-150 Raptor Underneath
Verdad Gallardo
Top 10 Most Expensive Ford Trucks Ever Sold on Bring a Trailer
Joe Kucinski
2027 Ford Super Duty Buyer's Guide (Every Model, Engine, & Package)
Brett FooteFTE Leadership Emeritus
Joined: Jul 2002
Posts: 42,561
Likes: 423
From: Long Island USA
Sounds like you might have basically pinched the glass, lengthwise.
Molon Labe
Joined: Dec 2006
Posts: 5,272
Likes: 1
From: Alaska
Thanks
New User
Joined: Apr 2010
Posts: 2
Likes: 0
In response to my own question. Yes, and thanks exv10, i was able to remove the rear hatch door trim, and thanks to all te info in this thread i was able to fix the actuator. I did notice the plastic that holds the trim in place was looking like it would crack if i pulled any harder. I stuck a flathead screw driver into the flat space behind the plastic mounts and slowly pryed it out instead of just pulling the trim. this allowed me to put the force and stress on the thicker plastic insert instead of bending the trim around it. after that it was a breeze. slipped a smaller flat head into the plastic tab holding the actuator onto the mount and slid it out. removed the power cable, and viola. Then i followed all the steps here, used aluminum foil, and i used bailing wire and zip ties incase it didnt work. but it did, also i did a nice enough job with the wire and ties, i decided to leave it. The more professional jobs listed here would have taken more time. Ill see how long this lasts and depending on that i may make it a more professional finish. either way it looks fine, works great, and saved me a ton of money. Im reallly happy i found all this info here and thanks to everyone who contributed. i really appreciate it!

Post Fiend
Joined: Mar 2009
Posts: 11,798
Likes: 14
From: Mt. Shasta California
You're welcome
That area in there really gets dirty. I spent about a half hour in there just scraping with a long screwdriver and applying WD40. I did 4 of my 5 locks and just crammed tin foil in the contacts. They work great but now the 5th one is going out. It is so sensitive to heat it actually works better on colder days.
Molon Labe
Joined: Dec 2006
Posts: 5,272
Likes: 1
From: Alaska


Freshman User
Joined: Apr 2010
Posts: 33
Likes: 0
The first door took me about an hour just to get the lock out. The second door from start to back together was all of 30 min. I bet I could do it faster, one of the latch rods got me screwed up. Took me like 10 mins before I just said screw it and took the door handle off. On the first door I also changed the lock tumbler thing, it was seized.