



Power Door Locks FIXED!!!!

New User
Joined: Apr 2009
Posts: 9
Likes: 0
I got some pics coming, I just did the fix this weekend, the first door is long and horrible, not to mention the bleeding hands, the second door, is well, better than the first. But I took some pics, hopefully they'll help anyone. I cant stand working in doors, too many holes, wires etc.

Posting Guru
Joined: Jul 2006
Posts: 1,720
Likes: 1
Hey guys, I took it apart again put the motor in RIGHT this time. And i just finished the second door. As far as Pop being rude, I am a grown up I can take it  . i figured if i looked hard enough i could find the answer but I think i got it faster by posting the question then i would have going through 24 pages of posts.and seeing as i am trying to do these locks through my lunches and after work before it gets dark rude or not it actually helped I appreciate all the help. This is an awesome fix and it will save me alot of leaning over and unlocking the door for people.
. i figured if i looked hard enough i could find the answer but I think i got it faster by posting the question then i would have going through 24 pages of posts.and seeing as i am trying to do these locks through my lunches and after work before it gets dark rude or not it actually helped I appreciate all the help. This is an awesome fix and it will save me alot of leaning over and unlocking the door for people. I feel your pain on this one. However we all need learn time. The .01 repair was my quick fix without soldering. Then I found I could put a small copper wire around the thermistor and it would work. If I do it again I will drill a hole through it and put the wire in and solder as a circuit board.
 I do understand about not reading 300 pages of stuff. Just the guy thought process of "I don't read instructions or ask for directions"
 At least with the wife
 in the car. Guy thing !
New User
Joined: Apr 2009
Posts: 9
Likes: 0
While Im getting the pics ready, when I lock the truck for the night, come out in the morning, the remote doesnt work. Unlock the door manually, and push the power door locks, the remote starts working again for the day. Any ideas?

New User
Joined: Apr 2009
Posts: 9
Likes: 0
Ok, pics for the directions for the fix!!!
No worries, here it is.
WARNING: The following is long winded, but if you want your PDL's to work again WITHOUT spending any $$ read on.
I finally got tired of my non-working PDL's and decided to tear into my truck and find/fix the problem. There has been many discussions about possible issues and I have concluded that the majority of us are seeing actuator motor problems and not relays, switches etc. Ill start by saying the problem I have had is that when I hit the switch, the locks attempt to move and after repeated attempts, the signal appears to get weaker and weaker until nothing....I assumed relay or switch.....NOT THE CASE!
First I started by testing the signal at the harness plug to the actuator. Perfect. No issues here. Next I completely removed the actuator/lock mechanism
*Steps to remove from 99 Ford F-250
Remove upper trim by pulling it straight out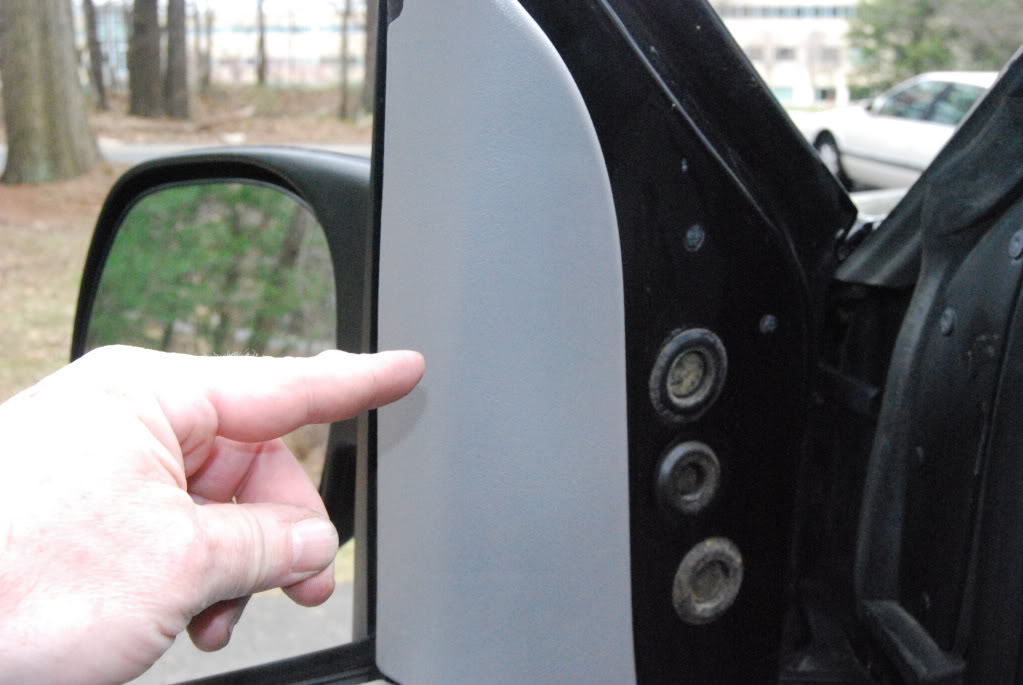
Remove door switches carefully by twisting from door panel
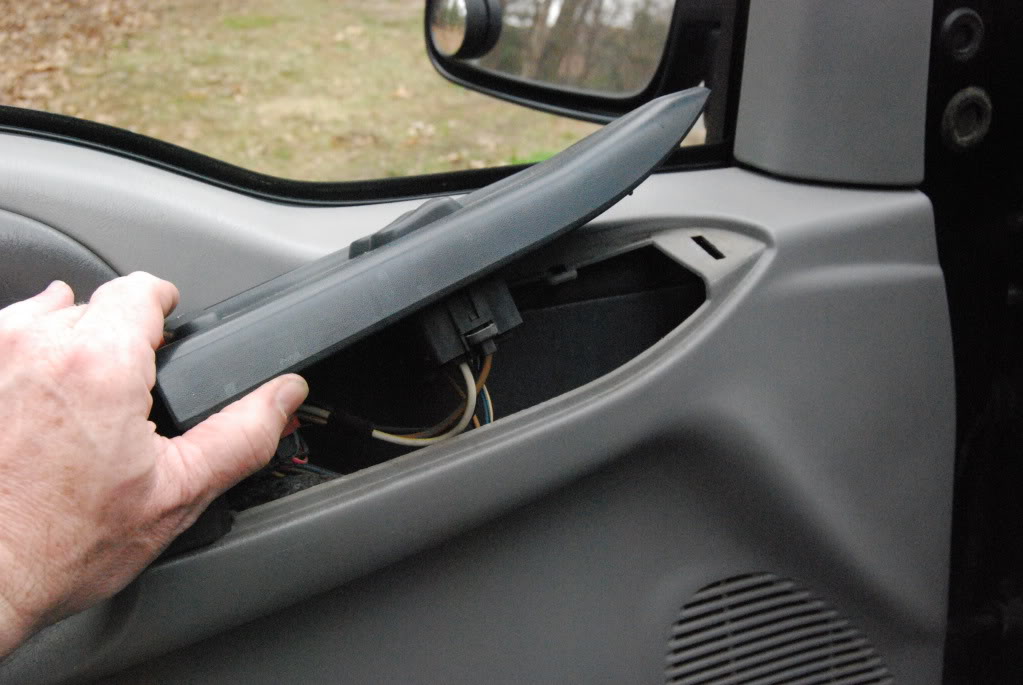
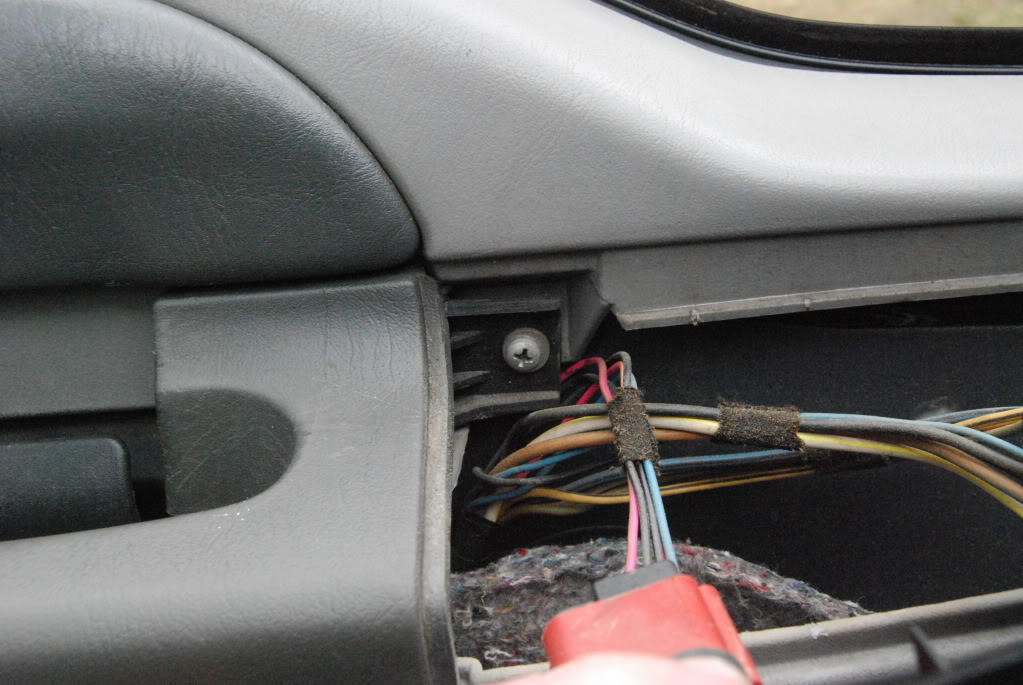
Remove bolt from behind switch panel (in this case, its a phillips screw)
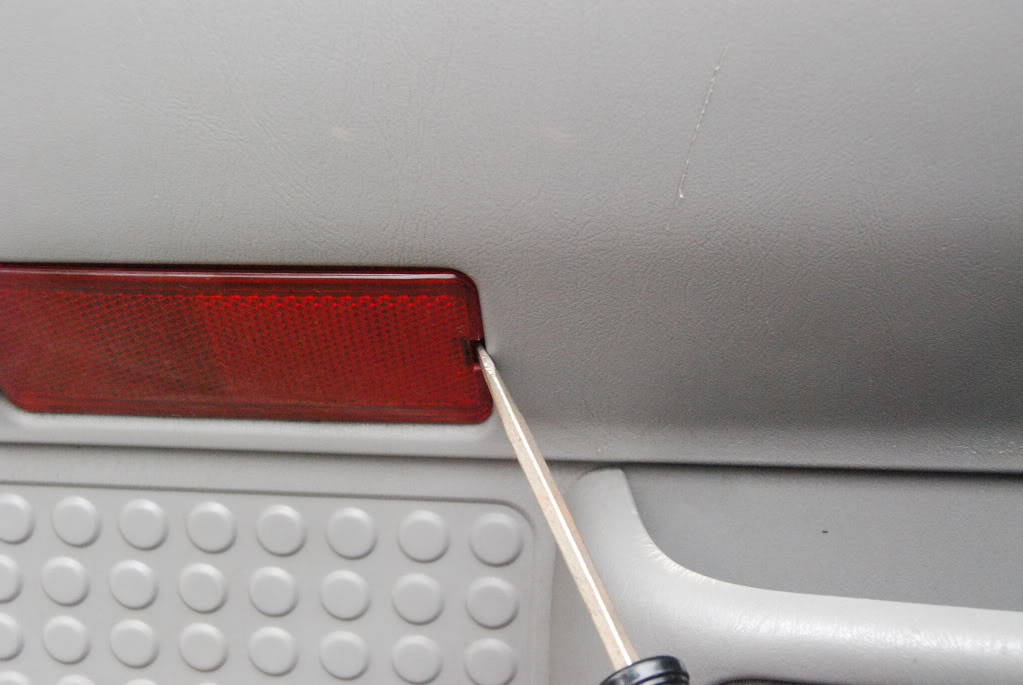
Remove reflector from lower door panel w/screwdriver
Remove bolt from lower door panel
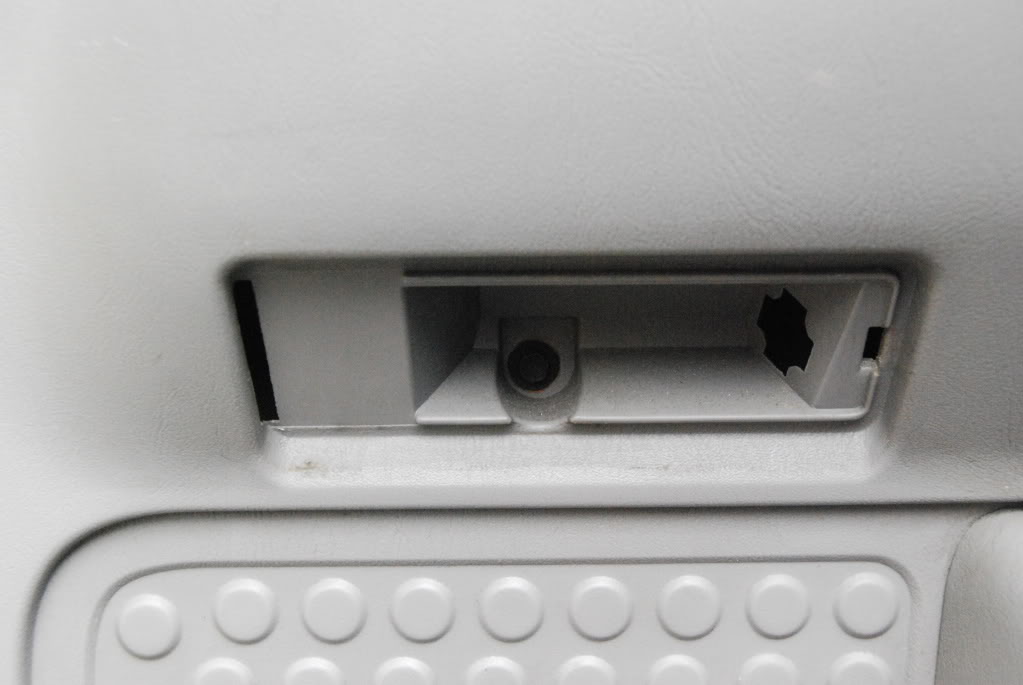
Carefully bump door panel UP, don't pull away from the door
The reason is the hooks on the panel itself
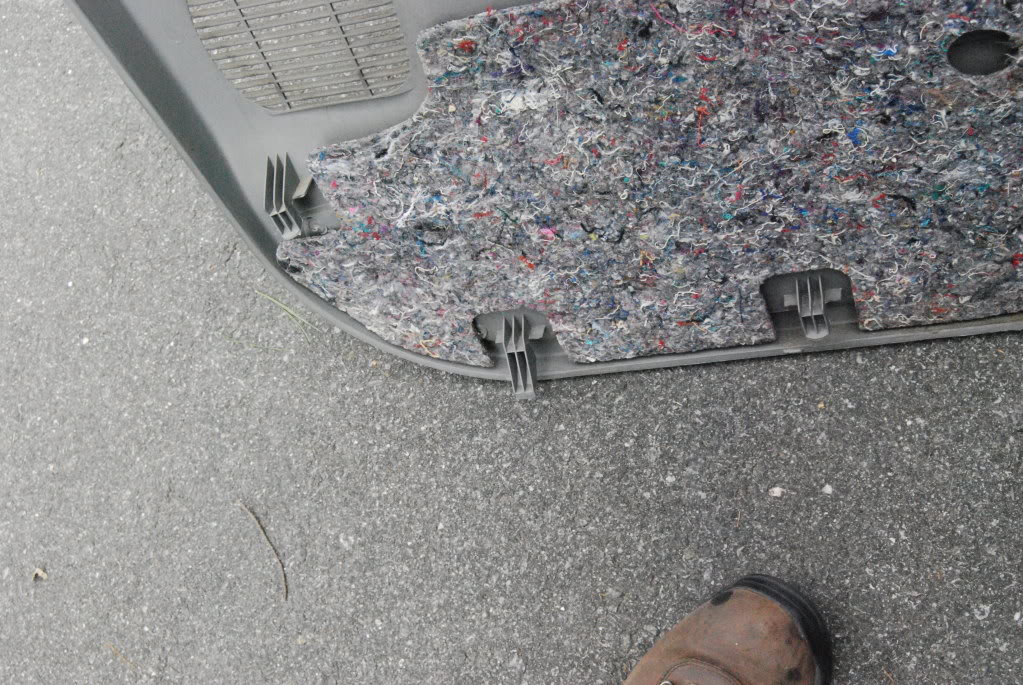
Carefully move weather panel by slowly pulling away from door, you can reuse the sticky if your careful
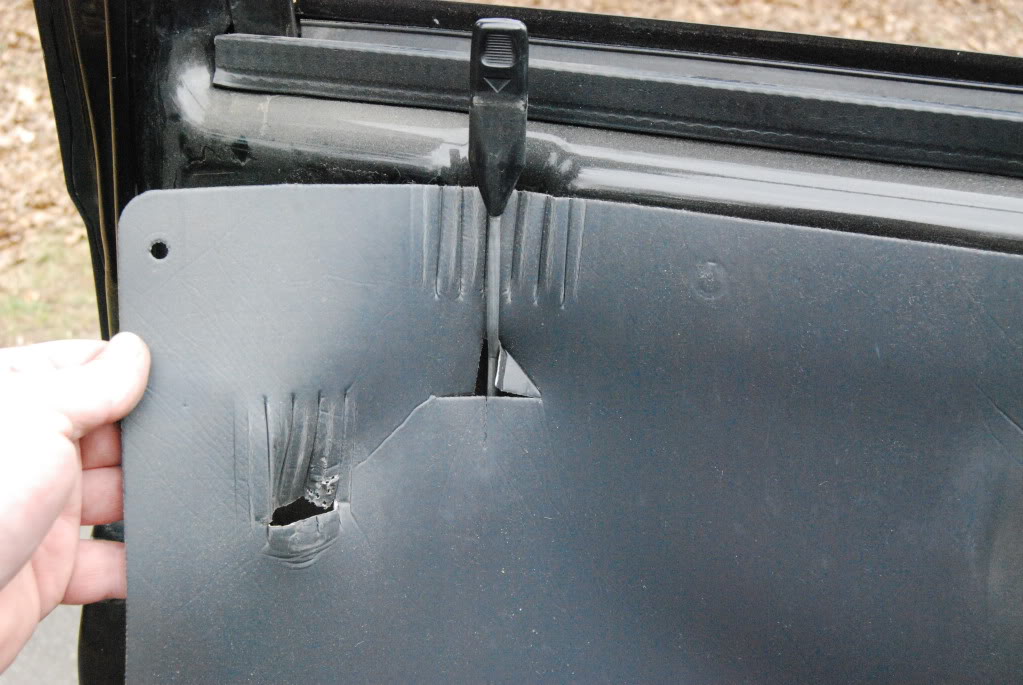
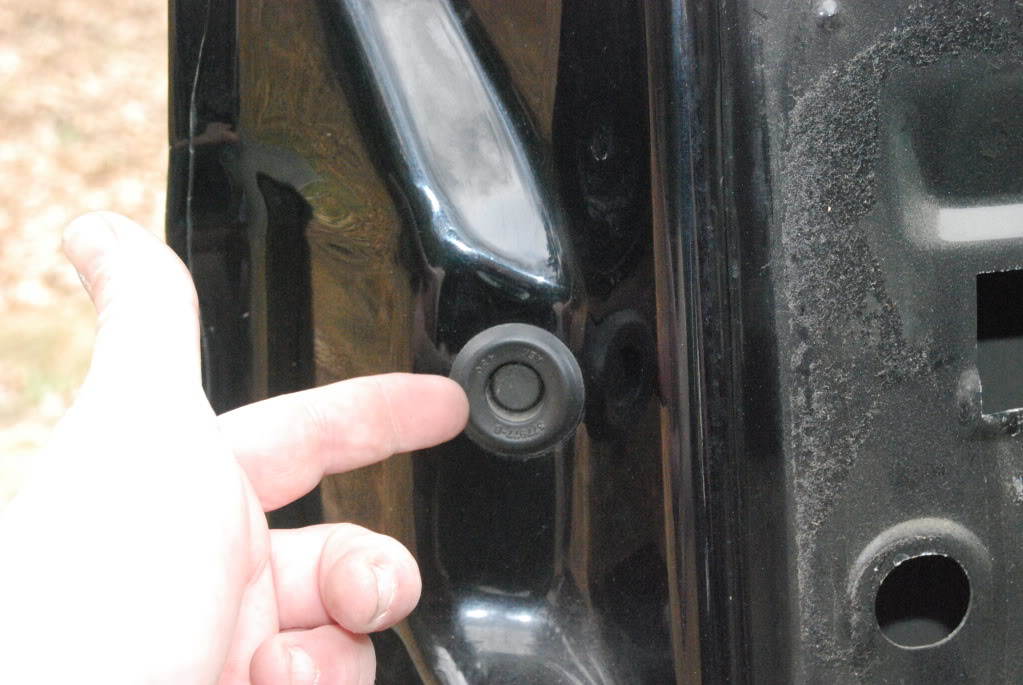
Remove 2 bolts that attaches outside door handle (1) through hole in upper door access gained by removing plug in door, and (2) using 7/16 wrench, removing bolt behind door runner
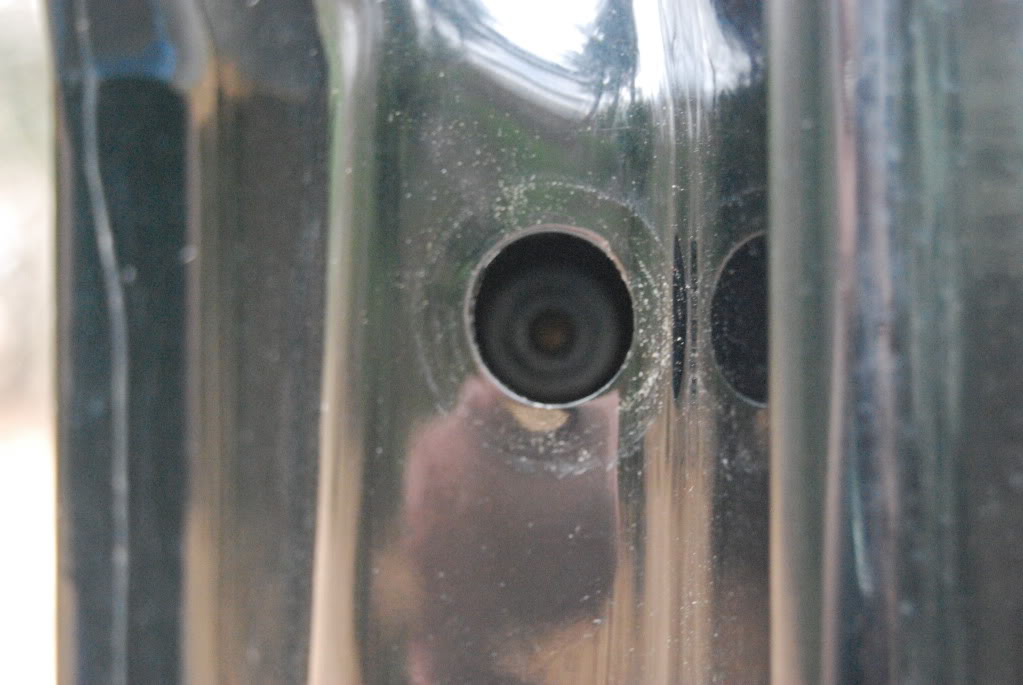
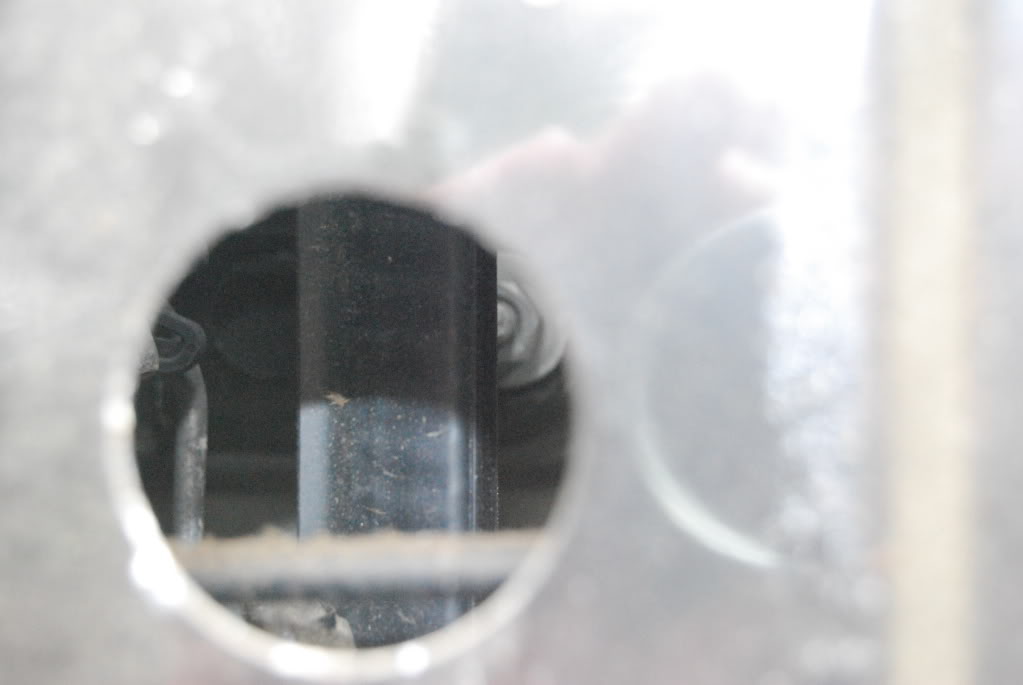
Remove 3 torx screws holding lock assembly in place
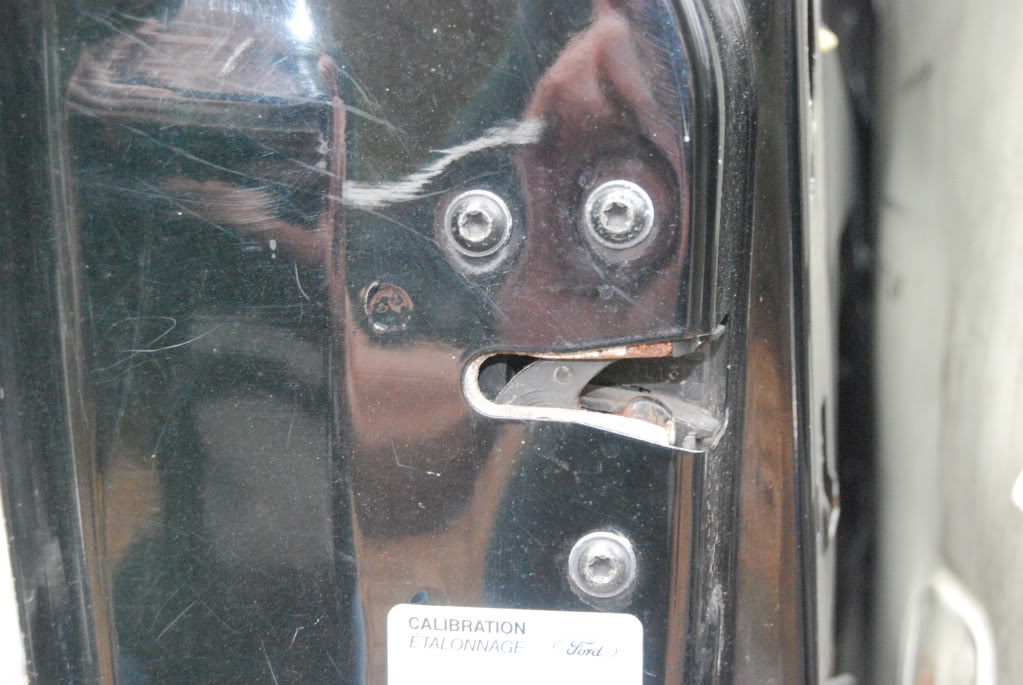
Carefully! remove latch bar from lower outer door lock
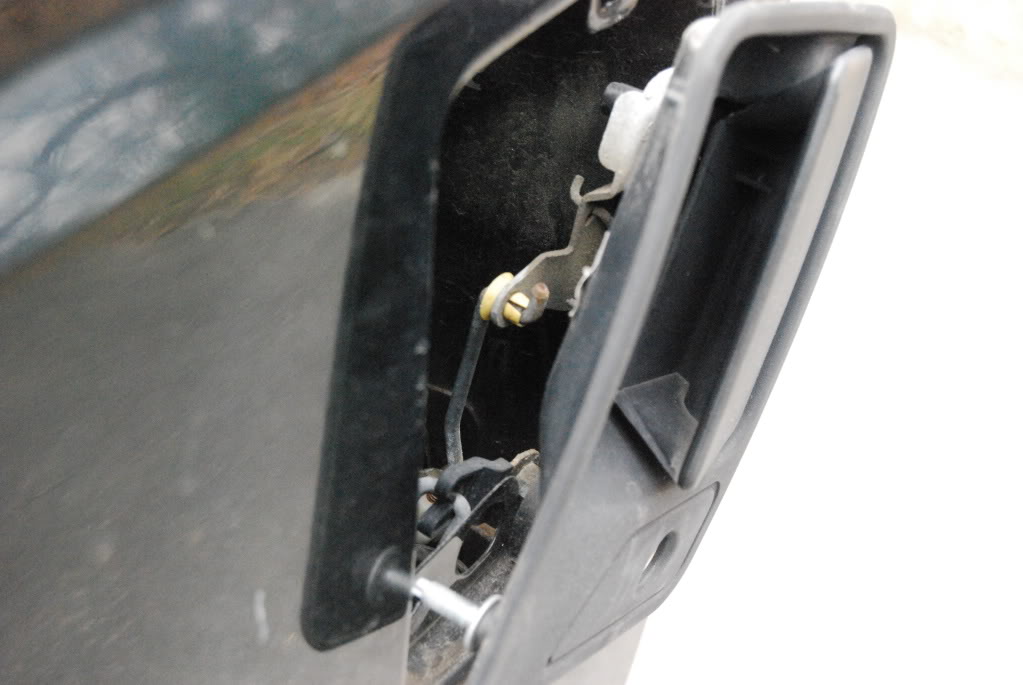
Carefully remove upper lock bar from outer door lock
Maneuver the lock assembly down to the larger opening in the door to gain access to cable and wiring plugs
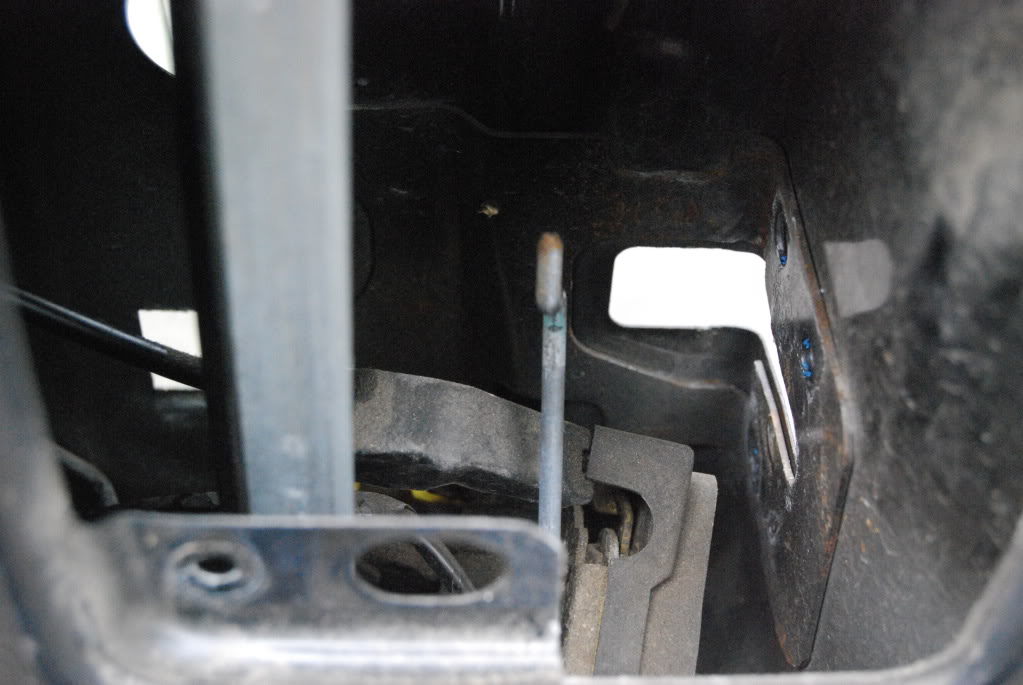
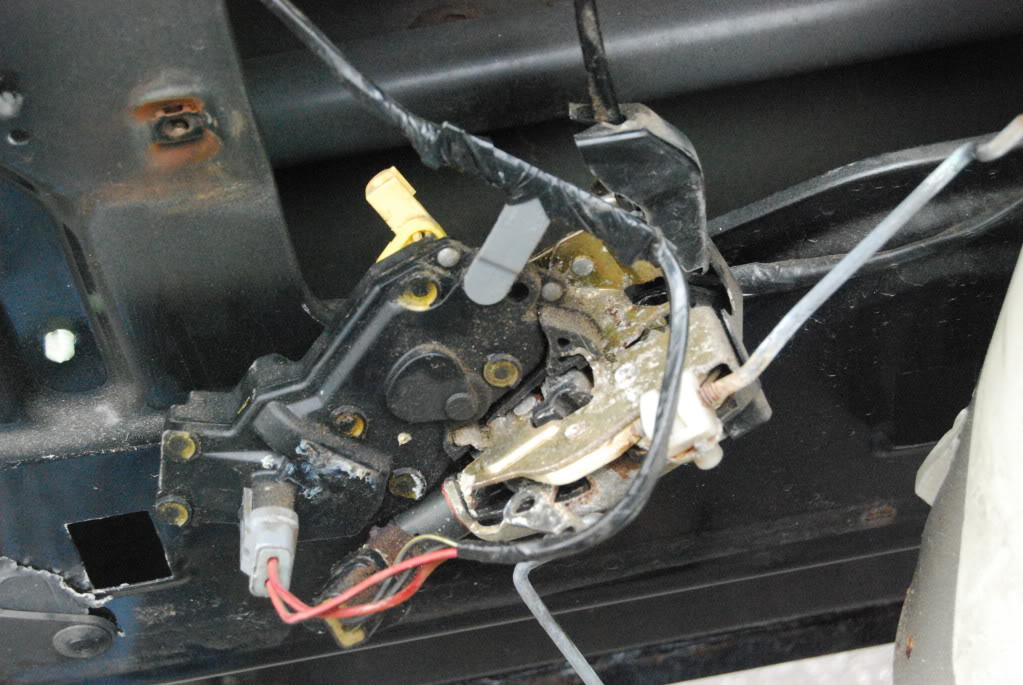
Remove inside door handle cable from lock assembly using needle nose pliers. Maneuver lock assembly to release the ball end of the cable from assembly
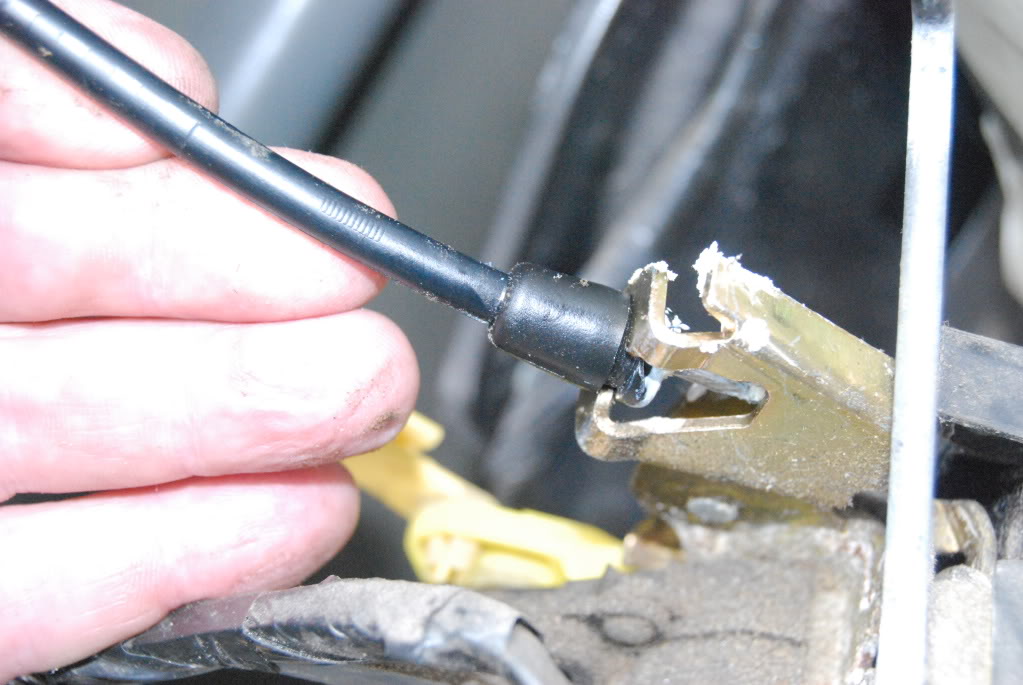
Carefully remove two plugs from lock/actuator assembly
End of removal procedure, reverse procedure to install!
and bench tested them with 12V..Here lies the problem. The actuator acted the same as when in the truck. First I did a thorough cleaning of all of the mechanism so it works freely and still had the same results. Here's where it get's tricky. These things are built so that they are NOT serviceable. I had already decided that they were going to need to be replaced, so I decided to break them open for closer inspection. It comes apart relatively easily, but appears that It cannot be put back together once apart.
I drilled out two small rivets and then pried the case apart. As you pry the case apart you'll notice these small little plastic rods protrude up through the case cover. These rods are then "mushroomed" with heat through the upper case and then sealed with some kind of silicone. When you pry apart the case the "mushroom" head breaks off and the rod remains.
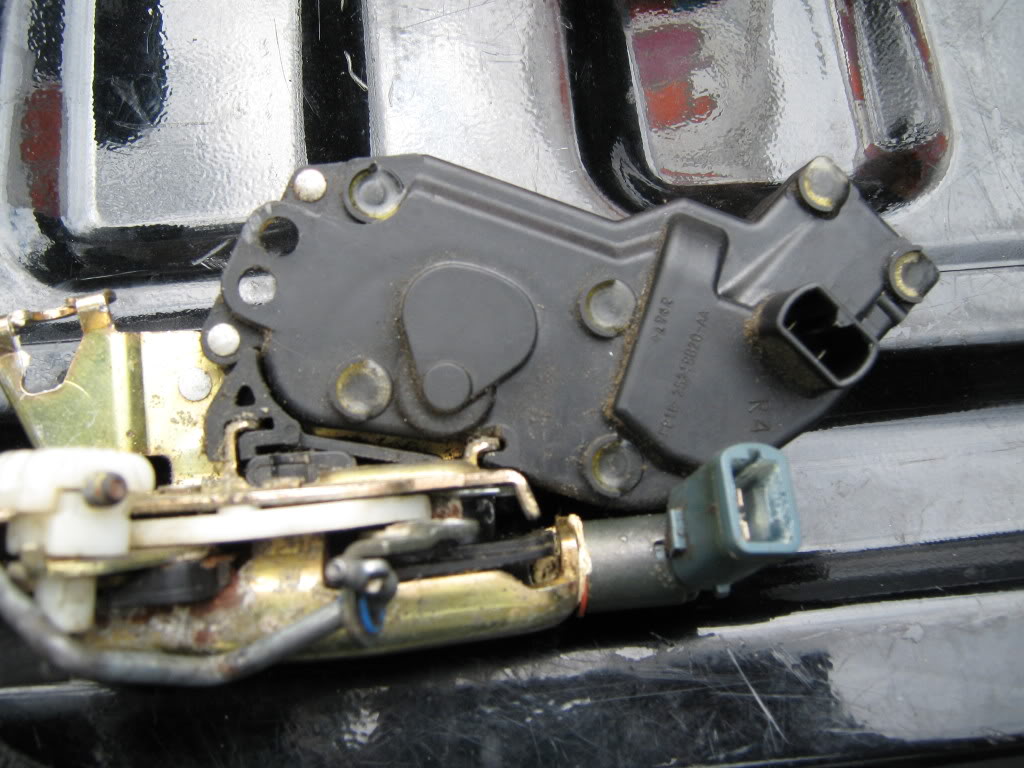
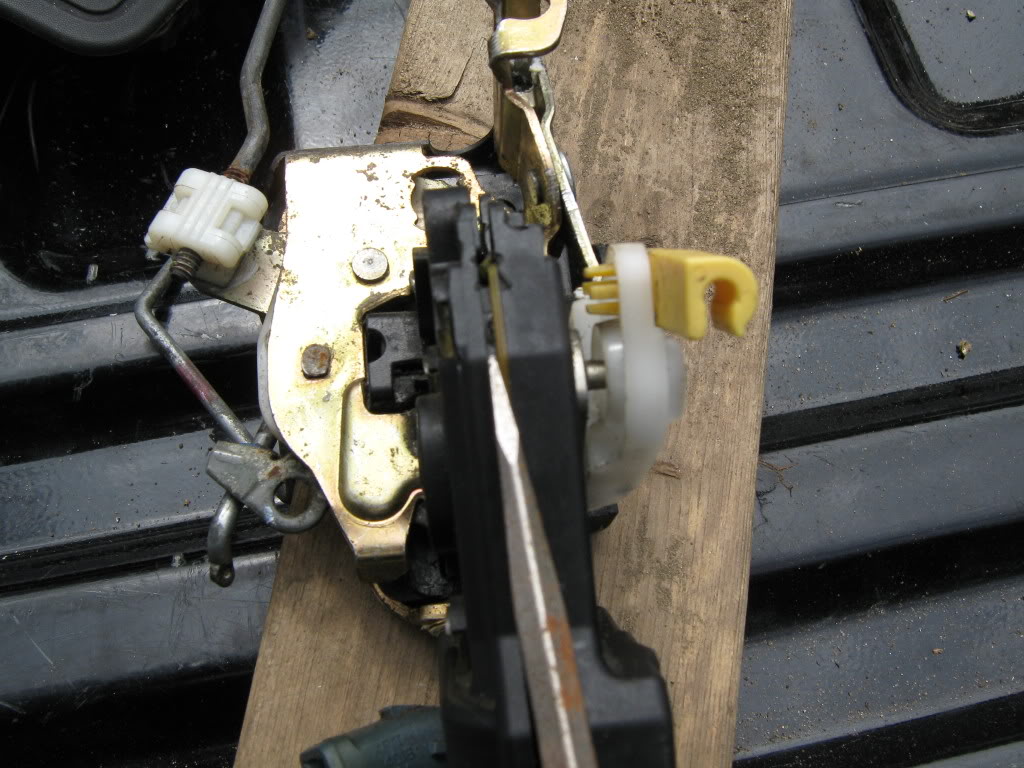
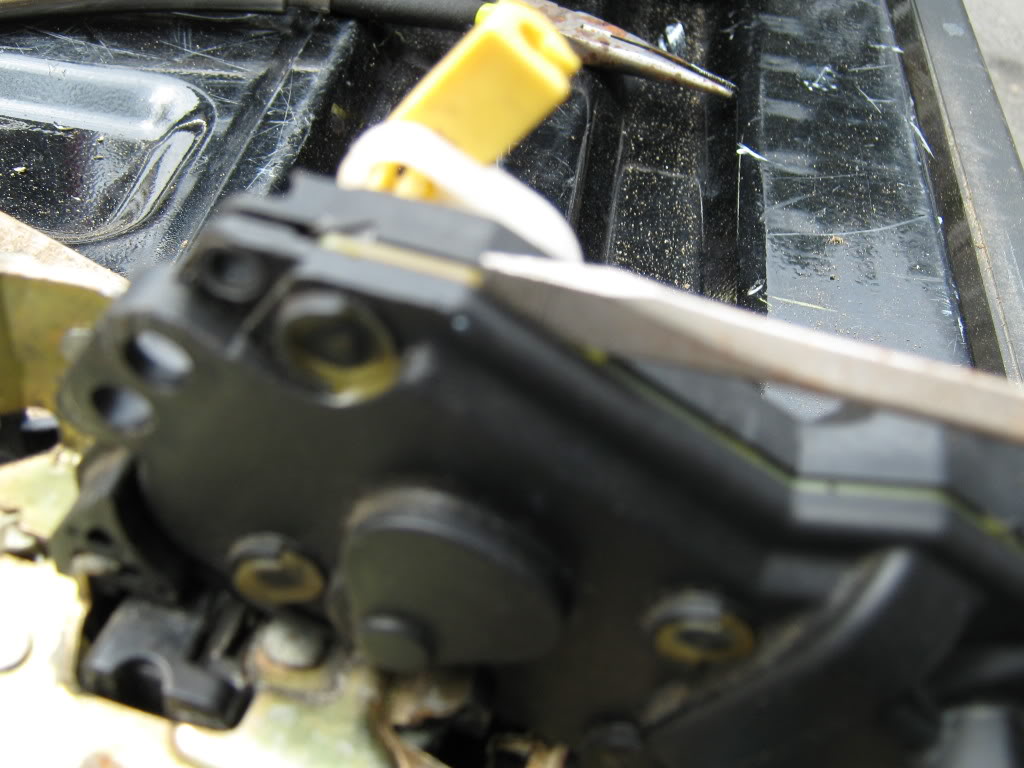
You can dig out the silicone and mushroom head with a pick. It comes out very easy. Inside you will find a very small motor and some gear mechanism. I believed the problem at first to be worn brushes or dirty commutator contacts in the motor itself.
You'll have to bend two little metal tabs out and pull off the brush housing on the back of the motor.
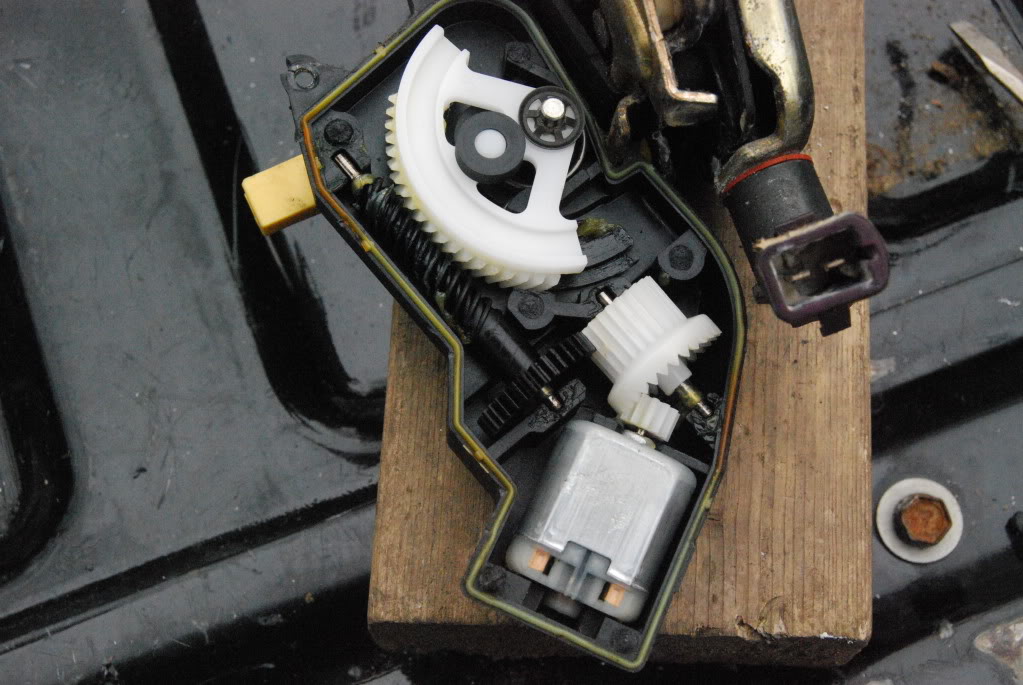
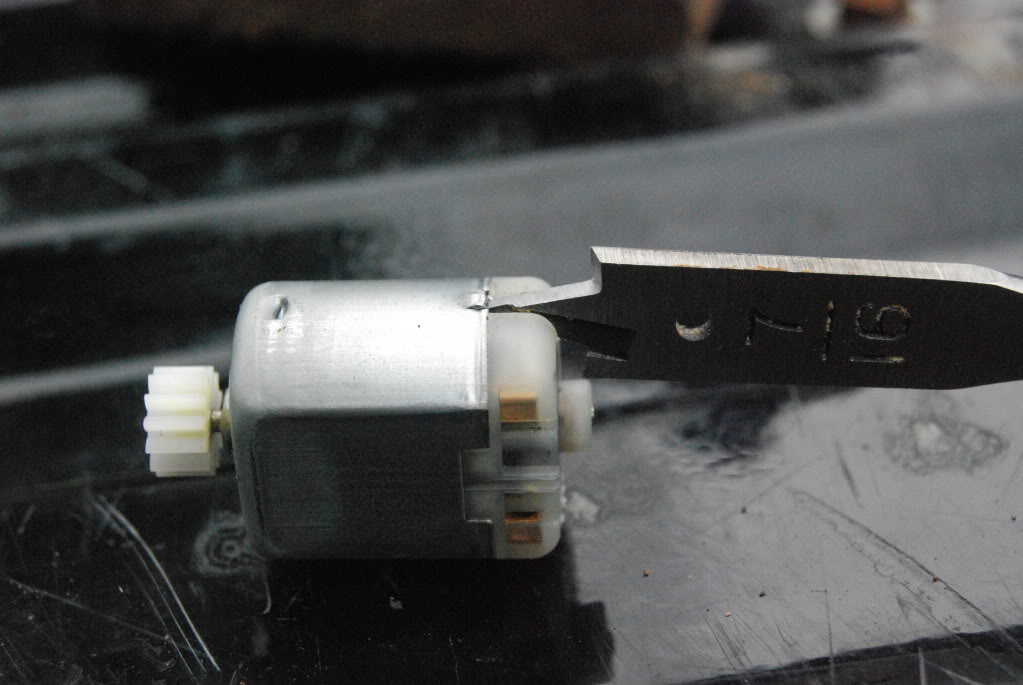
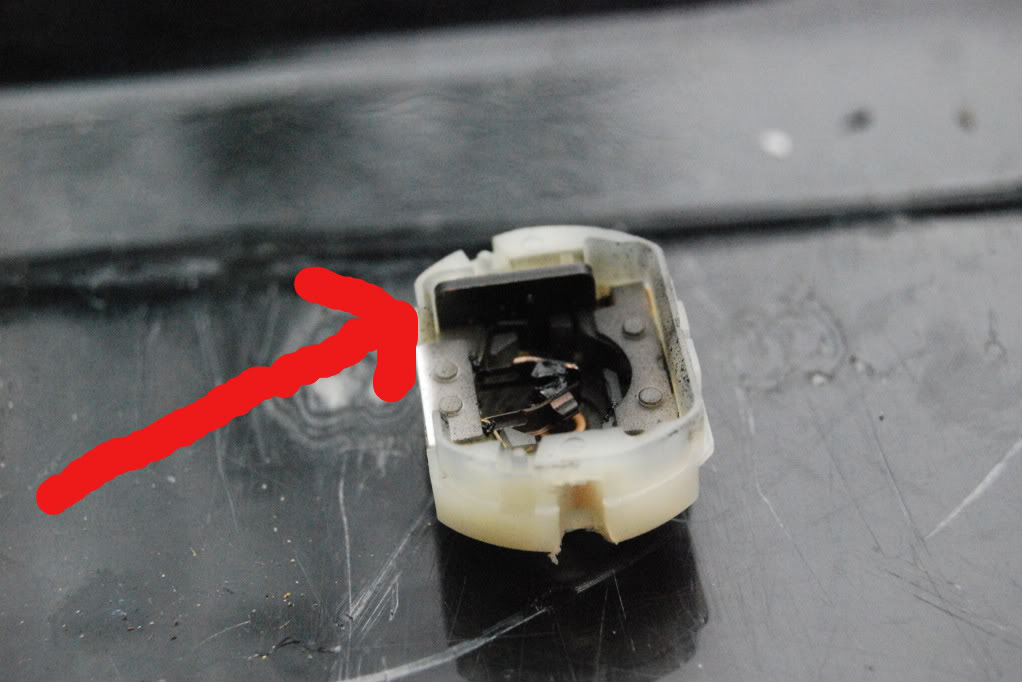
I cleanded the gunk off the brushes and took 1500 grit to the commutator contacts and reassembled the motor. The motor worked, but if you applied even a slight amount of resistance on the armature, it would stop the motor. It should have been WAY stronger than this. I was stumped until I looked a little closer at the inside of the plastic brush housing.
Inside you'll find a small, thin rectangular (thermal resistor relay, dodad, thingamabob??) pardon my ingnorance, but I'm not sure what to call it. All I know is that this little part is what keeps you from burning up the motor,
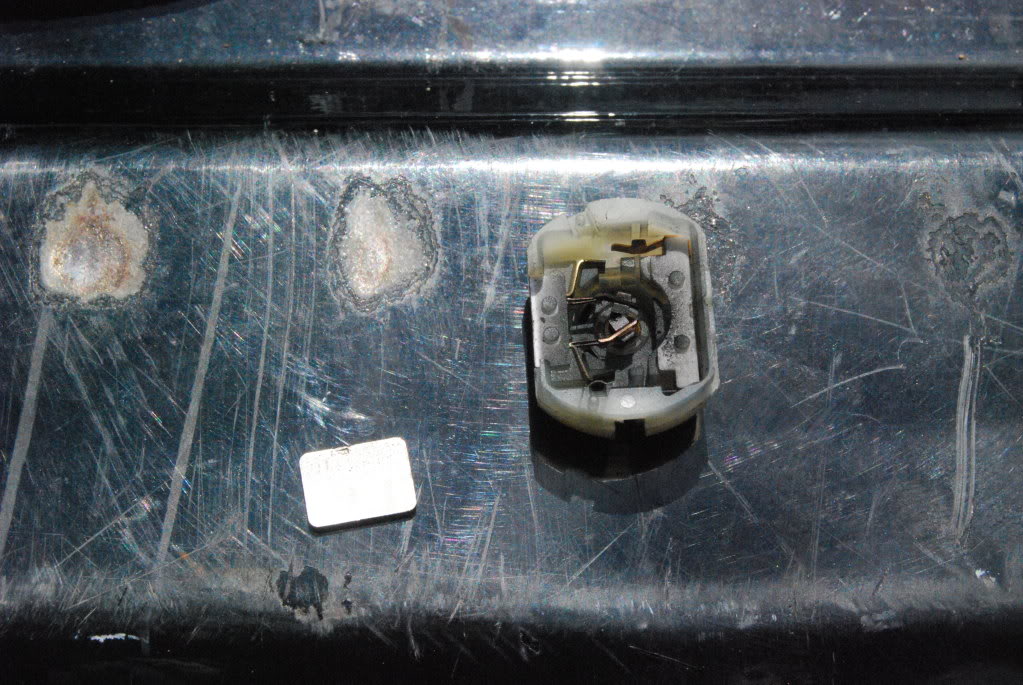
should you continue to press the switch once the lock has been actuated. It appears that this thing wears out over time and will not allow enough signal to get through to the motor to make it work. THE FIX. I am cheap. Since I had done so much work up to this point, I decided that I would go a little further and try to make it work without spending the $$. I have better things to spend my money on than actuators.
I took a small piece of aluminum foil and wrapped the "thing"
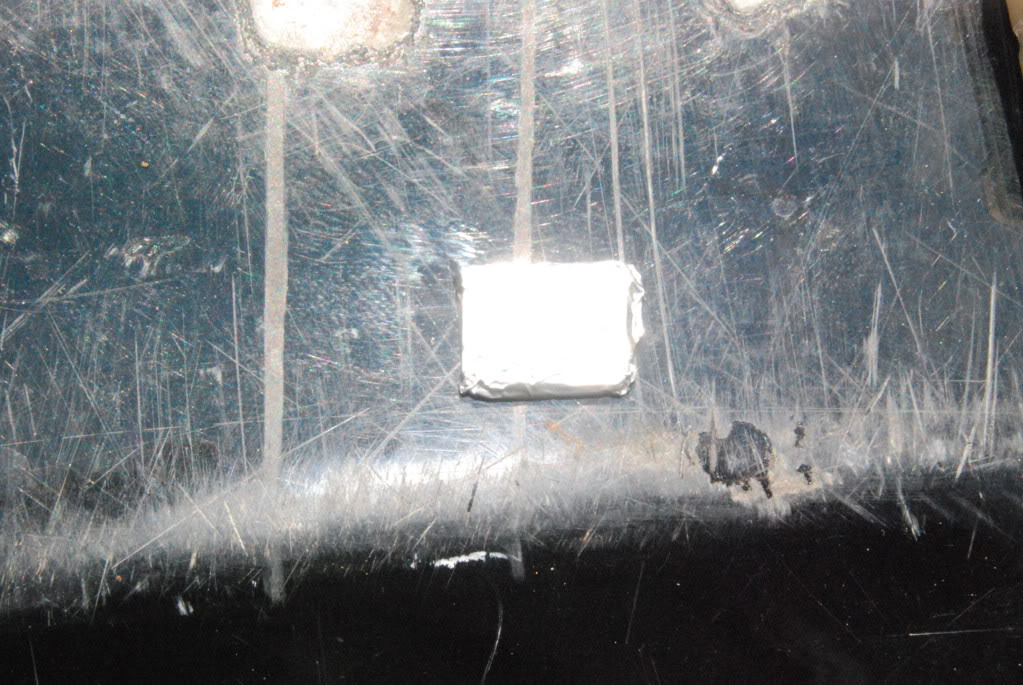
voila! Perfectly working motor! I sat there and operated the thing for 10 minutes including one or two times stopping the armature and holding down the switch to see what would happen.
The motor builds heat, but not much. Not enough to worry about. Now that I had a good working motor I decided I would try and reassemble the unit. The problem is you cannot glue the unit together as there is a rubber gasket around the perimiter of the case and if you tried to glue the rods into the case, you would not have enough pressure on the two halves of the case to keep the gears in place (these things actually apply a great deal of torque on the case)
What I decided to do is completely break off the plastic rods flush with the bottom side of the case and then drill out the bottom case and screw it together.
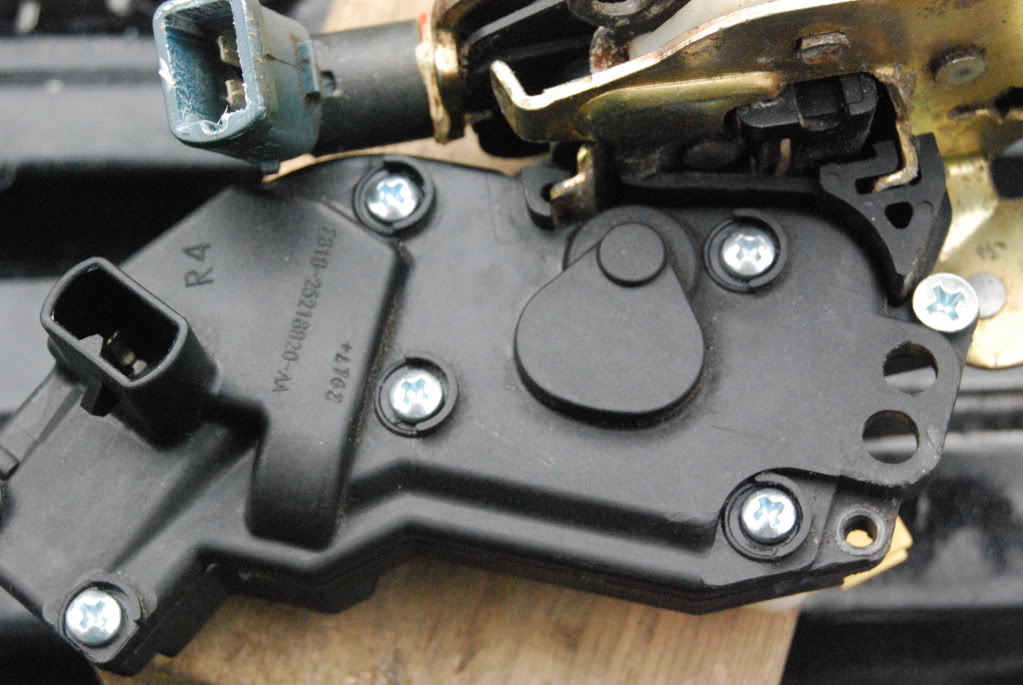
This worked perfectly. You'll need screws that are the same diameter as the holes in the top of the case to keep it from "wandering". Also the screws should not protrude through the back of the unit as some of the mechanism has some pretty close tolerances and a screw sticking through the back would not allow some of the mechanism to work (this can be remedied with a decent set of wire dikes or a hacksaw).
I know all of this is hard to picture, but if you do decide to try this fix, you'll see what I am describing here. The locks are back in and working flawlessly.
<!-- / message --> <!-- sig --> __________________
WARNING: The following is long winded, but if you want your PDL's to work again WITHOUT spending any $$ read on.
I finally got tired of my non-working PDL's and decided to tear into my truck and find/fix the problem. There has been many discussions about possible issues and I have concluded that the majority of us are seeing actuator motor problems and not relays, switches etc. Ill start by saying the problem I have had is that when I hit the switch, the locks attempt to move and after repeated attempts, the signal appears to get weaker and weaker until nothing....I assumed relay or switch.....NOT THE CASE!
First I started by testing the signal at the harness plug to the actuator. Perfect. No issues here. Next I completely removed the actuator/lock mechanism
*Steps to remove from 99 Ford F-250
Remove upper trim by pulling it straight out
Remove door switches carefully by twisting from door panel
Remove bolt from behind switch panel (in this case, its a phillips screw)
Remove reflector from lower door panel w/screwdriver
Remove bolt from lower door panel
Carefully bump door panel UP, don't pull away from the door
The reason is the hooks on the panel itself
Carefully move weather panel by slowly pulling away from door, you can reuse the sticky if your careful
Remove 2 bolts that attaches outside door handle (1) through hole in upper door access gained by removing plug in door, and (2) using 7/16 wrench, removing bolt behind door runner
Remove 3 torx screws holding lock assembly in place
Carefully! remove latch bar from lower outer door lock
Carefully remove upper lock bar from outer door lock
Maneuver the lock assembly down to the larger opening in the door to gain access to cable and wiring plugs
Remove inside door handle cable from lock assembly using needle nose pliers. Maneuver lock assembly to release the ball end of the cable from assembly
Carefully remove two plugs from lock/actuator assembly
End of removal procedure, reverse procedure to install!
and bench tested them with 12V..Here lies the problem. The actuator acted the same as when in the truck. First I did a thorough cleaning of all of the mechanism so it works freely and still had the same results. Here's where it get's tricky. These things are built so that they are NOT serviceable. I had already decided that they were going to need to be replaced, so I decided to break them open for closer inspection. It comes apart relatively easily, but appears that It cannot be put back together once apart.
I drilled out two small rivets and then pried the case apart. As you pry the case apart you'll notice these small little plastic rods protrude up through the case cover. These rods are then "mushroomed" with heat through the upper case and then sealed with some kind of silicone. When you pry apart the case the "mushroom" head breaks off and the rod remains.
You can dig out the silicone and mushroom head with a pick. It comes out very easy. Inside you will find a very small motor and some gear mechanism. I believed the problem at first to be worn brushes or dirty commutator contacts in the motor itself.
You'll have to bend two little metal tabs out and pull off the brush housing on the back of the motor.
I cleanded the gunk off the brushes and took 1500 grit to the commutator contacts and reassembled the motor. The motor worked, but if you applied even a slight amount of resistance on the armature, it would stop the motor. It should have been WAY stronger than this. I was stumped until I looked a little closer at the inside of the plastic brush housing.
Inside you'll find a small, thin rectangular (thermal resistor relay, dodad, thingamabob??) pardon my ingnorance, but I'm not sure what to call it. All I know is that this little part is what keeps you from burning up the motor,
should you continue to press the switch once the lock has been actuated. It appears that this thing wears out over time and will not allow enough signal to get through to the motor to make it work. THE FIX. I am cheap. Since I had done so much work up to this point, I decided that I would go a little further and try to make it work without spending the $$. I have better things to spend my money on than actuators.
I took a small piece of aluminum foil and wrapped the "thing"
voila! Perfectly working motor! I sat there and operated the thing for 10 minutes including one or two times stopping the armature and holding down the switch to see what would happen.
The motor builds heat, but not much. Not enough to worry about. Now that I had a good working motor I decided I would try and reassemble the unit. The problem is you cannot glue the unit together as there is a rubber gasket around the perimiter of the case and if you tried to glue the rods into the case, you would not have enough pressure on the two halves of the case to keep the gears in place (these things actually apply a great deal of torque on the case)
What I decided to do is completely break off the plastic rods flush with the bottom side of the case and then drill out the bottom case and screw it together.
This worked perfectly. You'll need screws that are the same diameter as the holes in the top of the case to keep it from "wandering". Also the screws should not protrude through the back of the unit as some of the mechanism has some pretty close tolerances and a screw sticking through the back would not allow some of the mechanism to work (this can be remedied with a decent set of wire dikes or a hacksaw).
I know all of this is hard to picture, but if you do decide to try this fix, you'll see what I am describing here. The locks are back in and working flawlessly.
<!-- / message --> <!-- sig --> __________________
Posting Guru
Joined: Jul 2006
Posts: 1,720
Likes: 1
A thermister is a heat activated resistor that works as a current limiter in a circuit. When the door lock is activated the thermistor is cold and will conduct enough amperage to allow the lock motor to activate. However if you hold the lock button the thermistor will heat, resistance will go up and current will be significantly reduced to prevent damage to the motor. Making a mod to the thermistor to be a straight conductor will work. WARNING. After this mod if you hold the door lock button down (I don't know how long is too long) IT WILL BURN out the motor and might cause other damage. So this is a good modification but if you have children , wife who holds the button long and you find the lock no longer works you know what happened.
Senior User
Joined: Aug 2008
Posts: 163
Likes: 0
From: madera California
1986 f-250hd
I have a 86 f250 with this problem.
Are the PDL's the same or at least the same fix as the newer models?
Are the PDL's the same or at least the same fix as the newer models?
FTE Stories
Ford Trucks for Ford Truck Enthusiasts

Top 6 Best Deals Available on New Fords & Lincolns Right Now
Brett Foote
This Hennessey Takes the Expedition Tremor's Off-Roading Capability to the Next Level
Verdad Gallardo
Top 10 Fords at 2026 Carlisle Ford Nationals
Joe Kucinski
3 Best / 3 Worst Parts of Modern Ford Ownership
Brett Foote
10 Amazing Upgrades That Solve Common Ford Truck Owner Headaches
Pouria Savadkouei
Every 2026 Ford Engine Explained
Brett Foote
10 Ugly Ford Trucks That We Still Kinda Love
Joe Kucinski
10 Things Every Truck Owner NEEDS (2026 Edition)
Michael S. Palmer
Rezvani's Latest Post-Apocalyptic Monster Is a Ford F-150 Raptor Underneath
Verdad Gallardo
Post Fiend
Joined: Mar 2009
Posts: 11,798
Likes: 14
From: Mt. Shasta California
Tips on fixing actuator
When you take the actuator apart, just separate the halves and leave the 2 rivets in place, and pull the little motor out. Then you can drill a few holes around the edge and wire it back together with rebar tie wire etc.
You can get the 2 little tabs to raise by drilling a little hole next to the tab to get a grip with a little screwdriver, spade bit ,etc. If you break the tab off just add some good glue around the 2 pieces, drill a shallow hole next to the broken tab and whack the metal there with a hammer and screwdriver at 45*.
No need to mark motor and bell end. The part # is on bottom of motor and the connections are on the top of the bell.
No need fon pennies and wrapping thermistor, just cram some tin foil in the slot where the thermistor was and dab some glue across the top to assure that it stays in.
Go to the auto store and get a spray can of brake parts cleaner. Blast a shot into the brushes end and another one into the motor end. This is mainly achohol, toulene, and acetone, and it will instantly turn your motor into a new looking motor due the the air blast and cleaning power. Also it will dry before you can grab your can of compressed air.
Make a little tool to keep the brushes open so you don't bend the arms when you put it together. A stiff piece of cardboard cut about 5/16" wide and bent near the end will work. Put it between the brush arms by the dip in the bell, and slowly slide parts together, then pull the tool out.
On the liftgate for the Ex; only take the actuator out and not the lock mechanism by lifting the black tab and slide out. The lock will probably be stuck so put a big phillips screwdriver through the 3/8" hole and pry on the mechanism (after a dose of WD40 from all angles) after it's free wipe it off and shoot some white lithium grease from a spray can in it and work it some more.
You can get the 2 little tabs to raise by drilling a little hole next to the tab to get a grip with a little screwdriver, spade bit ,etc. If you break the tab off just add some good glue around the 2 pieces, drill a shallow hole next to the broken tab and whack the metal there with a hammer and screwdriver at 45*.
No need to mark motor and bell end. The part # is on bottom of motor and the connections are on the top of the bell.
No need fon pennies and wrapping thermistor, just cram some tin foil in the slot where the thermistor was and dab some glue across the top to assure that it stays in.
Go to the auto store and get a spray can of brake parts cleaner. Blast a shot into the brushes end and another one into the motor end. This is mainly achohol, toulene, and acetone, and it will instantly turn your motor into a new looking motor due the the air blast and cleaning power. Also it will dry before you can grab your can of compressed air.
Make a little tool to keep the brushes open so you don't bend the arms when you put it together. A stiff piece of cardboard cut about 5/16" wide and bent near the end will work. Put it between the brush arms by the dip in the bell, and slowly slide parts together, then pull the tool out.
On the liftgate for the Ex; only take the actuator out and not the lock mechanism by lifting the black tab and slide out. The lock will probably be stuck so put a big phillips screwdriver through the 3/8" hole and pry on the mechanism (after a dose of WD40 from all angles) after it's free wipe it off and shoot some white lithium grease from a spray can in it and work it some more.


Posting Guru
Joined: Jul 2007
Posts: 1,360
Likes: 0
From: Charles Town, WV
Well I followed the instructions to the tee while woking on my rear passenger door and it's still dead. I was careful putting the motor cap back on and even marked the case so I was sure it's orientation was correct. It doesn't seem like it's getting power, no vibration or sound (I did plug the electical connections back in). Any ideas? I guess I could see if I'm getting power to the pugs when the remote is pressed.
Posting Guru
Joined: Jul 2007
Posts: 1,360
Likes: 0
From: Charles Town, WV
The motor definately went in correctly but I may rip into it in the a.m. and make sure the armatures are in the right spot )I was careful with the second one I did). I did the mod after that attempt on the hatch motor and it worked but the linkage wasn't moving enough to actually unlock the latches. The top of the actuator broke off trying to slide it back on the latch, I superglued in back on but the attempts to lock/unlock just broke it again. So off to ebay for one actuator.