


Engine Rebuild Part 2
Elder User
Joined: Apr 2012
Posts: 544
Likes: 6
From: Kalispell, MT
deviation from X or Y axis machining whether it includes additional angular error or not, could cause excessive friction/noise. its possible. worst part of that is...it wouldn't take much. plus we're all human. even a seasoned machinist can make mistakes. not saying that's for sure the issue, but it is possible. could be that the head shifted in his "fixture" while it was being worked on.
assuming he's worth his salt, as you say he is AB, seems to me like he'd measure at least a couple times prior to each milling operation.
should be two main operations though. 1) mill down the casted boss, which needs to be perpendicular to the axis of the drilled hole in the boss...and 2) the threading operation which needs to remain collinear with the other holes, and the threads should be concentric with the original drilled hole.
Both operations are pretty critical in order to keep tolerances to a minimum.
Thread Starter
|
Moderator


Joined: Dec 2007
Posts: 7,987
Likes: 104
From: Boise, Idaho

You guys are awesome! I certainly wouldn't say no to some help, I really appreciate it. Thank you. 
justin.m.lloyd@gmail.com
I'll, of course, document the whole process. (And not use Photobucket! )
)
As for the studs being crooked, this is something I have thought about. However, I brought it up earlier and the consensus was that it would be extremely difficult to get them crooked due to the holes already being pre-existing from the factory for the press-in studs. All they did was add threads to the walls. Then, even if the bosses weren't flat, the studs would still go in straight. They just wouldn't fully seat.
((The rocker arm swap was from some NOS stock ones I found on eBay to a set of Comp Cams rockers. However, they are still just stamped steel. Nothing overly fancy.))
But... anything's possible. Something is causing it. I just find it strange that all 12 chirp about the same once everything's said and done. However, if there IS an issue, I certainly would love to know what it is so that it doesn't keep perpetuating.
justin.m.lloyd@gmail.com
I'll, of course, document the whole process. (And not use Photobucket!
)As for the studs being crooked, this is something I have thought about. However, I brought it up earlier and the consensus was that it would be extremely difficult to get them crooked due to the holes already being pre-existing from the factory for the press-in studs. All they did was add threads to the walls. Then, even if the bosses weren't flat, the studs would still go in straight. They just wouldn't fully seat.
((The rocker arm swap was from some NOS stock ones I found on eBay to a set of Comp Cams rockers. However, they are still just stamped steel. Nothing overly fancy.))
But... anything's possible. Something is causing it. I just find it strange that all 12 chirp about the same once everything's said and done. However, if there IS an issue, I certainly would love to know what it is so that it doesn't keep perpetuating.
Thread Starter
|
Moderator
Joined: Dec 2007
Posts: 7,987
Likes: 104
From: Boise, Idaho
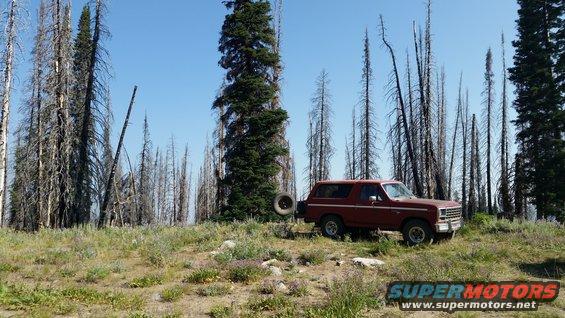
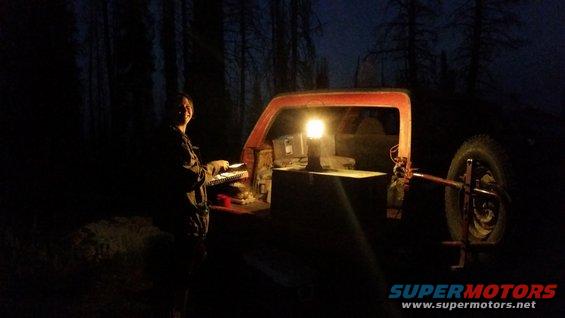
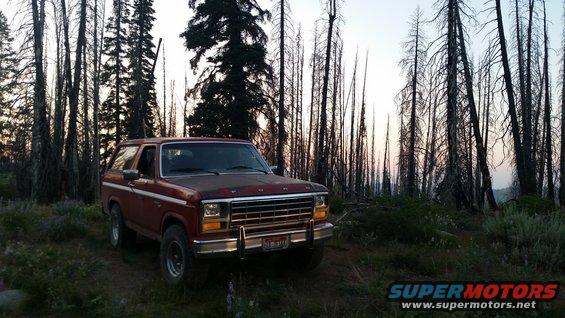
So, this weekend I crossed the 2000 mile mark on the odometer. My wife and I went out camping and had a great time getting out of town. It's also the first time I've had the Bronco out on the open road aside from a short trip down the interstate and back.
For starters, it was completely loaded down. 2 adults, my 120lb German Shepherd who takes up the whole darn back seat, and a full load of gear including our fishing raft and motor.
I gotta say, I am impressed. The drive consisted of 3 different parts. First is 80mph down the interstate, which it did effortlessly for an hour.
Then, a winding highway up into the mountains with lots of up and down hills. It was great to be able to keep my speed up some of the steeper stuff. I could just tell it had the breath it didn't used to.
Lastly was 20 miles of dirt road up to around 8000 feet elevation. Of course, this is where the 300 normally shines in stock form, so it was a total kick and was almost too easy.
At one point I had to quite put it to the test trying to get around some guy pulling his trailer through the winding canyon. His truck was not built for the weight of the size of trailer he had (the front end of the truck kept bounding up and down like he had no shocks), the tires on the trailer were all pointed different directions (something was definitely busted), and he was swerving between lanes to keep anyone from passing him through the canyon roads. After 10 miles I finally to a straight away and gunned it around him, and what does he start doing? He starts racing me! I swear the guy had to have been drunk. If not, he had massively unchecked ego issues. I had to do nearly 90 just to get passed him. He was probably doing 80 or more, and the front end of his truck was bouncing up and down so bad I was amazed he had enough traction to keep his steering. The kinda guy you want to yank out of their truck and give them a good talking to with your fist...
But, I'm digressing. Either way, it was great having that kind of passing power (fully loaded and over 6000ft elevation) and get safely away...
I've done the drive before, so the night and day difference from how my previous engine(s) performed was rewarding!
About 250 miles for the whole trip and averaged 13.5mpg. Not too shabby considering all the climbing, and 40 miles of dirt road. And that mileage is almost as good as when I first did a mpg test on the open road (with the hubs accidentally locked).
Thread Starter
|
Moderator
Joined: Dec 2007
Posts: 7,987
Likes: 104
From: Boise, Idaho
On another note, as great as the performance was, it's onward to roller rocker arms.
Thank you so much to everyone who's helped me out, I really appreciate it! It means a lot.
I'm looking into a set of Harland Sharpe's, unless someone has a really good reason I should go with BBC rockers. New, they're about the same cost, and the HS were designed for this engine.
https://www.summitracing.com/parts/c...view/make/ford
Next step is, once I get the rocker arms in hand, remeasure all of my push rods. With a little luck, since they're for the 300, and are the same ratio, I won't need to change them out. But, I want to be sure.
Lastly is a way to raise up the valve cover. I've heard of spacers that help, but am open to ideas! (I don't want to go the route of cutting up and welding two covers together.)

Lead Driver
Joined: Jul 2009
Posts: 6,477
Likes: 19
From: Sheffield, AL

Senior User
Joined: May 2014
Posts: 151
Likes: 0
From: Charlotte
Is that a cnc-dude made spacer? Marshal, the sellers name, if I'm not mistaken is
cnc-dude. If it is, I have one and it's a quality piece. Works exactly as described.
cnc-dude. If it is, I have one and it's a quality piece. Works exactly as described.
FTE Stories
Ford Trucks for Ford Truck Enthusiasts

Rezvani's Latest Post-Apocalytic Monster Is a Ford F-150 Raptor Underneath
Verdad Gallardo
Top 10 Most Expensive Ford Trucks Ever Sold on Bring a Trailer
Joe Kucinski
2027 Ford Super Duty Buyer's Guide (Every Model, Engine, & Package)
Brett Foote
Top 10 Ford Truck Tragedies
Joe Kucinski
AEV FXL Super Duty - the Super Duty Raptor Ford Doesn't Make
Brett Foote
Lobo Vs Lobo: Proof the F-150 Lobo Should Be Even Lower!
Michael S. Palmer
Ford's 2001 Explorer Sportsman Concept Looks For a New Home
Verdad Gallardo
10 Best Ford Truck Engines We Miss the Most!
Joe Kucinski
2026 Shelby F-150 Off-Road: Better Than a Raptor R?
Brett FooteThread Starter
|
Moderator
Joined: Dec 2007
Posts: 7,987
Likes: 104
From: Boise, Idaho
I'm pretty sure it is. I contacted him and he quoted the same shipping ($11.99), and both are from Georgia.
Thread Starter
|
Moderator
Joined: Dec 2007
Posts: 7,987
Likes: 104
From: Boise, Idaho
Over 2000 RPMs is where the cam really shines, but it definitely has more low end grunt. Every day coming home from work I drive up a pretty steep grade. If I went up it in 3rd (which is about 1100 RPMs at 35mph), I'd lose speed and would have to downshift. Now, I can climb the same hill every day in 3rd without even having to push the pedal hard enough to get into the power valve.
I like it.
Thread Starter
|
Moderator
Joined: Dec 2007
Posts: 7,987
Likes: 104
From: Boise, Idaho
In other news, these showed up yesterday:


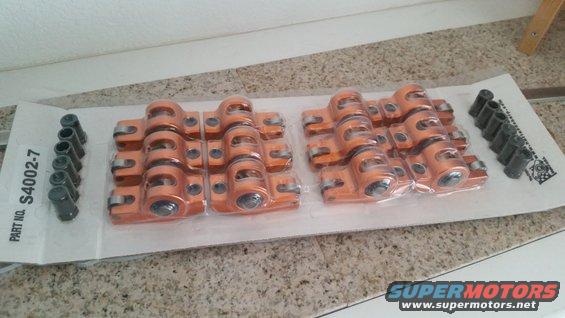
Thank you again to everyone who helped me out! You guys are awesome.
The instructions say I need to soak the rockers in break-in oil overnight. I think I have a half a quart left in the garage.
Then, it says to use break-in oil, or at least add a ZDDP additive for the first 500 - 1000 miles.
I just switched to synthetic, so I'd rather just use some additive. Any thoughts on ZDDP additives and synthetic oil? This is the first time I've used synthetic oil in any engine, so I'm new to the ins and outs of it.
Either way, next is measuring pushrods and hoping they're going to stay the same.
Fleet Mechanic
Joined: Nov 2002
Posts: 1,643
Likes: 69
I have a light coupe with the biggest hydraulic cam I could buy at the time and it is just delightful at low speeds (full disclosure: it does use a 2500 stall converter) easily putting a couple car lengths on the pack in the Stoplite Grand Prix.
Thread Starter
|
Moderator
Joined: Dec 2007
Posts: 7,987
Likes: 104
From: Boise, Idaho
So... First obstacle.
The spacer does not fit at all.
I'm not sure which valve cover he used as a template, but I'm pretty certain it wasn't the Powered By Ford cover (which it should have been since it's the most common cover).
This cover has a lip that the gasket rests up inside. It's a perfect fit, so there's no room for error. This spacer doesn't even begin to match, so there's no way for the cover to apply pressure on the gasket.


Really disappointing. I'll get a hold of him and discuss it with him, but the spacer should have been the exact same dimensions as the gasket, and it's no where close.


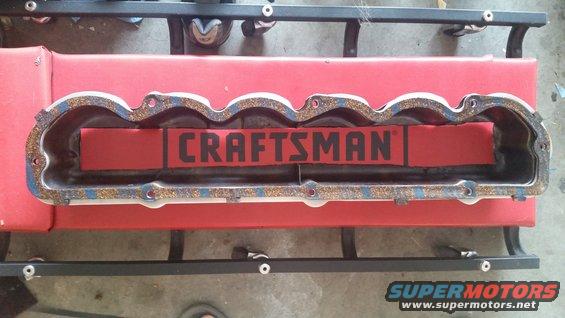
As it sits, I can't use it unless I drastically alter the cover.
The spacer does not fit at all.
I'm not sure which valve cover he used as a template, but I'm pretty certain it wasn't the Powered By Ford cover (which it should have been since it's the most common cover).
This cover has a lip that the gasket rests up inside. It's a perfect fit, so there's no room for error. This spacer doesn't even begin to match, so there's no way for the cover to apply pressure on the gasket.
Really disappointing. I'll get a hold of him and discuss it with him, but the spacer should have been the exact same dimensions as the gasket, and it's no where close.
As it sits, I can't use it unless I drastically alter the cover.