When you click on links to various merchants on this site and make a purchase, this can result in this site earning a commission. Affiliate programs and affiliations include, but are not limited to, the eBay Partner Network.
You can always put a board across the frame for a seat. For the battery box, I just sand blast and get rid of the corrosion then paint several coats. I have put thin rubber mat under them before. I also try to keep the battery in good shape and put grease on the terminals to keep them clean to prevent problems.
Thank you Spurredon, paint is always a good protection. Never tried the board seat though...
I am considering using Herculiner rattle-can bed liner polyurithane. Has anyone else done it and have feedback on that idea or its durability?
The spray bedliner I tried was thin. Too thin for bedliner. Would likely work ok for battery tray. In a former life refurbing rock saws I used a lot of "hammer tone" paints. Says it encapsulates rust. Leaves a slight texture that hides rusty surface. Multiple coats best. Once it is cleaned and sealed routine maintenance will make it last.
The spray bedliner I tried was thin. Too thin for bedliner. Would likely work ok for battery tray. In a former life refurbing rock saws I used a lot of "hammer tone" paints. Says it encapsulates rust. Leaves a slight texture that hides rusty surface. Multiple coats best. Once it is cleaned and sealed routine maintenance will make it last.
Thanks! I will look into this. Have you used it in one of your battery boxes? I figure the more options one has, the best available decision can be obtained!
No. Mine was a little rusty on the shelf part. I wire brushed it a little, primered with red oxide primer and sprayed with gloss black enamel. Mine has a thin rubber mat to put under the battery.
The thing about getting it to thick is that it can crack and allow stuff to get under it. I have had that happen so I just use paint and a rubber mat, move to protect the paint from wearing thru. Your battery box looks fair to me. I had to use parts from several trucks to put a good one together.
Progress ALWAYS feels slow but I'm finding that if I take pictures as I go along, I can see the hurtles behind me. Brakes look like they were new-ish Stripped to backing plate Shocks are DEAD Rubber parts shot to S!@# Anyone have the part numbers for good replacement shocks? Passengers side Wheel cylinder plungers stuck to shoes LOL Access to the firewall on drivers side is busy Got everything zip tied out of the way . . Finally Fenders are painted gloss black Battery tray is bedliner black Firewall is bedliner black New wheel cylinders and hoses Decided to paint the backing plate (first time I have done this...Will see if it was a good idea) New bearings and seals ready to go into the hubs
Looks like some real progress, always seems good to be working on new painted areas as opposed to old dirty rusty ones! You spent some time on those inner fenders and firewall.
Looks like some real progress, always seems good to be working on new painted areas as opposed to old dirty rusty ones! You spent some time on those inner fenders and firewall.
Yes and glad its behind me. I regret not doing the firewall recently when I did the motor in Red but fixed it on this one!
My 289 heads are almost finished and can start the motor build soon...
Im hoping the 1/2” thicker core isn’t a problem in my conversion. Already losing an inch based on preliminary measurements from shifter to the water pump pulley...
This Hennessey Takes the Expedition Tremor's Off-Roading Capability to the Next Level
Slideshow: The VelociRaptor Expedition gains a lift, upgraded suspension, Brembo brakes, and trail-ready equipment while retaining the stock 440-horsepower EcoBoost V6.
Rezvani's Latest Post-Apocalyptic Monster Is a Ford F-150 Raptor Underneath
Slideshow: Called the Fortress, the 850-horsepower pickup combines Raptor underpinnings with military-inspired features, survival equipment, and a starting price of $285,000.


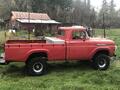




 progress