When you click on links to various merchants on this site and make a purchase, this can result in this site earning a commission. Affiliate programs and affiliations include, but are not limited to, the eBay Partner Network.
And even more pictures! I put some antiseize on the caster shims to make them easier to get out if needed. These are labeled 0-5. Not sure what that means. Axle assembled Too close for comfort See anything wrong here??
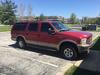
The plans are starting to come together for the Cummins swap but I keep coming up with other items that need work or I want changed. Figured I’d start a build thread to house it all. The kids named the X Clifford when I first got it. So, here goes:
During the research period for my Cummins swap I came across this forum and really enjoy spending time reading about other ideas and mods to do for the X. From there, it sort of bloomed into this giant list that I have neither the time or money to do all of. So I’m trying to come up with a definitive list of mods/updates/fixes that I can actually manage getting done in the time I’ve allotted for myself. So, in no particular order, here are the items that this build thread will consist of:
Cummins swap with a ’94 p-pump bus engine (engine to be rebuilt as well during this process)
NV4500 transmission with PTO coolers, short shift tower, and using existing NP273 transfer case (with the goal of keeping my electronically controlled 4WD)
Driveshaft modification for the above
Powerstop brakes and steel braided lines
Update the trailer hitch to a Class V (not settled on this yet)
New springs – I haven’t settled on the actual method or springs but likely I’ll go to a local spring shop and have them make me “X Codes” that are the same dimensionally as the factory X springs. In other words, I want the same ride and height but with higher carrying capacity (if that's possible)
Remove and grease front hubs (needle bearing and sealed bearing)
New u-joints for every shaft I touch
New shocks (likely stick with the KYB monomax I currently have and dependent on spring selection)
Mechanical pillar gauges (EGT, ECT, EOT, Boost)
Rear clips for seat backs instead of the Velcro
Soundproofing the entire inside
Sandblasting and undercoating/painting entire vehicle undercarriage
Sandblast and paint bumpers/grill/running boards black (maybe)
Remove cladding
Front and rear differential fluid changes with new rear cover (not settled on the cover yet)
Door rust fix (front doors, the others seem to be fine so far)
New touchscreen radio (had a Pioneer that had known issues (found out after the fact) and they wont touch it – not sure what direction yet)
Toolbox for the rear - planning on making a wood box to fill the back cargo area, roughly 6-8" high, 2 drawers with full extension slides
I think that’s it so far….we’ll see if I add to this list over time. Why a cummins swap you ask? Well, with 264000+ on the clock right now, it’s time. The 6.0 has treated me VERY well so far and I have only one complaint: towing. Just got back from a camping trip to the UP. ~1400 miles of fighting. We were loaded pretty heavy as far as “Stuff”, but well under the maximum towing capacity of the vehicle. I’d say (guessing) that we were right around 8000 pounds total trailer weight. With the AC on, I could barely hit 60mph on flat ground (so everybody cooked in the car). EGT’s were consistently over 1000 and temperature hit 225 at one point. I also want the reliability of the Cummins. If I build it correctly and don’t try and throw a ton of HP and Torque at it, it should last me a good long time. Manual transmission is because I want one. I’ve looked that the 6 speed varieties and just can't justify the extra expense for the extra gear in the middle (I may eat those words one day). The other main reason, is just to do it. It’ll be a good project to do with my dad and there’s not that many of those left. I’m also keeping the factory gauge cluster working completely, with cruise control as well.
As I do this build, I’ll document all the trials and tribulations (as I know there will be) and costs to do as well (at least what I pay for each item and where I get it) with the goal of helping someone else out as I’ve been helped by this group of folks.
Love to watch the build. Rather than reinvent the wheel, look up destroked. Its a company doing what your doing for a lot of years . Might have those odd pieces and harnesses too. Please send pics id love to follow along.
Progress looks great! I am glad that simple design solved the water problem for you. Keep up the good work!
Originally Posted by Dieseldope
Love to watch the build. Rather than reinvent the wheel, look up destroked. Its a company doing what your doing for a lot of years . Might have those odd pieces and harnesses too. Please send pics id love to follow along.
Thanks! I feel like I'm getting way closer now, but then I think of all the stuff I still have left to do....
Destroked (among others) is in fact a pretty decent source of purchased parts for this type of swap. For me, the juice is in figuring it out and making things myself. I would say that this started about 50/50 wanting a Cummins/doing the project. Now it's more like 85/15 doing the project/wanting a Cummins. Doing this with my dad who is getting up in years and can't physically do this stuff much any more is worth every penny of parts and every hour spent researching and figuring things out.
Got a few things done this weekend, but not nearly enough. I started tooling around the idea of going full manual 4WD late last week and found these on ebay:
I was a bit flabbergasted at the price. Normally these are around $300 for a set. I paid less than what the guy has them listed for now (about $125). the "does this fit your vehicle" filter on ebay said that they wouldn't fit, but I checked Warn's website and they are the correct part number. Free returns if they don't. So, that set me to searching around for a NP271 transfer case, as I had already sort of decided to go with a manual shift lever and modify my NP273 to accept the linkage. Local junk yard has a 2000 F350 with a NP271 and linkage and all. Headed over there Sunday morning to pull it all out and was only able to get the shifter. Driveshaft bolts are their usual pain to get out and even with proper sockets, breaker bar, hammer, cordless impact I couldn't get them to loosen up. Still trying to figure out how to sneak a torch in there. I'll get it next time, provided it's still there. Walked around a bit, and I'll be darned if there wasn't a 24V cummins truck right across the lane. Someone had pulled the badges off the side of the truck and closed the hood. I think they were trying to hide it. So, I got to work stripping some parts off I need or might need. Got some intercooler tubes, AC compressor, mounting bracket, dipstick (don't see those around much), Alternator and bracket. I'll have to go back as the fan was in perfect condition but couldn't get it off (knew I should have brought that 24" crescent wrench). Also couldn't get the dip stick tube out. Crossing my fingers it's all still there when I get back to it. I also was able to find some seat back clips out of a Expy for the X. Score all around!!
Saturday, I was able to finish up the brakes on the front axle and get it mounted under the truck. Old u-bolts worked fine for the passenger side, but just not long enough for the drivers. I'll go ahead and order up some proper bolts and put them in next time. Sandblasted, painted, and rebuilt front calipers this past week in prep for that. Boy was that a chore. The scale and junk on those things was obnoxious!! Unfortunately, I didn't get to take after sandblasting pictures. They cleaned up real nice, but it took several iterations and a lot of time. From there, I fired up the steam genny one more time to hit my carpets. The dirt rolled out pretty good, but the stains aren't gone. I finally found something that the steam genny wouldn't just clean. I'll go back at it next time with some simple green or other cleaner (maybe even dawn dish soap), a scrub brush, and then the steam. We'll see how that works out. I think I'll switch gears to the interior next so I can get most of it set up and get some parts back in the X. I'll have to get my F650 lower dash drilled and painted and the gauges installed so I can go ahead and run those senders after I drop the motor back in. With any luck that everything still matches up well enough, I'll go ahead and measure for driveshafts. I sure as heck don't want to get caught ready to start and not be able to drive!! Of course, I'll have some camshaft break-in and valve lash to hit before I actually drive it down the road, but I want to be ready!
Other considerations still up in the air....
Need to make a decision on tire/wheel setup. At this point, I don't really want to spend the cash on all new stuff, but the tires look pretty dinky. Still not sure I'm happy with it the way it is (other than not having to spend the money). Likely what I'll do is watch CL and FB for a set of 18" SD wheels and then figure out a tire I like. I don't want spacers if I can help it at all. That leaves me either the 18" SD wheels that work or aftermarket wheels. Backspacing and offset are currently wearing out my brain. Once I get the NP271, I'll obviously go through that rebuild again too, using the input shaft I got for the 273. With that, not many pictures, but here's a few!
Almost forgot to put these in. Found them in the brake parts box. Axle ready to go in! Current ride height. Tire/wheel combo seems small. The front will drop with the motor in. Not sure how much. Lots of room for activities! So clean and purty.
Almost forgot....I'll have to touch up all the paint from putting bolts in and still need a couple cotter pins installed. I also have the adjustable track bar, but that won't go in until all the heavy stuff goes back in. More pictures! Dirty carpet Lots of "stuff" from the kiddos One pass got it partially there. Still not happy. Pile O parts from the Cummins. Hopefully the AC pump will work (fit) correctly.
Update on the hubs. I received them last night and they appear to be correct. I won't know for sure until I actually install them, but with free returns, if you're looking for discounted Warn Premium's, that link is the bees knees. Not sure how they're selling them that cheap, but I'll be looking at whatever else they have for sale too.
Update on the hubs. I received them last night and they appear to be correct. I won't know for sure until I actually install them, but with free returns, if you're looking for discounted Warn Premium's, that link is the bees knees. Not sure how they're selling them that cheap, but I'll be looking at whatever else they have for sale too.
You convinced me to get a set of WARN Premiums as well
You convinced me to get a set of WARN Premiums as well
Glad I could be of assistance!
I was able to order my front u-bolts yesterday as well. Stengel Brothers again. They have a "custom quote" option on their website and the owner got back to me in like 30 minutes via email, corrected my mistake in diameter, and gave me a link to order. 30 minutes after the order, I got confirmation that they were shipped. They are located in Whitehall, PA and I expect I should have them in a few days. Great service from those folks. They have a whole host of other stuff you can buy. I purchased the rears from them back when I did that. Summit racing sent me the incorrect u-bolts, so those are going back. Stengel was good on pricing as well.
And even more pictures! I put some antiseize on the caster shims to make them easier to get out if needed. These are labeled 0-5. Not sure what that means. Axle assembled Too close for comfort See anything wrong here??
Yeah, what's wrong is that you started this thread over 2 years ago. Some of us would like to see the conclusion before we get placed in an old folks home without cable and internet!!!
Another short weekend in the books, and not a whole lot to show for it. Not enough hours in the day! I spent the majority of Saturday in the local salvage yard hunting more parts. I went back to get a few more bits off the Cummins truck I found and to get that dang NP271 out of the Ford. NP271 was gone. Ugh. In fact, someone had yanked the trans and all. So, I got to work on the Cummins. Got the fan blade, pulley, starter, grid heater relays, vac/power steering pump, and the dipstick tube that I couldn't get off last time around. That took forever because the truck is a greasy mess. Walked the yard for a bit and found another NP271 that I'll go back for next weekend (because I forgot my floor jack at home like a big dummy). Getting down to the last throes of this build, I decided to tackle the interior sound deadening. Overall, it goes in fairly quickly once you get going. I didn't remove the rear HVAC system to do the passenger side, but got the drivers side done up and almost the entire floor. Pressing that stuff in will work your hands over pretty good. I had purchased the required 3 boxes and forgot one of them at home, so I didn't get to finish it out. That's ok, because the carpet was still a bit damp. I ended up using purple power and scrubbing them down as the steam genny didn't get all the junk off. They still aren't perfect, but they're pretty darn clean compared to what they were. It'll have to be good enough. I did manage to get my lower dash out as well. This week I'll need to go ahead and get some of the accessories ordered that I still need so when I put the interior back together, it all goes in once and that's it. I'll have to order up the remaining gauges I want, drill, paint, and install the gauges I have in the F650 lower dash. Also ordered up the Ford OEM clutch pedal assembly so I have that prepped. I also installed the Warn Premium hubs that I found for a steal. They went in pretty easy. So, by the end of next weekend, the goal is to have the interior in (I'll leave the drivers seat loose so I can get under the dash easier), have all the gauges plumbed in and installed, and pull the motor back out of storage and start bolting accessories on. Only real question on that is whether the Dodge AC pump will fit (front to back) with my current mount setup. Fingers crossed I did all my prep work correctly. There will be a few more odds and ends to get done, like removing the solenoid for the locking hubs ad capping that Vac line, finish the brake lines up front (connecting), front sway bar, and cleaning up any other accessories in the engine bay. Oh, and I got the new u-bolts installed in the front. I know I'm forgetting other stuff. A few pictures to go along with it..
Did some digging around and was able to finally find more information on the conversion of a 273 to a manual transfer case. I can even keep the light on the dash (supposedly). And wouldn't you know it, the info was right here on FTE!
I'll investigate this a bit more through this week. I pulled the shift motor and housing off last night and the stub out of the side of the transfer case fits a 14mm open end wrench fits right on it. I was also able to rotate it without issue and I think I even found neutral.
Super nice weekend to get some work done! I was able to get the entire interior put in after finishing out the sound deadener. Overall, the sound deadener isn't a bad install and I hope it works well enough. I'll have to do the door pillars at some point, along with the inside of the doors. Another day. Carpet went back in pretty easy and all the seatbelts and seats went right back in. I did leave the drivers seat loose so I can get under the dash a bit easier for the wiring and clutch. Speaking of the clutch, I ordered up an OEM clutch pedal last week and it came in time for the install. I ordered a Valair clutch package a while back for the G56 (in a Dodge). What I didn't think about at the time was the connection between the pedal and the clutch master. Unfortunately, the pedal bolts (which fit perfectly into the X), were diagonally opposite to the clutch master. Ugh. However, I got to looking at the master and the flange that bolts to the vehicle is a twist lock mechanism, presumably so that you can install the flange and then place the master in and rotate it to lock it in. So, with the bolt pattern the same distance, the master flange needed to rotate 1/4 turn in order to line up. The only problem was that the locking mechanism was clocked to one position only. Turns out, the master "ears" that fit into the flange were all the same except one was a little longer. Trimmed about 1/6" off that "ear" and was just barely able to get it into the flange. Score! Now that everything would line up (with the reservoir tube pointed up), I was able to install everything. Removed the insulation on the firewall, which already had the cutout for the clutch pedal, removed the plastic cover plate, placed the pedal up in there and installed two nuts on the factory studs (loosely). Removed the supplied studs from the clutch flange (vise support and smack it with a hammer), lined it up, and it wouldn't fit in the space. Turns out there are several relay boxes and a mounting bracket in the way. So, removed all that wiring, removed the relay boxes, and removed the mounting bracket. I cut the end of the mounting bracket off where the larger relay box locks in, leaving one tab for it to still be installed correctly. Put it all back, and viola!! Everything fits! Felt super lucky all that worked out. I'll have to adjust the length of the master rod to match the clutch pedal and make a positive stop on the pedal. Otherwise, if you push it all the way to the floor, it breaks over the spring and stays down. Easy stuff to fix once I get the trans installed and adjust everything. that was the first day, and everything went swimmingly. Second day, apparently I used all my luck. Now that the interior is complete and al the other mechanicals are all replaced/updated/fixed/installed, I'm finally ready to get the motor in and start wiring and plumbing. So, I started with the wiring harness that goes to the transmission. I wanted two things for the new setup: backup sensor and 4WD dash light. So, I removed the harness from the X, stripped all the loom and tape off, and started working through the wiring. Then I decided I didn't really need the 4WD dash lights. That decision led me down the path of stupidity. I found the 3 wires for the reverse sensor, and removed the rest (cutting them). I left quite a lot left at the PCM plug so that I could add them back if necessary. This got rid of all of the old transmission plugs, the 4WD shift motor relays, the plug in the engine bay, and the plug that connects the rear harness to the front harness. Go ahead, I'm an idiot!!! UGH!! So, good news, I have an F350 dually that I have access to that's a 6.0/5R truck. Harness should be the same or darn close if I happen to need it. Bad news, I have a harness to rebuild. I won't be keeping all if it, but 3 wires ain't gonna cut it. That's by far the dumbest thing I've done in a while.
So, once I realized that, I went on to the Cummins and started getting accessories bolted on. I was able to install the flywheel, clutch, and pressure plate, along with the starter and mocked up the PS/Vac pump. I need to get my P-Pump put together and on the motor to make sure I get the PS/Vac pump bracket on correctly. Also, I need to dig up all of the oil feed fittings for everything and get them cleaned up for install. I've been debating on whether or not to have my pump rebuilt (Which, even the folks at Industrial Injection haven't called me back about a rebuild), finding a used pump, and buying a reman unit from Rockauto. I'm gonna at least give this old 230HP RV pump a go and see what happens. I've got a bit of cleaning to do as the DVs have junk and rust on them. Rust isn't bad except for #6, which I think I can get cleaned up. At this point, I've pulled them all, cleaned them up, and bagged them individually with oil in the bag to keep them from rusting again. I'll then clean out the barrels really well. Also need to install the Tork-Tek Adjustable OFV, #10 plate, drain any oil that's in it, install the DV's and paint the pump. I'll also put it to factory timing on the bench prior to install. I'll bump the timing to 16 degrees once I install it on the motor and I'm going to attempt the method described in the FSM. There are "easier" methods out there, but I'd like to learn this one for future reference and use. I'll also get the items together for the fuel pressure gauge and hopefully get that started plumbed in. The goal next weekend is to get all accessories bolted to the motor and installed fully (transmission included) so I can give it one final paint and install it in the truck. Presumably, I'll have fixed my wire harness by then. If not, I'll have to get it done before I put the motor back in.
So, good and bad this weekend, which is par for the course. Used this to paint my seat back clips Interior finished and ready for seat install. Seat back for the clip install. Carpet comes off pretty easy and you can see the indentation in the plastic. Template for the cutting. I undersized it a bit so I could trim to fit perfectly. Master fully installed. Top right is the relay box that had to be shuffled a bit. Still installed in factory location. Another angle of the master install. Wouldn't you know it, the reservoir fits the PS tank perfectly! Just realized I probably won't be using this tank. Great. Clutch pedal I ordered. Wire harness before total destruction.
Previous post you'll see the paint I used on the rear seat back clips from the Expy. Several coats of paint the day/night before and when I went to install them, I have to handle them so much for final fitment that I junked up the paint. I think it was not cured all the way, so may have to touch that up a bit. Harness stripped down. This relay box is for the 4WD shift motor...still don't need that. I'll need more than this though...time to break out the wire diagram book! Flywheel installed, with loctite, and torqued. 104 foot pounds on the bolts. Singele disk clutch Pressure plate Installed!
This Hennessey Takes the Expedition Tremor's Off-Roading Capability to the Next Level
Slideshow: The VelociRaptor Expedition gains a lift, upgraded suspension, Brembo brakes, and trail-ready equipment while retaining the stock 440-horsepower EcoBoost V6.
Rezvani's Latest Post-Apocalyptic Monster Is a Ford F-150 Raptor Underneath
Slideshow: Called the Fortress, the 850-horsepower pickup combines Raptor underpinnings with military-inspired features, survival equipment, and a starting price of $285,000.