When you click on links to various merchants on this site and make a purchase, this can result in this site earning a commission. Affiliate programs and affiliations include, but are not limited to, the eBay Partner Network.
Changed my cowl seal today. The old one was crystallized, no wonder it didn't seal worth a hoot.
As far as this goes, I plan to pull my hood to remove the motor. At the same time I'll be cleaning up the engine bay, painting some parts and probably changing the engine mounts. While the hood is off, I'm thinking I'll clean up the underside of the hood and paint it black, then I may order the factory insulation pad to put on.
The whole point of this was to say that I'll be replacing the weatherstripping for the hood. Mine doesn't have any at all. That combined with messed up hood hinges causes a large gap that lets water in to sit on the engine.
When they say to torque the pinion nut down, they mean tighten it, and then check the resistance with a beam style torque wrench for the pre load. Keep tightening to reach the desired drag. I'm pretty sure you're supposed to do that with the axle shafts removed.
As far as the seal, my old one let a lot of water through the middle and it would puddle up on my air filter assembly. Annoying. I wish the paint on the inside of my engine bay would clean up. But, it's seen too much heat over the years.
The only part I was confused about was tightening the nut. I wasn't sure if I was supposed to try getting another 200+ pounds of torque.
As for measuring drag, I plan to leave the axles in. The way I figure if the drag is 10 in-lbs with the wheels and axles in, and its the same after the new yoke is on, it should still be accurate. The conditions wouldn't change between yoke changes.
The steps I read were living the rear axle, measure drag with no brakes applied, lower wheels so the pinion won't move when loosening, count threads(or nut rotations coming off), then swap yokes. On reassembly, apply red thread locker then tighten but down till marks line up and the threads match. Then measure drag and adjust accordingly.
Those are the steps for the quickest repair without a new crush sleeve and pre load. It seems pretty simple to me.
Haven't done much to it lately, but today I changed the rear differential oil with Chevron Delo full synthetic 75w90, sure like how that stuff flows in the cold! the Pennzoil 80w90 conventional I drained today was almost like gel.
Oddly enough they were a much more secure engagement when hand threading them on, my old ones were kind of loose fitting on the threads and didn't torque to spec very well. These all went to 140lb. ft no problem. I used anti seize for a thread lubricant and rust prevention. Time will tell but they seem very nicely made.
I think I still have 2 rims with 1 style lugnut and 2 rims with another style. I was in the process of changing them all over and got lazy... I should finish that some day..
Picked up a used tool box, polished it up, ordered a key for it and put drawer liner material in it. Sure shines good, pictures don't do it justice since the box is wet. Looks nothing like it did before I polished it.
Looks good, I had one in a ranger a few years ago. It came with some J bolts to hold it to the bed lip. They were worthless. They would bend when I tightened it, and allow it to slide around. I got to a point where I had 1 left holding it and after ensuring that it wouldn't jump out over bumps, I just left it that way.
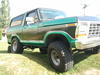
Don't know where they got these bolts but they sucked. But, I'm past that. I have room in my F150 for stuff, a Supercab. My Ranger was a regular cab. I tried having a toolbox in my Bronco with "emergency" tools but it wasn't worth the hassle. Now I have a small wood crate with parts and tools in it.
Honestly when I bought these I was expecting them to bend. Contemplating going to 5/16" J bolts. I had to trim down the stud length on them with a grinder and they were surprisingly strong. Gotta love it for .98 cents lol.
Wow, it's certainly been a lot longer than I remember since I've updated this thread. Not much new to speak of, just general maintenance done here and there and I painted the front bumper today. Put a center console in too.
This Hennessey Takes the Expedition Tremor's Off-Roading Capability to the Next Level
Slideshow: The VelociRaptor Expedition gains a lift, upgraded suspension, Brembo brakes, and trail-ready equipment while retaining the stock 440-horsepower EcoBoost V6.
Rezvani's Latest Post-Apocalyptic Monster Is a Ford F-150 Raptor Underneath
Slideshow: Called the Fortress, the 850-horsepower pickup combines Raptor underpinnings with military-inspired features, survival equipment, and a starting price of $285,000.




 Hopefully they work out fine!