When you click on links to various merchants on this site and make a purchase, this can result in this site earning a commission. Affiliate programs and affiliations include, but are not limited to, the eBay Partner Network.
You got a lot done
Some times a white board and markers works wonders like this.
Mark down the jobs you know you have and as you get them done cross it off.
Dont remove it, cross it out as done. This way you can look back and see just what you did.
If you remove it the list is still there and may look like nothing has been done.
Even more so to cross it off because as you work you may be adding things to the list and it will really look like nothing was done.
Dave ----
Actually I put a wipe board in the shop just for this purpose but sadly I didn't actually use it... My brain doesn't think of these kind of things sometimes, I just get way too focused on the task that I'm doing and it's like I've got blinders on sometimes LOL
Originally Posted by Bronco638
I tried to reply to your PM but your inbox is full.
I do have about 50% of the trans cooler lines after all. Both have the flare nuts to connect to the trans and looks like both were cut near the front of the engine. You may not want to put them on your truck but you could use them as patterns to make new ones. I also have two of the O.E. support brackets (that attach to the engine block, I think, to support those lines). LMK you you want them.
Sadly, not much interested in the tailgate. Looks like it's headed to the scrapper.
I didn't realize it got full already... I'll have to clear out some room...
The trans lines on my truck are still ok ish in that I can use them as a pattern. Right now I'm just going to use the rubber hose until phase 2 or if the hose doesn't hold, whichever comes first... I'm planning phase 2 will be this winter sometime.
Stinks that no one is interested in the tailgate... I hate seeing parts that are fixable go to the scrapper
Originally Posted by Max Capacity
You should flush the old brake fluid out also. We like to use a power bleeder, like the Motive Power Bleeder. Summit Racing them for a decent price. You can get qt's of DOT3 from Walmart for about $8.00 each.
I do have a "power bleeder" that I used when I did the rear brakes... Strangely both sides of the master were empty when I got the truck and the line did drain when I cut the old line but the master is a little dirty so I plan to back flush the lines when I replace the master during phase 2 of the work.
Why not..... There's another thread on hear by a gentleman who is having issues with his caliper not coming off so it doesn't surprise me that much that I had a similar issue with mine... I used a lot of heat and my air hammer with a blunt chisel and after a bit of time I got mine free... Mapp gas is a great thing... AND YES that is a jack stand inplace. This is the connecting hard line to the hose, it's soaked in KROIL but I've got a bad feeling about this... I'm already expecting to replace the hard lines from the prop valve to the caliper hoses. I think I'm still on track for being done this weekend...
FYI I used the white board when I built my drag can years ago but when doing the 4 year cab off frame rebuild of my 81 F100 I did not touch it.
It still has the drag car writing still on it. The was after a few years up north where I built the car, a move south and now 10 years.
So dont feel to bad
Dave ----
Actually I put a wipe board in the shop just for this purpose but sadly I didn't actually use it... My brain doesn't think of these kind of things sometimes, I just get way too focused on the task that I'm doing and it's like I've got blinders on sometimes LOL
I didn't realize it got full already... I'll have to clear out some room...
The trans lines on my truck are still ok ish in that I can use them as a pattern. Right now I'm just going to use the rubber hose until phase 2 or if the hose doesn't hold, whichever comes first... I'm planning phase 2 will be this winter sometime.
Stinks that no one is interested in the tailgate... I hate seeing parts that are fixable go to the scrapper
I do have a "power bleeder" that I used when I did the rear brakes... Strangely both sides of the master were empty when I got the truck and the line did drain when I cut the old line but the master is a little dirty so I plan to back flush the lines when I replace the master during phase 2 of the work.
Why not..... There's another thread on hear by a gentleman who is having issues with his caliper not coming off so it doesn't surprise me that much that I had a similar issue with mine... I used a lot of heat and my air hammer with a blunt chisel and after a bit of time I got mine free... Mapp gas is a great thing... AND YES that is a jack stand inplace. This is the connecting hard line to the hose, it's soaked in KROIL but I've got a bad feeling about this... I'm already expecting to replace the hard lines from the prop valve to the caliper hoses. I think I'm still on track for being done this weekend...
You are correct, you will have to probably replace a lot of lines. It's easy to measure the distance you need on the truck, and then go to the store and get universal Ni-Copp lines with the ends already flared. You usually have to get a line a little longer than you need, since you are bending it by hand the curves can have more radius and you can zig zag it a little bit to take up the extra line if you need to.
I have found the best way to take the old line loose after you soak it, is to take a large set of vise grips and pinch the nut with the pliers and lock them down, and then wiggle the pliers to loosen the nut. Then take the pliers off and get the proper open end wrench and take it loose. Even though the pliers mangle the nut a little bit, you can usually still use a wrench on it afterward. But 90% of the time, even if you get the nut loose, the line gets stuck inside the nut and starts twisting and will break off.
For that brake line fitting, hit the side of the caliper with a big hammer, while using a flare nut wrench to break it loose. Or if your replacing the line, cut the line just above it, use an impact gun and socket to try and remove it.
You are correct, you will have to probably replace a lot of lines. It's easy to measure the distance you need on the truck, and then go to the store and get universal Ni-Copp lines with the ends already flared. You usually have to get a line a little longer than you need, since you are bending it by hand the curves can have more radius and you can zig zag it a little bit to take up the extra line if you need to.
I have found the best way to take the old line loose after you soak it, is to take a large set of vise grips and pinch the nut with the pliers and lock them down, and then wiggle the pliers to loosen the nut. Then take the pliers off and get the proper open end wrench and take it loose. Even though the pliers mangle the nut a little bit, you can usually still use a wrench on it afterward. But 90% of the time, even if you get the nut loose, the line gets stuck inside the nut and starts twisting and will break off.
I still have some leftover Ni-Copp from the rear brakes with some fittings, hopefully I'll have enough. I also bought a tubing bender when I got the line originally so maybe I can keep the amount of line usage to a minimum.
Yeah I'm expecting the lines to twist off once I brake the fittings free.
Another thing I forgot I needed to do is clean and paint my West Coast style mirrors I got from the JY. I'll need to sandblast them first. I'm glad I remembered to get my blasting cabinet...
I hate this feeling that I'm forgetting something... I've got this nagging feeling that I'm missing something else...
For that brake line fitting, hit the side of the caliper with a big hammer, while using a flare nut wrench to break it loose. Or if your replacing the line, cut the line just above it, use an impact gun and socket to try and remove it.
That line is actually on the shock tower connecting to the rubber hose that goes to the caliper...
Well the last couple of weeks have been productive but real slow going. The weather hasn't been that great with the heat and rain along with needing to get other things done around the house.
I ended up just cutting those brake lines and replaced them from the proportioning valve to the hoses so that means all of the hard lines have been replaced with Ni-Copp except for the lines from the master cylinder to the prop valve. Once the the lines were installed and bled I noticed the master cylinder was leaking at the booster, so I replaced that with new. There might be a vacuum leak at the booster but more on that later...
My buddy and I worked on the tuning and timing yesterday and all went well. We've got her running pretty well but not 100% and we're stuck. We can't get it running the way it should be. She's running a little rich and spits some so there is some fine tuning that is needed. I've asked another friend of mine to give me a hand with this. I know there are a few vacuum leaks, I think one of them is at the booster as the RPMs go up when I press the brake pedal to the floor (I know that's another issue I need to address). I know I need to replace the HVAC vacuum lines and hook up the advance on the distributor and that should be all I need as all of the emission junk has been removed.
One major goal has been achieved, SHE MOVED UNDER HER OWN POWER! In doing this I did find a couple of other issues that need attention. The throttle cable is pretty crunchy and sticks hard. It's bad enough where I won't drive her on the road until I thoroughly clean and lube it. Another thing I found is the trans is quite low on fluid, I plan to flush it and replace the filter during phase 2. I put 2 quarts of Type F in it and it's still low by a fair amount. One thing I noticed is the dipstick says it takes something other than Type F, I think Type 2 or something. I've never seen an old Ford use anything other than Type F in the trans. It's the original C6. I don't think it'll hurt anything leaving the 2 quarts of Type F in there until I flush the trans in a few months but I'll let y'all tell me otherwise. She does seem to be going through the gears although it is a little sluggish still being low on ATF.
I started to fill the rear tank and the repair we did didn't hold so I will need a replacement rear tank (Like one of the Daves mentioned about a month ago). It sounds like the selector valve is working and when I tested it with air it seemed to work but once I tried with fuel it didn't work. I did needed to replace the rubber hoses as one of them looked like it may have been collapsing under vacuum from the pump but that didn't seem to help. I'll address that when I replace the rear tank but in the meantime I just switched the fuel lines so it is working off the front tank. I still need to replace the pigtail for the sending unit so that I have an operating fuel gage.
The wiper motor is struggling and spraying WD-40 on the arms and connections under the cowle helps but not much. I'm starting to think maybe one of the brushes are not getting power making the motor weak but I'll need to look into that some more. Maybe I'll make a video of that when I am working on it again later this week.
I still have a few more little things to do but they shouldn't take much time. I hate it but I keep needed to push the finish date more and more. I do see the light at the end of this tunnel and I don't think it's a train yet lol.
I enjoy following this build thread, been meaning to say that for a while. Also, maybe this will be helpful: back when my brake booster check valve fell apart and I was troubleshooting the issue I did notice when I pulled the bad check valve off the rpm’s did go up slightly, so it sounds like you’re on the right track.
Little by little you will get it done.
If you fix all the vacuum leaks I bet it will run better.
On the booster for testing you can pinch off the hose just dont drive it as you will not have any power brakes.
Dave ----
Thanks guys! I'm glad to see some people are enjoying this build thread and I hope I'm doing things that others can learn from.
Yesterday was too hot to work, it was 95º + in my office so I know it was hotter outside (right now it's already 90 in here). Today it's supposed to T-Storm most of the day with high winds so working under an EZ-UP isn't really going to be a good idea but tomorrow looks to be better as they are calling for temps in the mid to upper 80's.
Tomorrow I plan to finish my mirrors and see if I can track down the vacuum leaks. As for the booster, I'll try the pinching off trick and see what happens. If it is actually leaking then I might pull it off to see if I can find the hole. I didn't see anything on the front face of it but it does have surface rust. It could be as simple as rust around the port that isn't allowing the gasket to seal properly which is a real easy fix with sandpaper and maybe a little silicone. If there's a hole in the back area then I might try some sandpaper, JB and tape...
I found a pigtail online for my front tank but it seemed to be too good to be true, most online stores are selling them for around $20 and up plus shipping but this place is selling for $6 plus $12 shipping. I called the company just to see if it seemed legit and the 2 people I spoke with spoke english without an accent and when asked where they were the location matched the website (Cali) so I took a chance and according to UPS it'll be here today. We shall see... The site is "National Parts Depot" and I'll update once the part gets here. If it does get here then I'll add installing the pigtail to tomorrow's list.
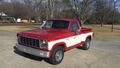
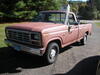
I was going through some old threads here and came across one that caught my eye. He had a paint scheme that was like mine but with contrasting colors that will be a great help later on down the road as it shows where to mask for the color brakes. Sadly this member has abruptly stopped posting and the last time he was on the forum was back on 2020. I'm honestly not a big fan of the patina look but to be honest, my truck actually looks good with it so I was planning to leave it. Lately I've been thinking about the possibility of repainting Ol' Red. The driver side fender and tailgate are both aftermarket and painted in that protective black paint and the hood is rotted at the secondary latch. I have a new hood, also in that black paint and the new bed isn't two tone but was rattle canned tan. I took a pressure washer to one side of the bed and 80% of that tan paint blew off. The bed also has a little rot on both wheel arches but I do have a set of new weld on arches to fix them. Part of me says to just repaint the entire truck in the factory colors however, I would lose all the patena. The other part of me says to just have the paint supply company match the faded colors and just paint the fender, tailgate and either the entire bed or just add the accent color. The problem is paint has gotten stupid expensive lately. A gallon of base is around $600 plus the reducer and top coat... I have some time so I don't need to make a decision right away. I welcome your thoughts on this...
On the brake booster vacuum leak it is not something you can fix as the rubber inside has a hole in it.
Only fix is to replace it with a rebuilt one from a parts store.
Now how old is the master?
If old you may want to replace it at the same time but you dont have to if it is new.
I say at same time as you can buy the booster & master as a set cheaper than if bought each.
Only thing is both are rebuilt.
I had to replace both when I first got my truck on the road and had issues getting a good break pedal but it stopped the truck.
Well I replaced the Ebrake cables and the pedal then went to the floor. I did not touch anything but the cables.
Bleeding would not get the pedal to pump up so I replaced the master with a new, not rebuilt, and the pedal has never been better.
So something to keep in mind.
I got things I would like to do in the garage but its been in the upper 90's with heat index of 105* here so been staying inside with the AC.
Tomorrow a group of us are helping a buddy on startup break in of a new motor & transmission.
They say 85* to 90* and 80% rain so I can see us wet from sweat and rain
Dave ----
I bought 2 fan shrouds from NPD, only used 1 other as a spare now and was happy with service and parts.
I keep forgetting about them when I need a part
Dave ----
On the brake booster vacuum leak it is not something you can fix as the rubber inside has a hole in it.
Only fix is to replace it with a rebuilt one from a parts store.
Now how old is the master?
If old you may want to replace it at the same time but you dont have to if it is new.
I say at same time as you can buy the booster & master as a set cheaper than if bought each.
I got things I would like to do in the garage but its been in the upper 90's with heat index of 105* here so been staying inside with the AC.
Tomorrow a group of us are helping a buddy on startup break in of a new motor & transmission.
They say 85* to 90* and 80% rain so I can see us wet from sweat and rain
Dave ----
It's been a while since I've worked on trucks and forgot about the diaphragm.
I have no idea as to the age of the booster but if it's like a lot of other things on the truck, I'd say it's original. Sadly I have already purchased and installed a new master cylinder so it looks like I'm gonna have to pay a little more than I should've.
Sounds like it's gonna be a hot day for ya... doesn't sound too fun. Looking at my thermometer here in my office it says it's 97°
The package that was supposed to arrive today... It was a catalog from NPD.
Rezvani's Latest Post-Apocalytic Monster Is a Ford F-150 Raptor Underneath
Slideshow: Called the Fortress, the 850-horsepower pickup combines Raptor underpinnings with military-inspired features, survival equipment, and a starting price of $285,000.