When you click on links to various merchants on this site and make a purchase, this can result in this site earning a commission. Affiliate programs and affiliations include, but are not limited to, the eBay Partner Network.
Well, supposedly, yes. But, I sometimes wonder how much of that is fact and how much is "let's sell more product". I had our Expedition done 2.5 years ago. Granted, we don't drive in winter weather much (because we both work from home) but I think the underside still looks great. Now, if you're driving in salty slush all winter long, then yes, I would consider having it done every Fall (for you, it's a business expense). And, I think the location (on the truck) has a lot to do with it. Anything behind the wheels is gonna need re-application before an area more centrally located, say above the transmission. I would definitely have a style side bed done every other year. There's too many nooks & crannies where corrosion can start and take off. But, you could eye-ball the underside of your truck, yearly, to see if it really needs it, or not.
Fluid-Film is pretty tenacious and spreads as well. I'm no longer needing to drive through salt treated passes but every oil change I scoot around on the creeper and retreat any areas showing corrosion. If you are not washing Fluid-Film off with soapy water it lasts for a long time. When I was needing to roll through salt I did a thorough coating of everything but the brake surfaces. If you don't do that kiss your truck good bye.
Fluid-Film came out with a new version, Fluid-Film Black. This version is the same a regular Fluid-Film but black pigment was added. I think it's a good choice for the undercarriage as the black will look good on the frame and axles, etc. The pigment will help with seeing coverage being applied. I also coat my truck body, chrome and plastic with Fluid-Film so regular is better for that. Protects painted surfaces and repels water like wax but so much easier to apply. The only thing I need to wash my truck coated in Fluid-Film is a cold stream of water, no soap. Maybe some light brushing in some spots, and an occasional addition of Fluid-Film. I brush it on and spread it as far as possible. On the body less is more. I use a dedicated shammy cloth to buff it a bit and also a dry car wash brush to add some shine. The salt did some spot damage to my body but keeping Fluid-Film on those areas stops further damage.
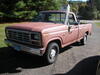
So here are the pictures of the cab corner and cab support... First 2 are the driver side and the last one is the passenger side... The driver side is really the only substantial rot on the truck that I need to worry about. Yes there is some fender rot and bed rot but I'm replacing the bed and I have a new fender should I decide to replace it...
It is hard to tell the shape of the rocker but that brace is pretty bad where it ties in to the rocker.
It looks like you can fix it the same way I did with flat sheet metal.
Just need to plan how you can get to the top to weld it in like I did when it was open.
Dave ----
I'm pretty big on Fluid Film too. I sprayed the bottom of the driver's door a few days before the photo, you can see how it climbed up the door from the inside. A lot of the underside of my truck is coated.
So the last few days have been no work days plus my wife wanted to spend time with me on our anniversary for some reason lol.
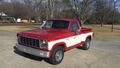
I did manage to score an awesome deal, I bought a brand new radiator core support for $50! I was planning to use the one out of the parts truck that seemed to be in decent shape but when I found this deal it was a no brainer... I'm expecting the original bolts to break so new bolts are going to be in order. I've been searching for the specs on these bolts but no one seems to give details other than FoMoCo part numbers. Does anyone know what size and length these bolts are? I'd rather go to Tractor Supply and get a couple grade 5 bolts and nuts for pennies over spending $100 for a kit online. Yesterday I painted the axle with the first coat of farm and implement paint and today it'll get the 2nd and maybe 3rd coat. I'll also paint the core support with the same paint. Today I'm also going to reinstall the brackets and crossmembers on the frame as well as running the new brake lines & cables and the fuel lines. Rear tank has a couple of small holes so I got the tank repair kit by JB Weld so that's also getting fixed and painted. If time permits I plan to start pulling the old core support out and hopefully tomorrow the new one will go in. Hopefully I'll get to reinstalling the rear axle tomorrow as well. After that, the only things left to do are the front brakes, finish fixing the dashboard, removing the broken valve cover bolt, install new mirrors and transfer the bed from the parts truck. Hard to believe but phase 1 is almost complete! If all goes to plan, I should be driving Ol' Red on Wednesday... Sadly I know how all of my plans usually go so I expect something to happen. We shall see...
Most any bolts you have will work for the old truck. Anti-seize compound on the threads of all nuts and bolts is some I have been doing for many years now.
Also PB Blaster is good for helping to remove old rusty bolts, or if you have the $$, Aero-kroil is really good.
Today's plan:
1) Finish painting the axle... Decided it only needed a second coat. CHECK!
2) Paint the core support... Still needs a second coat. Couldn't move it for about 4 hours after painting. Partial Check.
3) Reinstall spring hangers, shock brackets and crossmembers. CHECK!
4) Repair and paint rear fuel tank... Tank repaired but didn't get to painting it.
5) Remove core support. Got all bolts and screws off the support. All but 1. The main nut attaching the passenger side to the frame had rotted away only leaving the flange and a small portion of the hex making it imposable to unbolt. Tried a few different things but nothing worked. I resorted to cutting that section of the support off to remove. I ran out of daylight to finish that so Monday that will be finished.
6) Finish fixing the dash. I got the dash pad painted in the correct color but that's as far as I went. Tomorrow I'll repair the traces on the back of the cluster.
7) Run new brake lines and "E" Brake cables as well as the fuel lines. Didn't get to this but this too will be done Monday.
In regards to the fuel tank mounting diagonal brace. I decided that the rotted brace is still solid enough to put on the other side as only the center section is gone but the sides are still intact. I am still looking for a replacement but for now it'll do.
The gauge cluster looked like a 40 year old cluster with faded needles and the lens didn't look great. The gear indicator cable was also broke and some of the traces have lifted away from the plastic film.
Needles repainted, lens cleaned and polished & cable replaced. I still need to fix the traces and clean the contacts of all bulbs. I did clean the contacts on the seat belt, directionals, high beam, brake and 4X4 lights. I did upgrade the directionals and high beam bulbs to LEDs. The clock adjustment buttons didn't seem to work so I took some 99% IPA and 2000 grit sandpaper to the contacts. After a couple of passes the buttons all work perfectly.
Tomorrow's forecast is rain most all day so no work tomorrow. EZ-UPs only go so far.
Originally Posted by Max Capacity
Most any bolts you have will work for the old truck. Anti-seize compound on the threads of all nuts and bolts is some I have been doing for many years now.
Also PB Blaster is good for helping to remove old rusty bolts, or if you have the $$, Aero-kroil is really good.
I do use Anti-Seize for a lot of things but I didn't use any on the frame components.
I've never had any really good results with PB but I will say KROIL IS THE $#IT!!! I tried it a few weeks ago and will never go to anything else. Yes it's a little pricey BUT you get what you pay for. I'm cheap AF but I will spend extra on something that is proven to work for me.
Sorry no pictures today. I try to remember to take pics but don't remember most times.
As for the cluster traces I would bite the bullet and get a new one from LMC.
And if you got gauges and no tack (yet) get the trace for a tach and later when you find one you can just bolt it in.
What paint did you use on the gauge needles?
I used Testers and got to say they look great in day light but are hard to see at night with my geern LED bulbs.
I have one that flashes on & off as I drive so need to pull the cluster to fix that 1 bulb.
Dave ----
As for the cluster traces I would bite the bullet and get a new one from LMC.
And if you got gauges and no tack (yet) get the trace for a tach and later when you find one you can just bolt it in.
What paint did you use on the gauge needles?
I used Testers and got to say they look great in day light but are hard to see at night with my geern LED bulbs.
I have one that flashes on & off as I drive so need to pull the cluster to fix that 1 bulb.
Dave ----
Yeah that's what my buddy was saying but it doesn't feel like a lot was done. Still feels like I'm falling behind schedule.
I was looking into getting a new trace but mine only has a couple of traces that have lifted and nothing is broken. I'm trying to keep this build on the cheap so if I can re glue the lifted traces safely and save money...
I already do have the tach so that's a plus. I was actually happy to see the factory digital clock and tach when I got it.
The needle paint I got was from a seller called "White Gauges" on eBay. Cost for a small bottle (0.5 oz) of fluorescent orange was $8 and the LEDs were from the same seller and they were about $5 each. I was expecting the LEDs to be brighter than the stock bulbs and they are but not by much. I got 2 of their green LEDs for the directional and a blue LED for the High Beam indicators.
Before...
After...
I may or may not touchup the bottom of the lens... If those scratches are visible then I'll fix them...
On the gauge cluster, you know about poking out the original green plastic lenses? That is what causes the cluster to be dim, these factory colored lenses get old and cloudy and do not pass any light. Take the bulb out, and then take a pencil down in the bulb hole and poke them out. If you do not have colored lights the background will be yellow light but much brighter. Most people poke the lenses out and then use colored bulbs.
Cross your fingers on the rear tank. If it is rusted bad enough to cause holes, then it's rusted on the inside also. Rusty tanks are bad for your fuel system and carb, causing reliability problems. Later on I would plan on a new tank.
On the gauge cluster, you know about poking out the original green plastic lenses? That is what causes the cluster to be dim, these factory colored lenses get old and cloudy and do not pass any light. Take the bulb out, and then take a pencil down in the bulb hole and poke them out. If you do not have colored lights the background will be yellow light but much brighter. Most people poke the lenses out and then use colored bulbs.
Cross your fingers on the rear tank. If it is rusted bad enough to cause holes, then it's rusted on the inside also. Rusty tanks are bad for your fuel system and carb, causing reliability problems. Later on I would plan on a new tank.
Oh I kinda figured I could pop the lenses out but then I'd lose the arrows and lettering. I did paint the inside of all those light housings bright silver so that should help.
Yeah I'm not expecting much more time with that tank. I'm prob gonna rinse it out with hot water and a bunch of nuts and bolts to knock off the loose stuff then maybe buy a can of tank liner. I just want it to last till at least the winter and I'll replace it during phase 2 of this restore.
I also found another issue when I was working on the core support... The battery tray is almost non existent so I need to replace that. It really bothers me that a new one costs anywhere between $80 -$120! How can a small piece of tin cost that much when a new door is around the same price???
Oh I kinda figured I could pop the lenses out but then I'd lose the arrows and lettering. I did paint the inside of all those light housings bright silver so that should help.
Yeah I'm not expecting much more time with that tank. I'm prob gonna rinse it out with hot water and a bunch of nuts and bolts to knock off the loose stuff then maybe buy a can of tank liner. I just want it to last till at least the winter and I'll replace it during phase 2 of this restore.
I also found another issue when I was working on the core support... The battery tray is almost non existent so I need to replace that. It really bothers me that a new one costs anywhere between $80 -$120! How can a small piece of tin cost that much when a new door is around the same price???
No not the arrow on the front of the cluster,
There are color domes that fit over the factory bulbs to make them green. They get dirty & frosted and dim the light from coming thru.
Remove the color domes and you get bright lights.
Dave ----
I guess you're talking about the metal support under the battery tray ? I put a new tray in my truck and I don't recall it costing much.
LMC Truck $59.45 + 18.75 Shipping and about $5 for tax... Total $73.20... Still way too much for a piece of tin in my opinion...
Originally Posted by FuzzFace2
No not the arrow on the front of the cluster,
There are color domes that fit over the factory bulbs to make them green. They get dirty & frosted and dim the light from coming thru.
Remove the color domes and you get bright lights.
Dave ----
Ahh ok... They are blue in my cluster. I haven't checked them in the dark yet but I did clean them when I referbed the cluster.
Rezvani's Latest Post-Apocalytic Monster Is a Ford F-150 Raptor Underneath
Slideshow: Called the Fortress, the 850-horsepower pickup combines Raptor underpinnings with military-inspired features, survival equipment, and a starting price of $285,000.