When you click on links to various merchants on this site and make a purchase, this can result in this site earning a commission. Affiliate programs and affiliations include, but are not limited to, the eBay Partner Network.
An auto level rear air system would go a long way toward keeping headlights properly aimed - if nothing else! Since the system has been used and proven reliable for so long on OTR trucks, I don't understand why it is taking so long to start seeing it in consumer grade pickup trucks. Yes, it costs money, but that gives the company something of an excuse to raise prices again anyway.
This is one of the major advantages of full air suspension. On my truck the headlights are aimed exactly the same empty or with the 4300 lb camper in the back, automatically. The empty spring rate is adjusted to about 1/3 of that loaded, automatically.
I think one of the worries the manufacturers have about this is that it may require more knowledge on the part of the owner. Steel springs are pretty much maintenance free until they break, which is usually obvious. Had Ford offered the option on my truck I would have paid $4K for it - that's about what it cost me to retrofit and worth every penny in my opinion. The cost to Ford would probably have been a couple hundred dollars, max. I intend to do the front next - not for self leveling but to clean up the ride. It is possible to make these things ride almost like a luxury sedan.
I know FMC has been using them successfully for many years on the Lincoln Navigators as well, so it's not even new and unproven to them. No doubt, their use goes back even farther than that. The system in the Navigator would drop the rear end a few inches for ease of loading and unloading when the lift gate was opened, and maintain level ride regardless of load when running. That included a load in the rear cargo area, or a trailer hitched up out back.
Would be nice if ford included what some Toyota trucks have...adjustable headlights that can been aimed from in the cab on the fly. We pull a boat that is pretty front heavy and are able to adjust them so the lights are not pointing up into the trees.
If ford had this capability this would be as much as an issue.
KodiakF250, those backup lights look great! Like they are from this century! You are not helping my wallet lol
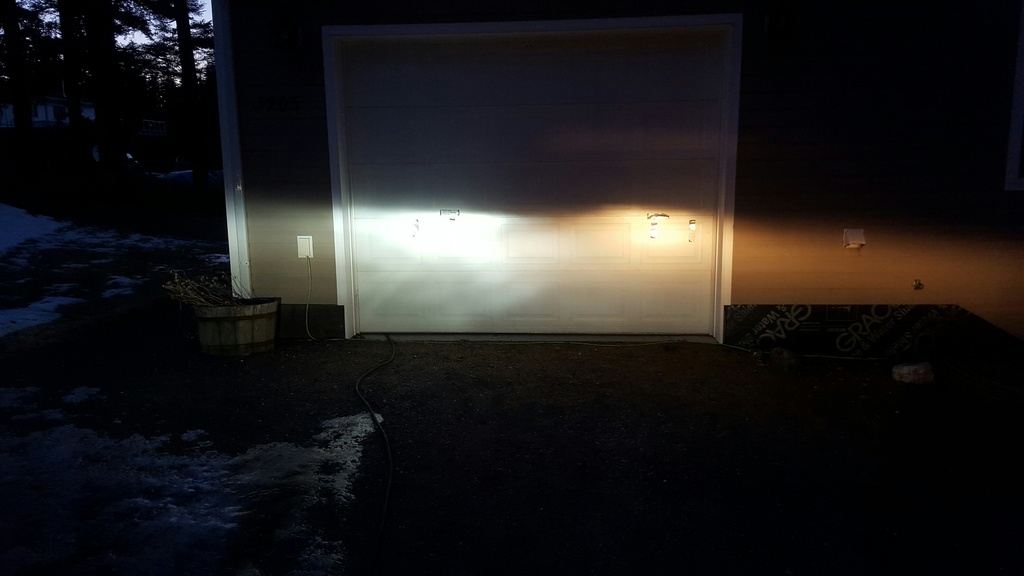
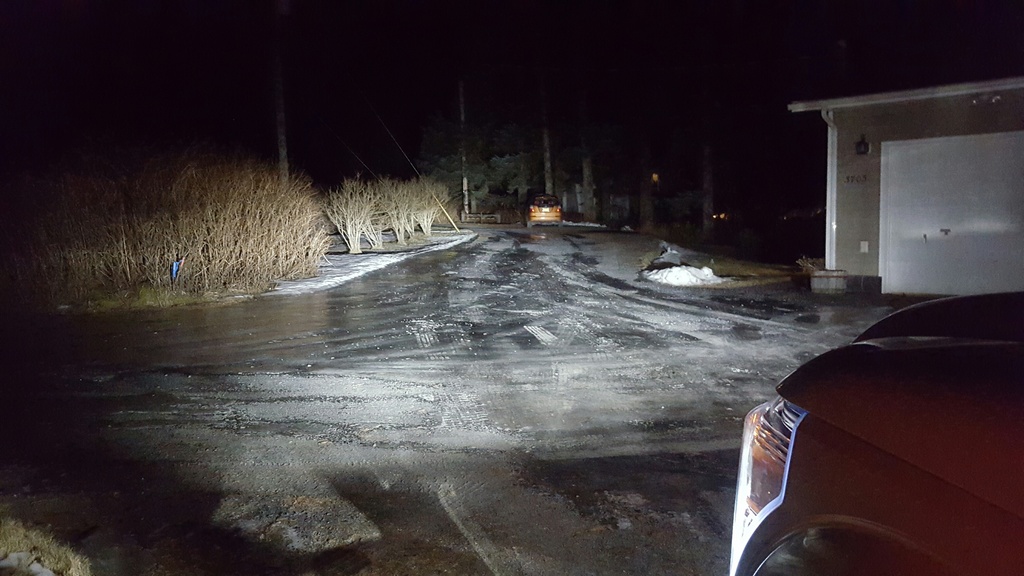
My headlight kit should be here between 3 and 5 tommorow. A buddy is coming with beer to help so I'm sure it'll take double the time it should but I'll be sure to throw a review up on this thread once night time comes around. Ive got wooden garage doors that are white, so it should make for a good background to compare and fine tune the beams on.
KodiakF250, those backup lights look great! Like they are from this century! You are not helping my wallet lol
My headlight kit should be here between 3 and 5 tommorow. A buddy is coming with beer to help so I'm sure it'll take double the time it should but I'll be sure to throw a review up on this thread once night time comes around. Ive got wooden garage doors that are white, so it should make for a good background to compare and fine tune the beams on.
Thanks! That same night I was going to install LED tail lights too, but when I tested the first one, it created quick flash. I had hoped it had the resistor in it to prevent quick flash since the website said it was street legal, but Xenon told me street legal just referred to the light generated. They have the resistor kit on their website, but I would never use the style connectors they use in a wet outside environment. Instead, I have an appt with the dealership on Tues to turn off the Lamp-Outage indication in the BCM, which will prevent the quick flash caused by LEDs. I took a copy of the SVE bulletin (Q-158R3) with me today when I made the appt, and the Service mgr said no problem doing it along with a couple other things I need them to look at.
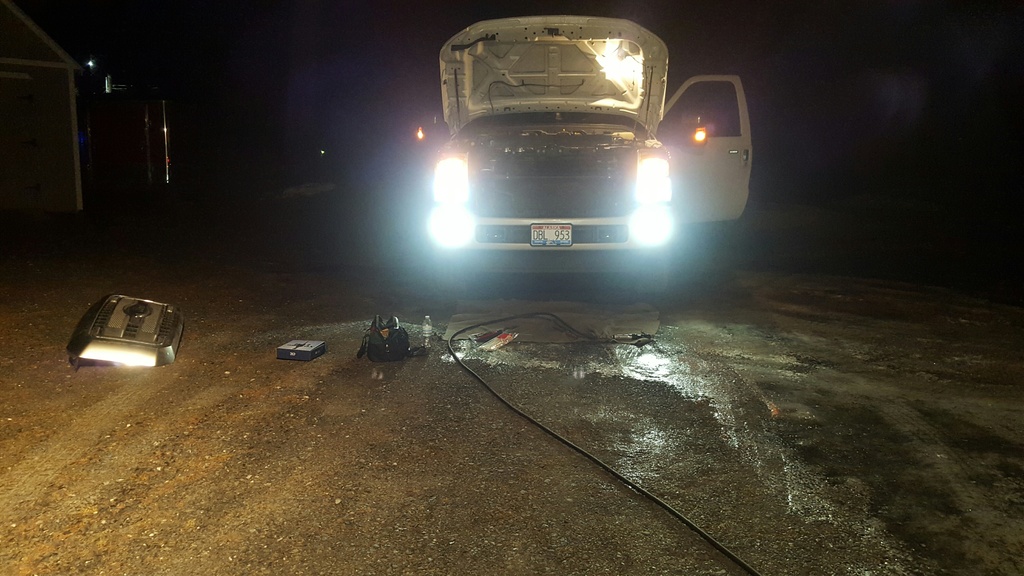
So tonight I installed the H10 Extreme LED fog lamps, and they are a great improvement! Then I removed the grill and driver's side headlight assy to install the headlamps. I didn't end up doing the install tonight. I'm doing this outside so I can take before/after pics, and I didn't realize part of the install required modifying the dust boot some. Decided I'll do this tomorrow or this weekend in better light so I don't screw up something due to poor lighting. Not a big deal backing out of the install tonight as I've had Super Duty grills off a few times, and it's a piece of cake now.
So, you get to go first and report back!!! Then I can follow your lead with any tips you have.
Hey folks, got the headlights installed tonight, and wanted to post a quick retraction of my dust boot comment yesterday. I could go edit that post and remove it, but those who already read it probably wouldn't read it again & notice my deleted comments.
The dust boot DOES NOT have to be altered in any way at all! I was looking at it wrong last night in the dark. My apologies.
I'll post a full review tomorrow with pictures, but let me just say I'm very happy with the results, it was critical to have lamps that can be clocked, and the install is very easy. Only time consuming part is clocking the lamp 1/8th of a turn each time, but once you do the first lamp & see the objective, the 2nd lamp goes quicker.
Good to hear. Do these lamps have the ability to adjust the depth into the housing, and was that necessary to match the position of the halogen filament?
Well I got them installed last night despite it being 25� outside. Very good quality kit and it came with instructions, zipties, and the correct alan wrench for clocking. I am pleased with the results so far, although I need to adjust my headlights a bit. I always turn my headlights off when backing out/pulling in the driveway to keep from disturbing neighbors so I guess thats why I never noticed the headlight aim being off from the factory. Before starting the install, I turned the headlights on against the garage door and noticed that my driver's side headlight was aimed higher than the passenger side. I will go back out tonight and aim them properly since that won't require removal of the grill. The install was very easy. 4 bolts along the top of the grill, 5 clips along the bottom and the grill comes out. Upon removal of the headlights, I noticed the gap on the driver's side bumper was alot tighter than the passenger side since I could not get a socket between the bumper and headlight like the other side. I'll be fixing the gap today. I removed the oem bulbs, gaskets stuck to housing so be sure to remove those before installing new bulbs. I then plugged everything together (used dielectric grease between each connection) and zip tied everything out of the way. Make sure to fan out the cooling fins before headlight re-install. I then turned the lights on with one side being the new led and the other being oem to ensure I was making the beam match. I got lucky and found that mine were a damn near perfect match to the oem beam, atleast from 5 ft away from the garage door. Repeat process on the other side and you're good.
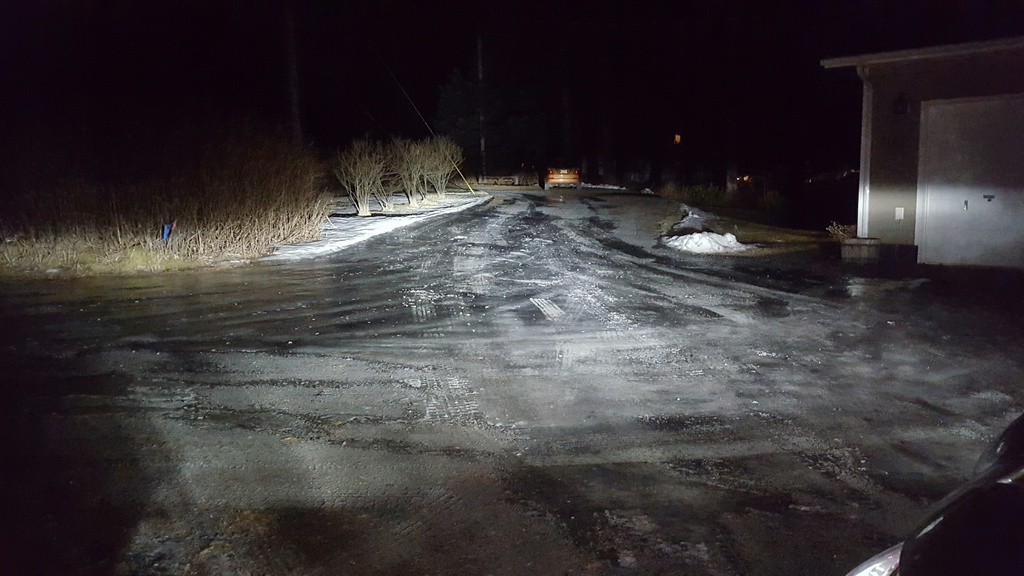
As for the first drive, the ONLY thing that kind of bugs me is the slight pockets of darkness which are small but noticeable if you're on a very dark unlit road. However, they still look GREAT, both from inside the cab and from the exterior. They made any and every sign pop ALOT more and I can see much better. I am impressed with how much brighter they are, especially since I have a tinted windshield and can still notice a big difference. I did get brighted multiple times, likely because they are aimed opposite of how they should be. After aiming the driver's side slightly lower than the passenger, I'll take another drive and see if I get brighted. As for the small pockets of darkness, I can live with them since the other benifits outweigh that aspect. I also plan to do the Morimoto projector fogs and Triton V3 Switchbacks which are also a cool white color. With both of these upgrades, I'm sure all lf the light beams will blend well enough to make a nice smooth beam of light in front and sort of fill in those pockets.
Now that the install is complete, I might play around with the bulb clocking to see if I can improve it for grins, which I'll be sure to update if I do.
09F250, If you can park farther away from your garage door, I think you'll notice a bigger difference when you clock the lamps. I did the driver's side first, and I decided to clock it in 1/8th turn increments (that's how they are designed) until I had rotated it 180*. I wanted to see what clocking did, and it's very very noticeable as you clock it. Poorly clocked splatters the light all over, and you don't have a good horizontal line at the top of the beam. I've got to think that's why many other packages that can't be clocked results in headlights that blind other drivers. It turned out the factory clock setting was the right one for the drivers side, but the passenger side required a single 1/8th turn clock for it to be right. "Right" is when you get the good flat line of light across the top, and that was pretty clear for me since I was parked back a ways from the garage. (In my pics, don't worry about my aiming on my garage door as my driveway is gravel and not level. I put duct tape on the garage door as markers for where my stock lights hit. My truck was higher on the driver's side where it was parked, and it turned out that I found my driver's side actually needed to be aimed a little higher than it was in these pics.) As a note, the instructions say to "loosen" the allen screw so you can clock the lamp, but you actually have to "remove" it, which is obvious once you see how the collar is designed to rotate. Be careful not to drop that little allen!
I had to adjust both headlights down a good bit after installing the LED lamps. Both LED lamps put the beam on the garage door higher than where I had put duct tape markers for the stock beams.
Wife and I took a drive afterwards, and I agree with what 09F250 said about the light having pockets that were a little less light than others. I wouldn't call them dark, but I think that's just the word he used to describe. The light intensity varies a little in spots across the entire field of view, but the light is a drastic improvement over the stock light! The LED fogs help fill in the light some. Nobody flashed their lights at me during the drive, but like I said, my driver's side was set a little too low. I adjusted the driver's side up, and I'll know more this next week as I drive to work. The top beam line on these LEDs is much more defined than it was on the stock lights, and I can easily see if they are aimed the same while driving.
The driver's side plug for the stock lamp gave me a hard time when trying to remove it. I had to fiddle with it a while as I was squeezing the release, and I started to wonder if it was a different type of release. If this happens to someone else, push the plug onto the back of the stock lamp and then press the release. After doing that a couple times I finally got it to release.
Dakster, these are H13 Extreme Headlight kit (XT-LED-H13) from XenonDepot.com, and the fogs are H10 Extreme LED CMB Bulbs in 5000K (XT-LED-H10-CMB).
Dakster, these are H13 Extreme Headlight kit (XT-LED-H13) from XenonDepot.com, and the fogs are H10 Extreme LED CMB Bulbs in 5000K (XT-LED-H10-CMB
Thanks for the advice, I think I'll take you up on that. Do you happen to have a picture of the bulb itself in the housing through the front of the headlight? I'd like to see where the led chips are facing to get a general idea when I'm clocking them. Yours look great! I love the fogs! Aren't you impressed with the quality of the kit? I think it's very nice for the money.
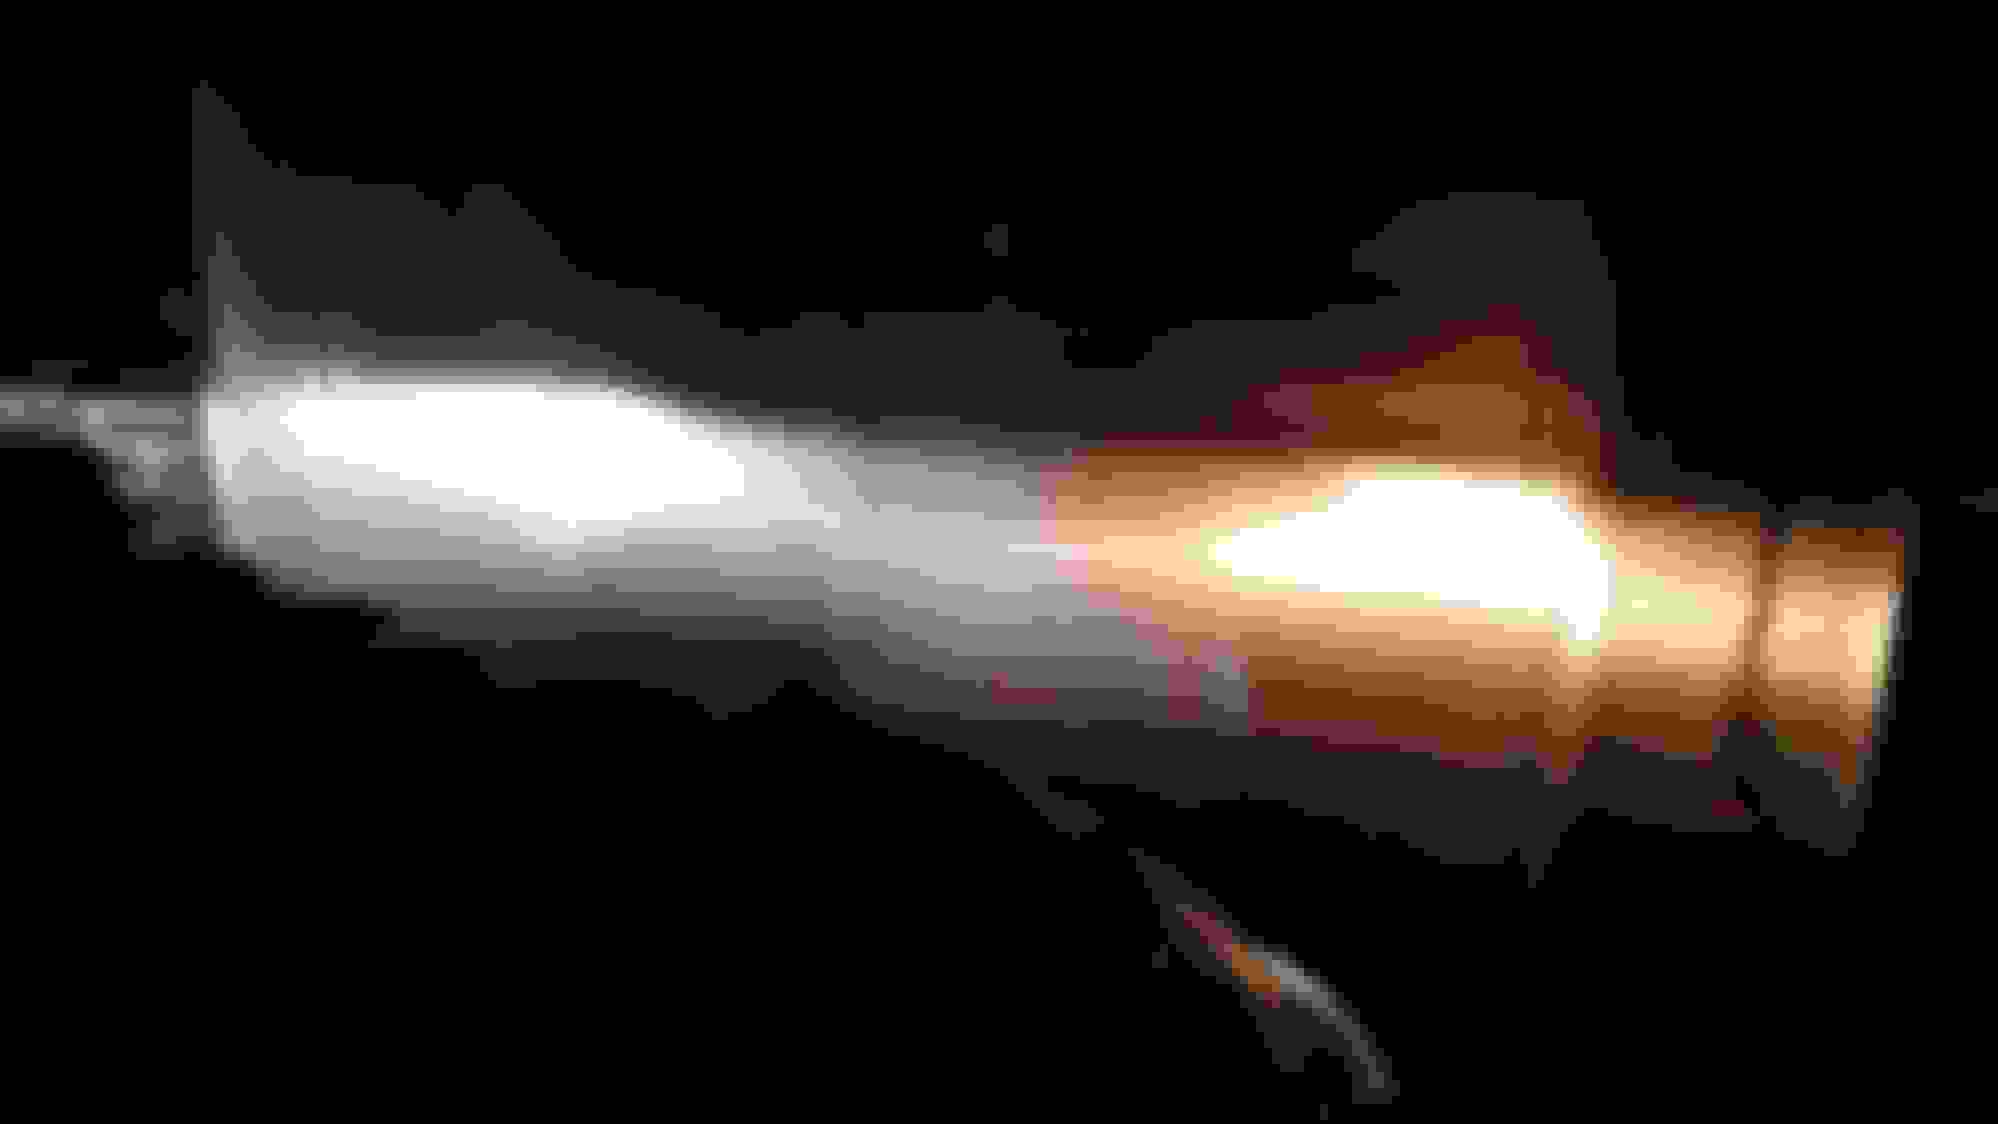
I do think these are very good quality. About the only anomaly I saw was the passenger light beam had an extra lobe at about 7 o'clock that the driver's side didn't. I don't know if that's from the headlight assy reflecting differently or if it's the new lamp. I suspect it's the lamp because the stock beam didn't have this. I'll throw up a picture here. The light generated still looks good, but I'm going to send a picture to the vendor for their thoughts. I tried clocking it a little, but it didn't remove the lobe. In hindsight, I could have swapped the two lamp assy's to see if the lobe moved to the driver's side, but I had already secured everything on the driver's side and buttoned it up.
I'll take a look and see if it's possible to see the LEDs in the housing from the front, and if so, I'll take a picture.
Thanks guys.. Looks great and a lot better than stock.
Curious to where that extra lobe of light is coming from. Will be interesting to see what xenon depot has to say about it. Also, curious if you notice a difference in ice build up on the headlight assembly. My daily driving it wouldn't be a big issue and I can keep the de-icing spray with me to deal with it.
The cutoffs of those LED's look much better than what I could achieve with the Lifetime LEDs I bought a couple of years ago. Even though they weren't "technically" clockable. I did take the heat gun to them and made them clockable. I'm wondering if that little hood that sits above the low beam LED is what is really making the difference. I may re-investigate the LED options when my current bulbs go out. I still don't know what I would think of them in the snow and sleet.
This Hennessey Takes the Expedition Tremor's Off-Roading Capability to the Next Level
Slideshow: The VelociRaptor Expedition gains a lift, upgraded suspension, Brembo brakes, and trail-ready equipment while retaining the stock 440-horsepower EcoBoost V6.
Rezvani's Latest Post-Apocalyptic Monster Is a Ford F-150 Raptor Underneath
Slideshow: Called the Fortress, the 850-horsepower pickup combines Raptor underpinnings with military-inspired features, survival equipment, and a starting price of $285,000.