Swapping 2007 Axles into Your 2001 Excursion

Adding the newer axles to your Excursion improves the braking and handling capabilities.
Upgrading the axles in your 2001 Ford Excursion to components from a 2007 model incorporates coil springs up front, stronger brakes all around and a slightly higher ride height. At first thought, replacing the axles in your big Ford SUV might seem like a daunting task – and it is – but this How-To thread from our Ford Truck Enthusiasts forums will walk you through every step of the process.
The Introduction
This 2001 to 2007 Excursion axle upgrade How-To thread was originally shared with the forum by “Nicmike”, who opened with a collection of pointers on how to make this swap a bit easier in the long run.
This will be a place for folks to ask questions as well. This is literally a work in progress…it is not done. You will be adventuring with me through the process as I do it. Need a special pic of a part? Just ask, and I can get it done.
Price:
– Expect to pay $1200-1500 for rust-free axles in Texas IF YOU DO THE REMOVAL YOURSELF. If you are buying them ready to load and carry away, expect to pay another $500-800 in labor/time/blood/sweat for the seller to remove the coil buckets and radius arm brackets. If the axles are rusty, then you need to adjust the price accordingly, because your prep/cleanup/paint times will be doubled…at least. Not to mention the replacement of rusty parts on your dime and time.First piece of advice:
– Get a picture of the door sticker from the donor. You will need that info for parts now…and later.Second piece of advice:
– Stick with 05-10 axles. There were some changes, although subtle, on the 08+ trucks that will cost you some more money to work around. Rear diff changed a bit, and you will have to shorten your driveshaft. More on this topic later.Third piece of advice:
– Get everything. Bolts, brackets, washers, hoses, fittings, speed clips…get it ALL. If a bolt screwed into something, and that something will come off, then take it with you. Hang onto everything till you are all done. Then toss what you don’t need.Fourth piece of advice:
– Sharp drill bits are your best friend for removing those %#$@*#%^ coil buckets and radius arm brackets. Prepare to bleed, sweat and hurt while removing them. I bought a drill bit sharpener after removing a few sets, and I am SOOOOOOO glad I did. Cut my time in half for removing the brackets, which are 60% of the labor for pulling a set of axles. I will detail the process that has worked best for me later. Gonna dedicate an entire post to just that with pics and techniques that WORK.Fifth piece of advice:
Remove the front and rear bumpers and EVERYTHING ELSE you can so you can roll the axles out with the tires on them. Thank me later.Sixth piece of advice:
– Get the rear leaf springs! Great opportunity to get them for “free” and do your modified B or F code rear springs. I didn’t get them (in the pics), because I have already done the mod and didn’t need them.
The Donor Tear-Down
The first steps of this Excursion axle swap begins with the OP detailing some odds and ends that you will want to remove from the donor vehicle. Obviously, you want to remove the front and rear axle along with all of the items attached to them (suspension components, brake lines, etc), but there are some parts that people might forget about.

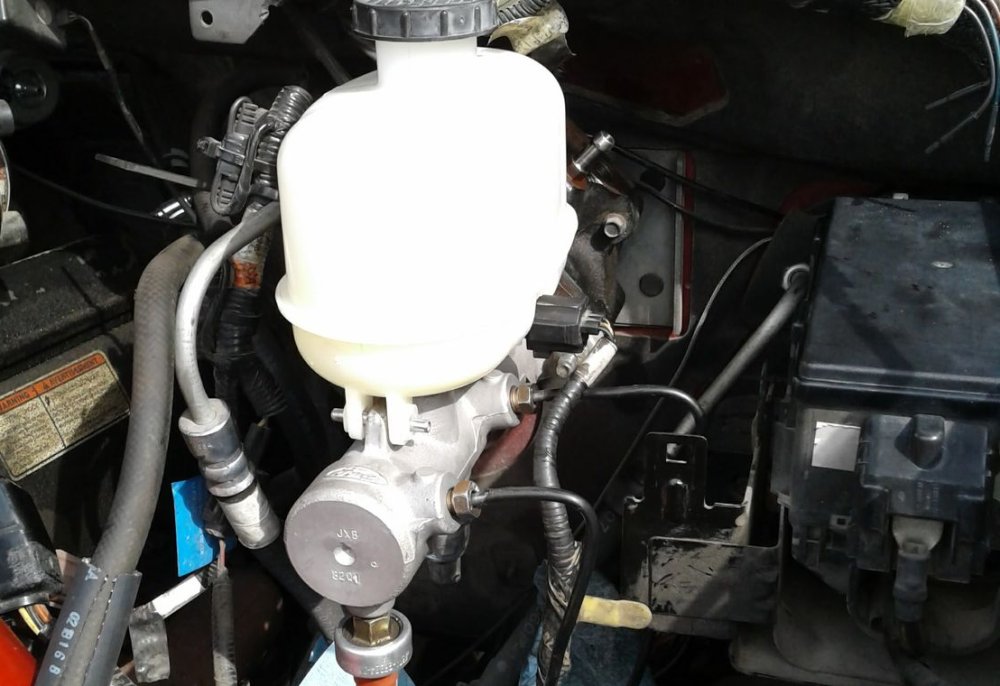
First, the master cylinder from the newer model is ideal for powering the brakes on the axles being swapped in, so you will want to remove the majority of the braking components.
Next comes an important step, as when swapping from the 2001 axles to the 2007 axles, you will also be swapping from front leaf springs to front coil springs. This means that you will need to remove the coil buckets and the radius arms from the donor vehicle, all of which the OP details in the thread. This might be the toughest part of the tear-down, as it will require lots of heavy-duty drilling and chiseling to remove those suspension components.

Fortunately, once you have harvested all of the components from the donor vehicle, you will have cleared one of the highest hurdles in the project.
Finally, you will want to remove all of the steering components from the donor truck, since you will be taking the power steering rack with the front axle.
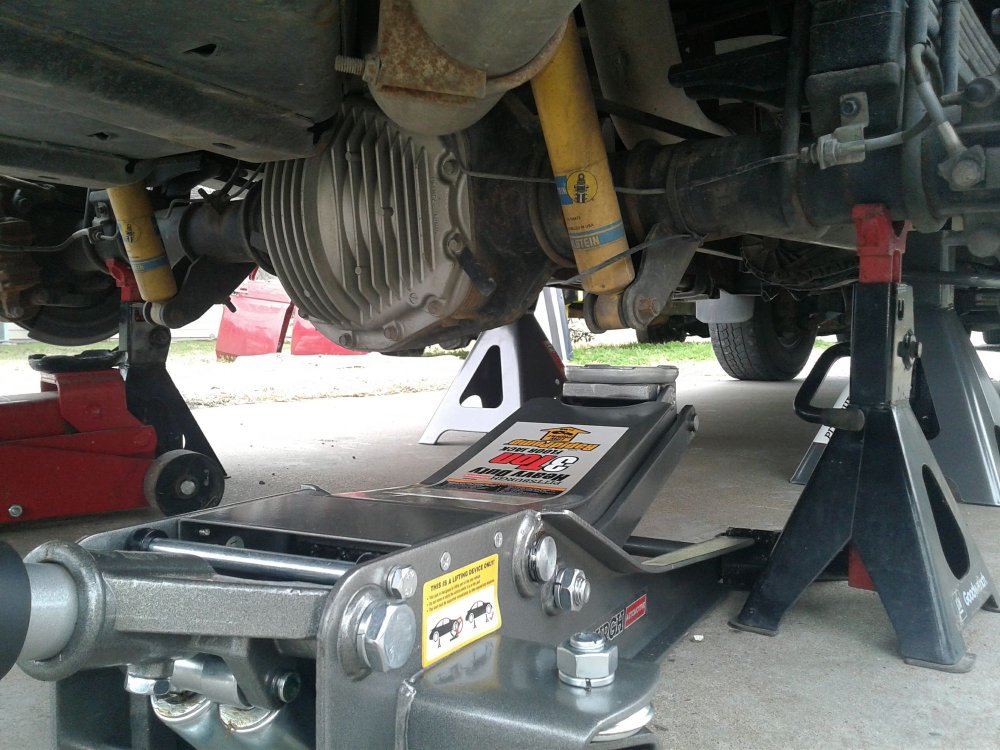
Rebuilding the Axles
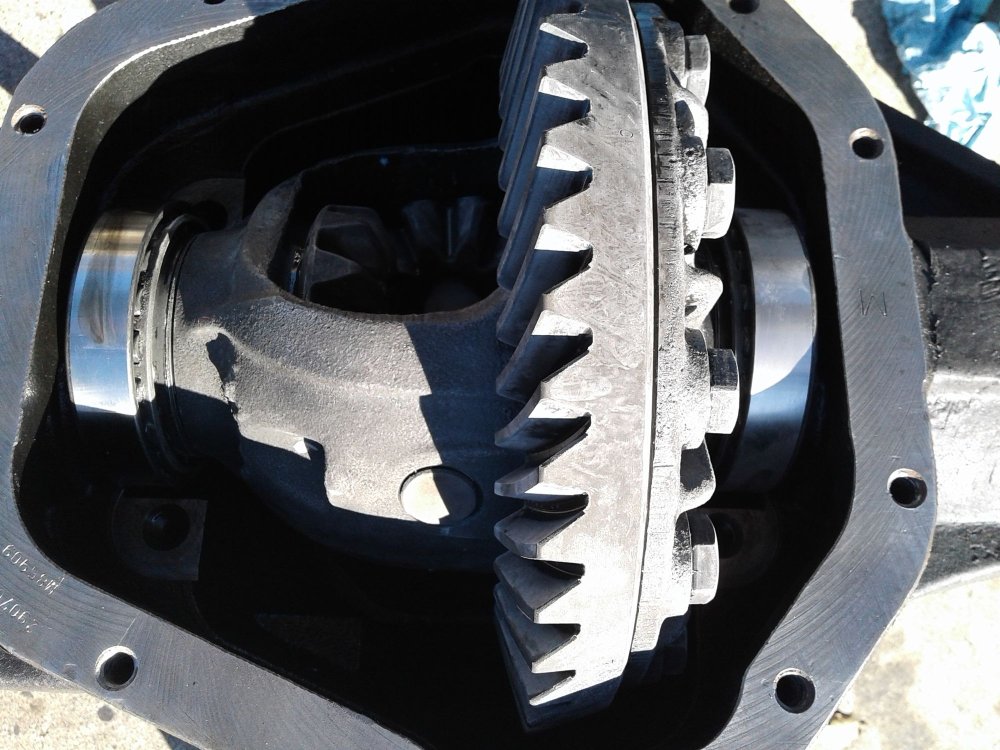
Once all of the components were removed, the OP started his build by tearing apart the axles from the 2007 donor vehicle to ensure that he was putting reliable components into his 2001 Excursion.

This includes checking axle seals, rebuilding the brake calipers, adding new brake pads, cleaning up the rotors or adding new rotors and servicing the front and rear differential. While we can run through that checklist in a hurry, that rebuilding portion of the project took up the bulk of the thread, with the OP provide serious detail on every step of the rebuild.
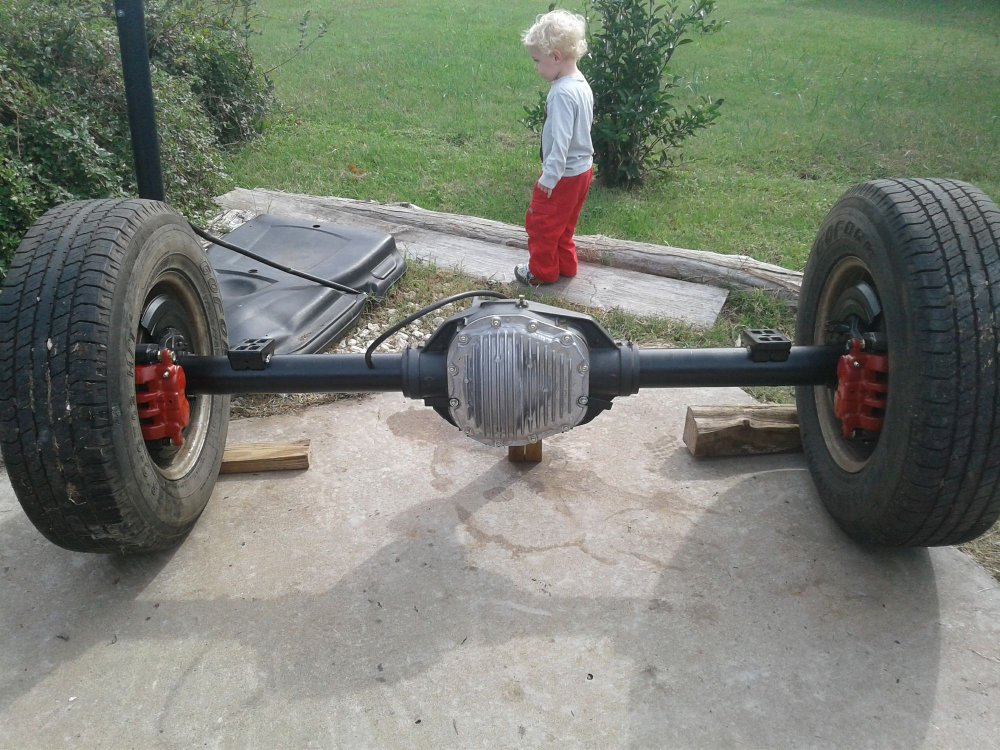
In addition to replacing seals and checking the condition of the moving parts, the OP painted the top of the brake calipers bright red and he painted the rest of the axle components gloss black. By the time that he was ready to install them, they looked like new and performed like new, from the pumpkin to the brakes and everything in-between.
In fact, even if you are just looking for a detailed explanation of how to rebuild your disc brakes or the differential, this thread is a wealth of useful information. No details were skipped, no matter how minor. He even goes so far as to point out where you don’t want there to be paint when you clean up your brake caliper bridge.

The OP started with the rear axle and then moved onto the front axle for his 2001 Excursion, with the front unit being a bit more complicated to rebuild and refresh. Like the rear axle, he removed the brakes and the axles, replacing the seals for everything, but he also removed the steering gear and the radius arms, painting those items up to look like new as well. In the process of shining up the front differential housing, he added new bushings where needed, making sure that the new front axle looked and performed like-new before installing it.
The Install
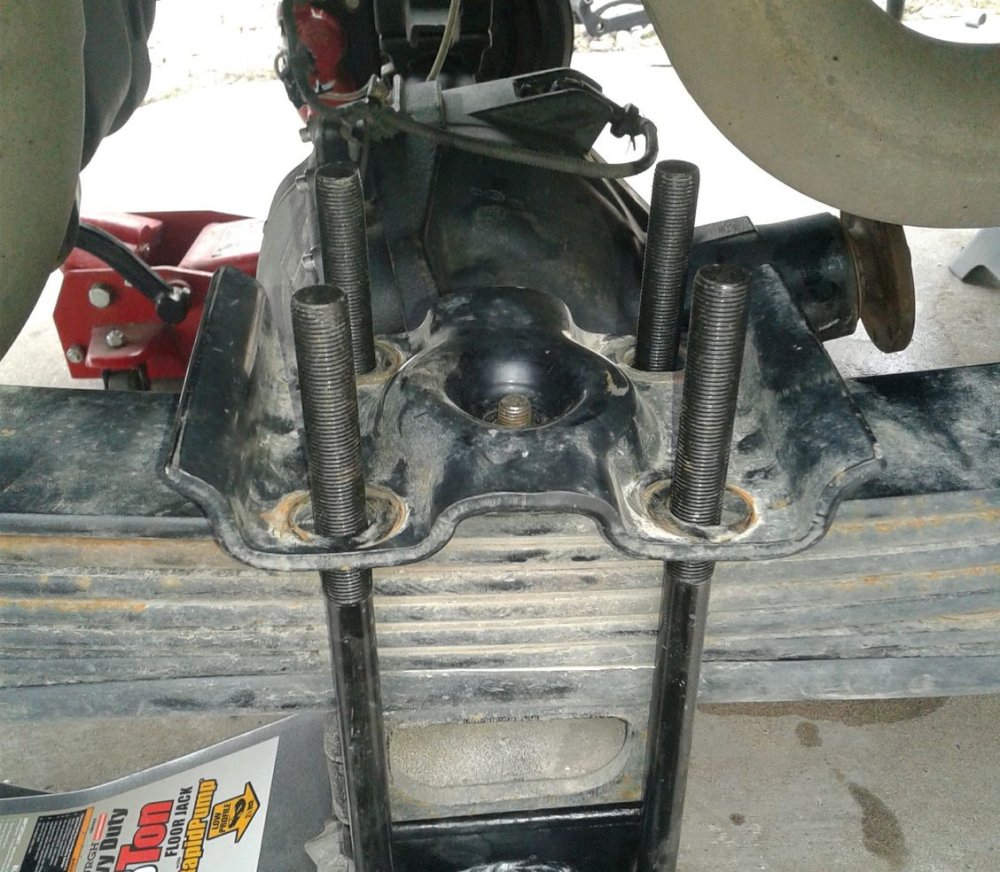
The OP’s step-by-step installation process of the 2007 axles in his 2001 Ford Excursion begins by tearing out the original rear axle components. He walks us through the removal of the brake lines, the spring mounts and the rest of the connections between the axle assembly and the frame. Once he had cleared out the stock rear axle, he rolled the 2007 unit under the truck, jacked it up and bolted it on.
He began with the rear, pointing out that it is the easier of the two, followed by installing the 2007 master cylinder and running the brake lines to the rear wheels.
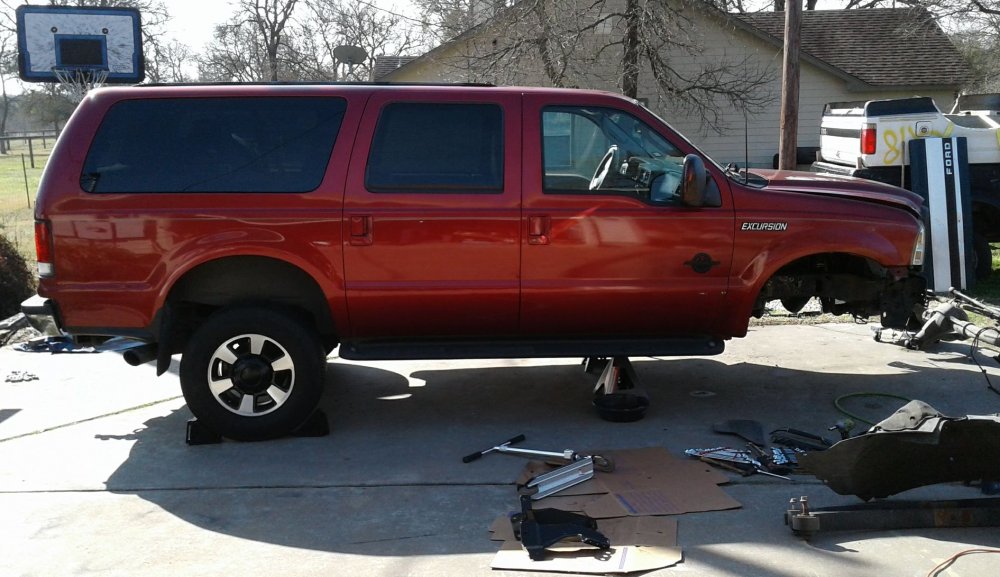
Finally, with the rear axle in place, the OP turned to the front end work. He started by removing the axle itself, leaving only the factory front leaf springs in place. Once those were removed, he was free to install the 2007 front axle, including the coil springs and the radius arms.

Unfortunately, winter has prevented him from completing the project and at the last report, this is what the OP’s 2001 Excursion looked like, waiting patiently for the front axle to be installed.
We have included a gallery of images of this swap below, but for step-by-step instructions on this entire swap, check out the original thread.


You must be logged in to post a comment.