When you click on links to various merchants on this site and make a purchase, this can result in this site earning a commission. Affiliate programs and affiliations include, but are not limited to, the eBay Partner Network.
I’ve been watching your reconstruction of your ‘56, I’m in the same process as you working on the cab corners,front floors and rockers,was wondering if you have the width of the door openings hi and lo, on my drivers side I have 35 7/8” and passenger side 36”, I actually got the truck in Jersey, I live on Long Island, I did the TCI 4 link and power R&P, after restoring mustangs I’m actually having fun with this, your build thread is excellent, Pete
Hey, it's awesome to see another build coming together in the area. Your truck looks like a great starting point...it's tough to find them around here.
I'll take some measurements of my door frames later today. The most important thing is to measure your doors and make sure your gaps to the cab are consistent even if not exactly the same on both sides.
Thanks for following along with my build and feel free to reach out with any questions.
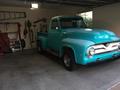
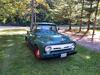
Yeah she's a beauty, this is when I looked at it in Jersey ,went back the following weekend with the trailer to drag it home, now a days my 3 golden retrievers are the closest wild life that goes into the garage, good winter project with heat finally
Yeah she's a beauty, this is when I looked at it in Jersey ,went back the following weekend with the trailer to drag it home, now a days my 3 golden retrievers are the closest wild life that goes into the garage, good winter project with heat finally
So that's a Jersey deer and not a Long Island deer.
I have no idea, originally I thought they were just missing the outer ends only to find out it was one piece and someone ruined a perfectly good chrome grill , that'll be hanging in the garage as soon as I vault the ceiling for the Bendpak lift I installed
Driver's side metal work this weekend. A lot of rust to deal with and I'm going to work on the floor board and rear support that was under the gas tank before putting on the cab corner.
Cutting out the old rocker is a pain if you are keeping the original front door pillar. I got all of the rusty stuff out of there and then notched the new rocker so it would slide up in there. Lots of dirt and rust behind the old cowl. I spent quite a bit of time with the wire brush on my drill, wire hand brush, and scraper to clean up all of the surface rust before treating it. The floor sagged with all of the tools sitting on it so I had to use floor jack with a chunk of wood to make it line up with the new rocker. Went slow welding a little bit at a time and moving around the panel so I didn't get any heat warping. Cleaned up the welds including the plugs that attached the rocker to the center support. Also welded in the rear door support. These are a pain to line up. The corners arent as deep as the originals so I chose to have the flat surface line up and I won't use the overlap on the cab corner. Welded in the inner cab corner. Both of these took a lot of work to get them to fit. I wish they would sell them in 2 pieces so there would be more flexibility in fitting them. Primed and painted. Ran into an interesting issue with the front cowl. The way the new panel fit it looked like I was going to have to much gap relative to the door. So I mounted up the door to see how the body lines would be and it was the original panel that needed adjustment. You can see the line I had to cut vertically in the top half so I could hammer the upper body line even with the new cowl panel. The door will now adjust properly and have good front and rear gaps. Cowl panel fully welded in.
This is an unbelievable amount of work! Lots of respect to any & all who can do this kind of thing. I'm dreading mine, but the pics from all these threads is a big help. Appreciate it!
To funny I guess it’s the week of working on drivers side in the northeast LOL, rear of cab is ready to be welded in then flip her to start on passenger side
It's been a slow couple of weekends when it comes to work on the truck. I did start to tackle the dash this weekend and will take some time next weekend to clean up behind the dash since access will never be so easy again.
For those that are just joining the thread, my dash had a couple of areas that had been cut out then patched with pop metal and Bondo. I had previously cut out the top of the panel which you can see in the upper left of this photo. The patch panel I created had the radius wrong and I just wasnt happy with it. So I am starting fresh with a big section of panel I got from Kevin (Bigwinf100). I mocked it all up and cut out the original dash. Here is the one for the scrap pile. The right side is the one I got from Kevin. I sanded it all down and will need to do minimal body work for it to be perfect. Back side is coated with Eastwood rust preventative paint. Close up of the new panel. New panel mocked in place. Should turn out good enough that you would never know it was repaired. Am leaving it open for now so I can do work on the vent and wipers and take care of rust treatment behind the dash.
It's been a while since I've posted. Flu bug hit my house so we were all dealing with it over the course of a few weeks.
Finally back to the truck today. Not much to update yet but hopefully some progress by the end of the weekend.
Getting underside of dash prepped for rust inhibitor paint prior to installing top of dash. I decided the floors were too rusty to support my fat ***. So I picked up patch panels and am making a plan to brace up the cab and get them installed.
All day project installing the dash panel. Turned out great.
Mocked up and held in with magnets. It was in and out a dozen times for grinding to fit. Tacked in. I did quick tacks with the welder set for 20 ga and chased with compressed air to cool as I was going. No warpage. Fully welded in. Used a flapper disk to grind down the welds. Again chasing with compressed air to take the heat out. Finished product.
Nice job! I found a surprise in the lower right corner of the glove box opening- all swiss cheese! There was a mouse nest in there I remember pulling out when I first started working on truck. Nasty rodents musta peed in there and caused rust. Strange...
Rezvani's Latest Post-Apocalytic Monster Is a Ford F-150 Raptor Underneath
Slideshow: Called the Fortress, the 850-horsepower pickup combines Raptor underpinnings with military-inspired features, survival equipment, and a starting price of $285,000.