


Stella's '47 updates

Junior User
Joined: Jul 2013
Posts: 92
Likes: 0
From: Savage, MN
Just curious, are those the stock leaf spring carriers/shackles? Look a heck of a lot similar to the ones on the back of my dad's '96 F-150. Also, if you aren't excited to see this thing all put together, I sure as heck am! This thread is giving me a ton of confidence in restoring something like this. Real good work!
Thread Starter
|
Senior User
Joined: Aug 2012
Posts: 131
Likes: 0
As far as I can tell the suspension parts are all stock, might even be the original ones from '47.
More goodies today, finally got the tranny cleaned up, new gaskets, throwout bearing, and paint. Still need to get the output shaft seal as the rubber lips were rock hard and poured diesel that I used to flush the tranny with. A few gears had some wear and surface rust but nothing to fret over. Also played around with the horn today as I was thinking it wasn't going to work after testing a few months back. Finally got it working and boy does it sing when 12v are going to it. Still need to jb weld some rust holes in it and redo the wires but hopefully it's good to go. Found out my new tranny mount is not going to work, it appears i need one that is mostly flat instead of the crescent moon shaped one I ordered. Also rebuilt the master cylinder and cleaned up the pedal assembly.
Also need to find out what the small hole is in the back of the distributor behind the threaded post and see if I can get an o-ring for it or something.

Freshman User
Joined: Jul 2013
Posts: 39
Likes: 0
Looking good Stella I really like the way the tranny came out .
Bob
<table width="100%" border="0" cellspacing="6" cellpadding="0"><tbody><tr><td class="alt2"></td><td nowrap="nowrap">
</td></tr></tbody></table><table width="100%" border="0" cellspacing="6" cellpadding="0"><tbody><tr><td class="alt2"></td><td nowrap="nowrap">
</td></tr></tbody></table>
Bob
<table width="100%" border="0" cellspacing="6" cellpadding="0"><tbody><tr><td class="alt2"></td><td nowrap="nowrap">
</td></tr></tbody></table><table width="100%" border="0" cellspacing="6" cellpadding="0"><tbody><tr><td class="alt2"></td><td nowrap="nowrap">
</td></tr></tbody></table>
Thread Starter
|
Senior User
Joined: Aug 2012
Posts: 131
Likes: 0
Started working on replacing sheet metal items on the cab. Welded in the driver side rocker panel as it rusted apart on the front cab pillar and making the the front corner of the cab flop around. The welding is not the greatest as I am still figuring out the new gasless mig welder i bought. Just have to slow down a bit and concentrate. Of course welding new sheet metal with the old is a bit tricky as I can't get rid of all the rust but it's definitely not going anywhere. Next will be the passenger side rocker panel then the floor.


Thread Starter
|
Senior User
Joined: Aug 2012
Posts: 131
Likes: 0
Finally got the other rocker panel and floor welded in. Need to get pieces of sheet metal to fill in areas not patched by the floor piece and repair some of the rotted areas. Got new rear inner bearings and races installed, sourced them from napa. the bearings are skf 368-a and the races are 362-a, the bearings and races were separate, not a complete set. Inner seals i got from MAC's. Also found the 3 brake hoses from napa, front 2 are #7600 and rear 1 is #6560. I tried the front inner bearing seal from napa #16900 but it goes down into the hub too far and rests on the bearing itself. the napa seal is only 1/4" thick while the original is 1/2" thick, gonna get those from MAC's too. The transmission rear oil seal is napa #21210, for the 4-speed t-8 trans. got all the brake lines ran and bent to the proper shape, was going to flare them myself but the flare tool had an unfortunate meeting with a hammer. note to self don't buy evercrest flare tool. just going to have brake shop flare them.
Thread Starter
|
Senior User
Joined: Aug 2012
Posts: 131
Likes: 0
Well, got a little bit done today. Modified the lifter bores for use with the adjustable lifters. Had gone thru yesterday and assembled the valve assemblies and set up the lifters for use. Installed cam and one lifter and valve assembly to set valve lash, then removed lifter to measure with micrometer and set the other lifters close to the measurement to reduce adjusting while they were in the block. As can be seen by the pictures there are now 5/32" holes near the bottom of the lifter bores. This is to facilitate the use of an allen wrench to keep lifter from spinning while adjusting. Worked pretty slick, all valves are adjusted to .014" according to cam manufacturer. Also set the heads on the block without head gasket to see if there would be any interference, sure enough there was. Put on gasket and didn't feel anything hit but that may change once the head is torqued down. It appears that the guy that resurfaced the heads took quite a bit of material off to make them flat, maybe too much. Will know more once the pistons and crank are installed. May just have to junk these heads. Also may have a little fun with the rear main as my original crank is a little different on the back end than the original crank that came out of this block.


Thread Starter
|
Senior User
Joined: Aug 2012
Posts: 131
Likes: 0
today I decided to throw in the crank and see which solution for sealing the rear would work best. i could use the goofy metal labyrinth seals that original to the '41 block but feel it would possibly leak pretty good, or use the rope seal devices that match the crank from the '47 block. As you can see from the pics the '47 crank has 1 oil slinger while the '41 crank has 2. Maybe I'm over complicating the simple but just don't want a heavy leaker. And of course the timing marks on the cam and crank don't line up, off by a tooth no matter how it's put in there, could be due to the fact this isn't a stock cam grind.


FTE Stories
Ford Trucks for Ford Truck Enthusiasts

10 Things Every Truck Owner NEEDS (2026 Edition)
Michael S. Palmer
Rezvani's Latest Post-Apocalyptic Monster Is a Ford F-150 Raptor Underneath
Verdad Gallardo
Top 10 Most Expensive Ford Trucks Ever Sold on Bring a Trailer
Joe Kucinski
2027 Ford Super Duty Buyer's Guide (Every Model, Engine, & Package)
Brett Foote
Top 10 Ford Truck Tragedies
Joe Kucinski
AEV FXL Super Duty - the Super Duty Raptor Ford Doesn't Make
Brett Foote
Lobo Vs Lobo: Proof the F-150 Lobo Should Be Even Lower!
Michael S. Palmer
Ford's 2001 Explorer Sportsman Concept Looks For a New Home
Verdad Gallardo
10 Best Ford Truck Engines We Miss the Most!
Joe Kucinski
Thread Starter
|
Senior User
Joined: Aug 2012
Posts: 131
Likes: 0
hey truckin23, what you have circled on the pic is a mark i made with a marker. however on the tooth just to the right of your green circle there is a faint crudely etched oval near the bottom of the tooth next to the ring that is machined into the gear. the timing mark on the small gear should be the one i highlighted as there is no other definite markings elsewhere.
well anyways at a definite work stoppage on the motor for a bit. found out the second set of heads are cracked so now I have 2 sets that basically scrap. so instead of messing trying to find usable heads at the junkyard, decided to get a pair of edelbrock #1125 aluminum heads. and since this max 1 cam seems to have quite a bit more valve(.350) and cam(.364) lift than a factory cam these heads should work just fine. not quite the original factory look but sometimes it's not worth it.
As far as the rear main seal issue goes MAC's has the appropriate aluminum seal holder for the rope seal to use with the older rear main bearing cap.
Also awaiting word back from Stumpyfabworks for the engine stand adapter that bolts into the side of the block.
I still think it would have been easier and cheaper to do the turbo 460 install.


Thread Starter
|
Senior User
Joined: Aug 2012
Posts: 131
Likes: 0
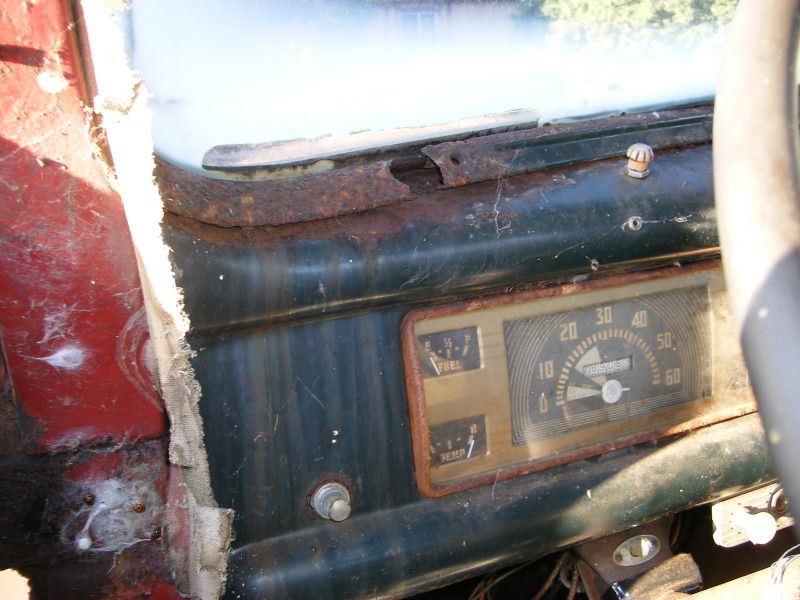
Used the decal kits that MACs sells, basically just stickers. don't replace anything inside the gauges as the guts looked to be in pretty good shape except for the oil pressure gauge. one of the wires had broken loose from the posts, they used some kind of glue to hold them on, just melted a dab over solder on it and good as new.