When you click on links to various merchants on this site and make a purchase, this can result in this site earning a commission. Affiliate programs and affiliations include, but are not limited to, the eBay Partner Network.
Looking good! I like the sill plates and may steal that idea.
Thanks! I found a pic of the ones in the Flareside. It's away for the winter now so I couldn't get better ones. This is a pic from my old flip phone, real A1 picture quality.
Interesting. Thanks. Do you know what paint you used? It seems to match the carpet pretty well.
Oddly enough, this may change how I paint/powder coat things under the hood. I can see either using a paint that matches the carpet, like you've done, or going with black. But, I've been debating whether to do the aluminum valve covers in Old Ford Blue or black and sand off the top to get brushed aluminum. Obviously doing the sills in OFB/aluminum would be ..... bizarre. But black/aluminum might look classy and tie in with the engine if the valve covers were done similarly. Hmmmm....
Interesting. Thanks. Do you know what paint you used? It seems to match the carpet pretty well.
Oddly enough, this may change how I paint/powder coat things under the hood. I can see either using a paint that matches the carpet, like you've done, or going with black. But, I've been debating whether to do the aluminum valve covers in Old Ford Blue or black and sand off the top to get brushed aluminum. Obviously doing the sills in OFB/aluminum would be ..... bizarre. But black/aluminum might look classy and tie in with the engine if the valve covers were done similarly. Hmmmm....
I used the same paint that I used on the interior panels. It's Dupli Color Vinyl and Fabric paint but it worked great on the aluminum as well-doesn't chip or crack any different that regular enamel.
I completely understand what you mean to tie the colours of the truck together. I painted the inner cover plate for the tailgate New Ford Blue and it looks somewhat out of place, so I know what you're getting at. I'll probably re paint it with the interior paint this weekend.
I think the black and aluminum would look very sharp. It would go along with any interior colour as well!
I'm using SEM paint for the interior, but never would have thought it would adhere to the aluminum. Good to know!
The self etching primer helps out a lot. If I were to do it again, I'd take the extra time and blast them in a cabinet with glass bead. Would definately help paint adhere to it a little better.
Yes, a trip through the blast cabinet is a big help for adhesion. And that's the best way to get all the "stuff" out of the grooves and ensure it is bare metal that the finish is going against.
If I go black I'll probably powder coat them black, sand the tops, and then PC them clear. But I doubt the SEM would stand a stint in the oven at 400 degrees without darkening, so I'd probably use their satin clear over it after sanding.
Yes, a trip through the blast cabinet is a big help for adhesion. And that's the best way to get all the "stuff" out of the grooves and ensure it is bare metal that the finish is going against.
If I go black I'll probably powder coat them black, sand the tops, and then PC them clear. But I doubt the SEM would stand a stint in the oven at 400 degrees without darkening, so I'd probably use their satin clear over it after sanding.
I've never had anything powdercoated before, I've heard it's awesome! Got some more work done this weekend. Finally got all four speakers in and working. I was hoping to run 6x9s in the back, but they just wouldn't fit in the factory grilles and I really wanted to use them. So I ordered a pair of 5x7" Kenwoods and they were a direct swap for the factory ones.
Also got the back seat in finally. That pretty much has the interior finished.
When I had the truck out for the first run, it ran TERRIBLE. Backfiring and missing. Stumbling when it left corners and it never did this before. The only thing I could think of was bad fuel. Real convenient. I knew it was running a little on the piggy side, so I intended to put in a size smaller jet in the primaries and secondaries. So, I popped the Holley off and went at draining the bowls. Primaries looked good. But this is what came out of the secondaries...
Shortly after it started running poor I added gas line antifreeze, 20 dollars of 91 octane and a bottle of octane boost to the tank. It started to clear out a bit after awhile. But I hadn't got at it hard enough to open the secondaries. So this is what that crap looked like. Luckily I don't have to drop the tank though! The plugs were so badly fouled I'm amazed it ran as good as it did. Two of them almost looked to be dead all together. The next run should be a little better to say the least..
Coffee in your secondaries? Keeping the engine awake?
It sure looked like it. Smelled like the 10+ year old varnish that I dumped out of the original tank. Just my luck of course.
Hopefully I'll have some road tests soon.
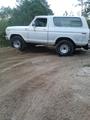
Well, there's a few bugs left but that's to be expected - ESPECIALLY from this truck. A little over a year and a half later, here's the finished (for now) product.
Thanks fellas! First I gotta get it out of the driveway. Fuel inlet line split with a whopping three miles on it. Real impressed. That's what I get for trying to use a cheaper braided stainless line. Then today the courier lost my new one and I had a bit of a fit. Also putting a heat stove on from the headers to the carb. Hopefully that will solve my problem with the fast idle not wanting to kick off and stay off. More pics soon! And a video if I ever get it sorted out.
Great job on the bronco looks awesome. Pretty quick rebuild too. I recently picked up an all white '85 Bronco thats in way better shape than the one I was gonna restore. Need to redo my build thread. Going to resto the '85 and make the '83 into a mud truck. Hope mines turns out this nice. I like the hidden hitch idea. Looking forward to a video.
Wow that turned out beautiful. I like the picture of it a few pages back in front of the orange fall background, almost looks like it belongs in a magazine or a picture for a calendar!
This Hennessey Takes the Expedition Tremor's Off-Roading Capability to the Next Level
Slideshow: The VelociRaptor Expedition gains a lift, upgraded suspension, Brembo brakes, and trail-ready equipment while retaining the stock 440-horsepower EcoBoost V6.
Rezvani's Latest Post-Apocalyptic Monster Is a Ford F-150 Raptor Underneath
Slideshow: Called the Fortress, the 850-horsepower pickup combines Raptor underpinnings with military-inspired features, survival equipment, and a starting price of $285,000.