


Effii gets rebuilt
Thread Starter
|
Senior User
Joined: Mar 2007
Posts: 238
Likes: 0
From: Australia
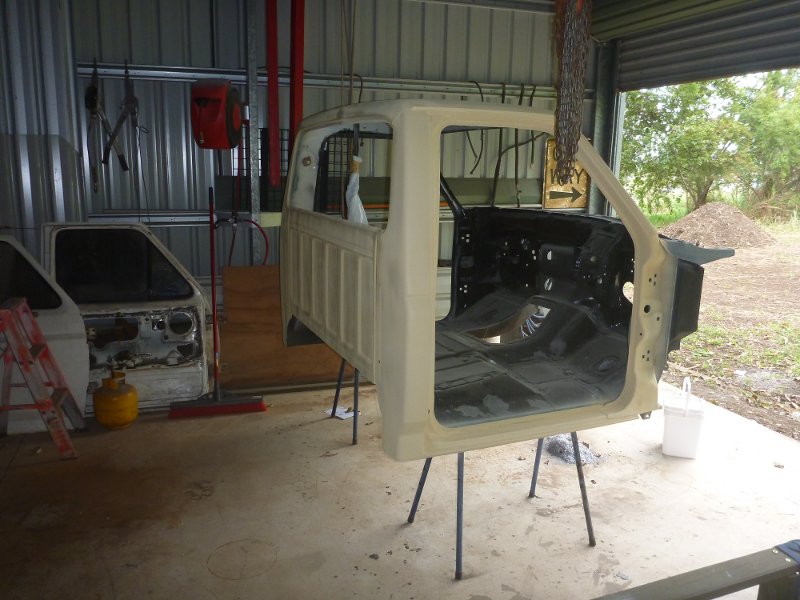
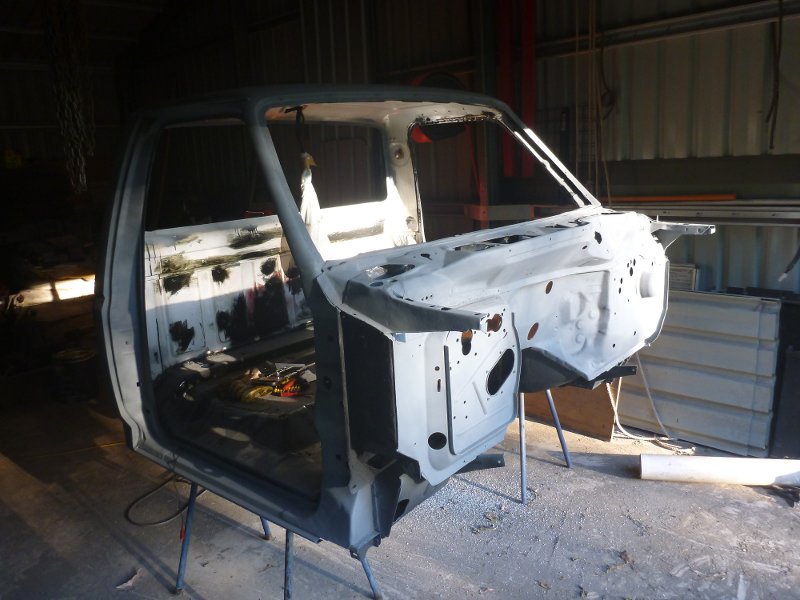
Week begining Monday 17th June 2013
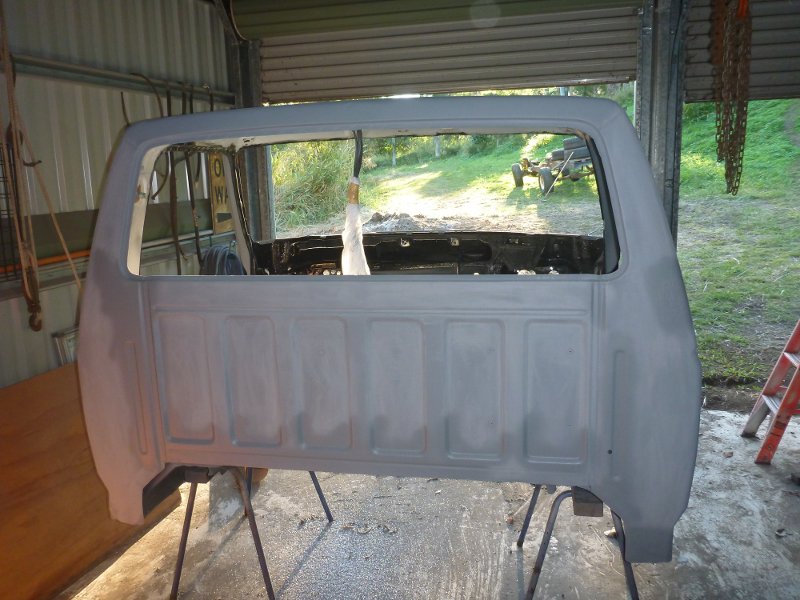
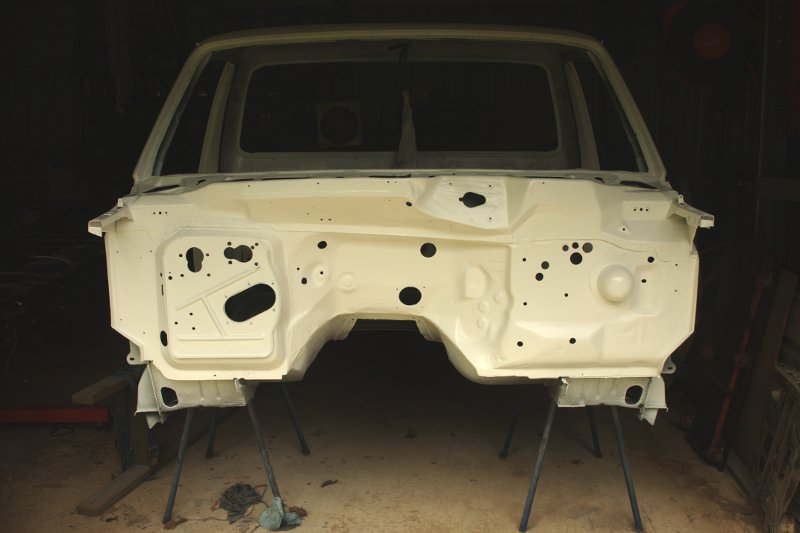
Completed primer coat on cab.
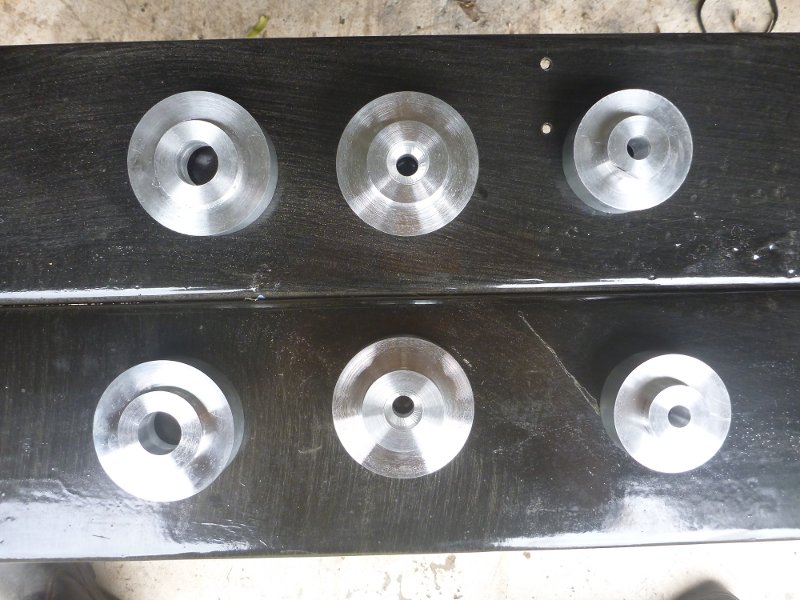
Started turning the aluminium blanks for the 1 inch body lift.

That's it for this week and there won't be much next week as I've got a dingo for the week and need to do several things around the house with it.
Back in about 10 days with more from the rebuild.
Started turning the aluminium blanks for the 1 inch body lift.
That's it for this week and there won't be much next week as I've got a dingo for the week and need to do several things around the house with it.
Back in about 10 days with more from the rebuild.
Last edited by 4x4falcon; Jul 2, 2013 at 03:24 AM. Reason: added images
Thread Starter
|
Senior User
Joined: Mar 2007
Posts: 238
Likes: 0
From: Australia
I wish. Mostly basalt soil here, lots of patches of clay. However what I allowed 3 days for took 1 so really can't complain about that.
Ended up doing about ten times more than originally planned.
Ended up doing about ten times more than originally planned.
Thread Starter
|
Senior User
Joined: Mar 2007
Posts: 238
Likes: 0
From: Australia
Week begining Monday 8th July 2013
Can't paint as it's too cold (less than 25 degrees) and too wet, been raining off and on all week.
So completed the body lift blocks and radiator hose adapters. Top radiator hose adapter also has thermo fan switch.
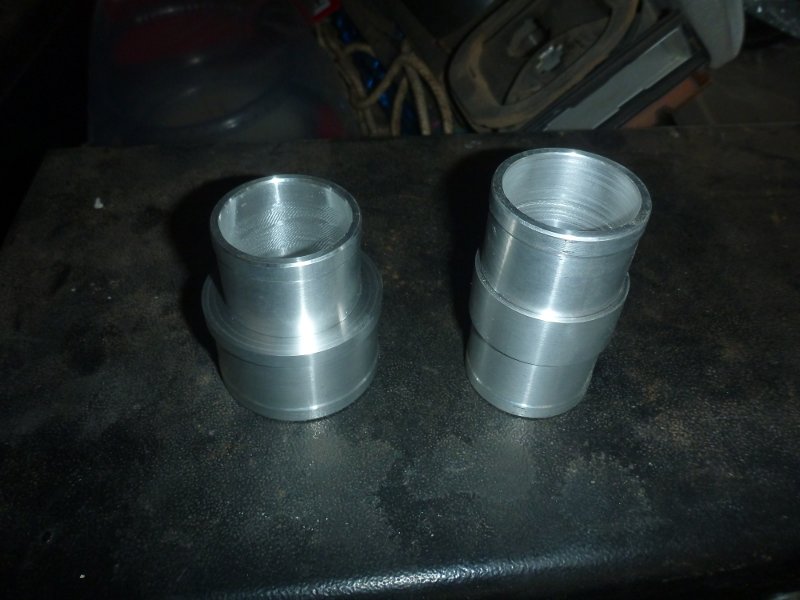
So completed the body lift blocks and radiator hose adapters. Top radiator hose adapter also has thermo fan switch.
Thread Starter
|
Senior User
Joined: Mar 2007
Posts: 238
Likes: 0
From: Australia
So lot's of other little things to be done but would really like to get the top coat on the cab so I can put it on the chassis and then have some room for changing over the diffs etc.
FTE Stories
Ford Trucks for Ford Truck Enthusiasts

Top 6 Best Deals Available on New Fords & Lincolns Right Now
Brett Foote
This Hennessey Takes the Expedition Tremor's Off-Roading Capability to the Next Level
Verdad Gallardo
Top 10 Fords at 2026 Carlisle Ford Nationals
Joe Kucinski
3 Best / 3 Worst Parts of Modern Ford Ownership
Brett Foote
10 Amazing Upgrades That Solve Common Ford Truck Owner Headaches
Pouria Savadkouei
Every 2026 Ford Engine Explained
Brett Foote
10 Ugly Ford Trucks That We Still Kinda Love
Joe Kucinski
10 Things Every Truck Owner NEEDS (2026 Edition)
Michael S. Palmer
Rezvani's Latest Post-Apocalyptic Monster Is a Ford F-150 Raptor Underneath
Verdad GallardoThread Starter
|
Senior User
Joined: Mar 2007
Posts: 238
Likes: 0
From: Australia
Week begining Monday 15th July 2013
Still raining and cold so no painting.
Started sorting the chassis wiring loom. The original is from a fuel injected chassis so has the wiring for in tank pumps, ecu, etc. So I'll be using some of those for other things.
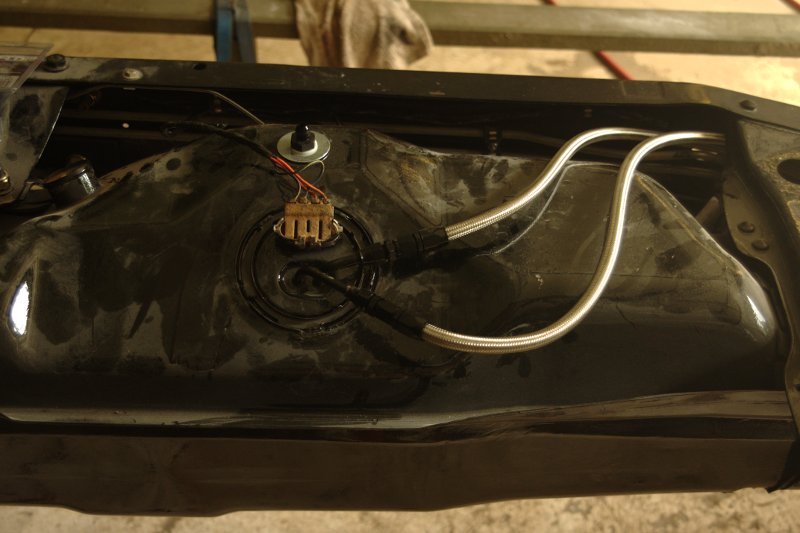
Rewrapped the chassis loom with dry vinyl tape. Much neater. Changed some of the wiring so that the fuel selector switch on the dash controls the fuel selector. This then switches the fuel sender to gauge.
Other changes include adding wiring for rear view camera, electric fuel pump, extra power wire to rear of chassis.
Reinstalled the loom in the chassis and connected everything up. Need to wait until the cab is on to test it all.
Completed connecting the fuel lines to the mid tank, air vent connector added to top as well.
Setup the power steering/hydraboost cooler and filter.
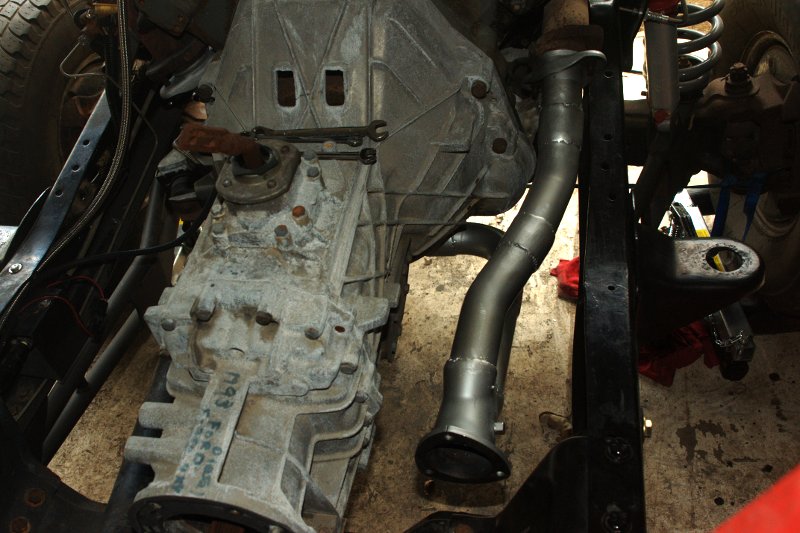
Started building the exhaust, I'm only doing back to where the muffler will be for now, as I'll take it to the local exhaust shop for the muffler and tail pipe.
Exhaust will be 2 1/4" from original engine pipes to merge collector to 3" to muffler and 3" tail pipe.
Started sorting the chassis wiring loom. The original is from a fuel injected chassis so has the wiring for in tank pumps, ecu, etc. So I'll be using some of those for other things.
Rewrapped the chassis loom with dry vinyl tape. Much neater. Changed some of the wiring so that the fuel selector switch on the dash controls the fuel selector. This then switches the fuel sender to gauge.
Other changes include adding wiring for rear view camera, electric fuel pump, extra power wire to rear of chassis.
Reinstalled the loom in the chassis and connected everything up. Need to wait until the cab is on to test it all.
Completed connecting the fuel lines to the mid tank, air vent connector added to top as well.
Setup the power steering/hydraboost cooler and filter.
Started building the exhaust, I'm only doing back to where the muffler will be for now, as I'll take it to the local exhaust shop for the muffler and tail pipe.
Exhaust will be 2 1/4" from original engine pipes to merge collector to 3" to muffler and 3" tail pipe.
Thread Starter
|
Senior User
Joined: Mar 2007
Posts: 238
Likes: 0
From: Australia
Week begining Monday 22nd July 2013
A fairly productive week.
Got some painting done as the rain cleared for two days and it was warm.
Painted the firewall completely, and one coat over the rest of the cab.
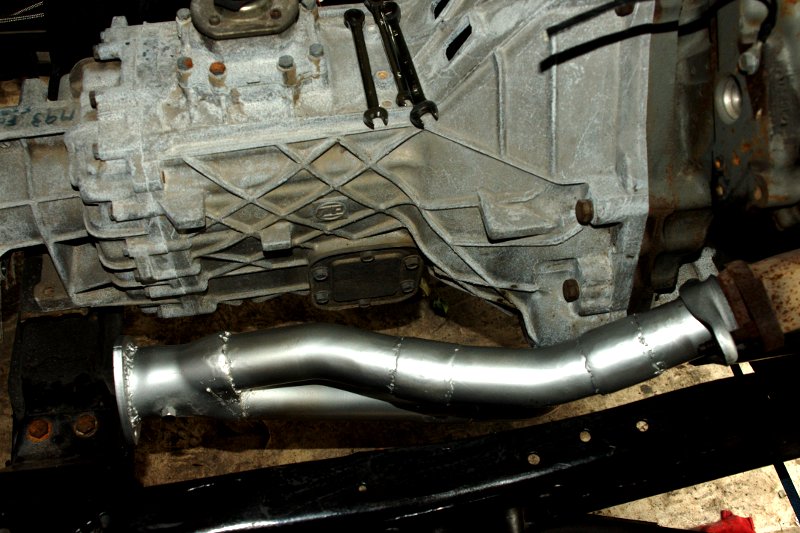
Finished the exhaust engine pipes, painted with heatproof paint, I'm going to wrap these with heat shield as well.
A slight change with this in that I can get an appropriate muffler and fit it myself then I only have to take it to the exhaust shop to have a tail pipe made up.
I was actually not looking forward to this job as previous experience trying to bulld exhausts was painful. However three mandrel bends, three straight couplers a length of straight pipe with a flare on the end, one merge collector, one flange and one egt bung, it all came together easily. Needless to say the fact that I'm working without the cab on and not having to do the welding from underneath made a big difference.
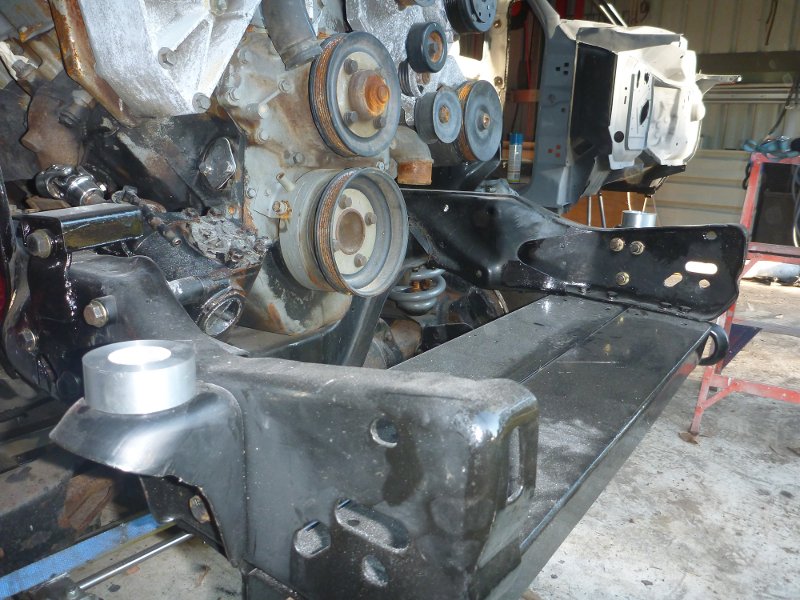
Put the cab on the chassis. Although I'll probably take it off again as I want to tidy up a few things and it's easier with the cab off.
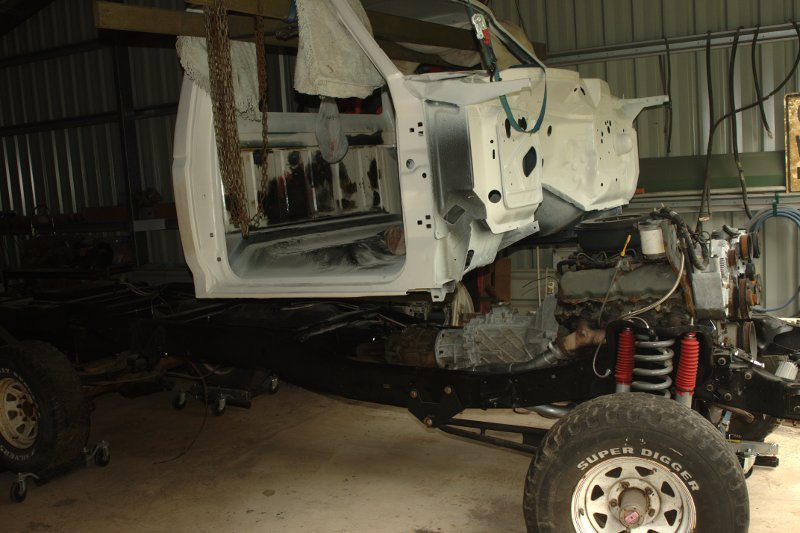
Plenty of clearance on the left hand side, although I'm going to move the fuel return line.
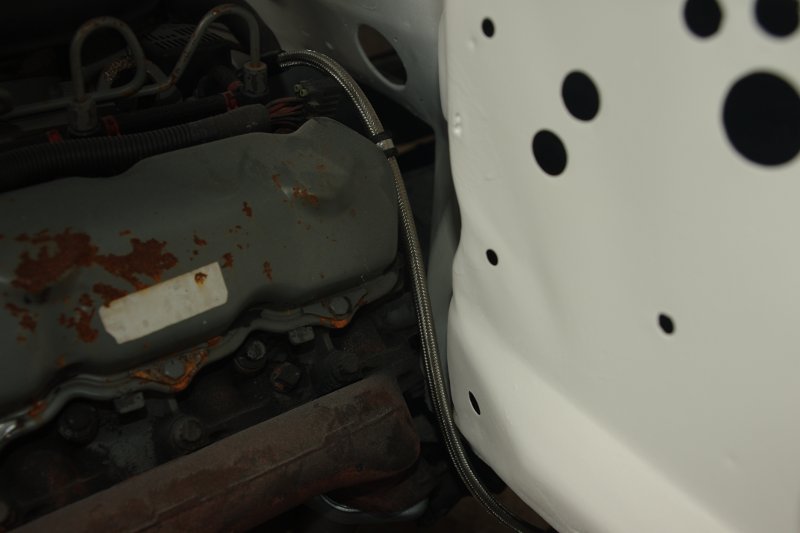
not quite as much on the right hand side, although its only near the reinforcement of the firewall where the clearance comes down to about 15mm.
lots of clearance if I decide to fit a turbo.
However without a 1 inch body lift it would be really marginal all round and I'd suggest you probably need to do some massaging of the firewall.
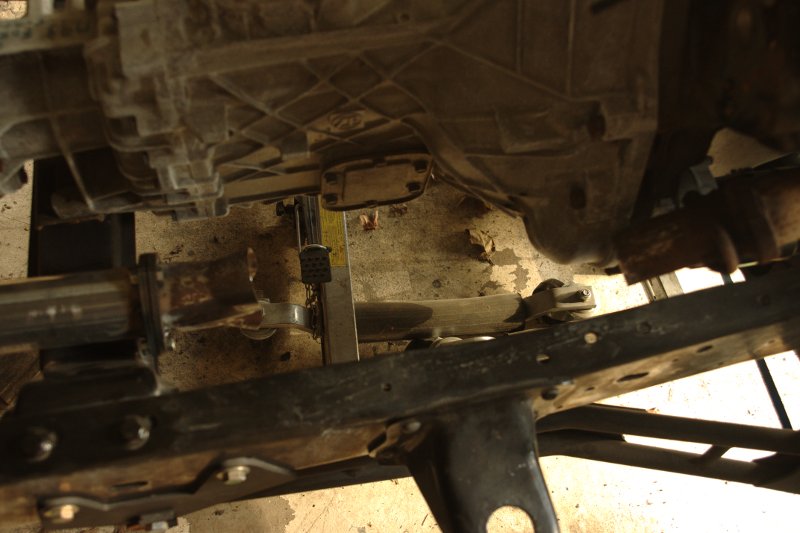
Swapped the transfer case for the original one. Originally I was going to have a new rear drive shaft made up but the angles really don't need the double cardan joint so going with the long slip yoke unit that was in there. It's exactly the same transfer case just with a slip yoke instead of a flange on the rear output.
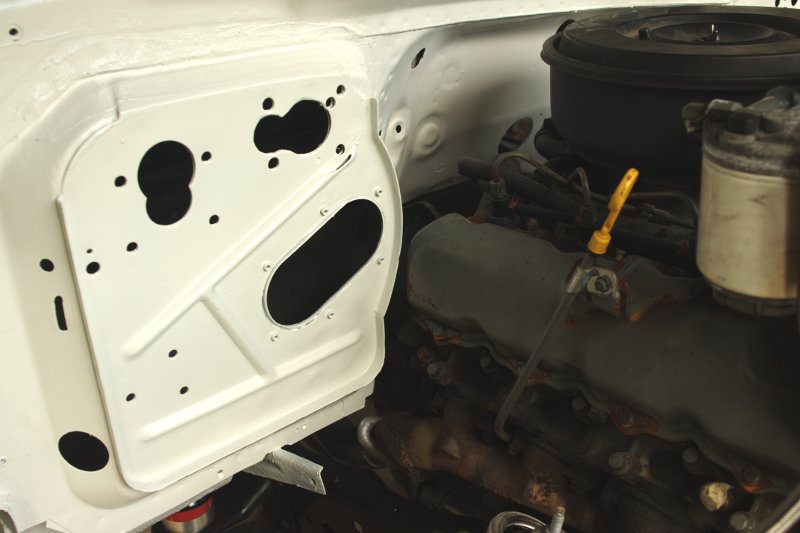
Also something I just noticed from the last photo and I had not mentioned elsewere, wherever Ford (and others) have used self tapping screws directly into bare metal I've put a rivnut. Mostly these are 3/6" as they tend to be for trim pieces, some are 1/4" like around the trans cover in the interior and around the steering shaft mount (you can see the ends of them in the photo). This way you don't end up with stripped holes with larger and larger screws to hold whatever it is in place. All up there's about 60 rivnuts in the cab. I'll be using these anywhere else needed.
Got some painting done as the rain cleared for two days and it was warm.
Painted the firewall completely, and one coat over the rest of the cab.
Finished the exhaust engine pipes, painted with heatproof paint, I'm going to wrap these with heat shield as well.
A slight change with this in that I can get an appropriate muffler and fit it myself then I only have to take it to the exhaust shop to have a tail pipe made up.
I was actually not looking forward to this job as previous experience trying to bulld exhausts was painful. However three mandrel bends, three straight couplers a length of straight pipe with a flare on the end, one merge collector, one flange and one egt bung, it all came together easily. Needless to say the fact that I'm working without the cab on and not having to do the welding from underneath made a big difference.
Put the cab on the chassis. Although I'll probably take it off again as I want to tidy up a few things and it's easier with the cab off.
Plenty of clearance on the left hand side, although I'm going to move the fuel return line.
not quite as much on the right hand side, although its only near the reinforcement of the firewall where the clearance comes down to about 15mm.
lots of clearance if I decide to fit a turbo.
However without a 1 inch body lift it would be really marginal all round and I'd suggest you probably need to do some massaging of the firewall.
Swapped the transfer case for the original one. Originally I was going to have a new rear drive shaft made up but the angles really don't need the double cardan joint so going with the long slip yoke unit that was in there. It's exactly the same transfer case just with a slip yoke instead of a flange on the rear output.
Also something I just noticed from the last photo and I had not mentioned elsewere, wherever Ford (and others) have used self tapping screws directly into bare metal I've put a rivnut. Mostly these are 3/6" as they tend to be for trim pieces, some are 1/4" like around the trans cover in the interior and around the steering shaft mount (you can see the ends of them in the photo). This way you don't end up with stripped holes with larger and larger screws to hold whatever it is in place. All up there's about 60 rivnuts in the cab. I'll be using these anywhere else needed.

Thread Starter
|
Senior User
Joined: Mar 2007
Posts: 238
Likes: 0
From: Australia
This is the turbo I've been looking at:
Hypermax
The up pipes come up over the gearbox/bellhousing.
There's about six inches of clearance there.
But also looking at the side winder installation instructions it would appear that there is enough room as well. I've removed the ear on the bell housing as per these instructions so it does not have to be done with the cab on later.
The bottom lip of the firewall above the transmission is just below the level of the rocker covers.
I'll see if I can get some other photos that show this clearer, the angle at the moment is quite deceptive.
Farkall User
Joined: Mar 2010
Posts: 800
Likes: 1
From: Slade Point, Australia

That's more room than our 2005 trucks,you'll do it easy..
Smart move rectifying the bell housing now,coming along nice ross
Smart move rectifying the bell housing now,coming along nice ross
Thread Starter
|
Senior User
Joined: Mar 2007
Posts: 238
Likes: 0
From: Australia
I'm trying to do all these type of things now while it is totally apart so I don't have to do them later when it will be difficult to get at.