When you click on links to various merchants on this site and make a purchase, this can result in this site earning a commission. Affiliate programs and affiliations include, but are not limited to, the eBay Partner Network.
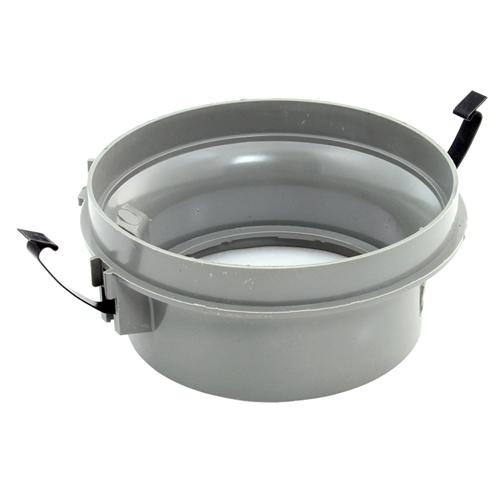
I don't think the rotor that came with the dist is long enough to work with the proper cap. Can different lengths of rotor be purchased that will work with the same dist? Maybe I can buy a rotor and adapter for the wide cap, that will fit this dist? Or maybe this is the right rotor .There's about a half inch of space between the metal contact at the end of the rotor, and the metal contacts in the inside of the cap. Is that right?
I don't think the rotor that came with the dist is long enough to work with the proper cap. Can different lengths of rotor be purchased that will work with the same dist? Maybe I can buy a rotor and adapter for the wide cap, that will fit this dist?
Post a pic of the rotor, If the cap that came with the dist had a rotor with it will work.
They made different kinds, different diameters, depending on the engine and the number of cylinders. You can do a little detective work yourself, and go to another automotive website like autozone, o reilly's, napa, etc. and look up your application and see what numbers you really need to work together. You can look at the descriptions and sometimes get hints on what fits what. I believe you will have choices your year, since I think the USA use the computer setup, but Canada used the duraspark II setup, so they usually have both styles for sale. If you run into a problem with that, just pick a 1982 or so engine to get the earlier style dist system. You can then see if rockauto really did send you the wrong parts.
I just get a piece of paper and start writing down all the proper numbers from the different sites. You will find some of them use numbers that are partially the same. You will see a pattern developing after you start writing the numbers down, don't believe just one website.
Alright thanks guys, I picked up an adapter and I'm going to install this Autoline dist.
I'm not clear on the positioning of the dist. It looks like the '83s have the vacuum advance port pointing straight back towards the cab, is that right? I'm looking at this video here:
I was under the impression that I want to keep the spark plug wires in the same position as I swap out the dist, but on my current setup, for instance plug 1 hooks into the dist at the bottom right side of the dist, when facing the engine bay, whereas in the video here, I can see plug 1 is hooking in at the upper right side of the dist.
Alright thanks guys, I picked up an adapter and I'm going to install this Autoline dist.
I'm not clear on the positioning of the dist. It looks like the '83s have the vacuum advance port pointing straight back towards the cab, is that right? I'm looking at this video here: https://www.youtube.com/watch?v=oeWb...nnel=SamWagner
I was under the impression that I want to keep the spark plug wires in the same position as I swap out the dist, but on my current setup, for instance plug 1 hooks into the dist at the bottom right side of the dist, when facing the engine bay, whereas in the video here, I can see plug 1 is hooking in at the upper right side of the dist.
Ok that is going to depend on how you stab the dist into the engine. And in video number 1 is on the lower right quadrant of the Dist. The Dist should have the number 1 cylinder post, marked on it.
A good idea is to put your engine TDC on the compression stroke on cylinder 1 then pull your old TFI dist and the DS II dist should install in near the same orientation.
I don't think I understand. Does the orientation of the dist actually matter, or is it just important to get the plugs on the right posts in the same relative position? I see a "1" mark on the underside of the cap, it is between two posts.
I have cylinder 1 on TDC, but I didn't do that until I pulled the old dist....
The actual position of the distributor doesn't matter. It does help with timing it and the vacuum can not swinging around and hitting anything. And it does make a factory wire set fit better.
Have you pulled the old distributor yet? It did run correct? If you have not pulled the old dist and it did run, then you can use that as a reference to were the engine cycle is at. That is the important part. You can pull the cap and see where the rotor is pointing by labeling each wire 1 through 6, with #1 being the very front cylinder. You can then put the cap on and take it off to figure out which wire the rotor is pointing to, or which wires it's inbetween. You can then put the new distributor in place, get it all the way down in and have the vacuum can where you want it. Then look at the position of the new dist rotor. Put the cap on and off just like you did on the old one, and put the same wire back in the same position in front of the rotor, and then put all the other wires back on in the same order as the old distributor.
For instance if you have the old dist in place, and figure out the rotor is pointing to #5 wire, then when you pull the old dist out and put the new one in, and put the new rotor and new cap in place, you want to plug in #5 wire so the rotor is pointing to it. You can turn the dist a little bit to line it up just like it was with the old distributor. Then plug all the other wires in the same order as the old dist.
If you have already pulled the old dist, and you don't know where the engine is in it's cycle, you are going to have to go through that routine to figure out where #1 TDC is before putting the new dist in place.
Unfortunately I had already pulled my old dist without marking anything. All I did was note the position of the spark plug wires on the cap, and the order they were in. I didn't mark where the rotor was.
After pulling the old dist, I did find TDC by cranking the wheel to the compression stroke, putting a screwdriver in the spark plug hole etc.. and I marked it on the wheel. I marked what post I want to be #1 on the cap/dist, and seated the dist with the rotor pointing at the #1 post. Is that about right? It turned out that the #1 position of the post on the new dist was in exactly the same spot as the old one, but that was an accident (btw the old dist was working, the truck ran fairly well aside from idle/fuel economy issues).
As far as the dist/rotor positioning goes, is there anything else I need to do to get it to fire up, and set the timing? I mounted the new ignition module and I'll work on the wiring harness tomorrow.
I don't think I understand. Does the orientation of the dist actually matter, or is it just important to get the plugs on the right posts in the same relative position? I see a "1" mark on the underside of the cap, it is between two posts.
I have cylinder 1 on TDC, but I didn't do that until I pulled the old dist....
It just makes stabbing the new dist in way easier. Since you pulled and rotated the engine it can be a pain to stab the new one in, as the oil pump drive shaft won't be lined up. You may have to take a few attempts to get it where you want it. The orientation of the dist does not really matter as noted as long as you have the rotor pointing at number one spark plug tower on the Dist at TDC #1 compression you will be able to fire it up and just the timing from there. if you do not have the swing space for the vac advance pull the dist and move it over a tooth, you may to bump the engine over as you stab it back in to get the oil pump drive shaft to line up.
Unfortunately I had already pulled my old dist without marking anything. All I did was note the position of the spark plug wires on the cap, and the order they were in. I didn't mark where the rotor was.
After pulling the old dist, I did find TDC by cranking the wheel to the compression stroke, putting a screwdriver in the spark plug hole etc.. and I marked it on the wheel. I marked what post I want to be #1 on the cap/dist, and seated the dist with the rotor pointing at the #1 post. Is that about right? It turned out that the #1 position of the post on the new dist was in exactly the same spot as the old one, but that was an accident (btw the old dist was working, the truck ran fairly well aside from idle/fuel economy issues).
As far as the dist/rotor positioning goes, is there anything else I need to do to get it to fire up, and set the timing? I mounted the new ignition module and I'll work on the wiring harness tomorrow.
Just making sure you really did find TDC #1. Just using a screwdriver is not good enough, you have a 50-50 chance of being off 180 degrees. The piston comes up to the top twice during the complete combustion cycle. One of them is for firing, the other is the exhaust cycle. The only way to know if you are in the right place is to know what position the valves are in on #1 when TDC mark comes up. You can pull the valve cover and watch the valves, when both are closed that is TDC firing. You can also get someone to crank the engine while you hold your thumb over the sparkplug hole on #1. When it tries to blow your finger off the hole, you know the piston is coming up and both valves are shut. You can then stop and turn it a little more till the marks line up.
You are over thinking this.
You have the old dist. cap marked where #1 was.
You have the motor set to TDC after the dist. was pulled so 50-50 it is right but not a big deal if it is out 180*.
Drop the new dist in so the rotor will point where the old cap showed #1. Remember as the dist is dropped in the rotor will turn a little as it slips in to the cam gear.
Also note were the vacuum can sits that you will have enough room to turn the dist. to adjust the timing. It should not need to turn a lot if you are close and on the 300 you should have enough room.
Wire the cap starting at #1 and follow the old cap for the order.
When you go to start it if you get back fire out the carb you can be 180* out.
First recheck all the plug wires if you have then in the right order if so then see below.
Set TDC again but have the rotor point 180* from #1 plug.
Pull the dist. turn the rotor so it points to #1 and drop the dist back in, remember the rotor will turn alittle when the gears line up.
You should not need to do any rewiring for the plug wires as they should be right.
Now when you start it should run with no back firing, you may need to turn the dist either way to keep it running till you get a timing light on it to set timing.
Good luck
Dave ----
How my 81 dist. is set in the motor
Sorry for the sideways picture it is right side up on my site 20171015 132444
Okay thanks Fuzz. Sounds like I'm more-or-less on the right track. Wiring it up today!
Rezvani's Latest Post-Apocalyptic Monster Is a Ford F-150 Raptor Underneath
Slideshow: Called the Fortress, the 850-horsepower pickup combines Raptor underpinnings with military-inspired features, survival equipment, and a starting price of $285,000.