


 cheers

Torque Converter Talk

Postmaster
Joined: Mar 2013
Posts: 3,066
Likes: 7
From: Over There
I just turned the spring up to where it could not pull in all 24* at idle.
This is what the instructions tell you to do.
http://www.jegs.com/InstallationInst...70-99607-1.pdf
This is what the instructions tell you to do.
http://www.jegs.com/InstallationInst...70-99607-1.pdf
23. Check for full clockwise adjustment and connect the adjustable vacuum
advance unit to the manifold vacuum source. (FIG. 17)
advance unit to the manifold vacuum source. (FIG. 17)

pedant
Joined: Jan 2008
Posts: 23,576
Likes: 39
From: EXTREME southwest CT

That's the way it came from the factory.
Though I did retain the little plastic restriction at the temperature switch on the thermostat housing.
I don't have an automatic and the stalling issues that accompany it.
Though I did retain the little plastic restriction at the temperature switch on the thermostat housing.
I don't have an automatic and the stalling issues that accompany it.
Moderator


Joined: Jan 2001
Posts: 56,984
Likes: 2,738
From: Virginia

This in my mind is the single hardest part of tuning vacuum advance. For a use like I suggest for Bruno 24 is too much and it's a very hard mod to make an adjustable limiter in a DSII unlike a GM dizzy. We need a list of available vacuum advance canisters and how much they advance, but I have yet to find one. To me this is the only real advantage to aftermarket distributors like MSD, you can get a Ford dizzy with GM style advance but Ford pickup and Ford big cap.
Secondly, there is something I did that seemed to work on the stock dist vacuum advance unit.
See the two screws poking through that mount the advance unit to the dist body? On my dist, the vacuum advance arm had a rectangle hole in it in this area. What I did was drill a hole through the dist casting between the two screws. I then took different sized nails and stuck through the hole I drilled. The nail went all the way through the rectangle hole in the arm, and when the advance pulled on the arm, the rectangle hole would bottom out on the nail. I used different sized nails to vary the amount of travel to the advance arm, which varied the amount of advance the unit would give.
It was a long time ago, I might have put two holes through that area, I can't remember. But it did work.
Postmaster
Joined: Mar 2013
Posts: 3,066
Likes: 7
From: Over There
1st off, I would not worry too much with the vacuum advance at first. It's not that important. While I was tuning and setting idle speeds, mixtures and playing with the timing, I would leave it disconnected. You can actually run without it, and it will not hurt the engine at all. It's just for efficiency/fuel mileage. So I would not make it a show stopper, you can put this at the end of the list as far as things to do to get the engine tuned and running.

Yes technically you don't need it, you don't technically need any timing advance. But this is about getting this engine to idle strong and low with a big cam and low stall. To get that to happen he needs it to idle with the timing in the mid to high 20s. You can't just turn the dizzy and set it in the 20's it won't start. So the only/best way is to use the vacuum advance to advance at idle. This is best done with a plan and the right parts to begin with.
Secondly, there is something I did that seemed to work on the stock dist vacuum advance unit.

See the two screws poking through that mount the advance unit to the dist body? On my dist, the vacuum advance arm had a rectangle hole in it in this area. What I did was drill a hole through the dist casting between the two screws. I then took different sized nails and stuck through the hole I drilled. The nail went all the way through the rectangle hole in the arm, and when the advance pulled on the arm, the rectangle hole would bottom out on the nail. I used different sized nails to vary the amount of travel to the advance arm, which varied the amount of advance the unit would give.
It was a long time ago, I might have put two holes through that area, I can't remember. But it did work.
Moderator
Joined: Jan 2001
Posts: 56,984
Likes: 2,738
From: Virginia
We will have to agree to disagree. I talked a long time ago to a engine builder who built and raced engines and had a good reputation. I was also confused about the timing thing. He said take the vacuum advance out of the equation totally when setting up a engine. He said the vacuum advance was only for very light load conditions. He said most engines are in the high 30's for "total advance", this was initial plus centrifugal advance. He said with a light load on the engine, the engine could take up to 50 degrees or more of advance for fuel mileage and this was what the vacuum advance was for.
The vacuum advance works on engine vacuum. No way would I have it trying to control the timing advance at idle on a engine going lumpty-lumpty with the vacuum going crazy at idle.
The vacuum advance works on engine vacuum. No way would I have it trying to control the timing advance at idle on a engine going lumpty-lumpty with the vacuum going crazy at idle.
Postmaster
Joined: Mar 2013
Posts: 3,066
Likes: 7
From: Over There
I'm all good with agreeing to disagree just gunna toss in a couple points.
A race engine doesn't need a goo idle or tip in, he may know everything about race engines. Doesn't mean any of it applies to the OP.
Idle and tip in IS a "very light load condition"
A race engine doesn't need a goo idle or tip in, he may know everything about race engines. Doesn't mean any of it applies to the OP.
Idle and tip in IS a "very light load condition"
Postmaster
Joined: Mar 2013
Posts: 3,066
Likes: 7
From: Over There
FTE Stories
Ford Trucks for Ford Truck Enthusiasts

Top 10 Most Expensive Ford Trucks Ever Sold on Bring a Trailer
Joe Kucinski
2027 Ford Super Duty Buyer's Guide (Every Model, Engine, & Package)
Brett Foote
Top 10 Ford Truck Tragedies
Joe Kucinski
AEV FXL Super Duty - the Super Duty Raptor Ford Doesn't Make
Brett Foote
Lobo Vs Lobo: Proof the F-150 Lobo Should Be Even Lower!
Michael S. Palmer
Ford's 2001 Explorer Sportsman Concept Looks For a New Home
Verdad Gallardo
10 Best Ford Truck Engines We Miss the Most!
Joe Kucinski
2026 Shelby F-150 Off-Road: Better Than a Raptor R?
Brett Foote
2027 Super Duty Carhartt Package First Look: 12 Things You NEED to Know!
Michael S. PalmerThread Starter
|
Postmaster
Joined: Nov 2009
Posts: 4,575
Likes: 5
From: Broken Arrow , OK
OK, so today I hit a lick on it with my buddy James. Here is what transpired today:
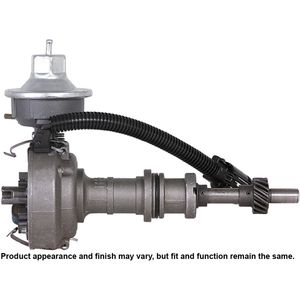
The change of the dizzy gear from cast to steel on the DSII. You guys may remember my post in the WHYDTYT thread about the Mallory gears I bought from Amazon. I ordered a gear that was not pre drilled. This gear had one hole in it. I cancelled that order and bought the one that was pre drilled. Amazon claimed it wasnt cancelled soon enough and sent both anyways.
FYI a dizzy gear on these units are not drilled center. They are offset. So there is a right and wrong way to install them. They can be put 180� out and the holes wont line up. Also the Mallory gear uses a .189" roll pin. The Motorcraft DSII dizzy uses a .125" roll pin. So having a bigger hole than the stock unit caused an issue to where it couldnt be up sized w/o elongating one of the holes on one side of the gear and that wasnt sitting right with me. So the gear that wasnt pre drilled and only had one larger hole turned out to be the one I needed to use. This let me center the hole on top of the smaller one as well as use the existing channel to guide the larger bits through. Turns out Amazon did me a huge favor by sending both of them.
Now while installing and removing and installing the gears a few times caused one the weights to come out of its place. Now I had to learn how to disassemble the dizzy to fix it. Turns out there is nothing to it. So I knocked that out.
We got the old ignition set up removed and the DSII installed. The oil pump drive shaft didnt want center up and go into the dizzy. A big shot of grease helped to hold the shaft in place finally.
The factory plugs on the wiring harness that connect to the module and dizzy are corroded pretty bad and need to be replaced. Does anybody know of a source that sells them?
The Bronco fired up and ran. It idled pretty decent as well. However, by the time we got to this point it was a little too late to be revving the motor and being noisy so we didnt get any serious tuning done, but it runs and idles for now.
There may be a valve out of adjustment too that needs to be addressed.
So maybe some tuning tomorrow.
pedant
Joined: Jan 2008
Posts: 23,576
Likes: 39
From: EXTREME southwest CT
http://vb.foureyedpride.com/showthre...tributor-Plugs
Originally Posted by foureyedpride
The 3-pin female is Standard S-629, BWD PT5540, or Napa EC72. The 4-pin female is
Standard S-698, BWD PT5619, or Napa EC127.
I say "sorta" available, because the 3-pin pigtail has the locking nubs to fit the ignition
module connector. The distributor pickup connector has the lugs in different positions,
so to use the S-629 pigtail for the distributor pickup, the nubs have to be removed.
http://www.fordtechservice.dealercon...torcatalog.pdf
Pico wiring has a lot of stuff.
http://www.picowiring.com/catalog.html
As does the repair connector store.
http://www.repairconnector.com/
Hope this helps...


pedant
Joined: Jan 2008
Posts: 23,576
Likes: 39
From: EXTREME southwest CT
It DOES come with a ballast resistor that we don't need.
But you can see that they have the unobtainable plug wired right in and the other two are pigtails.
If you want that plug, they are the only game in town.
So they are entitled to ask whatever they want.
But you can see that they have the unobtainable plug wired right in and the other two are pigtails.
If you want that plug, they are the only game in town.
So they are entitled to ask whatever they want.