

 .
.

She'll be comin' round the mountain
Thread Starter
|
Lead Driver


Joined: Jan 2005
Posts: 6,104
Likes: 138
From: Orcas Island Wa.

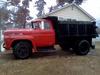
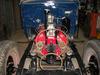
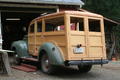
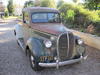
Thanks guys! My '37 1 1/2 ton was a true barn find. All original, cloth wiring, 6 volt, original paint etc. I got it running in one day and anything I do to it would make it not original, so it stays in it's shed and comes out now and then and I work it a bit and I enjoy it.Actually it has an 8ba flathead, but looks like it was swapped in there a long, long time ago. In contrast, this '47 was pretty much a rolling wreck. Everything needed a major rebuild and it had very little paint left on it. It had originally been green and then got repainted black and most of the black was on the back of the cab, the remainder being surface rust. This truck has been a blast to work on because I can do everything my way. No rules about what is correct or original. I have a basic theme and a desire for it to be very reliable so I can use it at a moment's notice when needed. I have been working on the hood, but not ready to take a photo yet. I'm not sure I will keep what I've done with the paint, just a good place to experiment as it's off the truck on sawhorses. Ok, it's that time.... Goodnight. zzzzzzzzzzzzz

Senior User
Joined: Mar 2014
Posts: 174
Likes: 0
From: Nelsonville, Ohio
Gary, nice build and we are indeed runnin a a parallel build. My boat gas can is about 1/2 the size that you used and I can't wait to get rid of it.
Was that you driving the toro???
....Roger
Was that you driving the toro???
....Roger
Thread Starter
|
Lead Driver
Joined: Jan 2005
Posts: 6,104
Likes: 138
From: Orcas Island Wa.
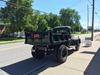
Yes, it was me. Stu, truckdog and his son in law visited last fall.Thanks for recognizing the similarities in our builds. Here are a few pics I took today. I have been battling within my self about how to paint the truck so i don't have to restore the finish. I am in a sense restoring the finish, but I don't have to do any body work or prep. Just a quick wire brushing of the surface rust and a couple colors of krylon and rustoleum rattle cans. Usually starting with rustoleum's rusty metal primer, next the greens,l Always use satin or flat, then a mix of blacks on the fenders and running boards. Napa hi heat black (because I had some) napa chassis black, rustoleum flat black and rustoleum semi gloss black. I never let one coat dry before I'm overlaying or fogging the next layer on. Then I buff out the highlights with the oily shop rag. I got some pics with my new I Phone but don't know how to use it yet to post. These were taken a bit later in what I thought was better light. In the earlier of today's pictures taken outdoors, the hood was solid surface rust with no color whatsoever. Then I shot the color and mostly abraded it away with steel wool and other means...... Call it phony if you will, but it was quick and cheap and I like how it looks.
Senior User
Joined: Mar 2014
Posts: 174
Likes: 0
From: Nelsonville, Ohio
Welllllll, I believe we have more similarities than just the current build,
Uhhmmm, I really thought I was looking in a mirror when looking at that Toro picture. When I do the maiden voyage video,,,hopefully this weekend,,,I think you will see what I mean...
Great progress and I like the painted hood,, looks great...
.....Roger
Uhhmmm, I really thought I was looking in a mirror when looking at that Toro picture. When I do the maiden voyage video,,,hopefully this weekend,,,I think you will see what I mean...
Great progress and I like the painted hood,, looks great...
.....Roger
More Turbo


Joined: Mar 2010
Posts: 705
Likes: 78
From: SoCal - Redlands
Yes, it was me. Stu, truckdog and his son in law visited last fall.Thanks for recognizing the similarities in our builds. Here are a few pics I took today. I have been battling within my self about how to paint the truck so i don't have to restore the finish. I am in a sense restoring the finish, but I don't have to do any body work or prep. Just a quick wire brushing of the surface rust and a couple colors of krylon and rustoleum rattle cans. Usually starting with rustoleum's rusty metal primer, next the greens,l Always use satin or flat, then a mix of blacks on the fenders and running boards. Napa hi heat black (because I had some) napa chassis black, rustoleum flat black and rustoleum semi gloss black. I never let one coat dry before I'm overlaying or fogging the next layer on. Then I buff out the highlights with the oily shop rag. I got some pics with my new I Phone but don't know how to use it yet to post. These were taken a bit later in what I thought was better light. In the earlier of today's pictures taken outdoors, the hood was solid surface rust with no color whatsoever. Then I shot the color and mostly abraded it away with steel wool and other means...... Call it phony if you will, but it was quick and cheap and I like how it looks.
Tim
Thread Starter
|
Lead Driver
Joined: Jan 2005
Posts: 6,104
Likes: 138
From: Orcas Island Wa.
There is/was no paint at all under the hood's surface rust. All the paint was applied over the rust, but it was very sound rust! I did the black on that '37s fender the same way about 7 years ago and no deterioration. Cleaned, pitted surface rust has a lot of 'tooth' for holding that rustoleum rusty metal primer..... 
FTE Stories
Ford Trucks for Ford Truck Enthusiasts

Top 6 Best Deals Available on New Fords & Lincolns Right Now
Brett Foote
This Hennessey Takes the Expedition Tremor's Off-Roading Capability to the Next Level
Verdad Gallardo
Top 10 Fords at 2026 Carlisle Ford Nationals
Joe Kucinski
3 Best / 3 Worst Parts of Modern Ford Ownership
Brett Foote
10 Amazing Upgrades That Solve Common Ford Truck Owner Headaches
Pouria Savadkouei
Every 2026 Ford Engine Explained
Brett Foote
10 Ugly Ford Trucks That We Still Kinda Love
Joe Kucinski
10 Things Every Truck Owner NEEDS (2026 Edition)
Michael S. Palmer
Rezvani's Latest Post-Apocalyptic Monster Is a Ford F-150 Raptor Underneath
Verdad Gallardo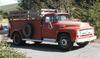
Thread Starter
|
Lead Driver
Joined: Jan 2005
Posts: 6,104
Likes: 138
From: Orcas Island Wa.
Thanks guys! Well, I'm back onto the '47 after a bout with that AA, (the '28 truck, not the meetings).  I have that aluminum marine tank under the bed and was working out how to fill it. I have built 3 flatbeds for trucks in the last 5 years and filling them is always a challange as it's a pretty level run no matter how you do it. Today my youngest son was visiting and he's taking some welding courses at a tech school on the mainland. I had some old stair railings from a church remodel we did and they were heavy 1 1/2" tubing with lots of nice bends. We plumbed it in a U turn headed to the back of the cab below the bed crossmembers. My son welded two 90 degree close bends into the U section. I took a holesaw and drilled through the cab and placed a 90 degree section headed up to the cab's stock filler location. Then he welded a filler neck I had from my parts '59 to a section of pipe the right diameter for the hose connections. Voila! Fill from a high spot on the truck, looks stock and with the aluminum tank's 1/2" vent line, I think it will take the full flow of the gas pump. I will get some pics tomorrow, it was kind of dark by the time we finished. Now soon I can deck that bed with some wood and build my headache rack, or my son can. His welds are prettier than mine these days.
I have that aluminum marine tank under the bed and was working out how to fill it. I have built 3 flatbeds for trucks in the last 5 years and filling them is always a challange as it's a pretty level run no matter how you do it. Today my youngest son was visiting and he's taking some welding courses at a tech school on the mainland. I had some old stair railings from a church remodel we did and they were heavy 1 1/2" tubing with lots of nice bends. We plumbed it in a U turn headed to the back of the cab below the bed crossmembers. My son welded two 90 degree close bends into the U section. I took a holesaw and drilled through the cab and placed a 90 degree section headed up to the cab's stock filler location. Then he welded a filler neck I had from my parts '59 to a section of pipe the right diameter for the hose connections. Voila! Fill from a high spot on the truck, looks stock and with the aluminum tank's 1/2" vent line, I think it will take the full flow of the gas pump. I will get some pics tomorrow, it was kind of dark by the time we finished. Now soon I can deck that bed with some wood and build my headache rack, or my son can. His welds are prettier than mine these days.
Post Fiend
Joined: Sep 2006
Posts: 14,325
Likes: 14
From: Island Southeast Alaska
That's great Gary. Glad to see them coming along. I have been fighting Pneumonia
for a couple months as well as a pinched nerve in my back that has had my left leg
useless. But went out yesterday and worked on the boys Quad most all day. Going
to do some more today. It feels so good to be able to get out and do something.
Even if it aint much. Gonna be a while getting my strength built back up. But I will.
You give me incentive my freind.
My biggest problem is keeping the kids from using my wheeled walker
as a go-cart or trailer behind there ATV's.
for a couple months as well as a pinched nerve in my back that has had my left leg
useless. But went out yesterday and worked on the boys Quad most all day. Going
to do some more today. It feels so good to be able to get out and do something.
Even if it aint much. Gonna be a while getting my strength built back up. But I will.
You give me incentive my freind.
My biggest problem is keeping the kids from using my wheeled walker
as a go-cart or trailer behind there ATV's.
Thread Starter
|
Lead Driver
Joined: Jan 2005
Posts: 6,104
Likes: 138
From: Orcas Island Wa.
So sorry to hear about your health problems. I'm glad I can be of assistance by sharing my dualing truck builds while you regain your strength. It's like I'm on some kind of truck crack right now. In December I took delivery of this 47 2 ton , and get right on it, then up comes the 47 pickup on CL, and I gotta have it for a future project. Then that infernal '28 AA that is now a time consuming project I didn't need. Now work has gotten really busy with the local contractors trying to finish projects for June when the 'summerfolk' return. Sheesh, how am I gonna repair 3 trucks with these builders bugging me about a bunch of silly kitchen cabinets and the like? Their priorities are obviously all screwed up. Take care.
Thread Starter
|
Lead Driver
Joined: Jan 2005
Posts: 6,104
Likes: 138
From: Orcas Island Wa.
Well I finally spent a day back on the 2 ton. Spent the first half of the day trying to finish up my fuel fill setup, but I did some more welding on the church handrail fittings and I think the weld came out contaminated with the powder coating or paint on the railing. No matter what, the welds were porous and leaked. It was weird and in the end after 3 trys I chucked the fitting deep into the woods. I'm gonna have my local muffler guy bend me what I need. Then I fabricated some secure rear brackets for the suburban seat. It had shifted while bouncing down the road a few times and I knew I had to address this issue. At least that part got done. I still need gauges and after the fuel filler is complete, bed wood. The green paint is working it's way up to the roof when I feel creative. Glad to be at it again. That pesky model AA distracted me for a time, but it's running now, and it can be stuck in a shed for the future.