


66 F100

Thread Starter
|
Laughing Gas


Joined: Nov 2016
Posts: 878
Likes: 232
From: NWPA
skidoorulz, Pickupman2, folks,
Yea mine might be a girl! I have not seen anything like those on mine! Unless they haven't come down yet?
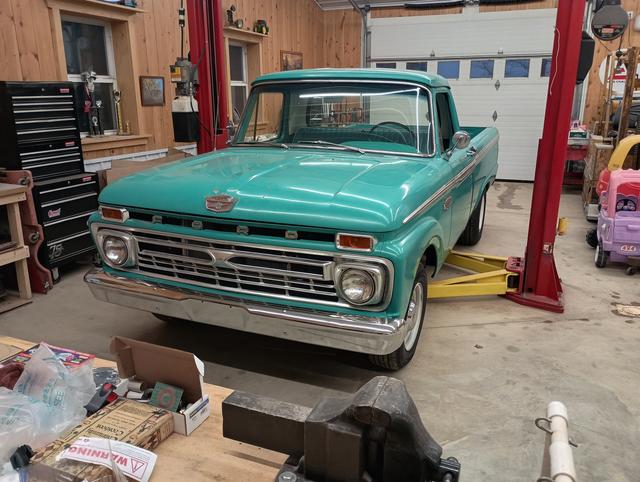
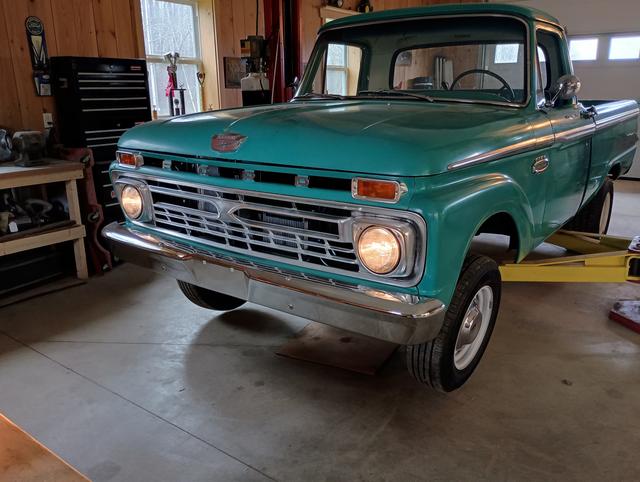
The little turquoise truck is now officially ours! All the notary work is in the states hands now. Could be 4-8 weeks for the PA title to come back.
Plenty to do on the truck if I get at it! Don't be afraid to give me a kick.
Thanks for the info on the two tone. I would not be afraid to do that paint color change if they were painted like that. White roof only. Need pictures! I think it might simplify any attempt to match the faded and dull turquoise paint. The drip rail really needs cleaned primed sealed and painted. I would not water coming into the cab if we were caught in rain or washing it. Hope it has not already entered the cab and rusted any areas??
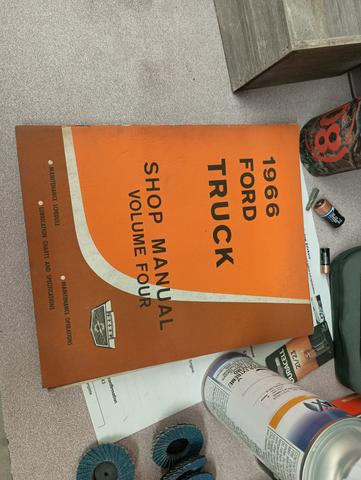
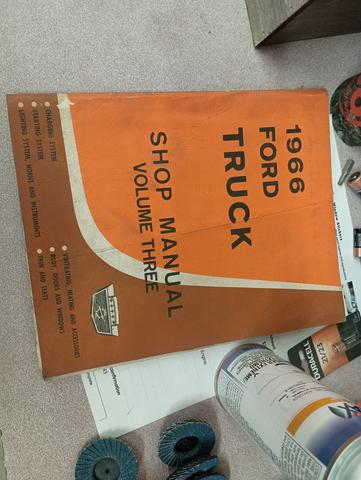
Thanks for the support guys. I will need a bunch of help. Friend John brought me a wonderful shop manual for the 66 F100. Also 2 supplements to the thick manual. This will of great help as we do the kingpins.
Ok this is a concern on this truck. I did not find till on the lift at my shop. The cross frame under the center front of the tranny has been cut and put back in place with straps and bolts. It is not welded. I asked the P.O. why this was cut and he said that it had to be cut to remove the transmission. He said some folks cut the whole thing out? I need some thoughts on this issue. This is not the tranny support its the one in front of that. at the ends the radius arms come into a casting which is riveted to the frame and this cross member. Talk to me guys I can take it I think. I was not happy to see this modification, but its there, so we react and recover if necessary?
I remember on our 79 that I had to do both front and rear springs hangers because these rotted away. These look pretty good. This picture does not show it up close. A nice bed cover might take care of that for a while and might be a nice addition if we were going to take some chairs and a cooler to cruise in's?
.jpg)
This rust at the front of the bed is a project that would require the bed to be removed and tipped upside down. The front support rail has rust at every place it was attached to the bed.
I will not be taking this project on soon. But always interested in how others would approach this area of the bed.
.jpg)
Oh yeah picture of the shop:
Yea mine might be a girl! I have not seen anything like those on mine! Unless they haven't come down yet?
The little turquoise truck is now officially ours! All the notary work is in the states hands now. Could be 4-8 weeks for the PA title to come back.
Plenty to do on the truck if I get at it! Don't be afraid to give me a kick.
Thanks for the info on the two tone. I would not be afraid to do that paint color change if they were painted like that. White roof only. Need pictures! I think it might simplify any attempt to match the faded and dull turquoise paint. The drip rail really needs cleaned primed sealed and painted. I would not water coming into the cab if we were caught in rain or washing it. Hope it has not already entered the cab and rusted any areas??
Thanks for the support guys. I will need a bunch of help. Friend John brought me a wonderful shop manual for the 66 F100. Also 2 supplements to the thick manual. This will of great help as we do the kingpins.
Ok this is a concern on this truck. I did not find till on the lift at my shop. The cross frame under the center front of the tranny has been cut and put back in place with straps and bolts. It is not welded. I asked the P.O. why this was cut and he said that it had to be cut to remove the transmission. He said some folks cut the whole thing out? I need some thoughts on this issue. This is not the tranny support its the one in front of that. at the ends the radius arms come into a casting which is riveted to the frame and this cross member. Talk to me guys I can take it I think. I was not happy to see this modification, but its there, so we react and recover if necessary?
I remember on our 79 that I had to do both front and rear springs hangers because these rotted away. These look pretty good. This picture does not show it up close. A nice bed cover might take care of that for a while and might be a nice addition if we were going to take some chairs and a cooler to cruise in's?
This rust at the front of the bed is a project that would require the bed to be removed and tipped upside down. The front support rail has rust at every place it was attached to the bed.
I will not be taking this project on soon. But always interested in how others would approach this area of the bed.
Oh yeah picture of the shop:
Last edited by Effies 56; Mar 30, 2026 at 08:37 PM.
Lead Gopher


Joined: Aug 2012
Posts: 10,014
Likes: 1,565
From: Seattle

The white only on top of the cab is what they called Regular Two-Tone.

Looking under the paint category Regular Two-Tone was available with all cab models while Deluxe Two-Tone was only available with "right-bed" Styleside pickups.

Looking under the paint category Regular Two-Tone was available with all cab models while Deluxe Two-Tone was only available with "right-bed" Styleside pickups.
Lead Gopher
Joined: Aug 2012
Posts: 10,014
Likes: 1,565
From: Seattle
Ford�s factories in the 1960s (especially the Rouge and Michigan Truck Plant) were surrounded by appliance dealers, cabinet shops, home modernization companies and billboard‑heavy commercial districts. �KITCHENS by BOND" "DIVISION OF BOND-BILT MODERNIZATION� was one of the most common signs in that era, especially in southeast Michigan. �Michigan�s Most Trusted Name in Home Modernization�. Bond Furniture & Appliance Company. They dealt in new cabinets, Formica countertops, built-in ovens, complete kitchen packages and financing plans. In business from sometime after WWII until the mid-70's.
Last edited by TA455HO; Mar 31, 2026 at 10:45 AM.
Thread Starter
|
Laughing Gas
Joined: Nov 2016
Posts: 878
Likes: 232
From: NWPA
Guys,
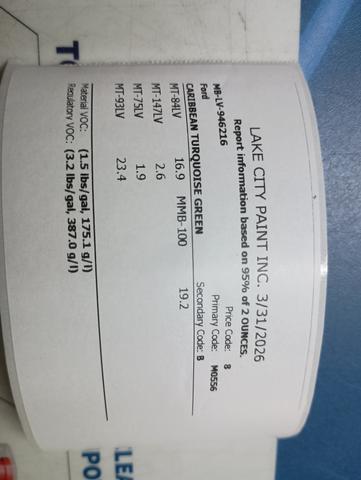
Spending money like Iwe have it. Stopped at the local paint shop and got some items for the shop and a rattle can of Caribbean Turquoise For touch up if I every get there.
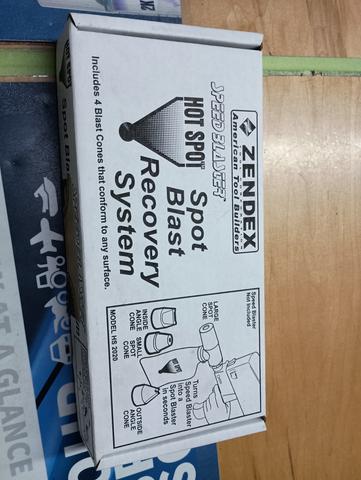
Also picked up a mini hand held sandblaster and a attachment to minimize the sand getting all over. Sounds good on paper?? Maybe its hokey? Maybe it will work?
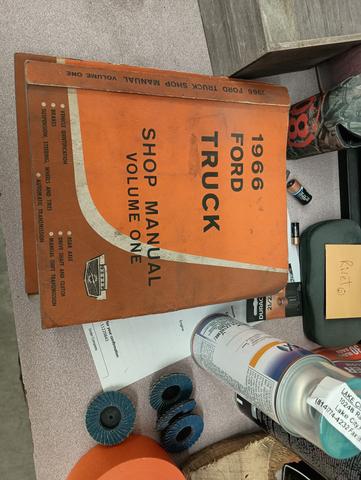
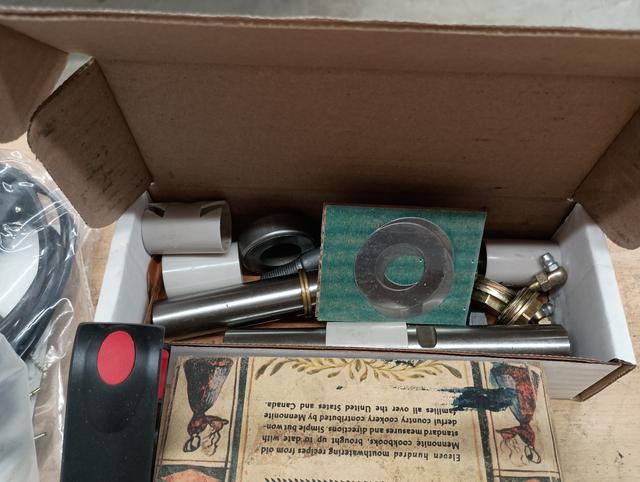
My friend John found this in his stash of many Ford parts ranging from Model A to mid 60's. What a nice gift that will go right along with the 66!

He also brought me these: also! I think I owe him big time!
The king pin kit Moog parts:
I kind of like the baseball cap white cab look. Could be a option if I ever get started on the drip rail clean up.
Spending money like Iwe have it. Stopped at the local paint shop and got some items for the shop and a rattle can of Caribbean Turquoise For touch up if I every get there.
Also picked up a mini hand held sandblaster and a attachment to minimize the sand getting all over. Sounds good on paper?? Maybe its hokey? Maybe it will work?
My friend John found this in his stash of many Ford parts ranging from Model A to mid 60's. What a nice gift that will go right along with the 66!
He also brought me these: also! I think I owe him big time!
The king pin kit Moog parts:
I kind of like the baseball cap white cab look. Could be a option if I ever get started on the drip rail clean up.
Thread Starter
|
Laughing Gas
Joined: Nov 2016
Posts: 878
Likes: 232
From: NWPA
Guys,
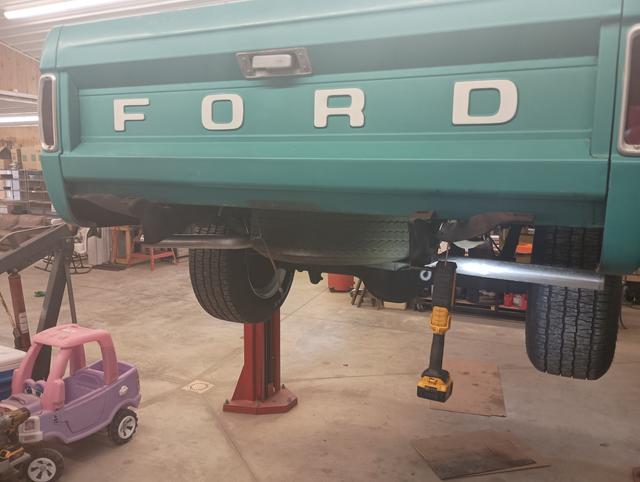
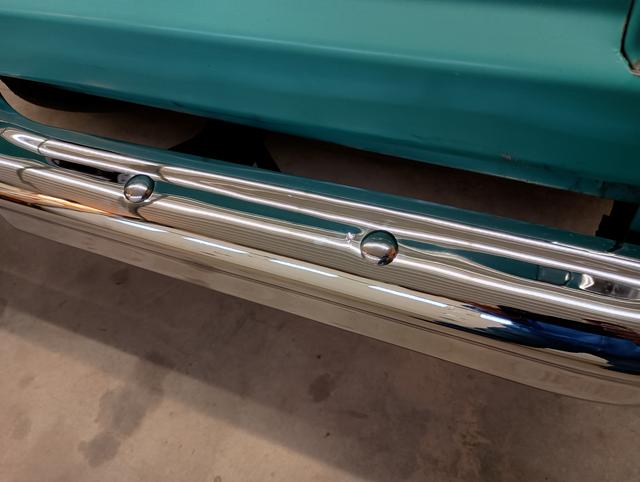
John and I tag teamed the rear bumper. The bolts were snug for sure.
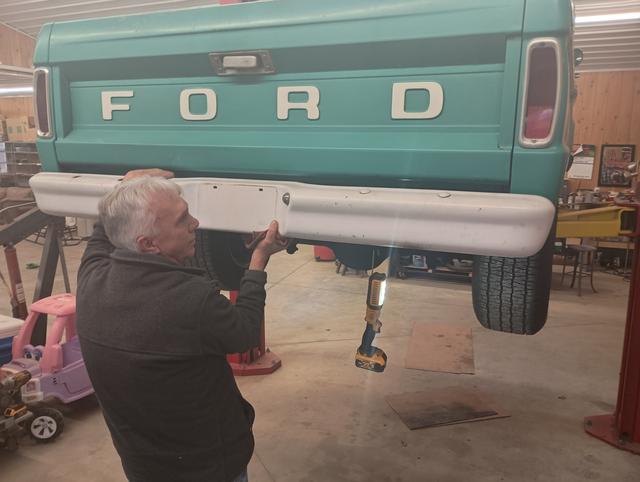
Sorry phone lens was dirty. The pink and purple short bed is the oldest great grand daughters truck.
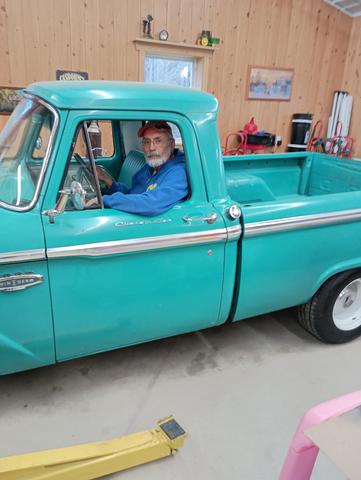
John Kelley and the 66
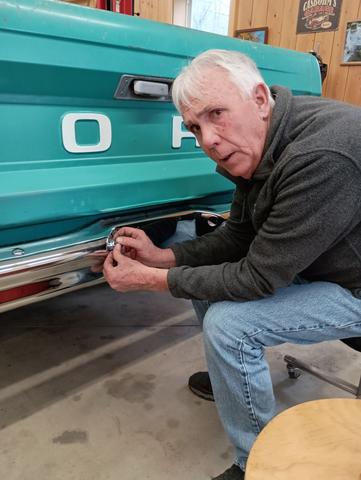
Lights in place
vintage plate and light check all around: Everything functions as it should.
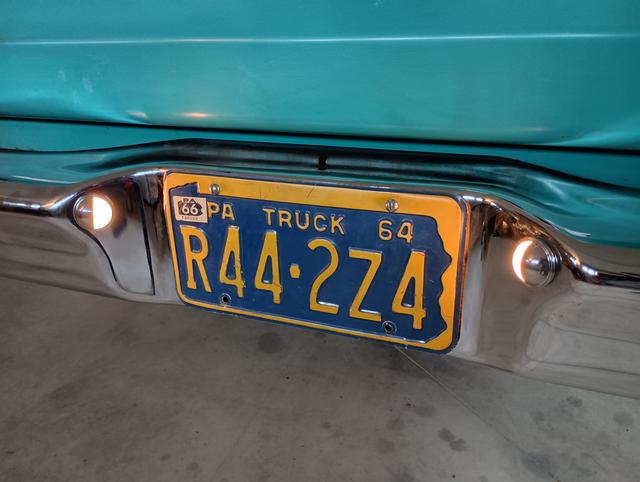

Old wiring was fine with some clean up. Some new ends for the lights from NAPA and some stainless bolts for the plate. Maybe they were gold plated. Yikes stuff is pricey!
Me and the crusty old Ford:
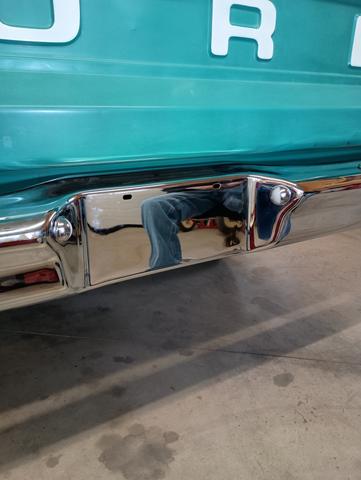
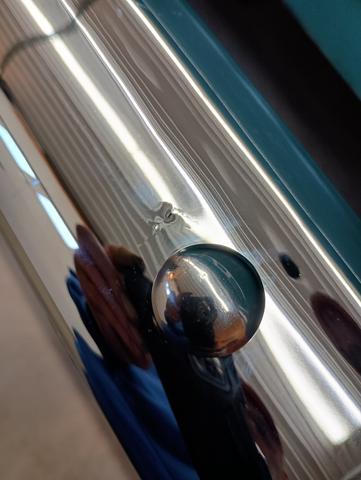
Last thing was to just wipe the fingerprints off. I found a spot near a bumper bolt where the chrome was popped up and pealing. I called Summit, they have another bumper on the way today. So nice to get good customer service! Awesome! It wont take as long to exchange the new one.
May tackle the king pins soon. That will take a little longer. Some clean up of parts while it's apart.
John and I tag teamed the rear bumper. The bolts were snug for sure.
Sorry phone lens was dirty. The pink and purple short bed is the oldest great grand daughters truck.
John Kelley and the 66
Lights in place
vintage plate and light check all around: Everything functions as it should.
Old wiring was fine with some clean up. Some new ends for the lights from NAPA and some stainless bolts for the plate. Maybe they were gold plated. Yikes stuff is pricey!
Me and the crusty old Ford:
Last thing was to just wipe the fingerprints off. I found a spot near a bumper bolt where the chrome was popped up and pealing. I called Summit, they have another bumper on the way today. So nice to get good customer service! Awesome! It wont take as long to exchange the new one.
May tackle the king pins soon. That will take a little longer. Some clean up of parts while it's apart.
Last edited by Effies 56; Apr 1, 2026 at 08:08 PM.
FTE Stories
Ford Trucks for Ford Truck Enthusiasts

10 Best Ford Truck Engines We Miss the Most!
Joe Kucinski
2026 Shelby F-150 Off-Road: Better Than a Raptor R?
Brett Foote
2027 Super Duty Carhartt Package First Look: 12 Things You NEED to Know!
Michael S. Palmer
10 Most Surprising 2026 Ford Truck Features!
Joe Kucinski
Top 10 Ford Trucks Coming to Mecum Indy 2026
Brett Foote
5 Best / 5 Worst Ford Truck Wheels of All Time
Joe Kucinski
Ford Super Duty: 5 Things Owners LOVE, 5 Things They LOATHE!
Joe Kucinski
Every 2026 Ford Truck Engine RANKED from WORST to FIRST!
Michael S. Palmer
The Best F-150 Deal of Every Trim Level (XL through Raptor)
Joe Kucinski
Thread Starter
|
Laughing Gas
Joined: Nov 2016
Posts: 878
Likes: 232
From: NWPA
Guys,
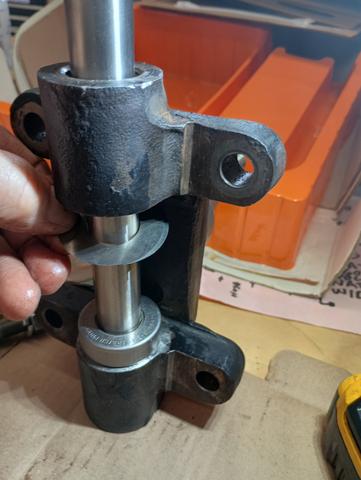
Day one with the kingpin project on the 66. John was getting right after it!
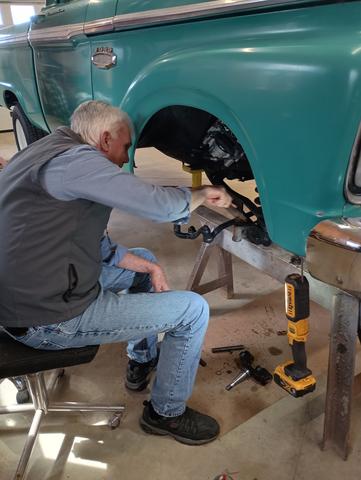
Found it was going to be better to remove the caliper disc assembly and the plate.
The right pin was stuck, rusted into the axle. So we applied some heat and placed a support under the axle. Several Sharp hammer blows and the pin began to move.
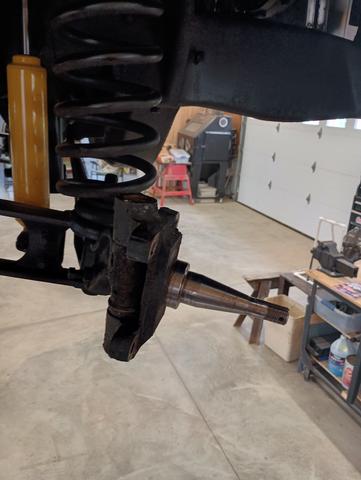
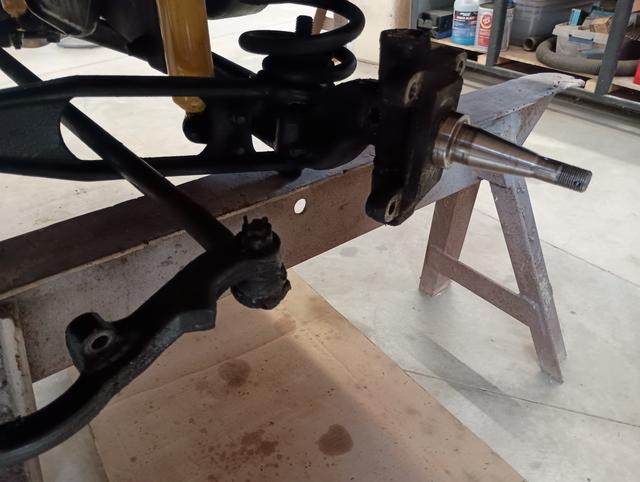
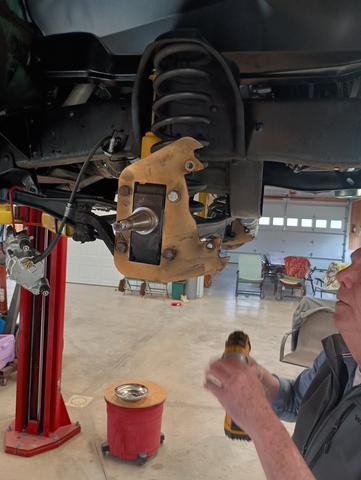
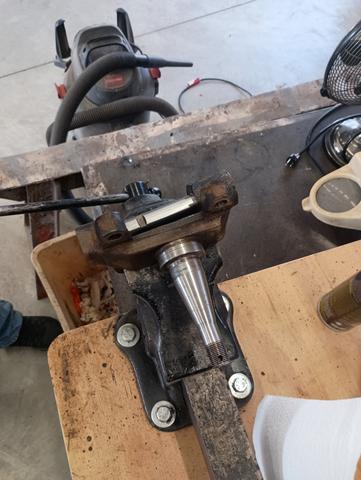
The new bearing was about a .001 press fit on the axle. Used a Dremel to clean up the bore. Fits nice on the spindle now.
Spindle clean up, installed new bushings,
Questions: The shims would they go on the bottom or the top?
Also there is a tiny seal (have 2) in the kit, Where do they go?
Day one with the kingpin project on the 66. John was getting right after it!
Found it was going to be better to remove the caliper disc assembly and the plate.
The right pin was stuck, rusted into the axle. So we applied some heat and placed a support under the axle. Several Sharp hammer blows and the pin began to move.
The new bearing was about a .001 press fit on the axle. Used a Dremel to clean up the bore. Fits nice on the spindle now.
Spindle clean up, installed new bushings,
Questions: The shims would they go on the bottom or the top?
Also there is a tiny seal (have 2) in the kit, Where do they go?
Last edited by Effies 56; Apr 2, 2026 at 07:22 PM.
Thread Starter
|
Laughing Gas
Joined: Nov 2016
Posts: 878
Likes: 232
From: NWPA
Guys,
So I did not get any instructions with the kingpin kit. So I called Summit for info but no help on the installation. They tried. They even called Moog tech support. Moog was on holiday, good for them.
Happy Easter!
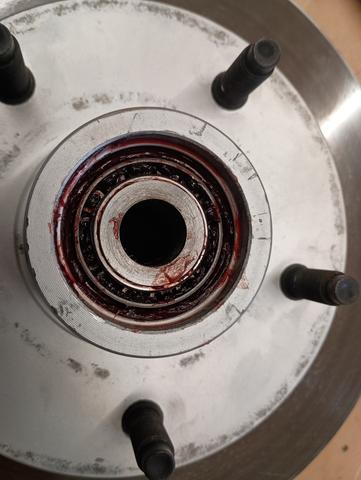
So I am going to take a run at how to place the ring seal and the new bearing.
Ring seal set into lower spindle area. My thoughts here would be it might keep moisture or dirt from entering the lower bearing area??
Then the new bearing would set on the spindle surface
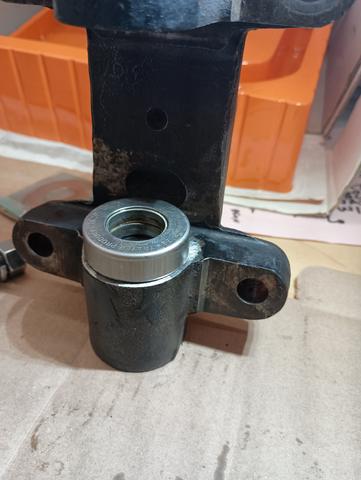
Then the two shims would go on top of the spindle when assembled??
Going to try to get the passengers side assembled today.
Got the LMC parts, Haven't opened the box.
Bumper should be here today too. Have parts to rebuild shift lever slop and turn signal switch.
So I did not get any instructions with the kingpin kit. So I called Summit for info but no help on the installation. They tried. They even called Moog tech support. Moog was on holiday, good for them.
Happy Easter!
So I am going to take a run at how to place the ring seal and the new bearing.
Ring seal set into lower spindle area. My thoughts here would be it might keep moisture or dirt from entering the lower bearing area??
Then the new bearing would set on the spindle surface
Then the two shims would go on top of the spindle when assembled??
Going to try to get the passengers side assembled today.
Got the LMC parts, Haven't opened the box.
Bumper should be here today too. Have parts to rebuild shift lever slop and turn signal switch.
Last edited by Effies 56; Apr 3, 2026 at 10:34 AM.

Lead Gopher
Joined: Aug 2012
Posts: 10,014
Likes: 1,565
From: Seattle
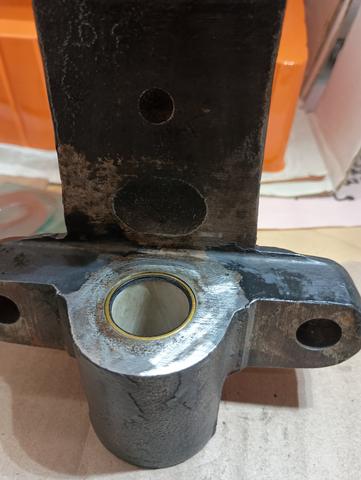
The seals Moog provides are interesting. They were not part of the originals as far as I've seen. Here's a NOS kit although I stole the shims out of this for another project there are not the 2 seals Moog provides. There are 4 O-rings but those go on the threaded side of each of the spindle plugs.

I'm wondering how your kingpin won't knock the seal out like you have it. Maybe you have the bushings installed already? If those are the nylons bushings I get it, I think. Still not sure how they go since ford didn't use those - like I say as far as I've seen so far.
I'm wondering how your kingpin won't knock the seal out like you have it. Maybe you have the bushings installed already? If those are the nylons bushings I get it, I think. Still not sure how they go since ford didn't use those - like I say as far as I've seen so far.
Last edited by TA455HO; Apr 3, 2026 at 07:11 PM.
Thread Starter
|
Laughing Gas
Joined: Nov 2016
Posts: 878
Likes: 232
From: NWPA
Well I probably wont tear it apart but they are on the top. Maybe could have used maybe another 1/2 thickness shim to remove all the vertical slop These were about .008 thick.
Thread Starter
|
Laughing Gas
Joined: Nov 2016
Posts: 878
Likes: 232
From: NWPA
I do appreciate the response and support.. So if its in the wrong place where is the right place?? Maybe in the upper under side to keep grease from leaking out??These new bearings are not like to old ones. They are very flat grease would go up through the center along the kingpin . Make more sense after thinking about it. Humm maybe these will have to come apart and change that seal to the upper portion of the spindle pivot.
By the way we usually have to do things a couple times to get projects correct. Not unusual at all for a couple old men.
Yes this kit has the nylon bushings.
The pin on the drivers side was in much better shape. But we replaced the king pin and components on the drivers side also.
Last edited by Effies 56; Apr 3, 2026 at 08:35 PM.