


78 Ford 4x4 steering problems

Thread Starter
|
New User
Joined: Jul 2010
Posts: 21
Likes: 0
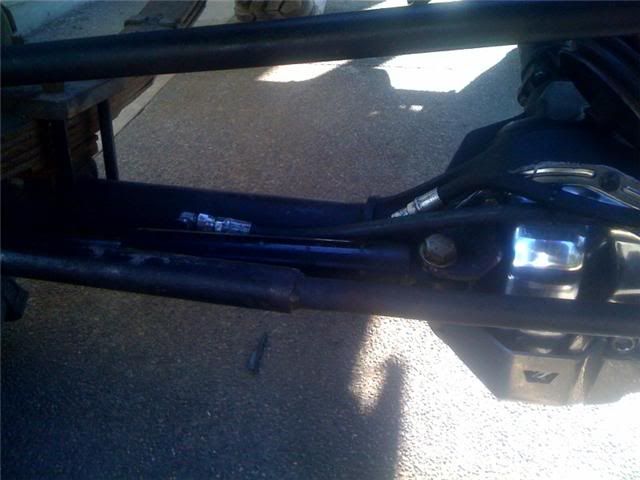
well i have a temporary fix. built a modified crossover t setup. i believe thats what its called. i have plans for this truck in the future but for now at least its movable. steering is much better than before and does not bind up at least on road. All your suggestions are awesome and I will consider them when i take this truck to the next level. But, first i have to come up with a dana 60. that will be my first big expense. I spent about 6 hours total making my custom drag link and getting the angles as close as possible. But only cost me $15. if you dont count rods, torch gas, and ice tea. Where can I see some in depth pictures of your setup, 73 Ford Guy?
Postmaster
Joined: Oct 2005
Posts: 3,083
Likes: 4
From: Victoria , BC
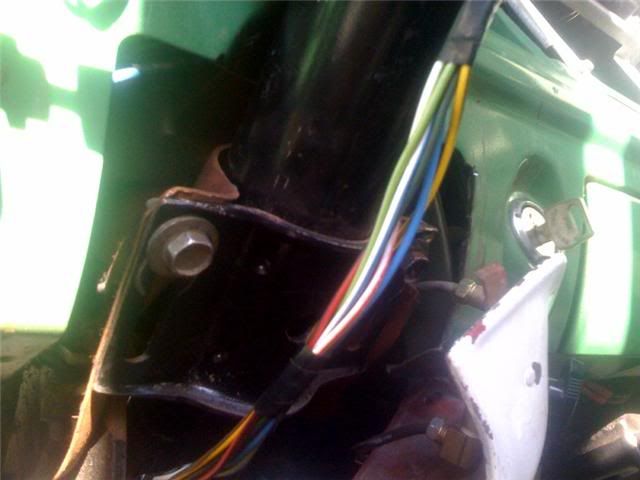
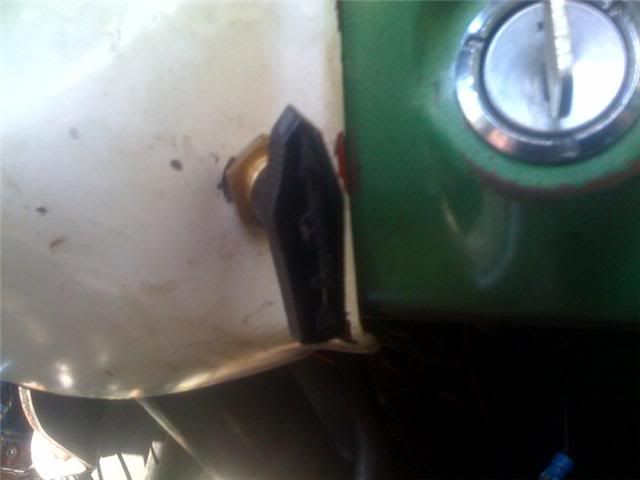
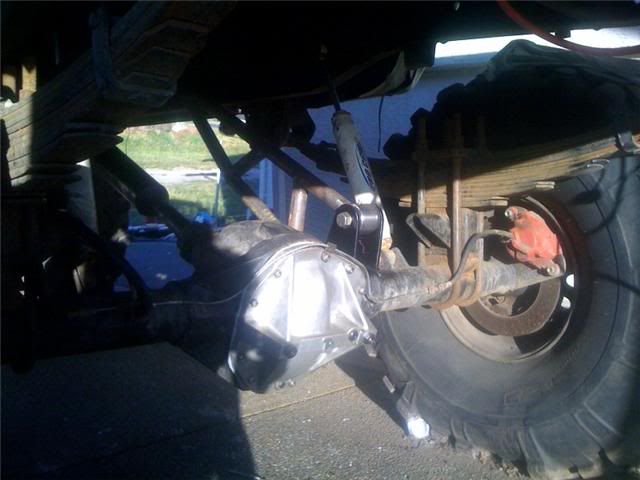
So thats the setup. you'll notice the angle on the draglink isnt even that steep even with my 15" lift. I included some pics of where I mounted my line lok where I think is the best location as it makees it alot easier to plumb in brake lines as its removeable. The other pic of steering colomn is showing where the colomn mounts with a slotted hole. I showed you that so if you decide to change out to the splined u joint at the end of the shaft like i took a pic of its best to set your colmun so its pressed inwards as far as possible on slotted holes so if you need to remove it you unbolt the two bolts on column and slide colomn towards you to service anything. Basically get rid of your rag joint or coupler connection ou have as it SUCKS and will let you down! The other pics show the box where it is tapped. These are pretty much the only locations to do it as I used a junk box as trial and error to find a good spot that had enough meat to tap into and would make a good seal. I chose to weld the fittings in around the base and I carry fitting caps in my glovebox for if I were to say tear a hose I could cap the hydro system fittings on box and now just run regular power steering just to get home.
This setup is also a tie rod over flip. I took the knuckles off drilled the tapered hole straight then my machinist made a pressed in sleeve that had a tapered fit so the tie rod bolted to the top instead of the bottom gaining a 3 inch height advantage out of the way of rocks. It was then welded in place with a cast iron rod. Not as ideal as high steer but it got me through a competion. high steer is on the list soon after I get this back on the road with my new motor.
This setup is also a tie rod over flip. I took the knuckles off drilled the tapered hole straight then my machinist made a pressed in sleeve that had a tapered fit so the tie rod bolted to the top instead of the bottom gaining a 3 inch height advantage out of the way of rocks. It was then welded in place with a cast iron rod. Not as ideal as high steer but it got me through a competion. high steer is on the list soon after I get this back on the road with my new motor.
Postmaster
Joined: Oct 2005
Posts: 3,083
Likes: 4
From: Victoria , BC
Heres the setup I did on another truck with high steer which is the ultimate way too go again with hydro assist

If you went this route go with the 1.75x6 ram as mentioned before as you need less stroke and can go with a bigger ram. Best of the Best on this setup!!!
This is the chart I found on how to tap my box

Wish I had this info when I was doing my setup!
Do all this and it will be Bad ***...
If you went this route go with the 1.75x6 ram as mentioned before as you need less stroke and can go with a bigger ram. Best of the Best on this setup!!!
This is the chart I found on how to tap my box
Wish I had this info when I was doing my setup!
Do all this and it will be Bad ***...
Lead Driver


Joined: Mar 2004
Posts: 8,922
Likes: 153
Buy the right steering arm for the 44 under your truck ( ORU & others have them) if you are going to keep the 44 front. Any machine shop or anyone with a mill can machine the knuckle for the steering arm for cheep. Don't bother over paying a 4x4 shop for doing it, there is NOTHING to machining the knuckle, a beginner on a mill could do it for you, It might take a hour on the mill. Get a drop pitman arm, ream it out for the Chevy 1 ton tie rod end if it isn't already and make up a drag link out of DOM tubing. Whole thing will not cost much $.
Postmaster
Joined: Oct 2005
Posts: 3,083
Likes: 4
From: Victoria , BC
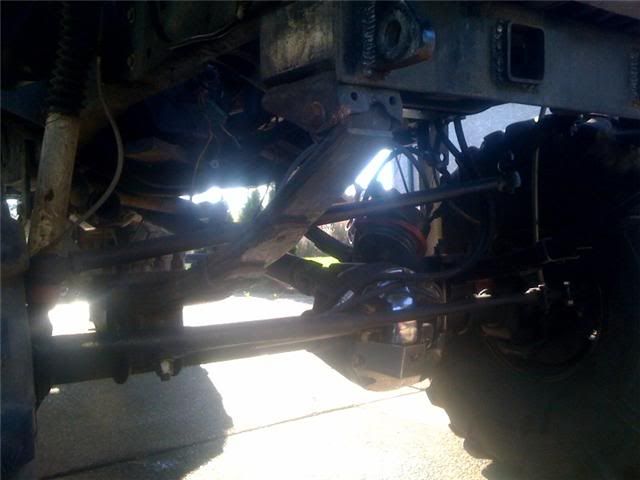
heres the rear setup with traction bar ,to maintain any axle wrap, and rear discs. I use 4 " blocks no more! To get the lift needed I then did a shackle flip.


So the shackle flip is actually the front mounted hager has been removed then moved to the rear location as it has a bigger drop. To compinsate for the flip in back you need to run a bigger front hanger to even it all out.
The tall front hanger is actually from a 78-80 ish chev pickup. These work awesome if you can find a set a a wrecker. I could have made some but these look stock and legal. The most critical thing in all this is you see the shackle angle on the rear one..it HAS to be at least vertical or better with it kicked back a bit so shackle cant kick the other way putting itself in a bind kicking forward and only way to un bind it is to lift truck from frame and put it back. Basically drill two holes in opposte corners with maybe 1/4 bolts for mockup and then lower it with all vehicle weight now resting on it and if it doesnt sit kicked back then redrill moving hanger forward on frame.
I got all the kinks worked out after 4-5 years of building this truck alone. All this stuff has been tried and tested to work as well.
Postmaster
Joined: Oct 2005
Posts: 3,083
Likes: 4
From: Victoria , BC
As for front run a 4 inch spring hanger drop like this.

its just 4 " tube with a 5x5x3/8 piece of angle iron connecting across each side bolted and welded in place. The back of the tube is capped for a look clean.
run these pro comp 6.5 superduty springs and make sure you make a set of longer shackles on the back end to even it all out again from the spring hanger drop on the other end.

Heres how it currently sits

its just 4 " tube with a 5x5x3/8 piece of angle iron connecting across each side bolted and welded in place. The back of the tube is capped for a look clean.
run these pro comp 6.5 superduty springs and make sure you make a set of longer shackles on the back end to even it all out again from the spring hanger drop on the other end.
Heres how it currently sits
FTE Stories
Ford Trucks for Ford Truck Enthusiasts

AEV FXL Super Duty - the Super Duty Raptor Ford Doesn't Make
Brett Foote
Lobo Vs Lobo: Proof the F-150 Lobo Should Be Even Lower!
Michael S. Palmer
Ford's 2001 Explorer Sportsman Concept Looks For a New Home
Verdad Gallardo
10 Best Ford Truck Engines We Miss the Most!
Joe Kucinski
2026 Shelby F-150 Off-Road: Better Than a Raptor R?
Brett Foote
2027 Super Duty Carhartt Package First Look: 12 Things You NEED to Know!
Michael S. Palmer
10 Most Surprising 2026 Ford Truck Features!
Joe Kucinski
Top 10 Ford Trucks Coming to Mecum Indy 2026
Brett Foote
5 Best / 5 Worst Ford Truck Wheels of All Time
Joe KucinskiJunior User
Joined: Mar 2005
Posts: 79
Likes: 0
From: Belleville, MI
Hey 73, I would like a little clarification on what you're running in the rear. As I read it, you put the original front rear spring hanger in the far rear and used a chevy in the front of the rear. Right? Is it the factory hiboy rear spring? 2.5 in wide? That matches height with a 4 in spacer, longer shackle and a 6.5 in superduty spring in front?
Thanks
Thanks
Postmaster
Joined: Oct 2005
Posts: 3,083
Likes: 4
From: Victoria , BC
As long as it helped someone if not the original guy who posted question. Ive referred guys to this link a couple times cuz I'm not writing all that info down again!

Thread
Thread Starter
Forum
Replies
Last Post
UBWoodman
1961 - 1966 F-100 & Larger F-Series Trucks
8
Jul 13, 2016 08:44 AM
Jimbo484
1961 - 1966 F-100 & Larger F-Series Trucks
4
Nov 2, 2015 02:44 PM
xbox73
1999 - 2003 7.3L Power Stroke Diesel
6
Jan 14, 2013 06:40 PM