


Butt welds for patch panels
Thread Starter
|
Tuned


Joined: Aug 2007
Posts: 459
Likes: 123
From: Maryland
The tack welds are merely to keep the panels aligned for welding. Yes, it does warp up when you weld as the weld is shrinking. When you get done, planish the weld to give it some stretch and the warping goes away.
Thread Starter
|
Tuned
Joined: Aug 2007
Posts: 459
Likes: 123
From: Maryland
Thanks Greg!
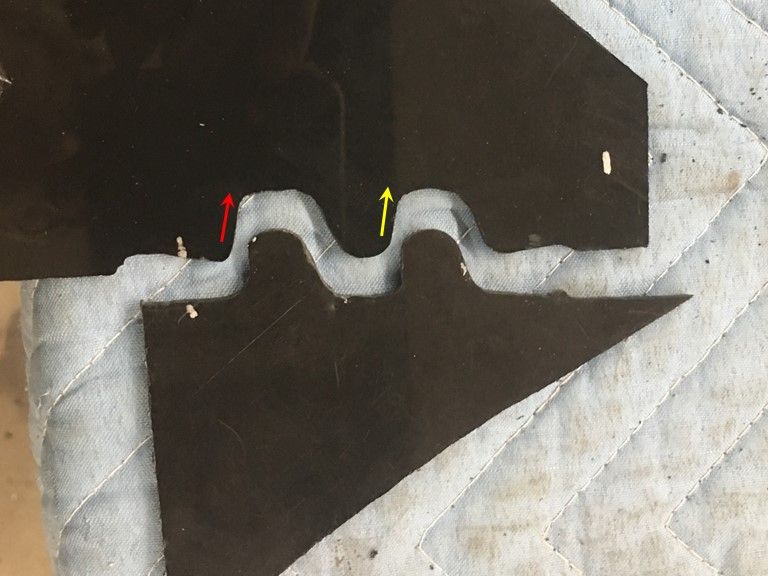
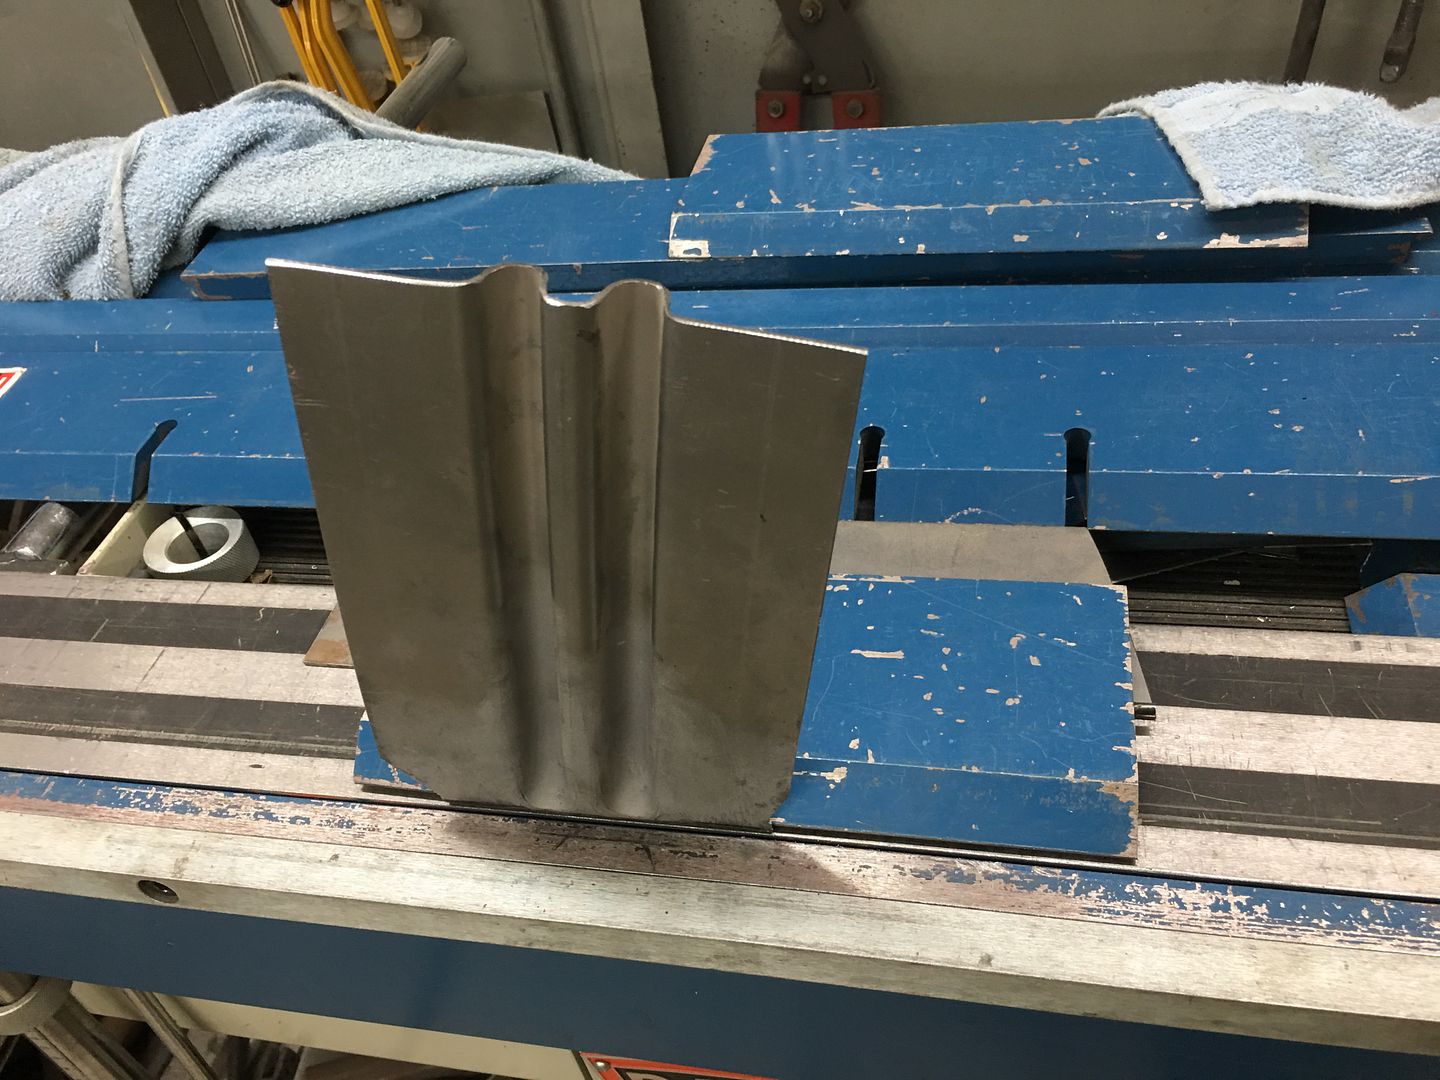
Now to fine tune our dies for the hood brace. Looking at our original profile template, the first upsweep (red arrow) and second upsweep (yellow arrow) are both nearly vertical as compared to the opposite side.
Our first test run shows the first upsweep spread too wide, not enough vertical...
Looking at the die that was made, a bit too much material was removed such that this vertical feature was lost...
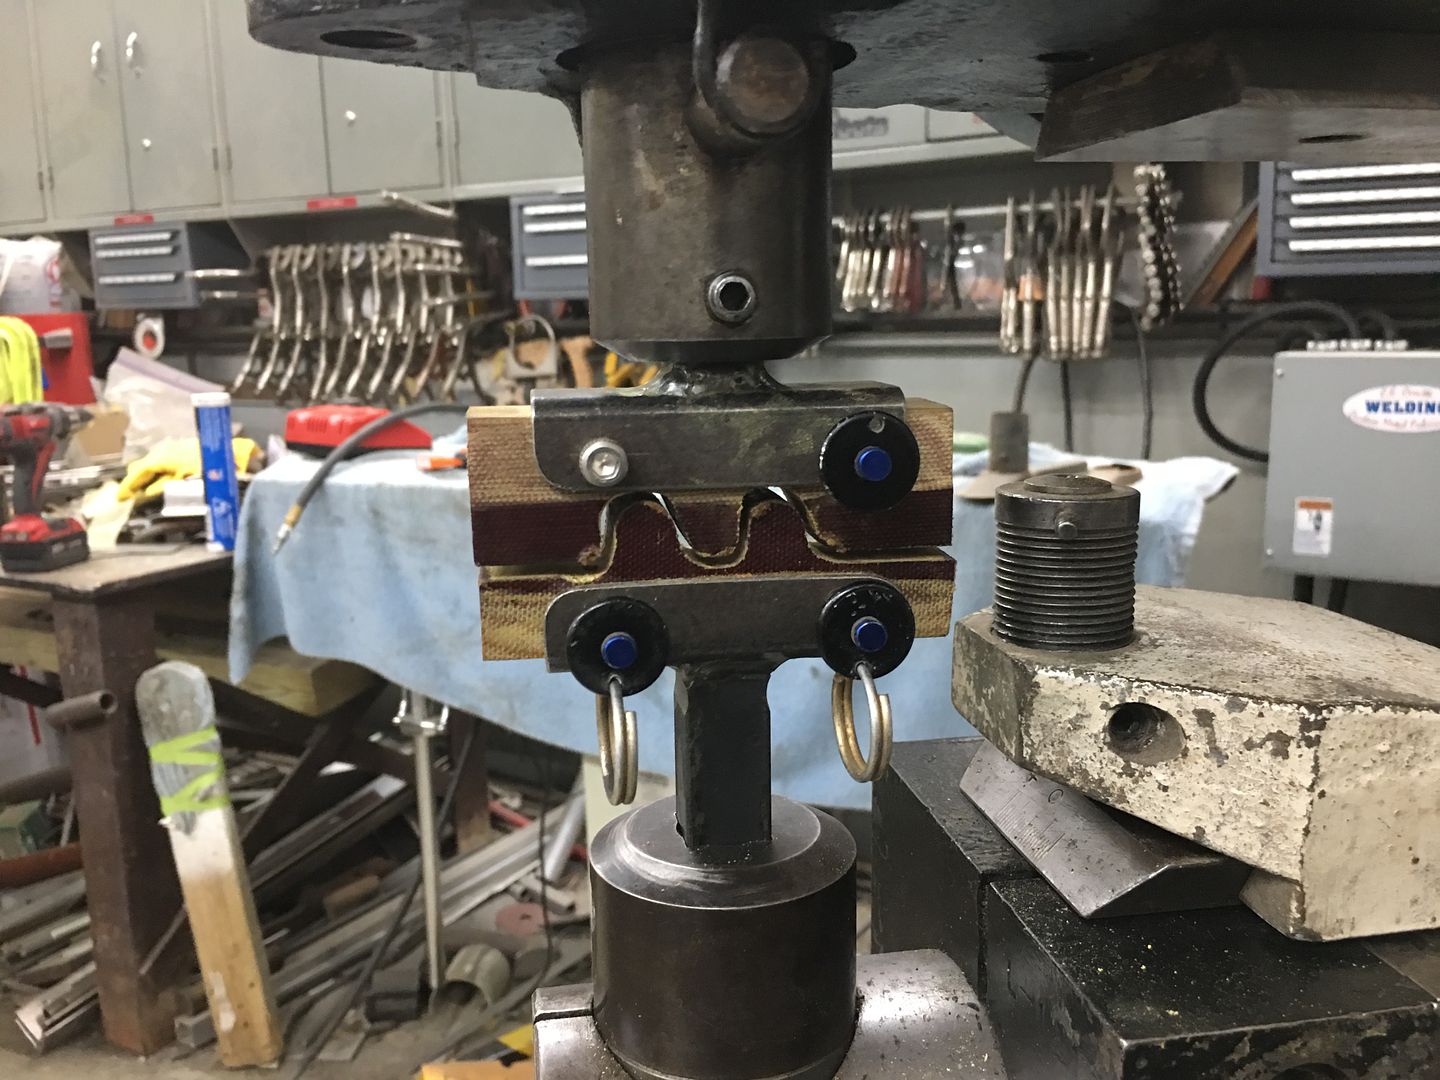
So a new die was made for the top, this time out of aluminum. The phenolic is somewhat easy to cut out but does have challenges in making crisp bend details, so lets see if the aluminum helps out..
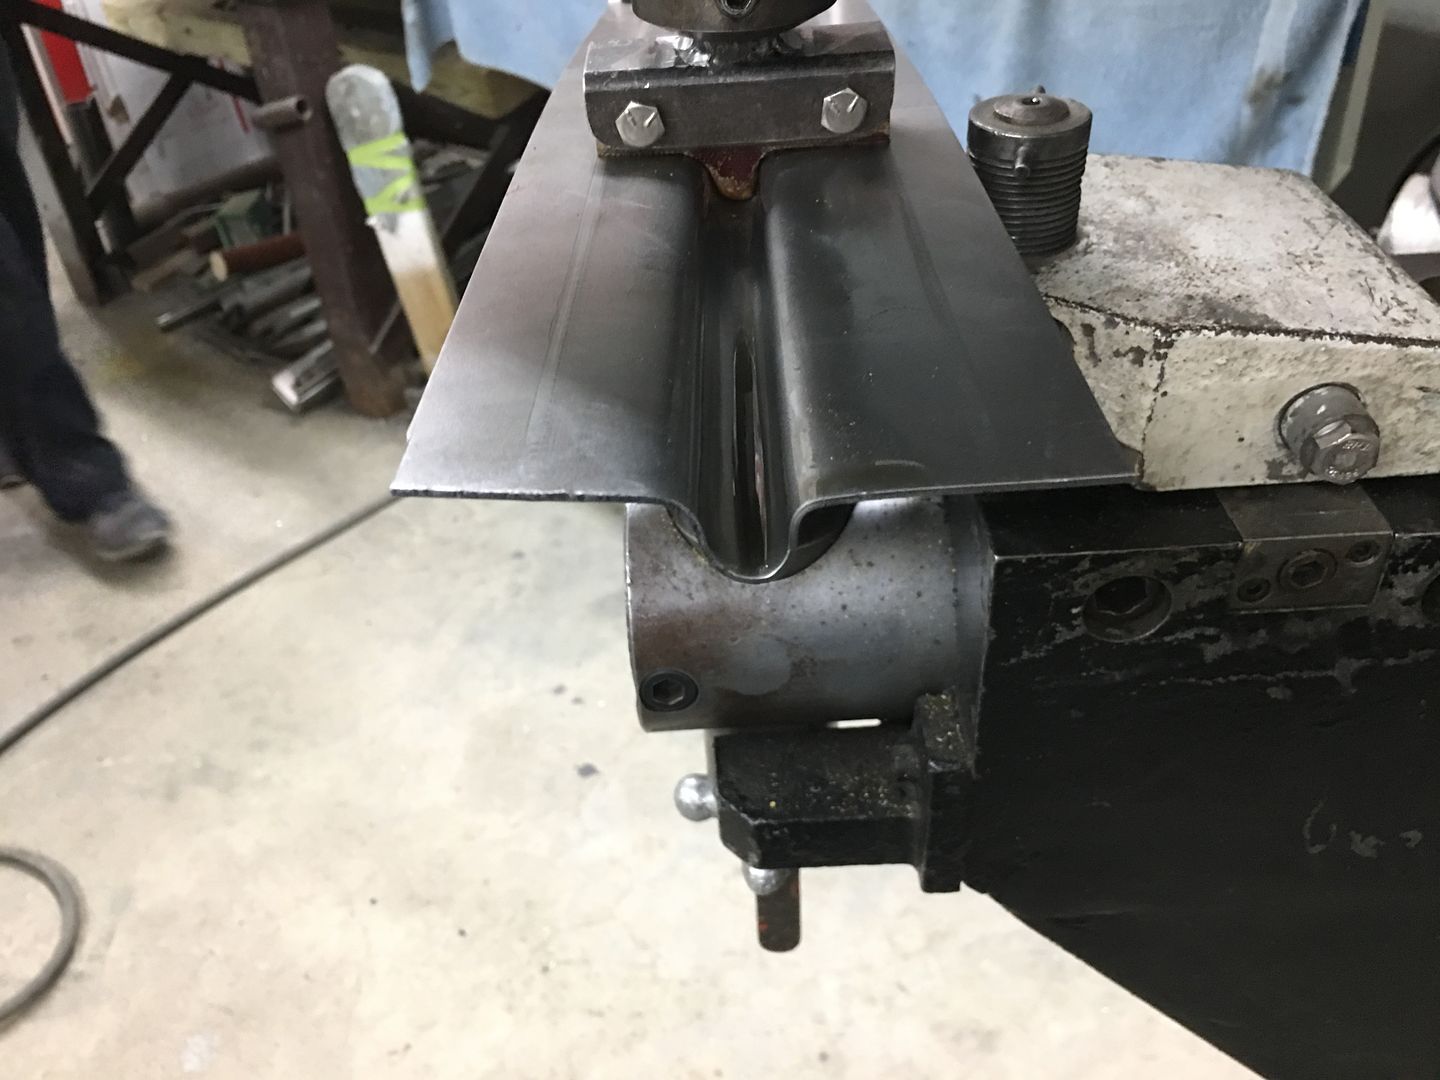
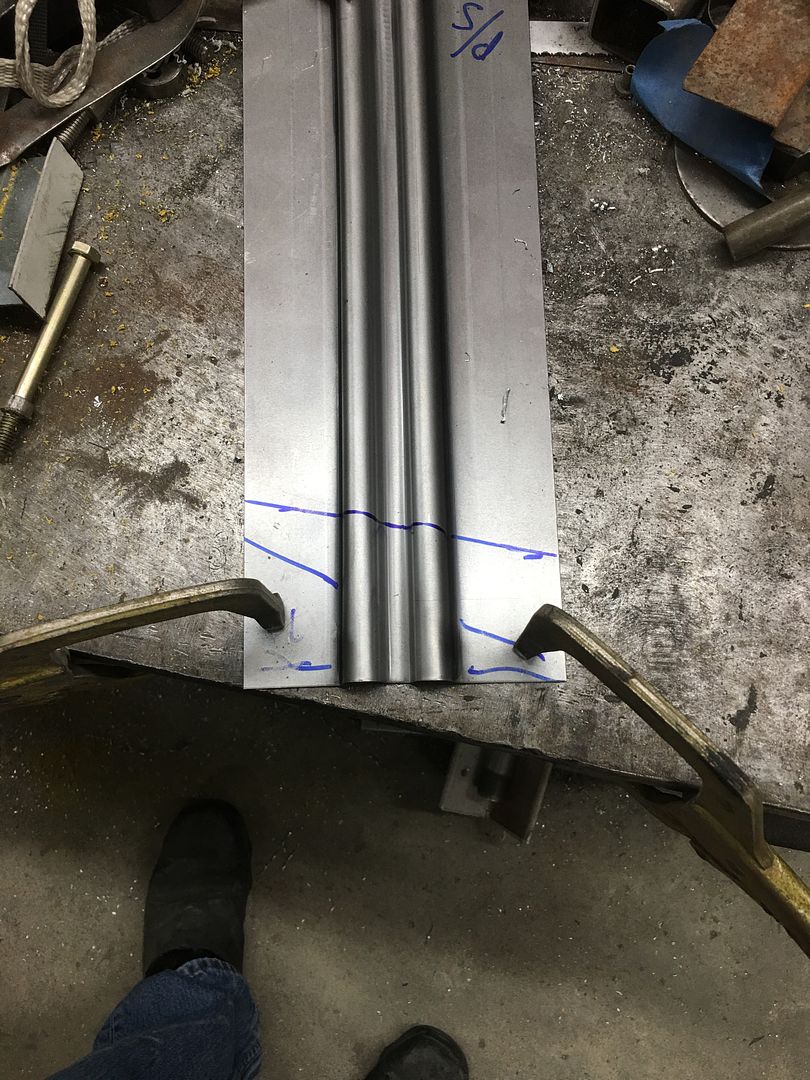
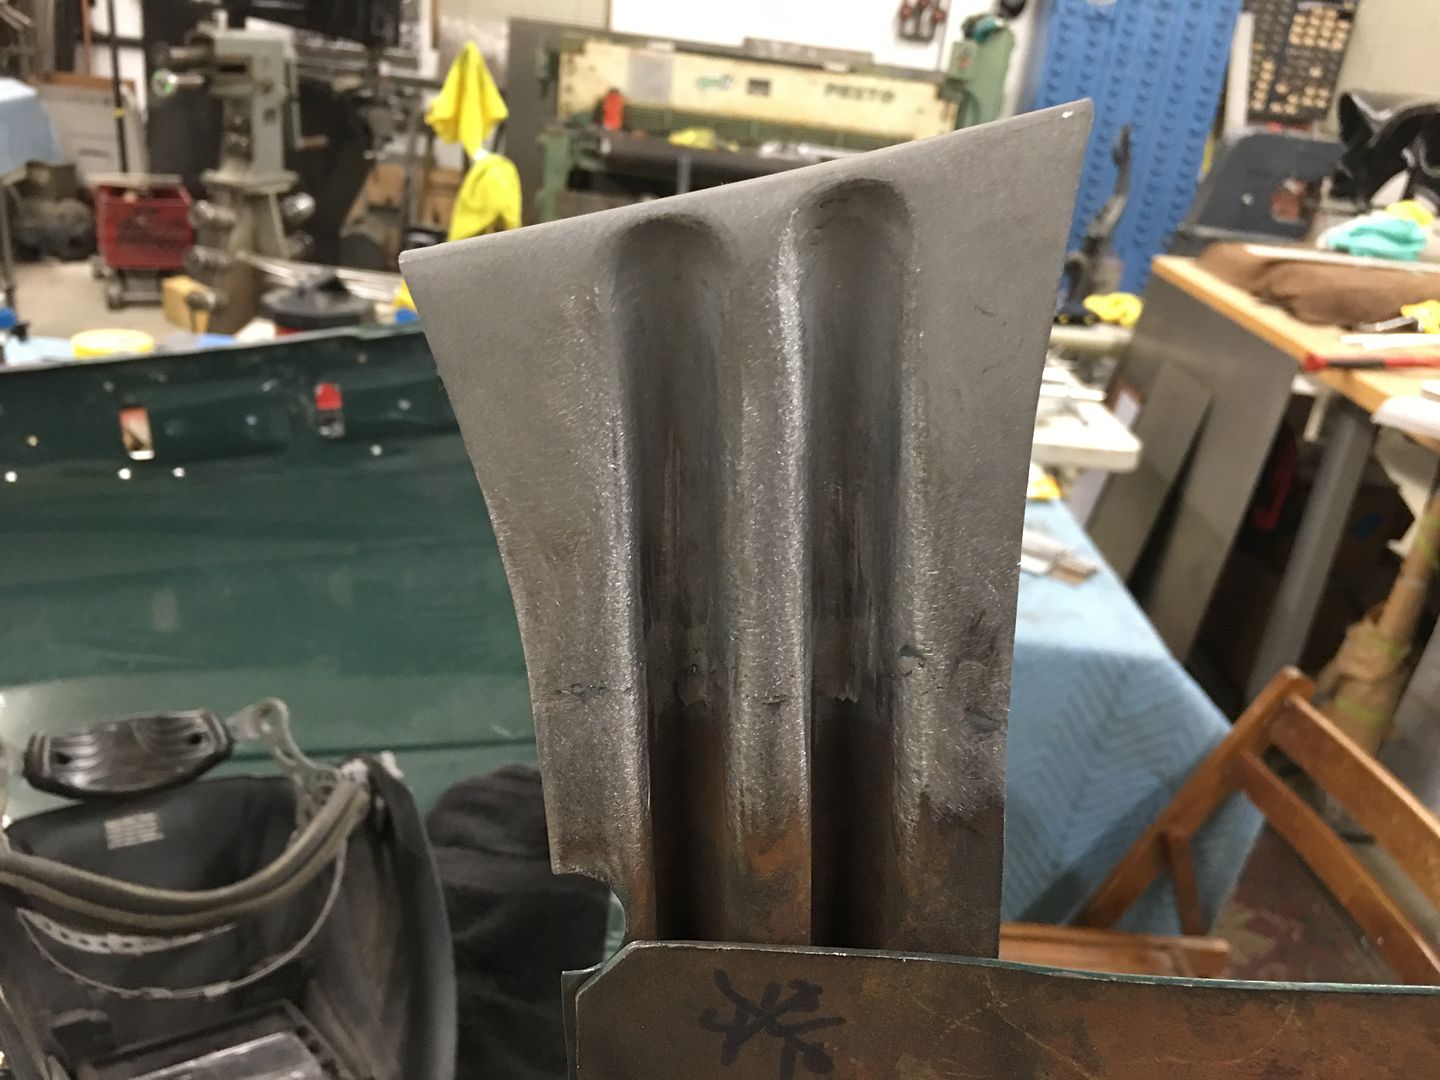
Next run, this time we'll do two panels in case they work... First pass to draw the metal into the center rib...
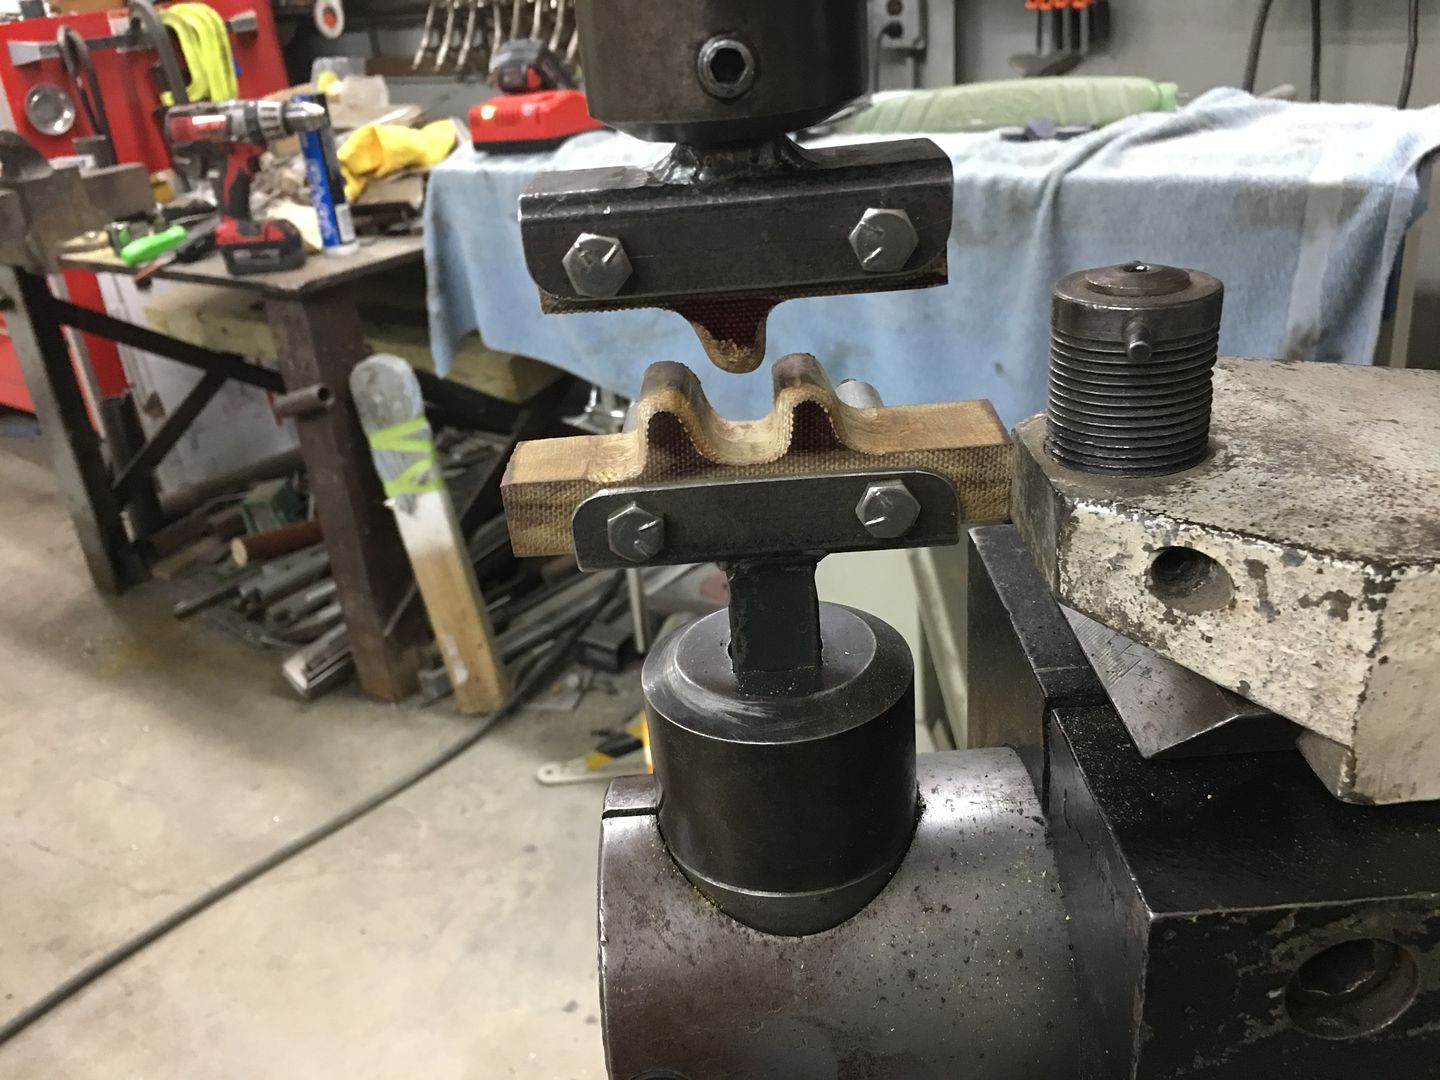
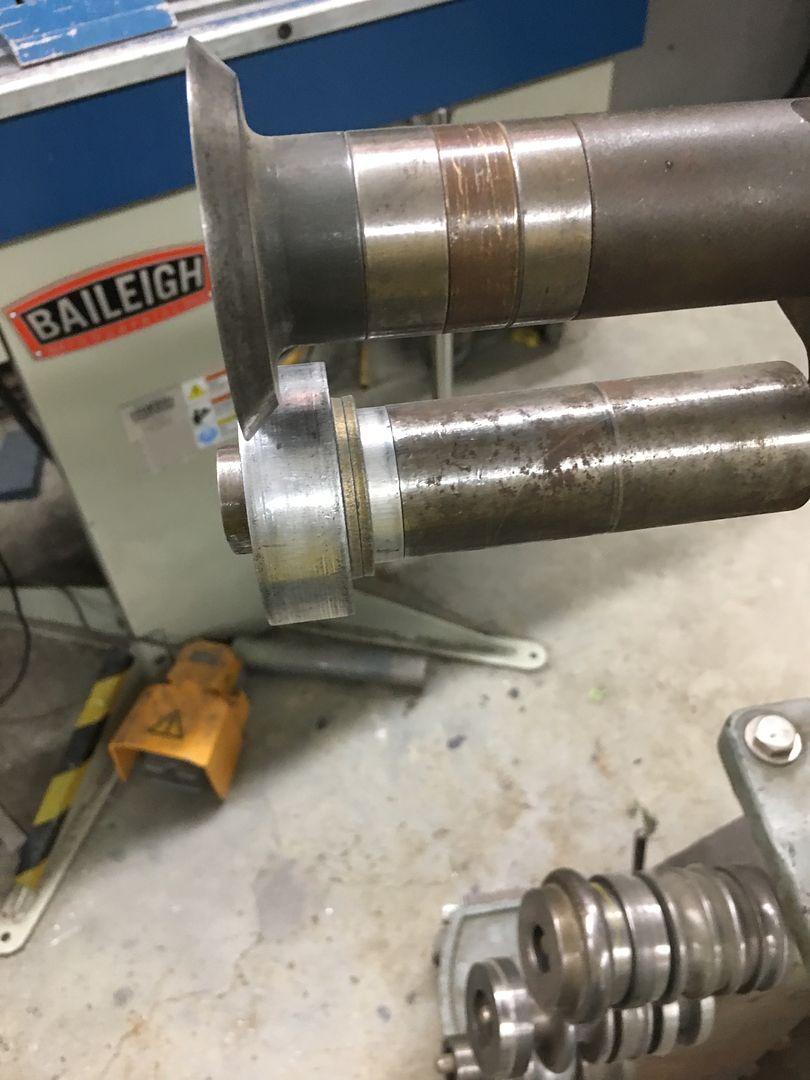
This is about 8 passes, each progressively deeper. The circle fixture to the right in the picture (white base) is used as a back stop to keep our rib centered.
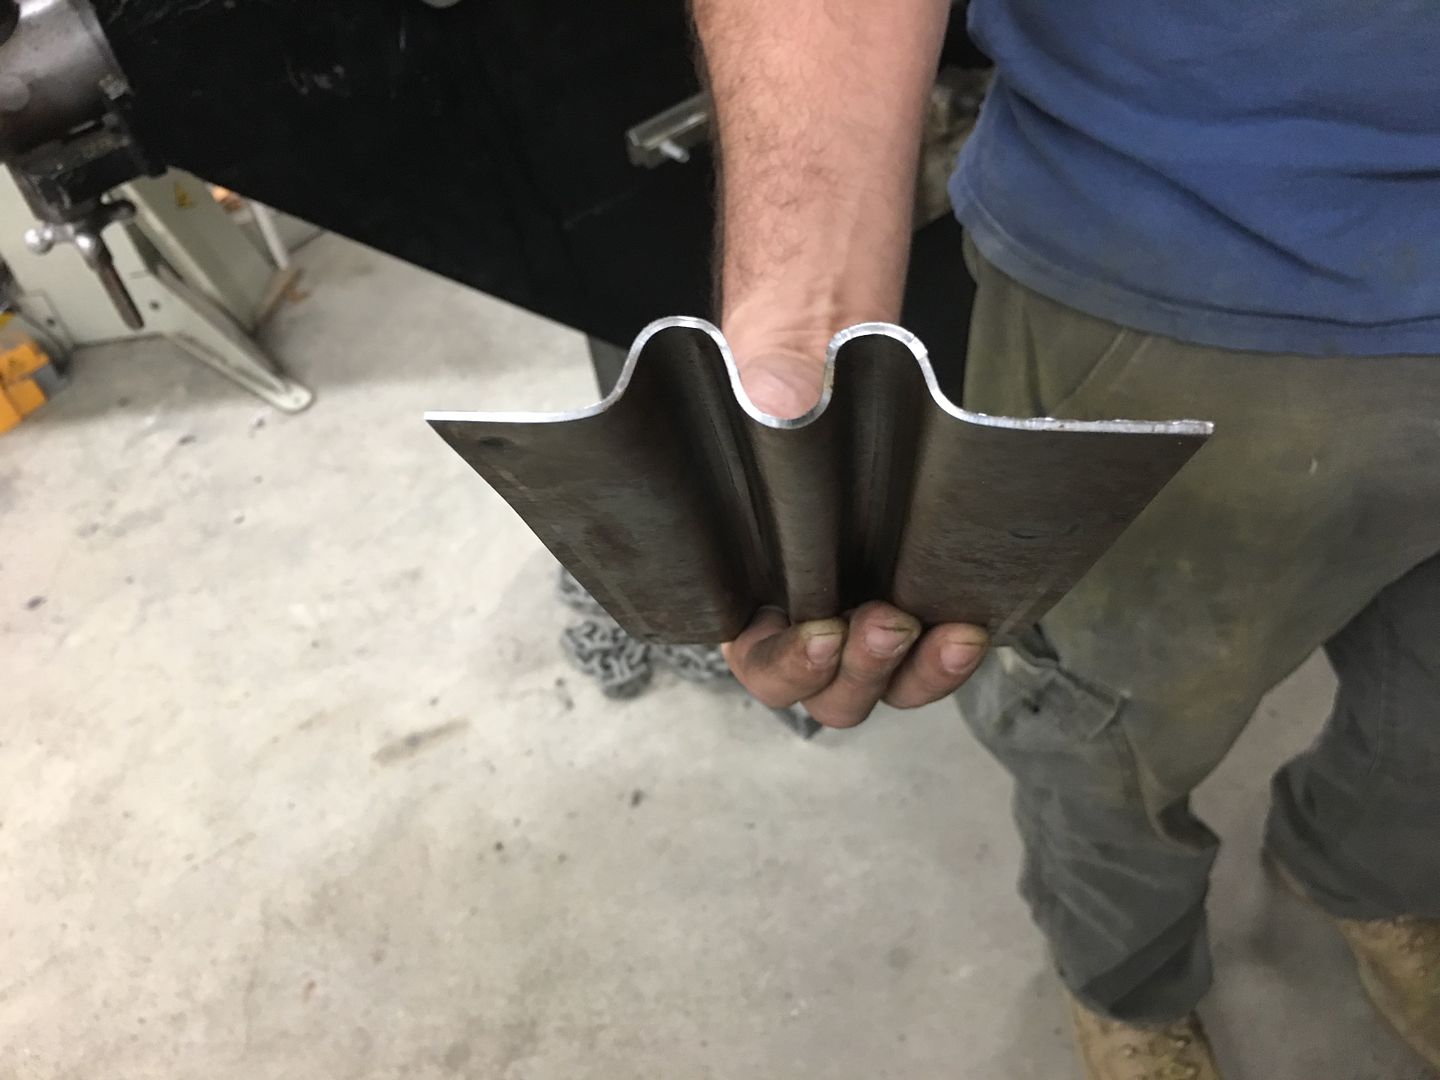
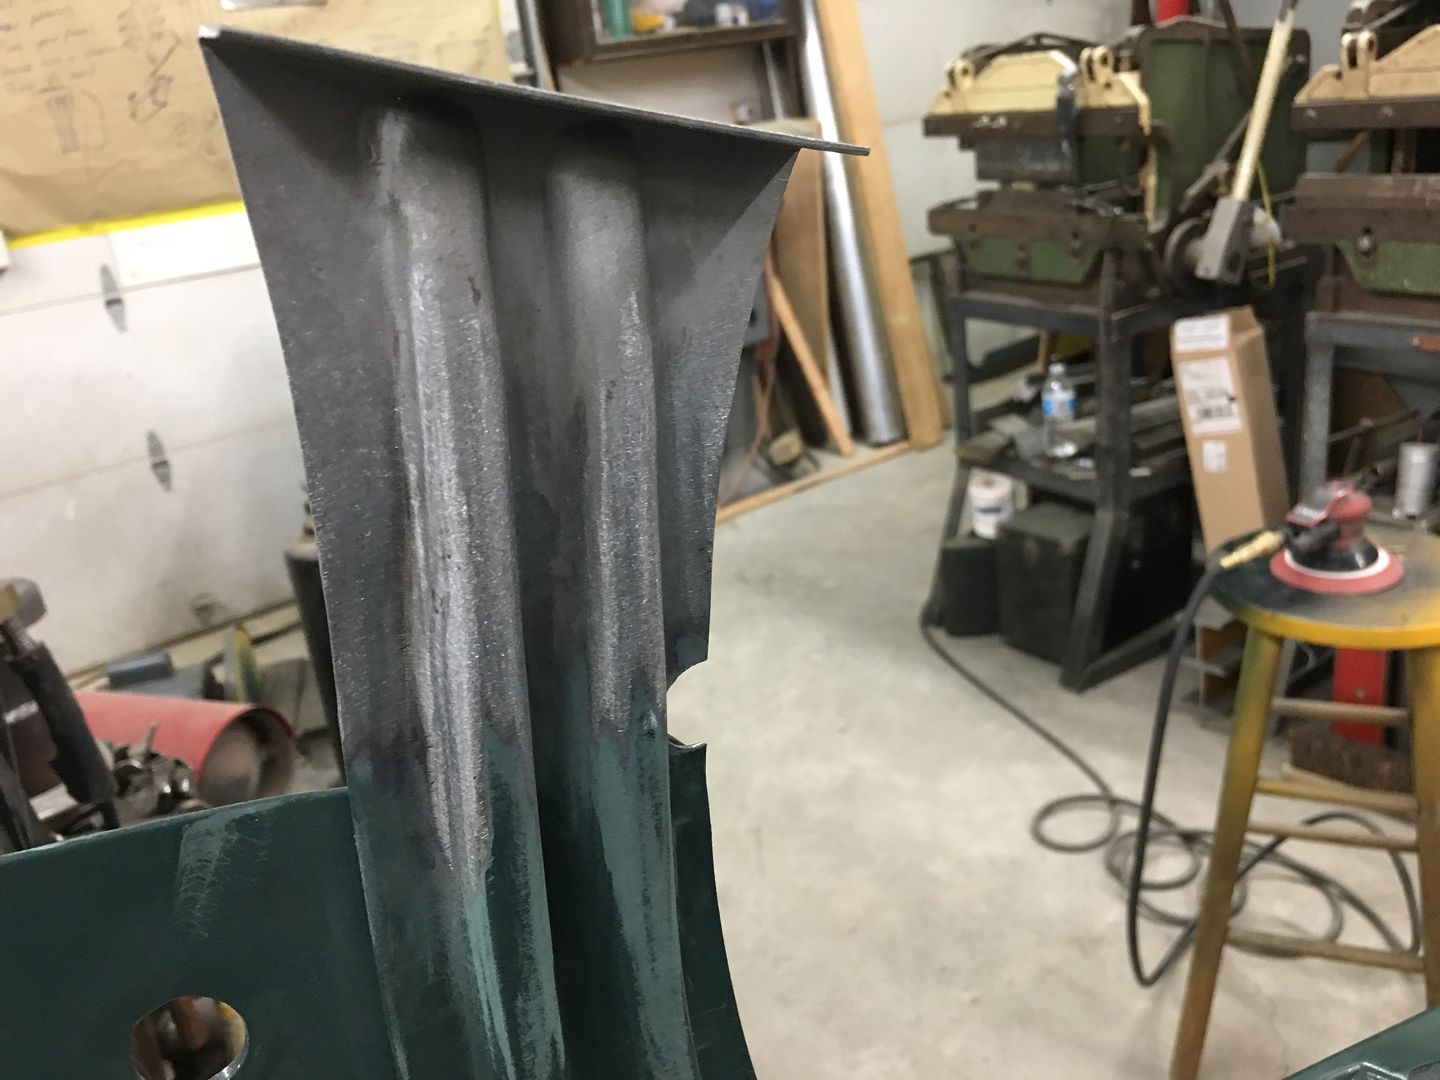
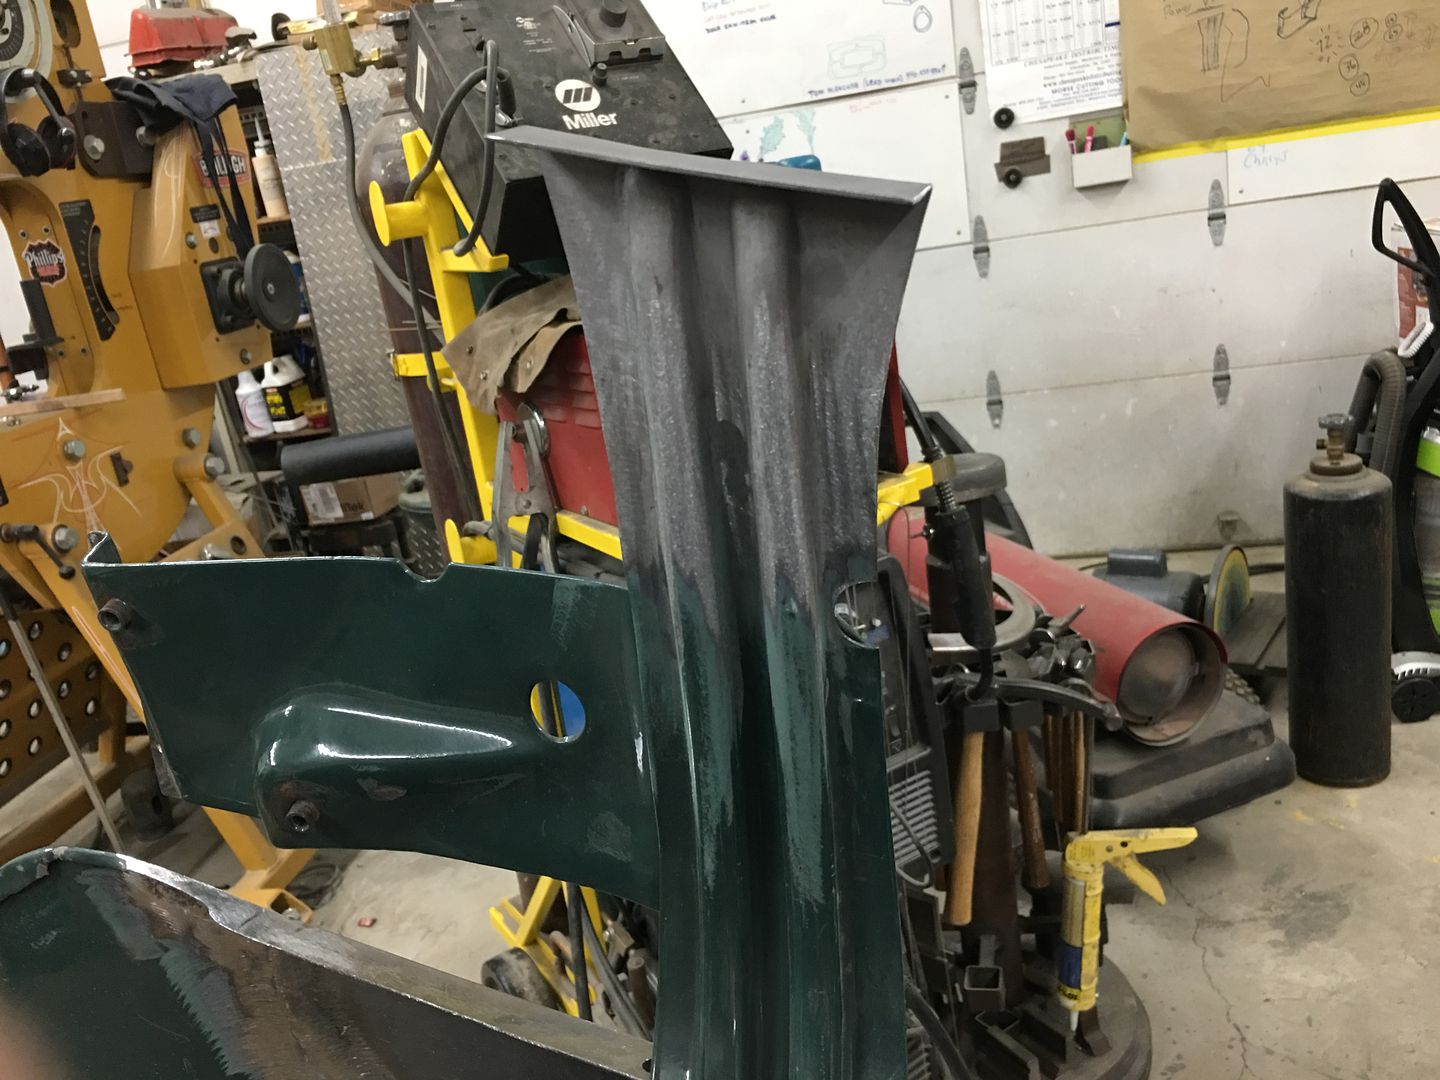
This is about 9/16 of depth, so quite a bit of draw.. Next, the new top die is added and goes through the same 8 progressive passes.. Note in the next picture the vertical upsweeps are both nearly vertical. Success!
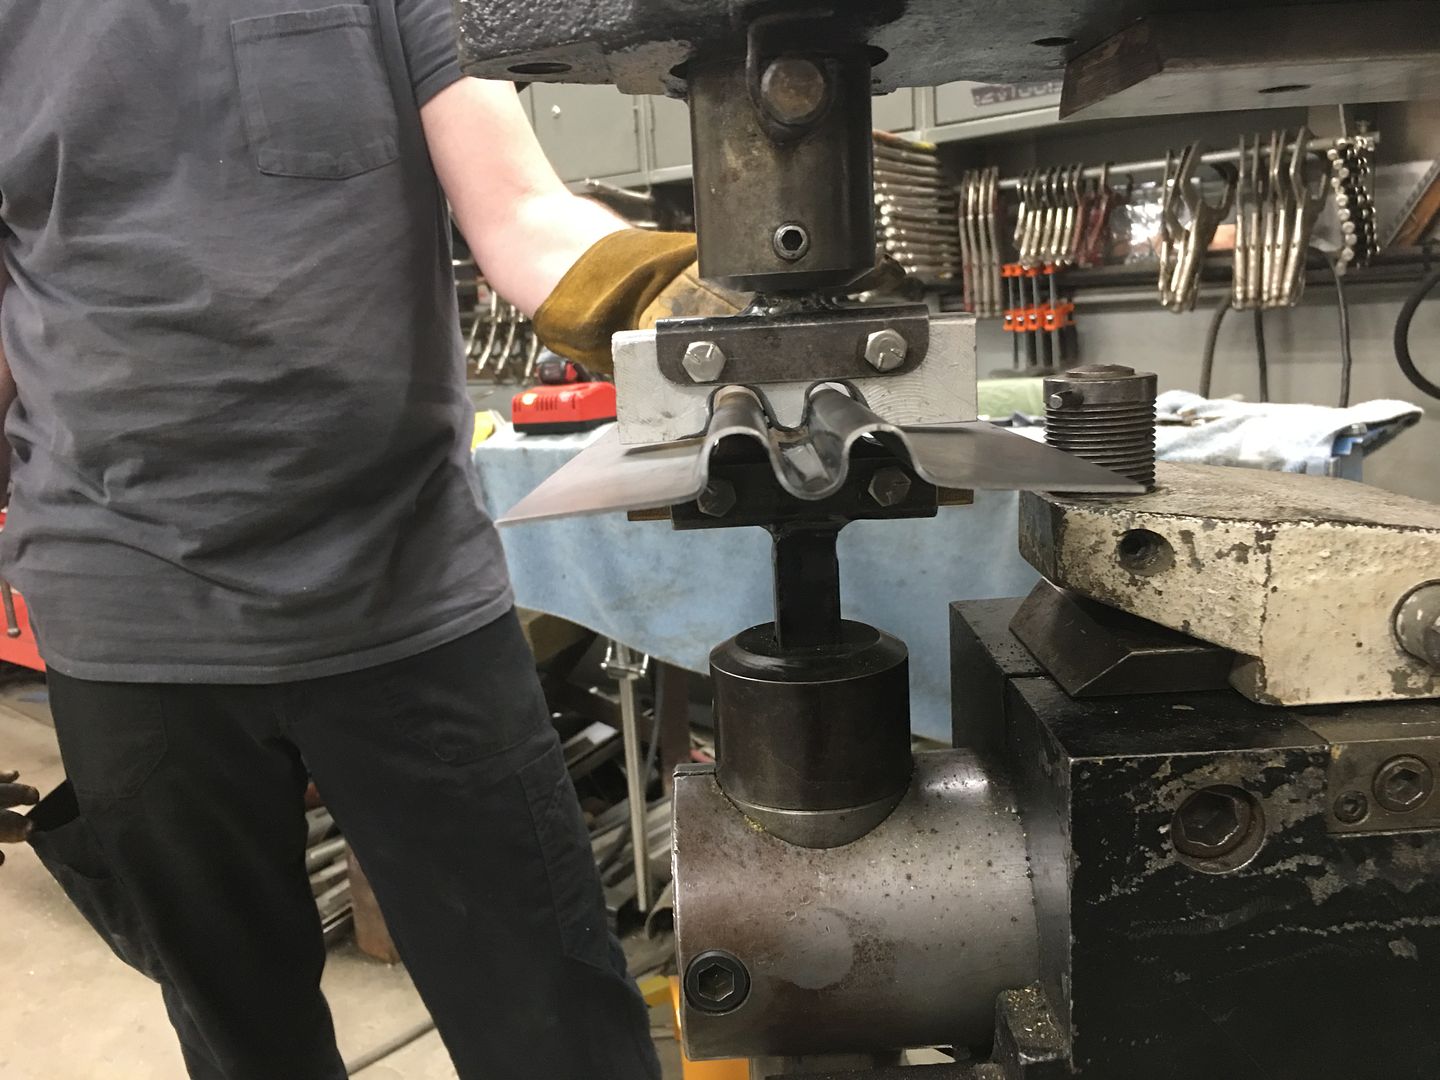
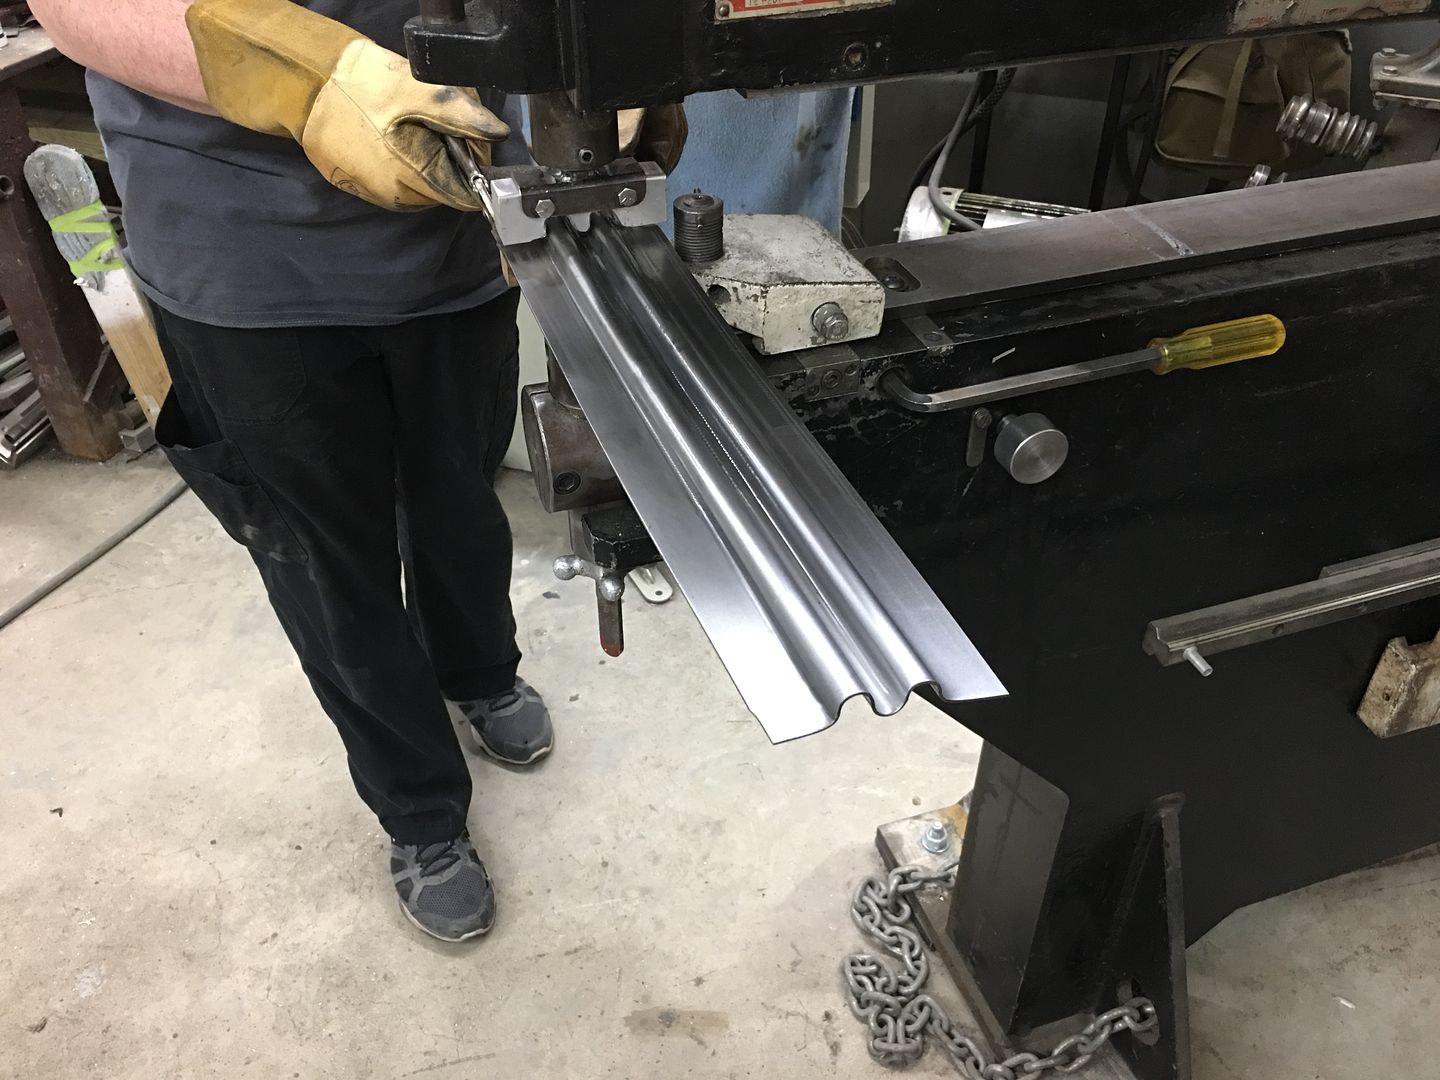
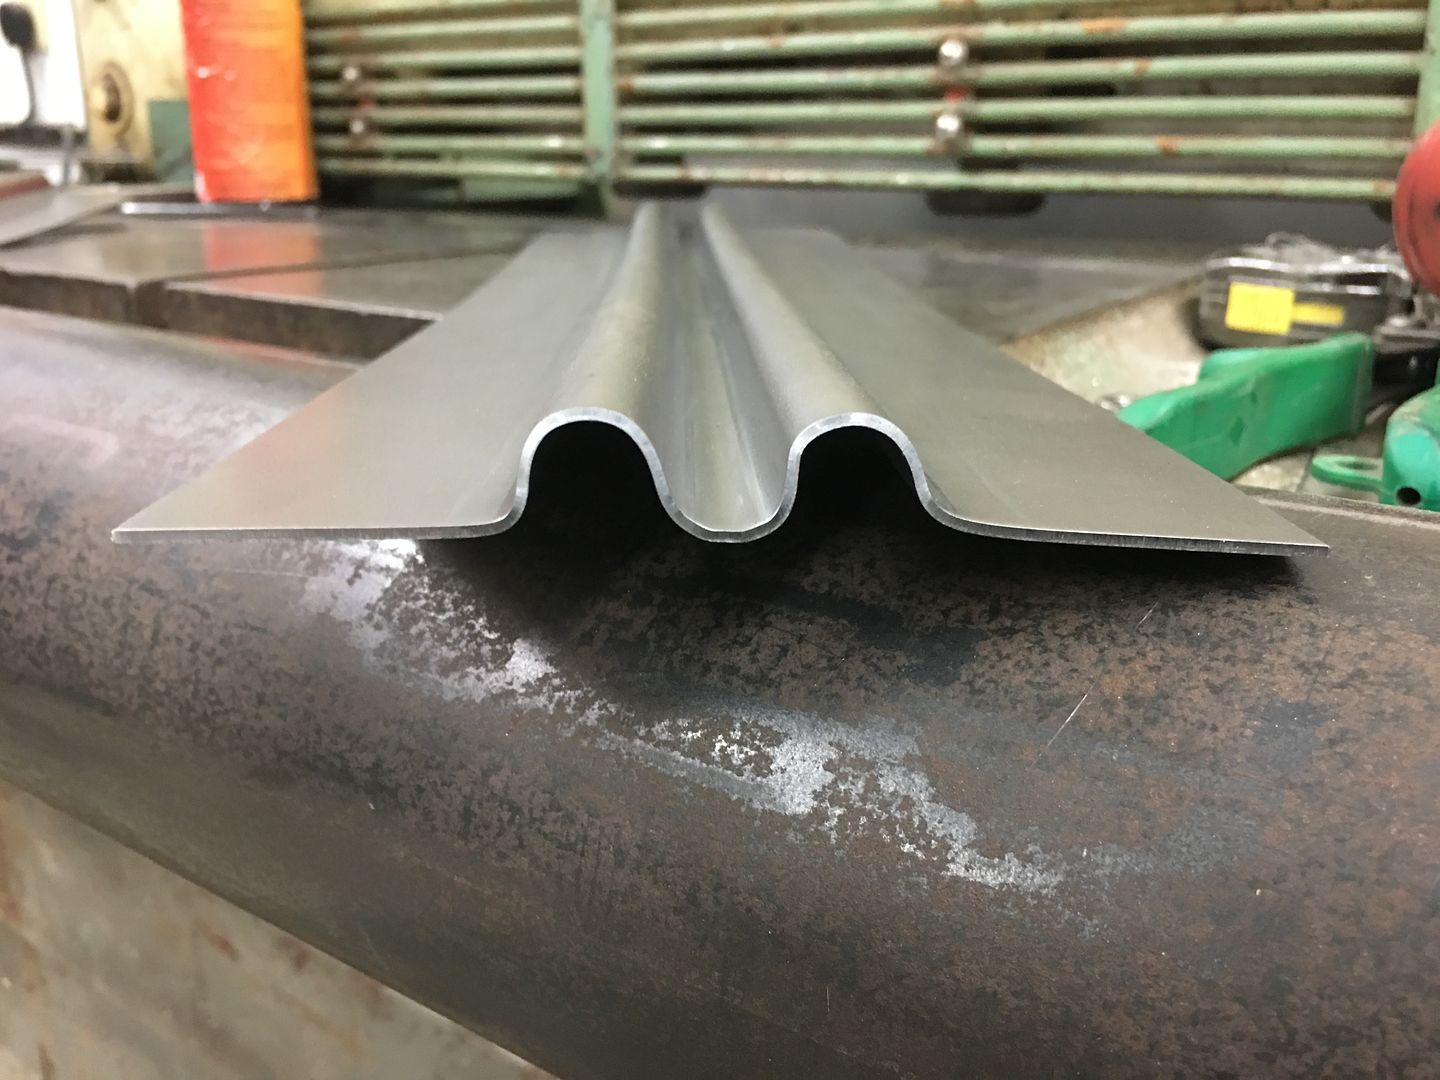
Matching up to the original, this looks like the right replacement.
video version:
.
Now to fine tune our dies for the hood brace. Looking at our original profile template, the first upsweep (red arrow) and second upsweep (yellow arrow) are both nearly vertical as compared to the opposite side.
Our first test run shows the first upsweep spread too wide, not enough vertical...
Looking at the die that was made, a bit too much material was removed such that this vertical feature was lost...
So a new die was made for the top, this time out of aluminum. The phenolic is somewhat easy to cut out but does have challenges in making crisp bend details, so lets see if the aluminum helps out..
Next run, this time we'll do two panels in case they work... First pass to draw the metal into the center rib...
This is about 8 passes, each progressively deeper. The circle fixture to the right in the picture (white base) is used as a back stop to keep our rib centered.
This is about 9/16 of depth, so quite a bit of draw.. Next, the new top die is added and goes through the same 8 progressive passes.. Note in the next picture the vertical upsweeps are both nearly vertical. Success!
Matching up to the original, this looks like the right replacement.
video version:
.
Thread Starter
|
Tuned
Joined: Aug 2007
Posts: 459
Likes: 123
From: Maryland
Thanks for the comments guys!
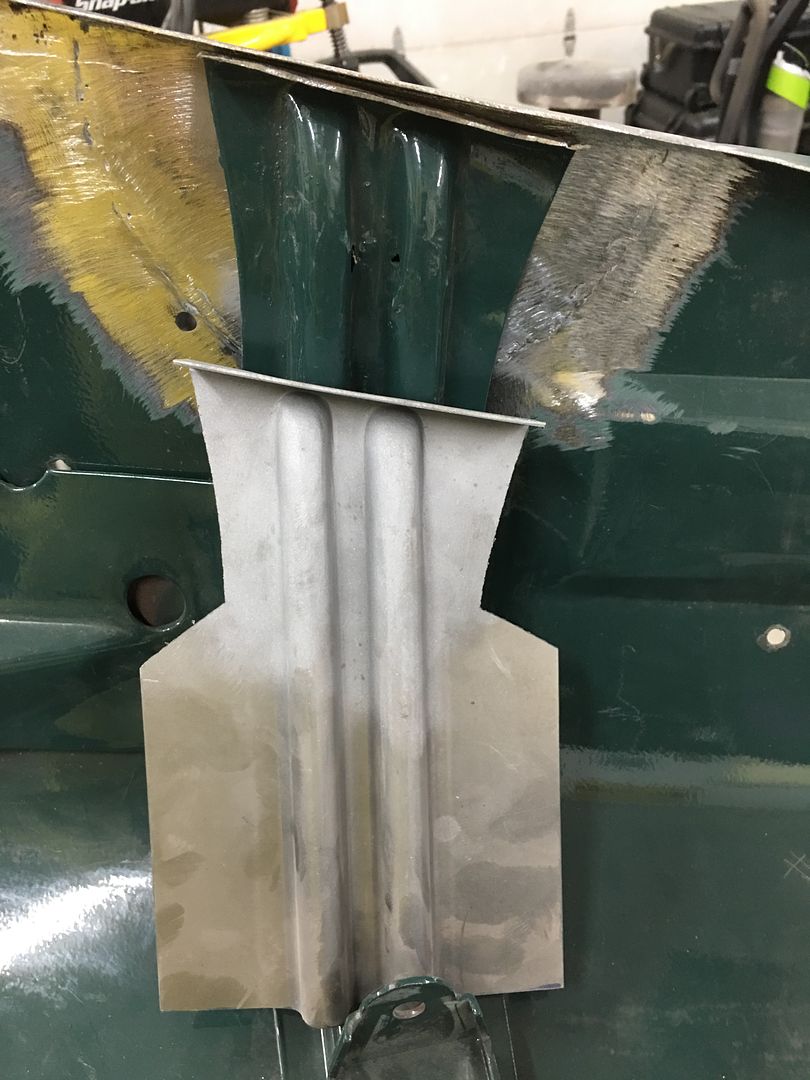
Progress on the hood, the bead details in the brace are offset on the ends to match the hood opening flange. So we use a Vernier protractor to find the angle, and transfer that to our panel. This is where the transition of the taper starts..
Once tapered, the excess is removed from the bottom side and the outer seams TIG welded in place.
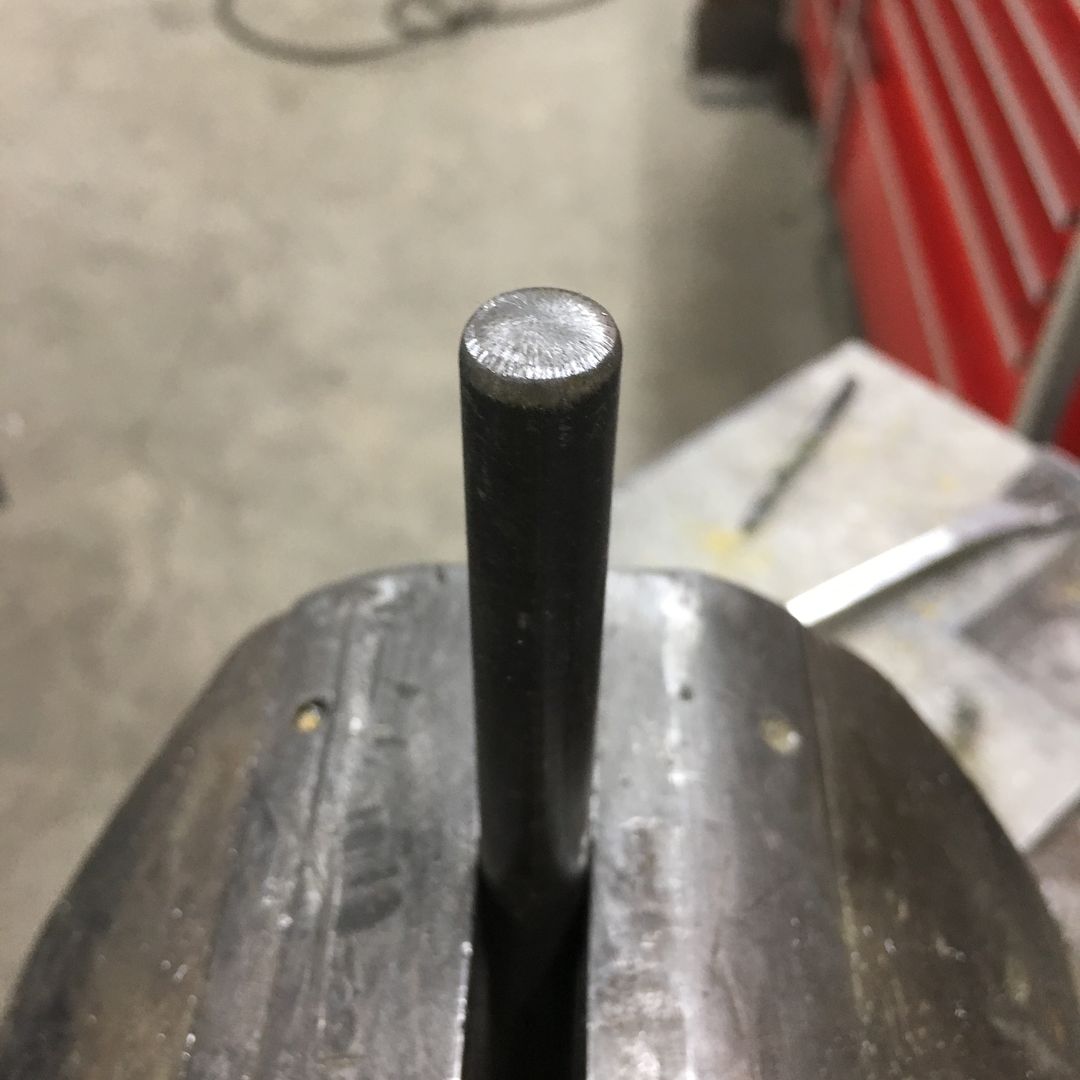
A piece of round stock has a radius added to serve as a hammer form for the beads. They are hammered around and excess removed from the back side..
A piece of 16 gauge cold rolled steel is trimmed to fit and TIG welded in place.
Welds dressed and media blasted..
The bend line is transposed from the original. As this bend is slightly convex, it was started using a tipping wheel on the bead roller to a 45* angle, and then finished on the mag brake.
A reminder of the carnage we are repairing:
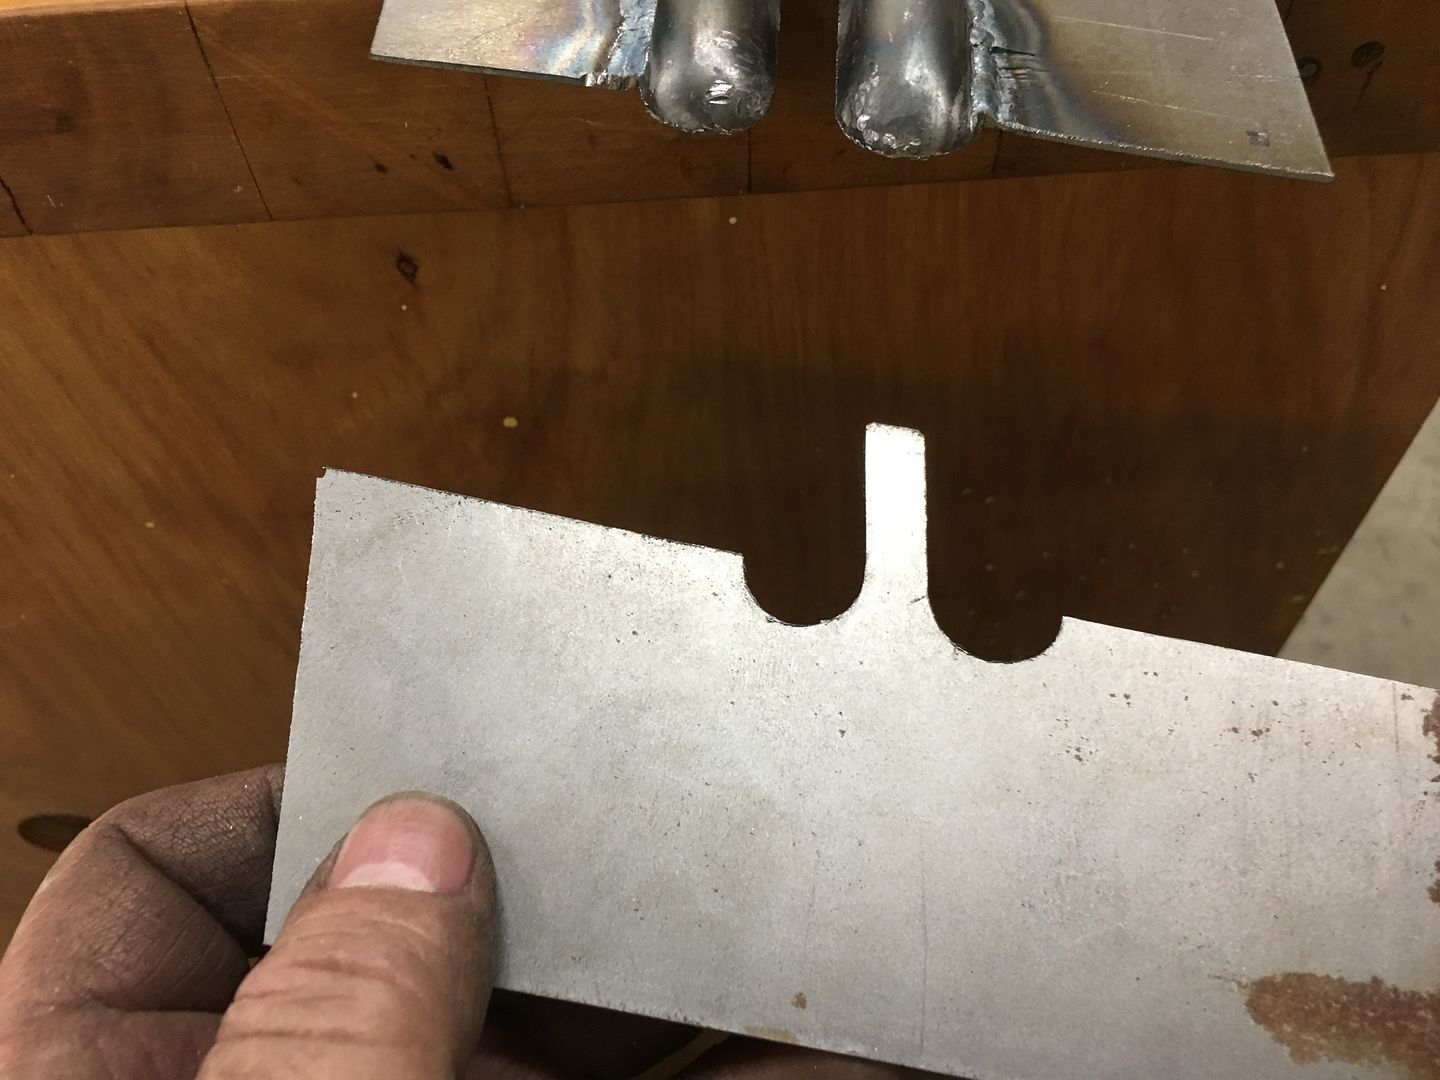
A profile template is made prior to cutting out the old....

Progress on the hood, the bead details in the brace are offset on the ends to match the hood opening flange. So we use a Vernier protractor to find the angle, and transfer that to our panel. This is where the transition of the taper starts..
Once tapered, the excess is removed from the bottom side and the outer seams TIG welded in place.
A piece of round stock has a radius added to serve as a hammer form for the beads. They are hammered around and excess removed from the back side..
A piece of 16 gauge cold rolled steel is trimmed to fit and TIG welded in place.
Welds dressed and media blasted..
The bend line is transposed from the original. As this bend is slightly convex, it was started using a tipping wheel on the bead roller to a 45* angle, and then finished on the mag brake.
A reminder of the carnage we are repairing:
A profile template is made prior to cutting out the old....
Cargo Master


Joined: Aug 2015
Posts: 2,076
Likes: 101
From: Marana, Arizona
FTE Stories
Ford Trucks for Ford Truck Enthusiasts

3 Best / 3 Worst Parts of Modern Ford Ownership
Brett Foote
10 Amazing Upgrades That Solve Common Ford Truck Owner Headaches
Pouria Savadkouei
Every 2026 Ford Engine Explained
Brett Foote
10 Ugly Ford Trucks That We Still Kinda Love
Joe Kucinski
10 Things Every Truck Owner NEEDS (2026 Edition)
Michael S. Palmer
Rezvani's Latest Post-Apocalyptic Monster Is a Ford F-150 Raptor Underneath
Verdad Gallardo
Top 10 Most Expensive Ford Trucks Ever Sold on Bring a Trailer
Joe Kucinski
2027 Ford Super Duty Buyer's Guide (Every Model, Engine, & Package)
Brett Foote
Top 10 Ford Truck Tragedies
Joe KucinskiLogistics Pro
Joined: Jul 2016
Posts: 3,653
Likes: 818
From: Swan River Valley M.B Can
Fantastic work made possible with the great " toys " you have . It is interesting and helpful for everyone to have an idea of how much goes into these repairs regardless of their own skills .Thanks for sharing . P.S. I'm quite glad that I'm not on the receiving end of bill for that little ( 20 + hour ? ) repair . lol
Thread Starter
|
Tuned
Joined: Aug 2007
Posts: 459
Likes: 123
From: Maryland
Thanks for the comments and following along with our progress!
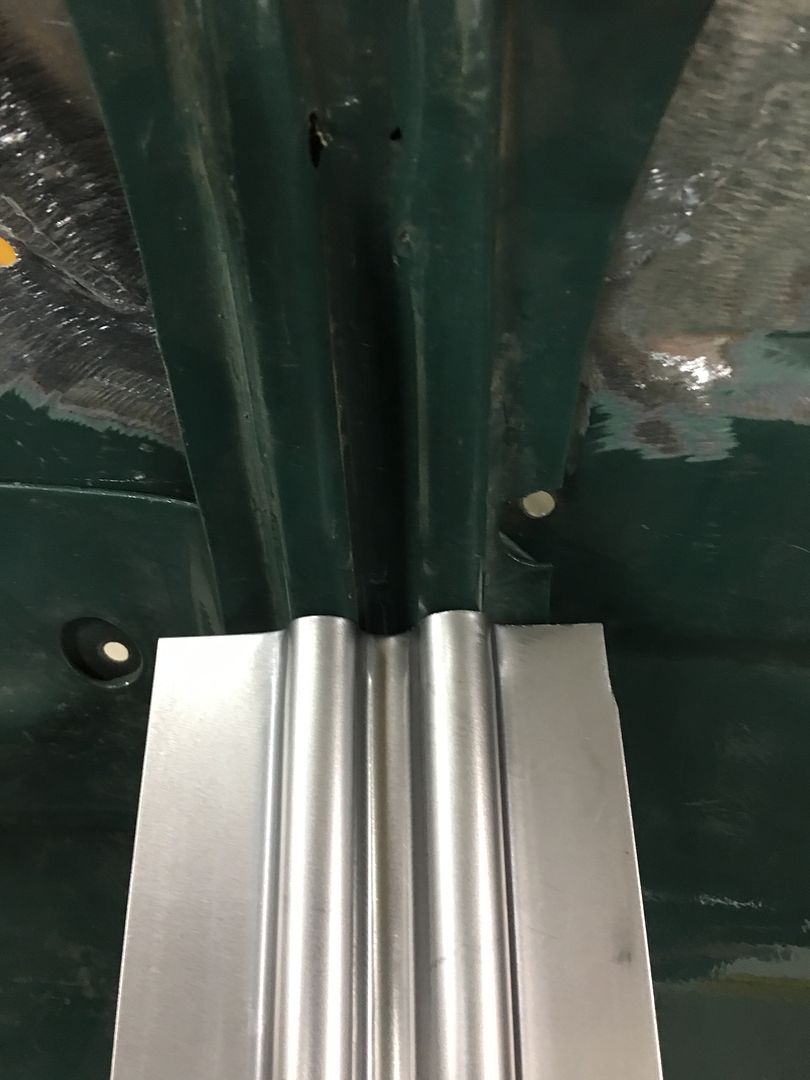
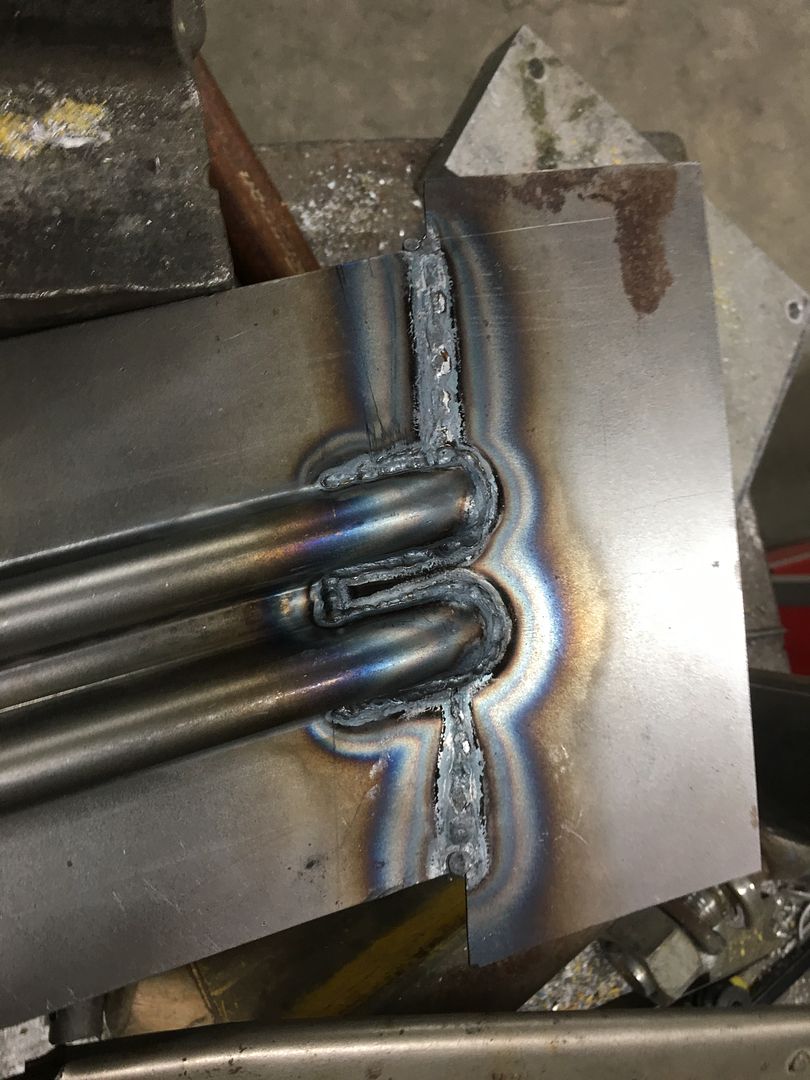
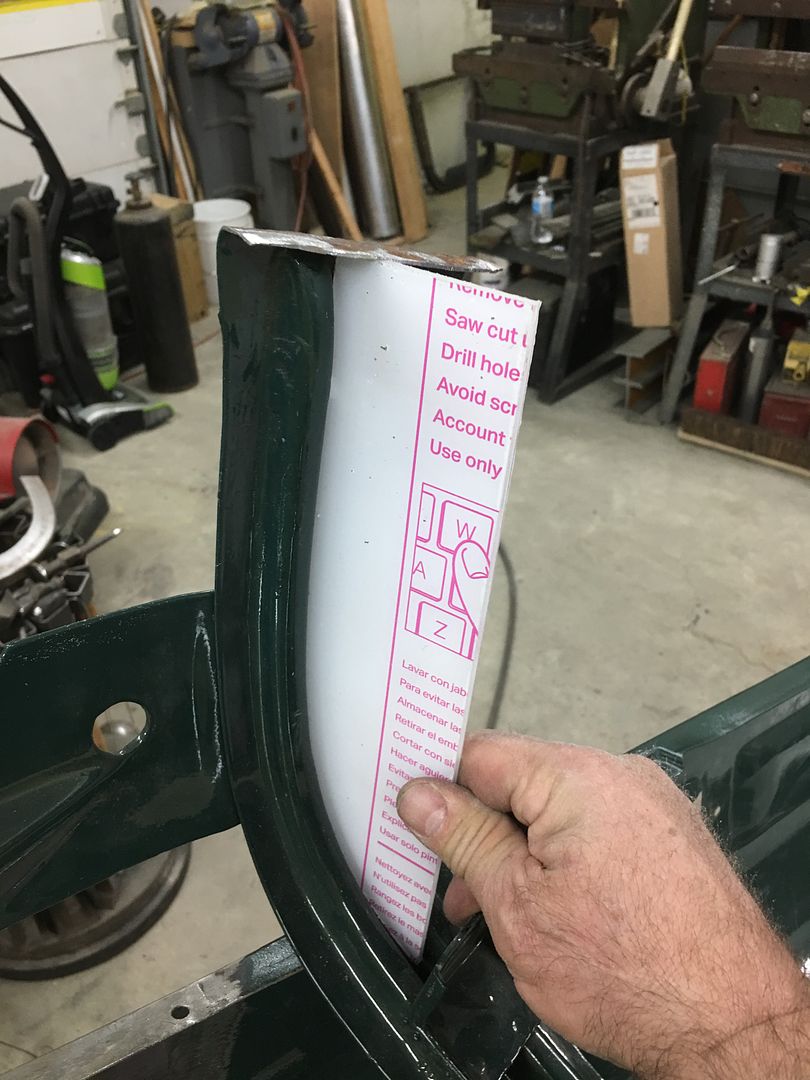
Time to get the hood brace end welded in place. The overall measurement had been taken prior to cutting off the old one, down to the 14 gauge outer plate as a reference. So the new end is trimmed to match this dimension, then held in place with rare earth magnets. The center (inside) rib is aligned and tacked using the TIG....
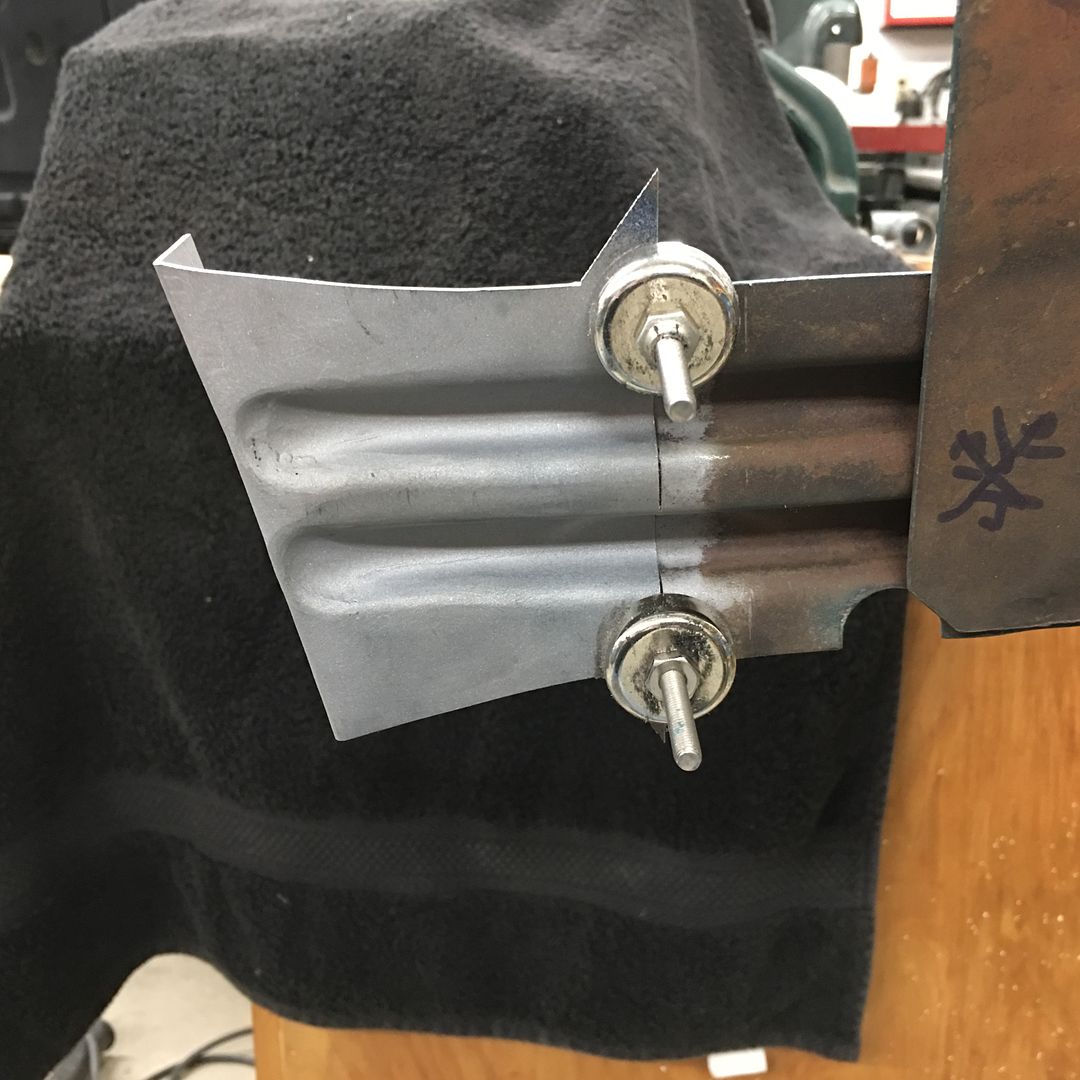

Working outward, the panel surfaces are aligned and tacked as we go. Note the "batwings" left on the outside of the new brace end (yellow arrows). This will act as a heat sink when we make the outer tacks. Had these been trimmed to match prior to welding, the edge will have a tendency to burn back from the heat.

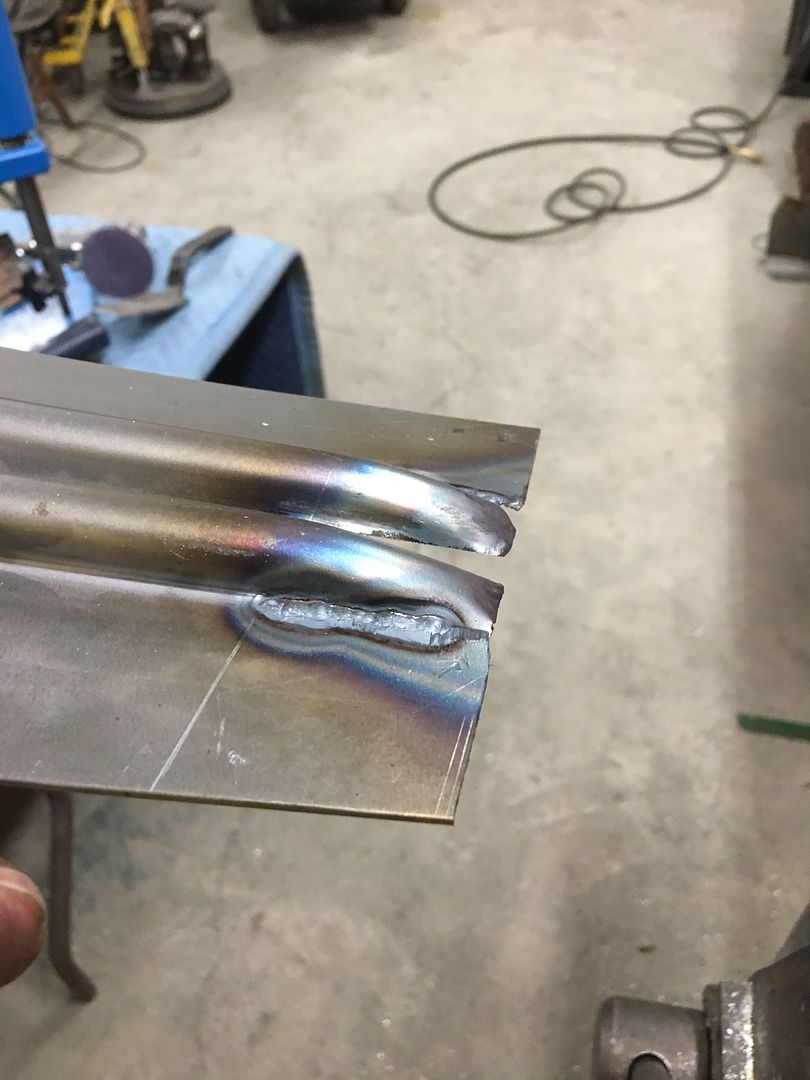
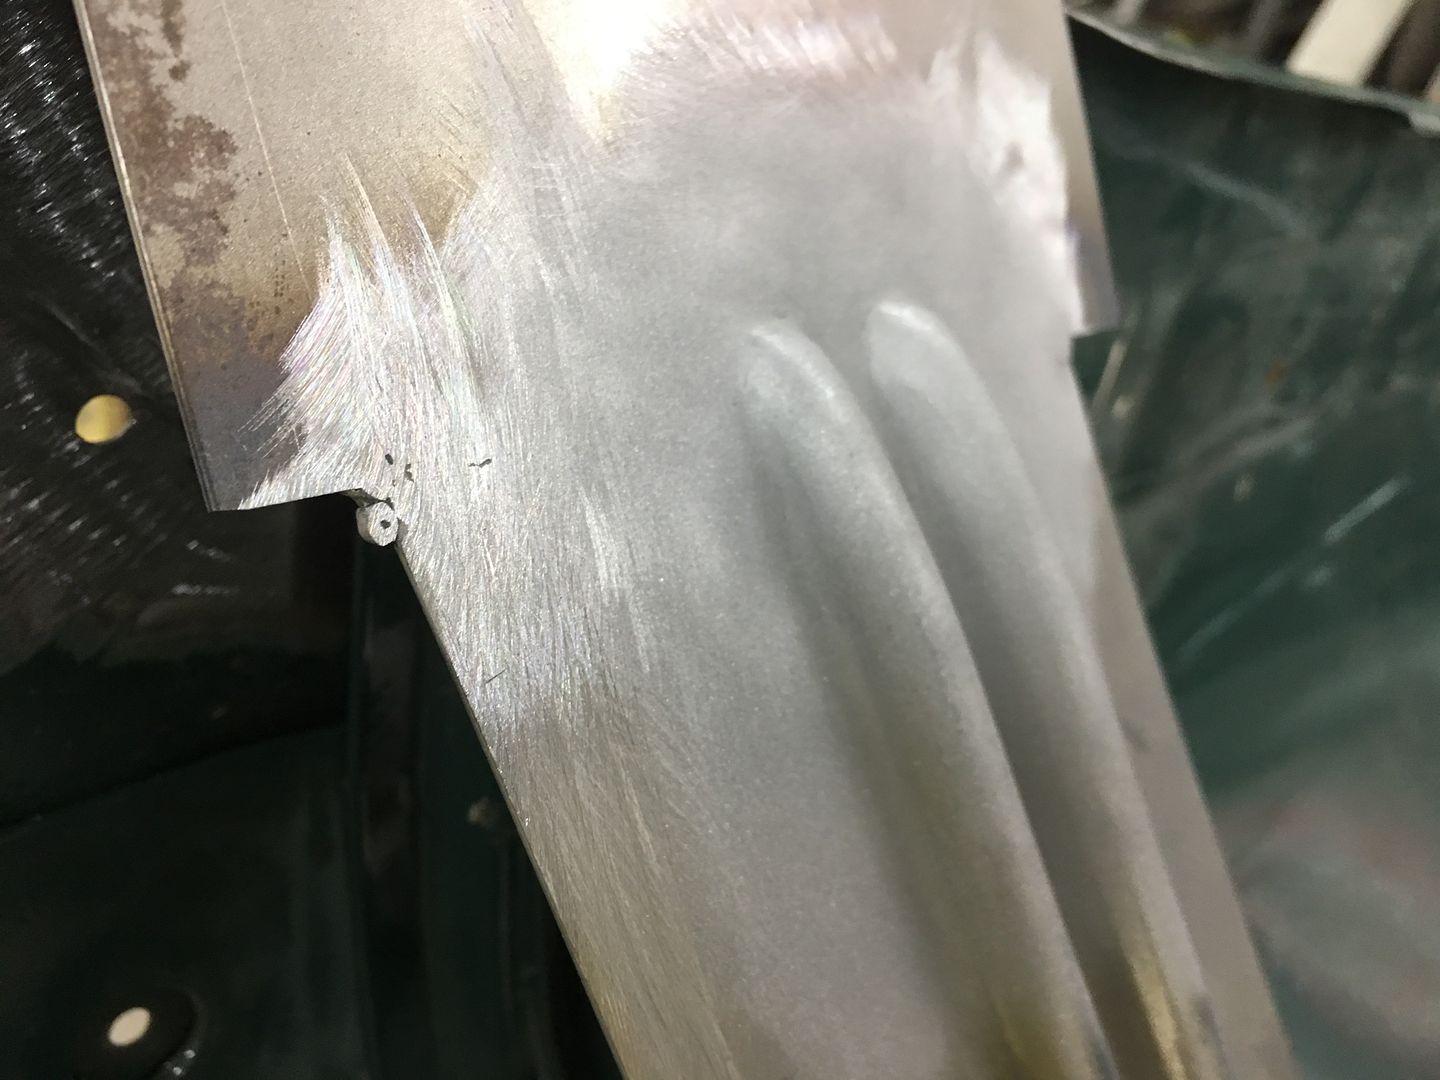
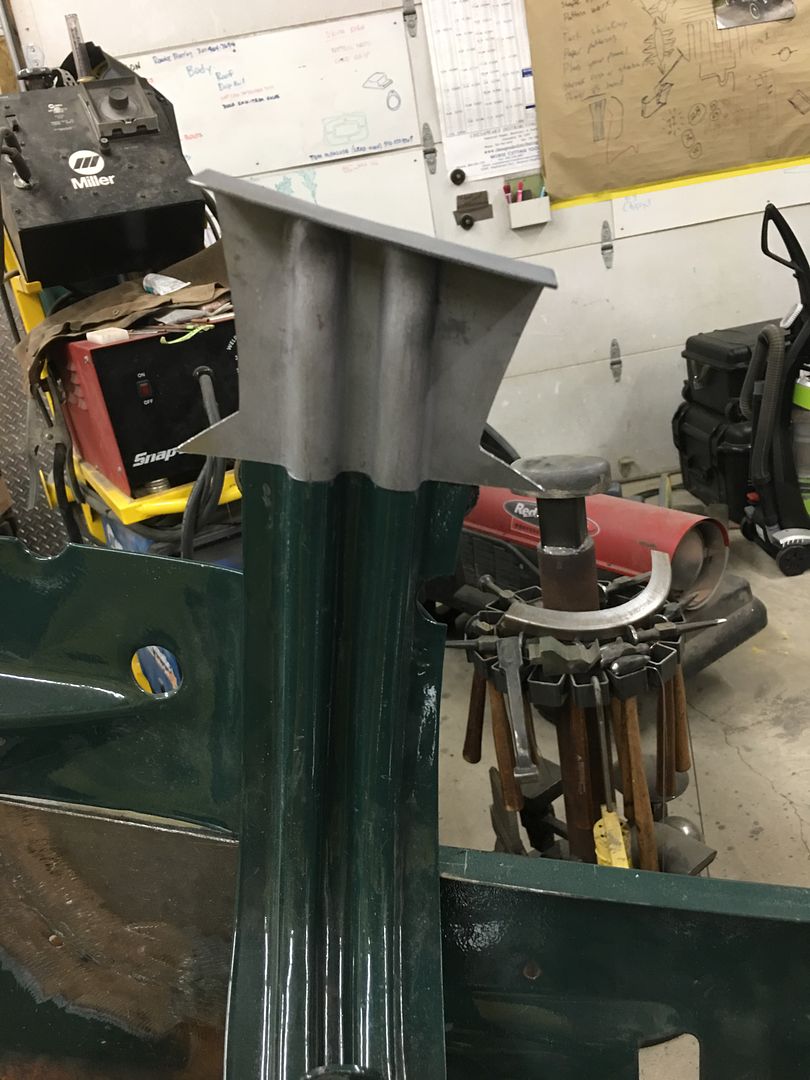
The entire seam is TIG welded and then our batwings are trimmed using offset snips, then welds dressed..
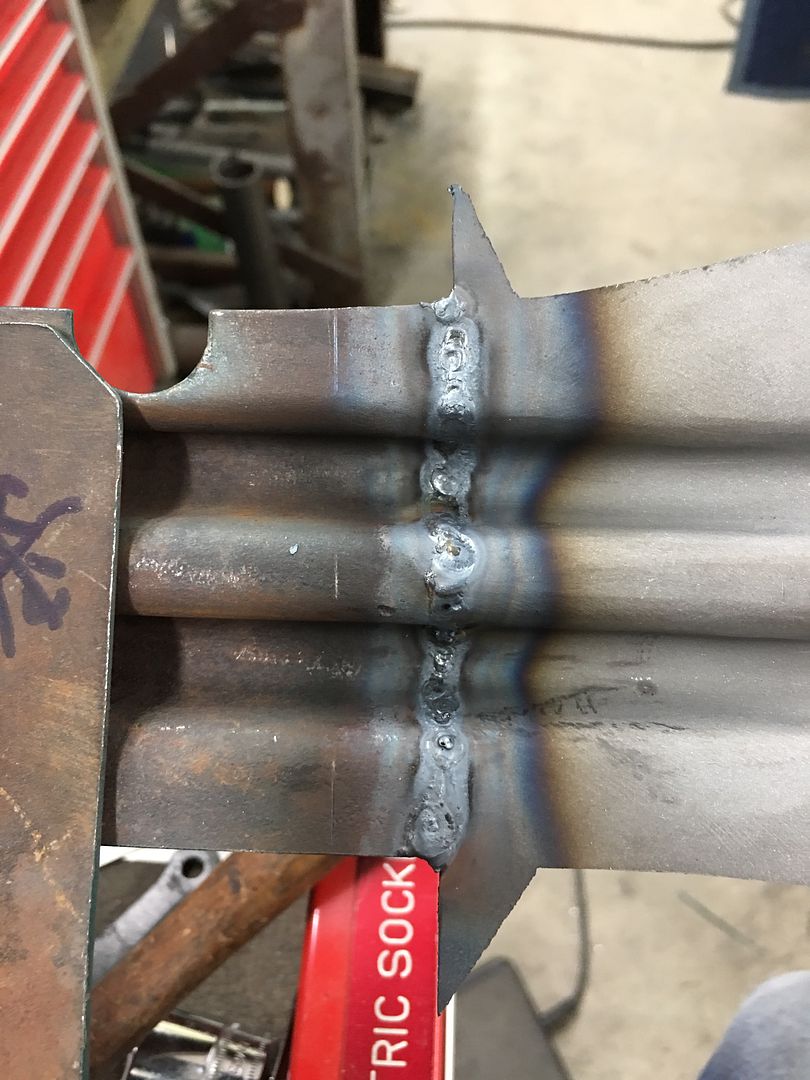
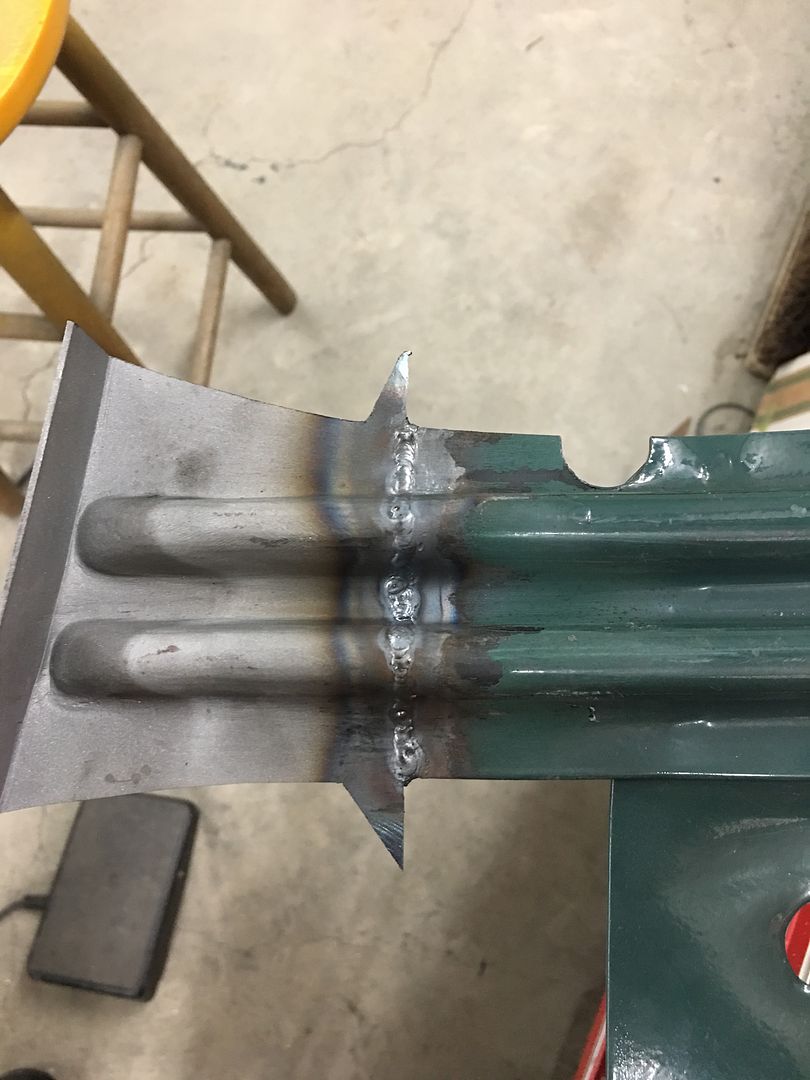
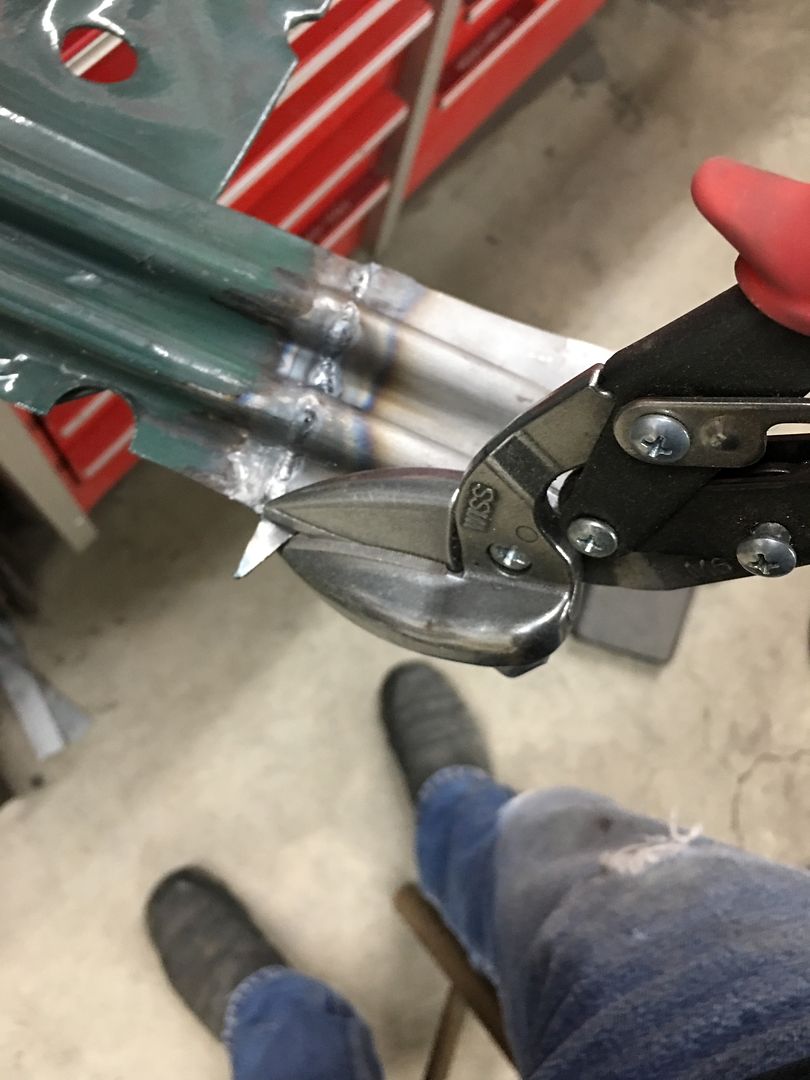
One down......
Time to get the hood brace end welded in place. The overall measurement had been taken prior to cutting off the old one, down to the 14 gauge outer plate as a reference. So the new end is trimmed to match this dimension, then held in place with rare earth magnets. The center (inside) rib is aligned and tacked using the TIG....
Working outward, the panel surfaces are aligned and tacked as we go. Note the "batwings" left on the outside of the new brace end (yellow arrows). This will act as a heat sink when we make the outer tacks. Had these been trimmed to match prior to welding, the edge will have a tendency to burn back from the heat.
The entire seam is TIG welded and then our batwings are trimmed using offset snips, then welds dressed..
One down......
Fleet Mechanic

Joined: Feb 2014
Posts: 1,350
Likes: 24
From: Maryland
I am curious as to what machines you have in your shop and how you come to learn to use them.I have been adding to my collection but i dont think i have enough time to learn to master them all. My sons have lost most interest so I afraid It will end when im gone.
Thread Starter
|
Tuned
Joined: Aug 2007
Posts: 459
Likes: 123
From: Maryland
The ribs were added using a Lennox TE250 Metl-Master (Pullmax type machine). Other eqpt includes Baileigh MH19, Pexto 5212 shear, Diacro 2' hand powered press brakes, 4' magnetic brake, Fasti-Werks Swaging machine (bead roller) , etc, etc. For the most part self taught other than a few videos and some metalshaping workshops.
I see you are in MD, when this plague stuff subsides, stop on by for a shop visit, I am in Leonardtown.

