When you click on links to various merchants on this site and make a purchase, this can result in this site earning a commission. Affiliate programs and affiliations include, but are not limited to, the eBay Partner Network.
On our last camping trip, my girlfriend pull the camper with her Jeep. We had mud covering everything in the front of the camper and decided at that point I was going to buy or make a set of mudflaps for her Jeep. I have a set of Rock Tammers on my Dually but those are $300 or better news. I shopped around for alternative brands and found some as low as $100 at camping world. However, I was not impressed with the reviews so I decided to fabricate my own.
1-8’ 1” square tubing-
1-6’ 1” steel strap-
2-6” 1/2” carriage bolts
6-1/2” nuts
2-1/2” threaded rod connectors
6–1/2” Lockwashers
1-3” receiver stock
2-24”X 30” mud flaps -$15/ both
1-Can Black paint
TOTAL $62
4 hours fabricating time.
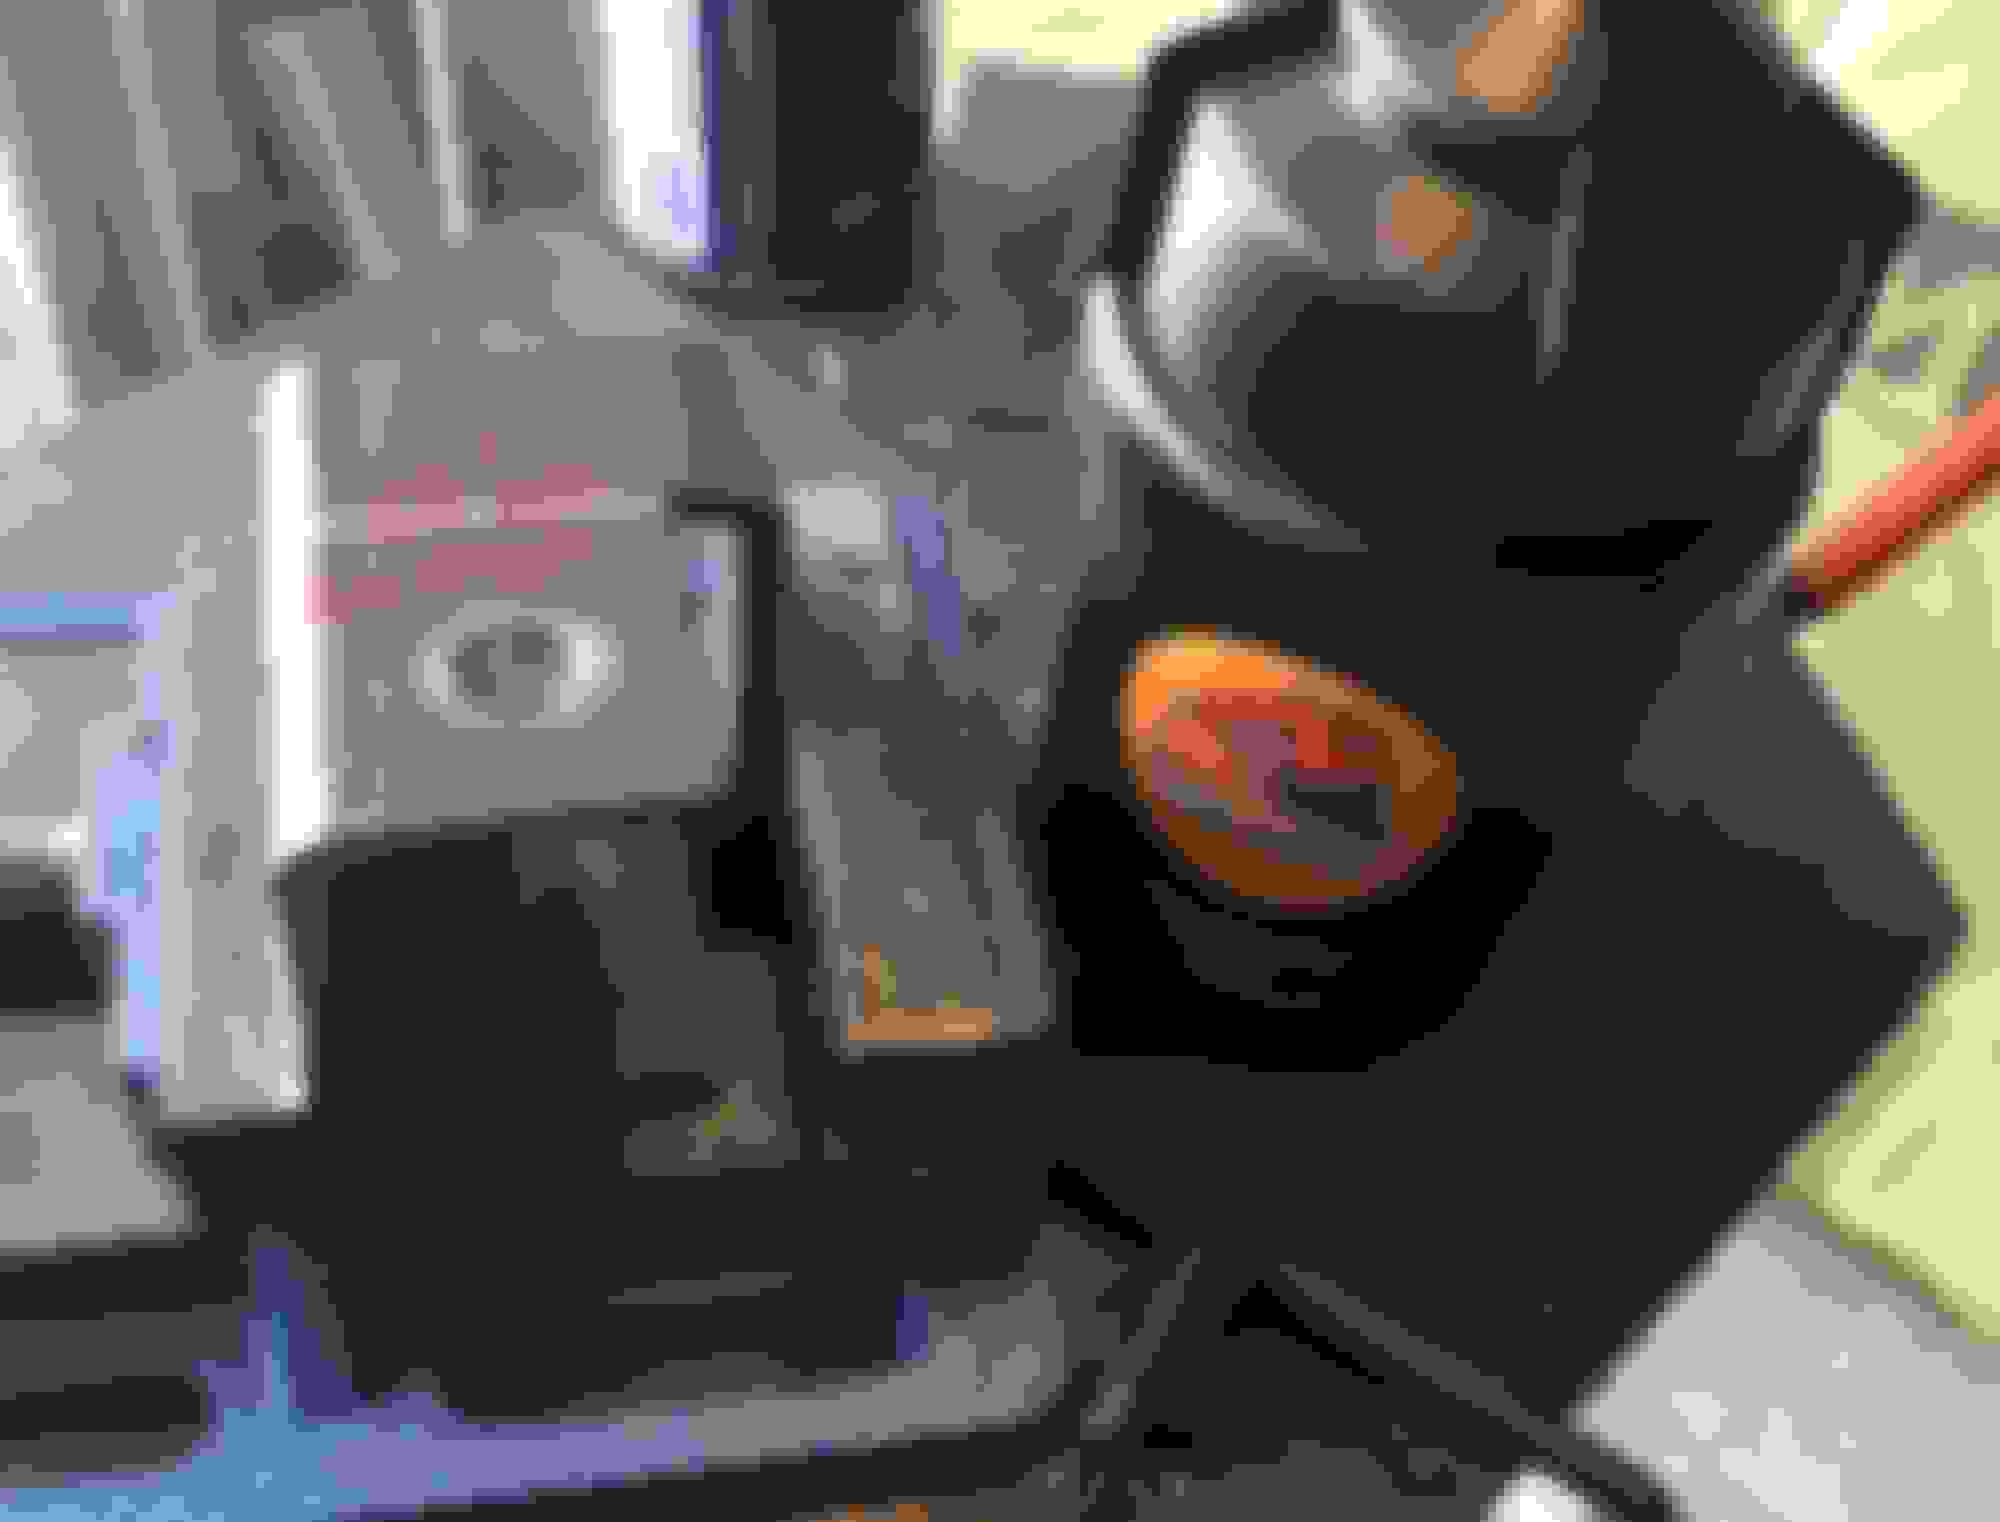
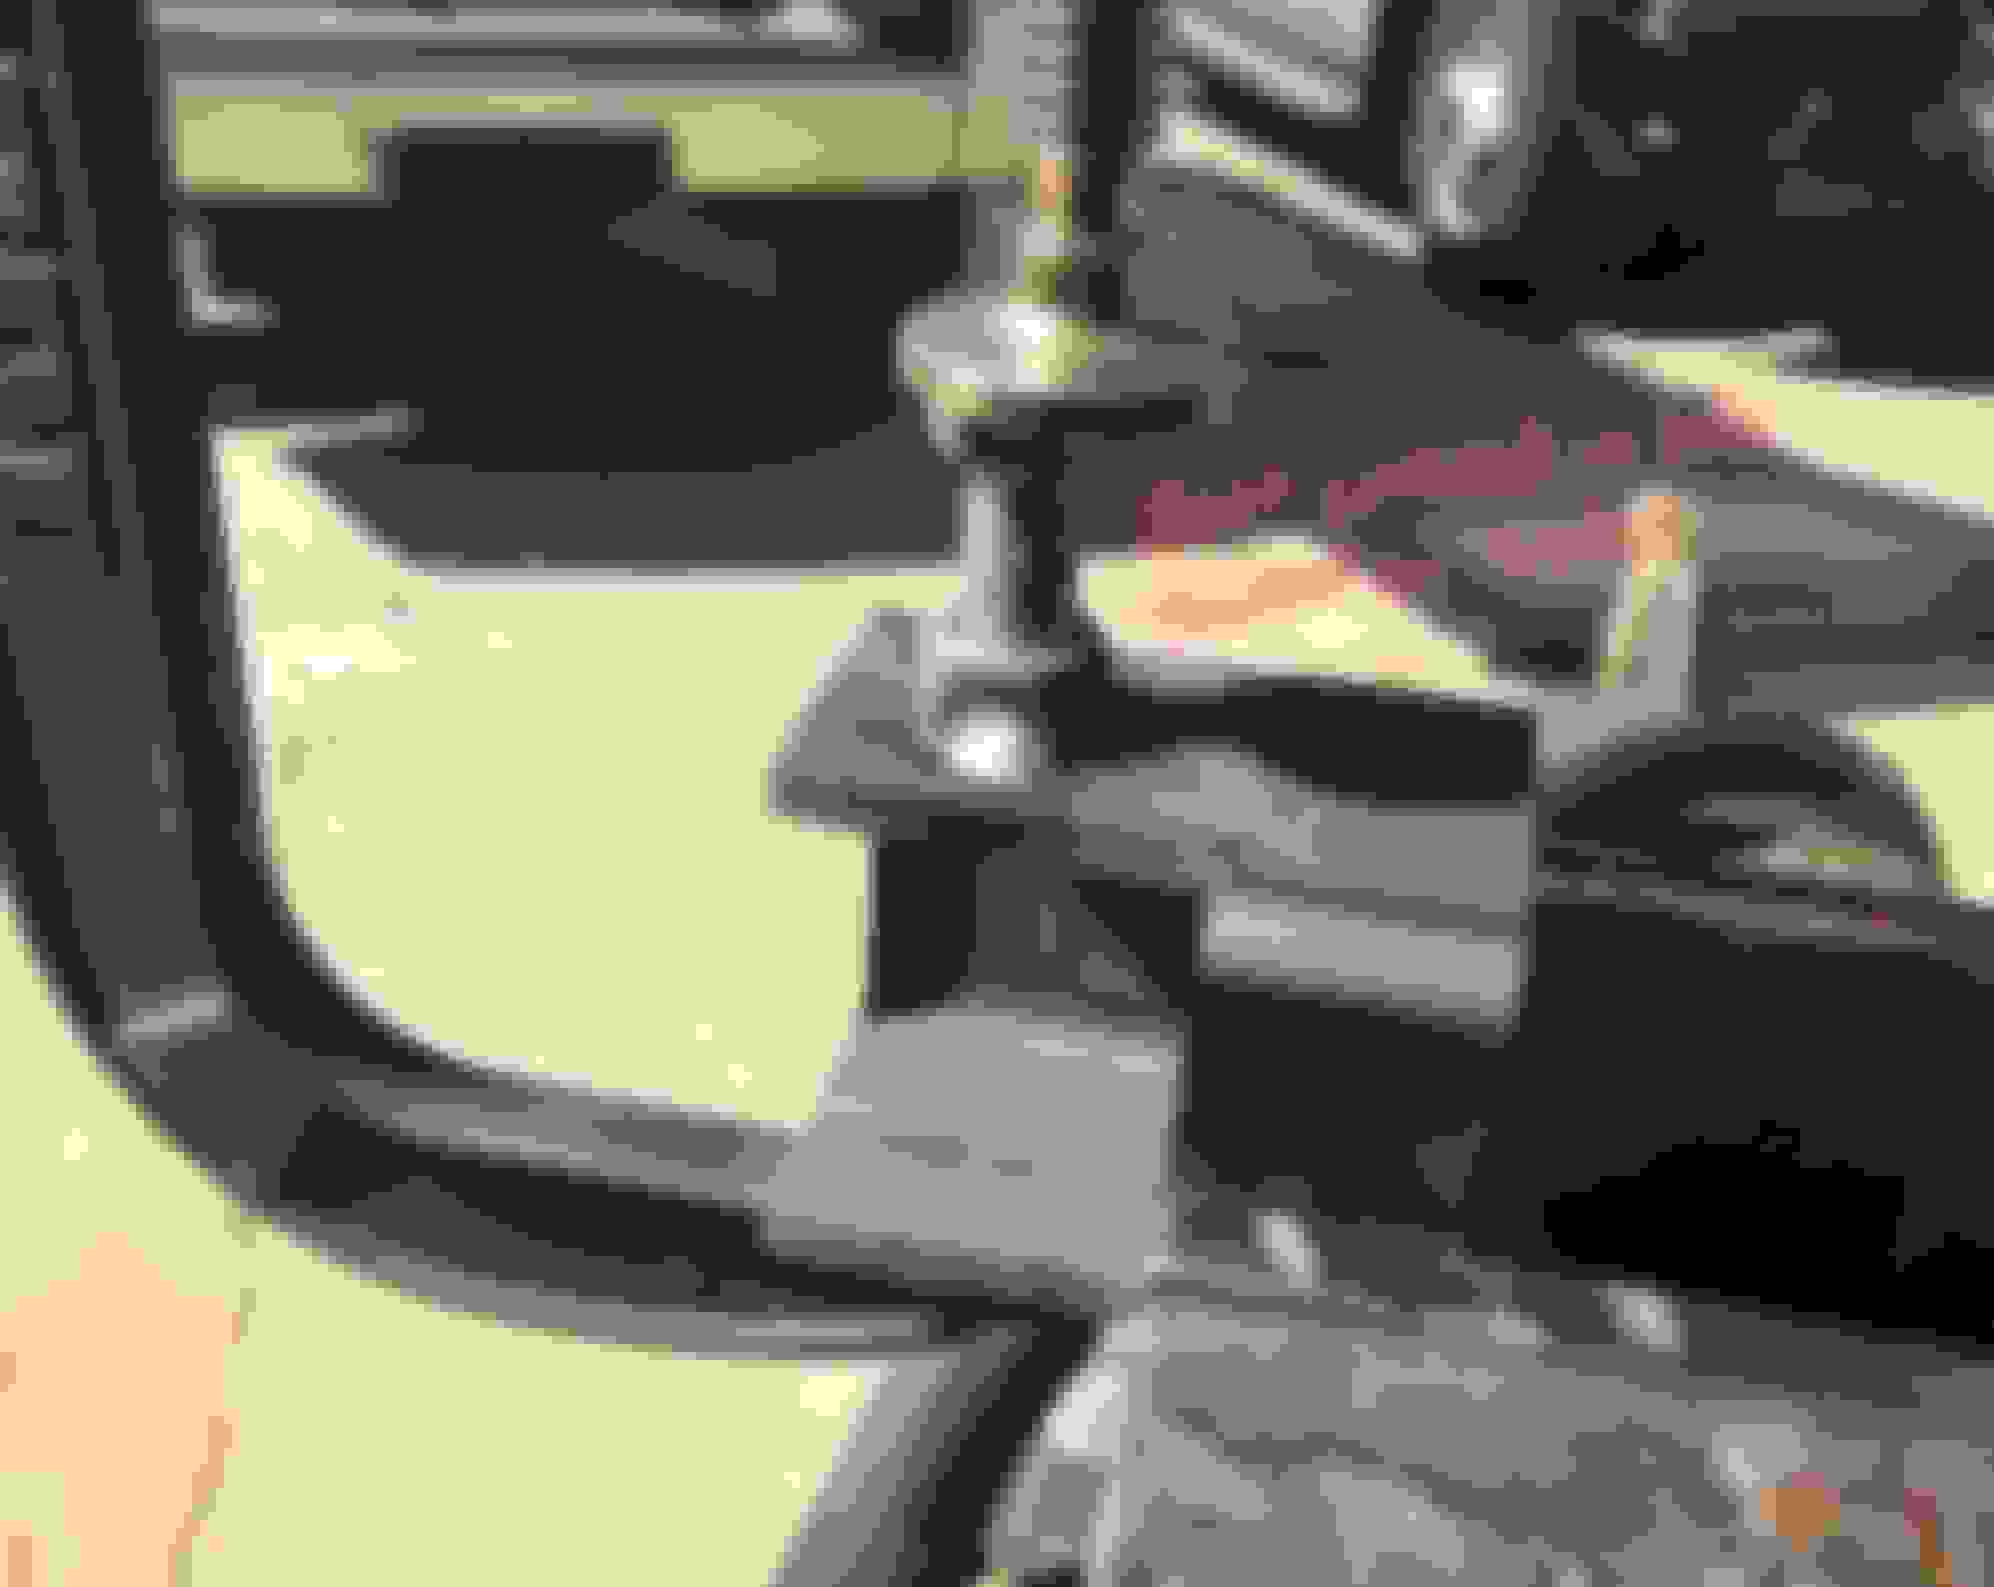
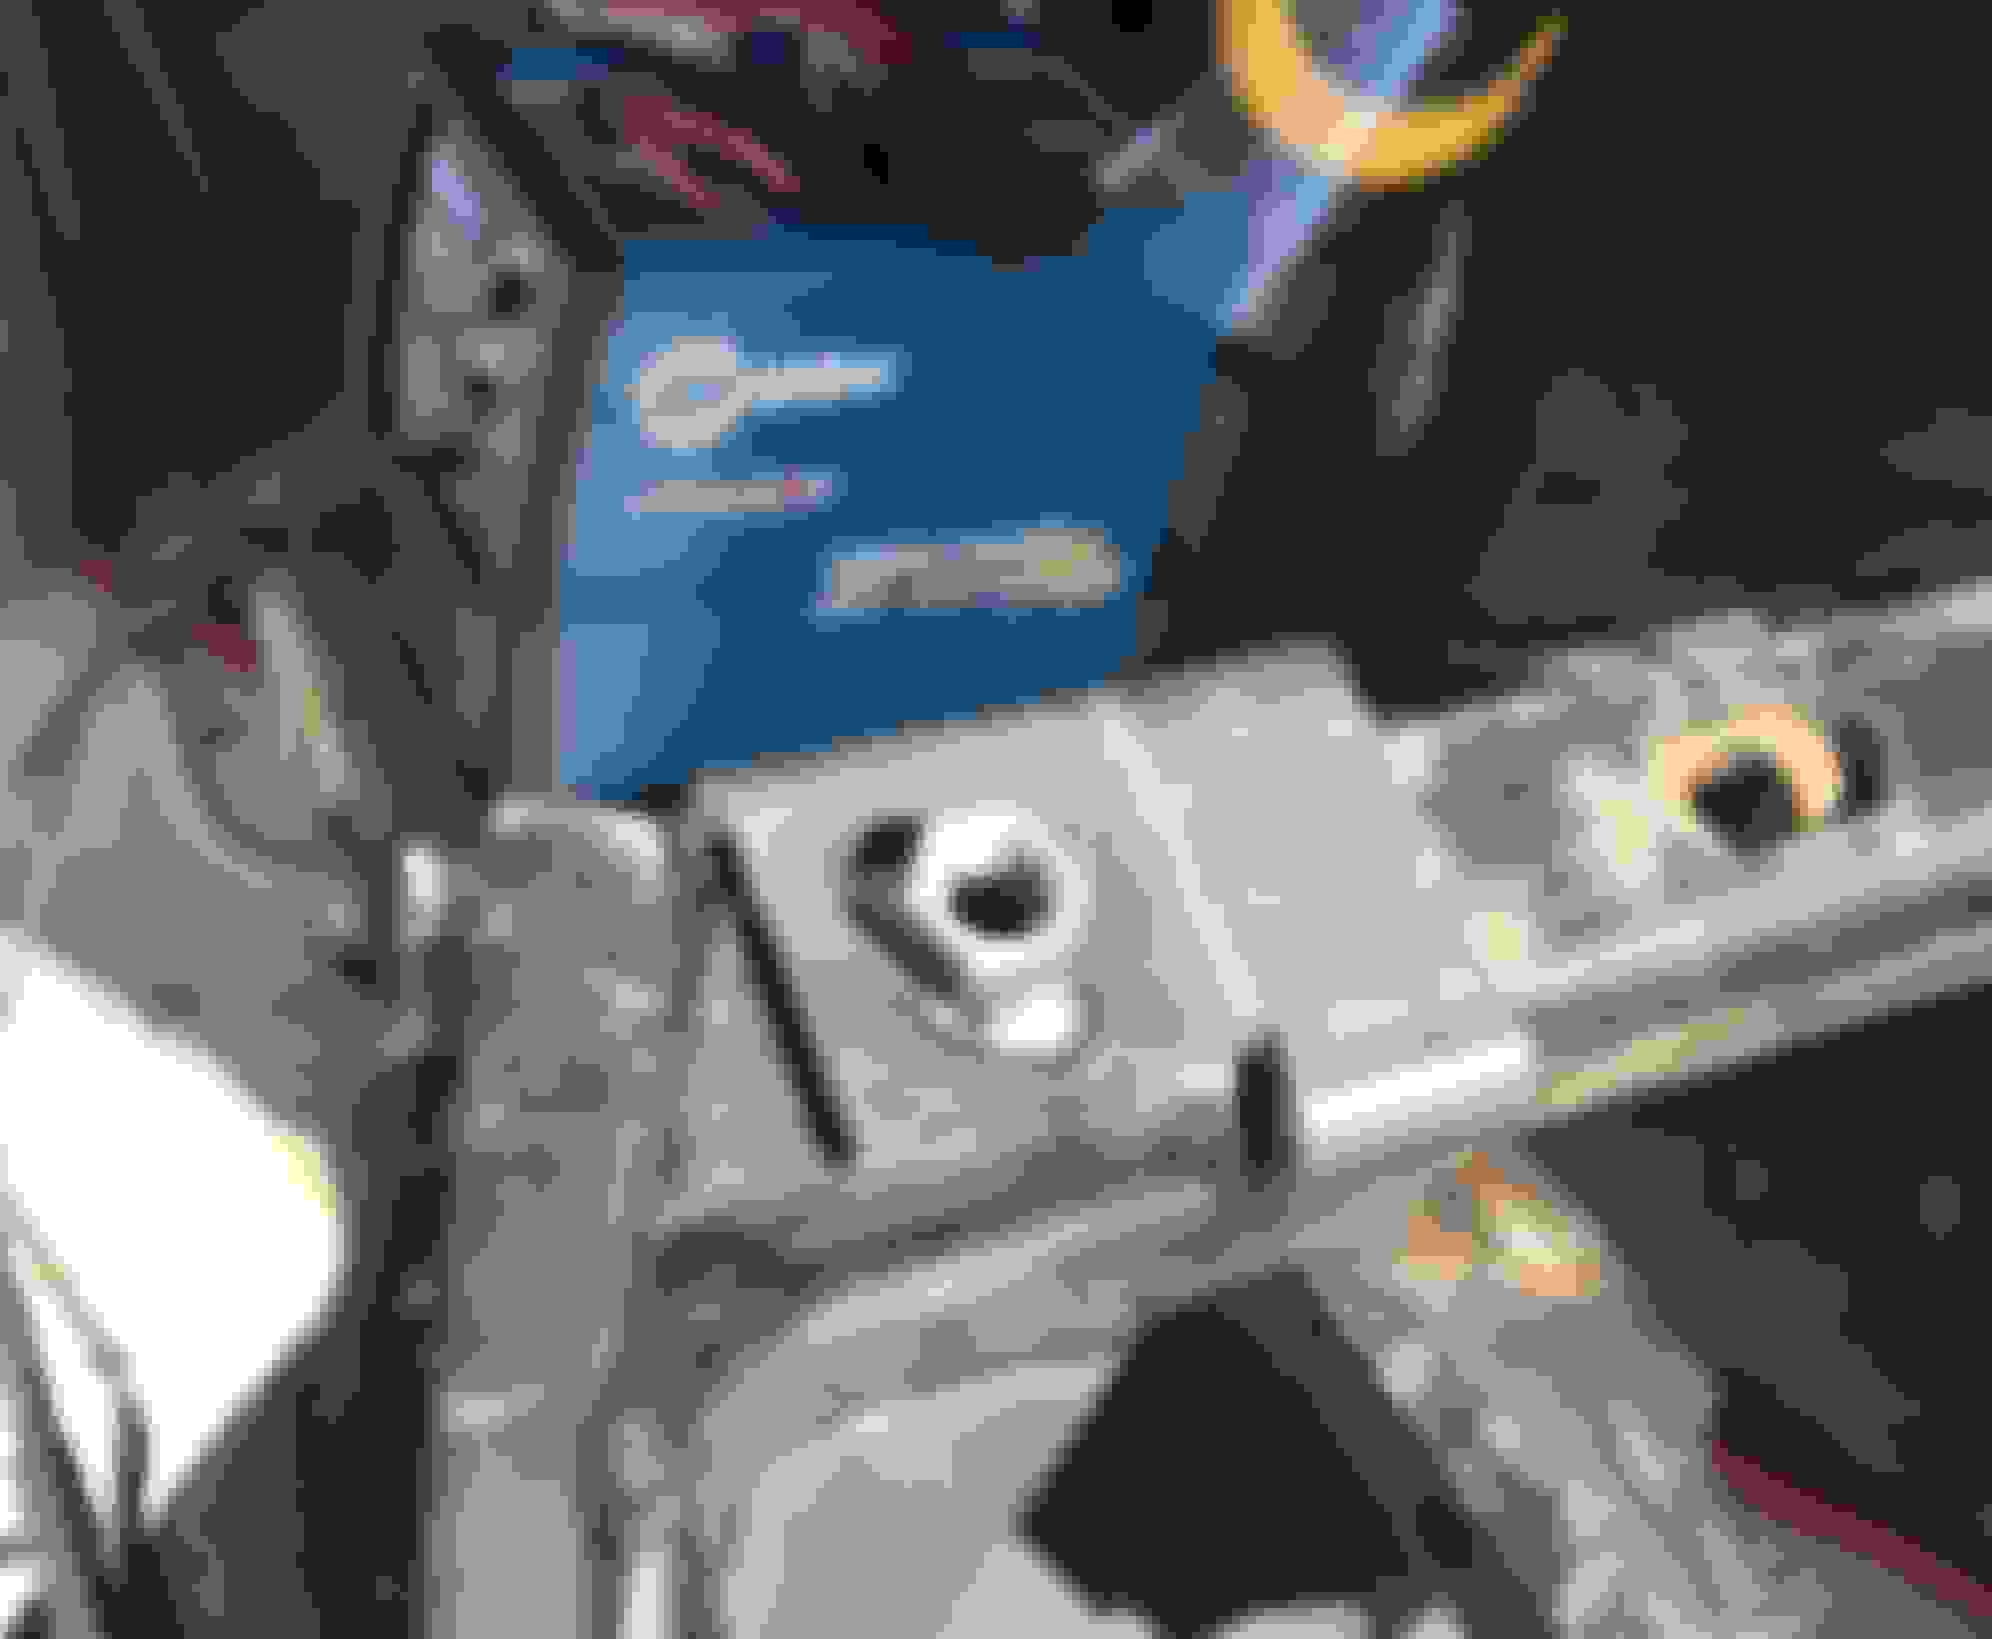
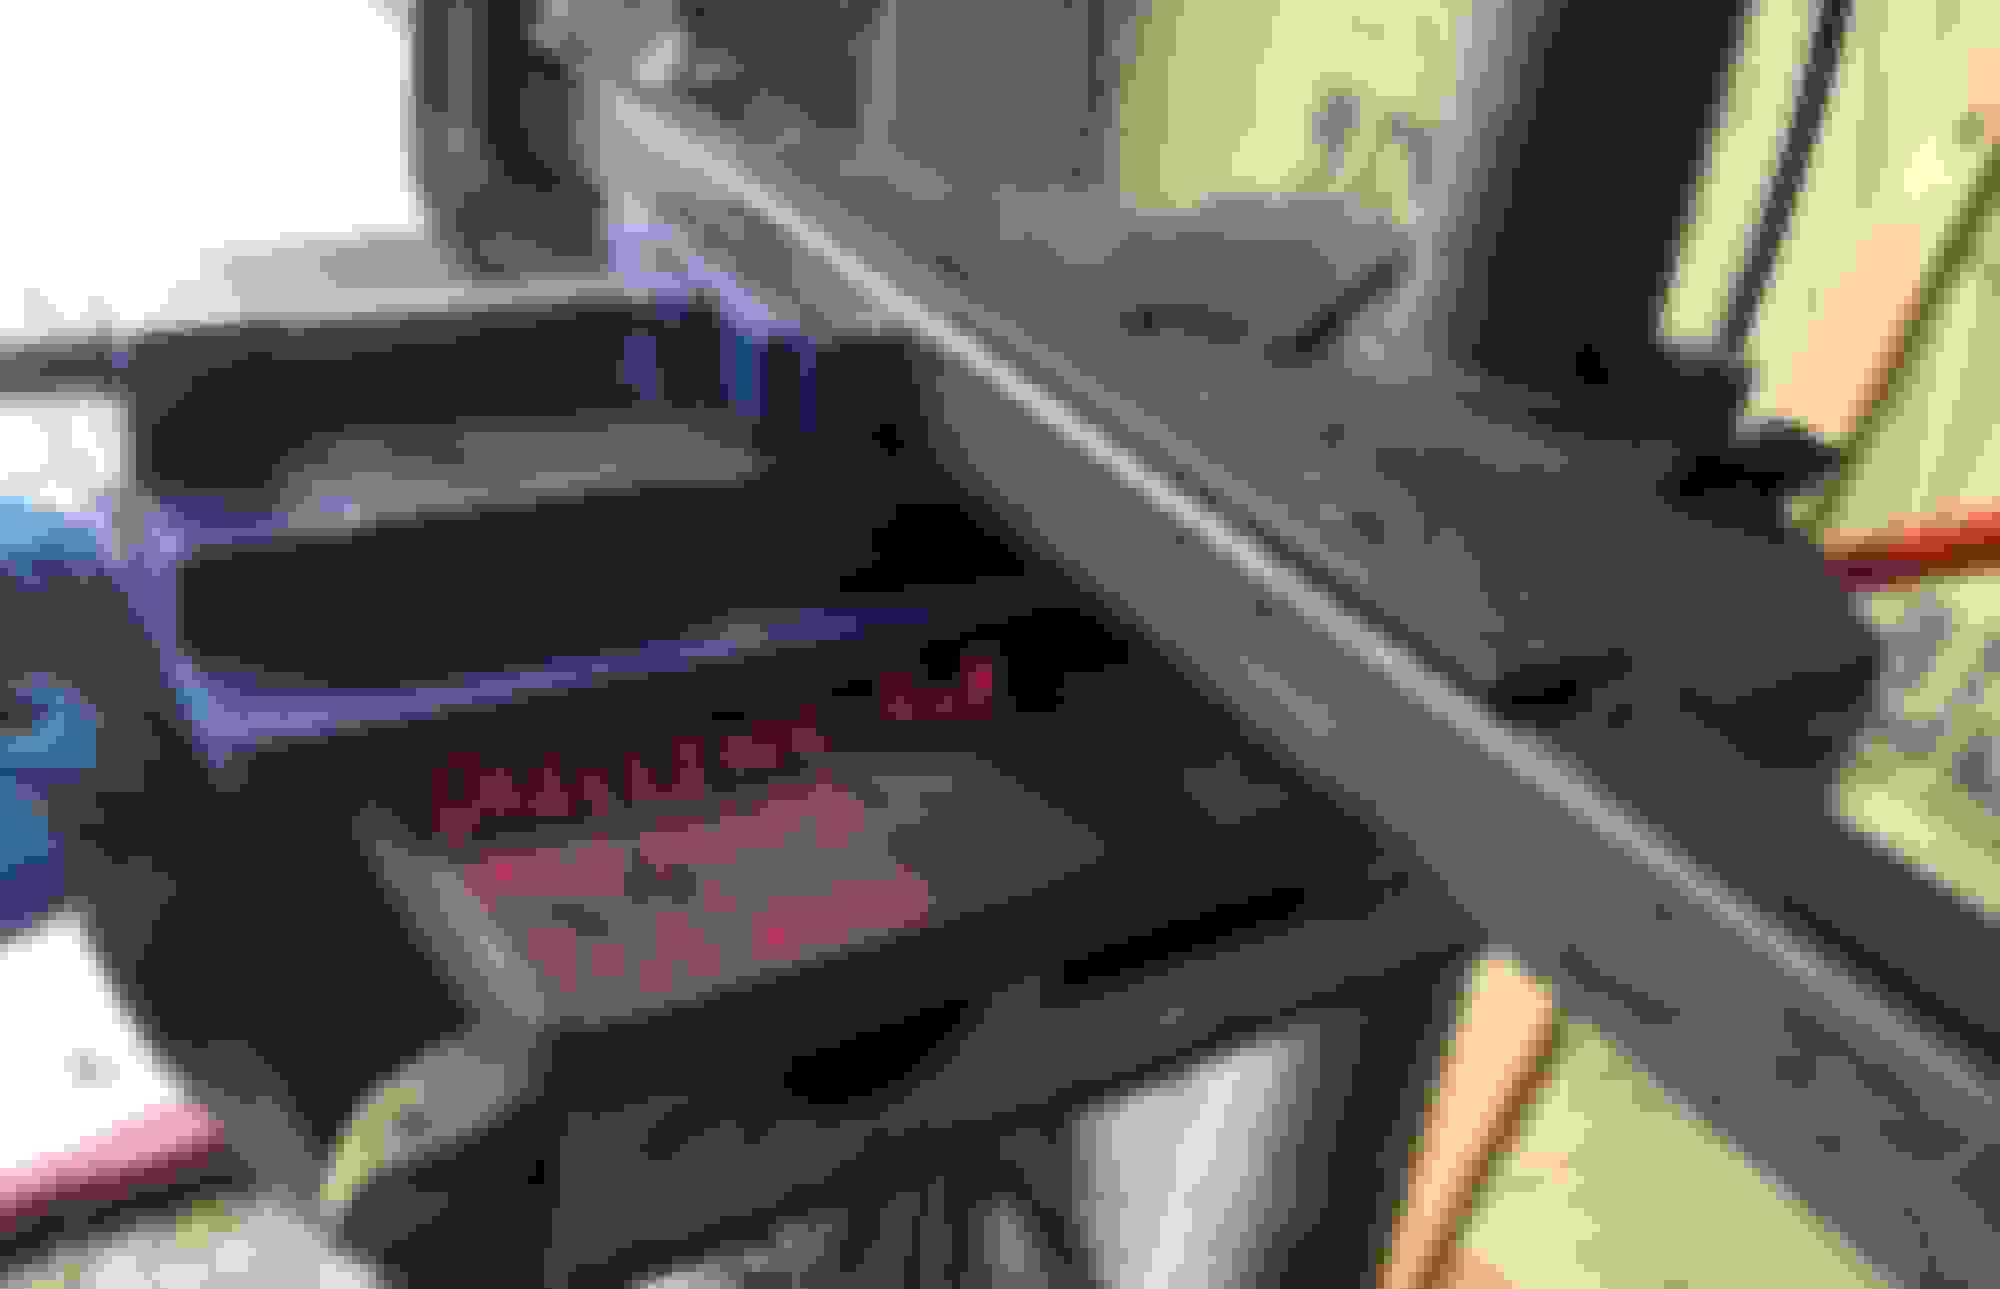
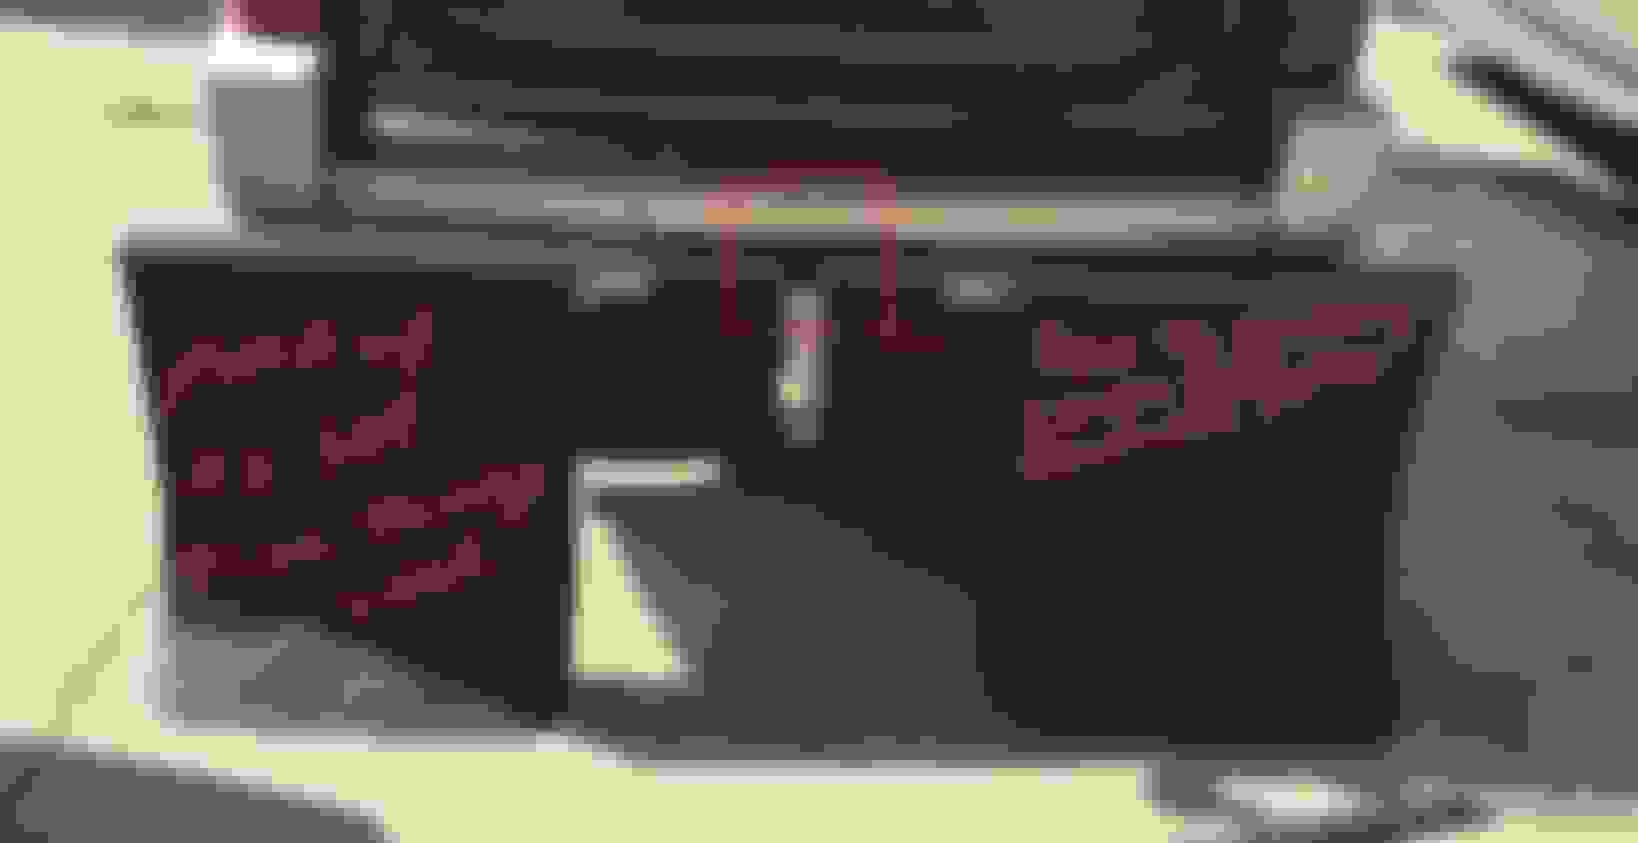
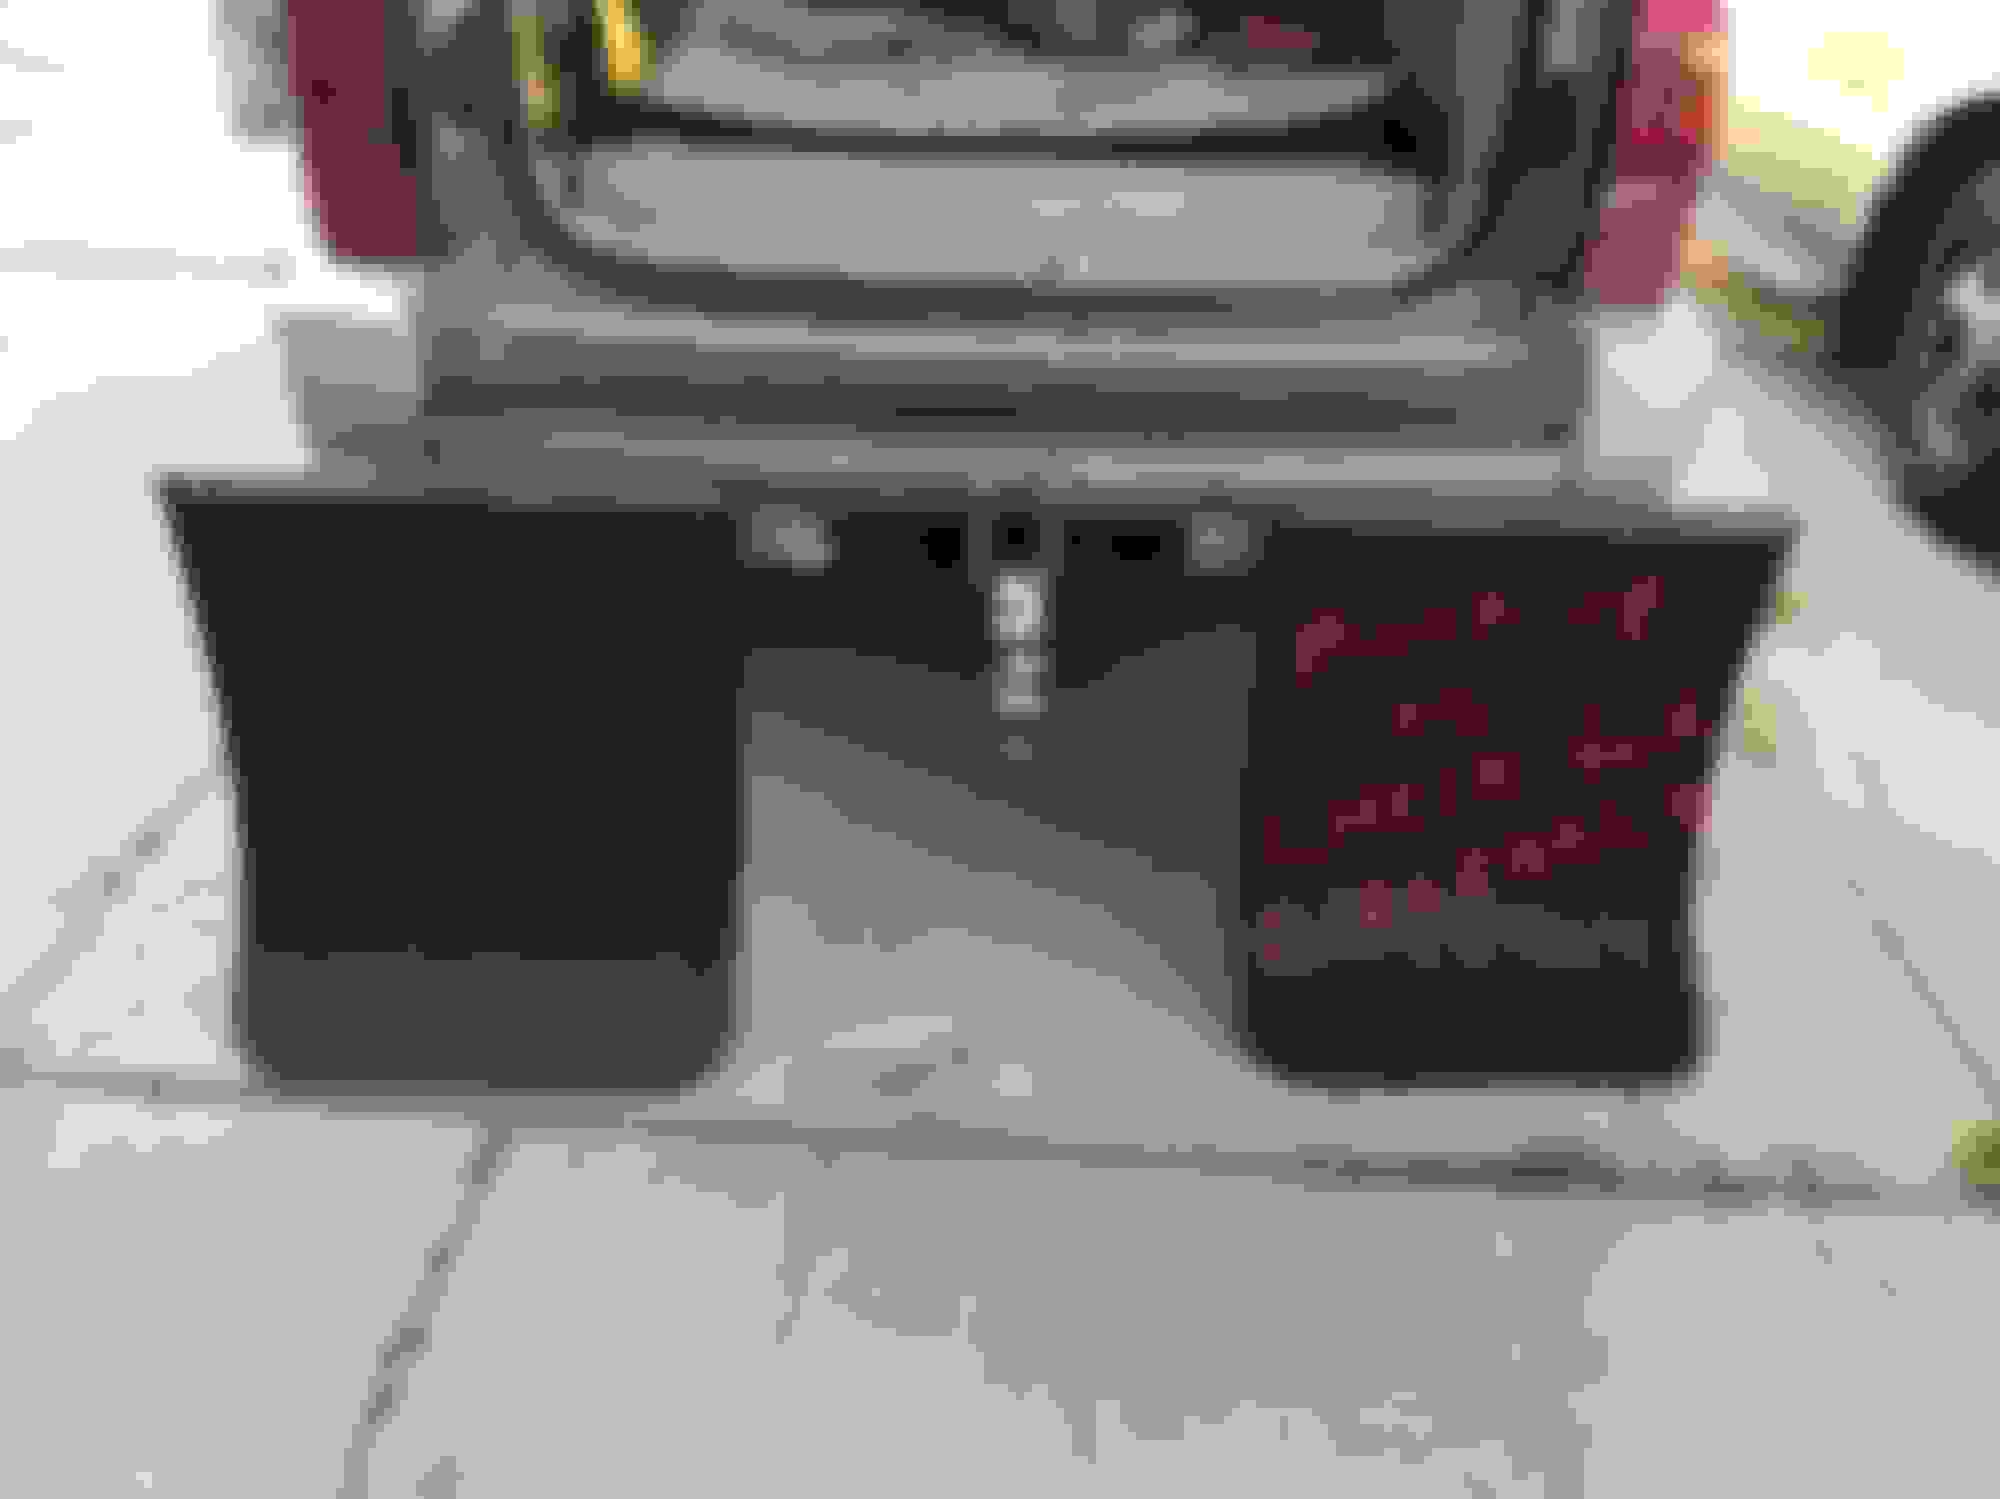
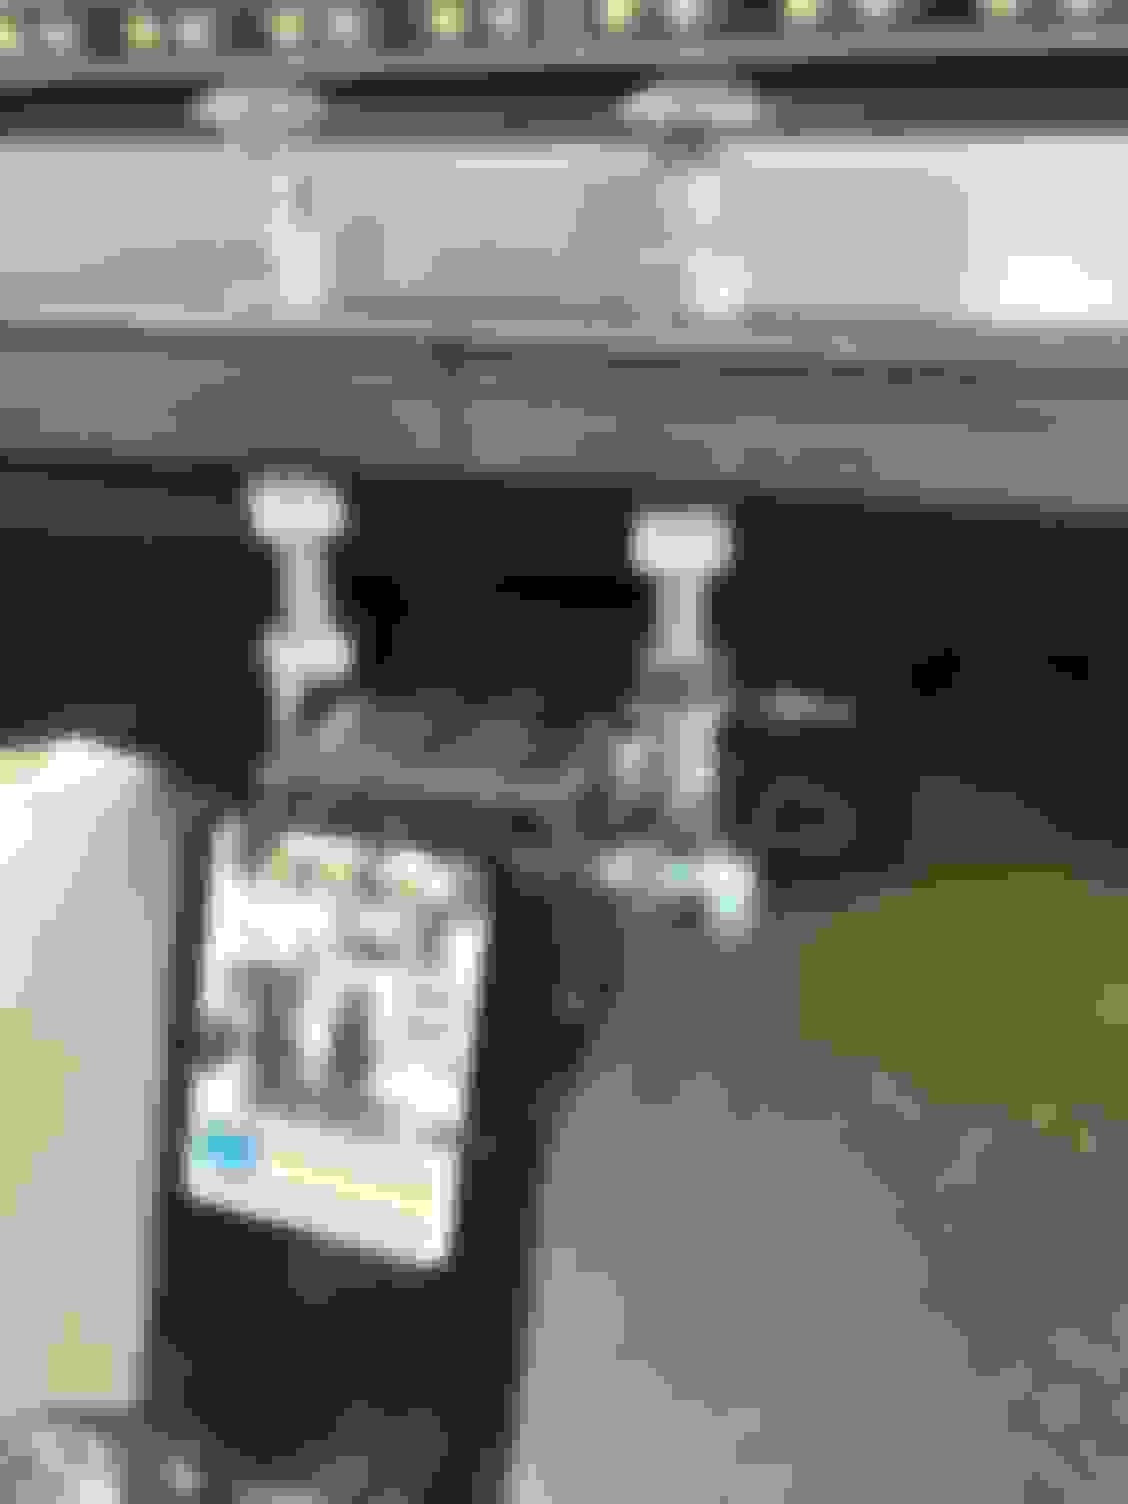
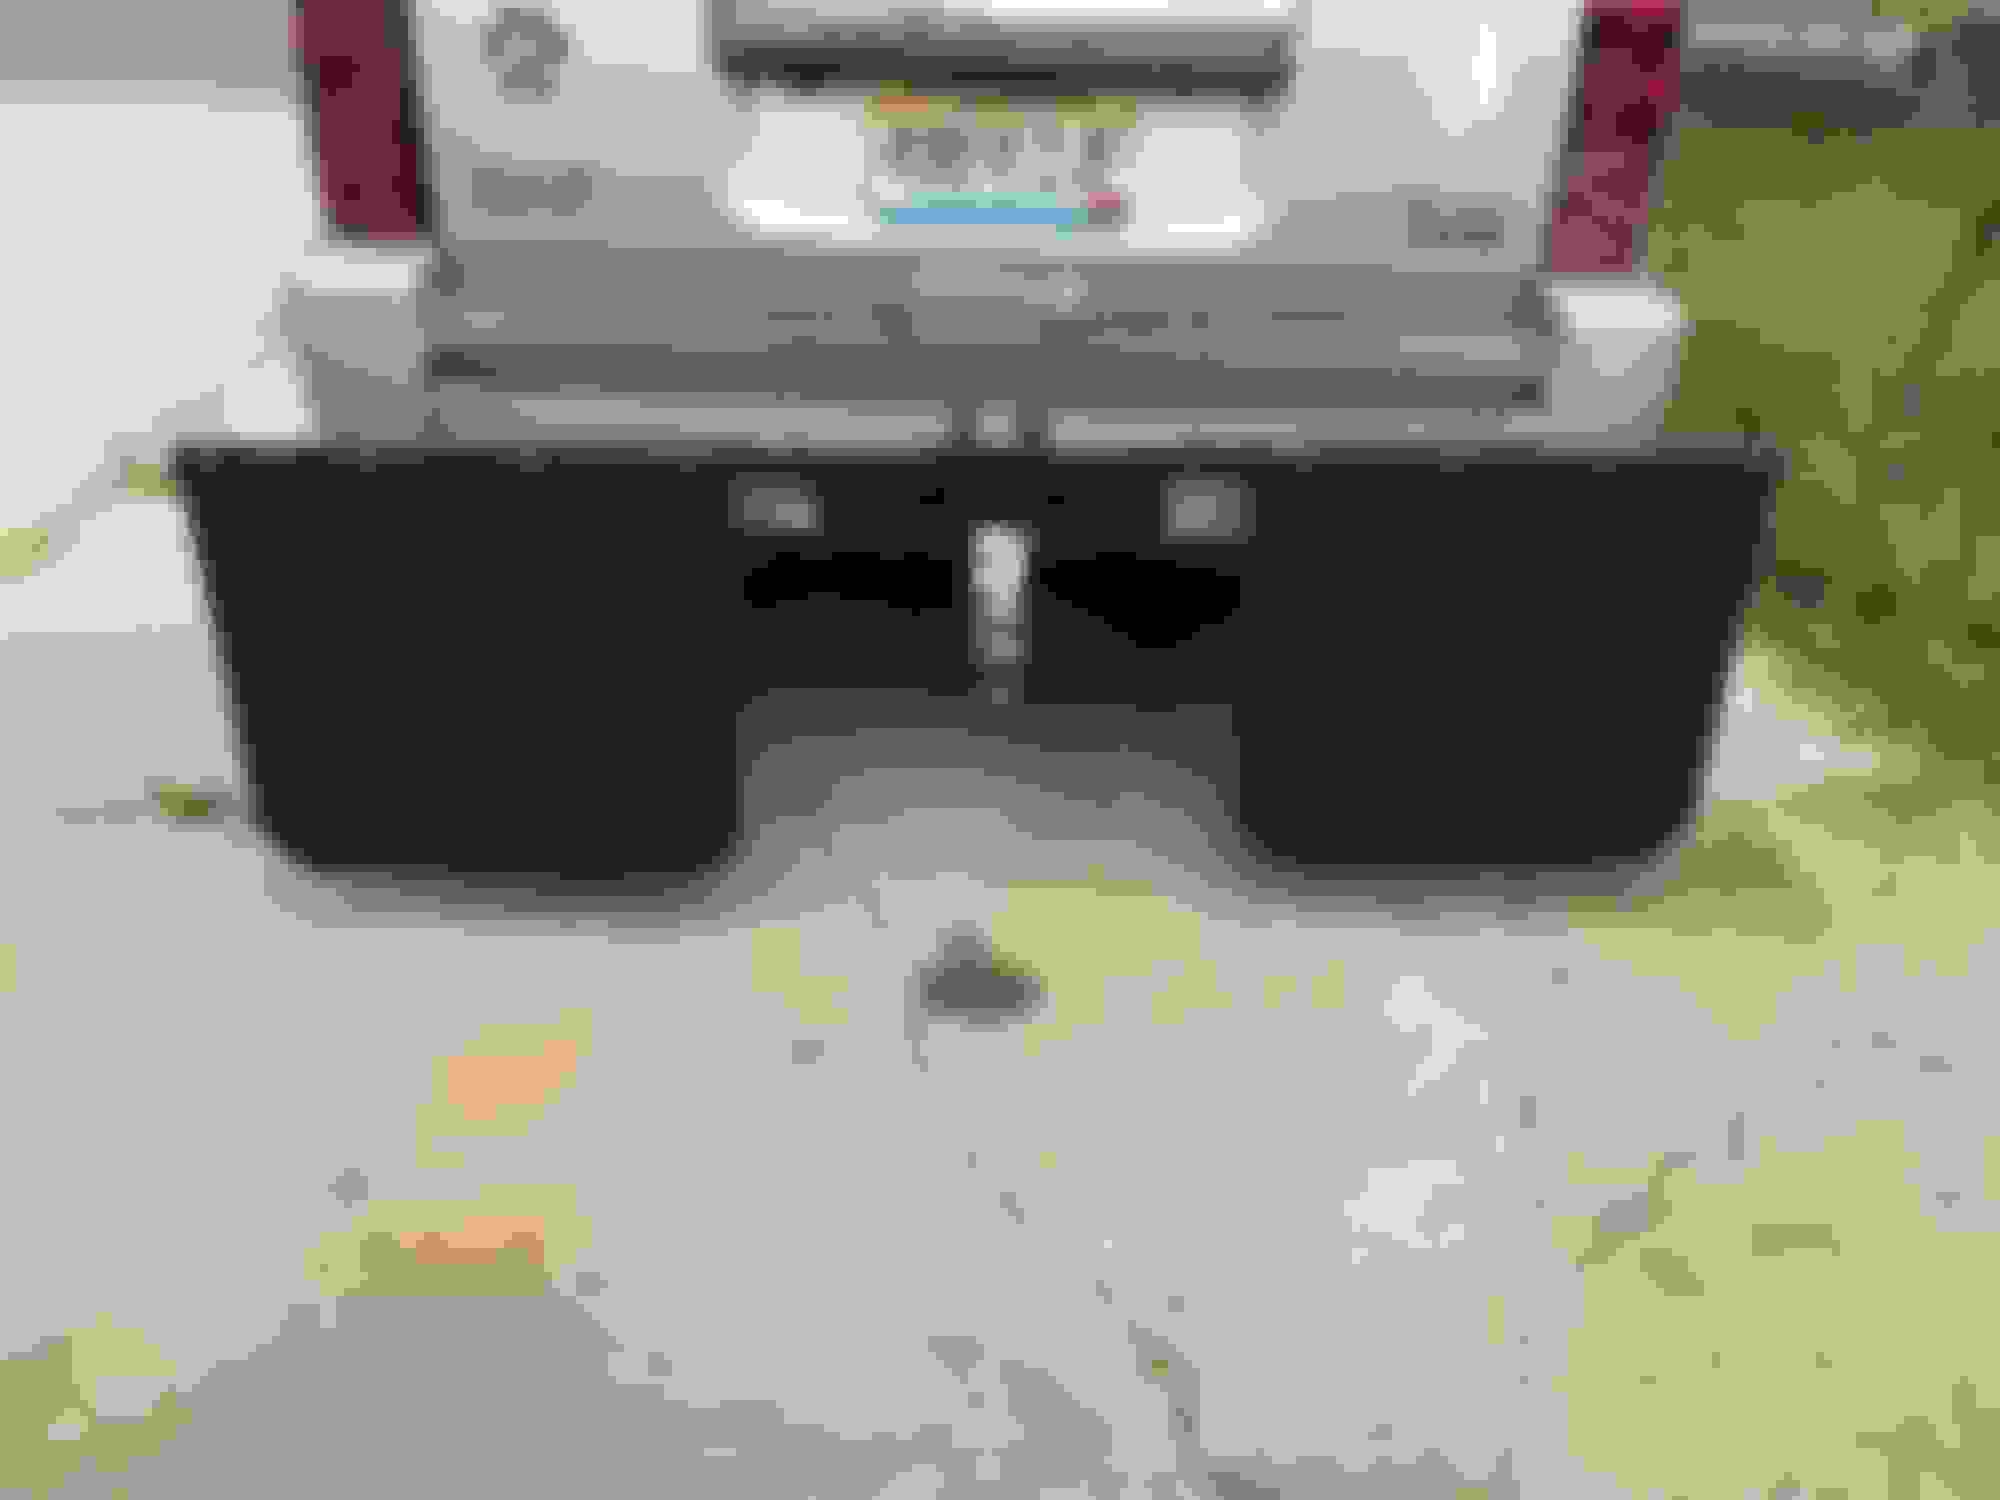
I used actual receiver stock to make the mounting collar for the mudflaps. It was 1/4” thick and allowed for solid deep penetrating welds. After notching the bottom out, it was on to creating a tightener to prevent the mudflaps from rocking on the receiver itself. I drilled 5/8” hole to use a 1/2” nut as the foundation of the tightener. I used a 1/2” bolt, screwed it completely through the nut, then centered it in the hole and used a C clamp to hold everything in place while I tacked it down. Be careful to nut heat the not too much, you do not want to deform the nut and threads. I used the bolt to chase the nut to ensure that it wasn’t deformed when I welded it to the collar. The next step was to drill the holes for the compression strap that would hold the mudflaps in place. I clamped both pieces together and drilled them at the same time to ensure they were all lined up later . I installed the mudflaps on the crossmember to check for clearance issues and determine if the mudflaps/crossmember were too wide. I could not see either side of the mudflap from the driver seat looking through the mirrors. The next step was to determine how to mount the crossmember to the collar I fabricated? I removed the mudflaps to allow for easier handling of the crossmember. The easiest route would be to weld the crossmember to the collar I created, Then remount the mudflaps cut to length and be done. However, I did not like the idea of having zero vertical adjustment ability. So I decided to fabricate a bracket that would allow for vertical adjustments and potentially use these mudflaps on a different vehicle if needed. I used threaded rod connectors for the mounting points of the vertical adjustment bracket. I took a grinder and took off the zinc coating to allow for better welding connection. I used 1/2”, 6’’ Carriage bolts because they are threaded the entire length of the bolt. And the rounded head eliminates sharp edges or the concern for impalement should one of the dogs jump out of the back of the Jeep. You can use any length carriage bolt here if you want more vertical adjustment capability. The square portion under the head of the bolt takes a 1/2” wrench to hold in place during adjustment. Although I did not get a picture, the hardest part here is aligning the threaded rod connectors to the center of the crossmember. For this I put everything in a vice to hold the connectors to the collar then used a C clamp to hold the crossmember in place. I ran a punch through the connectors in order to allow for me to drill the holes in the crossmember. I then used 2- 1/2” bolts to tighten The connectors to the crossmember. Then slid it over the collar and tack welding them to check for fit. I reinstalled the mudflaps and check for any clearance issues. Once I was sure the threaded rod connectors were far enough back to not interfere with a vertical adjustment of the bolts and interference by the bumper I welded everything solid. The threaded rod connectors are approximately 2” long. The bolts go completely through the connecters. You can see in this picture after everything was welded together. How the bracket will allow for up to 4 1/2 inches vertical adjustment. You can also see the tightener on the right side. I disassembled everything, primed and painted it. Also added that missing lock washer to the top nut. Although it really was a horse apiece to add one or remove the other one. I decided to add it. Here is the finished product. I cut the mudflaps to 22 inches long from the top of the crossmember. I used the bottom portion of the mudflap I cut off as a template to re-create the rounded corners.
Ya man, awesome idea and killer outcome
how thick them mats so they dont "wave" when enroute? See truckers have barstock mounted inside at bottom to keep them at bay while goin down the road
Ya man, awesome idea and killer outcome
how thick them mats so they dont "wave" when enroute? See truckers have barstock mounted inside at bottom to keep them at bay while goin down the road
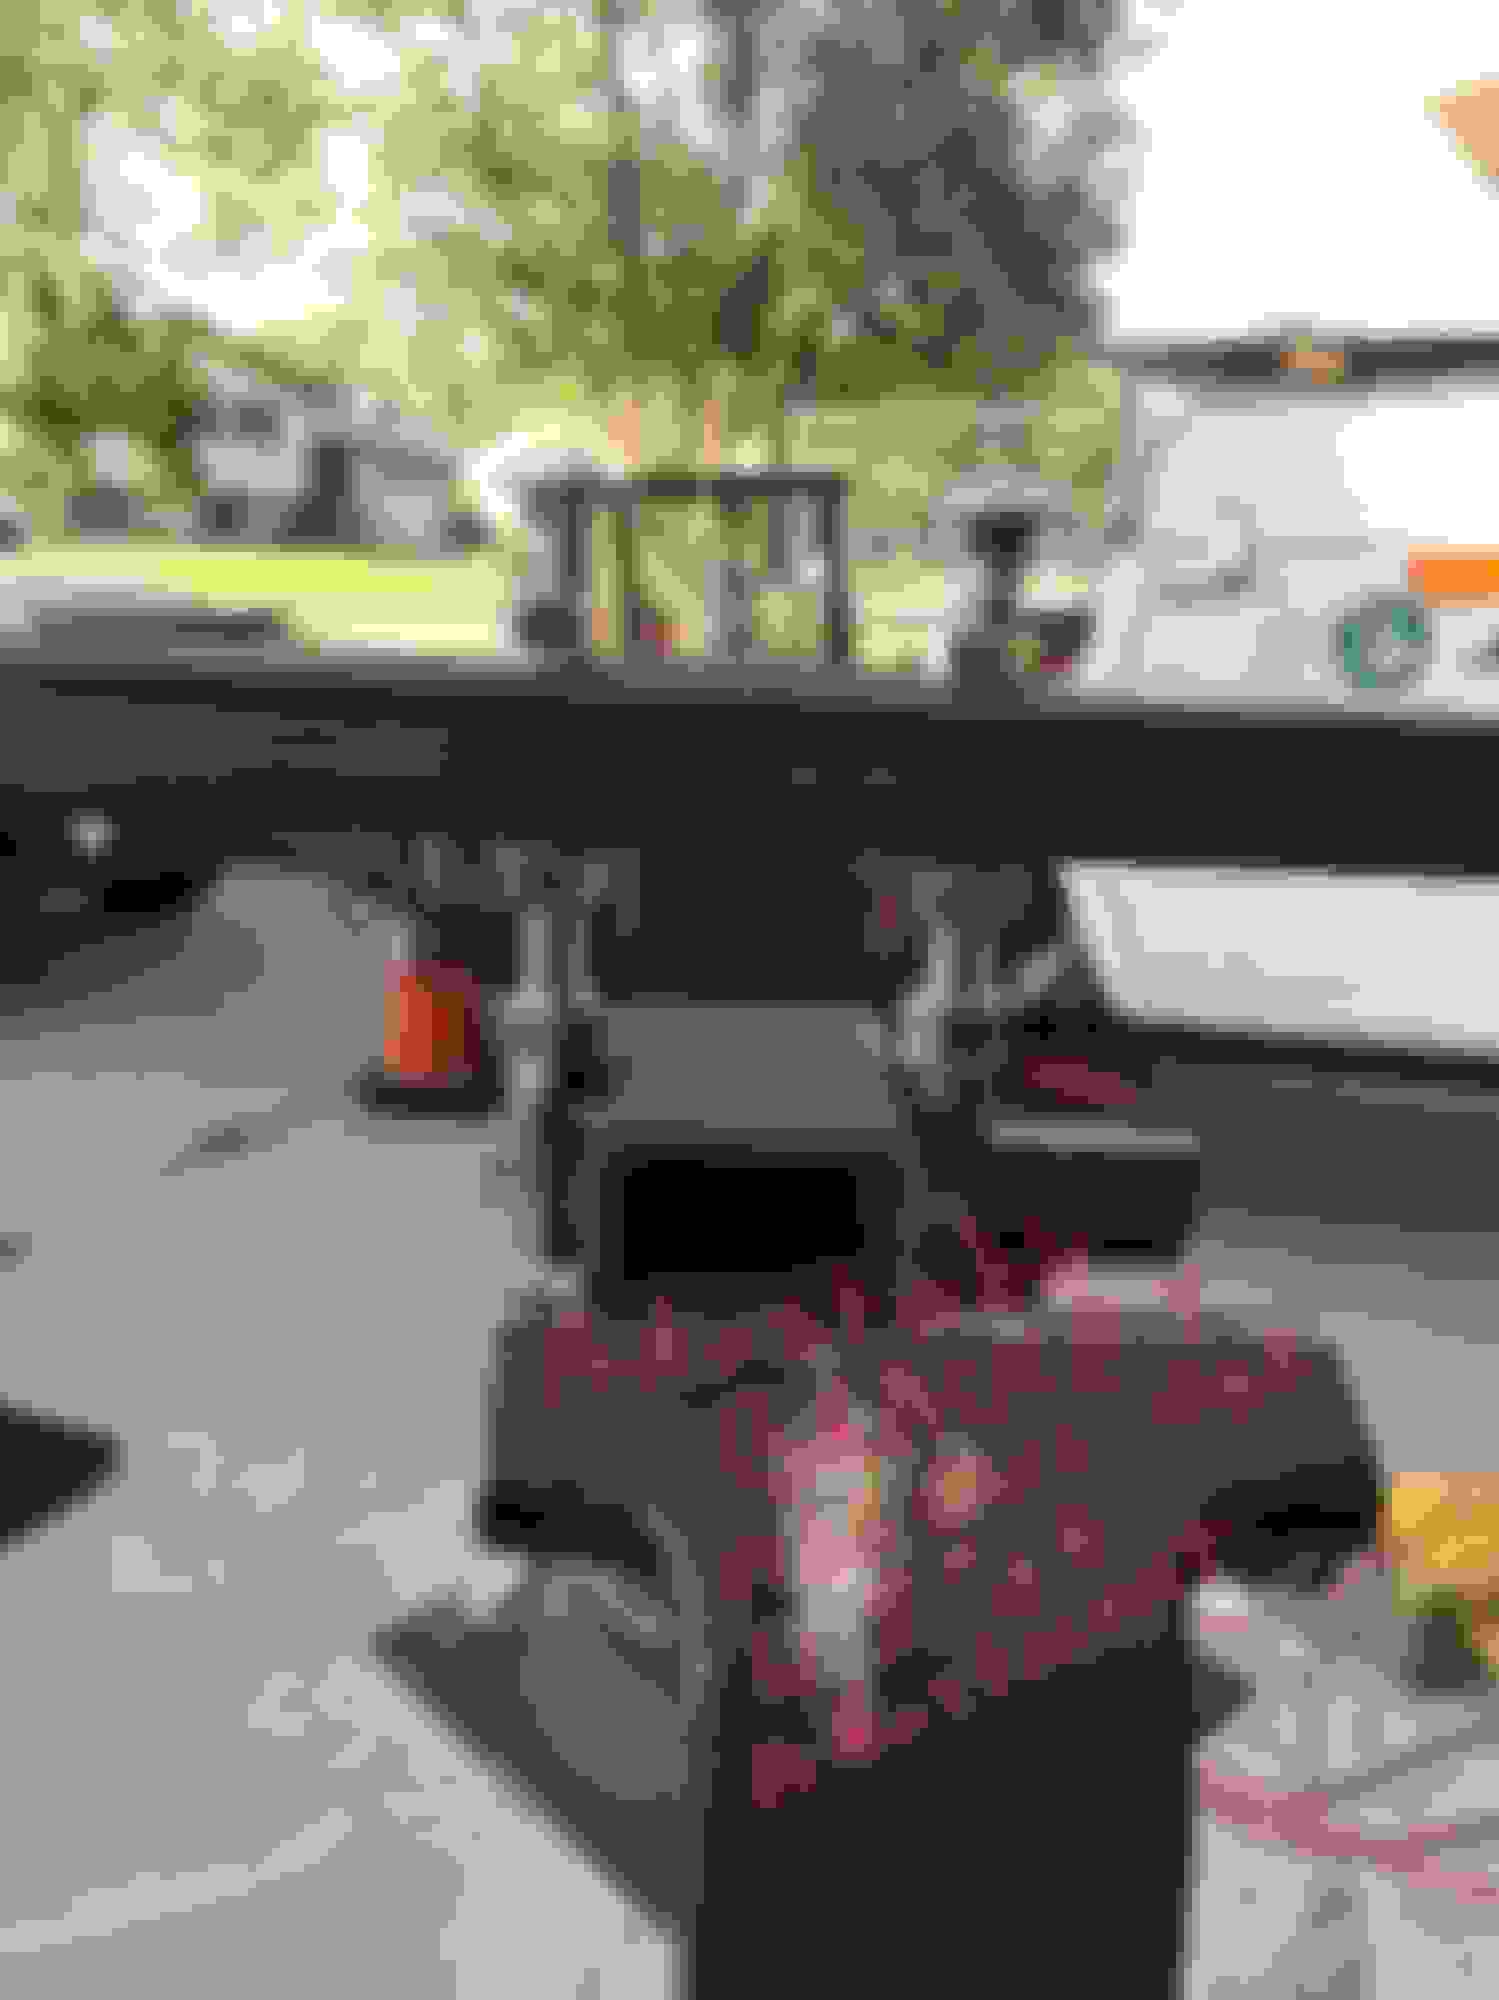
They are for semi trailers, not as stiff as the Rock Tamers but fairly heavy. On my test drive they lifted a little bit but evenly and didn't flop at all. We plan on going camping this weekend, we'll see if the turbulence of the camper being attached changes anything. I kept the 8" pieces I cut off, worst case I can bolt the 8" on the bottom of the flaps for weight. The other option is to add a hold down bracket in the form of an upside down T to the inside of the flap, either way it's an easy fix.
The ones I have on my truck are old ones with expanded metal inside the rubber. I always thought they were cool. I have been meaning to add a set at the back like you did. I like how you made them removable.
Rezvani's Latest Post-Apocalyptic Monster Is a Ford F-150 Raptor Underneath
Slideshow: Called the Fortress, the 850-horsepower pickup combines Raptor underpinnings with military-inspired features, survival equipment, and a starting price of $285,000.