


1979 bronco build.

Thread Starter
|
Tuned

Joined: Nov 2015
Posts: 365
Likes: 13
1979 bronco build.
This my build thread for my 1979 bronco, "Rusty". It looked like this when I got it.
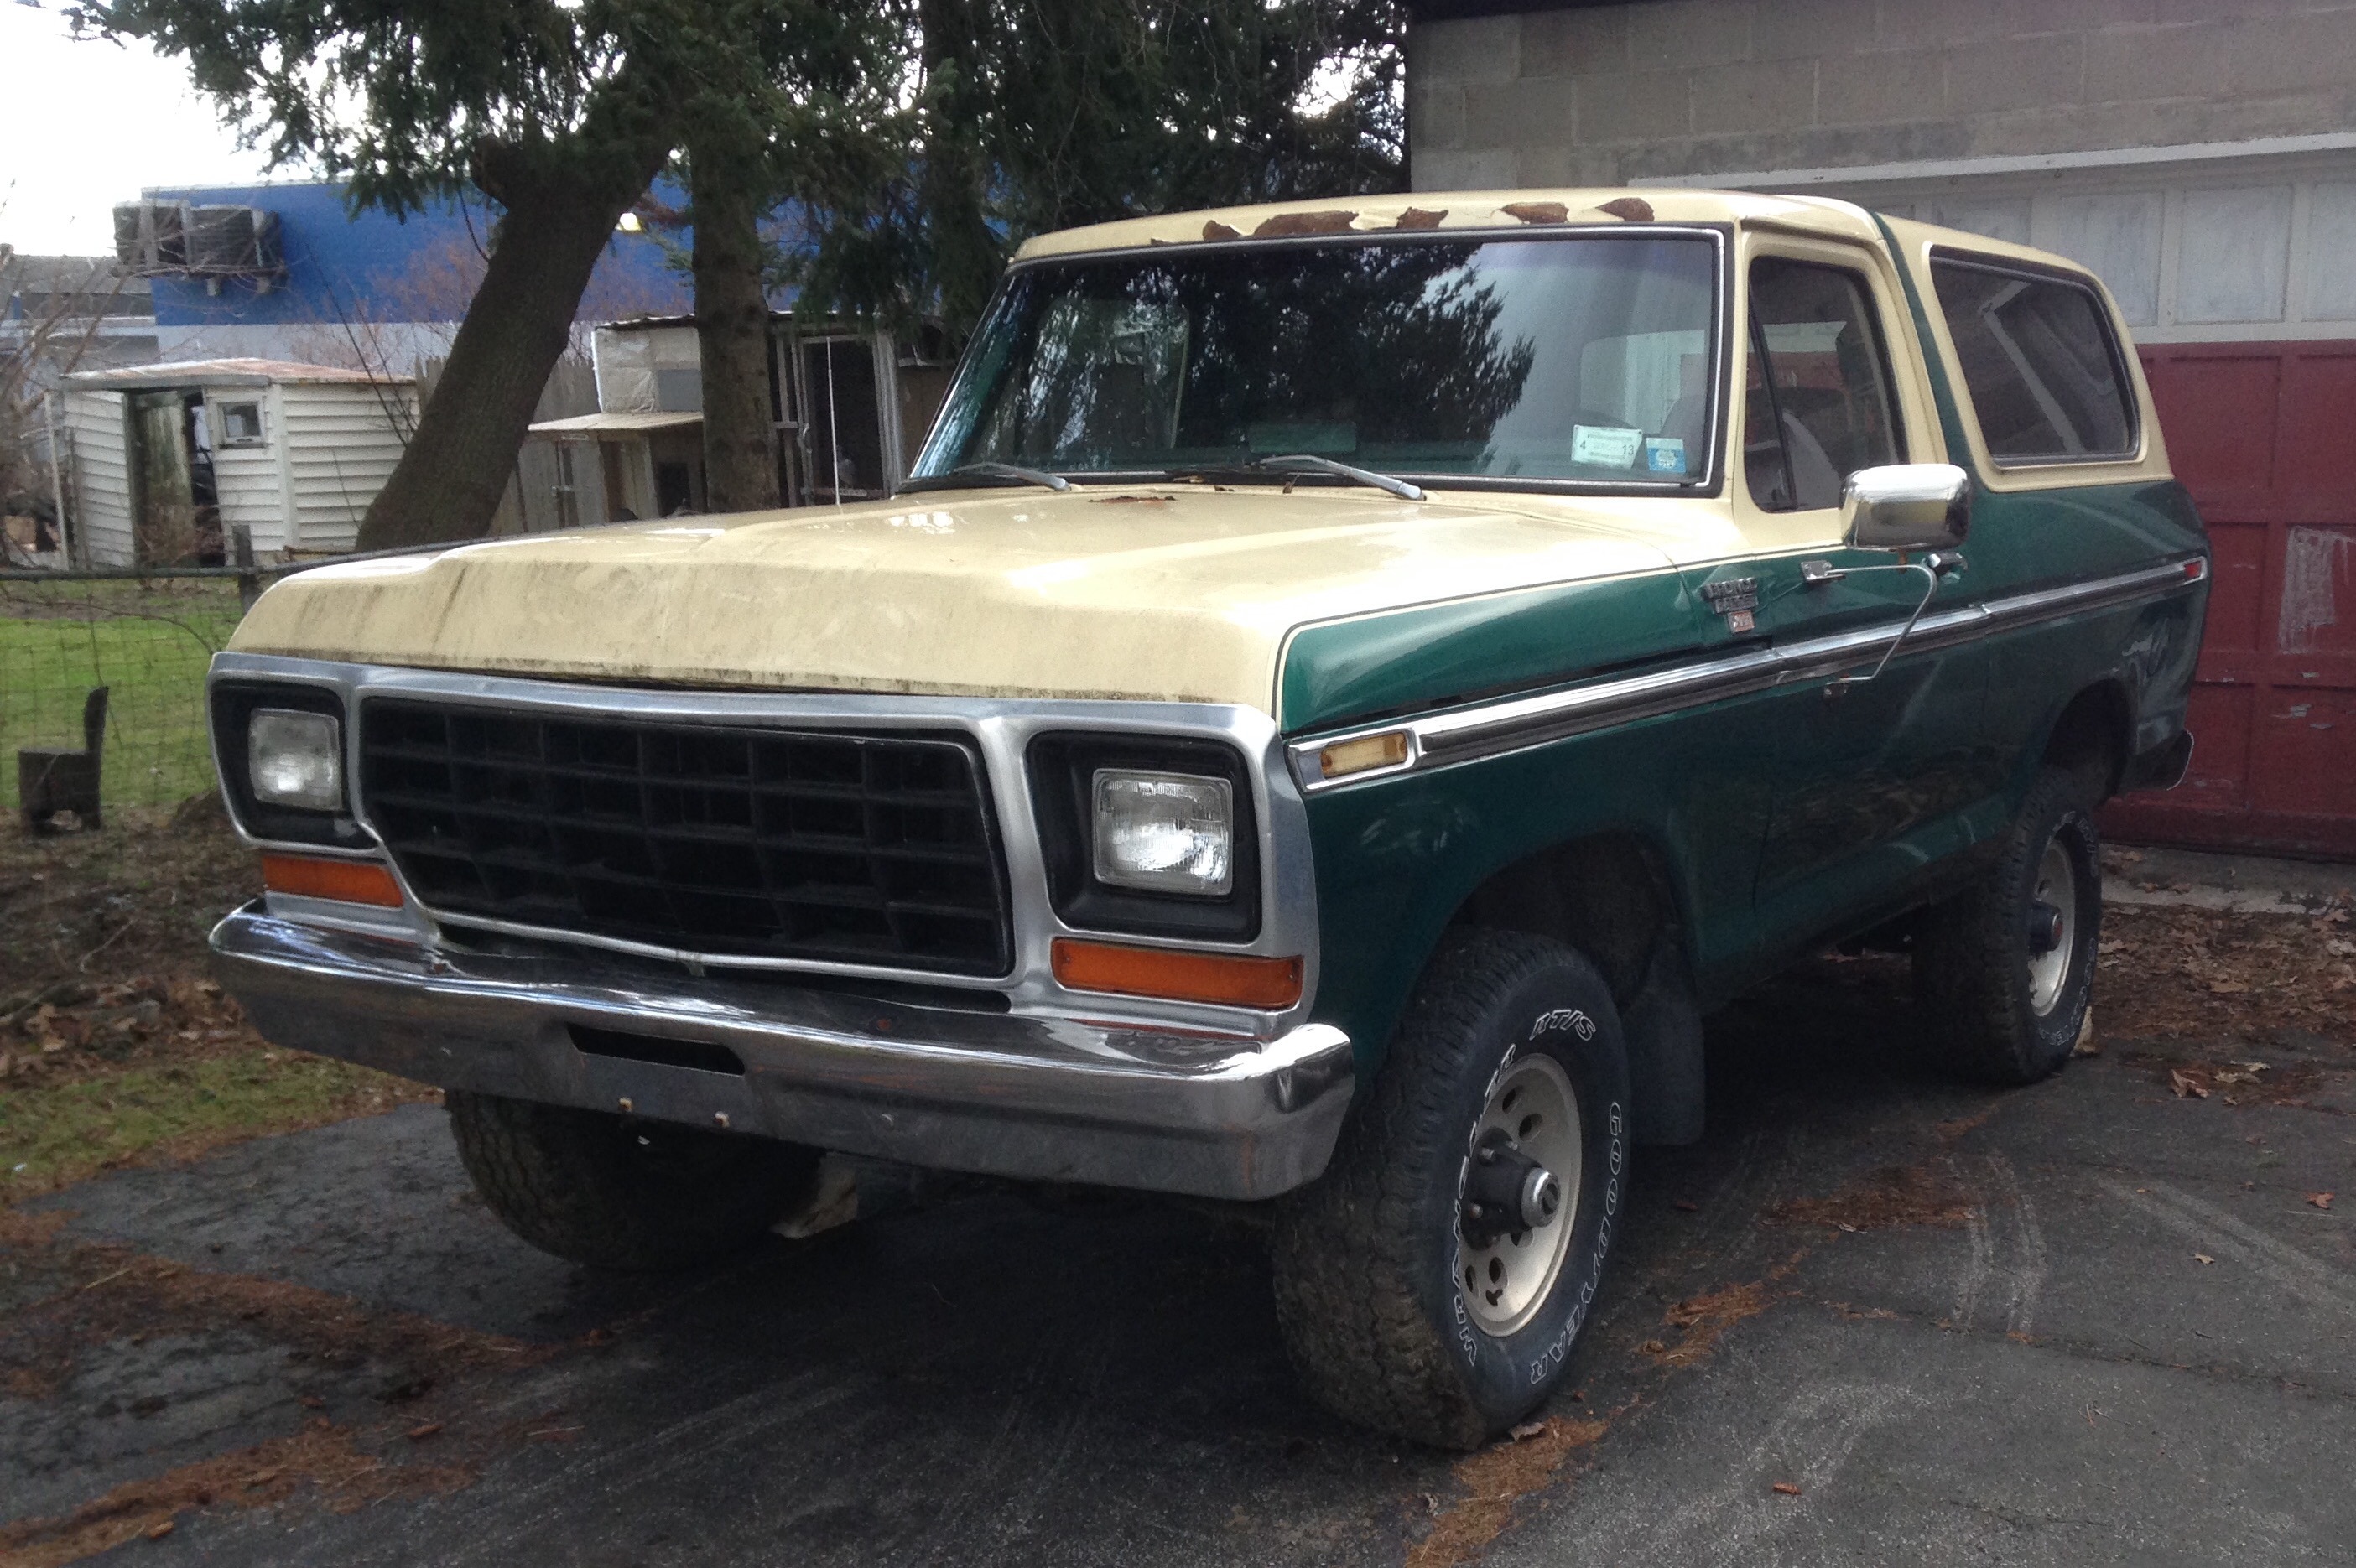
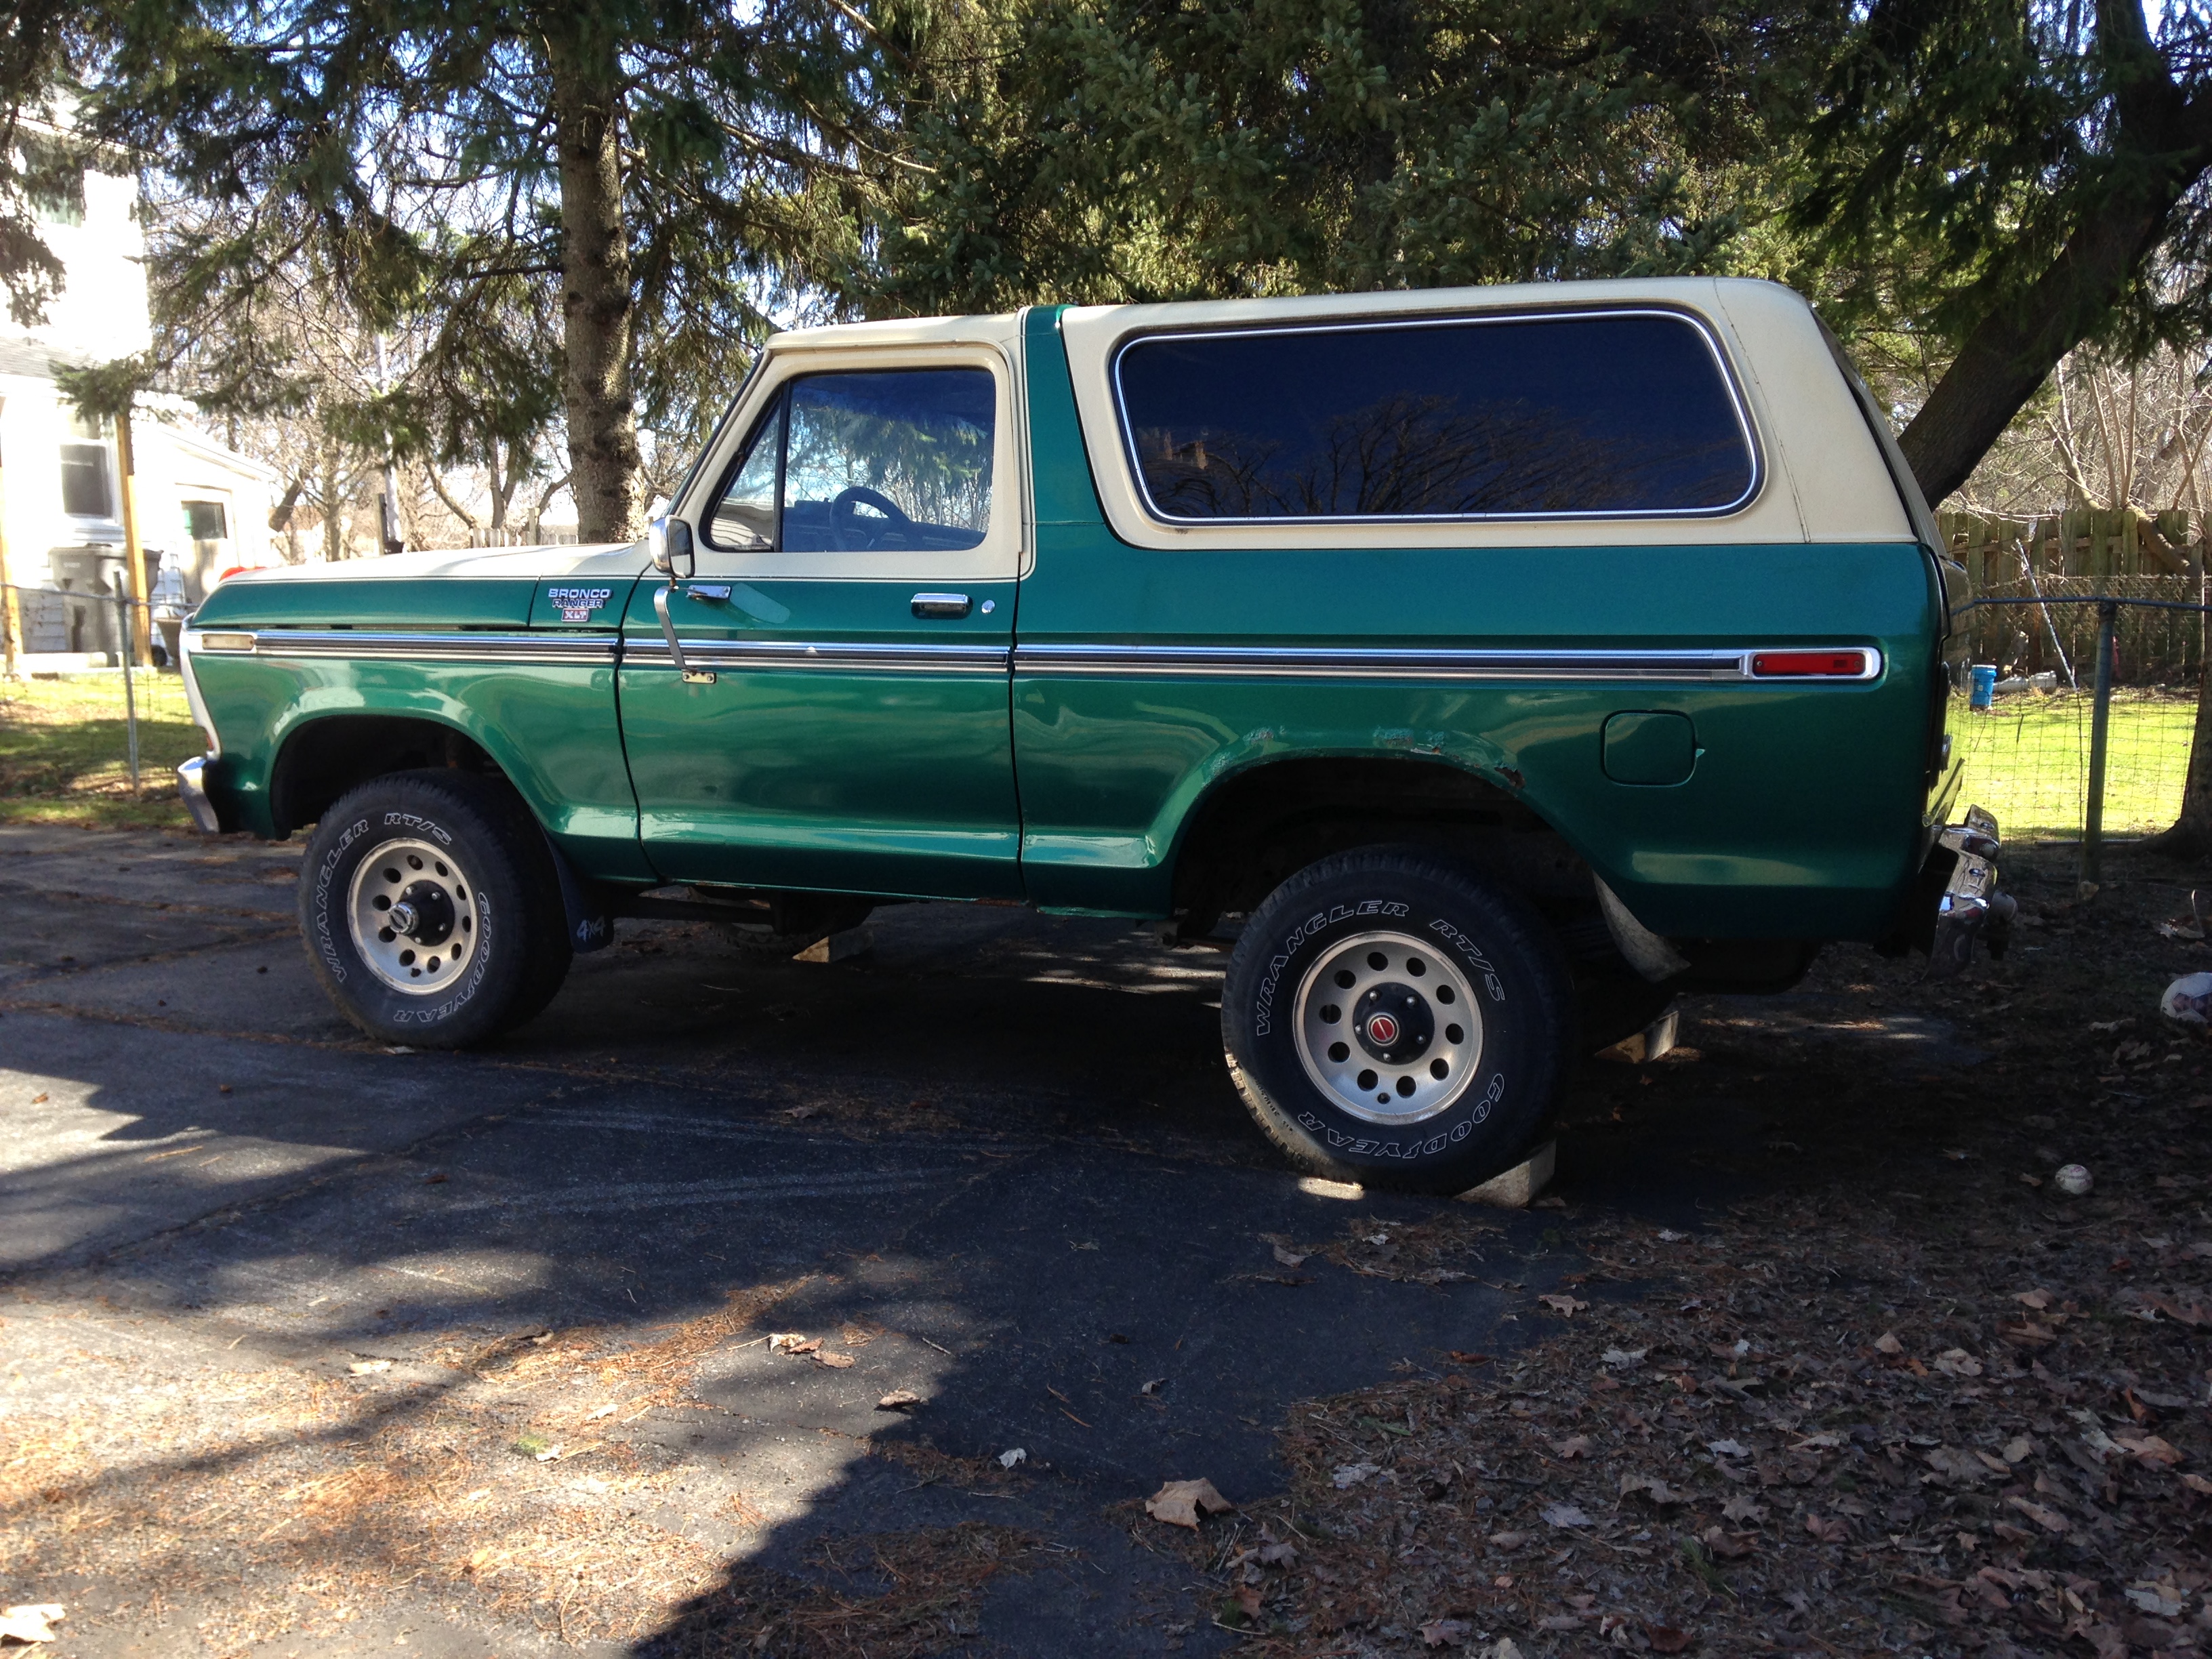
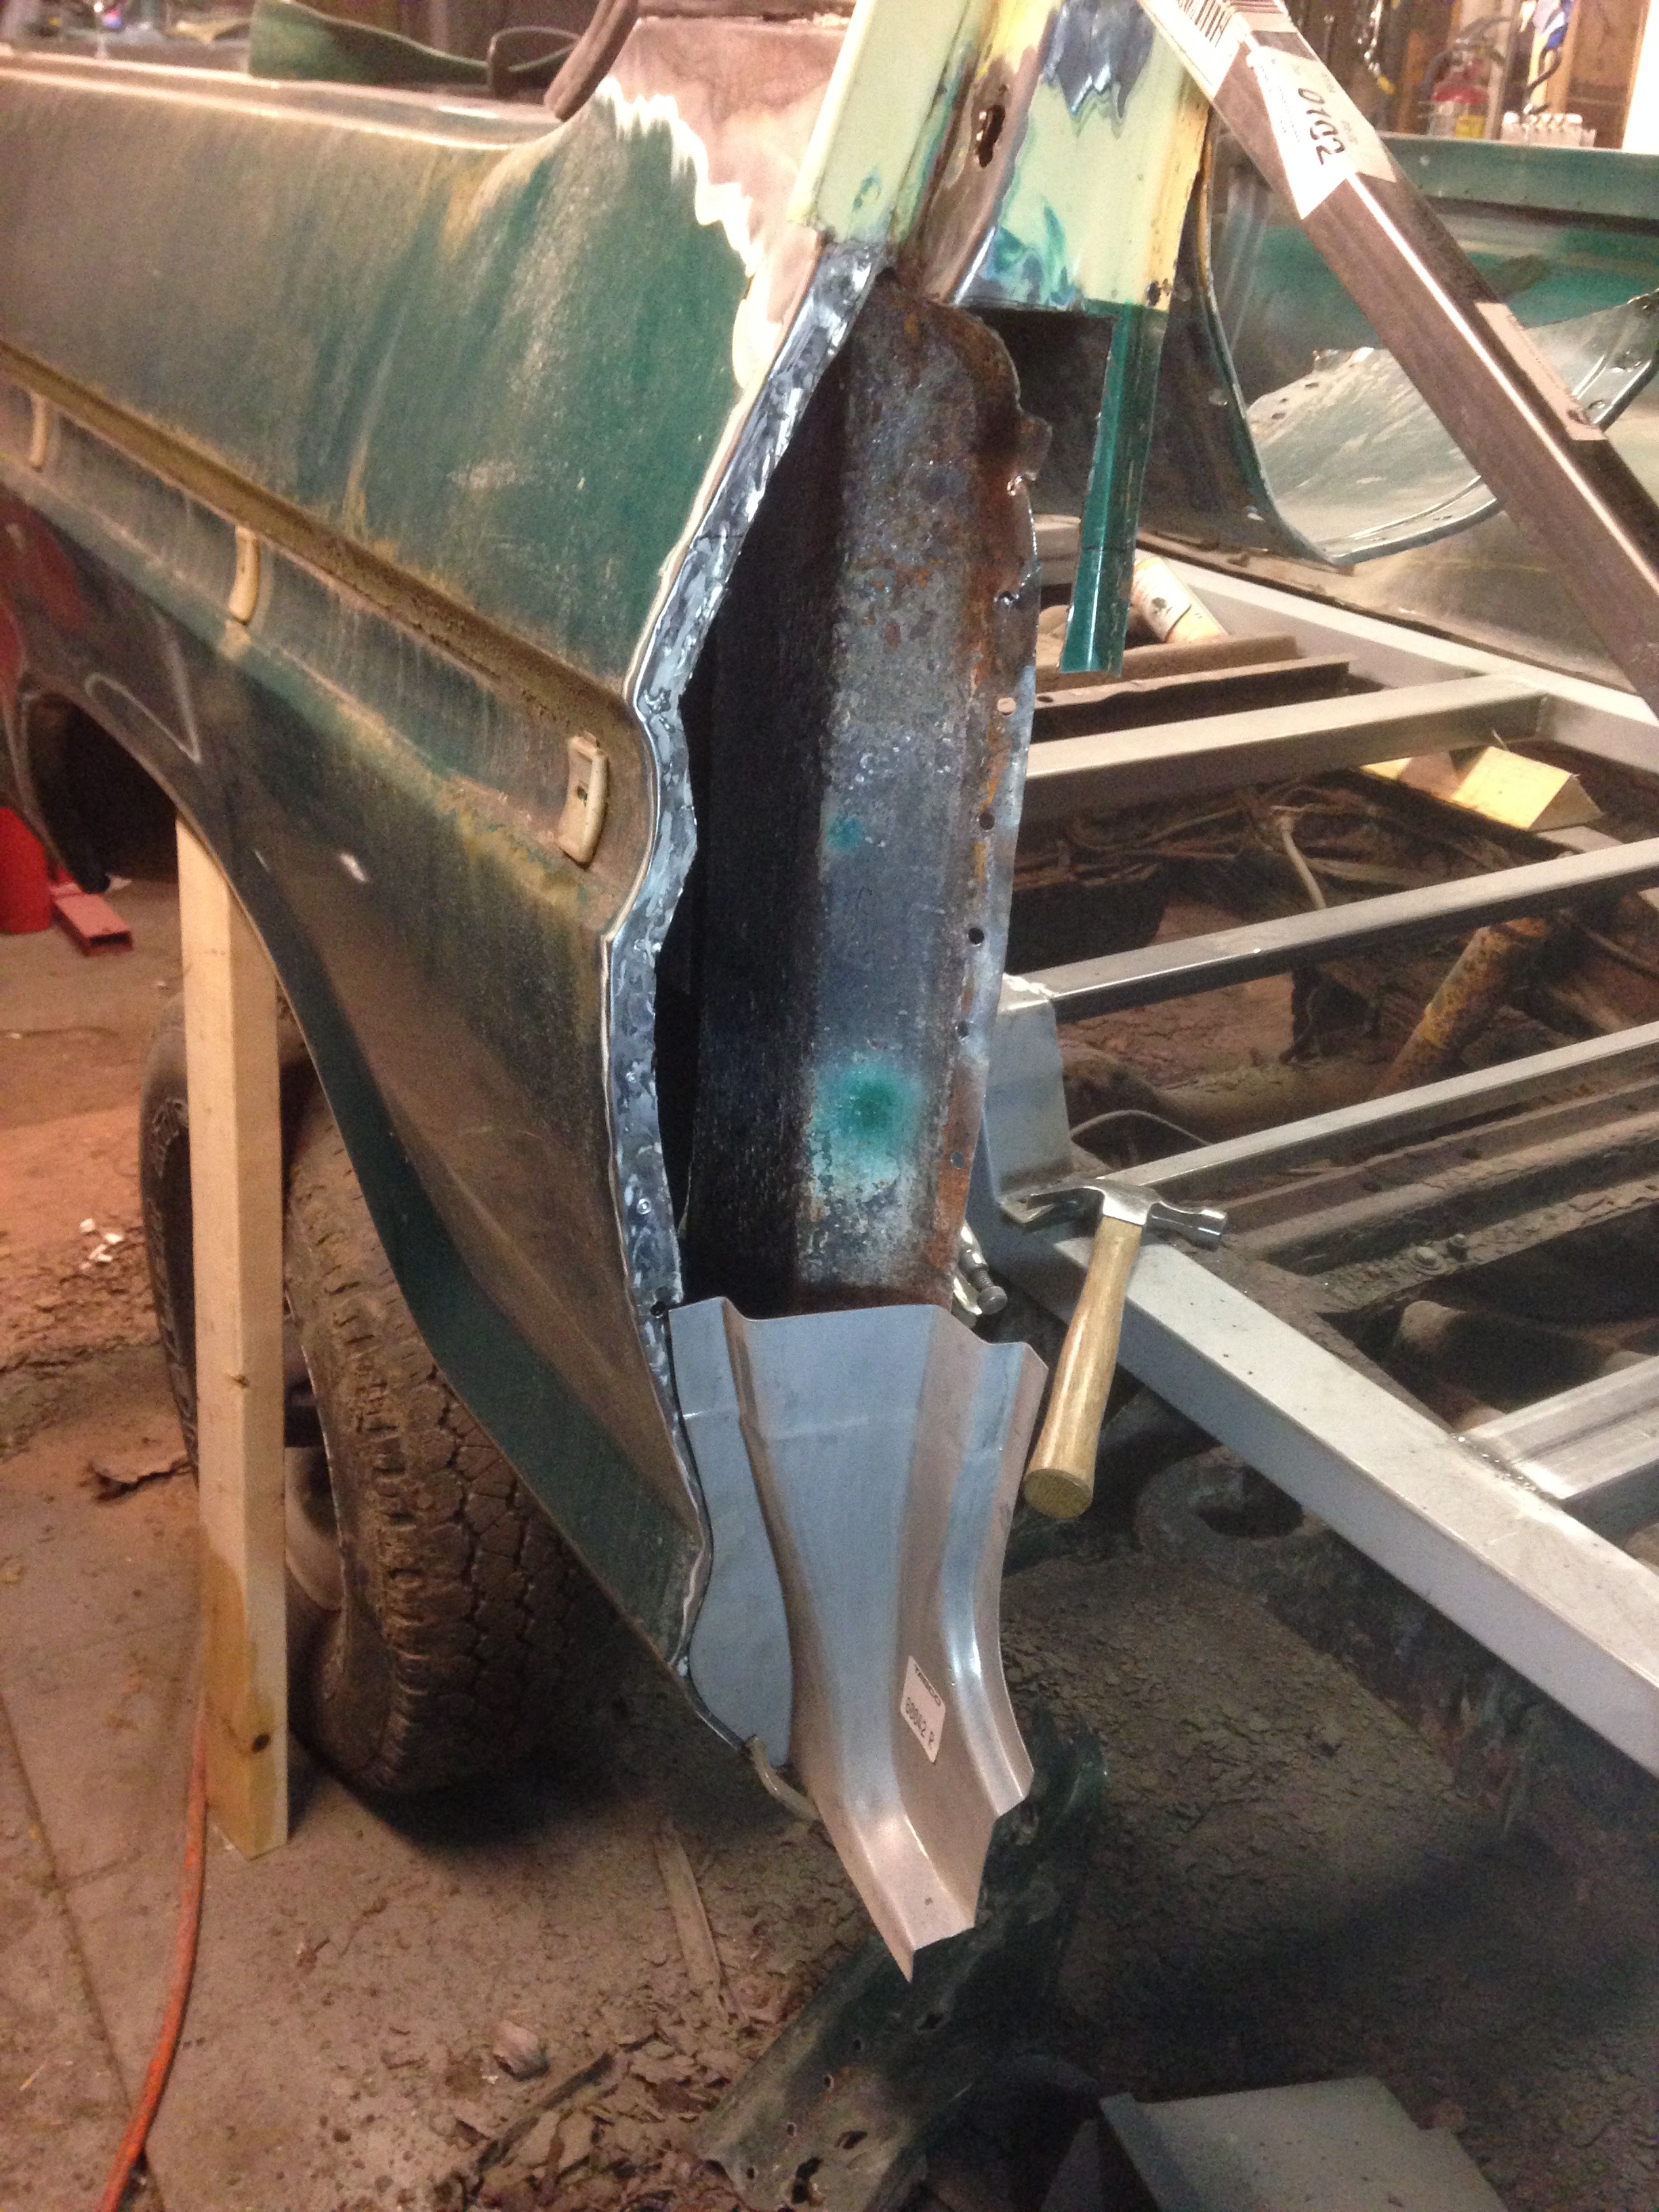
Not too bad, a little rust in the drivers side quarter.
Then there is the floor. Well, what was left of it.
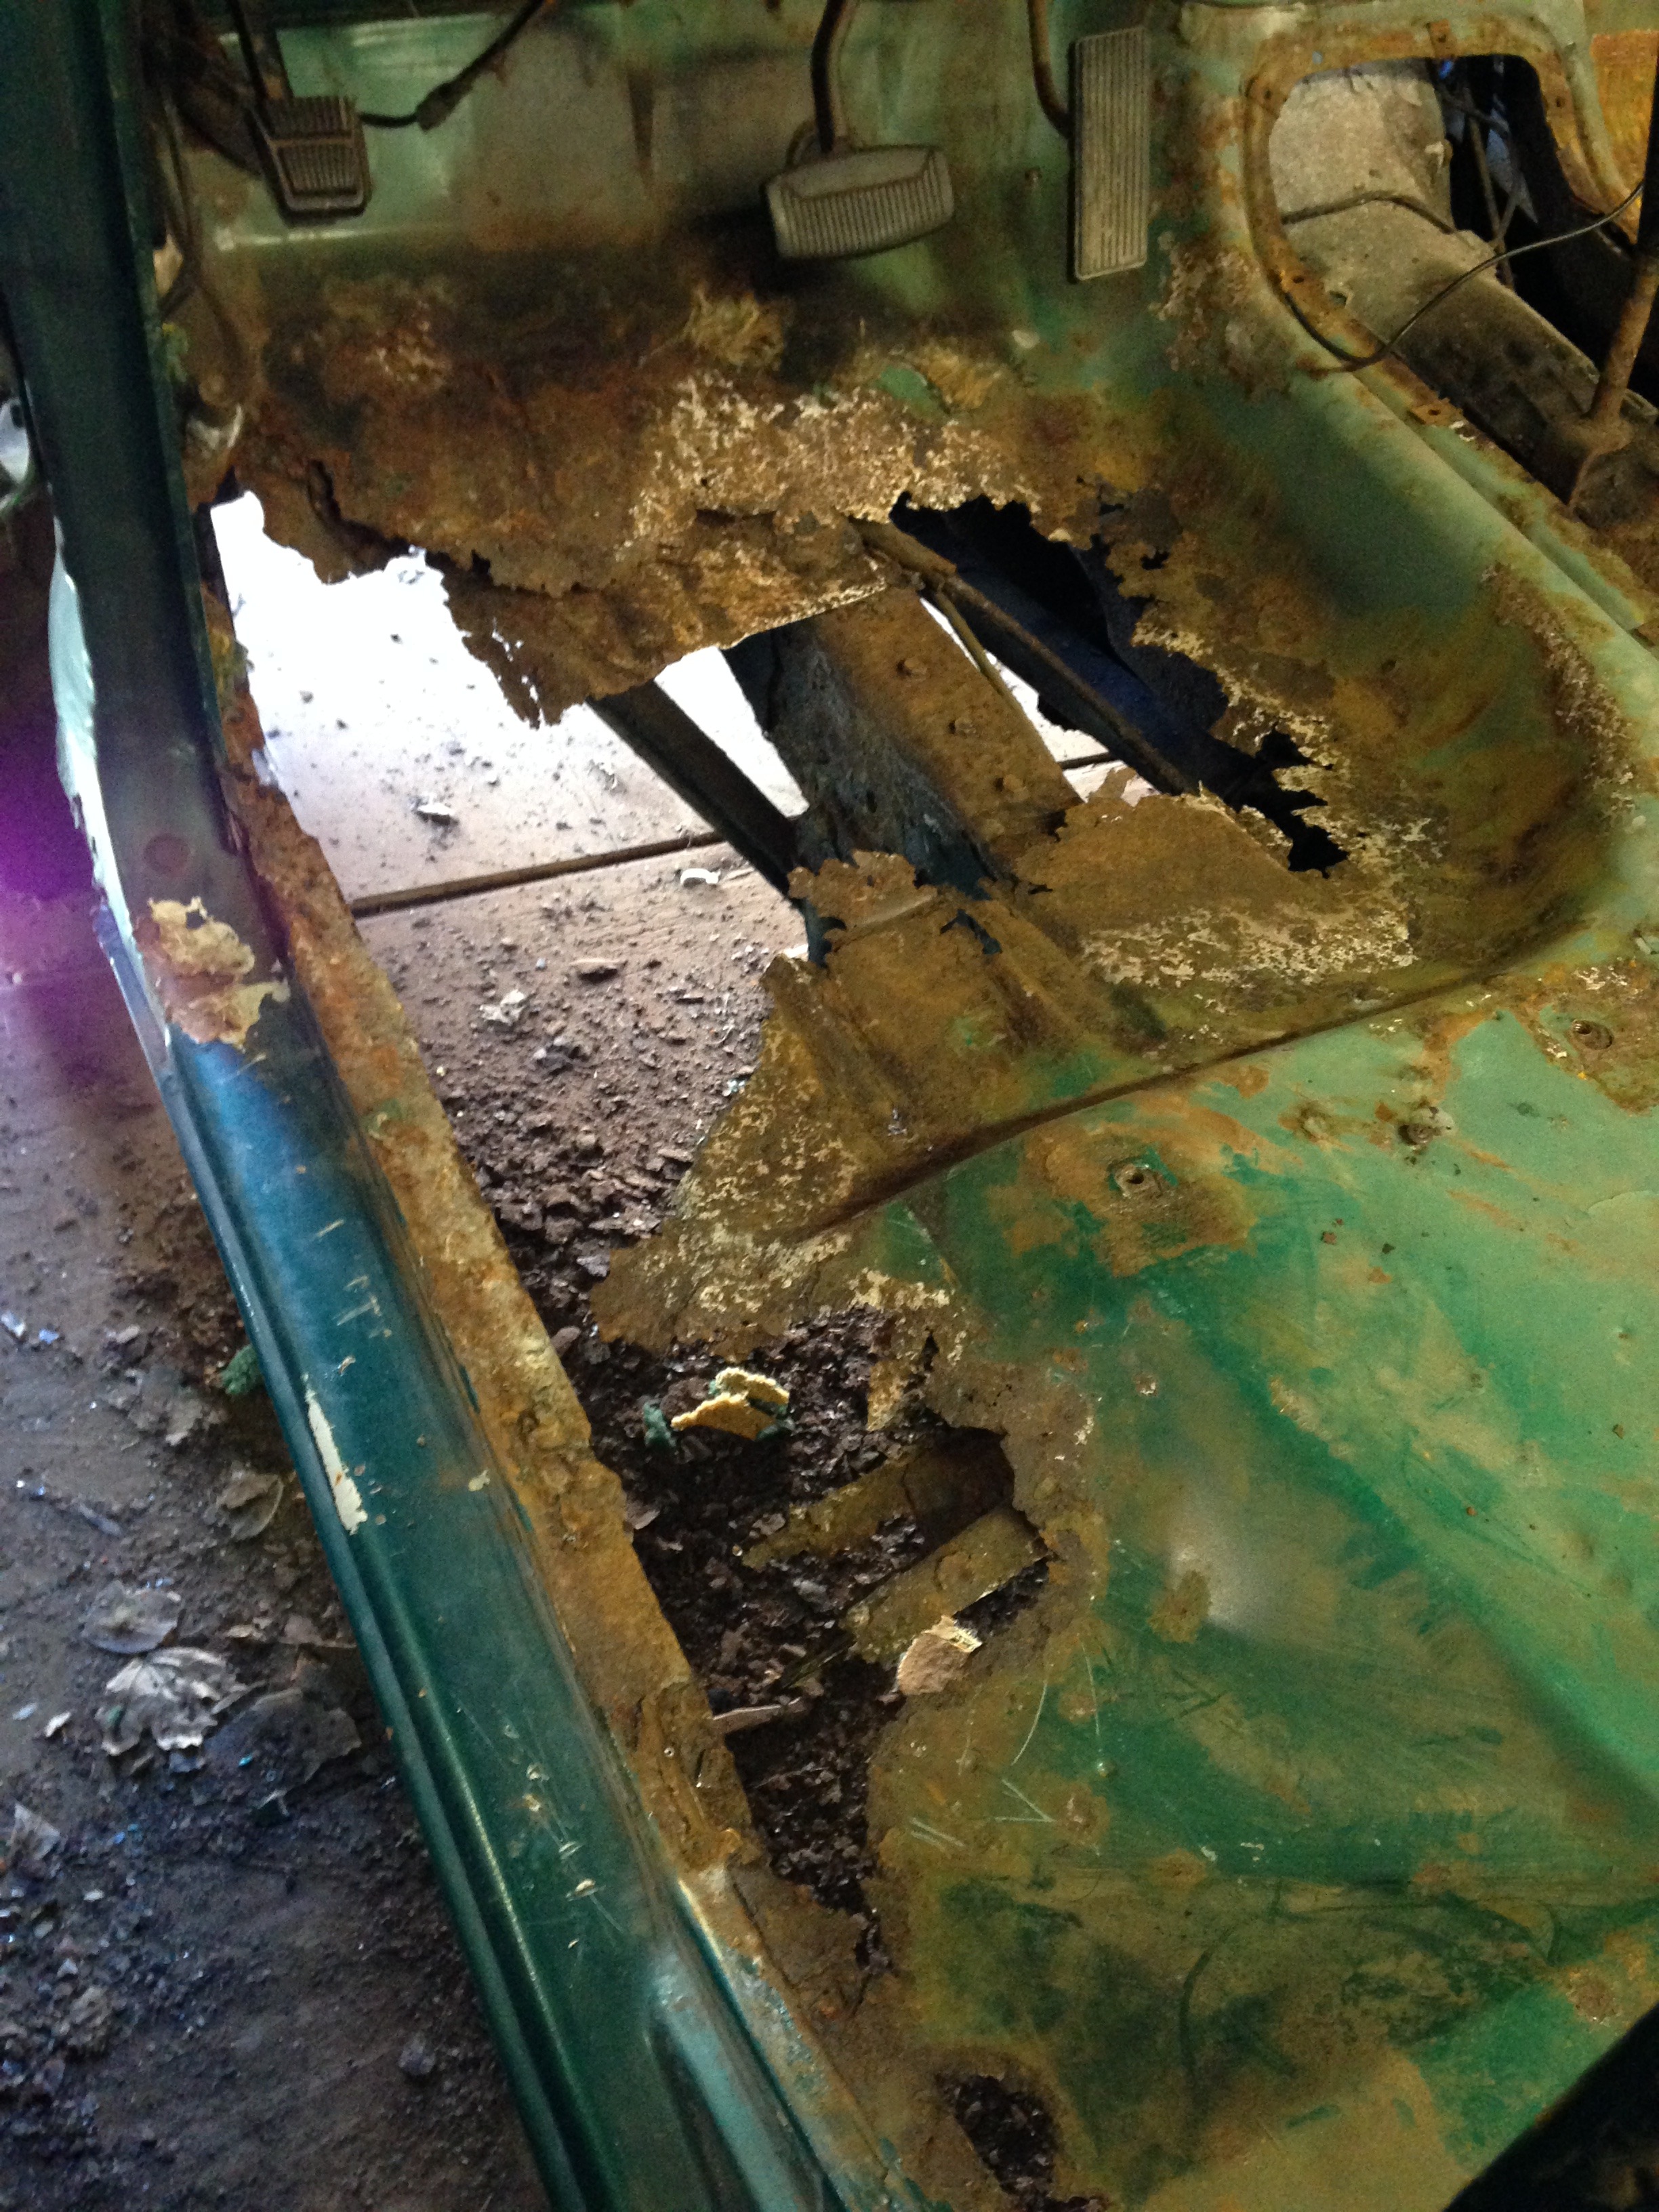
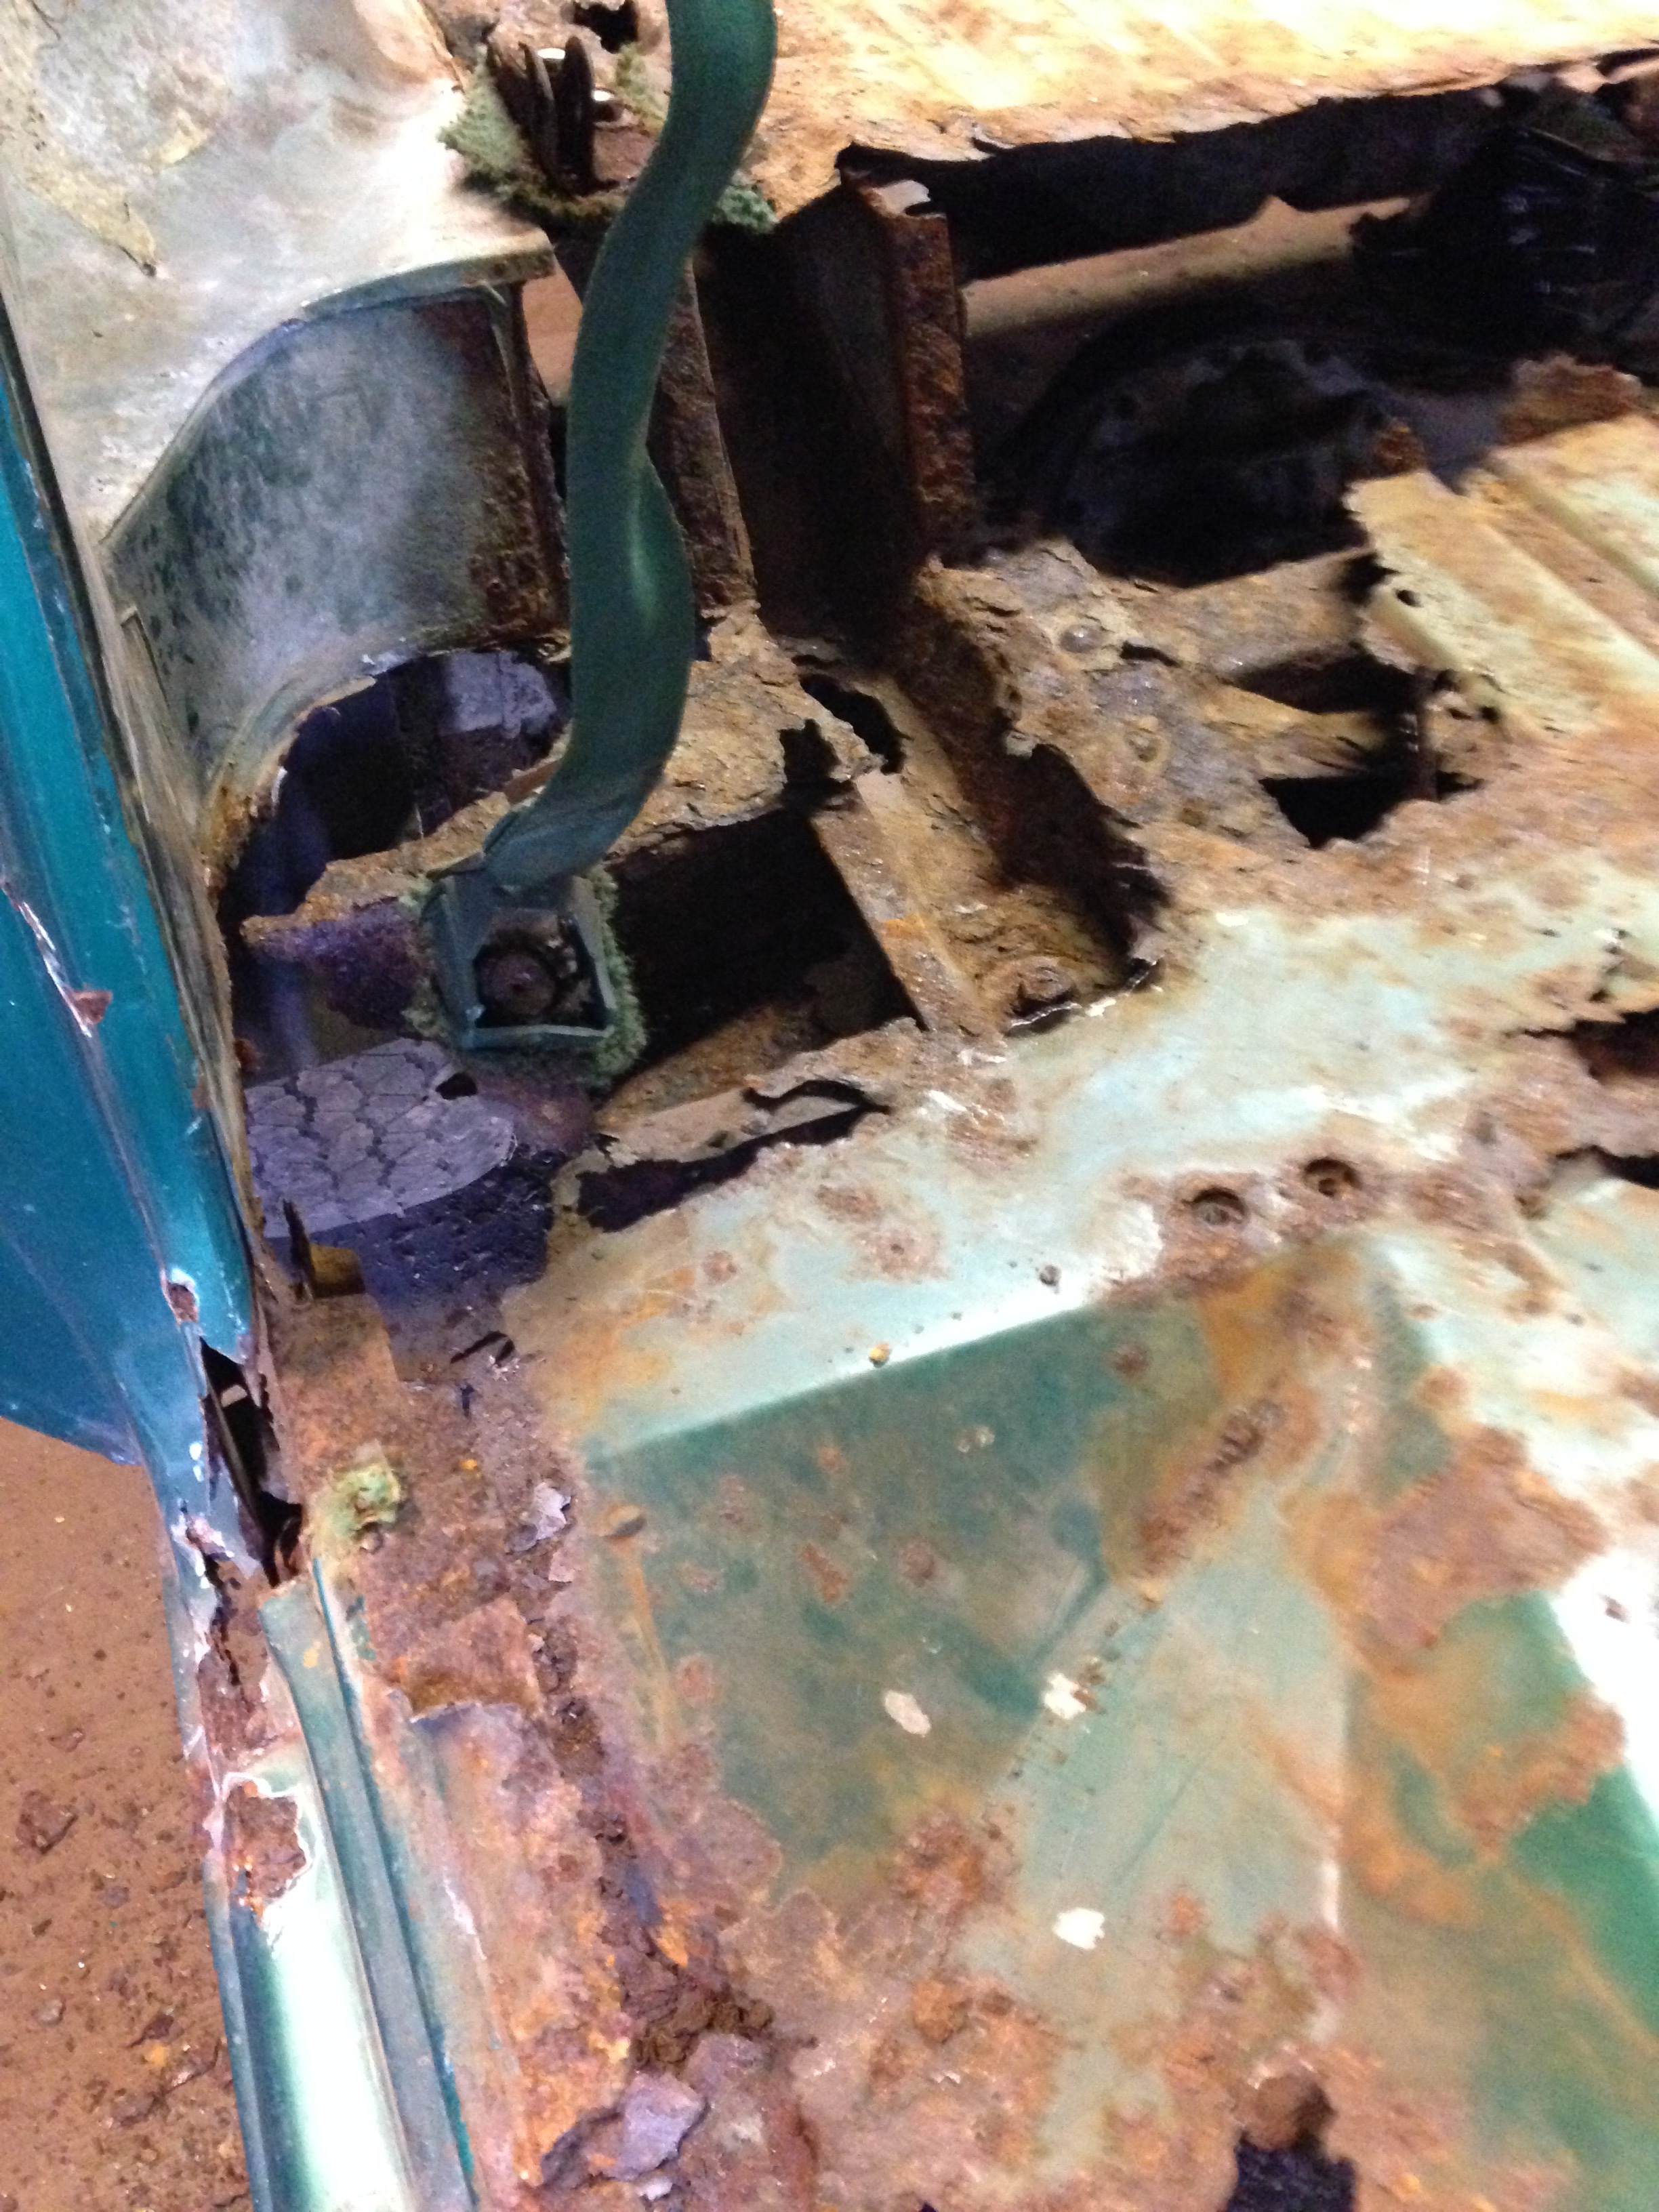
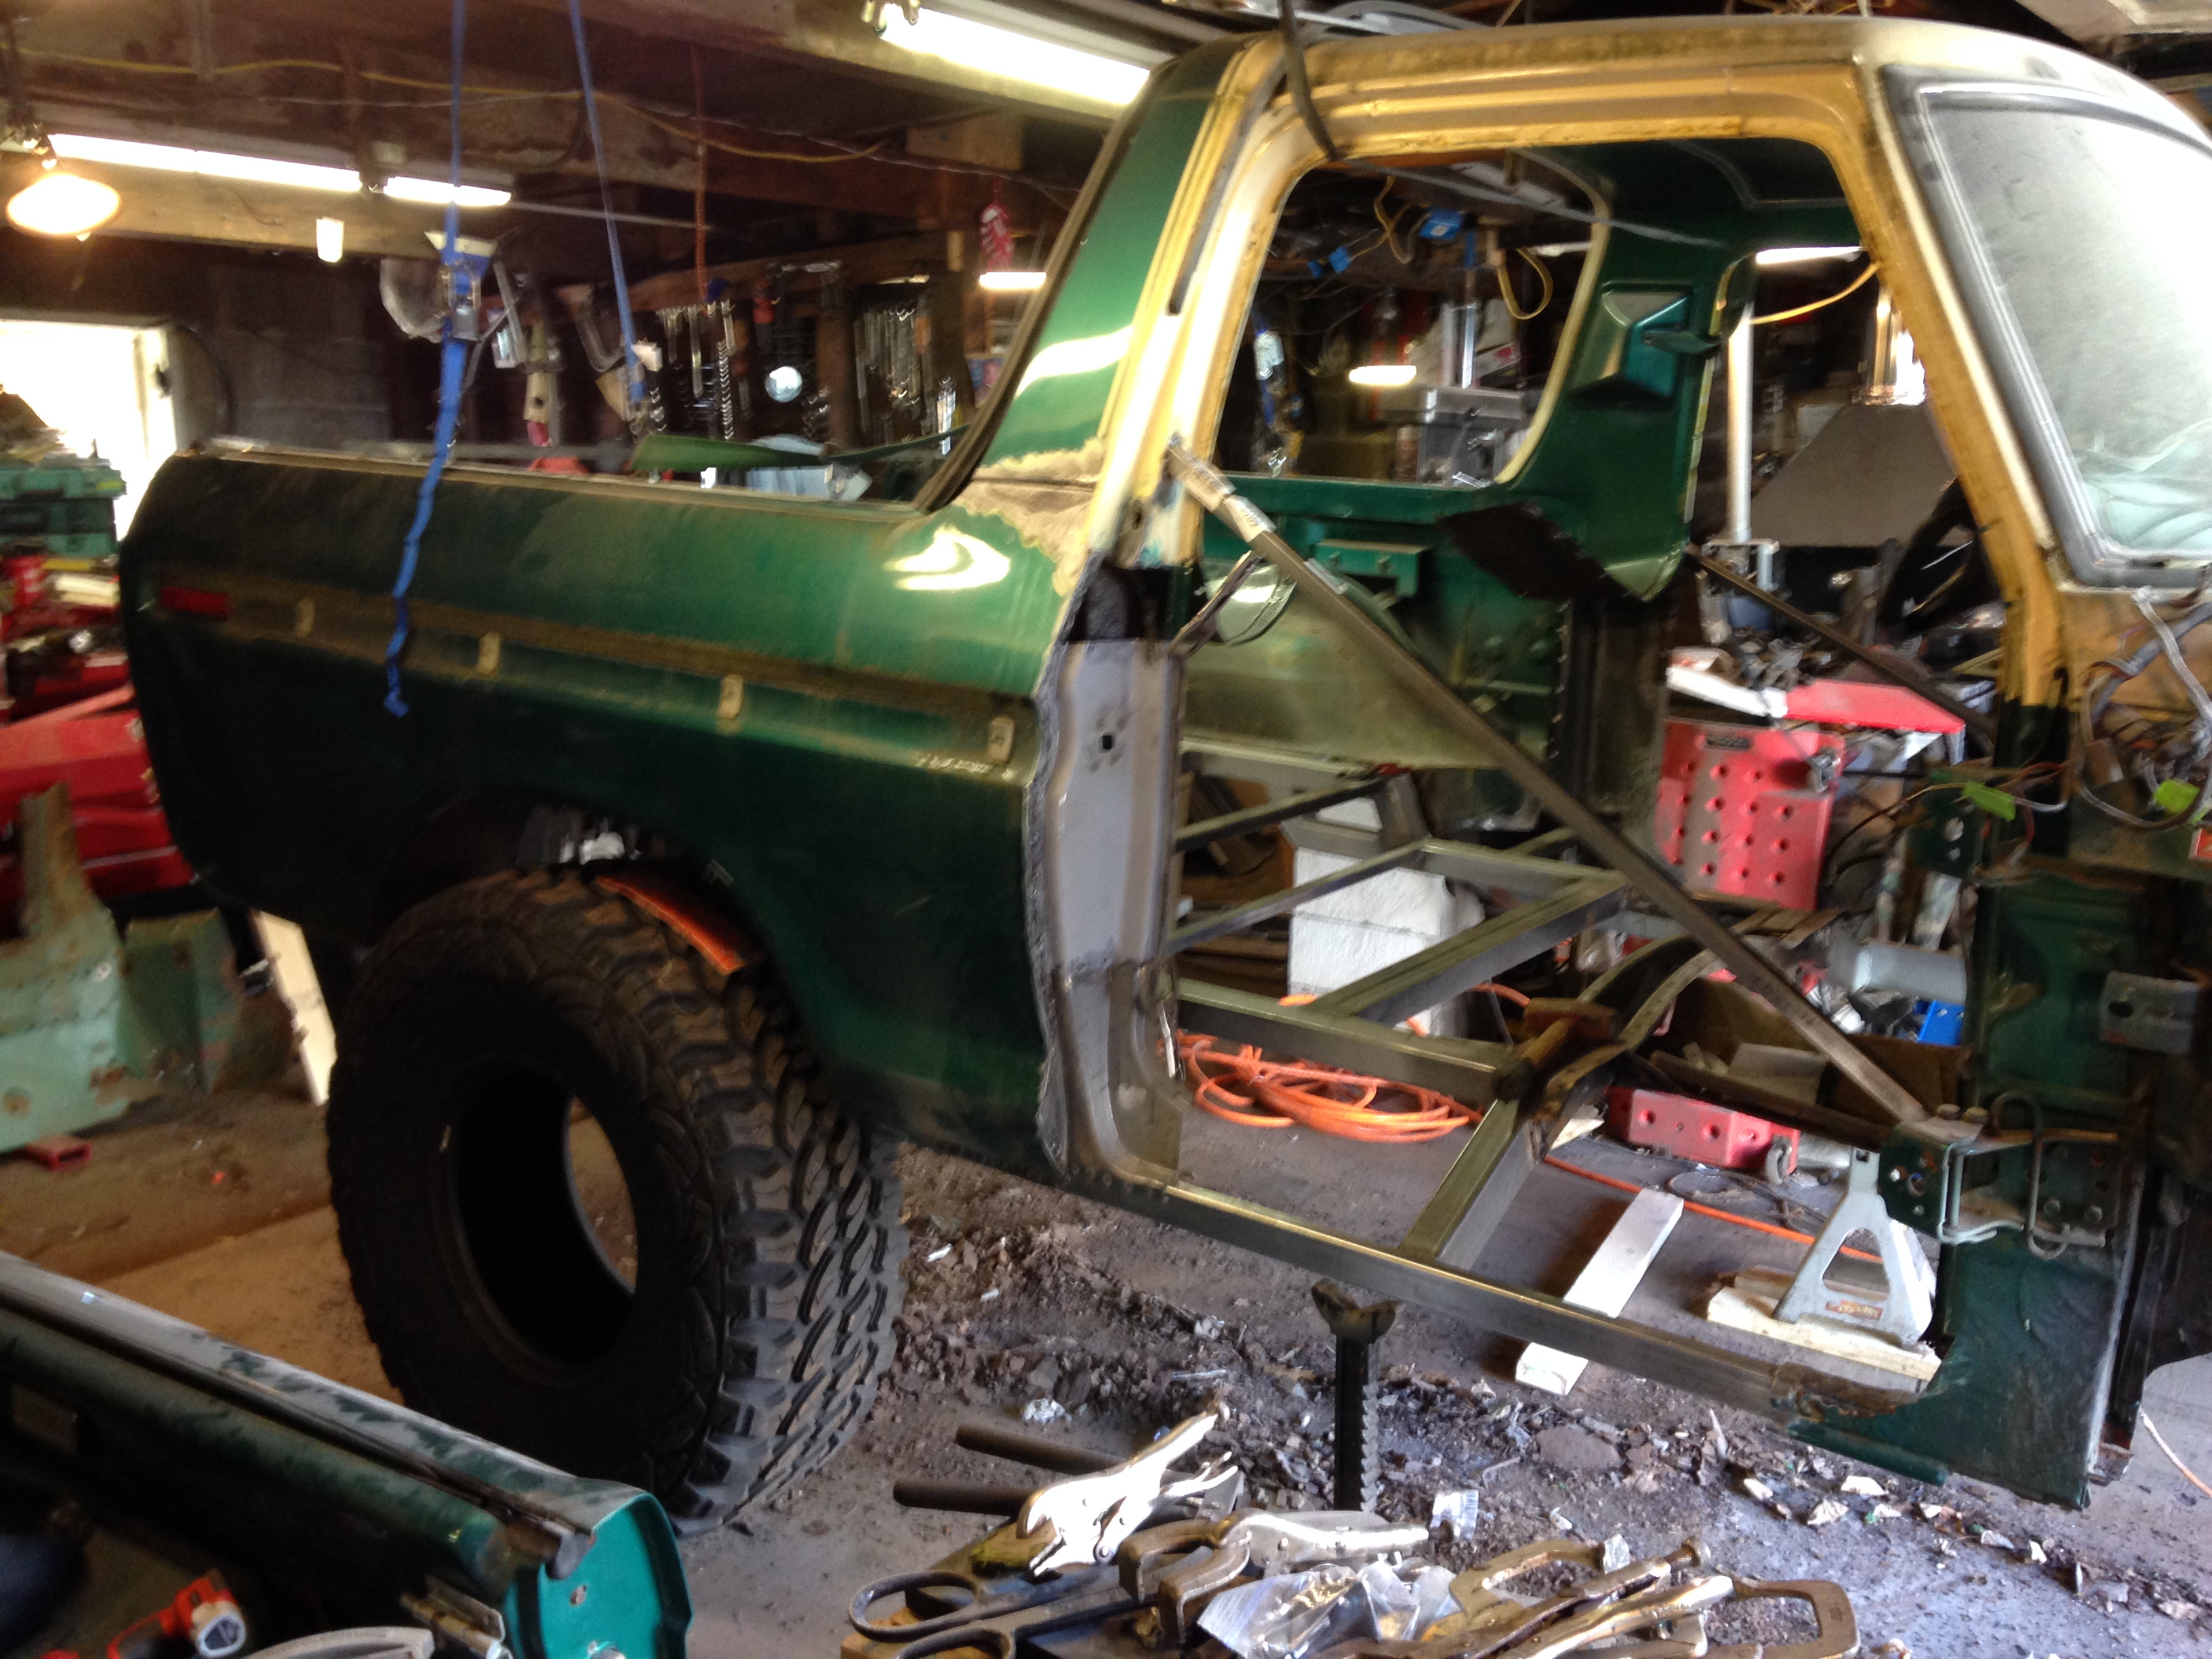
The whole floor was junk. I cut it all and tossed it out except for a little bit around the transfer case shifter area.
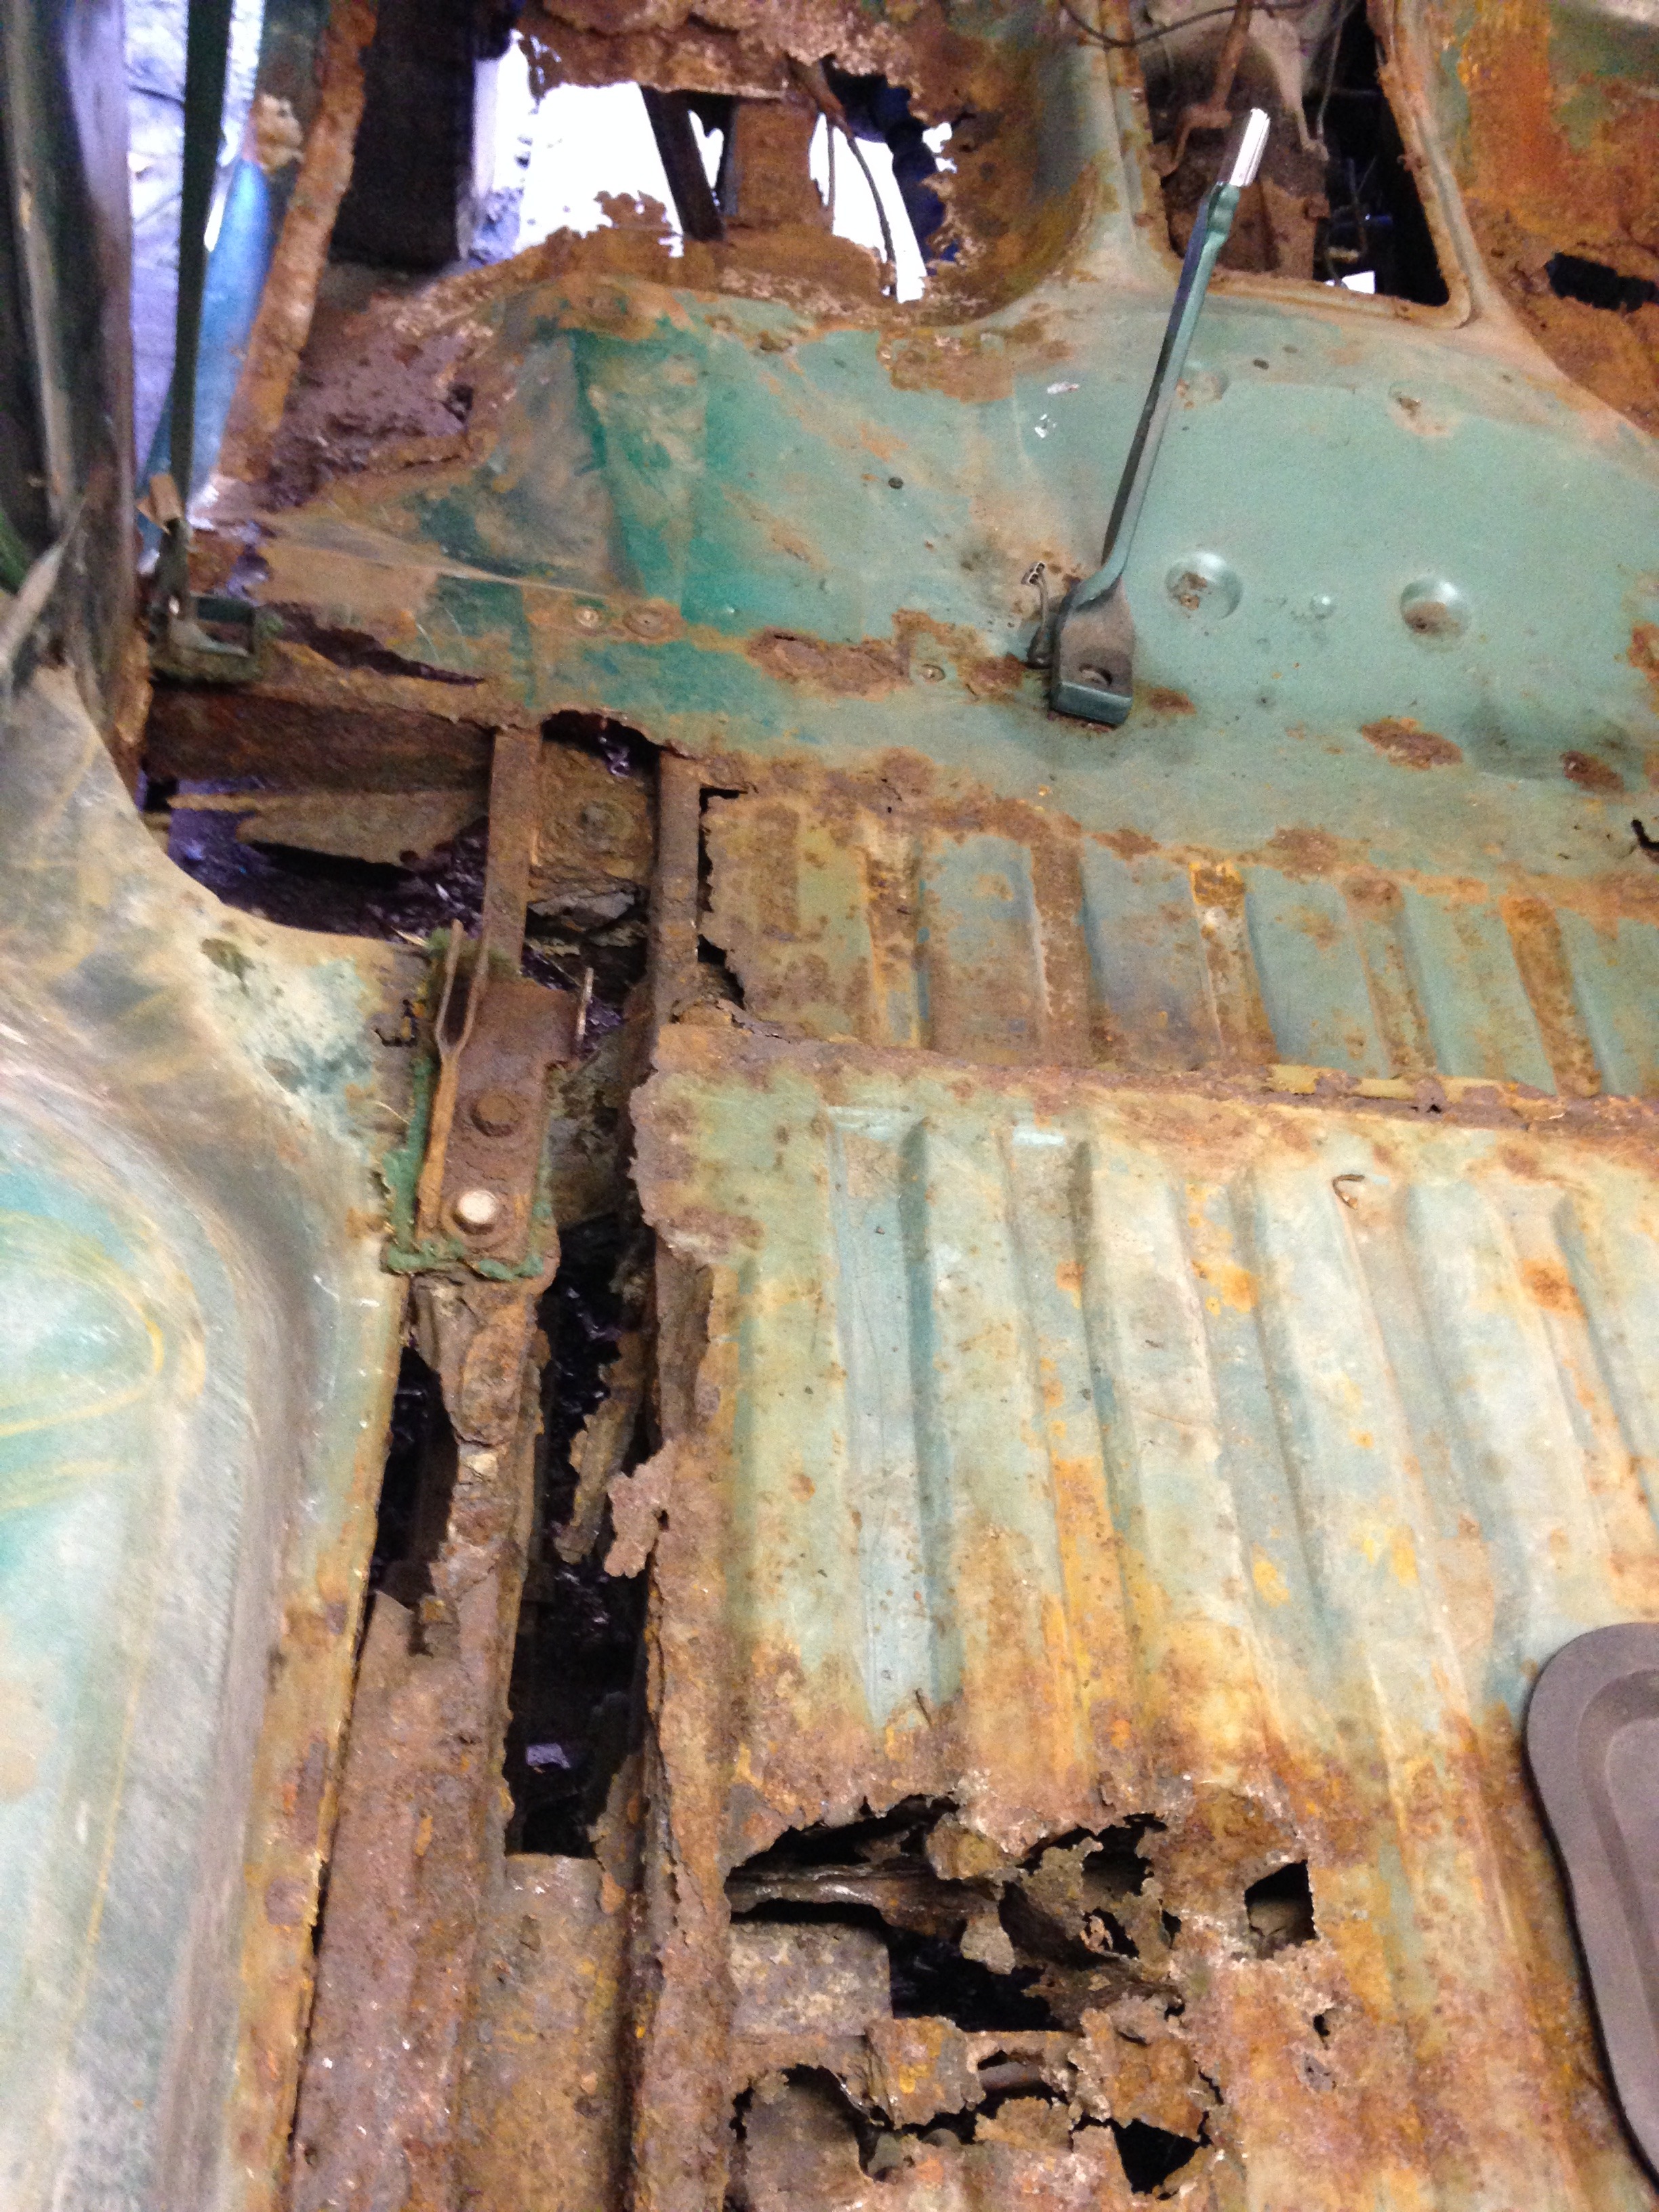
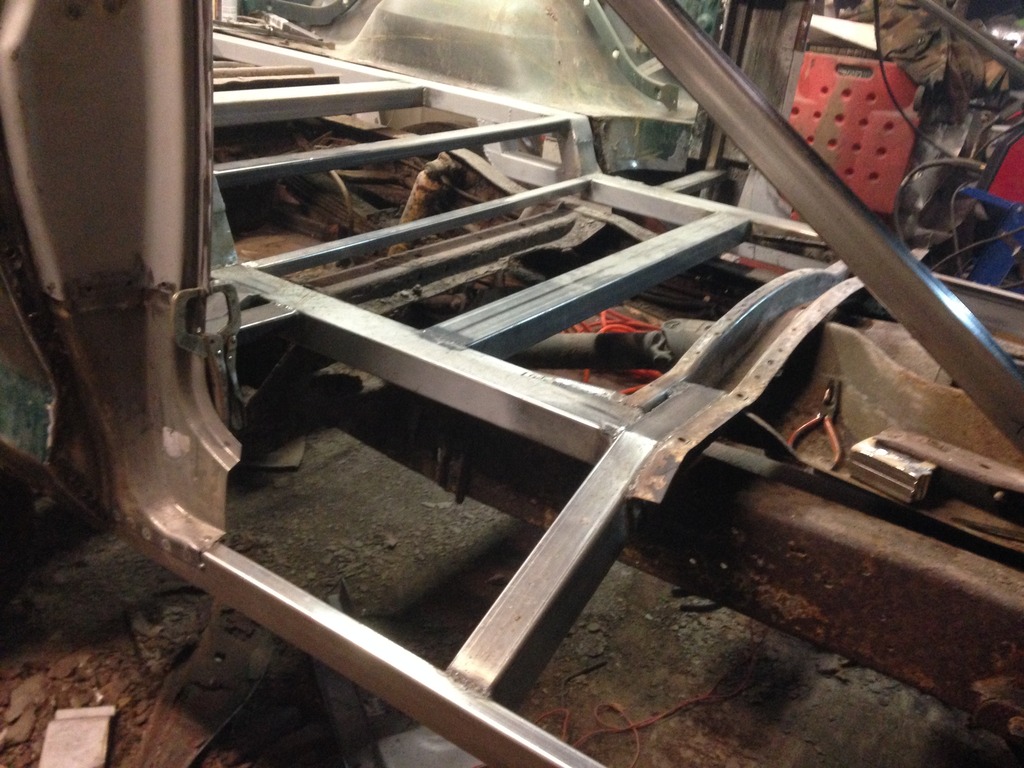
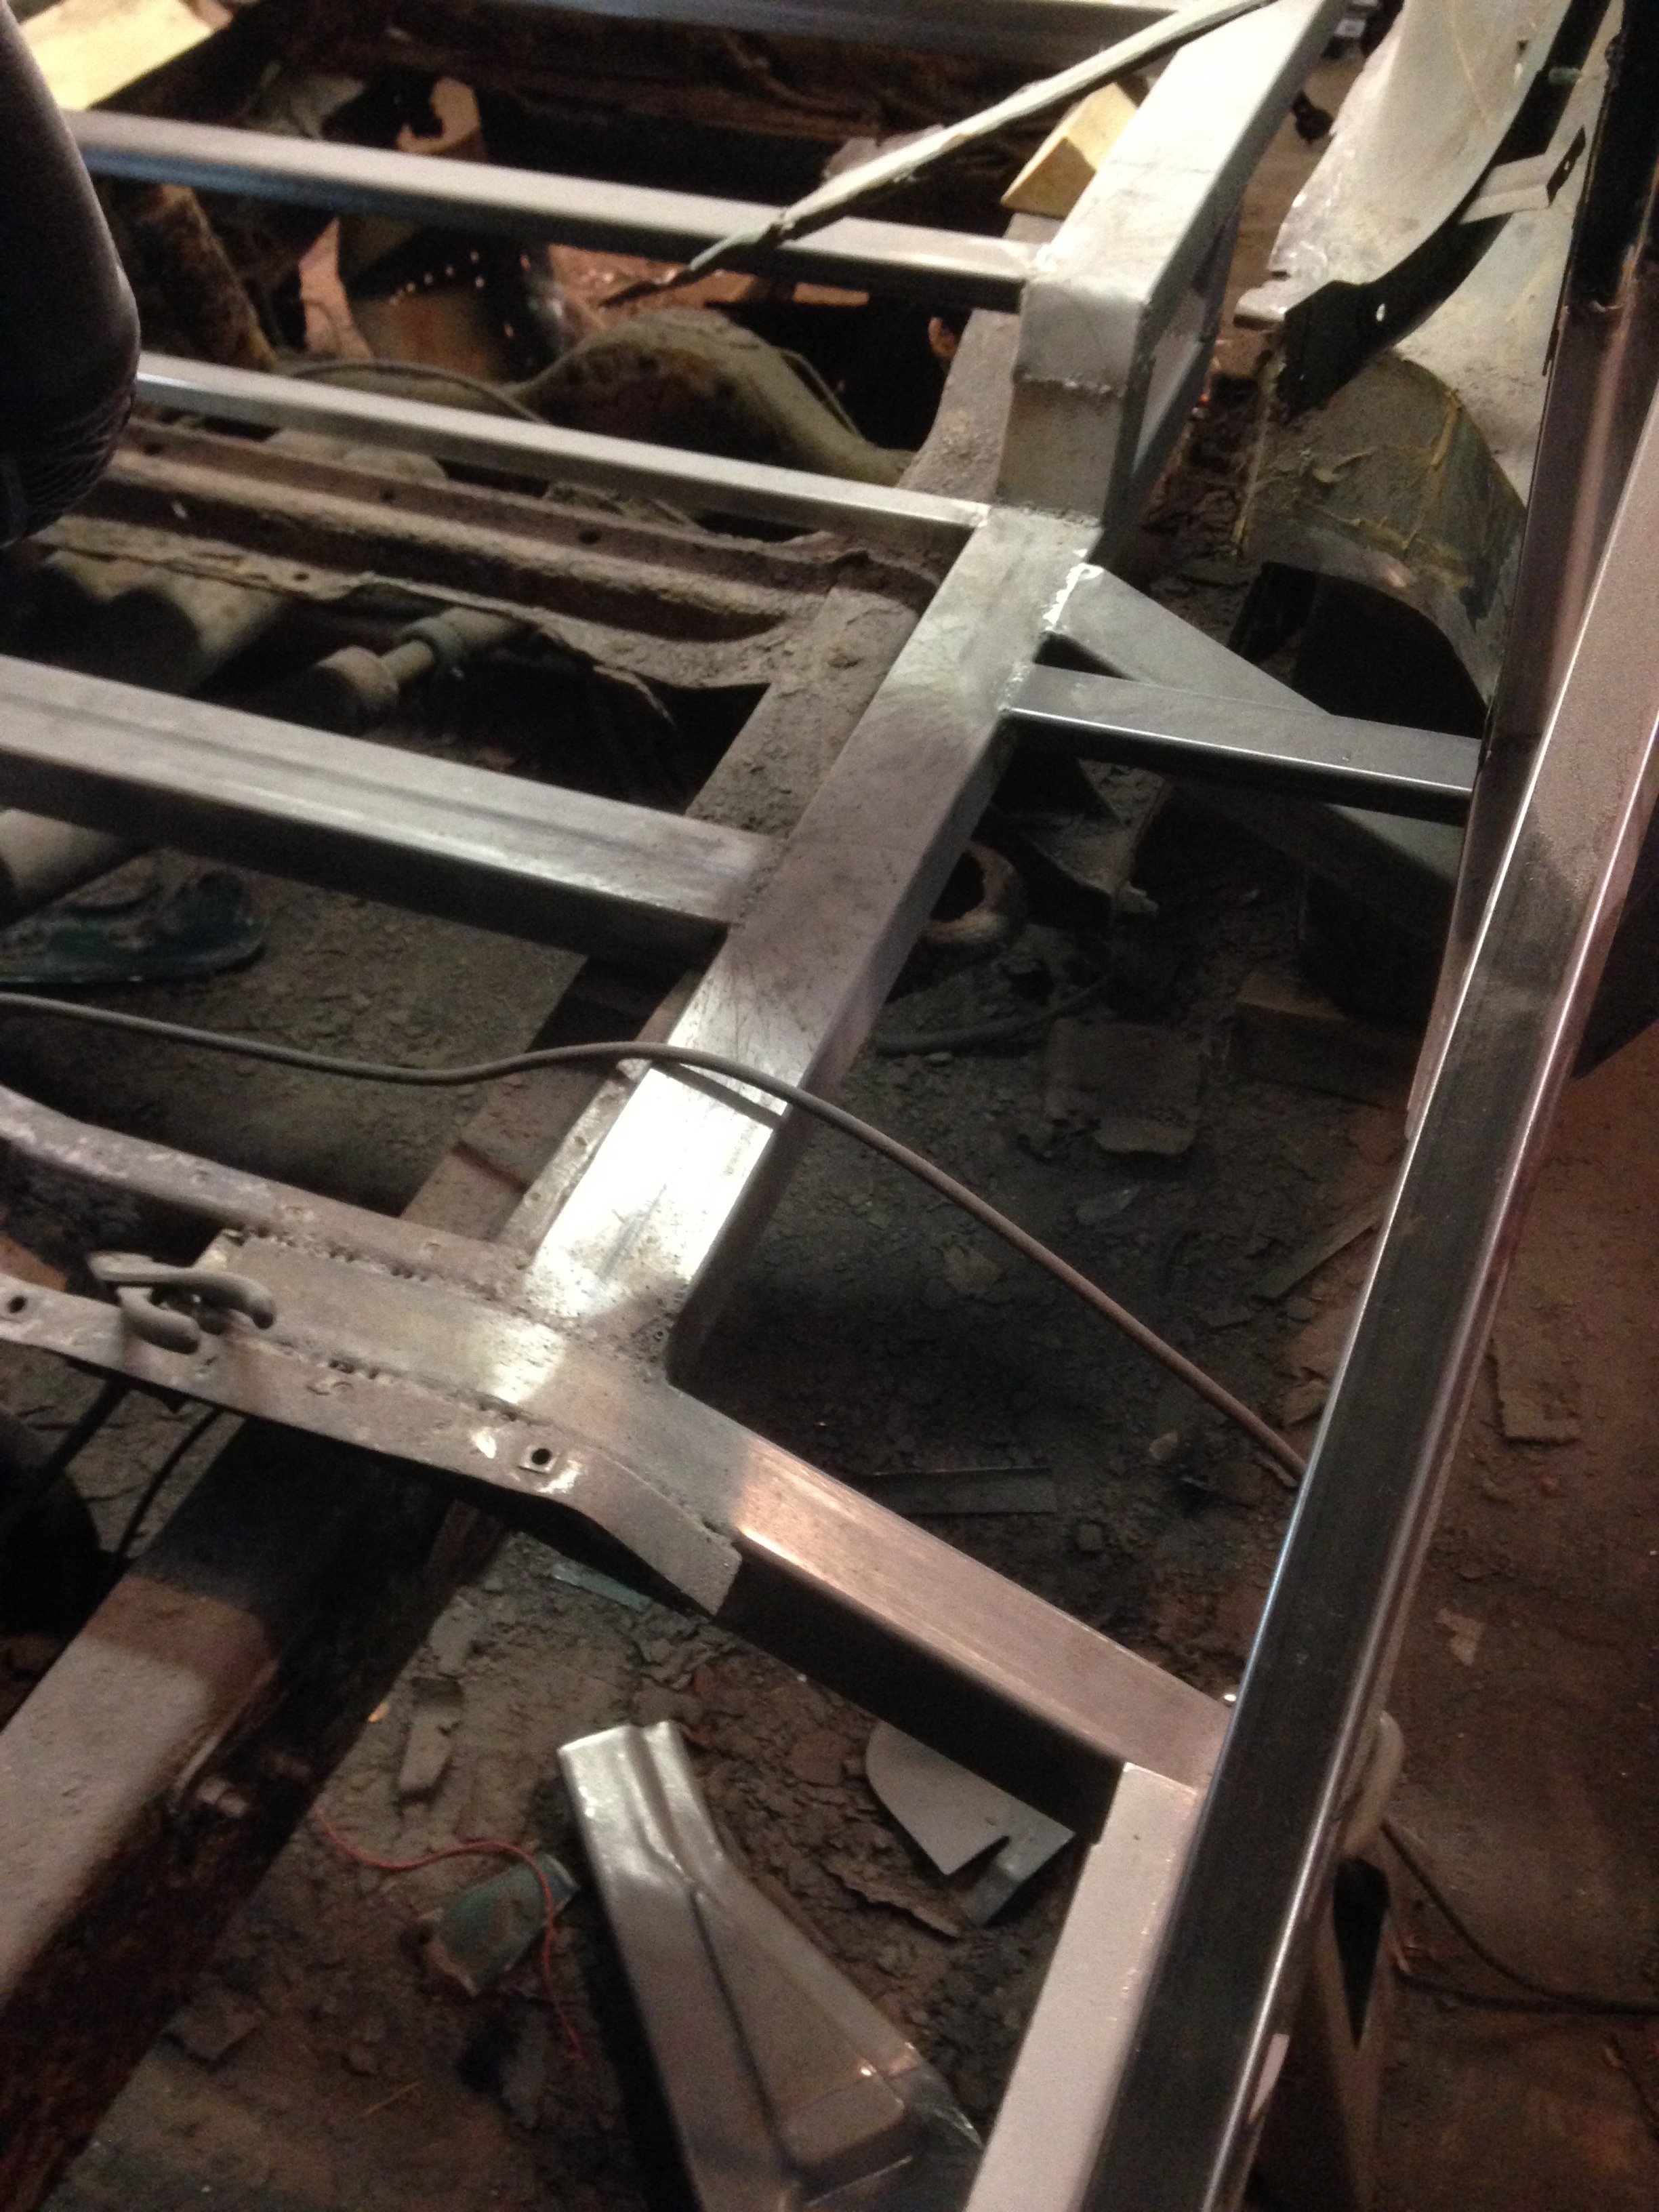
Subframe was shot too, so that also when. I just kept a little bit that went under the front seats. Then built a new subframe from 2 x 3" box tubing. With the bronco frame still under it.
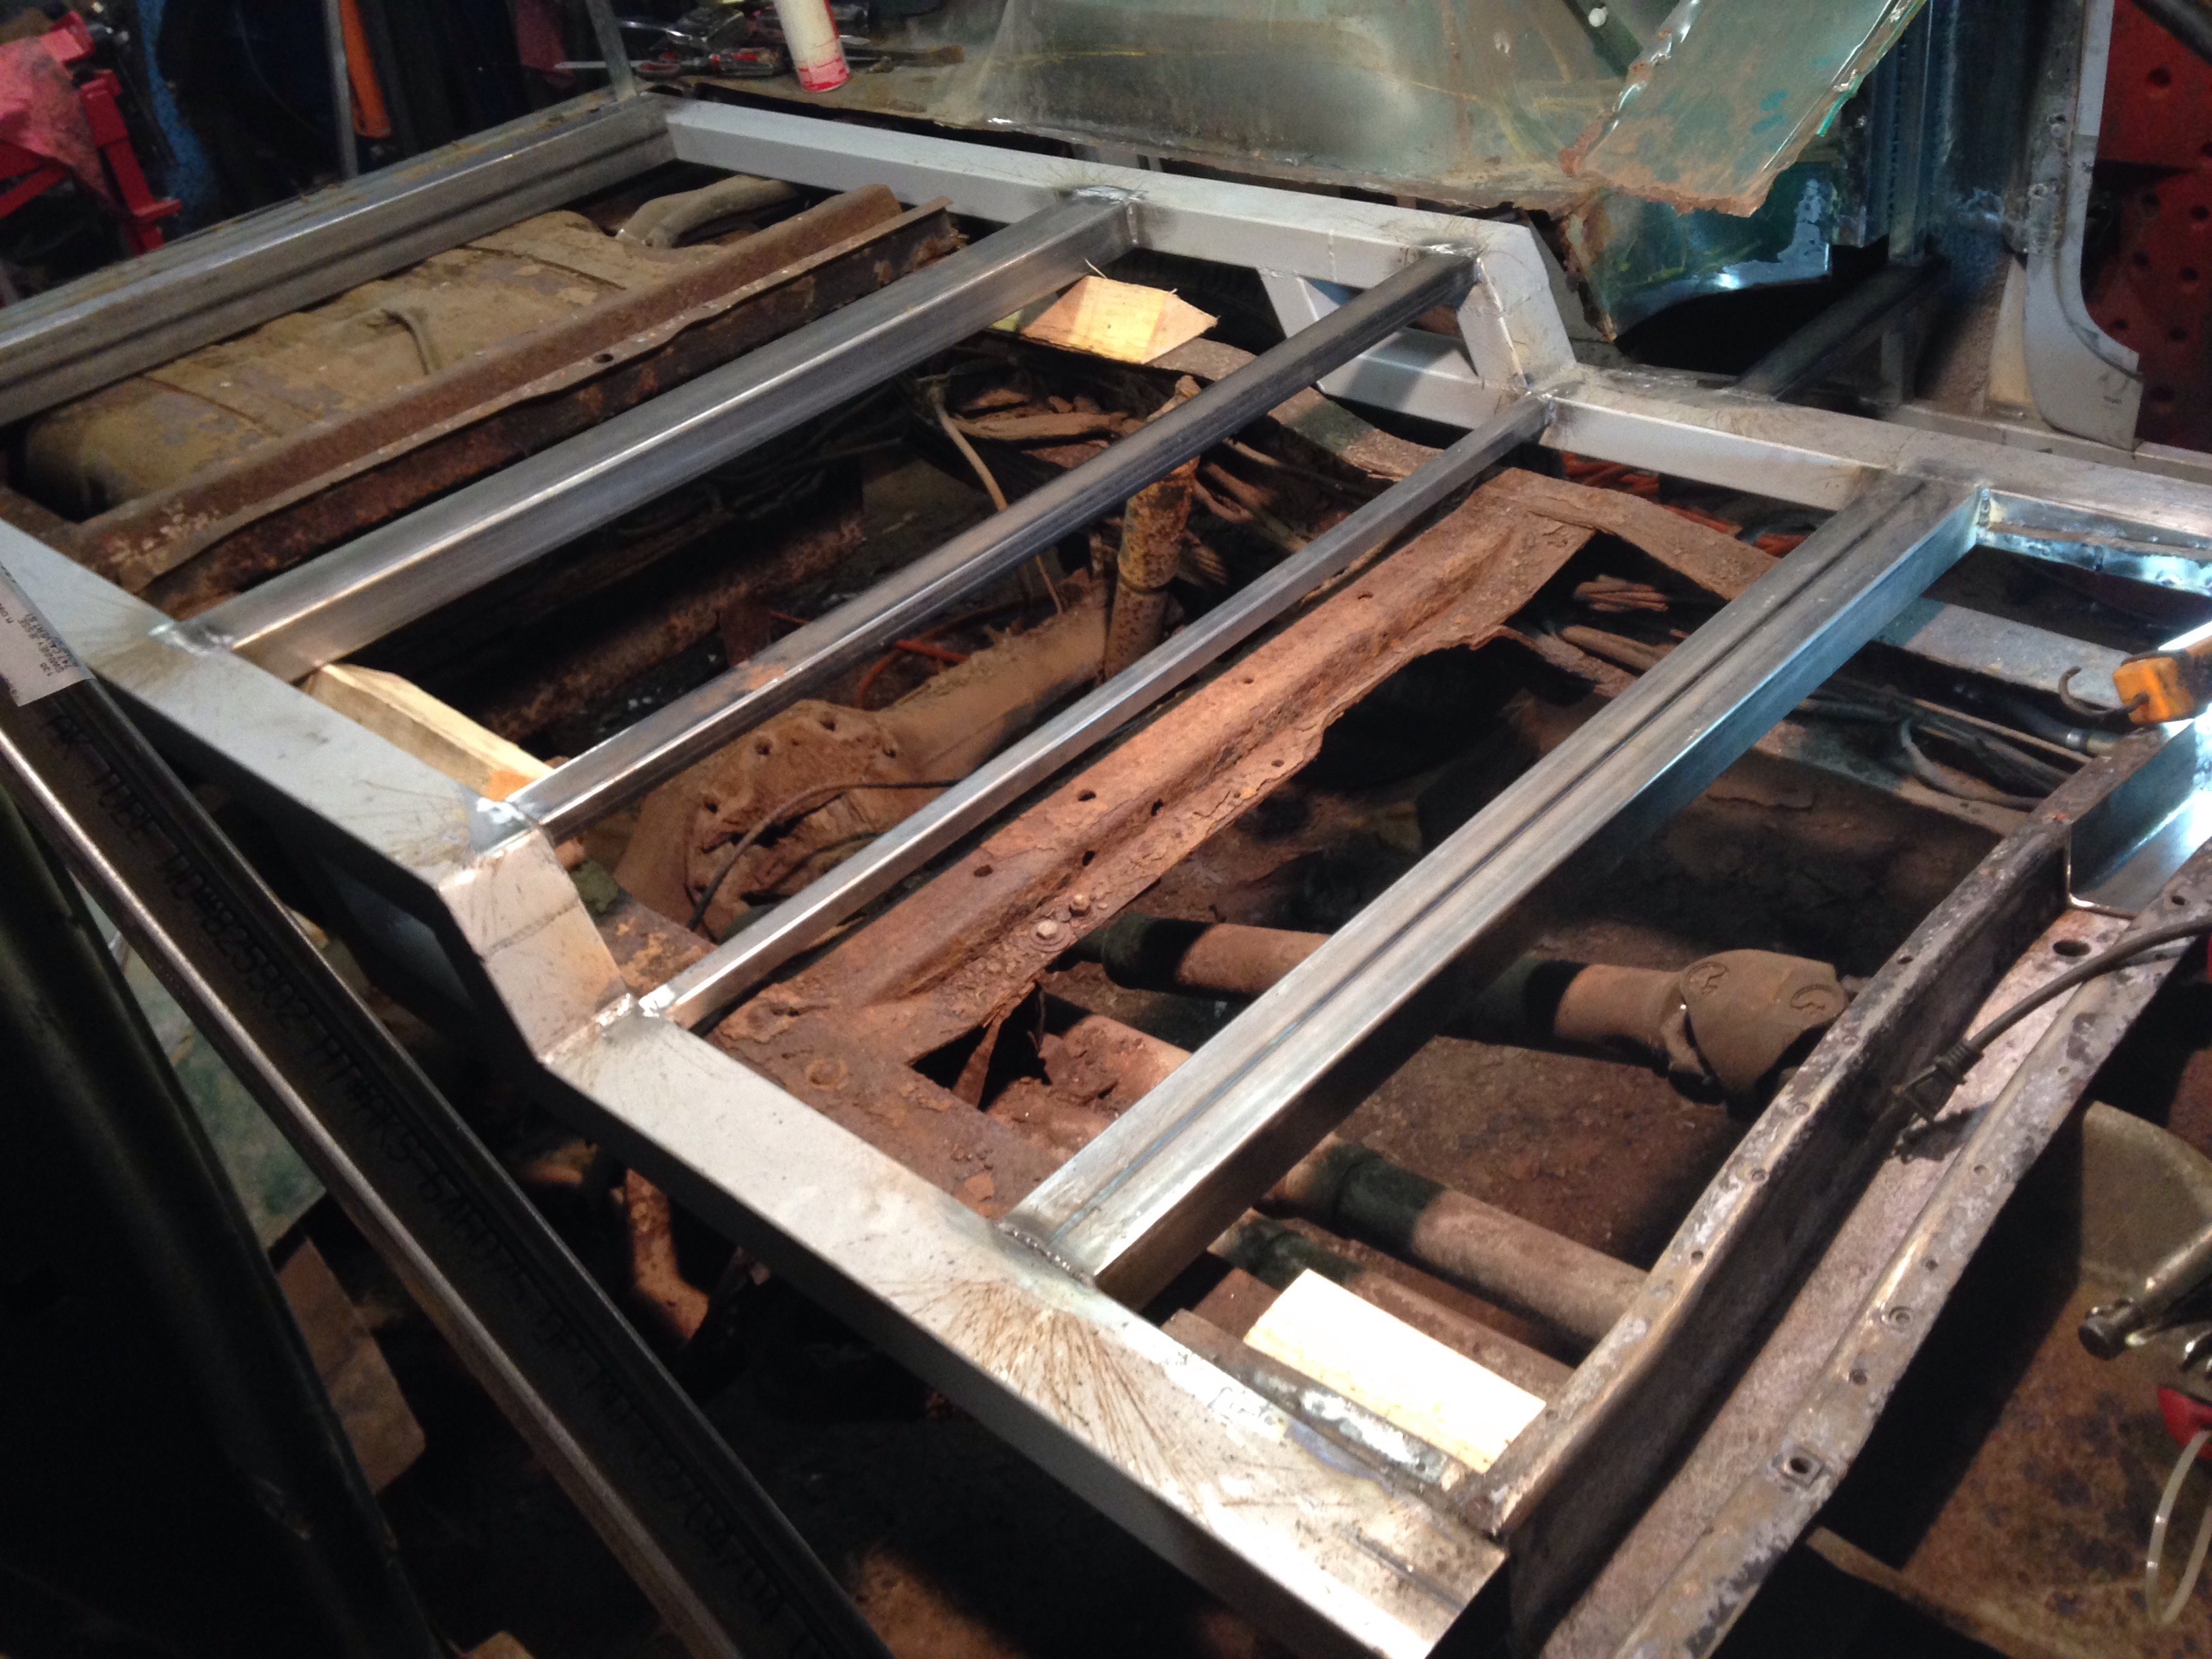
Rockers were both gone too. I ran a length of 1 x 2" box tubing inside the rocker. Should add a good deal of strengh.
Then out with the frame. Because it had rot holed in it too.
Like my lovely pile of bronco bits on the floor? I have a wheelbarrow full of rust pieces of bronco. The tires I am going to run are in this pic too. ProComp 40 x 13.5 17"
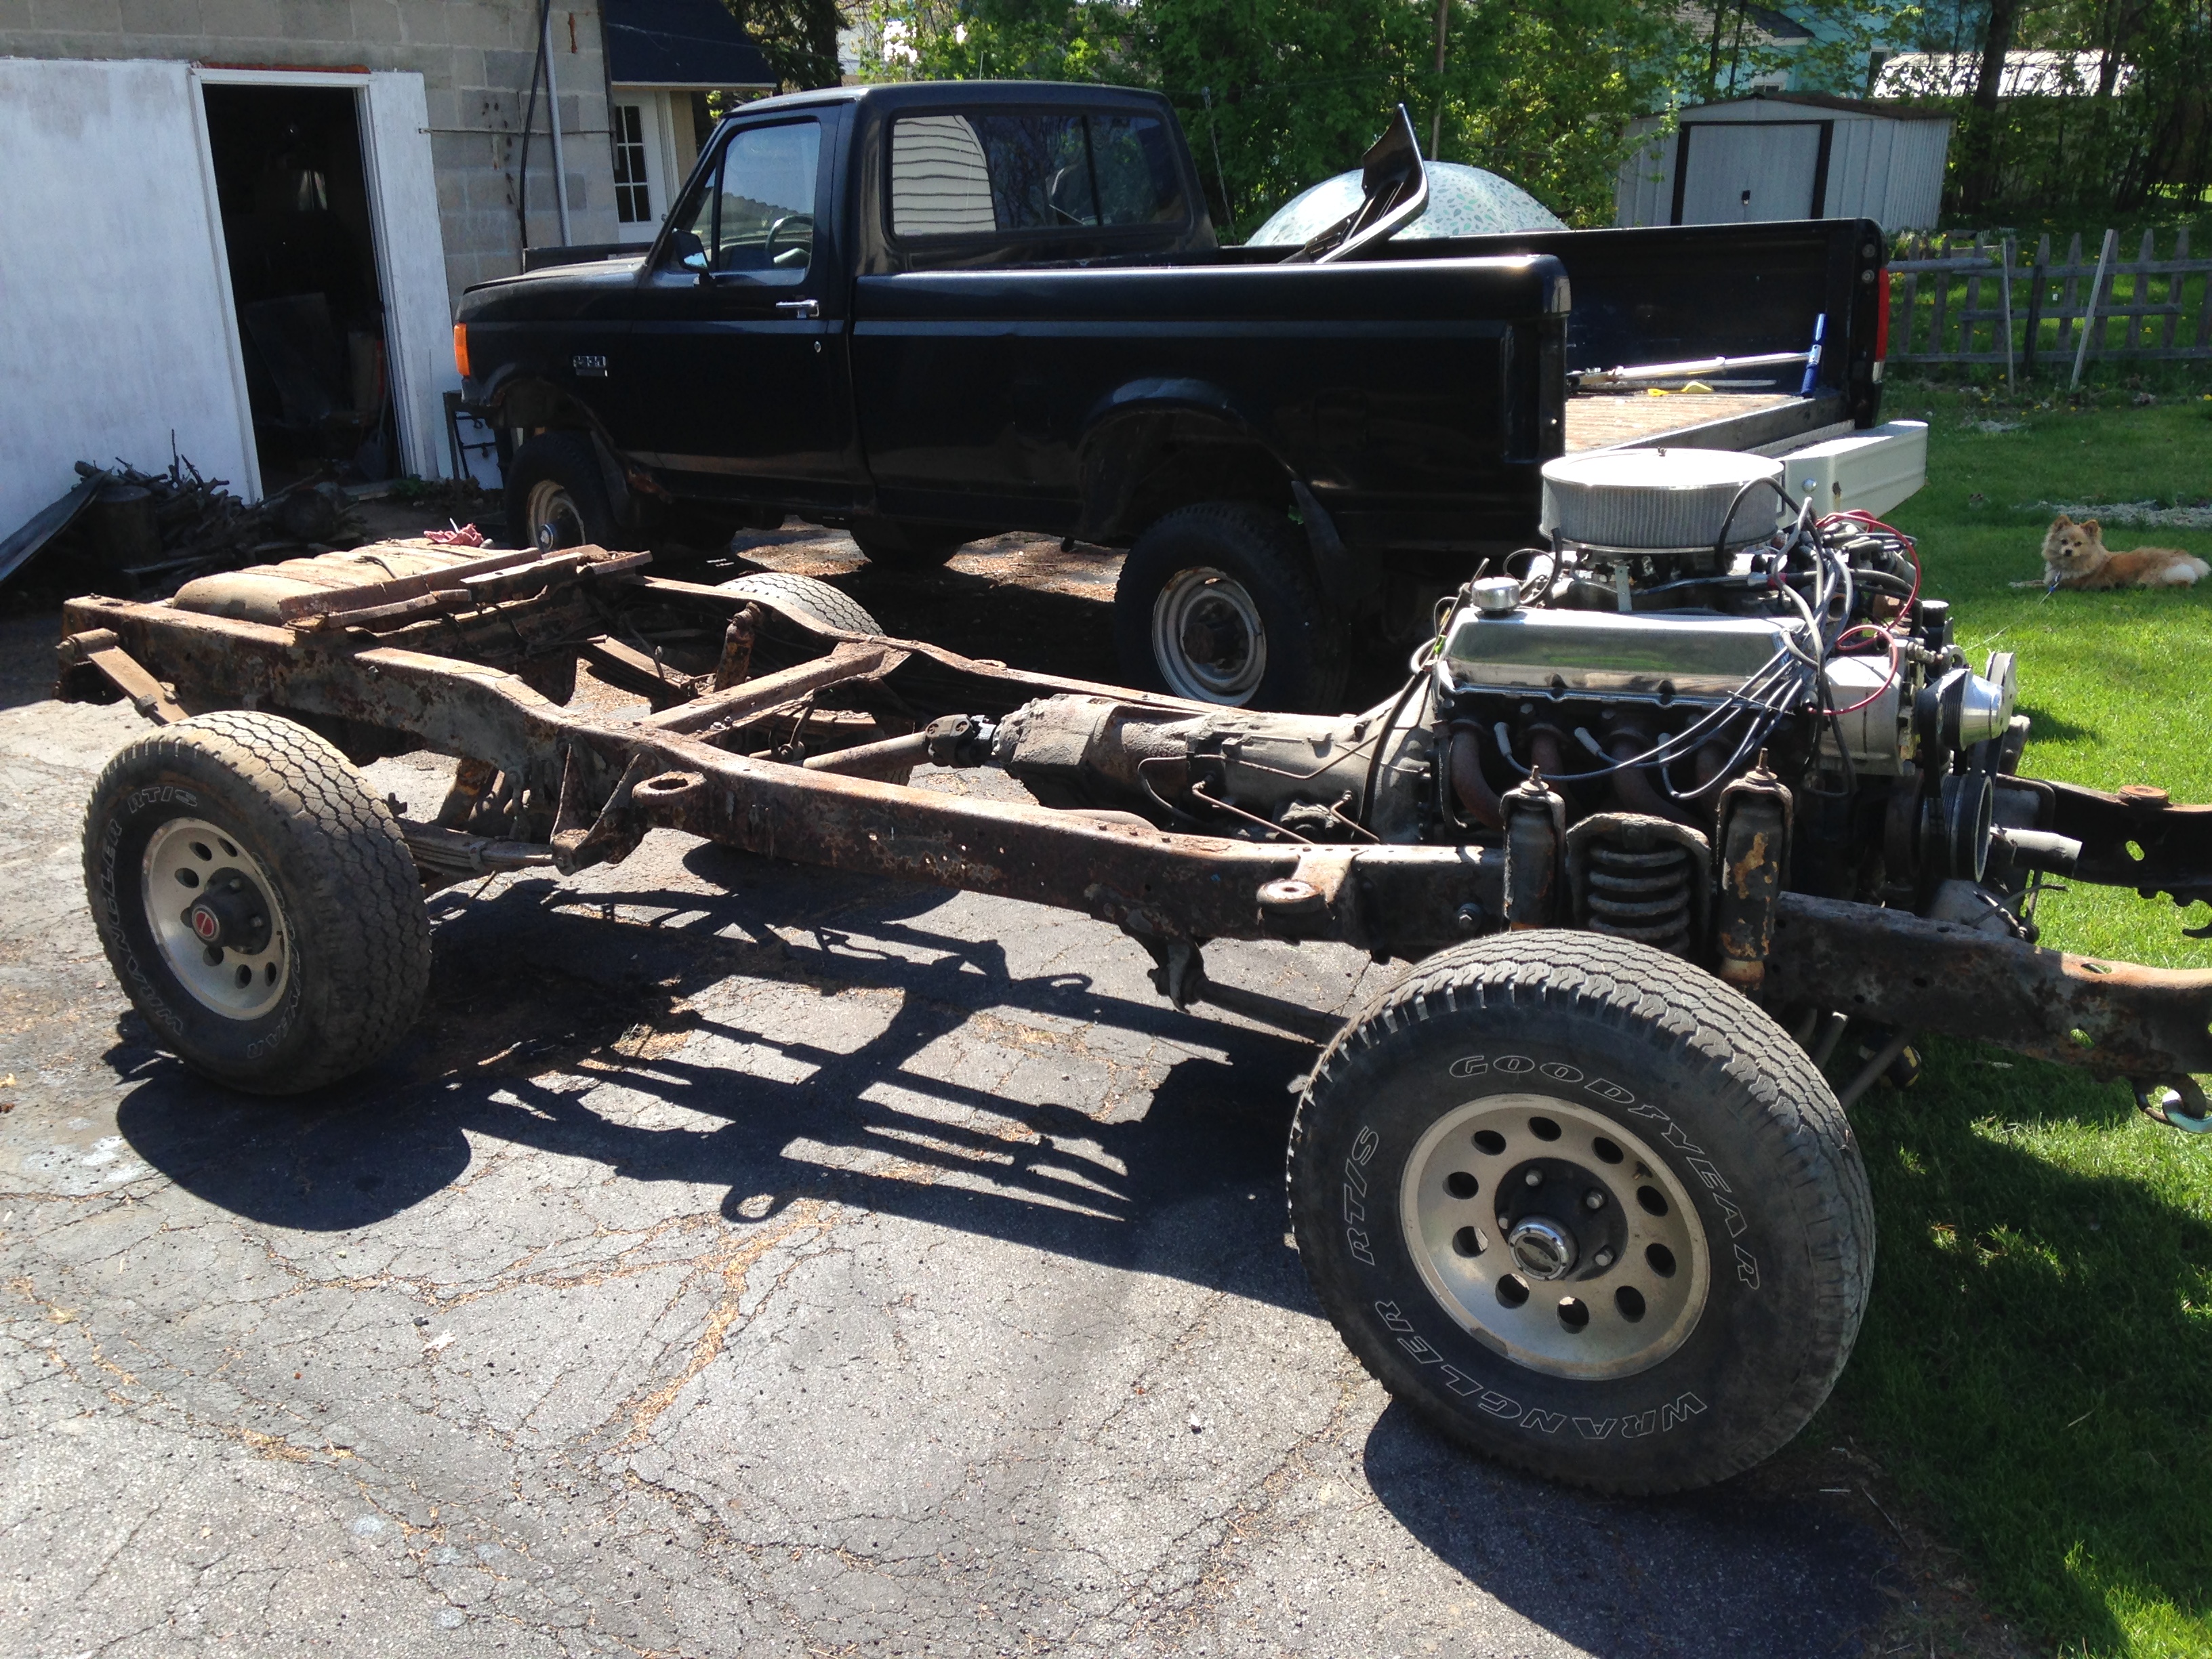
Bronco frame with my donor truck behind it.
Jess


Not too bad, a little rust in the drivers side quarter.
Then there is the floor. Well, what was left of it.


The whole floor was junk. I cut it all and tossed it out except for a little bit around the transfer case shifter area.

Subframe was shot too, so that also when. I just kept a little bit that went under the front seats. Then built a new subframe from 2 x 3" box tubing. With the bronco frame still under it.

Rockers were both gone too. I ran a length of 1 x 2" box tubing inside the rocker. Should add a good deal of strengh.


Then out with the frame. Because it had rot holed in it too.

Like my lovely pile of bronco bits on the floor? I have a wheelbarrow full of rust pieces of bronco. The tires I am going to run are in this pic too. ProComp 40 x 13.5 17"

Bronco frame with my donor truck behind it.

Jess
Thread Starter
|
Tuned
Joined: Nov 2015
Posts: 365
Likes: 13
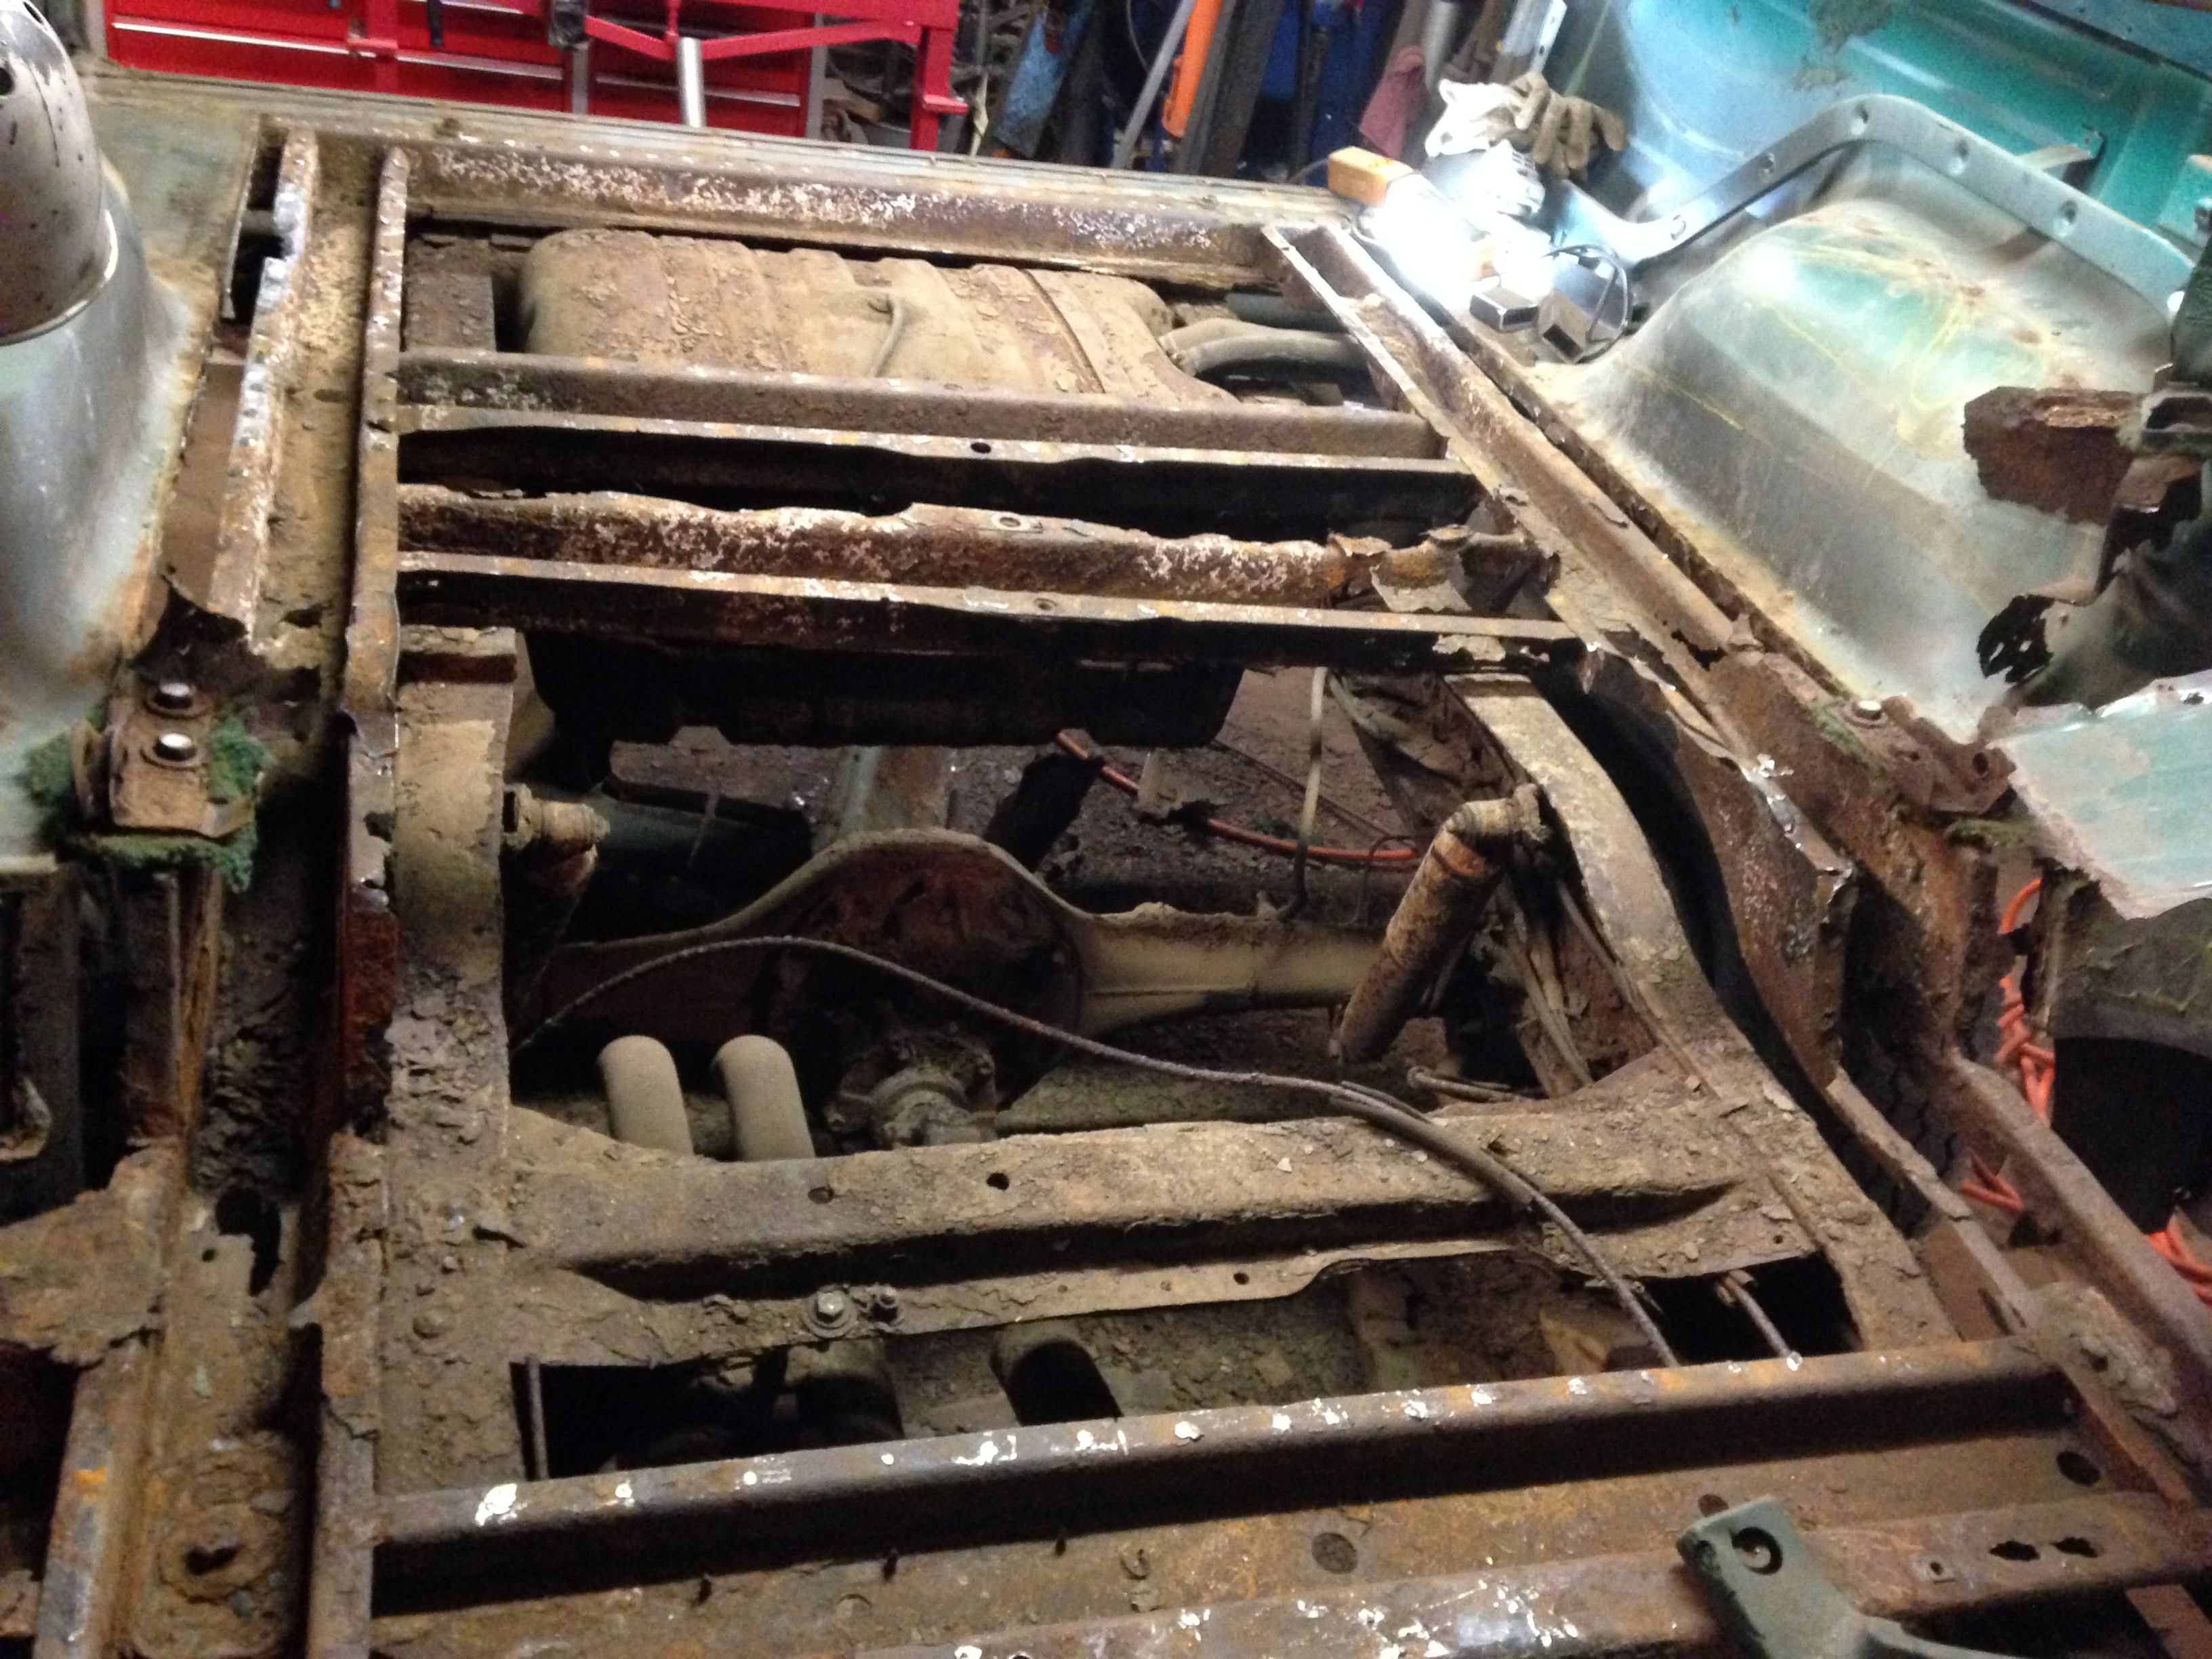
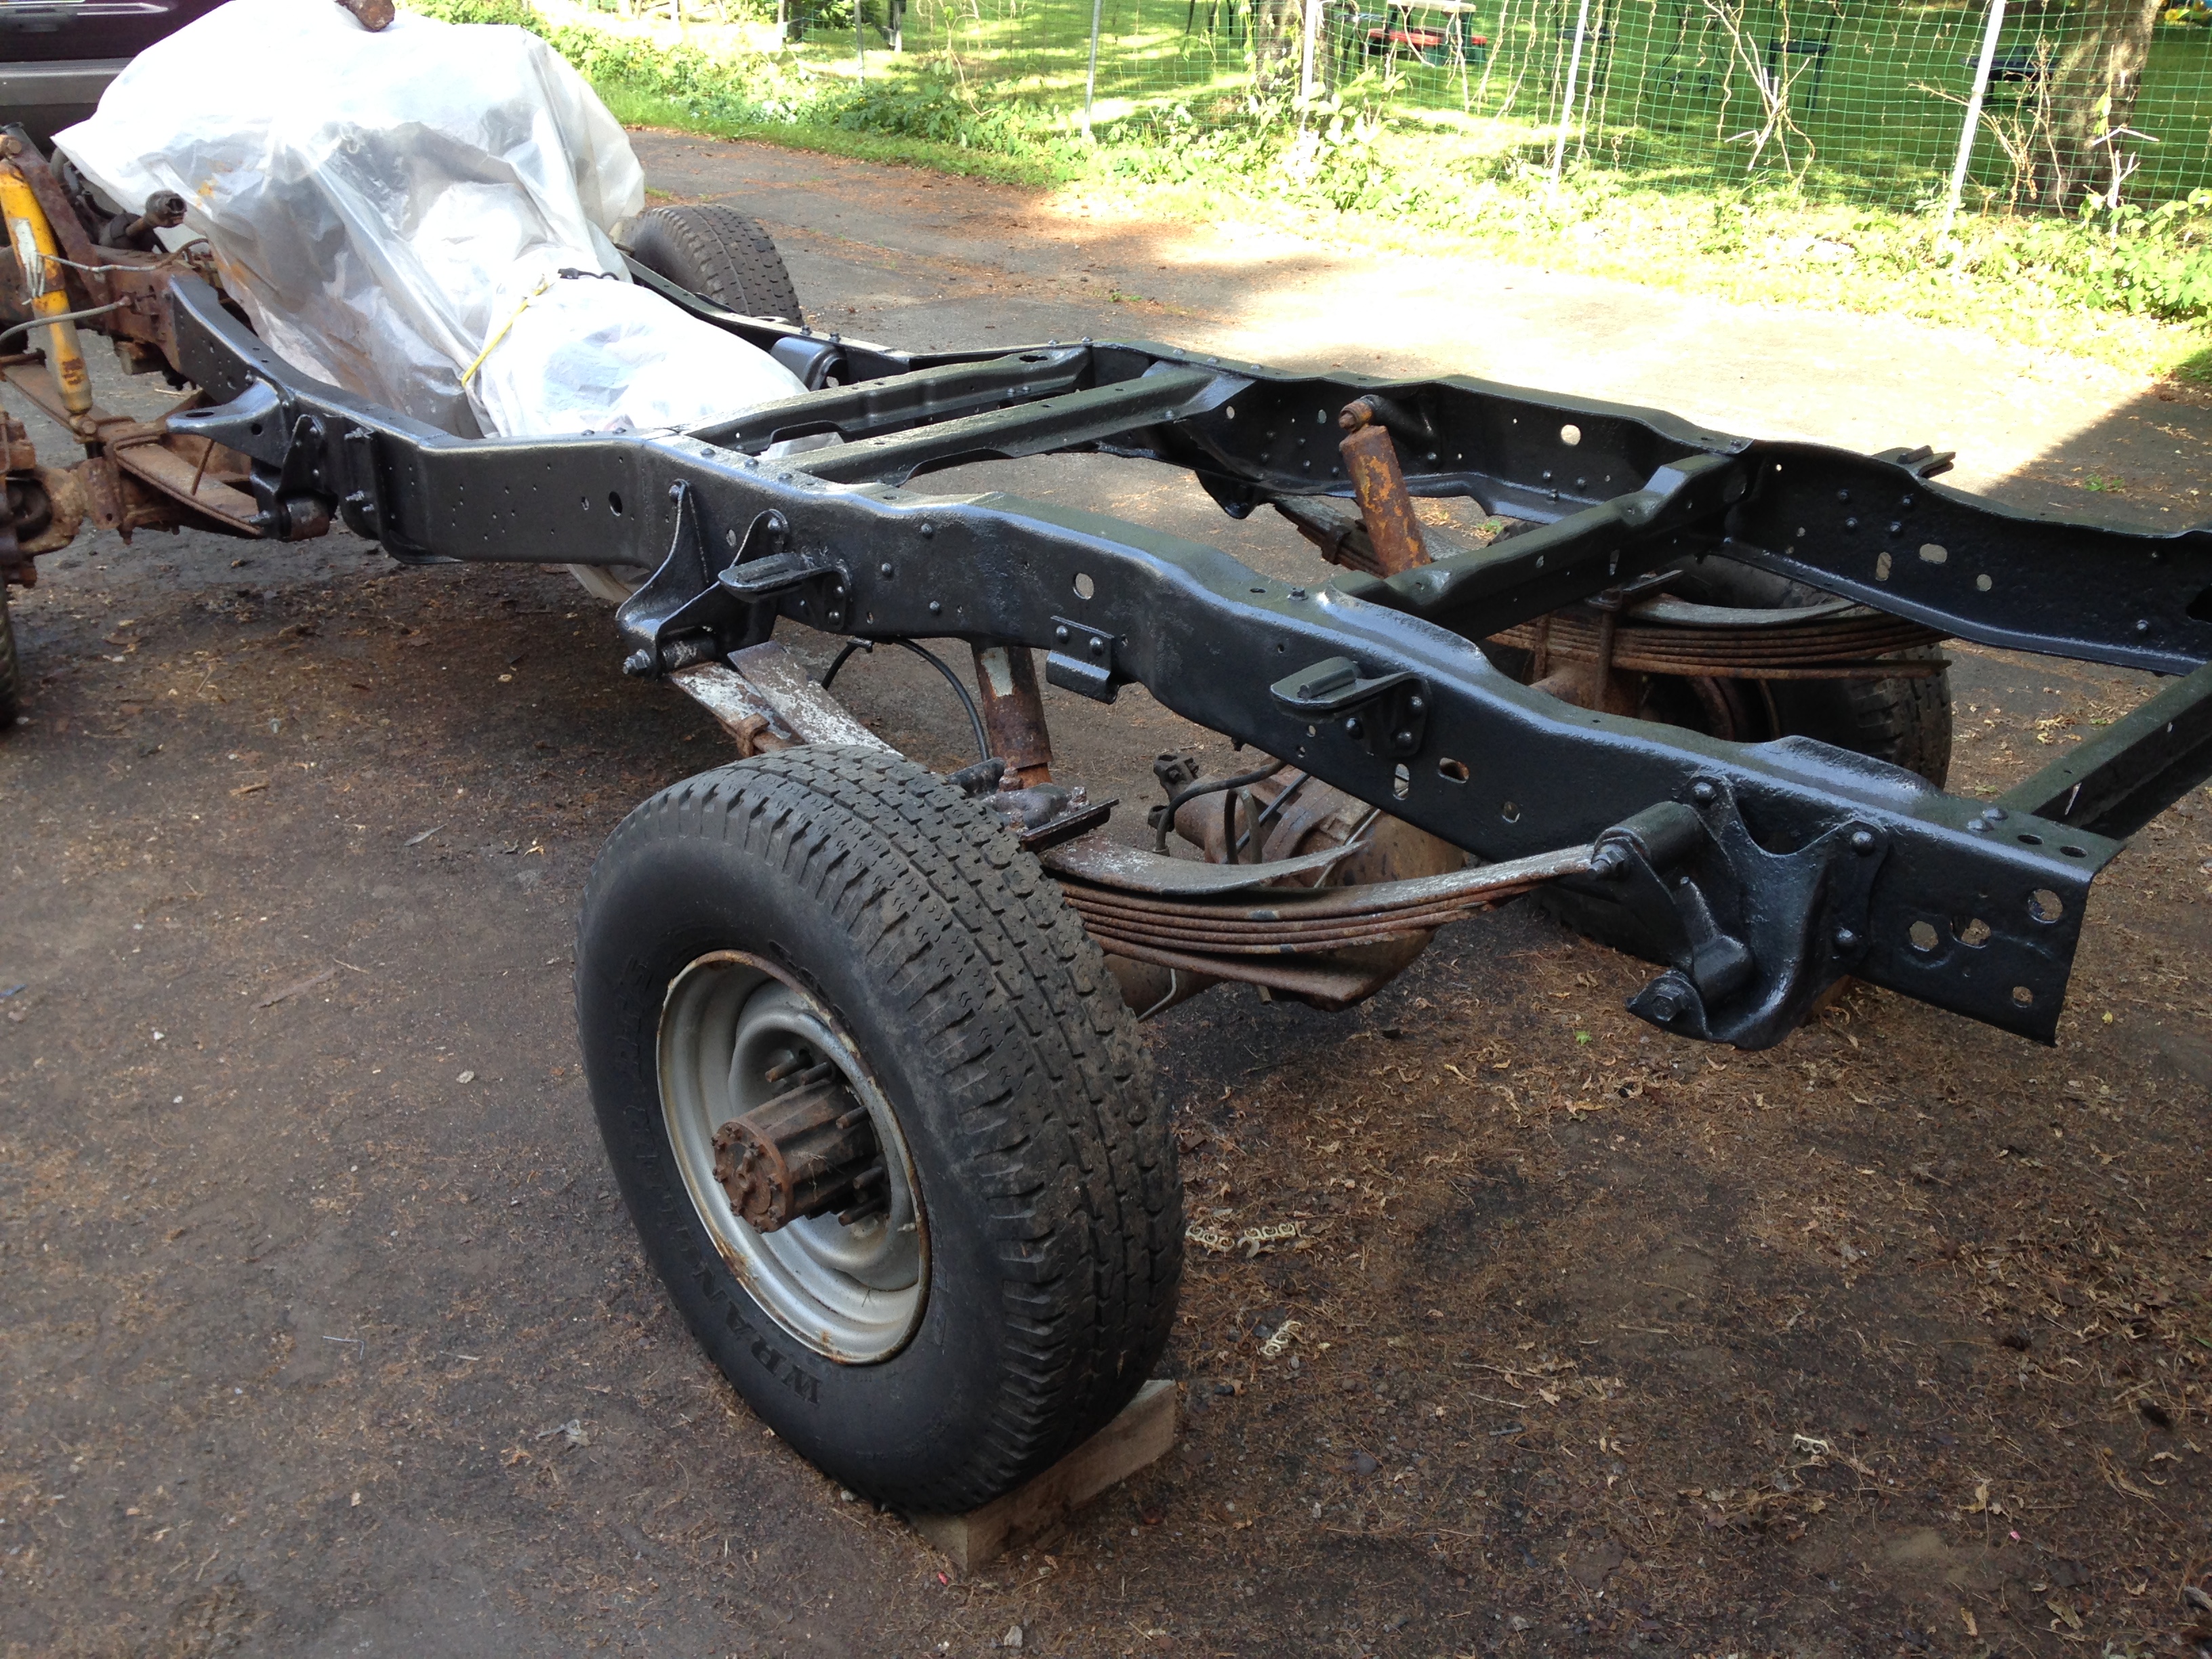
Donor truck was a 1987 F-350 diesel. I gave up its frame with axles and the floor of its bed. The bed floor will replace the back of my bronco. I grabbed the fuel filler too, because, surprise, mine was rotted out.
I am going to keep the F-350's leaf sprung front Dana 60 set-up, Rear is a Sterling 10.25". 4.10 gears.
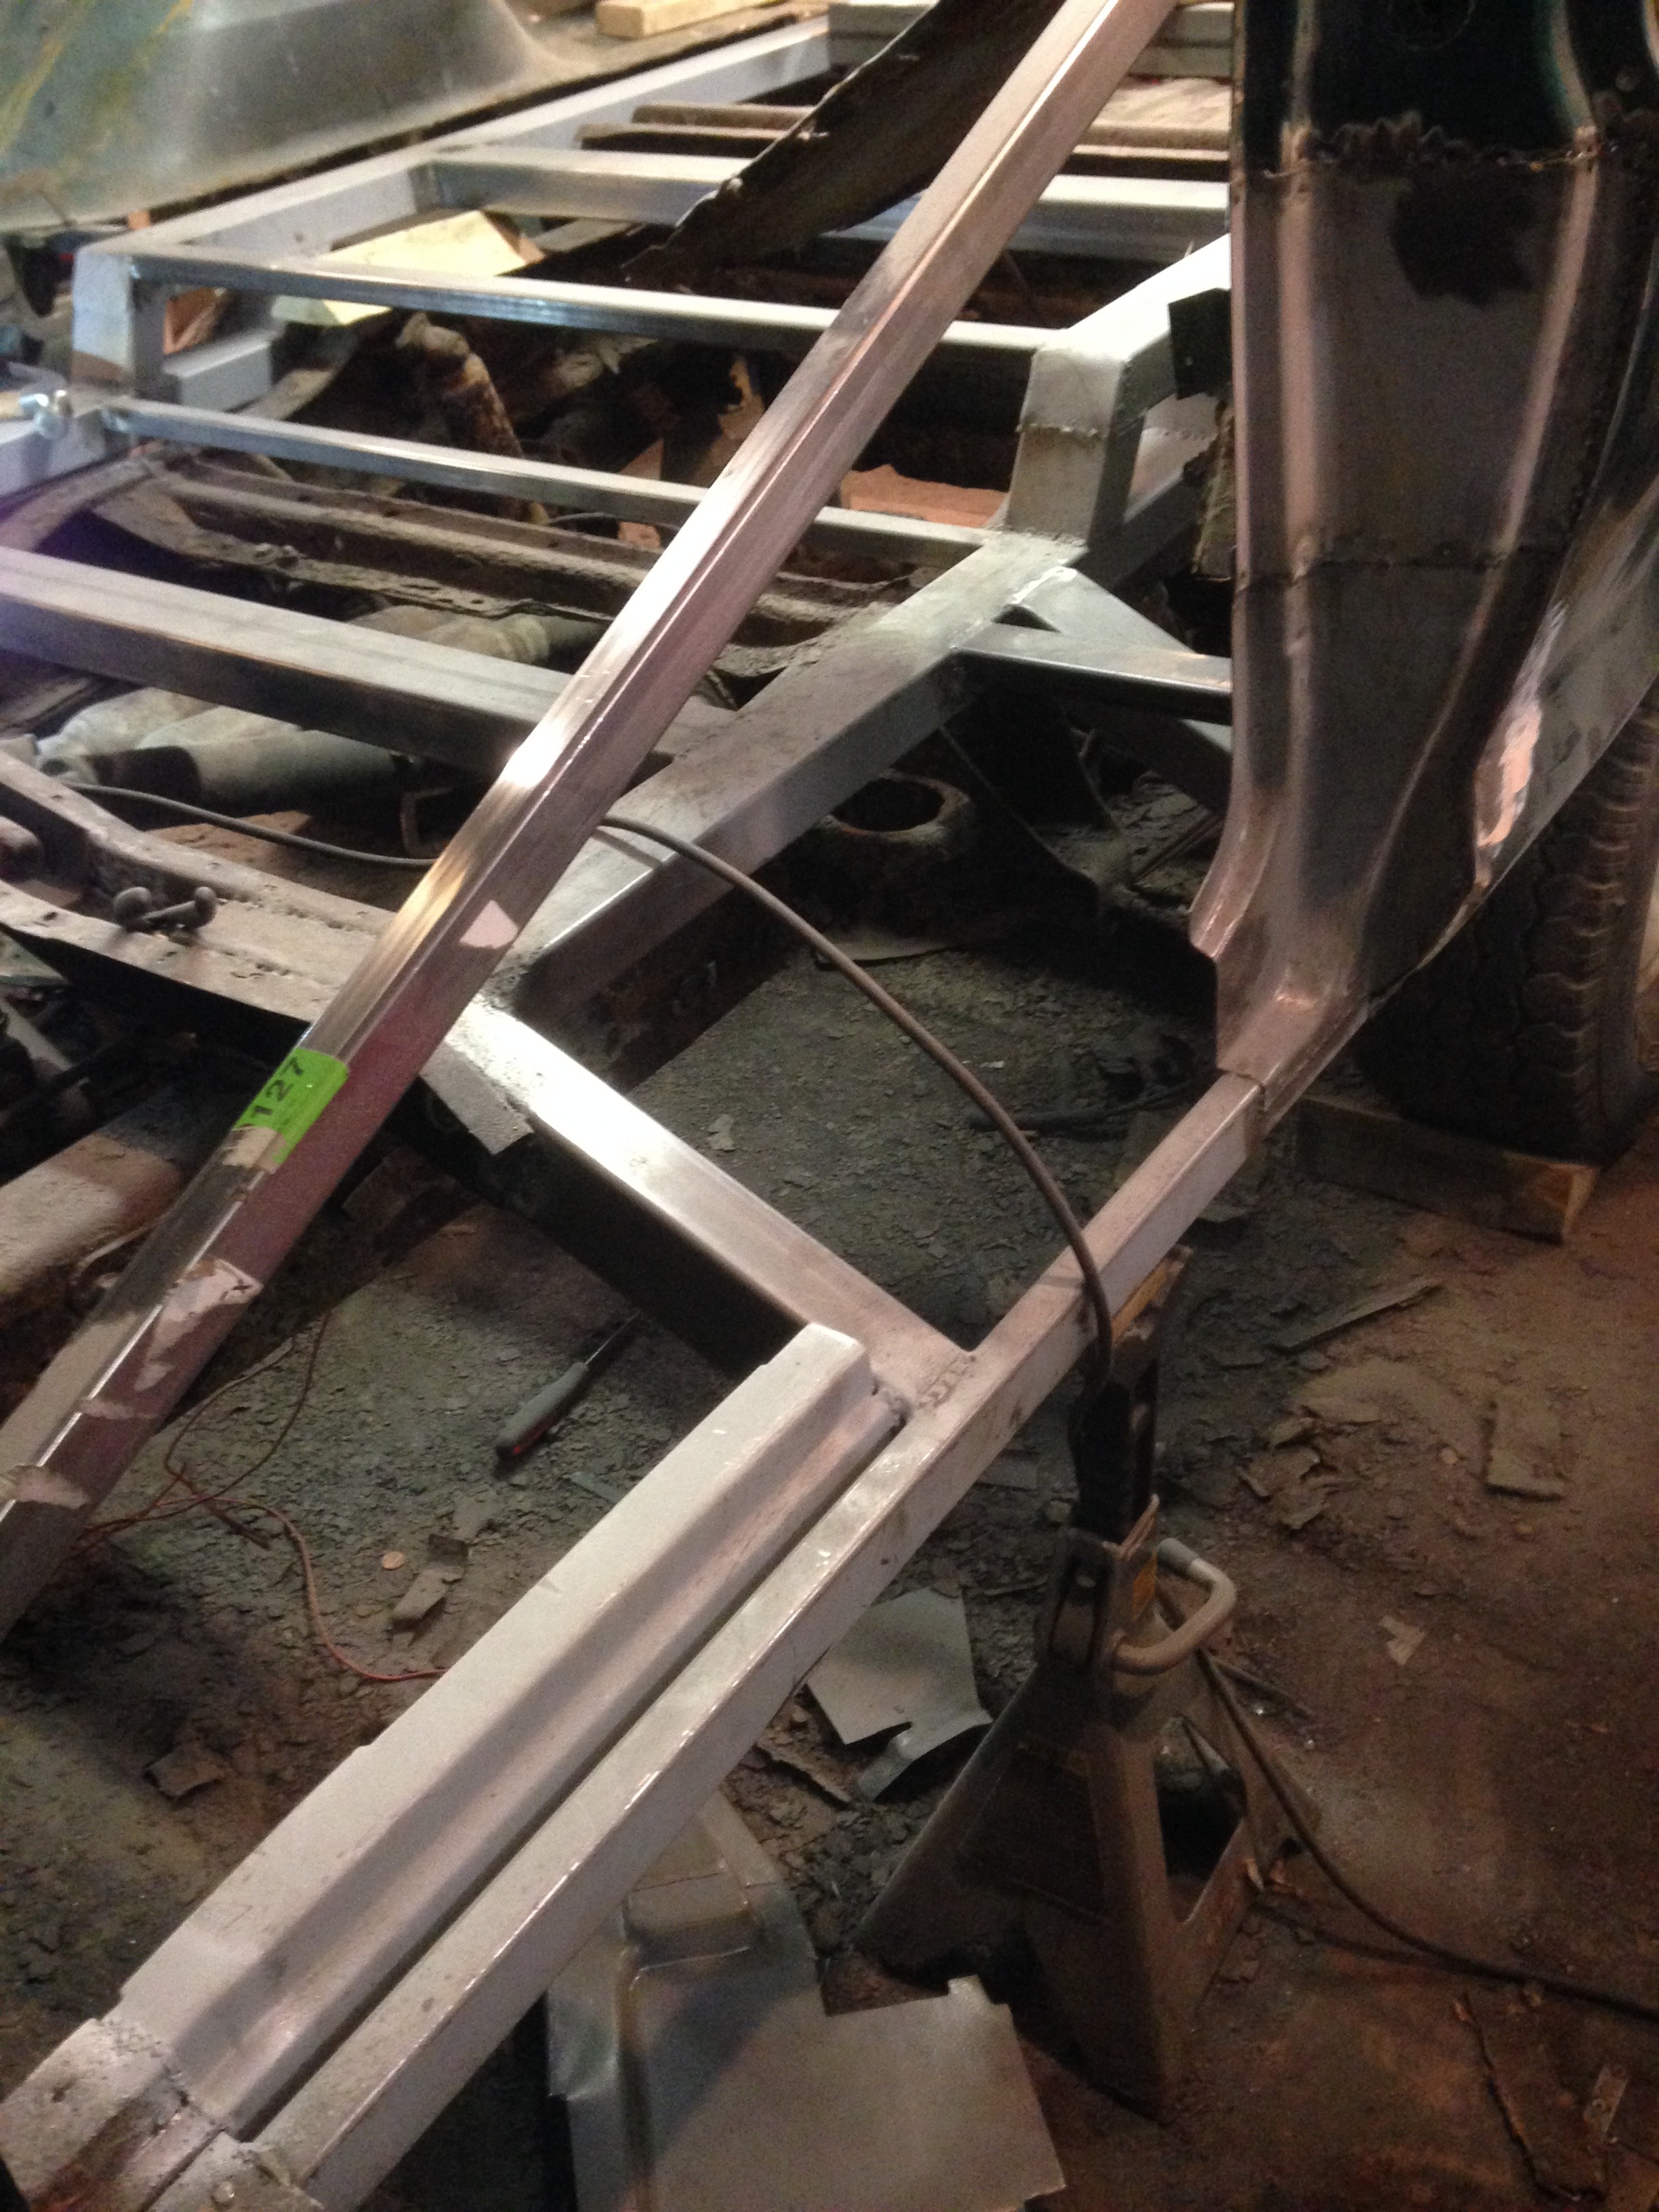
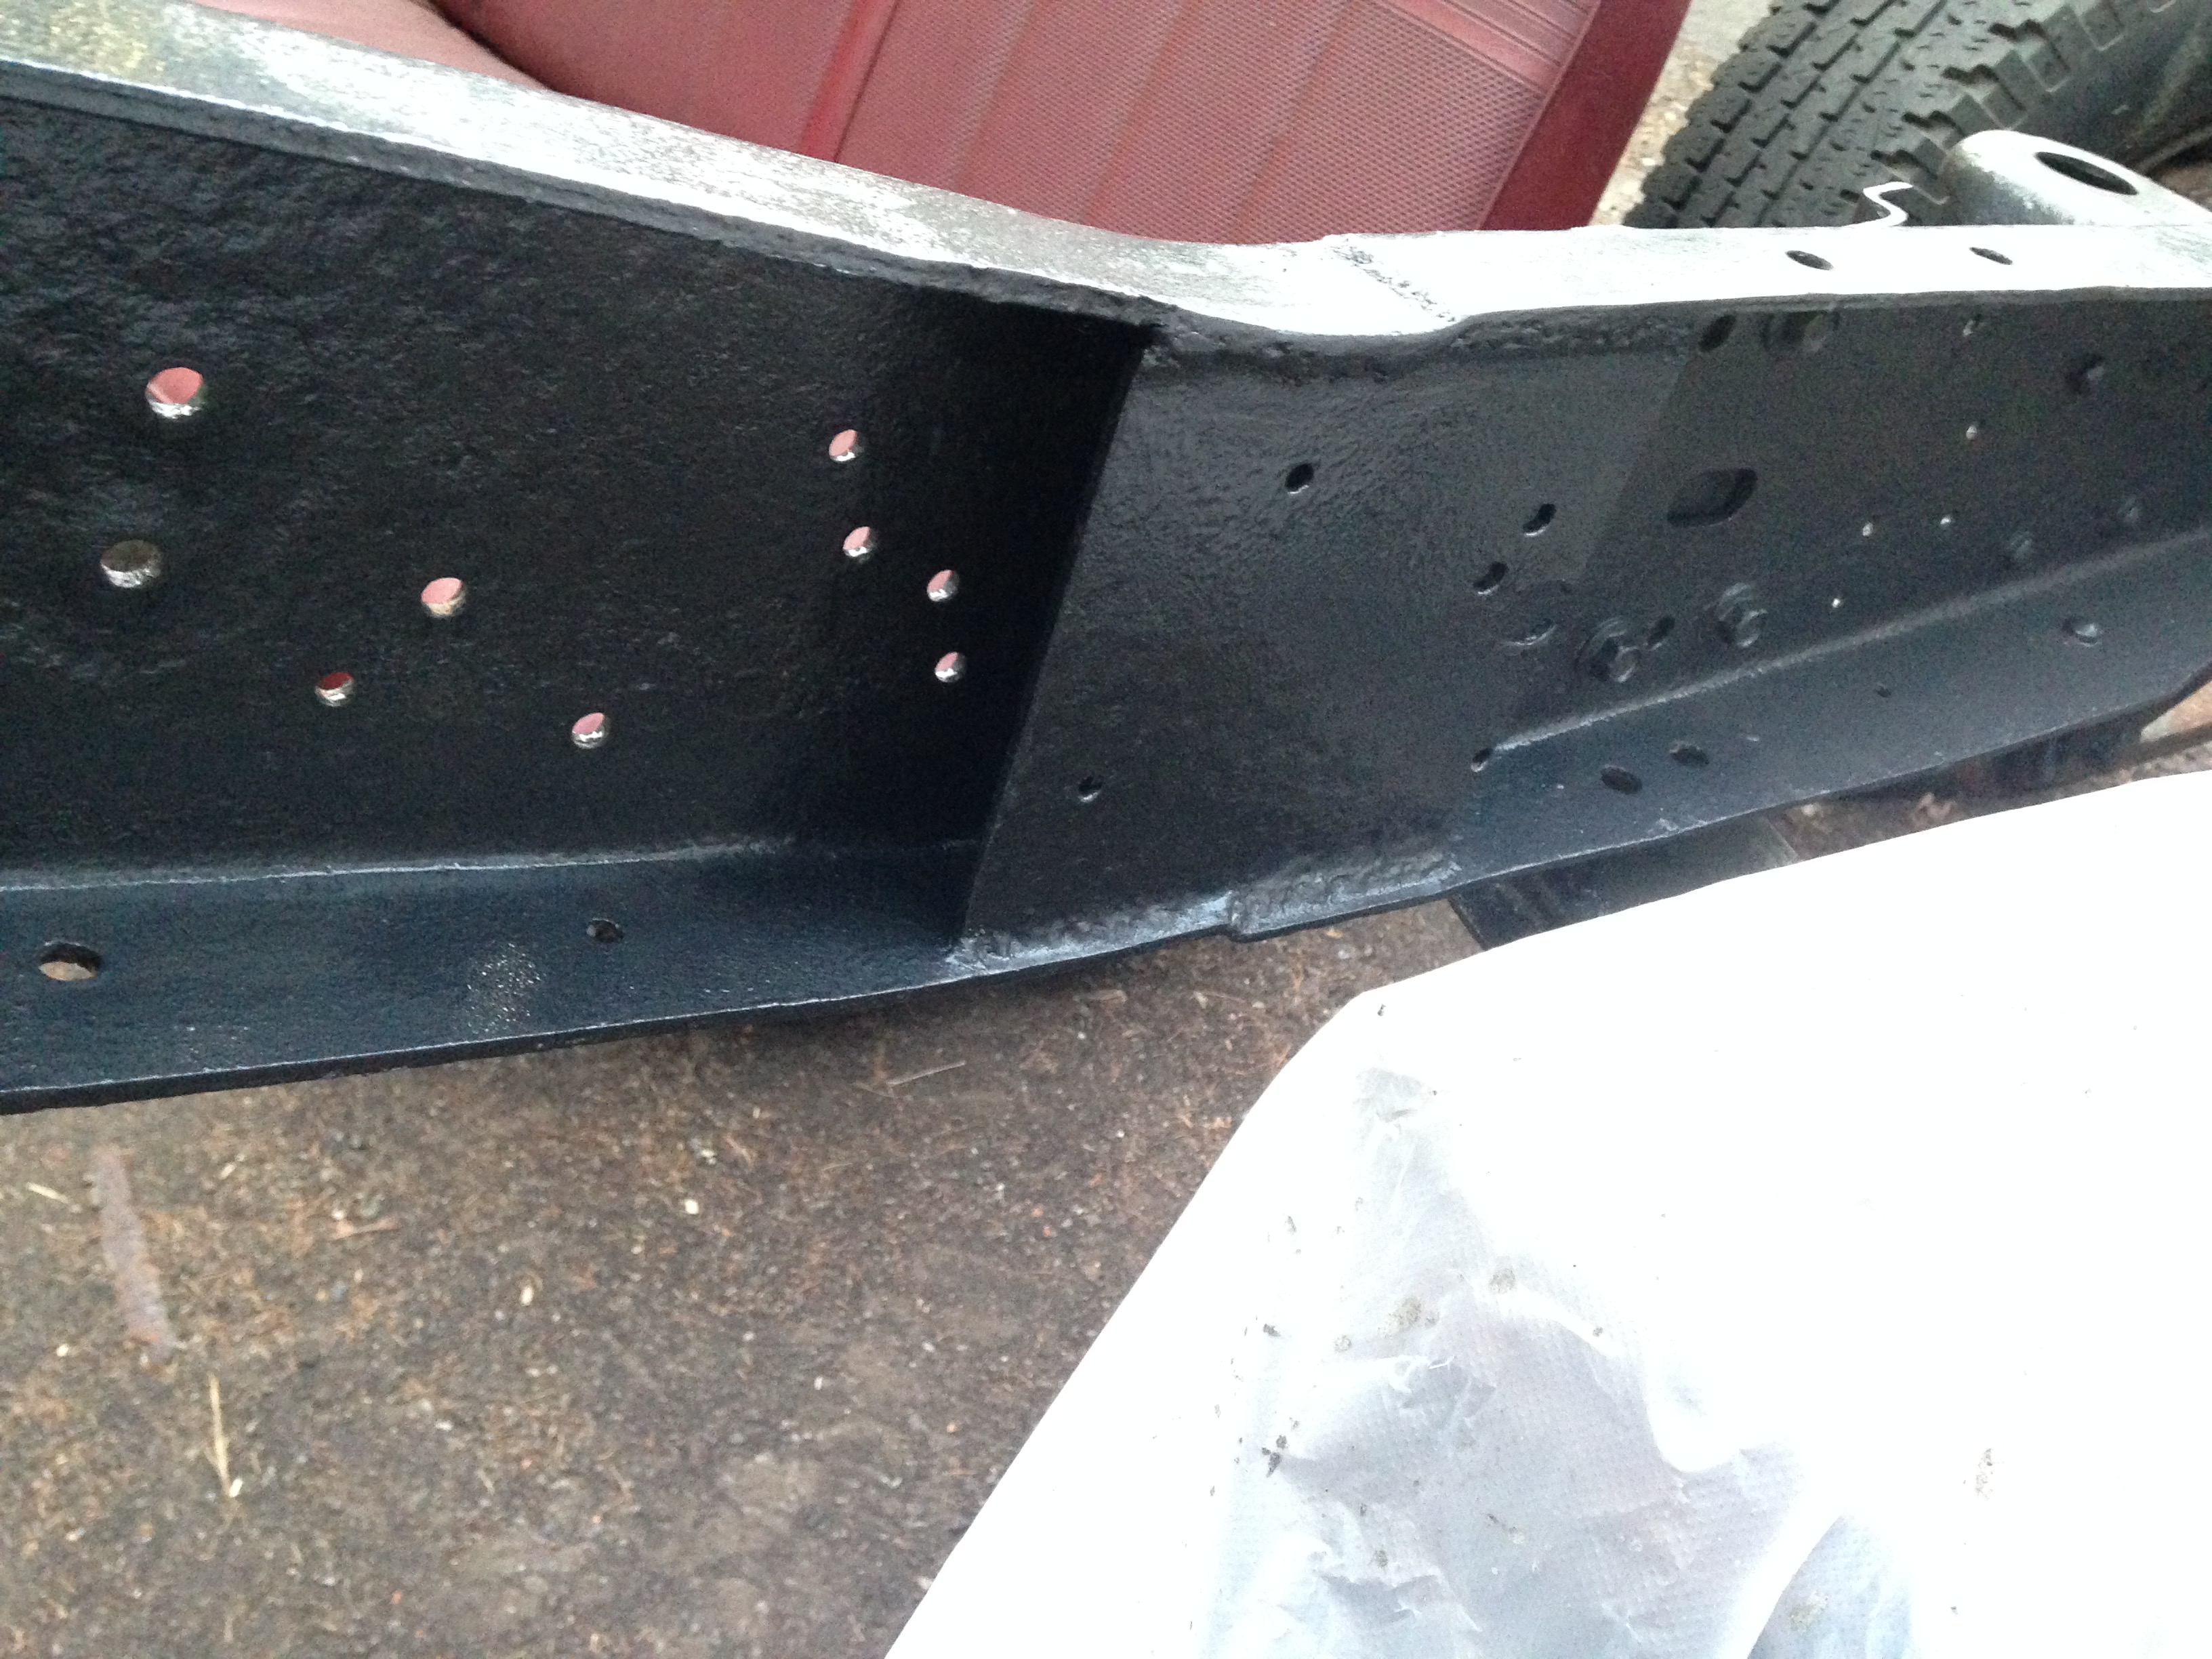
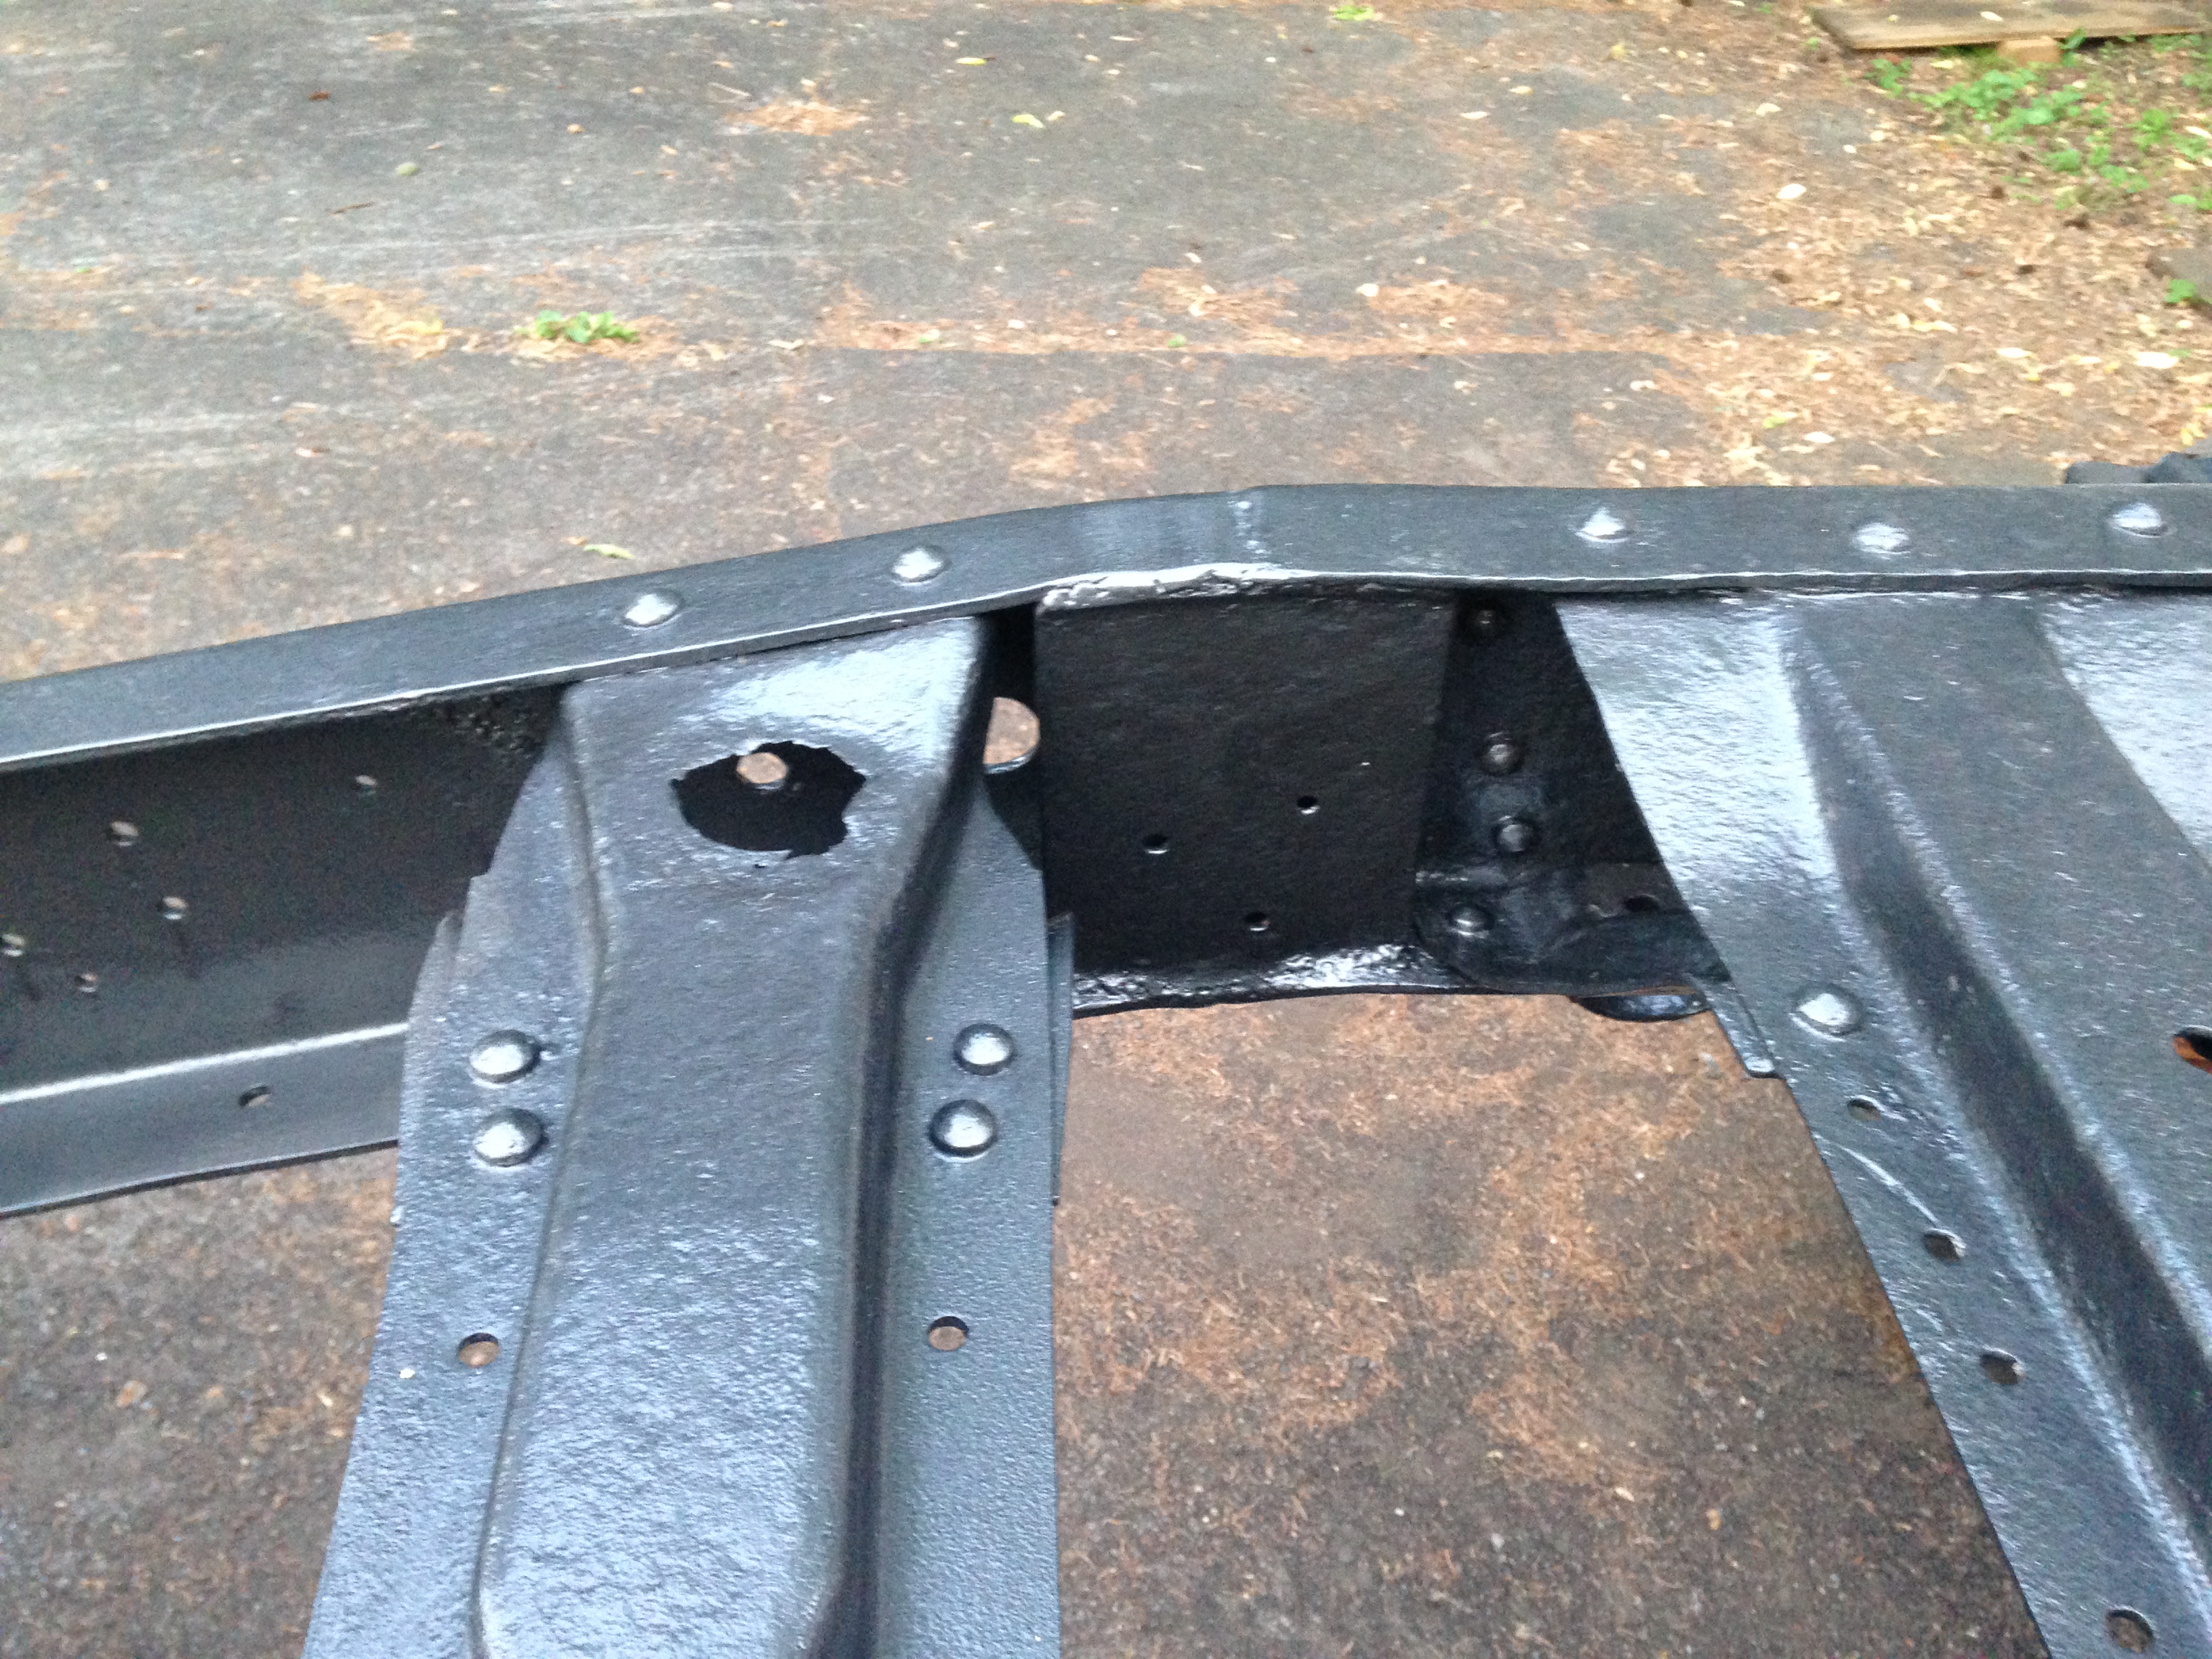
I had to cut the frame down in two places because I couldn't get all 28" out in one place. 21" out behind where the cab used to mount, and 7" up near the transfer case. I sandblasted and ground down the frame as much as I reasonable could, from the back up to the motor mounts. Then I brushed on a rust converter and painted it in Rustolium Hammertone.
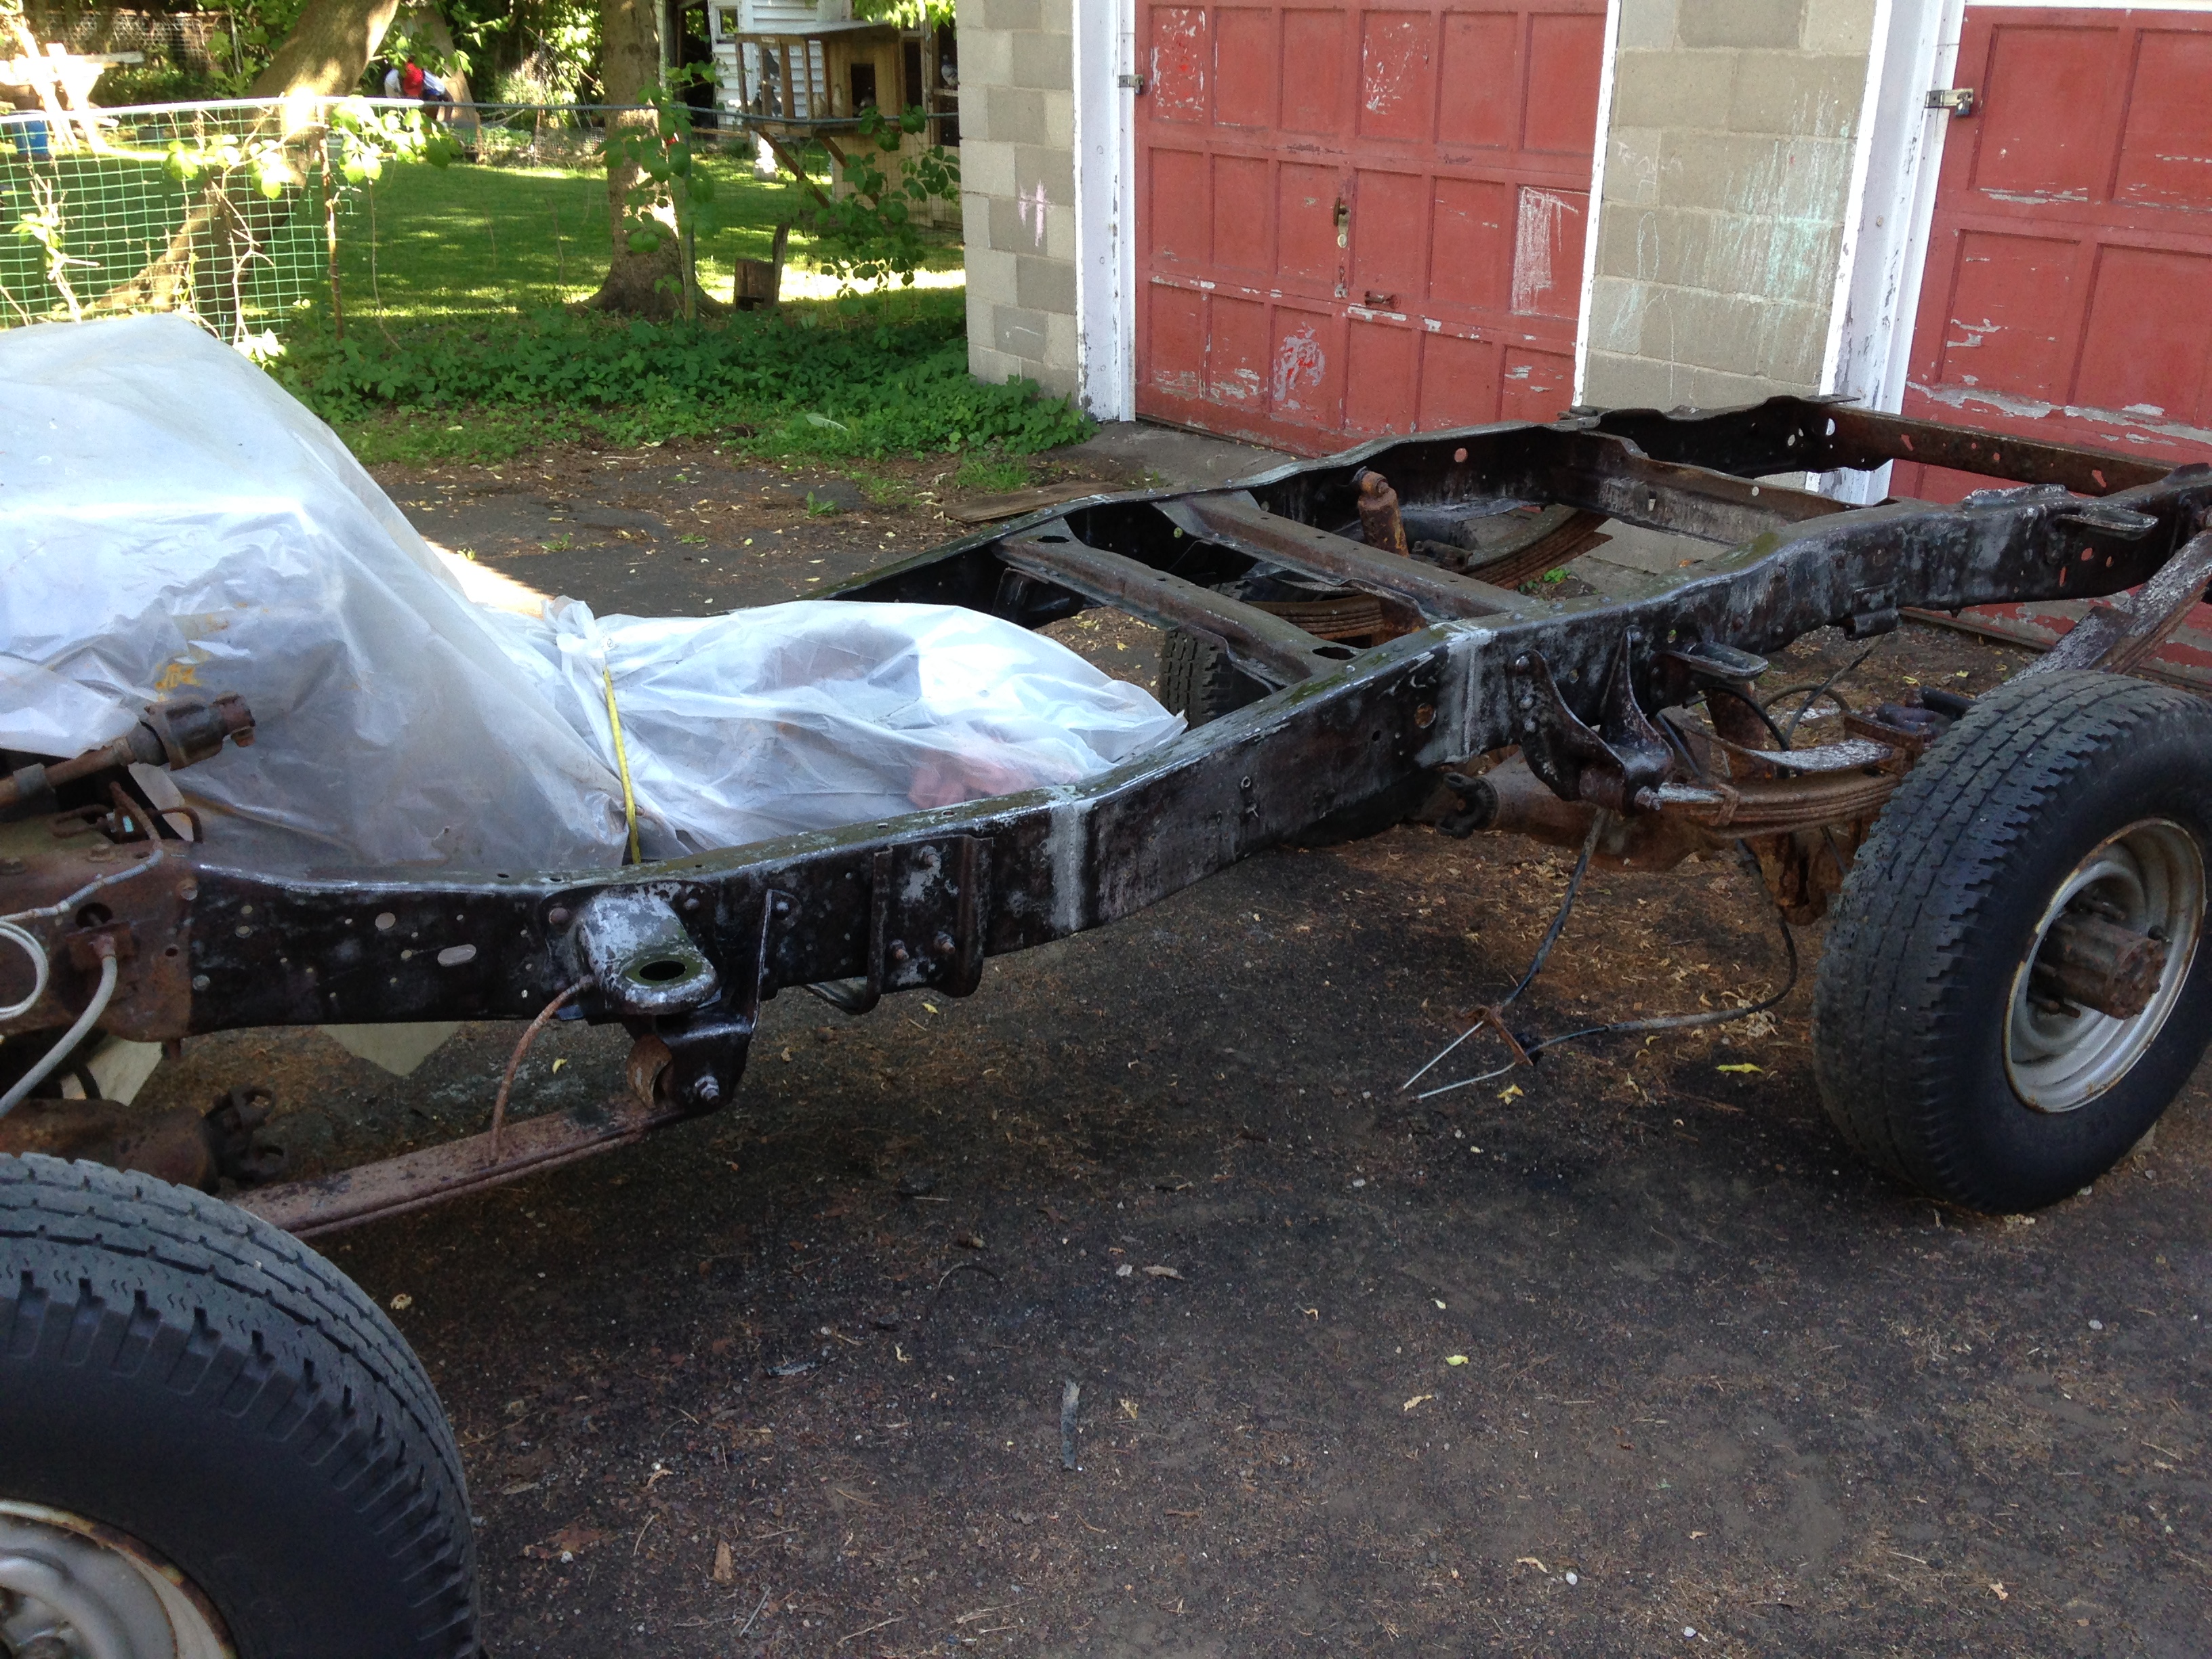
I used sections of the frame that I removed to box in the areas where I made my cuts.
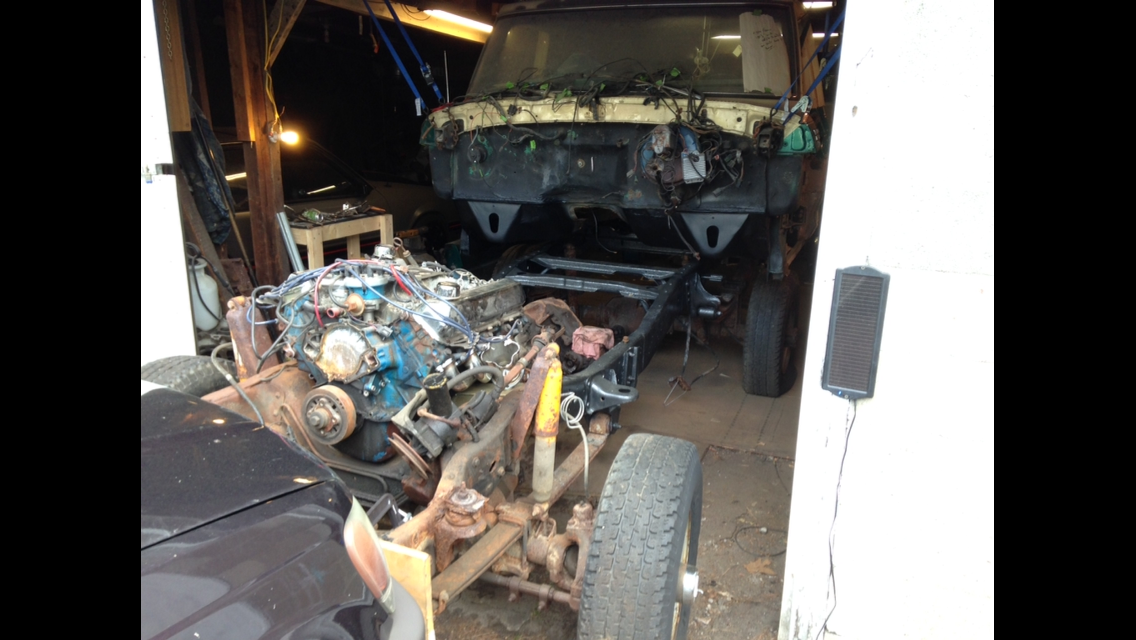
Motor under the plastic is the 460 that was in my bronco when I got it. I used L&L diesel to 460 swap brackets and mounts to bolt it into the truck frame.
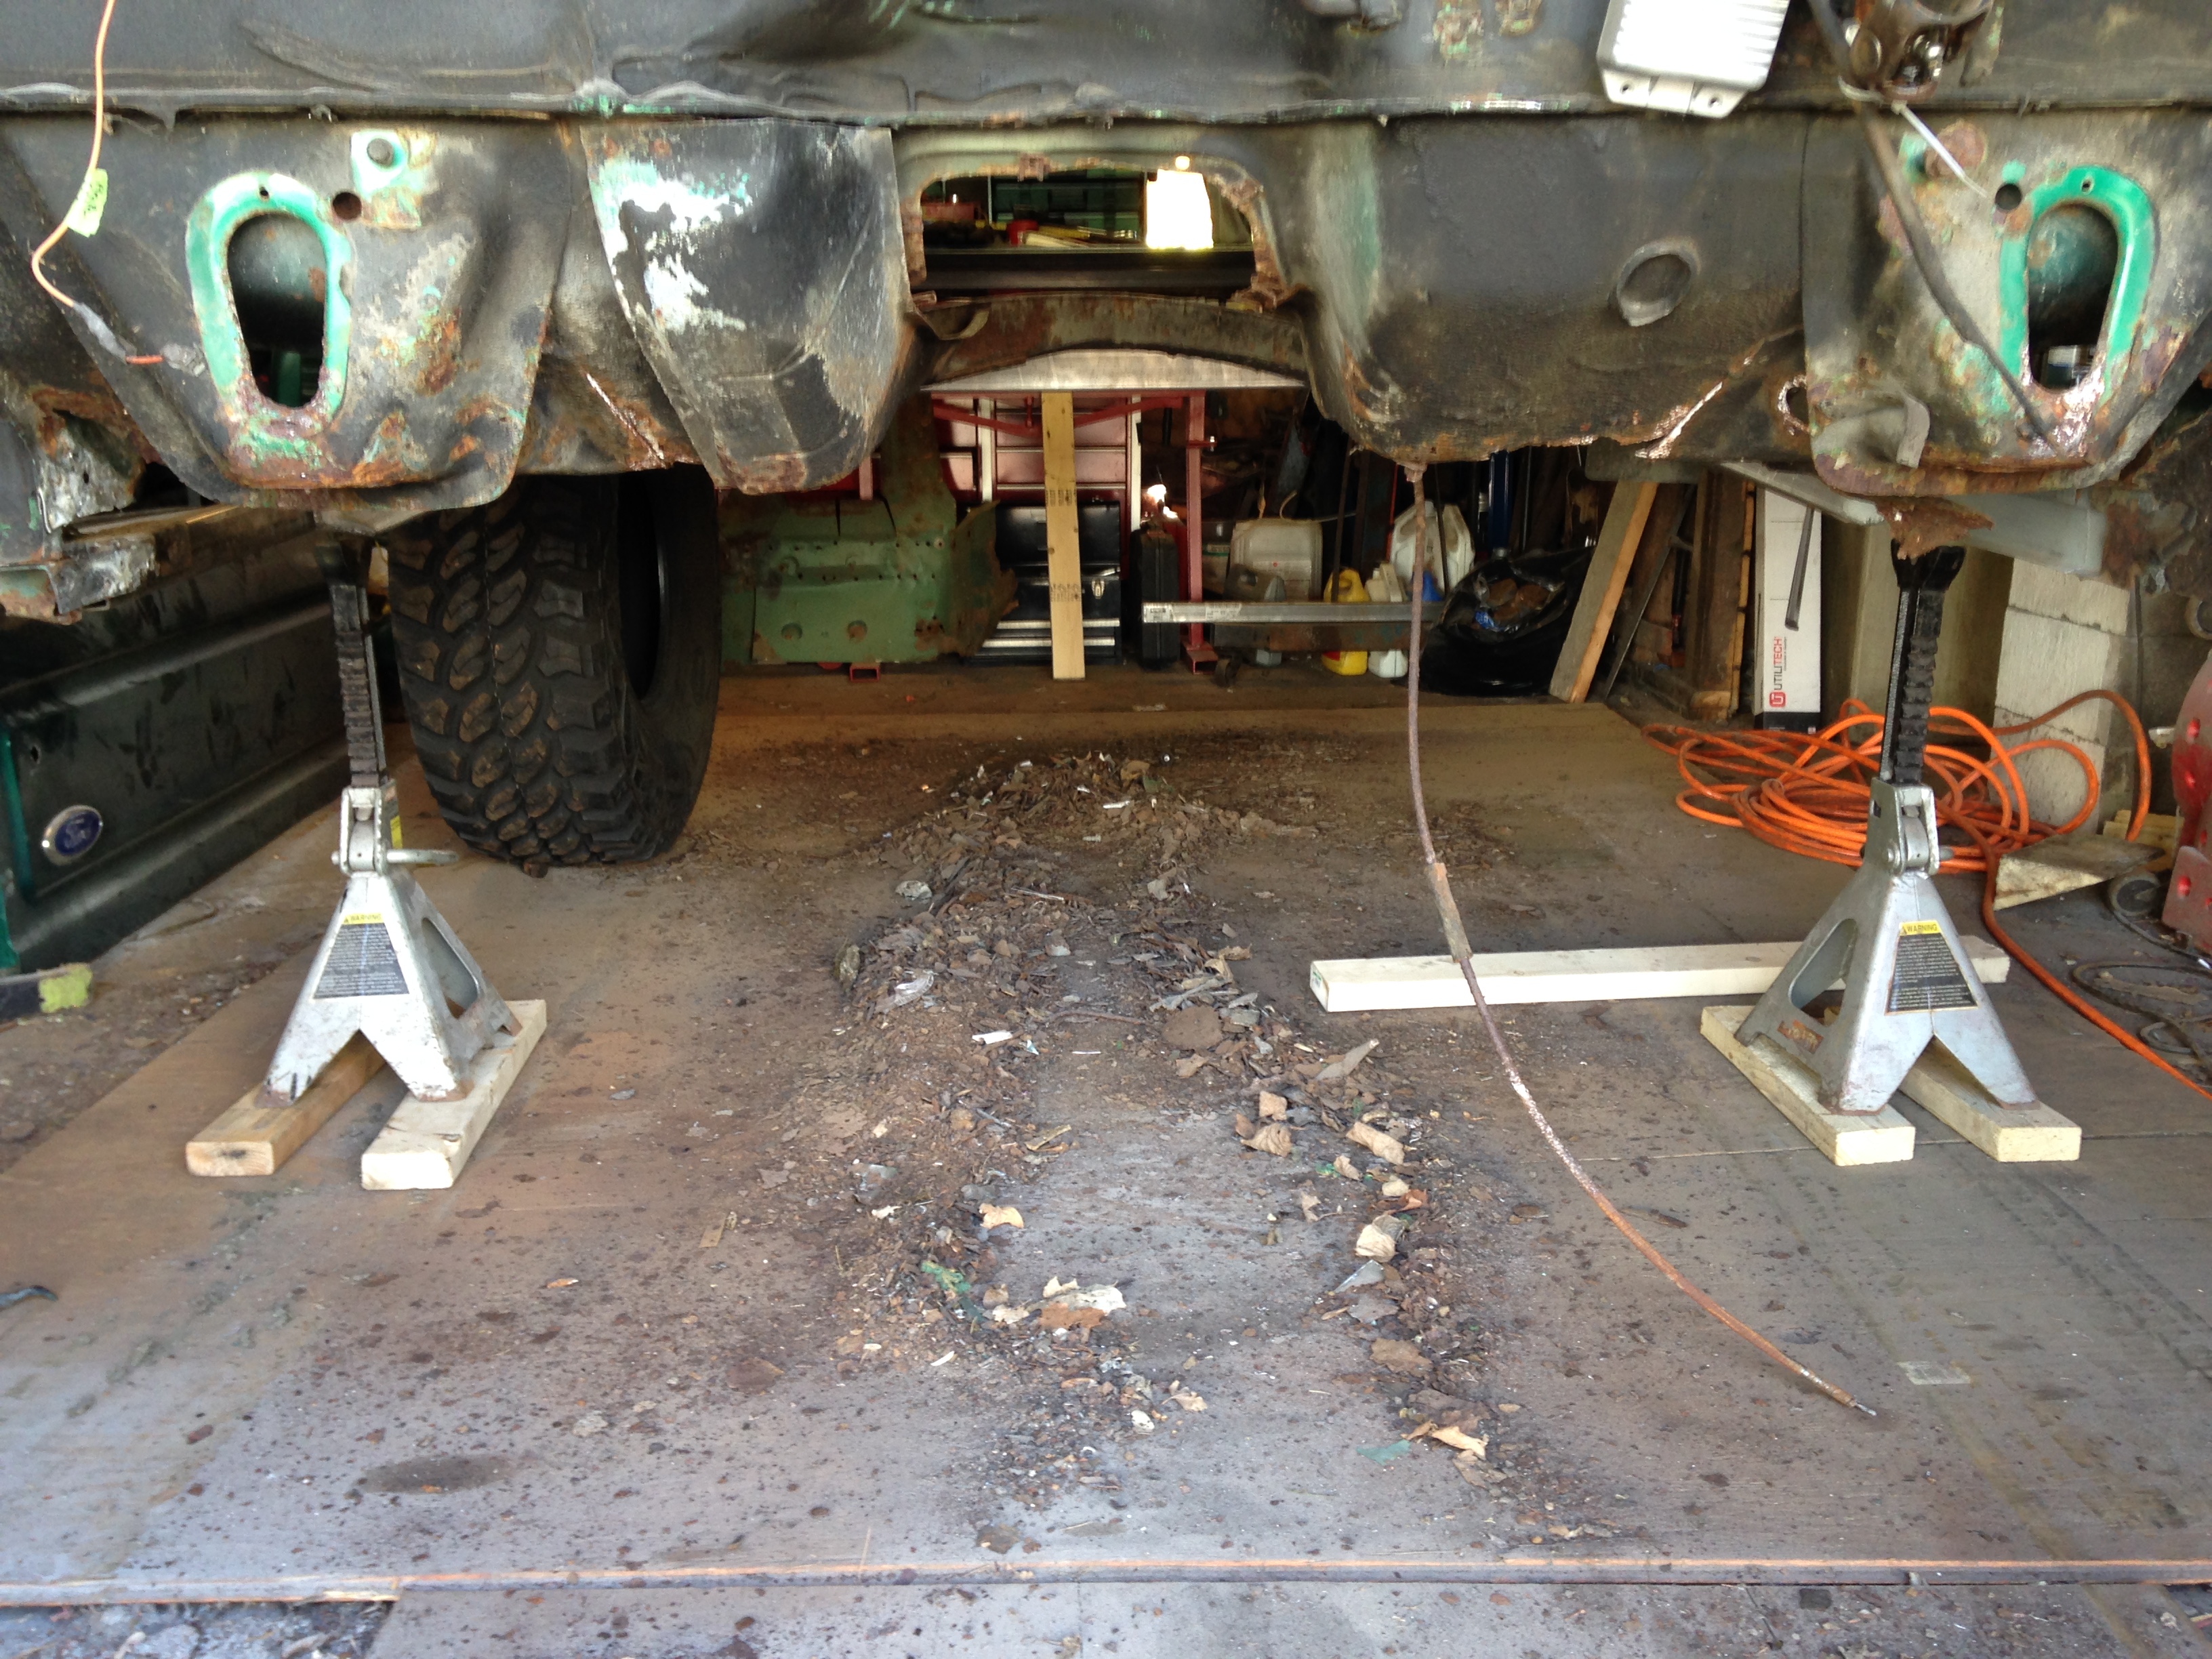
Time to put the frame under the bronco for the first time.
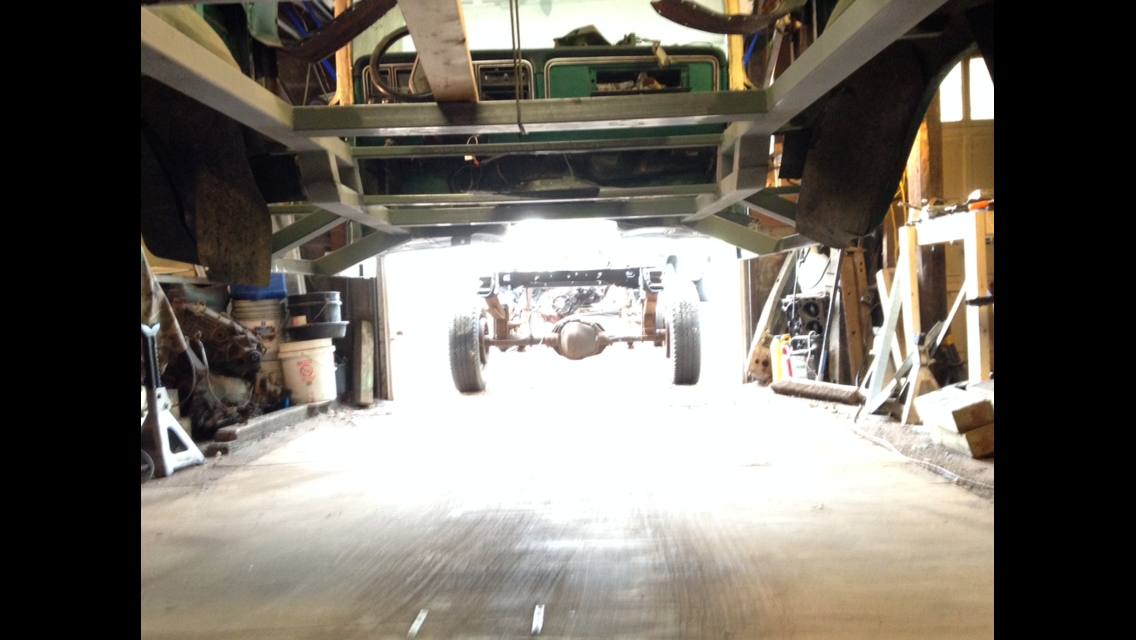
Doing this all by myself can sometimes be a challenge, my Jeep was wiling to help give a push. You can see in this picture also that I have replaced the front floor pans and body mounts. Both the pans and mounts were junk on both sides.
I had to move the front body mounts for the frame ahead 6 1/4" to mate up with the bronco mounts. I moved them forward and up a bit.
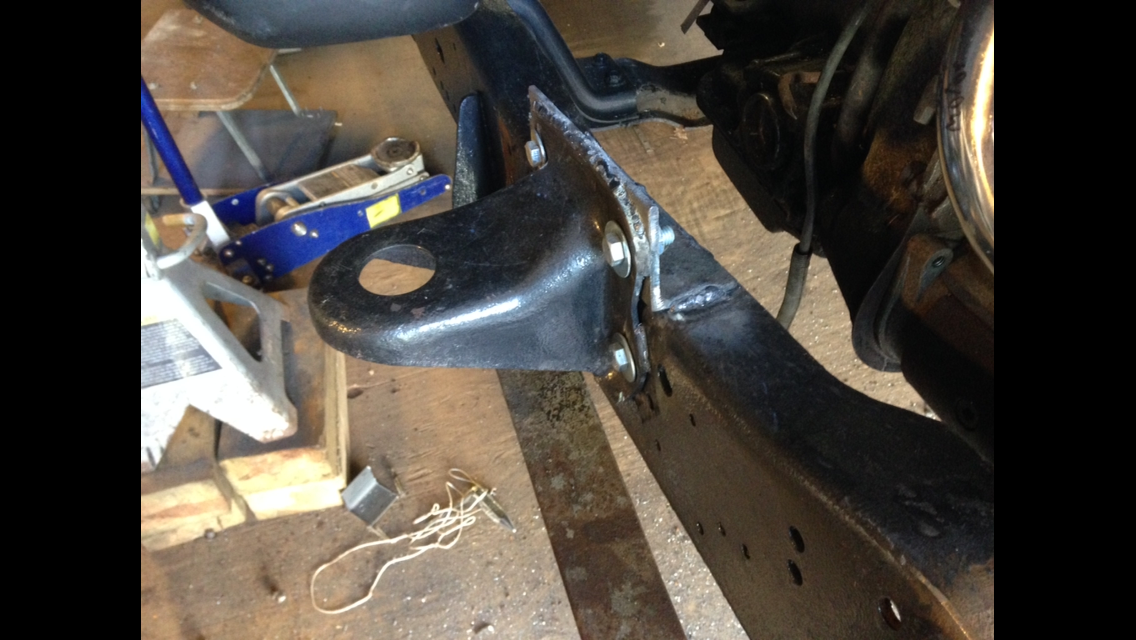
Brackets are bolted with an extra piece on top to support the top of the bracket. Then I added a few welds just for my piece of mind. Haven't cleaned up the welds of painted any of it yet.
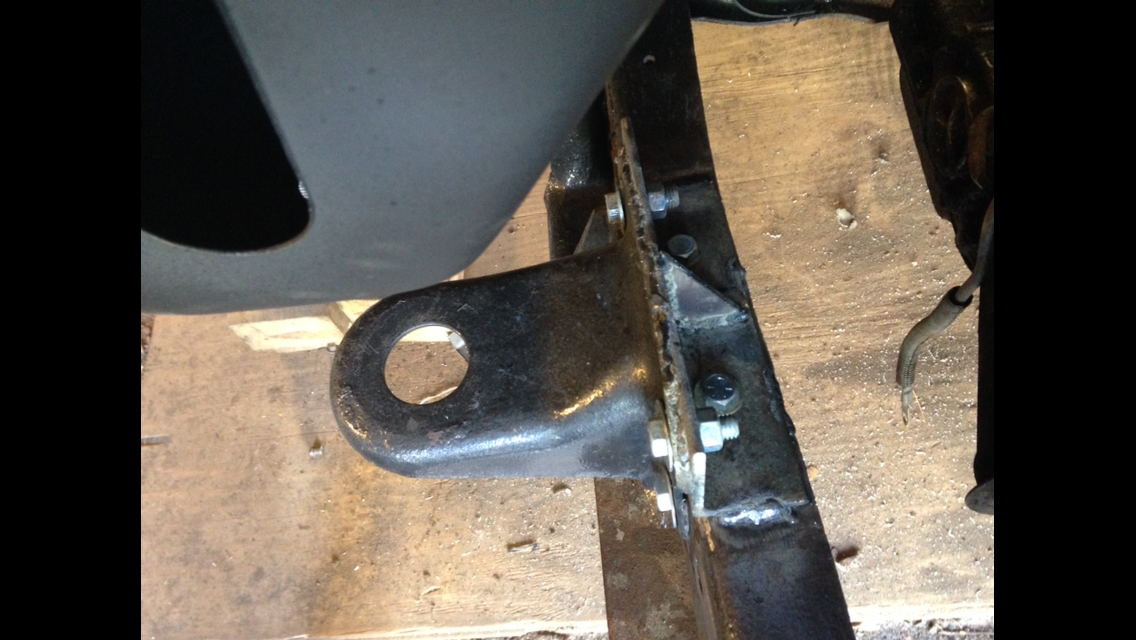
This pretty much bring me up to where I am now. I have the front body mounts bolted down. Next up is doing all the rest, three more sets. Plenty more things to do after that too.
Jess
I am going to keep the F-350's leaf sprung front Dana 60 set-up, Rear is a Sterling 10.25". 4.10 gears.
I had to cut the frame down in two places because I couldn't get all 28" out in one place. 21" out behind where the cab used to mount, and 7" up near the transfer case. I sandblasted and ground down the frame as much as I reasonable could, from the back up to the motor mounts. Then I brushed on a rust converter and painted it in Rustolium Hammertone.

I used sections of the frame that I removed to box in the areas where I made my cuts.


Motor under the plastic is the 460 that was in my bronco when I got it. I used L&L diesel to 460 swap brackets and mounts to bolt it into the truck frame.

Time to put the frame under the bronco for the first time.

Doing this all by myself can sometimes be a challenge, my Jeep was wiling to help give a push. You can see in this picture also that I have replaced the front floor pans and body mounts. Both the pans and mounts were junk on both sides.

I had to move the front body mounts for the frame ahead 6 1/4" to mate up with the bronco mounts. I moved them forward and up a bit.

Brackets are bolted with an extra piece on top to support the top of the bracket. Then I added a few welds just for my piece of mind. Haven't cleaned up the welds of painted any of it yet.

This pretty much bring me up to where I am now. I have the front body mounts bolted down. Next up is doing all the rest, three more sets. Plenty more things to do after that too.
Jess
Thread Starter
|
Tuned
Joined: Nov 2015
Posts: 365
Likes: 13
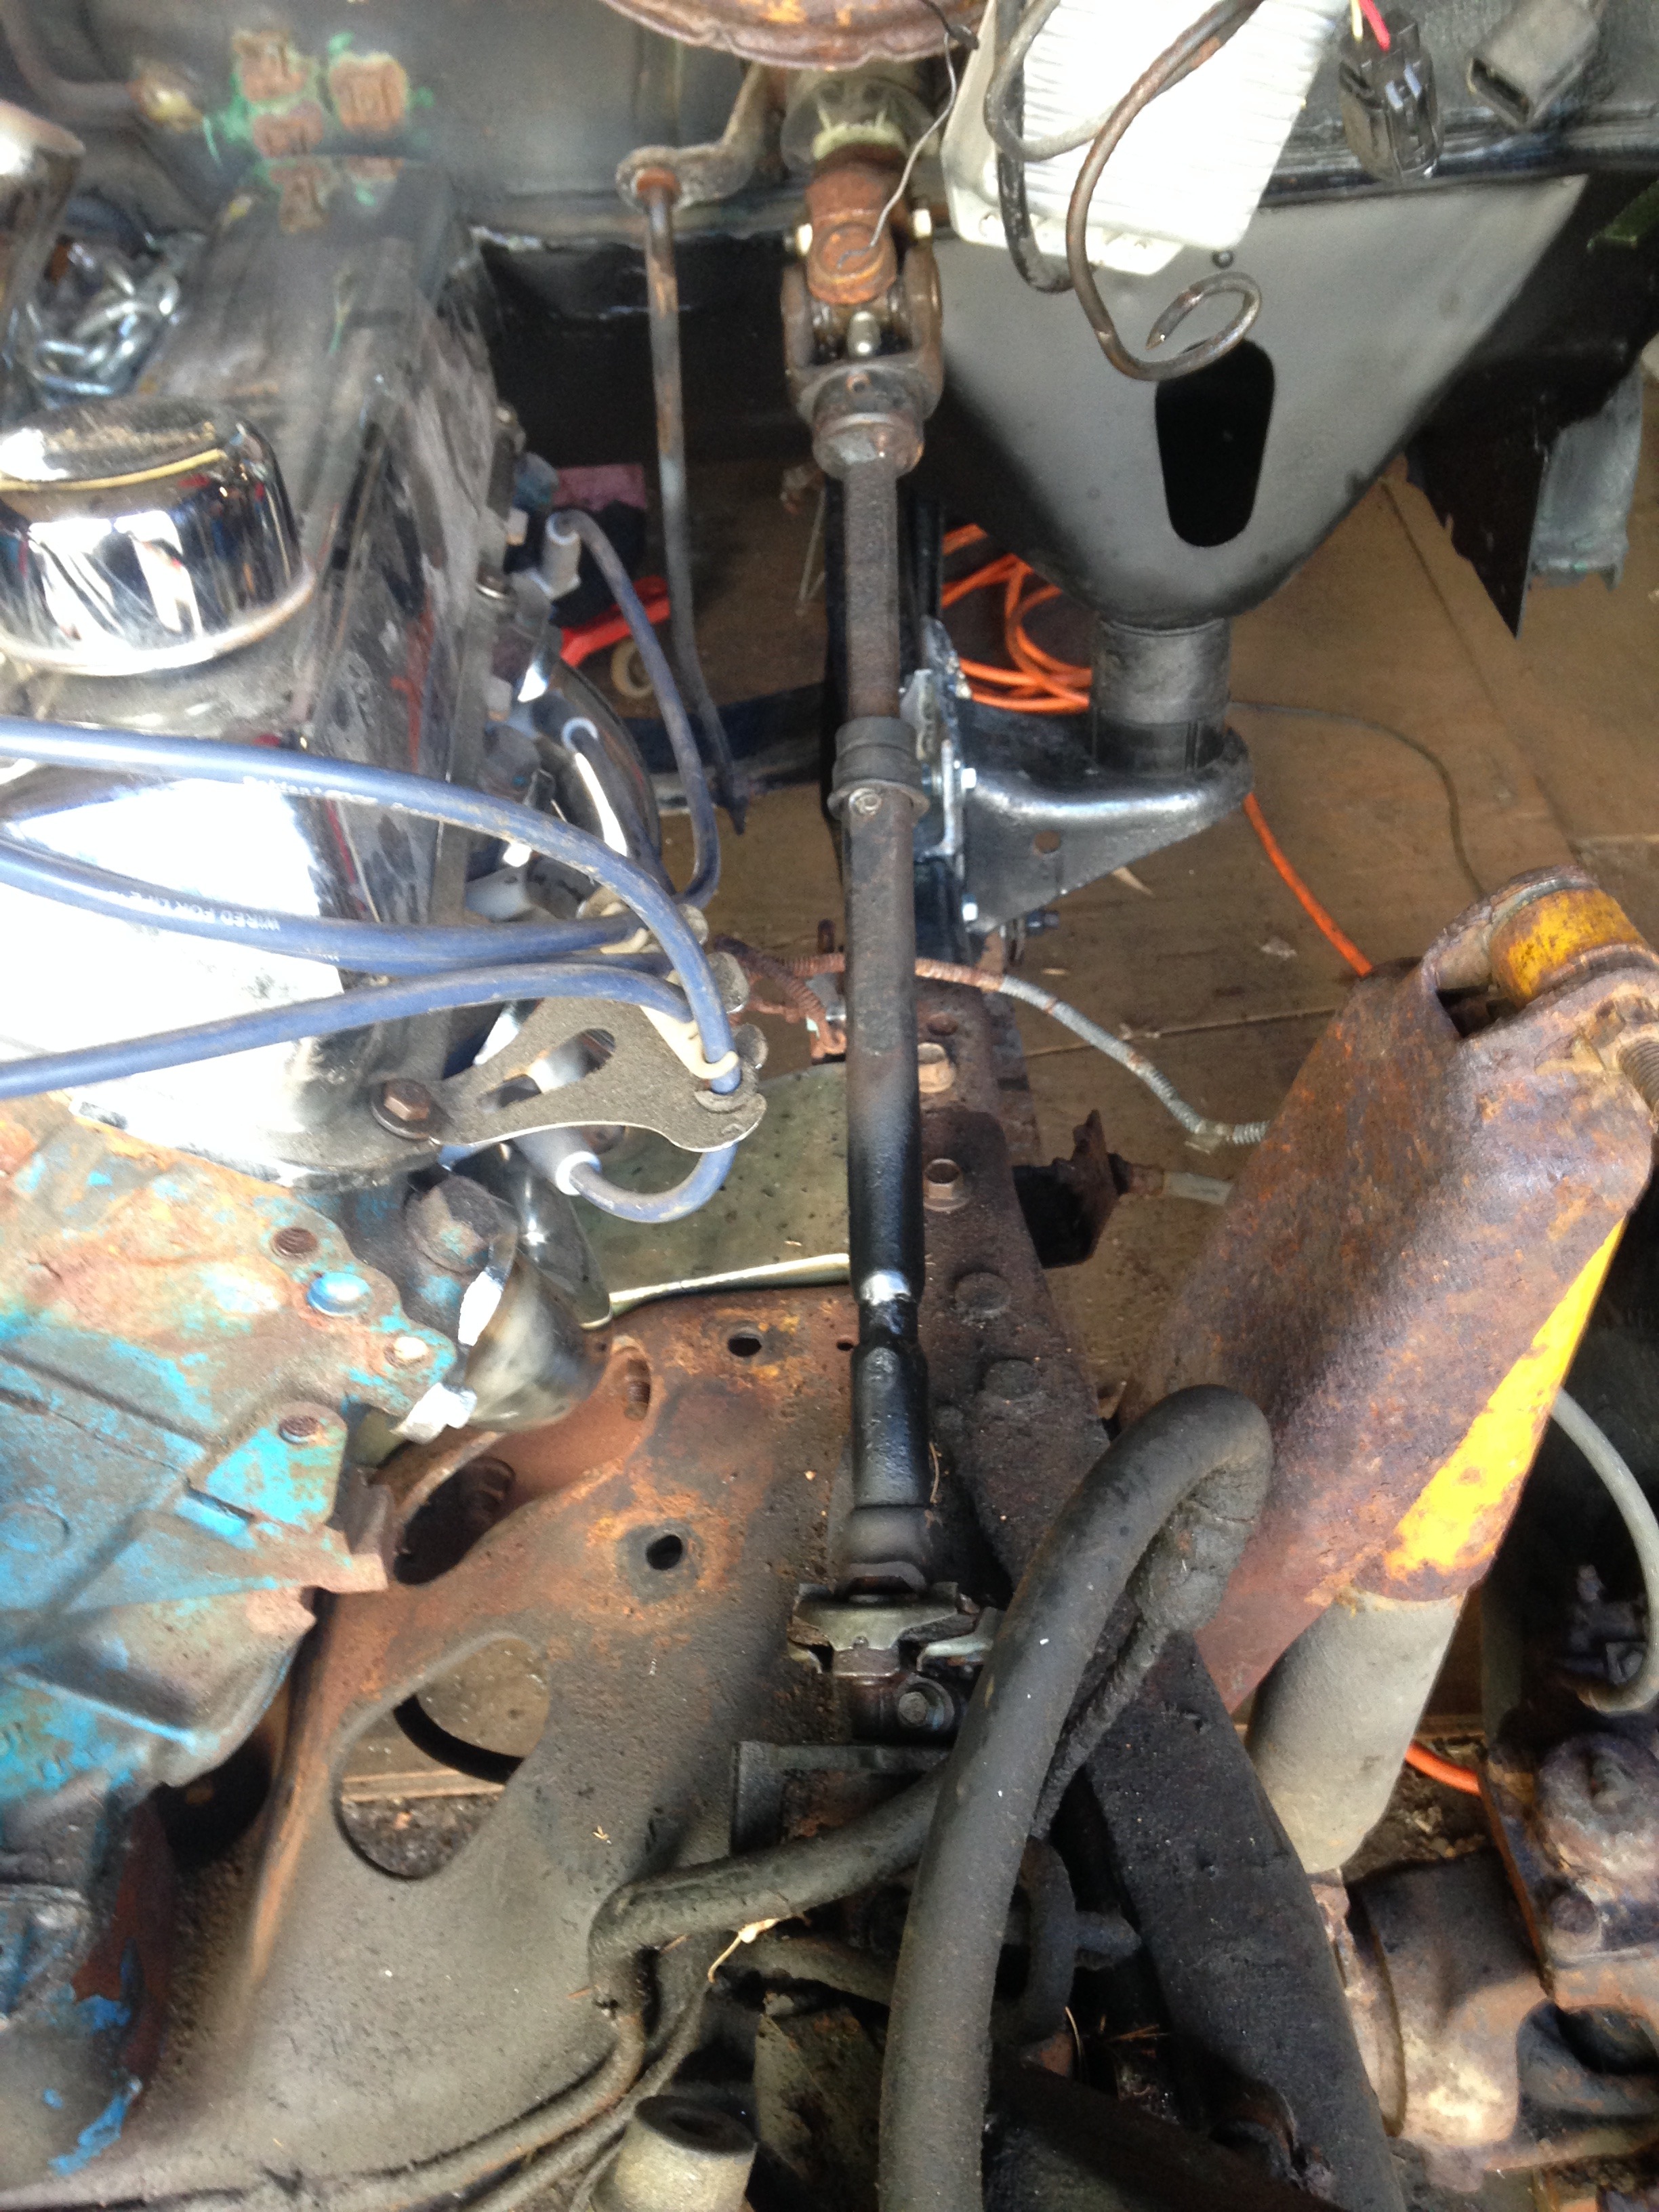
Did the steering shaft today. I chopped off the end connected to the truck steering box, sleeved it, and welded it to the steering shaft that came with my bronco. It turned out good, looks like a straighter shot than the path that the stock shaft followed. I did screw up a bit and not pay attention to the position of the flange. I forgot that there was a flat on the splines so the shaft only goes in one way. I should be able to get the steering wheel straight later, it's only off about 1/8 turn.
Jess

Jess
FTE Chapter Leader


Joined: Feb 2004
Posts: 14,904
Likes: 76
From: Wayland, MI

Nice work!!
I also have a solid frame from a 78 that I picked up out of Kentucky. But the 1 ton frame you've got going on will be awesome!
I also have a solid frame from a 78 that I picked up out of Kentucky. But the 1 ton frame you've got going on will be awesome!
Trending Topics
Thread Starter
|
Tuned
Joined: Nov 2015
Posts: 365
Likes: 13

I actually wanted to use the f-350 frame because of the factory installed Dana 60 up front. I don't have to try and adapt it to a coil sprung frame. Unless I decide to go higher with it(with a shackle reversal) I will be dealing with factory front suspension geometry and hopefully factory levels of durability too. I plan to run a lot of power in this bronco, and I want to not be working on it all the time.
Motor is a 545 BBF stroker. Solid roller, probably going to use the tunnel ram too. 10.7:1 compression. It was in my street/strip mustang which I sold as a roller to get this bronco moving along. Crazy how much bigger tires cost now days.

Jess
FTE Stories
Ford Trucks for Ford Truck Enthusiasts

Top 10 Most Expensive Ford Trucks Ever Sold on Bring a Trailer
Joe Kucinski
2027 Ford Super Duty Buyer's Guide (Every Model, Engine, & Package)
Brett Foote
Top 10 Ford Truck Tragedies
Joe Kucinski
AEV FXL Super Duty - the Super Duty Raptor Ford Doesn't Make
Brett Foote
Lobo Vs Lobo: Proof the F-150 Lobo Should Be Even Lower!
Michael S. Palmer
Ford's 2001 Explorer Sportsman Concept Looks For a New Home
Verdad Gallardo
10 Best Ford Truck Engines We Miss the Most!
Joe Kucinski
2026 Shelby F-150 Off-Road: Better Than a Raptor R?
Brett Foote
2027 Super Duty Carhartt Package First Look: 12 Things You NEED to Know!
Michael S. Palmer
Thread Starter
|
Tuned
Joined: Nov 2015
Posts: 365
Likes: 13
I needed some headers, so I decided to make it as complicated as possible.  One side of my 180 degree headers pretty much done. Collector isn't welded on yet. I'm waiting to see the position rest of the pipes. Lots of thinking and cutting. First thing to go was trying to keep them all equal length, I tried.
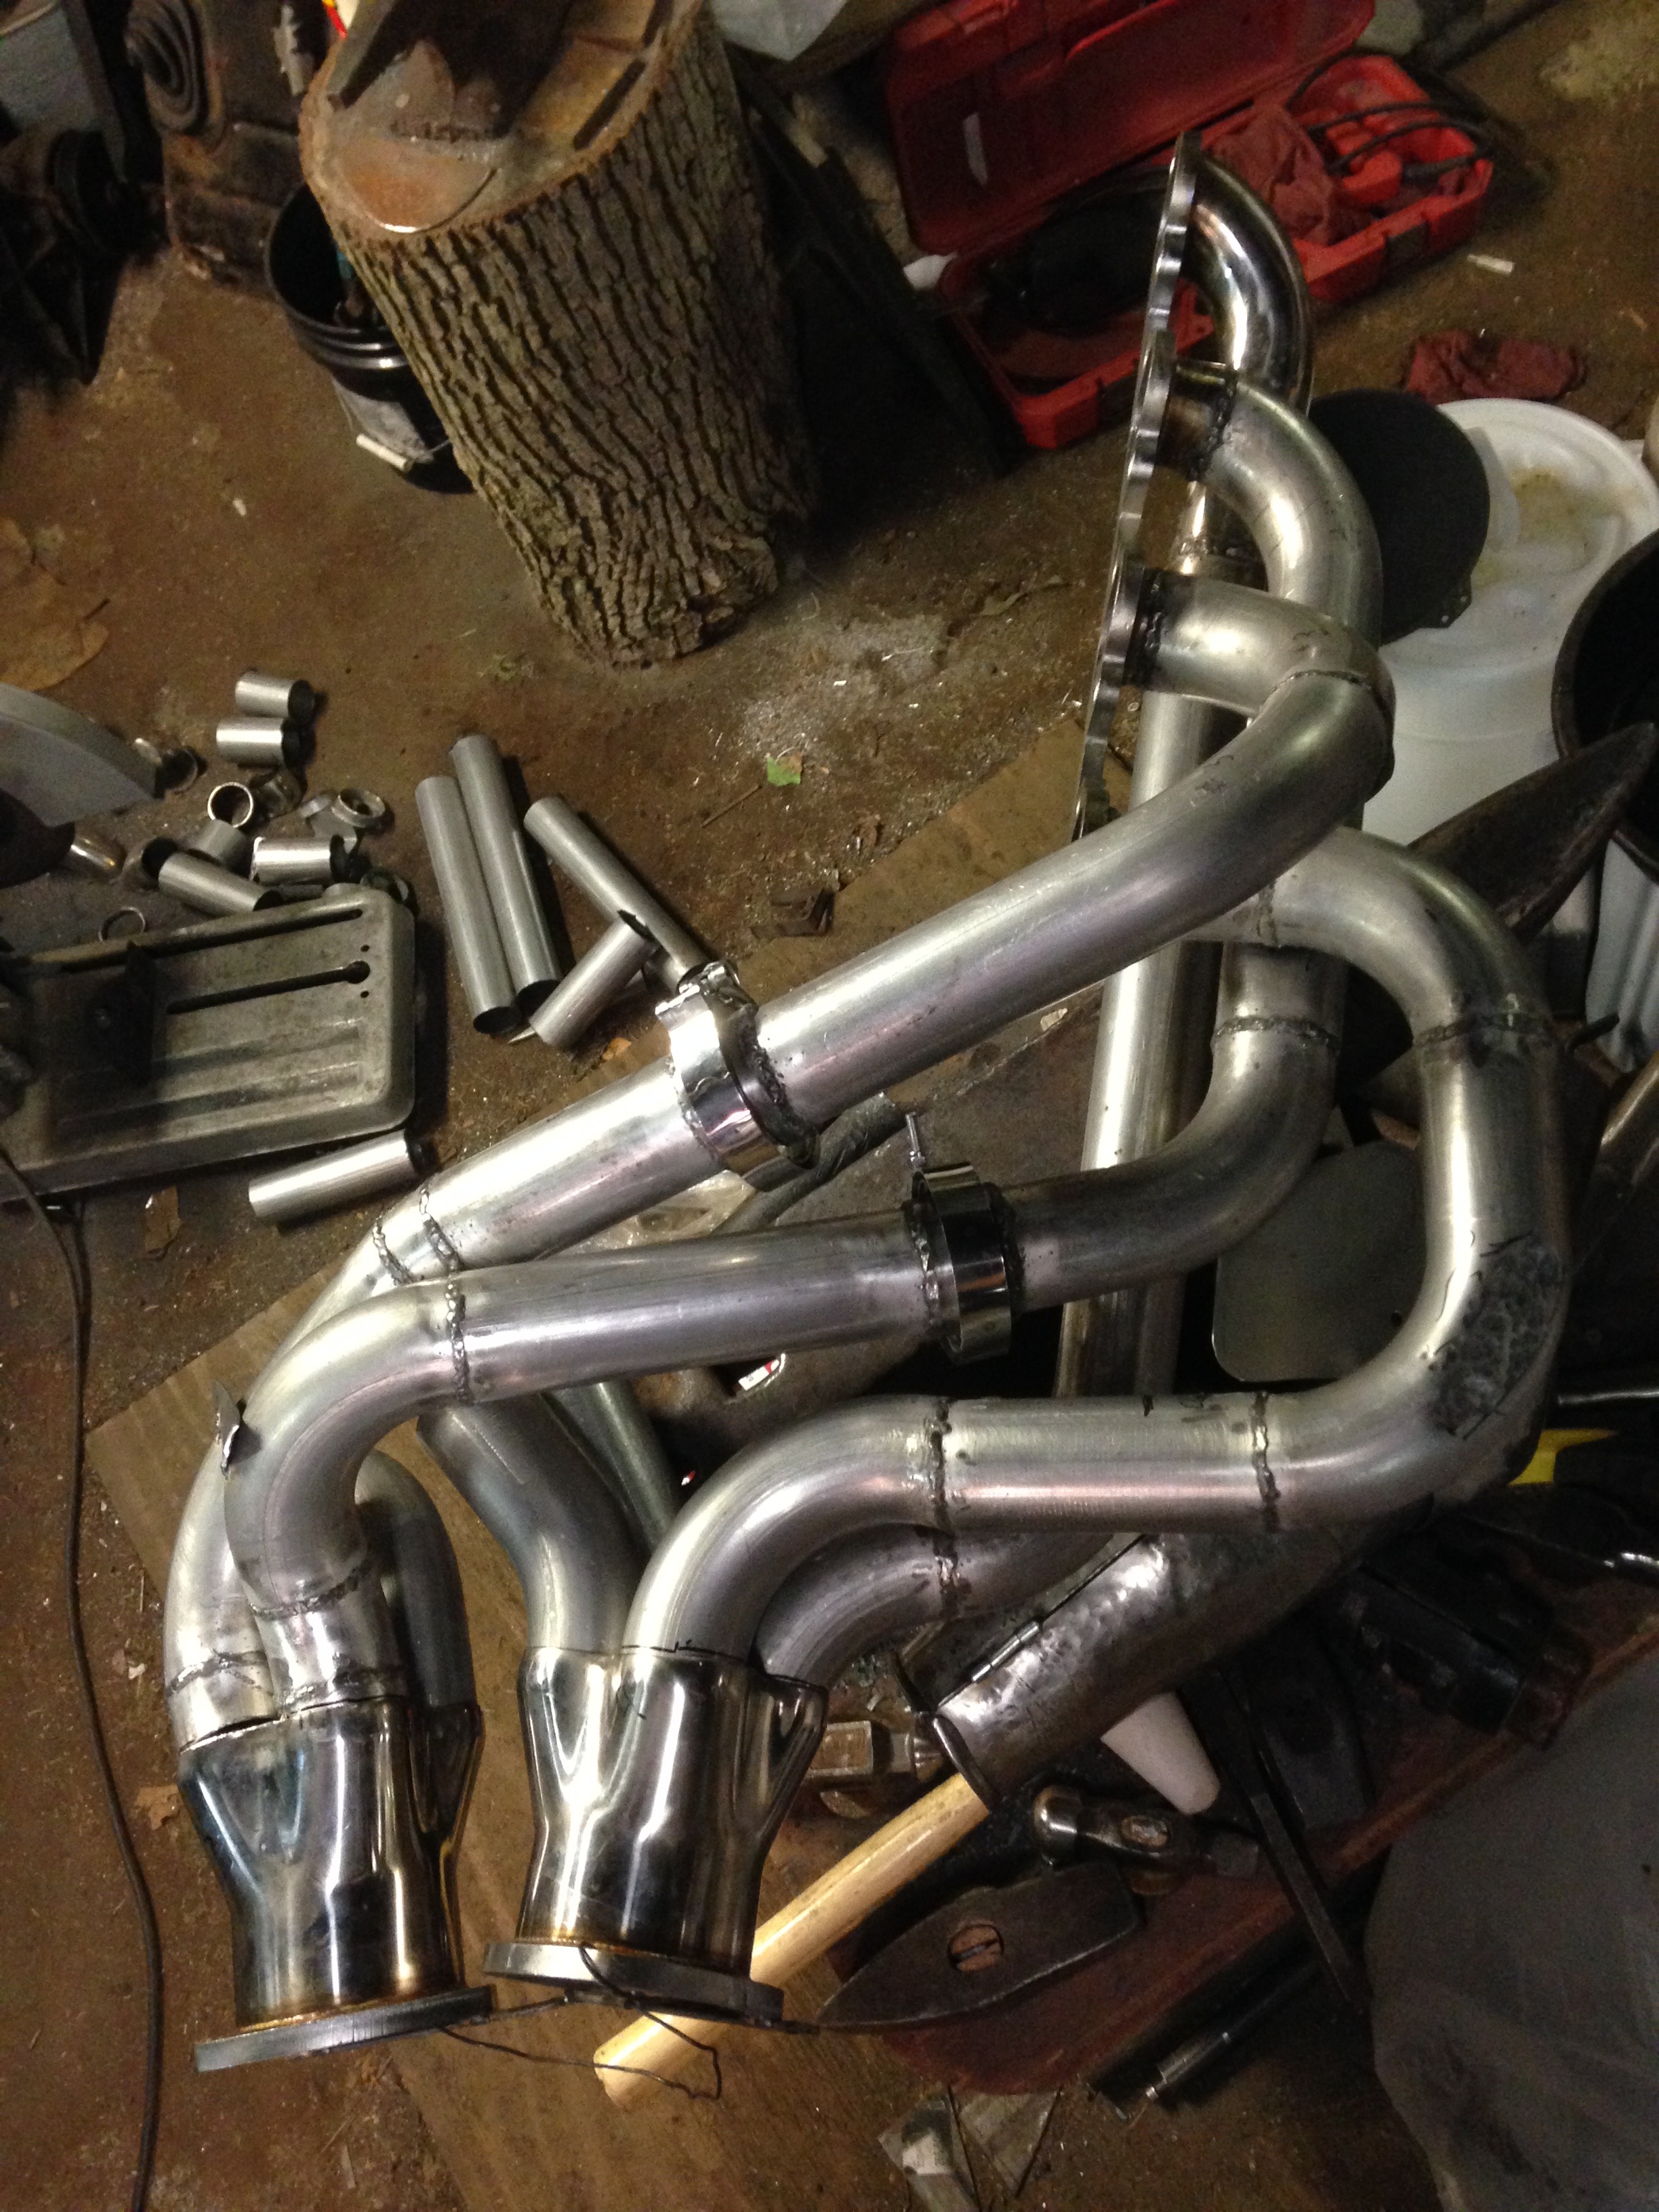
I went with 2" pipes. 1 3/4" would have been much easier.
Got my fuel tank done too. I cut the bottom off of my fuel pick-up and added a 255 lph EFI pump. And added a return line to the tank.
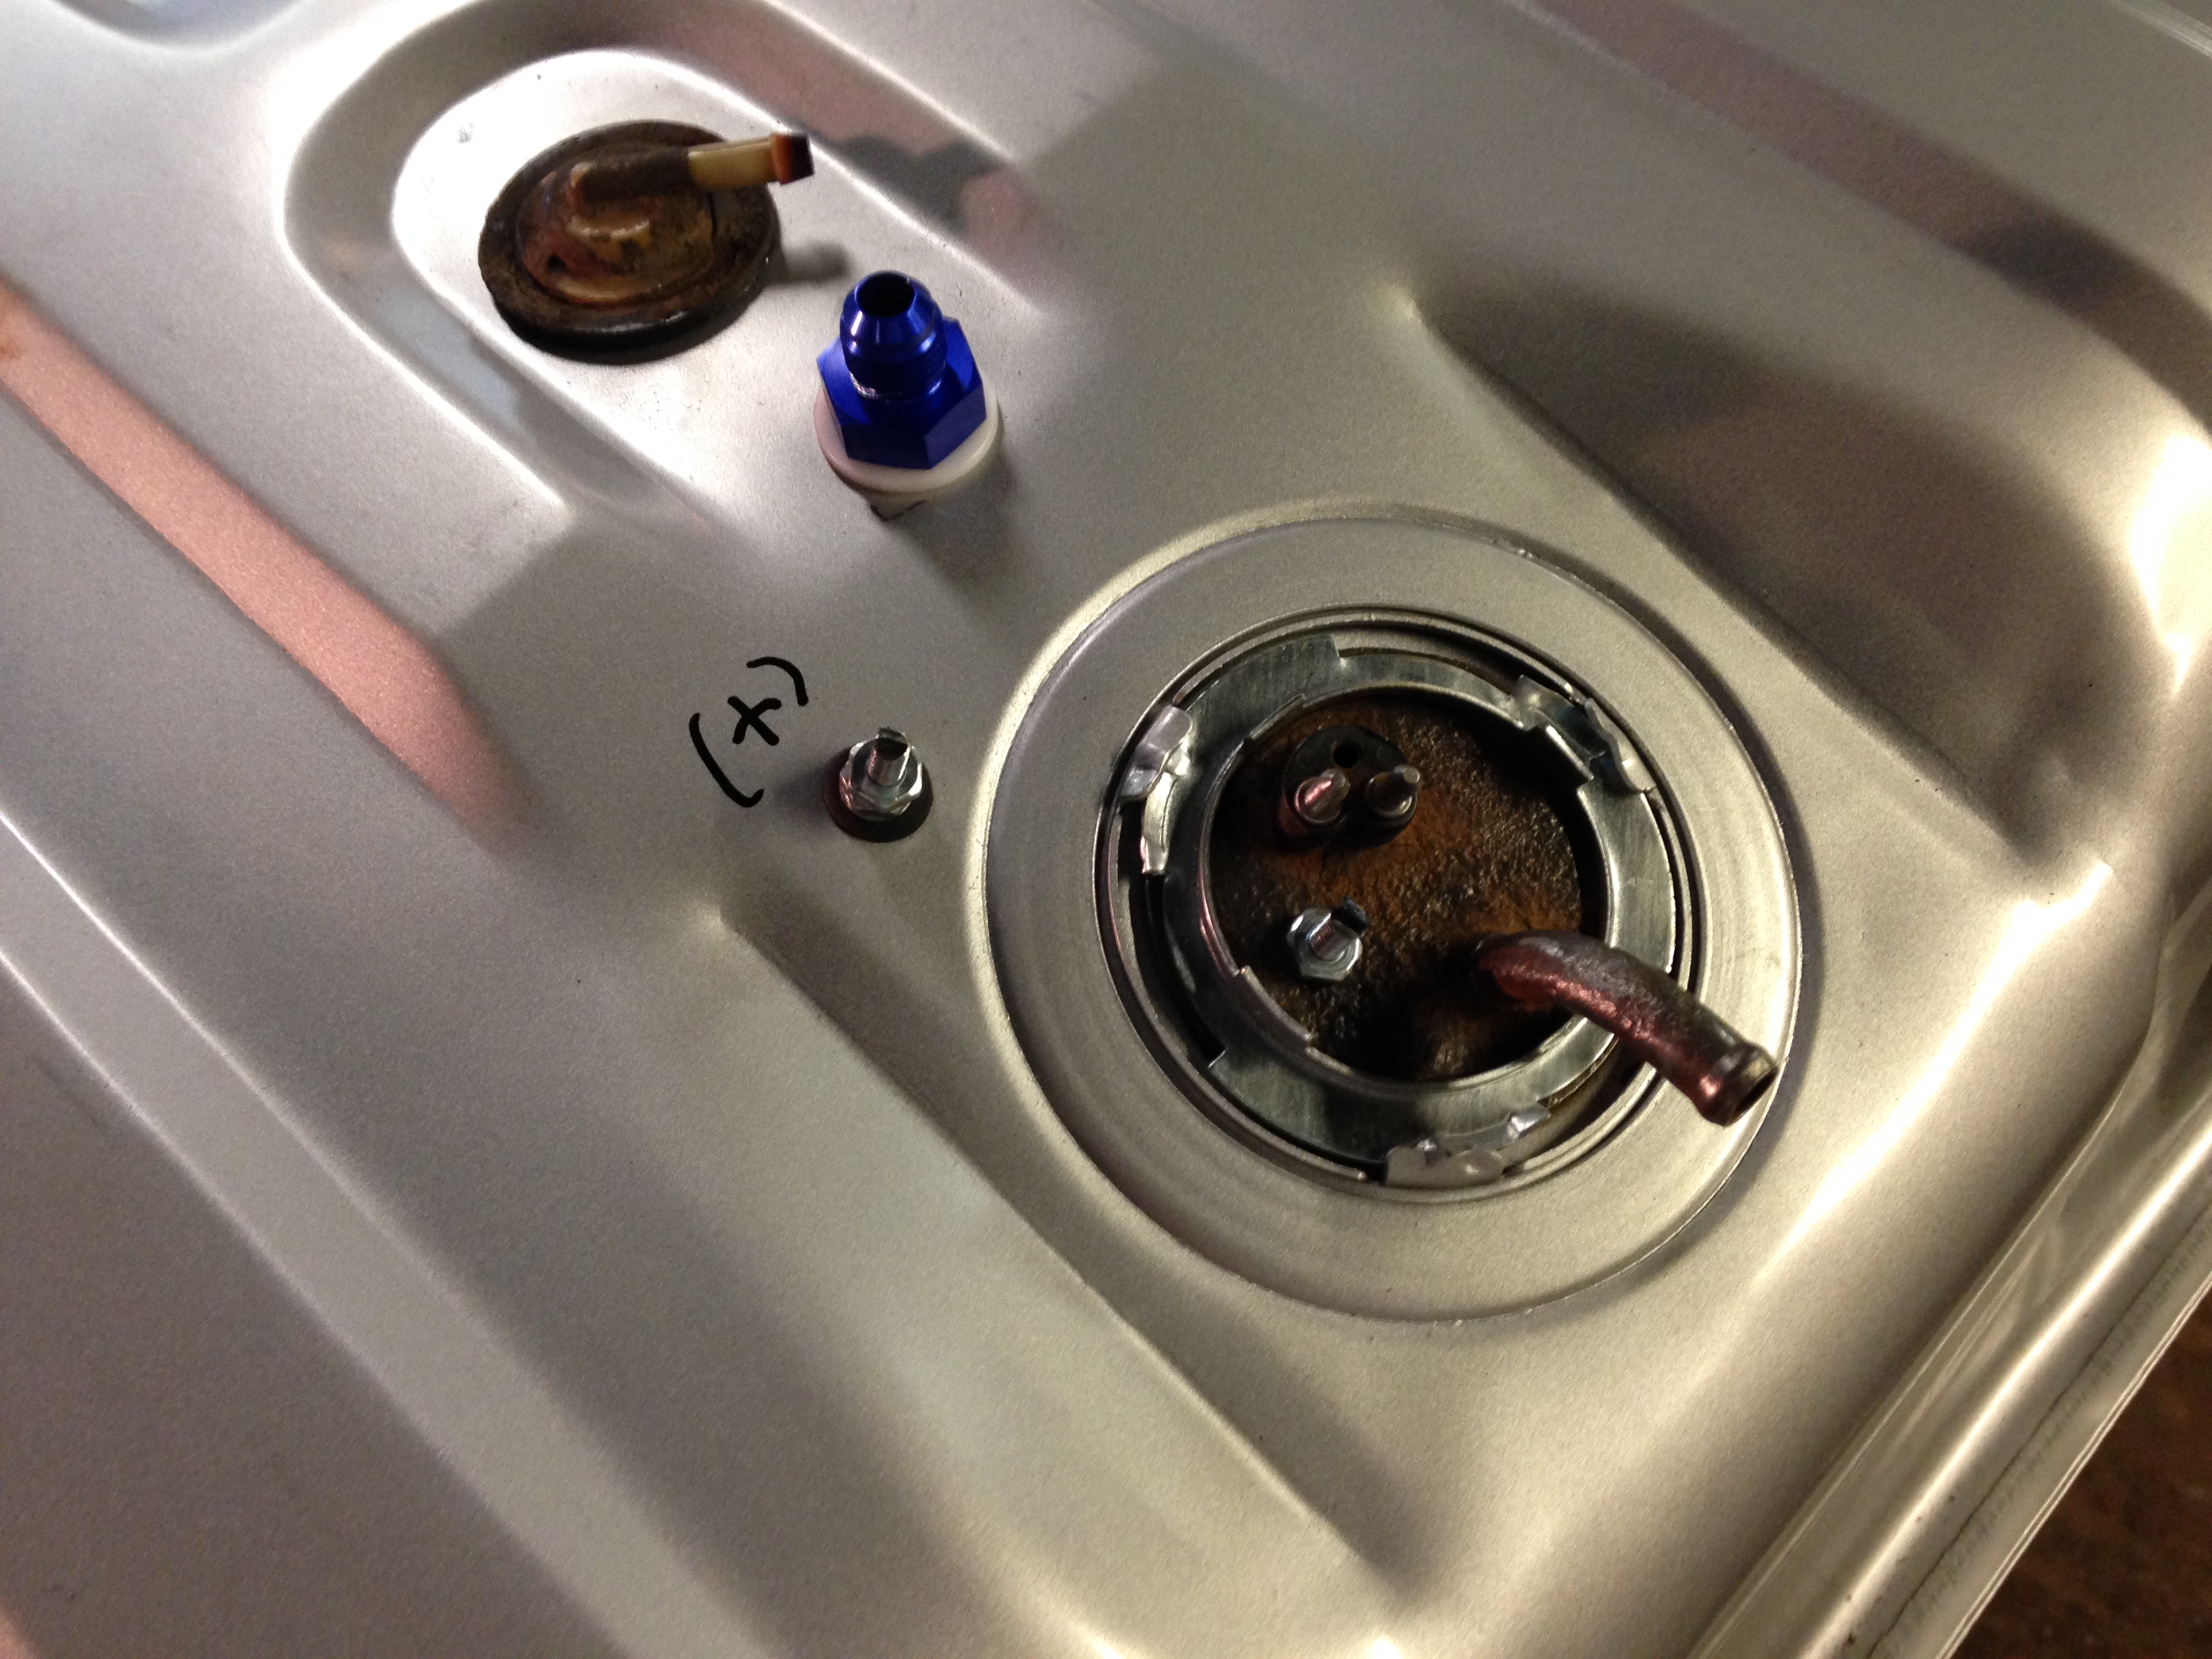
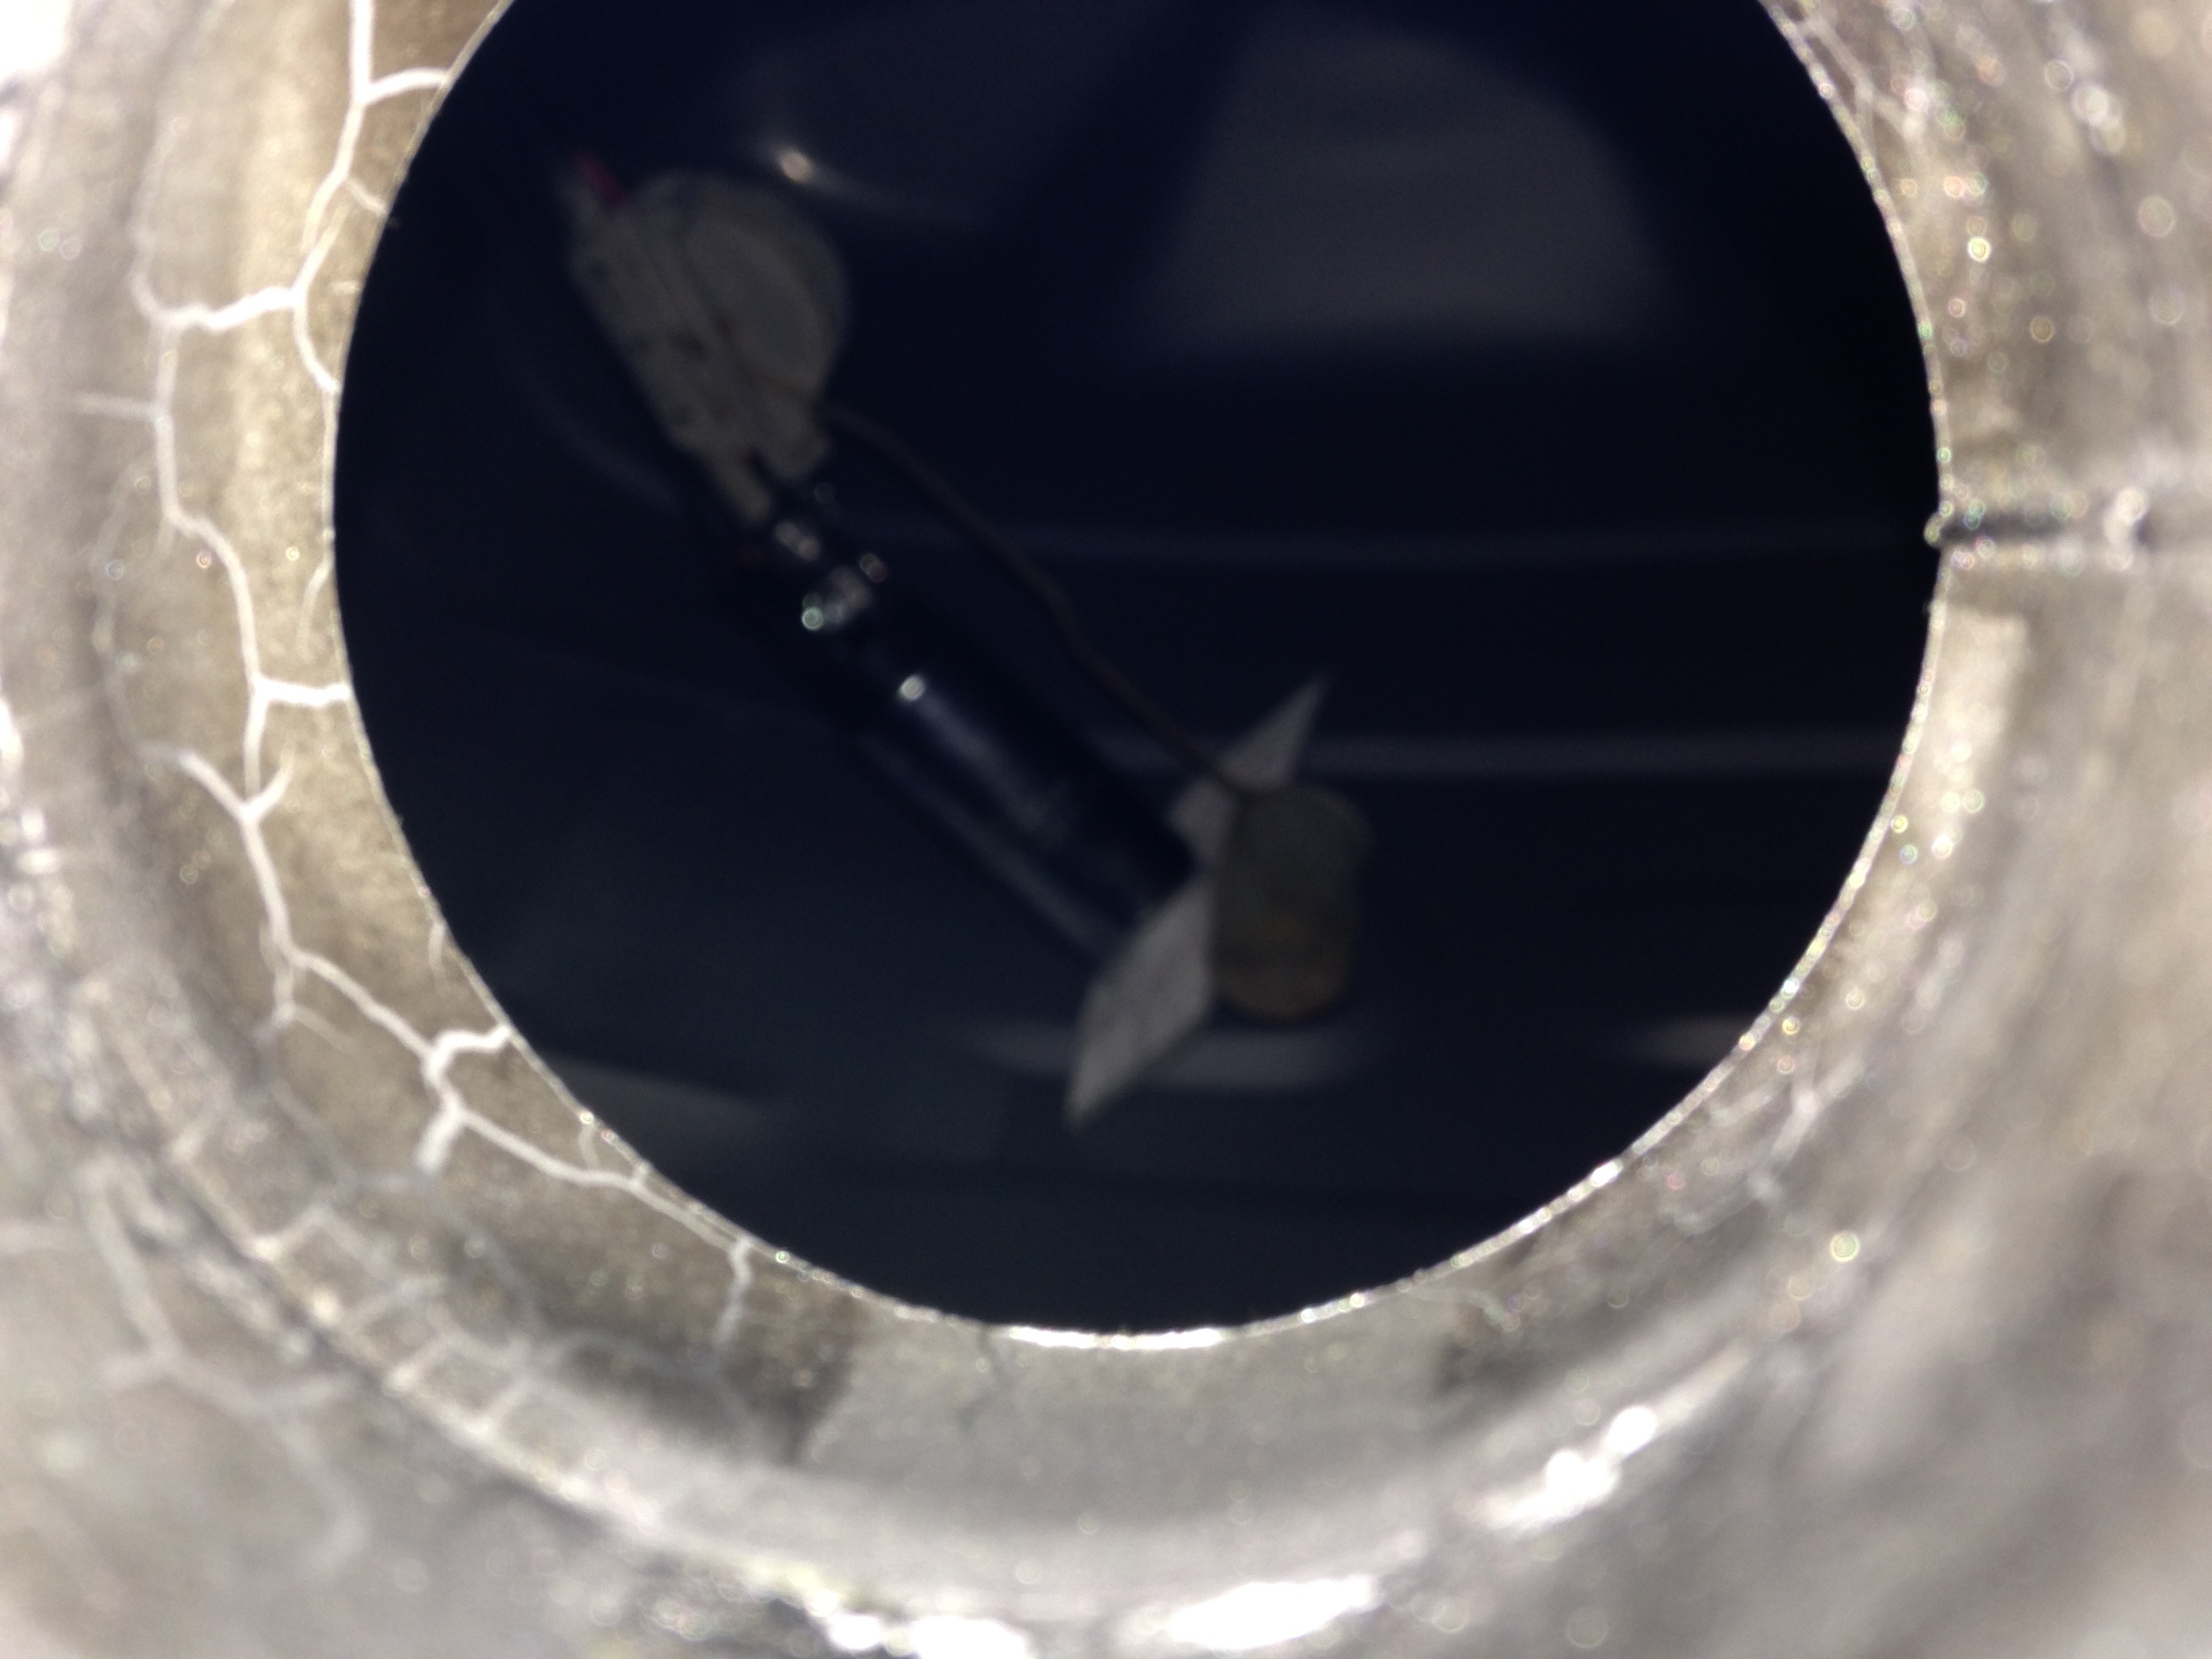
Electrical connections, negative grounds to the fuel pick-up and positive is marked off to the side a bit. I did something similar to this with two of these pumps in a fuel cell. Works good and is really cheap compared to something like an Aeromotive 1000 pump. I didn't think of taking a picture before stuffing the whole deal into the tank so I grabbed a shot through the gas filler hole. You can see the pre-filter sock thing on the end of the pump and the float for the fuel level sender.
Jess
One side of my 180 degree headers pretty much done. Collector isn't welded on yet. I'm waiting to see the position rest of the pipes. Lots of thinking and cutting. First thing to go was trying to keep them all equal length, I tried.
I went with 2" pipes. 1 3/4" would have been much easier.
Got my fuel tank done too. I cut the bottom off of my fuel pick-up and added a 255 lph EFI pump. And added a return line to the tank.

Electrical connections, negative grounds to the fuel pick-up and positive is marked off to the side a bit. I did something similar to this with two of these pumps in a fuel cell. Works good and is really cheap compared to something like an Aeromotive 1000 pump. I didn't think of taking a picture before stuffing the whole deal into the tank so I grabbed a shot through the gas filler hole. You can see the pre-filter sock thing on the end of the pump and the float for the fuel level sender.

Jess
Thread Starter
|
Tuned
Joined: Nov 2015
Posts: 365
Likes: 13
Took a long time to get to this point. Still need some more work to them. I have a few more v-bands coming so I can get the headers on and off easier. I had to take the trans mount off and lower the motor and trans assembly down to get them out as they are now. A few more removable pipes should make it an easier job to install them. There are a few strategically placed dimples to clear stuff where needed, mainly the floor, shouldn't affect much.
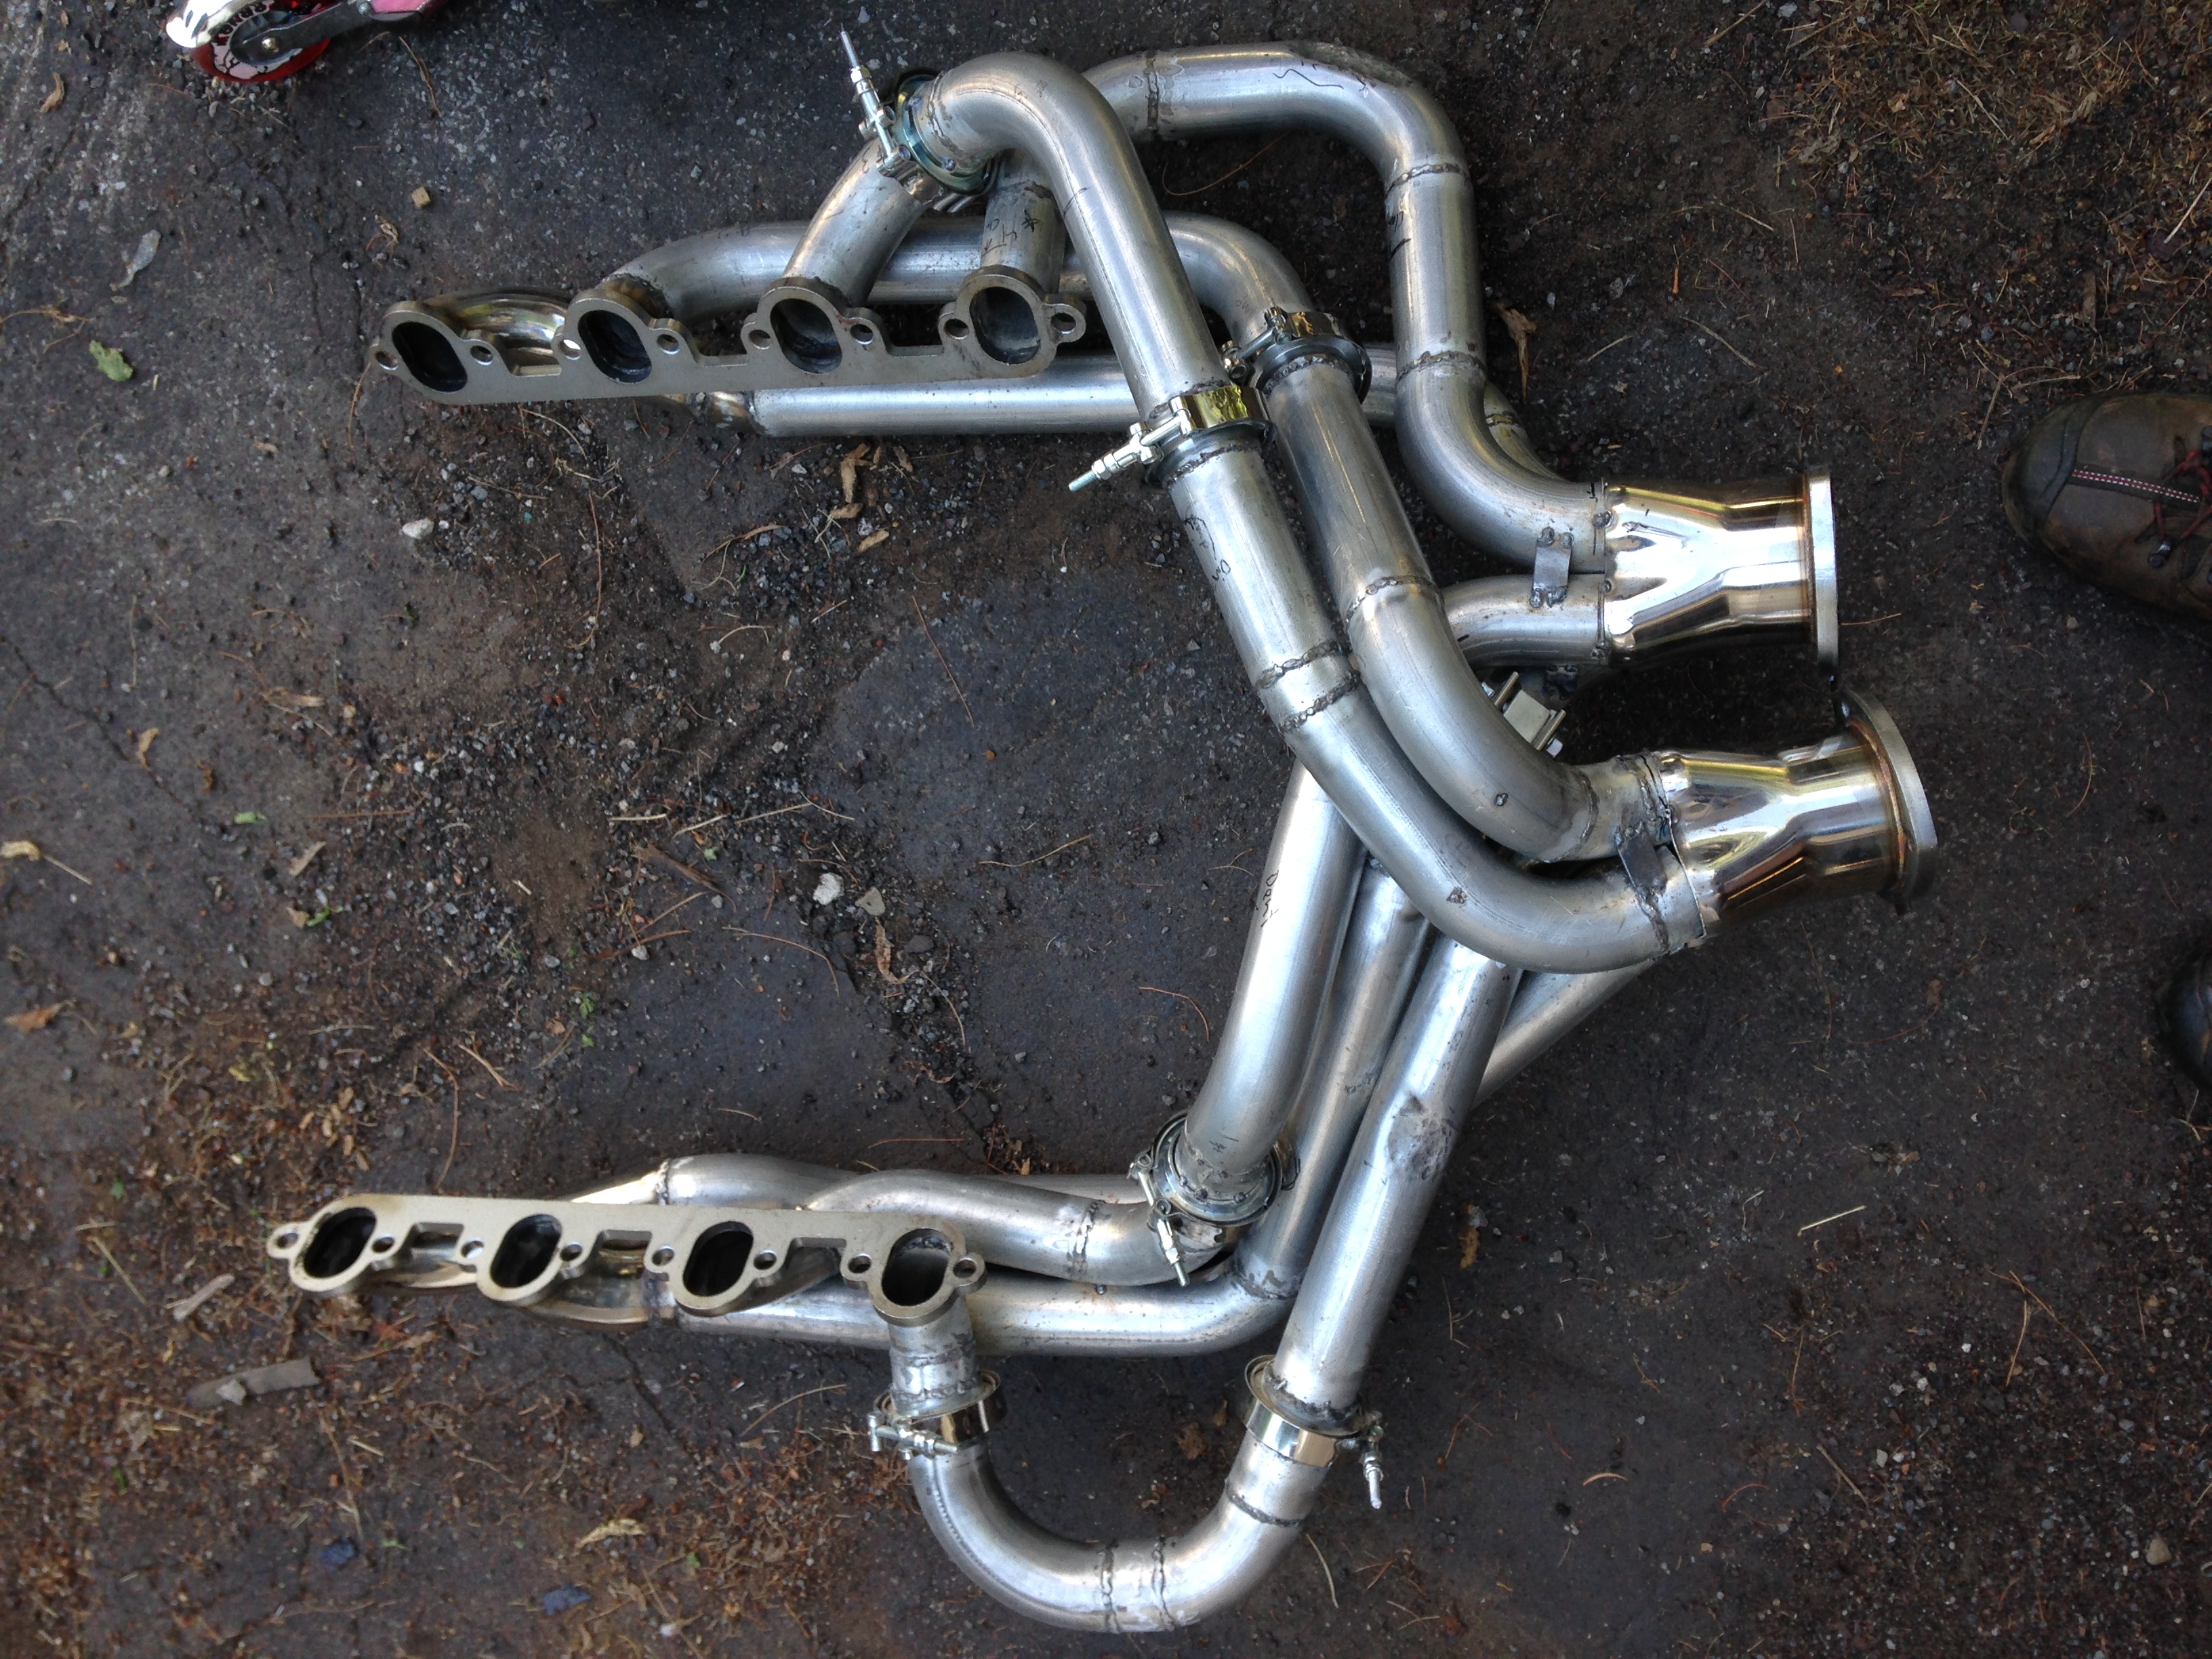
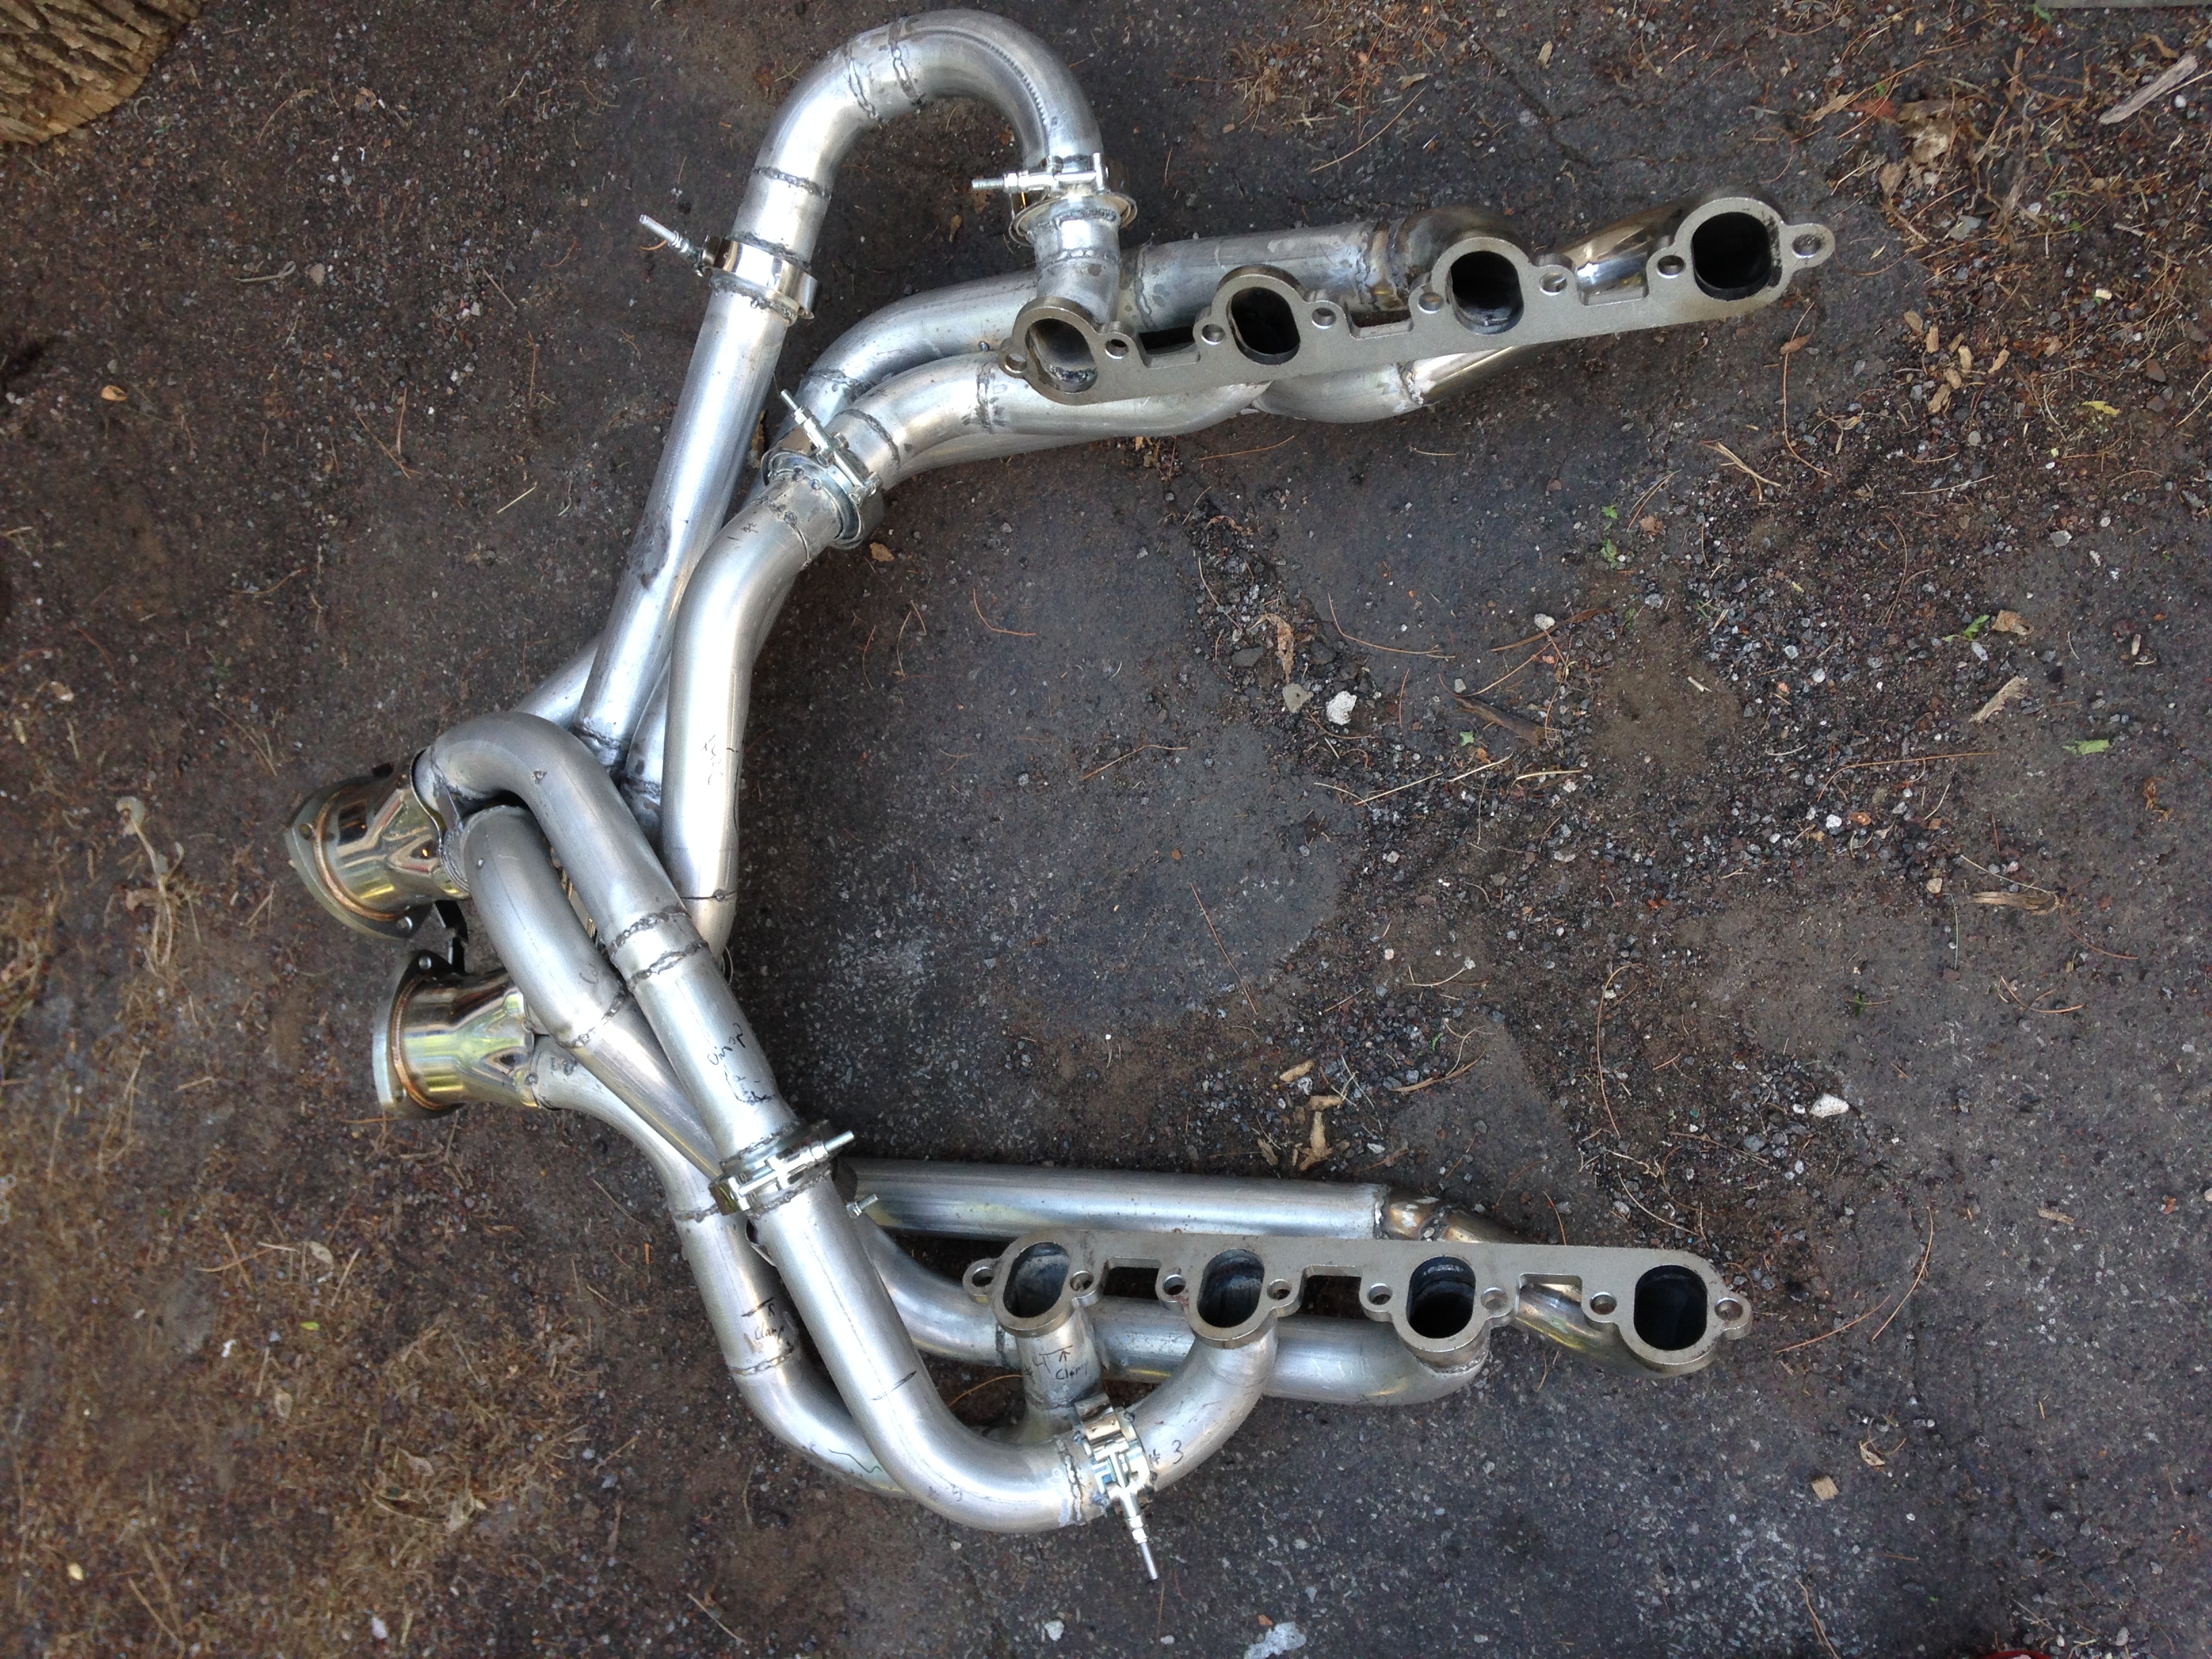
A bit more welding to do. Adding the extra v-bands. Remove the collectors and make some merge spikes to make the exhaust flow better. Supposedly this type header likes small collectors, the spike will take up some volume inside the collector and fill in the gap between the four pipes. I have plenty of exhaust pipe scraps to make something with. In the last picture the header flanges don't quite line up, this is because the clamps aren't tightened up all the way. Drivers side collector is angled towards the passenger side to avoid the transfer case shifter. The scrap of steel on the flange of the collectors was to hold them together and in place where I wanted them.
I think I will move on to running brake lines while I wait for the other v-bands to be delivered. I think if I can get it mobile before the end of summer I'd be happy. Still have the bulk of the floor to finish, that can wait though.
Jess


A bit more welding to do. Adding the extra v-bands. Remove the collectors and make some merge spikes to make the exhaust flow better. Supposedly this type header likes small collectors, the spike will take up some volume inside the collector and fill in the gap between the four pipes. I have plenty of exhaust pipe scraps to make something with.
In the last picture the header flanges don't quite line up, this is because the clamps aren't tightened up all the way. Drivers side collector is angled towards the passenger side to avoid the transfer case shifter. The scrap of steel on the flange of the collectors was to hold them together and in place where I wanted them.I think I will move on to running brake lines while I wait for the other v-bands to be delivered. I think if I can get it mobile before the end of summer I'd be happy. Still have the bulk of the floor to finish, that can wait though.
Jess
Thread Starter
|
Tuned
Joined: Nov 2015
Posts: 365
Likes: 13

Jess