





NEXT INTERIOR MAKE OVER
Thread Starter
|
Logistics Pro

Joined: Jan 2011
Posts: 4,762
Likes: 54
From: Antelope Valley ,CA
YUP I tried to think of a way to get rid of that f*&king screw , but without it the headliner board sags . Maybe i'll swap it with a chrome allen head if i can find one with the large diameter

Fleet Owner
Joined: Dec 2009
Posts: 20,678
Likes: 83
From: NorCal
I was thinking more of a thin strip aluminum or something decorative like a repurposed emblem or symbol.... something else that just a lone screw. Even a fake or real auxiliary dome light from.. a Mustang!

Hotshot


Joined: Mar 2013
Posts: 14,255
Likes: 199
From: Phoenix, Az.
How about attaching the center of the headliner just like later model vehicle's door trim panels? AKA a hole in the headliner's backer board and twisting a door trim panel pushpin in it. The screw's hole would have to be bigger but there would be no hole in the material.
Thread Starter
|
Logistics Pro
Joined: Jan 2011
Posts: 4,762
Likes: 54
From: Antelope Valley ,CA
well to late for me but this just popped in my head
sticky backed velcro tape ?
they have it in 2" wide so run it length of center support and on underside of headliner board . augh why didn't i think of this ?
sticky backed velcro tape ?
they have it in 2" wide so run it length of center support and on underside of headliner board . augh why didn't i think of this ?

Lead Driver
Joined: Aug 2003
Posts: 7,592
Likes: 10
From: **** hole San Jose ca.
I was thinking a long the lines of a flat U=shaped bracket kind of like an old cell phone belt clip.
That would slid into an opening in the roof brace while the U bracket is affixed to the center of the headliner cardboard piece..
my.02cents
Orich
That would slid into an opening in the roof brace while the U bracket is affixed to the center of the headliner cardboard piece..
my.02cents
Orich

Lead Driver


Joined: Apr 2011
Posts: 6,399
Likes: 40
From: El Dorado, Arkansas
He epoxied a magnet to the center, top side of the head liner. The magnet sticks to the metal rib running fore and aft down the middle of the ceiling and keeps the head liner pulled up where it should be. Clean, simple, effective and it doesn't show.

FTE Stories
Ford Trucks for Ford Truck Enthusiasts

Top 6 Best Deals Available on New Fords & Lincolns Right Now
Brett Foote
This Hennessey Takes the Expedition Tremor's Off-Roading Capability to the Next Level
Verdad Gallardo
Top 10 Fords at 2026 Carlisle Ford Nationals
Joe Kucinski
3 Best / 3 Worst Parts of Modern Ford Ownership
Brett Foote
10 Amazing Upgrades That Solve Common Ford Truck Owner Headaches
Pouria Savadkouei
Every 2026 Ford Engine Explained
Brett Foote
10 Ugly Ford Trucks That We Still Kinda Love
Joe Kucinski
10 Things Every Truck Owner NEEDS (2026 Edition)
Michael S. Palmer
Rezvani's Latest Post-Apocalyptic Monster Is a Ford F-150 Raptor Underneath
Verdad Gallardo




Thread Starter
|
Logistics Pro
Joined: Jan 2011
Posts: 4,762
Likes: 54
From: Antelope Valley ,CA
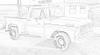
I used 2" foam for seat bottom cut it big and ligned up to back edge , then i took some 1" foam 6.75 " wide and glued it to the bottom of the 2"foam in the shape of the seat . glued it in place with 3m 90 spray glue . cut the 2" foam to shape with a electric kitchen knife . i was pressed for time so didn't take my normal step by step pictures . i'll draw something up so you guys can see .