



repairing volare hack install!
Thread Starter
|
Hotshot


Joined: Nov 2000
Posts: 11,591
Likes: 14
From: Pflugerville, tx

Sam
old and in the way


Joined: Jul 1997
Posts: 5,928
Likes: 1,055
From: Lovely Hueytown Alabama

Hey Sam,
this morning was the first time I've read through the whole thread... You've really done a fantastic job... all you fab/install work looks professional. When you get in business... you can do my work !!!
I'm jealous of that sway bar... what did it come from ??
your conversation with Grizz about the copper backer plate was a big help... I had a piece of 2" x 1/4" buss bar I used and it's disappeared... Headed to the scrap pile to find a piece of pipe to 'hammer down' thanks for the tip...
later
John
this morning was the first time I've read through the whole thread... You've really done a fantastic job... all you fab/install work looks professional. When you get in business... you can do my work !!!
I'm jealous of that sway bar... what did it come from ??
your conversation with Grizz about the copper backer plate was a big help... I had a piece of 2" x 1/4" buss bar I used and it's disappeared... Headed to the scrap pile to find a piece of pipe to 'hammer down' thanks for the tip...
later
John
Thread Starter
|
Hotshot
Joined: Nov 2000
Posts: 11,591
Likes: 14
From: Pflugerville, tx
Hey Sam,
this morning was the first time I've read through the whole thread... You've really done a fantastic job... all you fab/install work looks professional. When you get in business... you can do my work !!!
I'm jealous of that sway bar... what did it come from ??
your conversation with Grizz about the copper backer plate was a big help... I had a piece of 2" x 1/4" buss bar I used and it's disappeared... Headed to the scrap pile to find a piece of pipe to 'hammer down' thanks for the tip...
later
John
this morning was the first time I've read through the whole thread... You've really done a fantastic job... all you fab/install work looks professional. When you get in business... you can do my work !!!
I'm jealous of that sway bar... what did it come from ??
your conversation with Grizz about the copper backer plate was a big help... I had a piece of 2" x 1/4" buss bar I used and it's disappeared... Headed to the scrap pile to find a piece of pipe to 'hammer down' thanks for the tip...
later
John
here is a link to the the bushing kit, that will get you their phone number.
mustang II sway | eBay
Sam
Thread Starter
|
Hotshot
Joined: Nov 2000
Posts: 11,591
Likes: 14
From: Pflugerville, tx
I also didn't mention that when I put the front spindles/brakes together on Sunday, I discovered that the bracket that holds the caliper to the spindle on the drivers side wasn't even threaded, so the slider bolts the caliper sits on couldn't be retained.. fun..
took a while to find the receipt with the order number..
they are sending a set of brackets.. so, never a dull moment.
(purchased 3/8)..
Sam
took a while to find the receipt with the order number..
they are sending a set of brackets.. so, never a dull moment.
(purchased 3/8)..
Sam
Senior User
Joined: Nov 2010
Posts: 243
Likes: 2
From: Guadalajara, Mexico
Hi Sam,
Just went over the whole thread and wanted to drop a line to repeat what the others have said, great work and documentation on the process. Realy gets me hoping to make some progress soon.
Thanks for being and inspiration to those of us behind.
Ed.
Just went over the whole thread and wanted to drop a line to repeat what the others have said, great work and documentation on the process. Realy gets me hoping to make some progress soon.
Thanks for being and inspiration to those of us behind.
Ed.
FTE Stories
Ford Trucks for Ford Truck Enthusiasts

10 Fords to Drive Before You Die
Joe Kucinski
3 Best / Worst Features Of The 2025+ Ford Expedition
Brett Foote
10 Ways Ford is LOSING to the Competition
Joe Kucinski
Top 6 Best Deals Available on New Fords & Lincolns Right Now
Brett Foote
This Hennessey Takes the Expedition Tremor's Off-Roading Capability to the Next Level
Verdad Gallardo
Top 10 Fords at 2026 Carlisle Ford Nationals
Joe Kucinski
3 Best / 3 Worst Parts of Modern Ford Ownership
Brett Foote
10 Amazing Upgrades That Solve Common Ford Truck Owner Headaches
Pouria Savadkouei
Every 2026 Ford Engine Explained
Brett Foote
Fleet Mechanic

Joined: Apr 2008
Posts: 1,373
Likes: 6
From: Moore (or less), OK.
Man, now that you repost the floor pic you do have a lot of welding and grinding to do. I just looked at Dennis Carpenter and they have the left and right floor pans for the 53-55 and the right side for 56 with battery cutout. Have you checked them out yet?
Thread Starter
|
Hotshot
Joined: Nov 2000
Posts: 11,591
Likes: 14
From: Pflugerville, tx
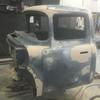
now that the front end is done, I can move on to that repair.
I think I am going to use panel adhesive instead of welding, I have enough for a good overlap, and have clecos to clamp with
Sam
Thread Starter
|
Hotshot
Joined: Nov 2000
Posts: 11,591
Likes: 14
From: Pflugerville, tx
will do, but I'm going to do that in the other topic, cause this one is about the volare, and its done except hooking up the steering again, which is now stuck behind the floor and dash projects..
the floor topic is here
https://www.ford-trucks.com/forums/1...l#post10316446
the dash topic is here
https://www.ford-trucks.com/forums/1...l#post10728875
Sam
the floor topic is here
https://www.ford-trucks.com/forums/1...l#post10316446
the dash topic is here
https://www.ford-trucks.com/forums/1...l#post10728875
Sam
Thread Starter
|
Hotshot
Joined: Nov 2000
Posts: 11,591
Likes: 14
From: Pflugerville, tx
here is a link to the cab floor repair topic..
https://www.ford-trucks.com/forums/1...l#post10770118
Sam
https://www.ford-trucks.com/forums/1...l#post10770118
Sam
Thread Starter
|
Hotshot
Joined: Nov 2000
Posts: 11,591
Likes: 14
From: Pflugerville, tx
I finally made enough progress that we could put the front clip back on today. the engine wiring is almost done, o2 sensors, and the standard: alternator, starter, battery hookups to go.. before rewiring the truck itself.
we found covers for the truck engine intake, so we don't have to convert to the car intake to make it look nice..
lots of room up front for the radiator and electric fan..
Sam
we found covers for the truck engine intake, so we don't have to convert to the car intake to make it look nice..
lots of room up front for the radiator and electric fan..
Sam