Ford F-250: How to Replace Drive Shaft
You'll know you need to change your drive shaft joints when you get a small clunk before taking off in first gear. This guide will walk you through how to replace the entire drive shaft and how to fix those noisy U-Joints.
This article applies to the Ford F-250 and F-350 Super Duty (2005-2014).
The drive shaft is key to keeping you moving, without it your F-250 or Super Duty can't deliver power to the wheels. U-joints are used to transfer the power into and out of the driveshaft, causing it to spin. These will wear out either due to an improperly balanced driveshaft or simply due to time. You'll know they're bad when they start making a squeaking sound. Neglecting the u-joint failure signs can cause them to break, which can both damage the driveshaft and leave you immobilized.

Materials Needed
- 12mm 12-point socket
- Large flat ended punch tool or something like a spark plug socket
- Hammer
- Pliers
- File
- New grease
- WD-40
- Brake cleaner
- 4 wheel chocks
- Transmission Fluid
- Paper towels
Step 1 - Safety first
With the driveshaft removed, the truck will be able to move freely so you'll need to take some precautionary steps to protect yourself.
- Park on flat, level ground
- Chock all four wheels
- Set the parking brake
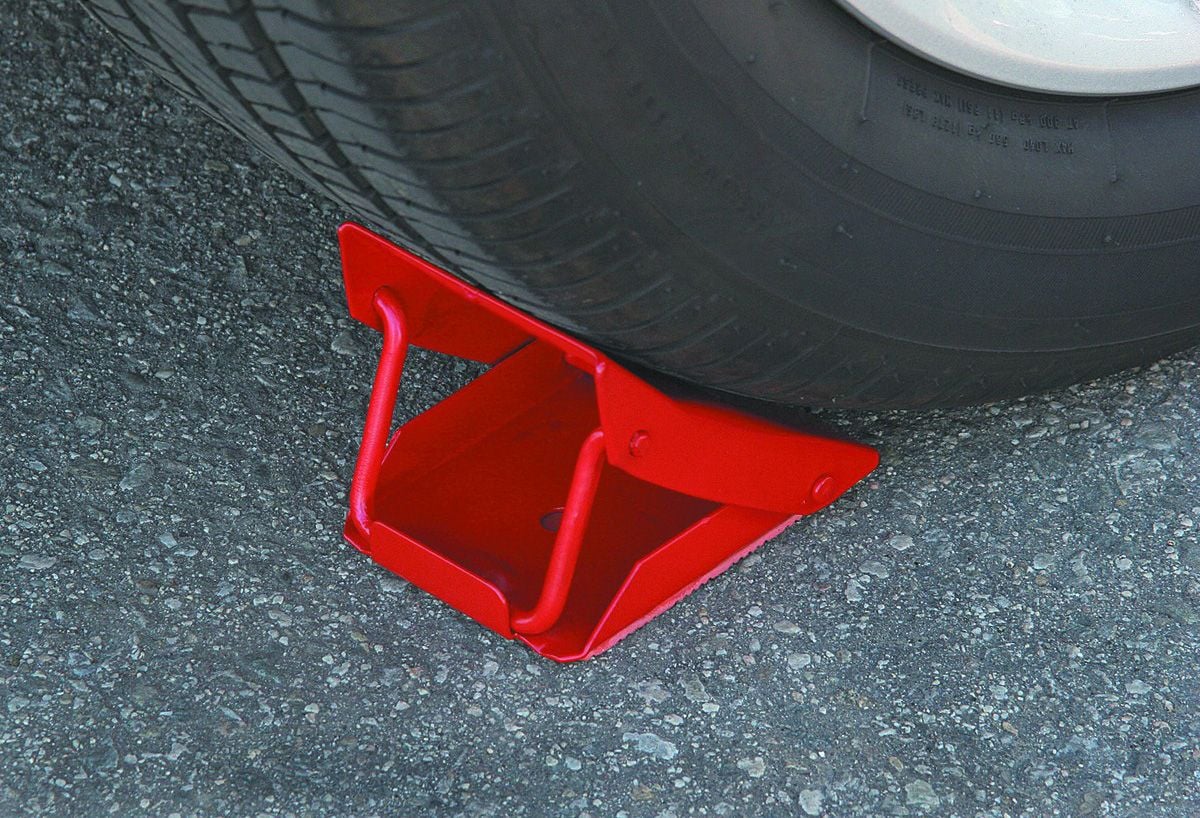
Figure 1. Chocked Wheel
Pro Tip
Your F-250 or Super Duty's drive shaft may come in a single, double, or even a three piece unit. The method of dissasembly is the same regardless of how many links there are.
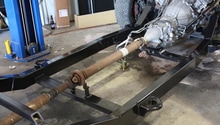
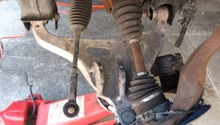
Step 2 - Drive shaft removal
- Put the truck in neutral. This will allow you to spin the driveshaft to access bolts easier.
- Spray all the bolts that you need to remove on the driveshaft with WD-40 or something similar and allow it to sit for a few minutes, this will make removal much easier.
- Using your 12mm 12-point socket or wrench remove the bolts connecting the driveshaft to the rear differential, see Figure 1.
- Depending on your driveshaft type, you may need to repeat this process on the transmission end as well, otherwise you can carefully pull it out of the transmission.
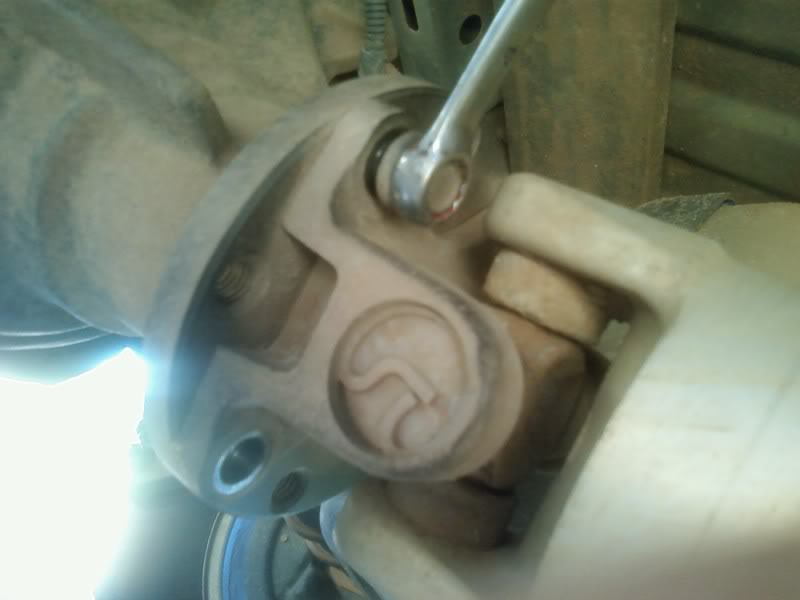
Figure 1. Remove the bolts connecting the drive shaft to the rear differential. 
Figure 2. The drive shaft has been removed from the transmission tail shaft (outlined above)
Pro Tip
If your drive shaft is the style that pulls out of the transmission, you'll want to line underneath with paper towels as some transmission fluid will come out with it as well.
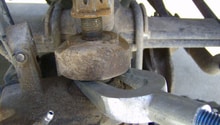
Step 3 - U-joint removal (optional)
Almost all of the drive shafts from the factory will come with non-serviceable u-joints which means you can't replace them, instead you'll need to replace the entire drive shaft. For those that have servicable u-joints, read on.
- Depending on your driveshaft you'll either have the standard c-clip or Spicer snaps holding the race (the bearings that the u-joint ends plug into) into the u-joint. To remove, simply squeeze together the center with pliers and they'll pop out. See Figure 1.
- Soak the races with WD-40 and let sit for a few minutes.
- Using your punch/spark plug socket/etc. and hammer, knock one race inward to force the other side out. If it won't come all the way out, you can use channel locks to pull it the rest of the way. See Figure 2.
- Repeat the process hitting the other side outward to remove it.
- Once removed, you'll be able to pull out the u-joint. At this point you'll want to inspect the yoke for any chips or burrs and file these off.

Figure 1. Driveshaft C-Clip 
Figure 2. Removing U-Joint 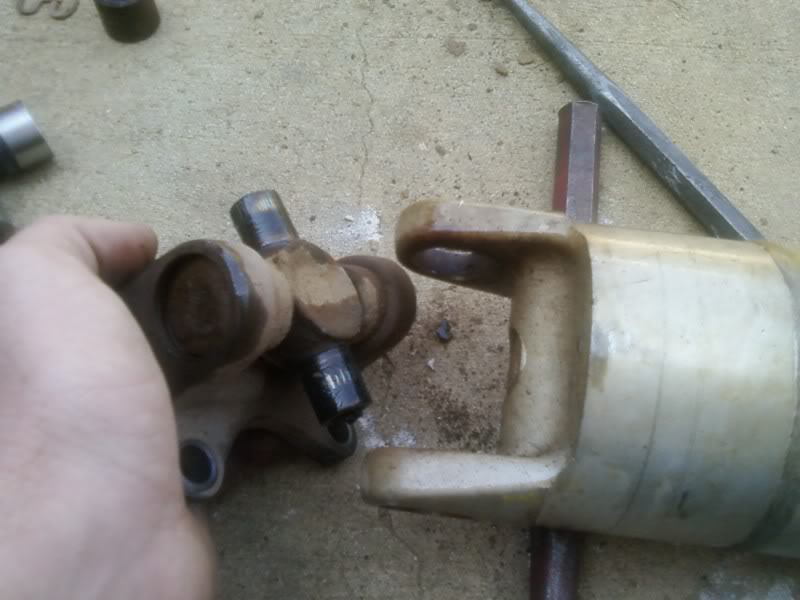
Figure 3. U-Joint Removed
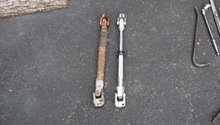
Step 4 - U-joint install (optional)
Like Step 3, this is dependent on what your doing as almost all new driveshafts will come with the u-joints pre-installed as well. This step takes patience and may require a couple redo's to get everything to line up correctly.
- Pull two opposing races off the new u-joint and then position it in the yoke with one hand. Using the other hand, carefully push the race onto it. See Figure 1. If the race doesn't slide easily into place, chances are you dislodged the needle bearings and you'll need to pull off the race and reset them. See Figure 2.
- Once it's pushed in as far as you can get it, tightly grip the u-joint with one hand. Using the other hand, hammer in the race lightly until it's far enough where you would be able to get the c-clip on it.
- At this point repeat the process for the race on the other side, if it get's dirty you'll need to use the brake cleaner to clean it off before installing.
- Using the hammer, give it a nice firm hit to seat the other race
- Install the c-clips
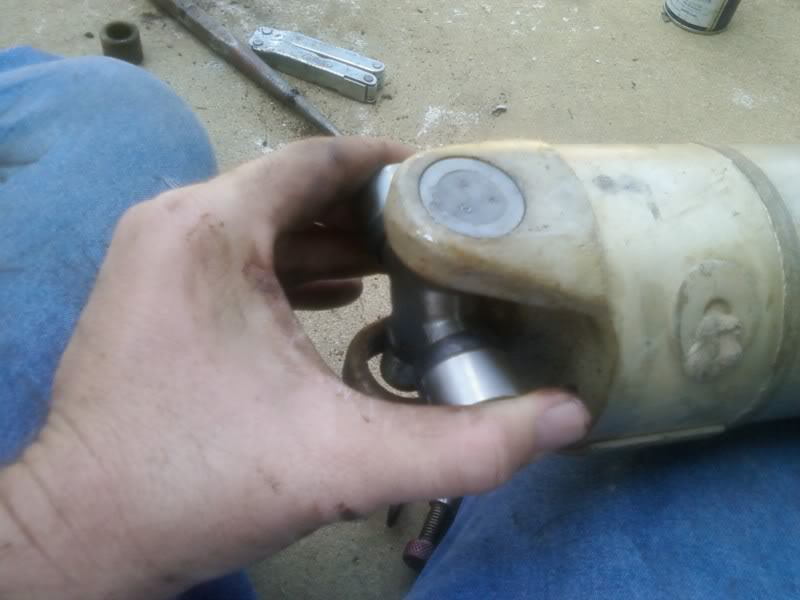
Figure 1. First Race In Place 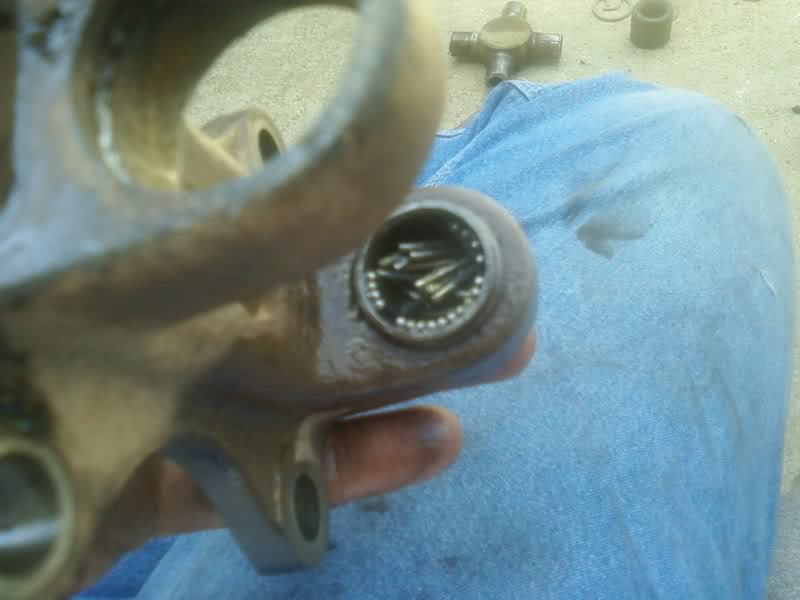
Figure 2. Misaligned Needle Bearings
Pro Tip
If you got u-joints with grease fittings, align them so they both face the same way. This will keep you from having to move the truck to grease the u-joints. Also, apply a light layer of grease on the needle bearings.
Step 5 - Install driveshaft
This is a pretty straightforward step, it's simply the reverse of removal. However, if you have the driveshaft type where it pulls out of the transmission you'll notice on that end it looks like a gear will be missing. This is used for alignment inside the transmission and therefore will only fit in one way. On the differential end, simply tighten down the bolts until they're nice and snug. Don't forget to check the transmission fluid and top it off if necessary.
On the first test drive, go slow. This way you can make sure everything is tight and correct without risking damage to the truck or the driveshaft you just installed.
Featured Video: How to Index and Remove Drive Shaft
Related Discussion
- Replacing a Staked in U-Joint - F150online.com