Ford F150: How to Replace Power Steering Pump
Quite often the stock F-series power steering pumps will start whining worse than it normally does, which means it's time to change it out. Changing out the pump may not stop the whining completely, but should help dramatically. Read on to find the finer details of the operation.
This article applies to the F-150 (1987-1996).
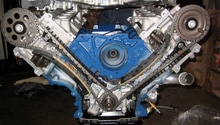
The power steering pump provides the brute force via hydraulic pressure to help turn the wheels left or right. When it goes out or starts making an unbearable amount of noise, installing a new pump is your only choice. Changing it out isn't very hard, it just takes some time, a little patience, and at least one specialized tool.

Materials Needed
- Basic tool set
- Pulley removal/install tool (Harbor Freight Item#: 40749 - can be found at many places)
- Screwdriver
- Drain pan
- 2-3 quarts Type F ATF fluid
- Jack and jack stands
According to many posts found on the forum, there is a Saginaw pump which is a swap for the OEM pump. This pump will provide quiet operation for a long time to come and should be considered when the need arises to change out the power steering pump. Finding one may be problematic, but well worth the trouble. They can be had from vans with the same engine and A/C configuration (either with or without, depending on what you have). You'll need the bracket as well as the high pressure hose to make it work. Also, if it hasn't been done in a while, consider replacing the serpentine belt, you will be taking it off to do this anyway. You'll also want to flush the power steering fluid to keep the warranty of the new pump intact.
(Related Article: How to Replace Power Steering Fluid - Ford-Trucks.com)
Step 1 – Clear power steering pump area
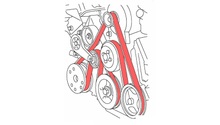
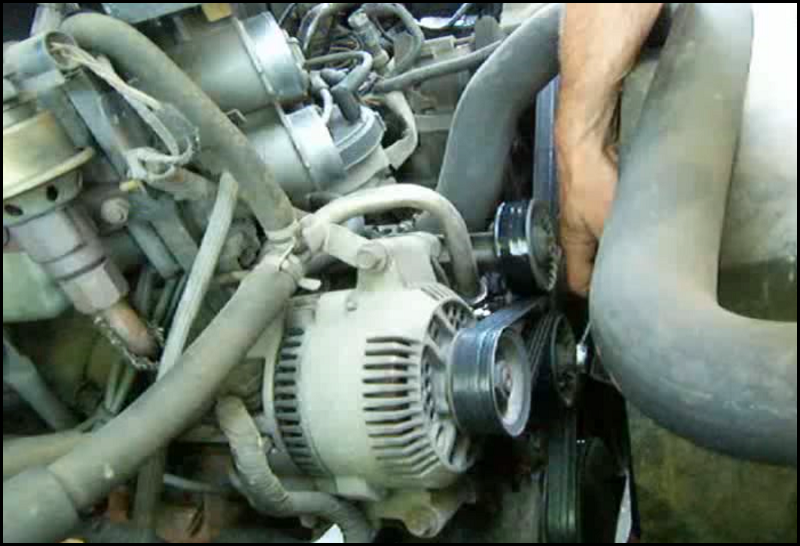
Using a flat tip screwdriver to relieve the hose clamps at each end of the intake hoses, then remove the intake hoses. Place the boxed end of a 15mm wrench on the tensioner pulley (Figure 1), turning it counterclockwise to loosen the serpentine belt. Pull the serpentine belt off of the tensioner pulley, then allow the pulley to move into the relaxed position. Finish removing the serpentine belt, by sliding it from the other pulleys. On the core support, remove the two friction connectors, which hold the forward air ducting in place, then remove the air ducting from the air filter box. Remove the two bolts holding the fan shroud in place, then slide the shroud towards the passenger side of the vehicle to allow room to attack the power steering pump pulley.
Pro Tip
If there no longer is a routing guide for the serpentine belt on the core support, take a couple pictures of the belt routing with your cell phone. This can save a lot of time when putting things back together and you cannot easily figure out the routing.
Step 2 – Remove power steering pump pulley
Assemble the pulley removal tool on the front of the power steering pump pulley (Figure 2). In the picture, the pulley is off of the power steering pump in order to show detail of how to assemble the tool.
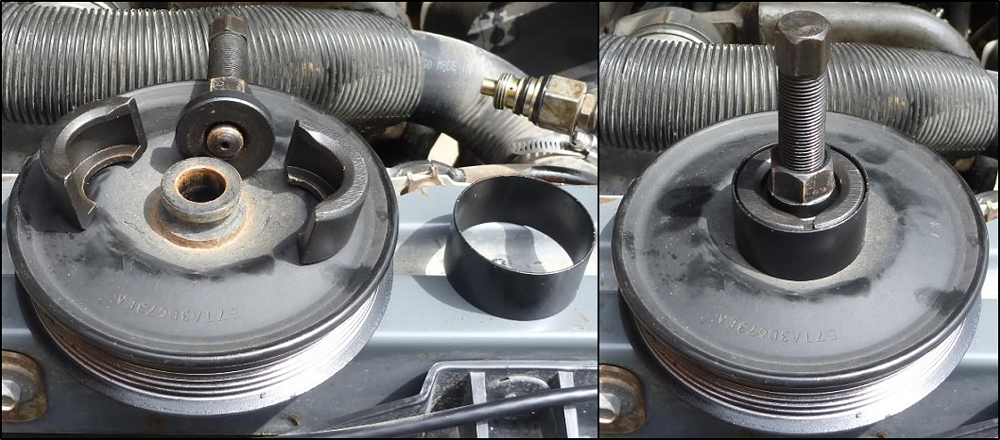
Using a long open end or adjustable wrench, fit it on the base of the pulley removal tool, with the other end resting on the frame of the truck. Use a ratchet and correct size socket for the screw on the pulley removal tool (Figure 3). Turn the ratchet clockwise to tighten and begin the removal process. The pulley may be hard to start pulling off of the pump shaft, but once it starts moving, it becomes much easier. Continue with this until the pulley is fully removed from the pump shaft.

Step 3 – Remove pump
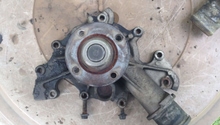
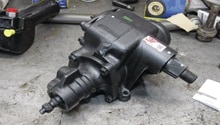
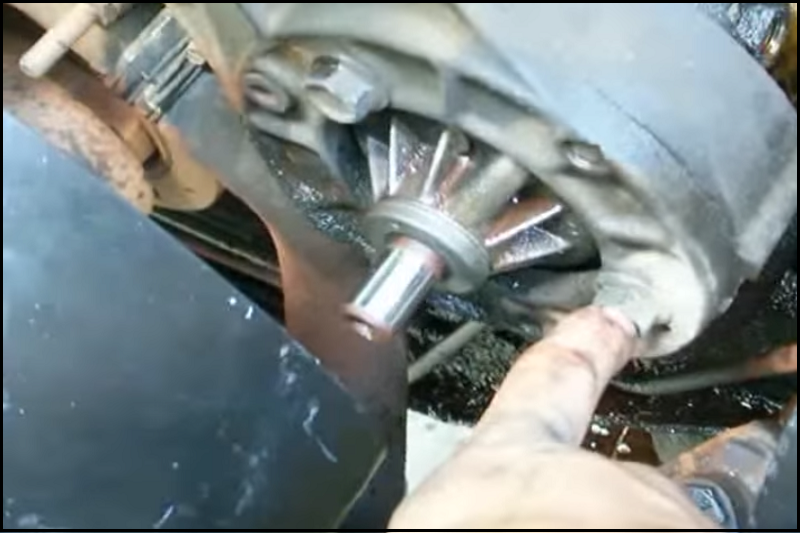
Place the drain pan under the vehicle to catch any fluid which may escape from the power steering lines. Loosen the pressure side power steering line at the pump. Continue to unscrew it until it comes free of the pump. Disconnect the return hose from the pump. Place both of these hoses correctly to drain into the drain pan. Remove the three bolts, which attach the pump to the bracket (Figure 4), and remove the pump. Drain the fluid in the reservoir into the drain pan to avoid spillage.
Step 4 – Install new pump
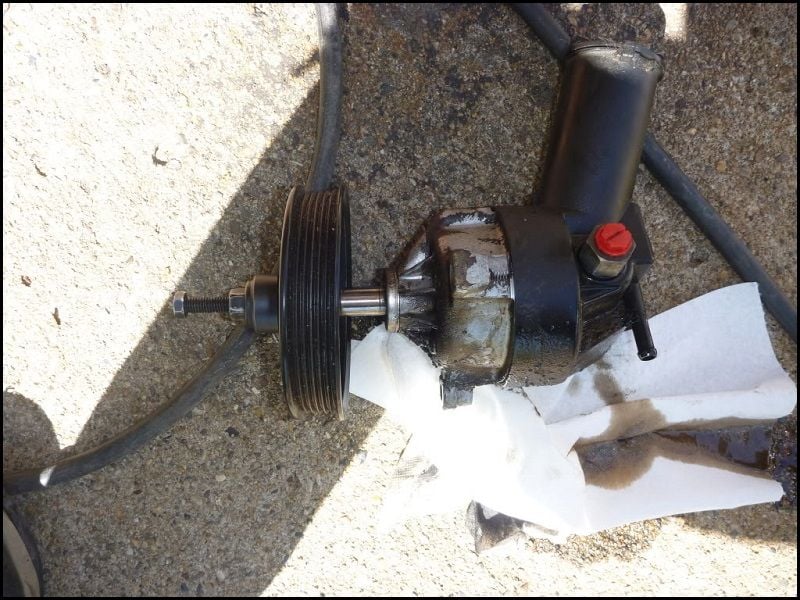
Place the new pump into position and install the three mounting bolts. Most power steering kits come with new O-rings for the high pressure hose. Install those now. Reconnect the high pressure side hose, but leave the return line hanging. This is to allow the flush of the power steering system to occur. Place the pulley onto the shaft of the power steering pump as far as it will go without trying to force it. In the pulley removal tool kit there should be an installation bolt and threaded collet (or possibly nut and washer). Assemble the installation bolt and collet together so the collet is all the way onto the base of the bolt. Screw the installation bolt with collet into the pump shaft until it bottoms. It is important to bottom the bolt so as to not cause damage to the threads of the shaft during pulley installation. Holding the pulley, screw the collet so it fully engages the pulley face. Using the correct size combination wrenches for both installation bolt and collet, start turning the collet clockwise to press the pulley onto the shaft (Figure 5). Continue pressing pulley onto pump shaft until the front of the pulley is flush with the shaft. This should be at the point where the collet bottoms out.
Note
Installation bolt and collet shown on old pump for demonstration purposes.
Step 5 – Reassembly
Move the fan shroud back into position and re-install the two bolts to hold it into place properly. Install the serpentine belt. If the belt routing has slipped your mind, follow the routing guide that should be located on the core support (or photos if you happened to snap them during disassembly). Hold off on installing the intake ducting until Step 6.
Step 6 – Flush power steering system
Fill the reservoir with new fluid. Jack the front of the truck up so the front tires are off the ground and place securely on jack stands. Ensure the return line is pointed down into the drain pan. It may be better to place the return line into an empty two liter bottle so as to contain the fluid as it comes out of the hose. This would prevent the hose from flopping around and making a mess everywhere. Start the truck and immediately rotate the steering wheel to the right and left, lock-to-lock several times. This will drain the old fluid out of the steering rack. Once the power steering pump is empty, immediately shut down the engine. Install the return line onto the power steering pump. Fill the power steering pump reservoir with clean fluid once again. Re-install the air ducting, but leave the cap off the power steering fluid reservoir. Start the truck again, rotating the steering wheel several times, back and forth, from lock-to-lock. Do not cramp the steering. Shut the engine off again. Jack the front end of the vehicle back up and remove the jack stands, setting the truck back onto the ground. Start the engine back up and check fluid for proper level; once it has settled, refit the cap to the reservoir.
Featured Video: F150 Power Steering Pump and Belt Change
Related Discussions
- How to Power Steering Pump Replacement - Ford-Trucks.com
- Whining Power Steering Fix - Ford-Trucks.com
- Saginaw PS Pump Conversion Completed - Ford-Trucks.com
- Questions About Saginaw Power Steering Pump Conversion on a 4.9 - Ford-Trucks.com