Ford F-150/F-250: How to Replace Your Timing Chain
Even though the timing chain itself will probably outlast the rest of your truck, the guides and tensioners are less reliable. The good news is that those parts are inexpensive. The bad news is that labor at a shop isn't. Learn how to do it yourself and save a lot of money in the process.
This article applies to the Ford F-250 and F-350 Super Duty (2005-2014).
Your F-250's timing chain controls when the valves open and close by spinning the camshafts. When the timing chain becomes too loose or the tensioner breaks, the most hopeful outcome is a stall or an engine that won't start. The worst case scenario is having a valve hit a piston. A broken valve in the combustion chamber will completely destroy your engine. Avoid this by anticipating the timing chain's failure. There are subtle signs that the timing chain is going bad that mostly occur during start up in the form of a rattle or knocking and pinging sound. If you hear such noises on start up, you should probably investigate your timing chain tensioners and guides. Learn how to do so with our guide below.

Materials Needed
- 7/16 wrench
- Flat head screwdrivers
- Impact wrench (optional)
- Pry bar
- Timing chain repair kit (timing chain, guides)
- Harmonic balancer puller
Step 1 - Disconnect battery
Disconnect the negative (black) terminal from the battery first. Then, disconnect the positive (red) battery cable.
Step 2 - Drain the radiator
The radiator hoses will need to be removed in order to access the timing chain. Instead of just yanking the lower hoses and letting coolant flood out everywhere, drain your radiator via the petcock valve. It should be a white, plastic bolt (Figure 1) located on the bottom of the radiator. You have two options for draining the fluid. You could unscrew the petcock and let the fluid drain out into a bucket without a hose, which could be messy; alternatively, you could connect a 3/8" tube to the valve and drain the fluid into a bucket (Figure 2).
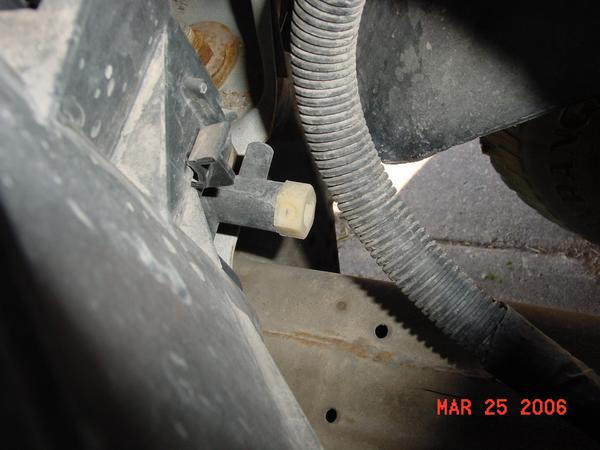
Figure 1. Locate this white nut on the bottom of your radiator. Unscrewing it will cause fluid to drain. 
Figure 2. Drain radiator fluid into a bucket or used coolant bottle.
Pro Tip
Radiator fluid smells sweet like candy to pets, and it is too hard for them to resist this deadly poison. If you have pets be sure to clean up any spills and properly dispose of the old fluid.
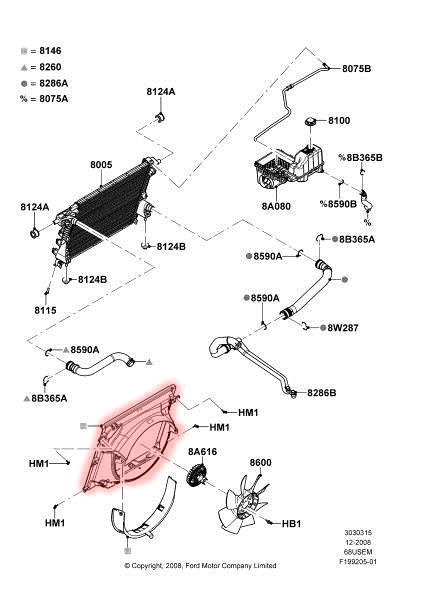
Step 3 - Remove the fan shroud and fan
The fan shroud (if you have one) takes up vital space and needs to be removed. The fan itself ought to be removed as well. This will likely take a 7/16" wrench. The shroud is highlighted in the diagram below, and its location and mounting points are plainly visible when looking under the hood.
Step 4 - Remove the valve covers
You will need to remove the valve cover in order to access the timing chain. Blast the cover with compressed air first so that you don't accidentally knock dirt and muck into your valvetrain. You will need to remove the ignition coils and any other components attached to the valve covers that will obstruct its removal.
For the driver's side valve cover, you will need to:
- Remove the air intake.
- Remove the ignition coils.
- Unbolt the oil dipstick tube from the block and move it out of the way.
- Unbolt the power steering reservoirs and move them to the side.
- Remove the PCV tube.
- Disconnect vacuum hoses connecting to the valve cover.
- Disconnect all brackets attached to valve cover and all wiring harnesses and electrical connectors.
For the passenger side valve cover, you will need to:
- Unbolt all electrical connectors and brackets from the valve cover.
- Remove ignition coils.
- Disconnect A/C compressor manifold tube assembly and suction accumulator-to-A/C compressor manifold tube stud.
- Disconnect all other tubes obstructing valve cover removal.
- Loosen the ten fasteners holding the valve cover to the cylinder head.
- Pull valve cover from cylinder head.
Featured Video: Removing Driver's Side Valve Covers
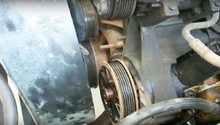
Step 5 - Remove accessory belts and pulleys
Insert a 1/2” drive ratchet into the tensioner and rotate the arm clockwise. Pull the serpentine belt from the engine.
Related Articles:
- How to Remove Serpentine Belt- Ford-Trucks.com
- How to Remove Pulleys- Ford-Trucks.com
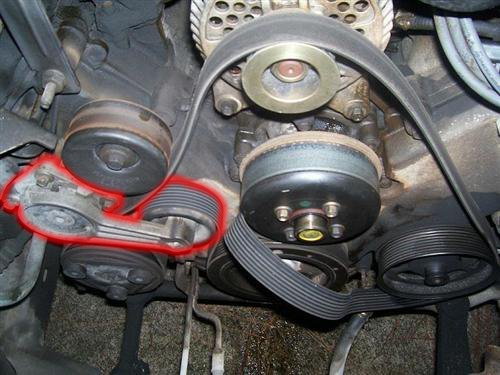
Figure 4. The serpentine belt tensioner is highlighted above. It looks and operates the same way in most Ford V8s and V6s, including diesels. You will not find it on the new 3.7-liter V6, the 3.5-liter EcoBoost, or the 5-liter "Coyote." 
Figure 5. Rotate this arm clockwise to relieve tension on the serpentine belt.
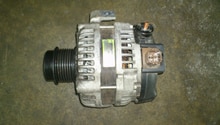
Step 6 - Remove the alternator and bracket
Remove the alternator and bracket. Be sure to note the wiring and where they go.

Pro Tip
Be sure to note where the wiring to the alternator goes so you don't fry it and the battery when you re-install it.
Step 7 - Remove the hoses
You will next remove the heater hose and the lower radiator hoses from the water pump. These are held on with clamps that will require pliers to remove. There are two that must be removed. The first connects to the top of the radiator from the water pump. Disconnect this one first as it'll be the easiest to get to. Remove it from the radiator and the waterpump. The next step might be easier if the lower radiator hose is removed, too.

Figure 7. Remove upper radiator hose from radiator. 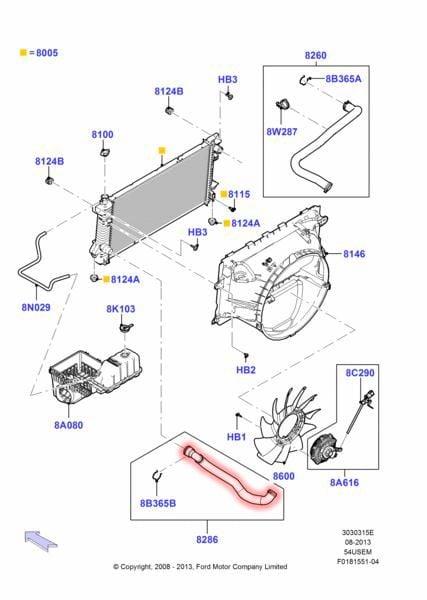
Figure 8. Remove lower hose (highlighted above) if needed.
Step 8 - Remove the crank shaft pulley
The crankshaft pulley must come off, which is the most difficult step in the job. To get the bolt out, you'll need to stop the pulley from spinning. You will need a pry bar or something similar to jam the pulley, otherwise the pulley will spin when you try and remove its center bolt. Be warned: this bolt is a bear. If you happen to have an impact wrench, the job will be easier and you may not need any extra help.
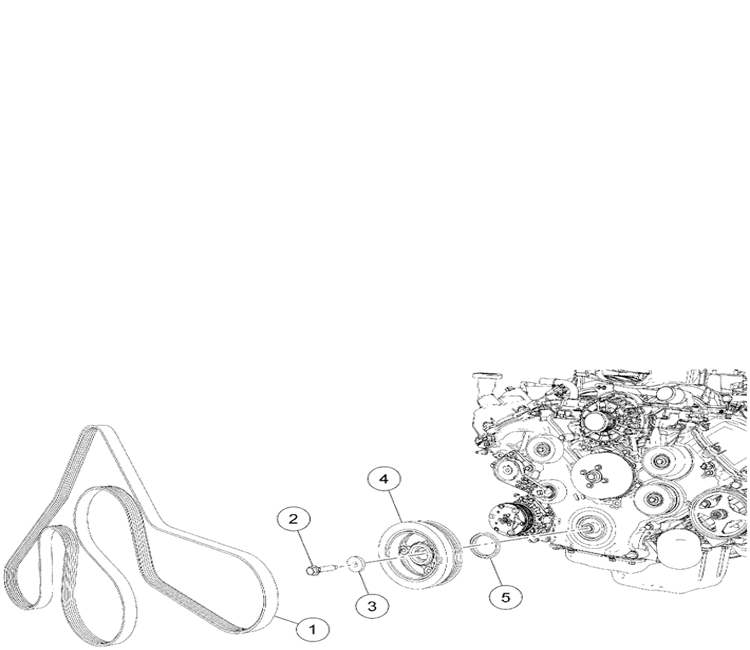
Figure 9. Unbolt crankshaft pulley bolt to remove crankshaft pulley.
1 -- Accessory belt
2 -- Crankshaft pulley bolt
3 -- Crankshaft pulley bolt washer
4 -- Crankshaft pulley
5 -- Crankshaft front seal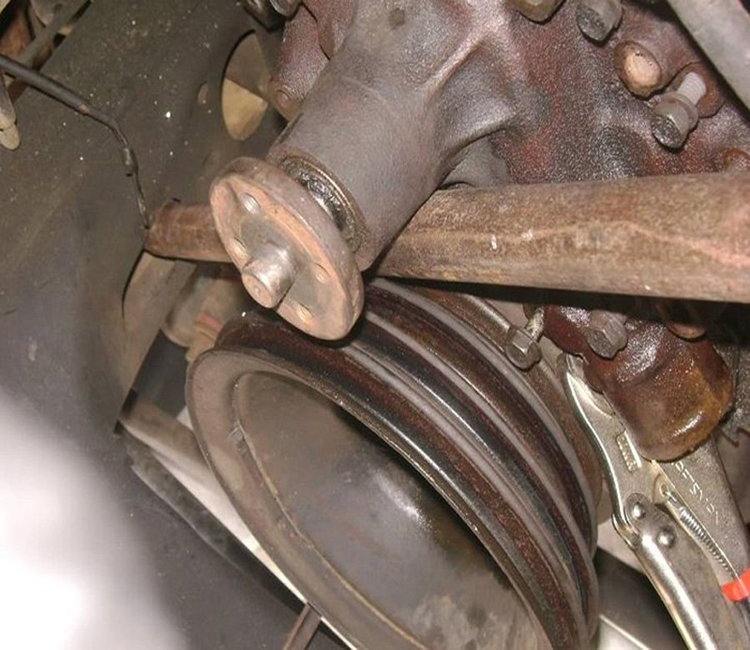
Figure 10. Crankshaft pulley held tight with pry bar.
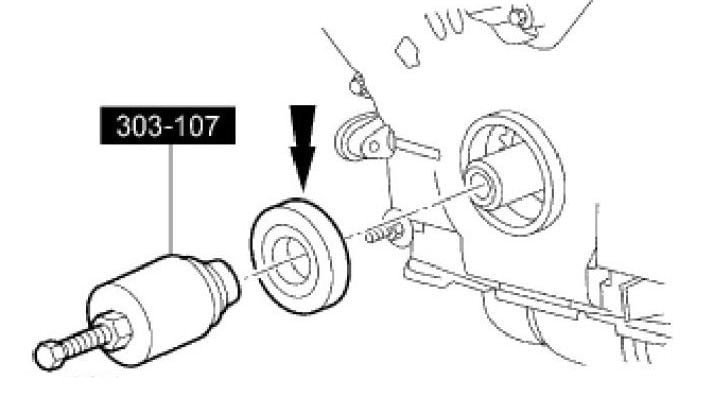
Step 9 - Remove crankshaft front seal
When you get the pulley off, you will also need to remove the crank shaft front seal. This should be replaced with a new one to avoid the potential of an oil leak. Pulling off the seal can be tricky. The key is to pull it out without scoring or otherwise damaging the surrounding hardware. While a flathead screwdriver could will work in a pinch, it could also do damage by accident. Just be careful not to let the let the screwdriver scrape or hit anything other than the seal. Alternatively, there's a special tool just for this task available on Amazon.
Featured Video: Front Main Seal Replacement
Step 10 - Camshaft position sensors
You'll need to remove the electrical connectors first, then the bolt that holds the sensors on. Set those aside and consider purchasing replacement O-rings for them. Even a small nick in one can cause oil leakage.
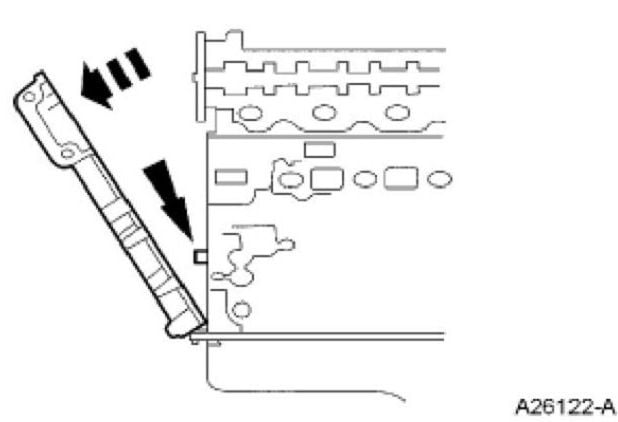
Step 11 - Remove the front engine cover
There are several bolts and dowels keeping this in place. When the front cover is removed, you'll have access to the timing chain for removal and replacement.
Pro Tip
Do not use metal scrapers, wire brushes, power abrasive discs, or other abrasive means to clean the sealing surfaces. These tools cause scratches and gouges which make leak paths. Use a plastic scraping tool to remove all traces of old sealant.
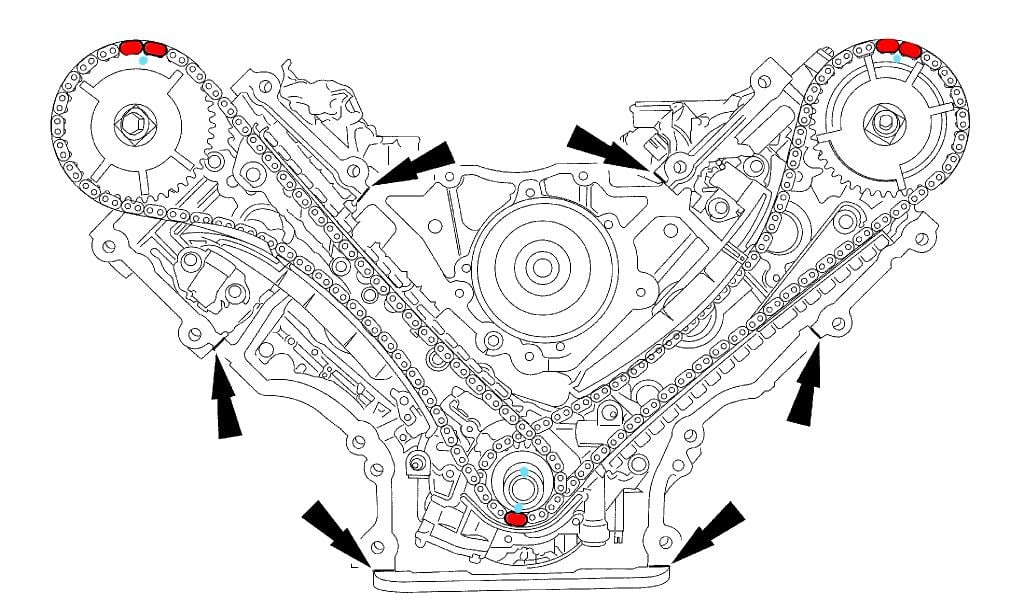
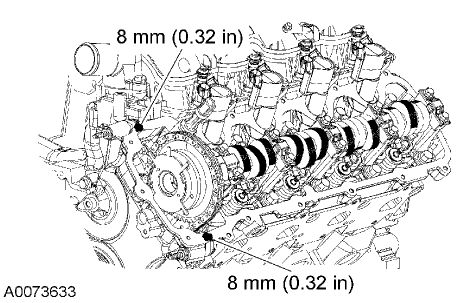
Step 12 - Replace chain and guides
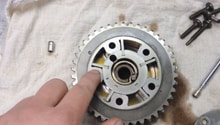
Now, your timing chain and guides will be exposed. Rotate the crankshaft so that the number 1 cylinder is at top dead center. The timing chains have markings on them to make sure they're correctly aligned. On the crank shaft, there's a black mark that should be pointing straight up. Also, the link on the chain nearest to the bumper should have a colored link in the 6 o'clock position. The camshaft gears have marks on them, too. The timing chain will have two colored links that should straddle that mark.
Remove the bolts holding the chain tensioners and chain guides to remove the chain. Replace guides and tensioners with new ones and a new chain, if necessary. So long as the marks on the gears and timing chain line up the way they are supposed to, you won't have to worry about your camshafts being misaligned.
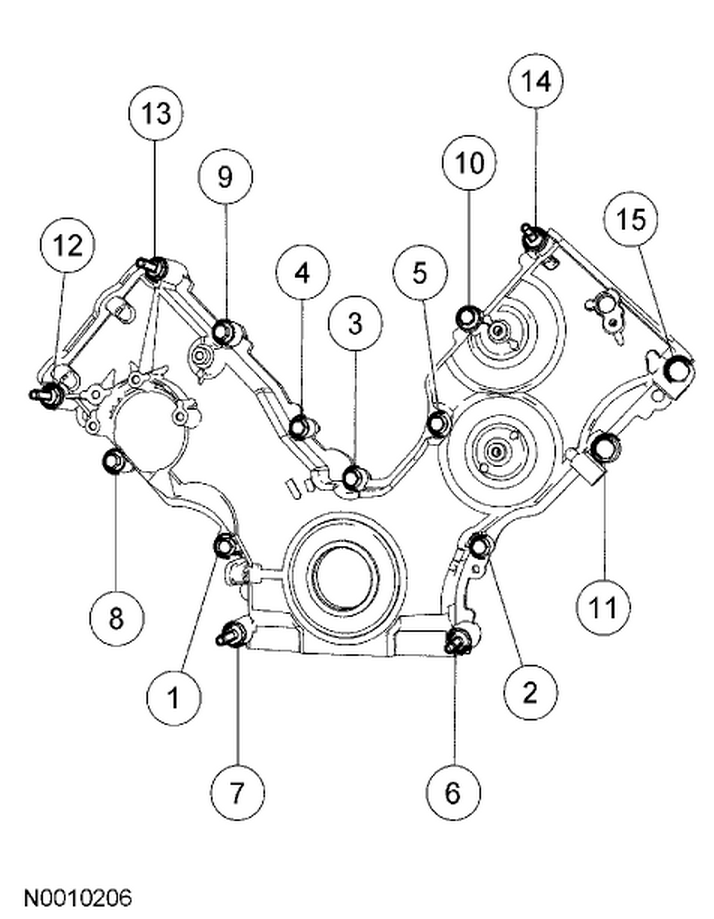
Step 13 - Re-install timing chain cover
Loosely install bolts and re-tighten in this sequence:
Step 14 - Re-install engine accessories and pulleys
Continue re-installing the components that you removed in reverse order. Reconnect the camshaft position sensors. Replace the crankshaft front seal and install the crankshaft pulley. Reinstall the alternator, serpentine belt tensioner, all pulleys, and serpentine belt.
Step 15 - Re-install valve covers
Discard the old valve cover gaskets. Clean the gasket groove on the valve cover with soap and water. Clean the mating surface on the engine block with a silicone gasket remover. These come with scrapers that will make sure you get a clean mating surface. Apply silicone gasket sealant in the places indicated below for both gaskets.
Next, put the valve cover gaskets and valve covers in place. Re-tighten in the order indicated below. Failure to do so will result in oil leaks.

Figure 17. Passenger side valve cover bolt order. 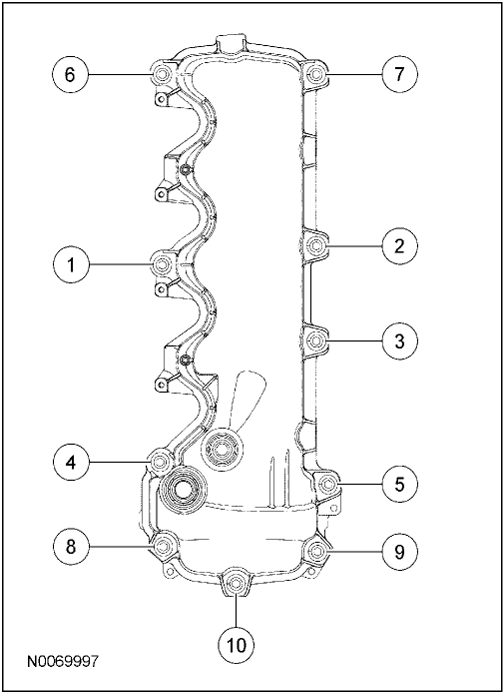
Figure 18. Driver's side valve cover bolt order.
Step 16 - Finishing up
Re-install all wiring harnesses, ignition coils, and other loose ends. Refill the radiator. Start the truck. You'll know if something's wrong immediately, as a misaligned timing chain with either not run, or run horribly. If there are other issues, you might want to double check the other components that were removed in the process. If the ticking is gone and your truck runs smoothly, congratulations! You just saved yourself several hundred dollars in labor.
Featured Video: How to Replace Timing Chain on Modular Fords
Related Discussions and Sites
- Timing Chain Tensioner Failure - Ford-Trucks.com
- How to Replace the Timing Chain - Ford-Trucks.com
- Timing Chain Replacement - FordTruckFanatics.com
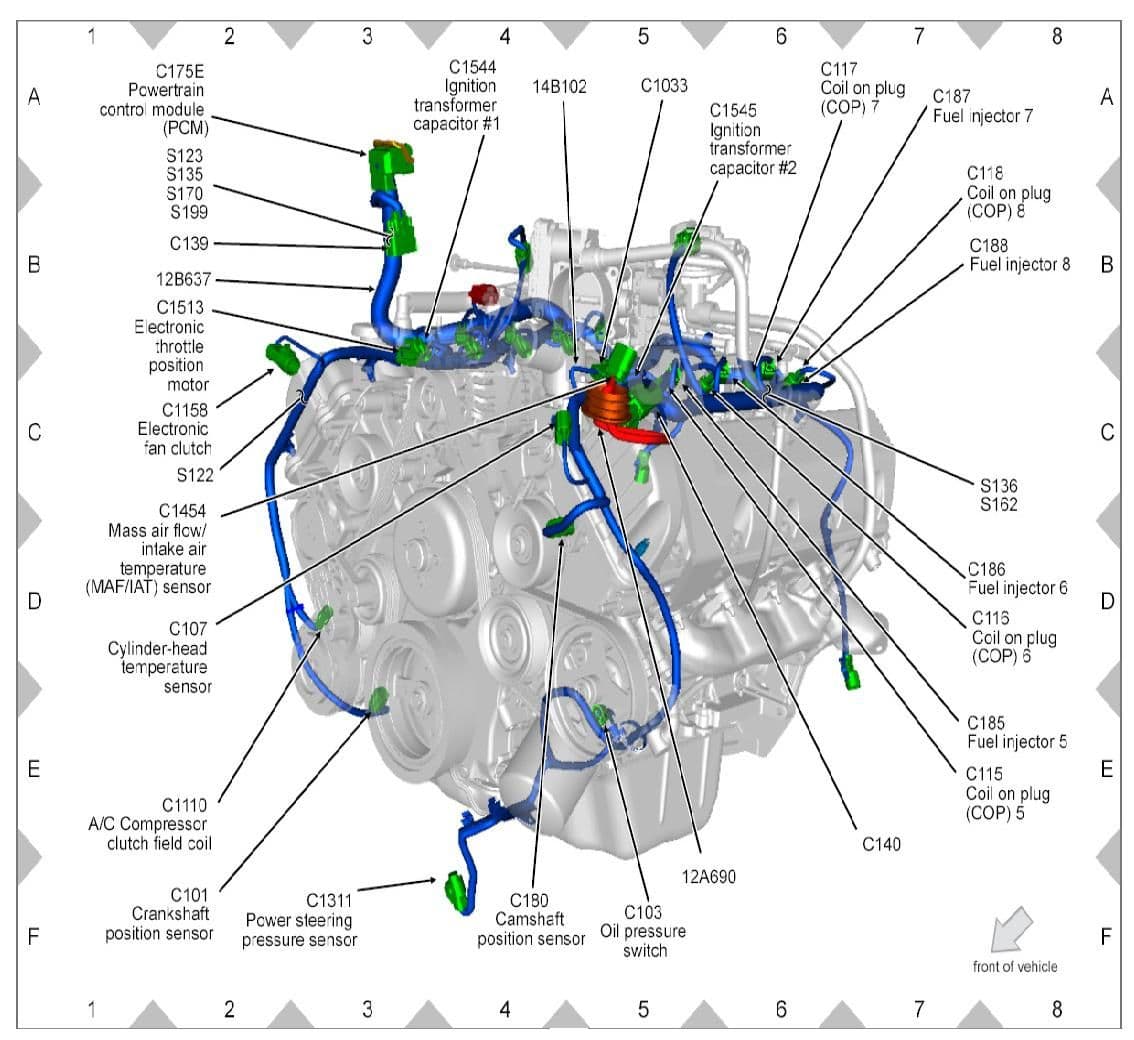
- Engine and Timing Chain Diagrams - AllData.com