


Thorley Header Install
Thread Starter
|
Senior User
Joined: Aug 2009
Posts: 246
Likes: 1
From: Westerville, Ohio
Thorley Header Install
I just started the install of my Thorley headers. Let me say that ever since the headers got here weeks ago, I've been dreading this.  All the horror stories about the studs have had me wondering if I should pay someone to do this. Since I like a challenge and mostly because the wifey said no more money spent on the Ex, I decided to go ahead with it.
I began tonight with the intent of only removing the fender wells and spraying the studs and collectors with PB Blaster to let them soak. The wells were a bit of a pain because of the annoying little push through connectors that are used for most of the components attached to the well. If there is a special tool for them, I don't have it. Some of them I had to cut with the intent to replace them when I reassemble. Once I got the wells off I was there...with those dreaded studs staring me right in the eye. Unfortunately, I also discovered a leaking axle seal on the left side. Looks like I get one last hurrah on my ESP that expires next month.
As I was wrapping up my tools, I thought I might as well give a stud or two a try and see what happens. I threw a 13mm deep well on the ratchet and tried the top stud on forward left. It broke loose with barely more than the weight of my hand on the ratchet. At first I thought I had found a broken stud that was barely hanging on. I continued to turn and then realized the stud was turning with the nut. The nut and the stud came out without any effort at all. Now I'm feeling really froggy so I tried another...and another...and so on, until I had all the top studs removed on both sides in about 5 minutes.
Of the ten studs, eight came out of the heads by just turning the nut. The other two nuts broke loose and came off separately but a 5mm socket on the end of the studs brought them right out. 4 of the studs broke loose with just the weight of my hand. That tells me they were slowly working their way loose and might eventually have fallen out. The Ex only has 62,000 miles so I thought this was a little unusual. Also of note, the PB Blaster had only been on for about 10 minutes.
I stopped there because I need to unbolt the collectors and remove the O2 sensors before I remove the manifolds. The lower studs will be a little harder to access especially on the passenger side where the engine is closer to the frame. It was also getting late and I didn't feel like getting out the compressor and impact wrench to go any further.
Here are a few pix. Pardon the quality, I had to use the cell phone:
Drivers Side

Passenger Side

Studs

Wish me luck on the rest of the studs.
Stew
All the horror stories about the studs have had me wondering if I should pay someone to do this. Since I like a challenge and mostly because the wifey said no more money spent on the Ex, I decided to go ahead with it.I began tonight with the intent of only removing the fender wells and spraying the studs and collectors with PB Blaster to let them soak. The wells were a bit of a pain because of the annoying little push through connectors that are used for most of the components attached to the well. If there is a special tool for them, I don't have it. Some of them I had to cut with the intent to replace them when I reassemble. Once I got the wells off I was there...with those dreaded studs staring me right in the eye. Unfortunately, I also discovered a leaking axle seal on the left side. Looks like I get one last hurrah on my ESP that expires next month.
As I was wrapping up my tools, I thought I might as well give a stud or two a try and see what happens. I threw a 13mm deep well on the ratchet and tried the top stud on forward left. It broke loose with barely more than the weight of my hand on the ratchet. At first I thought I had found a broken stud that was barely hanging on. I continued to turn and then realized the stud was turning with the nut. The nut and the stud came out without any effort at all. Now I'm feeling really froggy so I tried another...and another...and so on, until I had all the top studs removed on both sides in about 5 minutes.
Of the ten studs, eight came out of the heads by just turning the nut. The other two nuts broke loose and came off separately but a 5mm socket on the end of the studs brought them right out. 4 of the studs broke loose with just the weight of my hand. That tells me they were slowly working their way loose and might eventually have fallen out. The Ex only has 62,000 miles so I thought this was a little unusual. Also of note, the PB Blaster had only been on for about 10 minutes.
I stopped there because I need to unbolt the collectors and remove the O2 sensors before I remove the manifolds. The lower studs will be a little harder to access especially on the passenger side where the engine is closer to the frame. It was also getting late and I didn't feel like getting out the compressor and impact wrench to go any further.
Here are a few pix. Pardon the quality, I had to use the cell phone:
Drivers Side
Passenger Side
Studs
Wish me luck on the rest of the studs.
Stew
Posting Guru
Joined: Apr 2010
Posts: 1,112
Likes: 0
From: South Shore, MA
Wow!
That's great news. I'm glad you're off to a good start! Good Luck with the rest of the project.
And remember to be VEEERRRRYYY careful with that dipstick... Don't wanna break it at the block.
That's great news. I'm glad you're off to a good start! Good Luck with the rest of the project.
And remember to be VEEERRRRYYY careful with that dipstick... Don't wanna break it at the block.
Thread Starter
|
Senior User
Joined: Aug 2009
Posts: 246
Likes: 1
From: Westerville, Ohio

I hope the rest goes this smoothly...

Stew
Thread Starter
|
Senior User
Joined: Aug 2009
Posts: 246
Likes: 1
From: Westerville, Ohio
I bought this Ex in Durango, Colorado, in July '05 with 19,000 miles on it. I'm not sure what they do to their roads in the winter but Alaska doesn't do salt. Just gravel at the intersections...sometimes.
I agree. I'm definitely having an easy time so far. Knock on wood.
Time to get back at it and get those things off.
Stew
Trending Topics

Junior User
Joined: Oct 2007
Posts: 73
Likes: 1
From: Sperry Iowa
Sounds like your having better luck than me. I put my headers on a few weeks ago.
I had 4 broken studs on each side I knew of... Broke off about half of the others when taking them out. Most were just hanging on waiting to fall out... The worst one was left front that was broken off below flush. I went through about a dozen nuts welding them on and either braking the weld or braking the stud farther back each time...
Finally drilled drilled out the stud and re-tapped it. After 12 hours off and on I got them all out and the headers on...
The install was the easy part. They fit great, no leaks and no funny sounds. Left the stock pipes the rest of the way back. And got my tune from Mike put in... I don't tow much, but for a 7000 lb truck it gets right with it now...
FTE Stories
Ford Trucks for Ford Truck Enthusiasts

3 Best / 3 Worst Parts of Modern Ford Ownership
Brett Foote
10 Amazing Upgrades That Solve Common Ford Truck Owner Headaches
Pouria Savadkouei
Every 2026 Ford Engine Explained
Brett Foote
10 Ugly Ford Trucks That We Still Kinda Love
Joe Kucinski
10 Things Every Truck Owner NEEDS (2026 Edition)
Michael S. Palmer
Rezvani's Latest Post-Apocalyptic Monster Is a Ford F-150 Raptor Underneath
Verdad Gallardo
Top 10 Most Expensive Ford Trucks Ever Sold on Bring a Trailer
Joe Kucinski
2027 Ford Super Duty Buyer's Guide (Every Model, Engine, & Package)
Brett Foote
Top 10 Ford Truck Tragedies
Joe KucinskiThread Starter
|
Senior User
Joined: Aug 2009
Posts: 246
Likes: 1
From: Westerville, Ohio
Well, my luck ran out on the last stud. It broke off just below the surface of the header. It was my own fault, too. I had the manifold off already and got too sideways with the pressure instead of making sure the stud remained at the radius of my turning.  I just went to Sears and bought an angle drill and some extractors. Off I go to get this sucker out.
Broken stud in lower hole of right front cylinder

Cheers,
Stew
I just went to Sears and bought an angle drill and some extractors. Off I go to get this sucker out.Broken stud in lower hole of right front cylinder
Cheers,
Stew
Thread Starter
|
Senior User
Joined: Aug 2009
Posts: 246
Likes: 1
From: Westerville, Ohio
Crap! It didn't take long to break 3 drill bits and I'm still not deep enough for the extractor to get a bite. I tried titanium bits. Think I'll get some cobalt bits tomorrow and keep drilling.
Hole started

I know this will feel great when I finally get it out but I'm just not feeling it right now.
Stew
Hole started
I know this will feel great when I finally get it out but I'm just not feeling it right now.
Stew
FTE Leadership Emeritus
Joined: Jul 2002
Posts: 42,561
Likes: 423
From: Long Island USA

Those studs are stainless, so it takes the HARDEST thing you can find to drill them.
What I would do is, check the depth of another hole, tape the drill bit at that depth, and DO NOT GO PAST THAT. You can actually feel when the drill bit goes all the way through the stud, there's a space where the stud doesn't actually bottom out in the hole. In my case, I was able to spray penetrating oil into the hole and get it behind the stud. Let it sit for a while before you even TRY to extract it. It can be a biotch.
What I would do is, check the depth of another hole, tape the drill bit at that depth, and DO NOT GO PAST THAT. You can actually feel when the drill bit goes all the way through the stud, there's a space where the stud doesn't actually bottom out in the hole. In my case, I was able to spray penetrating oil into the hole and get it behind the stud. Let it sit for a while before you even TRY to extract it. It can be a biotch.
Thread Starter
|
Senior User
Joined: Aug 2009
Posts: 246
Likes: 1
From: Westerville, Ohio
Great news! The stud is out!
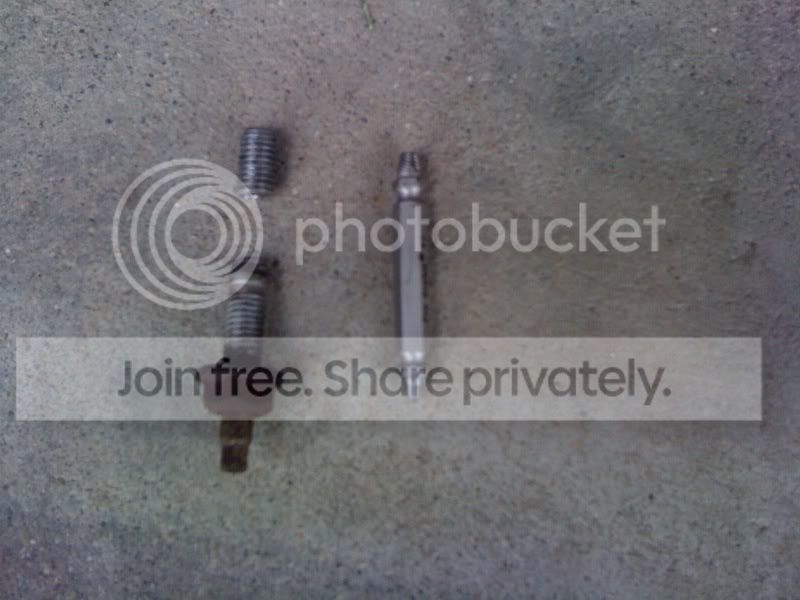
I found an extracting tool at Lowe's called "Grab it." The tool has a tip on one end like a left-hand drill bit to shape the hole. The other end is reverse-threaded similar to a spiral screw remover only it is very short with very fine threads. Both tips are slightly conical at the same angle. This shape allows the spiral end to bite with its entire surface when you insert it into the shaped hole. You have to press very hard to get it to bite but once it does it is set. I was able to get a crow bar between the back of the drill and the frame to apply pressure.
I think I had trouble last night because I was using titanium bits and they were too soft. I soaked the stud overnight with PB Blaster. Once I had the tool this morning, I followed the directions (new thing for me) and it came right out. I varied the directions a little because I already had a pilot hole started from my other attempts to drill. The "Grab it" directions didn't call for one but I recommend it, especially on the stainless studs.
If you remember from my earlier post, the stud did make a complete revolution before I put too much sideways pressure on it and broke it off. I think the one revolution was enough to free the stud's threads from the head. I can't say for sure if the Grab It would have had enough bite to overcome seized threads however it was really connected to the stud. I had to use vise grips and pliers to get it back out of the stud.
The extractor before I removed the stud piece
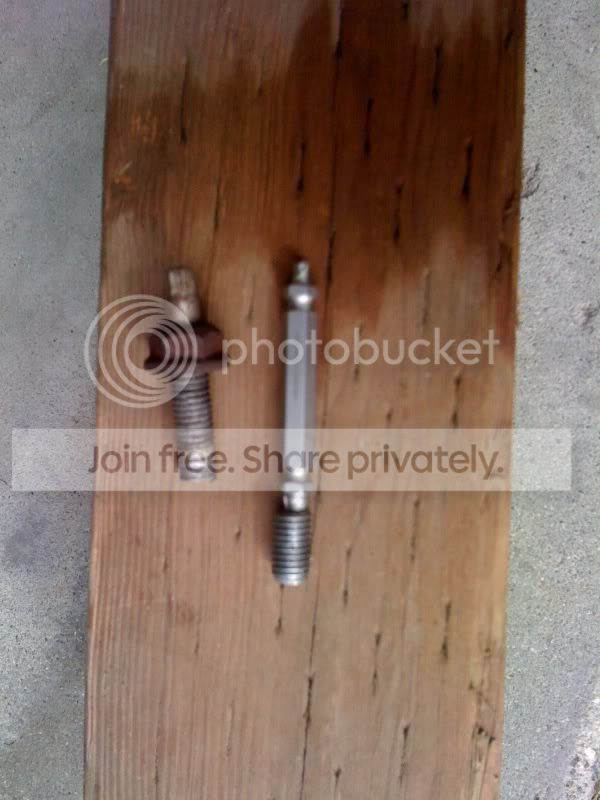
The extractor and broken stud
Time to go remove the y-pipe from the cat and clean up all the mating surfaces.
Thanks for all the suggestions and helpful hints...in this thread and others.
Stew
I found an extracting tool at Lowe's called "Grab it." The tool has a tip on one end like a left-hand drill bit to shape the hole. The other end is reverse-threaded similar to a spiral screw remover only it is very short with very fine threads. Both tips are slightly conical at the same angle. This shape allows the spiral end to bite with its entire surface when you insert it into the shaped hole. You have to press very hard to get it to bite but once it does it is set. I was able to get a crow bar between the back of the drill and the frame to apply pressure.
I think I had trouble last night because I was using titanium bits and they were too soft. I soaked the stud overnight with PB Blaster. Once I had the tool this morning, I followed the directions (new thing for me) and it came right out. I varied the directions a little because I already had a pilot hole started from my other attempts to drill. The "Grab it" directions didn't call for one but I recommend it, especially on the stainless studs.
If you remember from my earlier post, the stud did make a complete revolution before I put too much sideways pressure on it and broke it off. I think the one revolution was enough to free the stud's threads from the head. I can't say for sure if the Grab It would have had enough bite to overcome seized threads however it was really connected to the stud. I had to use vise grips and pliers to get it back out of the stud.
The extractor before I removed the stud piece
The extractor and broken stud
Time to go remove the y-pipe from the cat and clean up all the mating surfaces.
Thanks for all the suggestions and helpful hints...in this thread and others.
Stew
Thread Starter
|
Senior User
Joined: Aug 2009
Posts: 246
Likes: 1
From: Westerville, Ohio
The headers are almost done. It's 12:45 AM and I just couldn't go on. I just lack connecting the 3-bolt flange to the cat and reinstalling the fender wells. I've done this whole project alone in my driveway with a pair of jackstands holding the Ex just high enough that I can get the tires back on at night. I live on an Air Force base and they are really strict about not working on your car in the driveway. Other than having a hard time lining up the bolt holes while simultaneously holding the gasket and threading a bolt at the same time it wasn't too bad. The real time killer was having to crawl in & out from under the Ex to get tools. One of my 4 daughters usually gophers but they are all out of town this week.
I'll be done tomorrow and will post some pictures.
Stew
I'll be done tomorrow and will post some pictures.
Stew
Thread Starter
|
Senior User
Joined: Aug 2009
Posts: 246
Likes: 1
From: Westerville, Ohio
I'm done!

I finally finished and got it all buttoned up. Started her up and no ticking or hissing so I took her for a 30-mile run of about half city, half highway miles. It sounds slightly louder than before only there is a more noticeable rumble at idle through the lower RPMs and it sounds less like a 6 cylinder at full throttle.
Speaking of full throttle...Holy Cow! I was pinned to my seat as I left a snotty little Lexus behind at the light. At the next light he gave me that look of disbelief.
In all it was about 20 hours of work going completely solo. That includes trips to O'Reilly, Sears and Lowe's for a drill and extraction tools. I think I could have shaved about 5 hours if I had any kind of help. My usual gophers (kids) are out of town. The only parts casualty was an O2 sensor I couldn't break free from the old y-pipe. Short of drilling it there was no way I was getting it out. At 62k miles it wasn't really time to replace them yet but I decided to replace both of them so they would match and I won't have to do the other one in a couple years.
Headers $541
SS Band Clamps $26
O2 Sensors $107
Angle drill $72
Extractor Kit $20
$766 for a set of ceramic coated, full length headers...installed. I get to keep the drill and extractor set; and the O2 sensors would have been replaced in a couple years anyway. That's way better than paying the local shop $600.
My only regret is not getting help for the right side. Trying to maneuver the header and the crossover alone was a little too much to handle and I scratched up the ceramic coating. It mostly just looks bad so hopefully it won't cause premature failure of the coating.
I used the 8-1.25x25, grade 8 stainless bolts that came with the headers. They also came with a nice set of graphite gaskets like the Remflex so I used those as well. The only thing in the package I didn't use was the clamps. I chose to use stainless band clamps from Walker specifically made for overlapping joints.
Here are few pictures of the install:
Driver side from the wheel well

Driver side from underneath

Passenger side from the wheel well

Passenger side from underneath

Crossover underneath from rear

Y-pipe

These headers are the end of a year-long project to get better towing mpg, torque, and horsepower. It has included a CAI, FM 70BB II muffler, SCT tuner, and the headers.
I will be towing my travel trailer on a long trip next month so I will let you know the effects of the modifications on my towing experience. I am already much happier with just the tuner, CAI and muffler. I'll let you know what difference the headers make.
Many thanks to everyone way back to July of last year for all the advice, help, and encouragement. I honestly couldn't have done it without you.
Stew
I finally finished and got it all buttoned up. Started her up and no ticking or hissing so I took her for a 30-mile run of about half city, half highway miles. It sounds slightly louder than before only there is a more noticeable rumble at idle through the lower RPMs and it sounds less like a 6 cylinder at full throttle.
Speaking of full throttle...Holy Cow! I was pinned to my seat as I left a snotty little Lexus behind at the light. At the next light he gave me that look of disbelief.
In all it was about 20 hours of work going completely solo. That includes trips to O'Reilly, Sears and Lowe's for a drill and extraction tools. I think I could have shaved about 5 hours if I had any kind of help. My usual gophers (kids) are out of town. The only parts casualty was an O2 sensor I couldn't break free from the old y-pipe. Short of drilling it there was no way I was getting it out. At 62k miles it wasn't really time to replace them yet but I decided to replace both of them so they would match and I won't have to do the other one in a couple years.
Headers $541
SS Band Clamps $26
O2 Sensors $107
Angle drill $72
Extractor Kit $20
$766 for a set of ceramic coated, full length headers...installed. I get to keep the drill and extractor set; and the O2 sensors would have been replaced in a couple years anyway. That's way better than paying the local shop $600.
My only regret is not getting help for the right side. Trying to maneuver the header and the crossover alone was a little too much to handle and I scratched up the ceramic coating. It mostly just looks bad so hopefully it won't cause premature failure of the coating.
I used the 8-1.25x25, grade 8 stainless bolts that came with the headers. They also came with a nice set of graphite gaskets like the Remflex so I used those as well. The only thing in the package I didn't use was the clamps. I chose to use stainless band clamps from Walker specifically made for overlapping joints.
Here are few pictures of the install:
Driver side from the wheel well
Driver side from underneath
Passenger side from the wheel well
Passenger side from underneath
Crossover underneath from rear
Y-pipe
These headers are the end of a year-long project to get better towing mpg, torque, and horsepower. It has included a CAI, FM 70BB II muffler, SCT tuner, and the headers.
I will be towing my travel trailer on a long trip next month so I will let you know the effects of the modifications on my towing experience. I am already much happier with just the tuner, CAI and muffler. I'll let you know what difference the headers make.
Many thanks to everyone way back to July of last year for all the advice, help, and encouragement. I honestly couldn't have done it without you.
Stew