


Small rust spots - Help

Thread Starter
|
Posting Guru
Joined: Oct 2007
Posts: 1,130
Likes: 0
From: Bloomfield Hills, MI
Small rust spots - Help
Hey guys, I have a few rust blisters and some small rust spots on the rear wheel well panels. I wanna do somthing to get rid of these sports as they are bleeding rust. I dont have access to sand blaster and good body work equipment. How can i fix this? sand it down then paint over it? In what steps do i apply what paints? Thanks everyone!
Cargo Master


Joined: Dec 2004
Posts: 2,232
Likes: 3
From: NE Texas
I don't live in salt country, but I've seen enough rust to know that sanding down these rust spots and putting primer and paint over them would be like trying to cure cancer with a band aid.
The problem is BEHIND the paint. The only way to cure it correctly, is to cut it out at least an inch beyond any rusted area and weld in a patch.
Good luck,
The problem is BEHIND the paint. The only way to cure it correctly, is to cut it out at least an inch beyond any rusted area and weld in a patch.
Good luck,

Senior User
Joined: Sep 2007
Posts: 129
Likes: 0
From: Baton rouge, Louisiana
Depending on how bad the rust actually is, well determin if you can sand and paint over. Like MBD just said, cutting out the rust and patching is really the way to go. If you have access to a welder and a metal shop it is really a cheap fix and as long as theres no sharp angles any regular joe with any welding knowledge would be able to handle it. If you do not have access to a welder or metal, i would sand it down the best you can, and use rust bullett or por 15 under the paint. If por 15 is too expensive, i used what is called metal prep, you can get it from some hardware stores and it is a rust converter. Its a watery liquid that can be sprayed with a plastic spray bottle. It actually works well on minimum rust spots and it verry cheap. Good luck

Senior User
Joined: Sep 2005
Posts: 116
Likes: 0
Once the paint has ben removed and you can see the rust though areas are only pinholes, another alternative is to drill out the pinholes and braze them. I know you need either brass or bronze rod but im not sure which. I do know one of them cannot be painted without being leaded over, the other takes paint just fine; unfortunately, I do not recall which rod causes the problem.
I agree the best method is to cut out the rust and fill the hole with a welded in metal patch. Any good welder with a mig (a tig is better) or a small oxy acetelyne torch should be able to weld in your patch pieces.
Tig is better because it does not put as much heat in the area surrounding the repair.
A mig works well if the welding is done by skipping around with tack welds and the panel is allowed to cool after each set of tack welds and any warpage is removed with a hammer and a dolly prior to adding the next set of tack welds.
I have used the mig-tack weld technique successfully. I prefer to grind the tacks down prior to the hammer and dolly work, just be careful you dont start thinning your panel or the patch when grinding.
I have also found 36 grit 2 inch abrasive disks on a small air angle grinder keeps warpage to a minimum when compared to the same grit on a 4 1/2 inch electric grinder. I have also had resonable results with the edge of a cutoff wheel; however, it is harder to control a cutoff wheel. I have heard flat flap disks on a 4 1/2 inch angle grinder cause less warpage than a hard wheel of the same size and grit but have never used flap disks
Cargo Master
Joined: Dec 2004
Posts: 2,232
Likes: 3
From: NE Texas
Brazing with brass or bronze is NOT a long term solution. The dissimilar metals will eventually experience bimetallic corrosion and cause the paint to bubble or delaminate. Welding should be done with a steel filler rod. If you are gas welding, baling wire works quite well as the filler rod. Migging with regular MIG wire, ER70S10 I think it's called will be a permanent fix with no corrosion problems and TIGing with the correct steel filler will also provide a corrosion free bond.
The weld should be sealed. Fiberglass reinforced plastic filler will seal it well. Since you then have it to bare metal, Epoxy Primer would give the best corrosion protection.
Good luck,
The weld should be sealed. Fiberglass reinforced plastic filler will seal it well. Since you then have it to bare metal, Epoxy Primer would give the best corrosion protection.
Good luck,
Tuned


Joined: Aug 2007
Posts: 457
Likes: 115
From: Maryland
Grinding welds.......
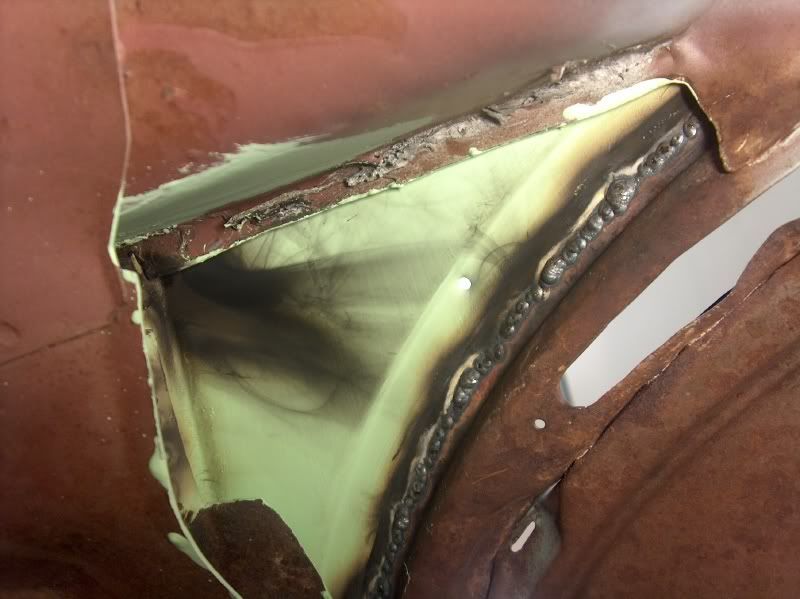
Grinding welds.....After installing a new cowl.


Prior to grinding welds, it never hurts to check the back side of the welds to see if you have full penetration.
Here's my process for grinding down the welds. It's kinda hard to take pictures and grind at the same time, but we'll do the best we can.
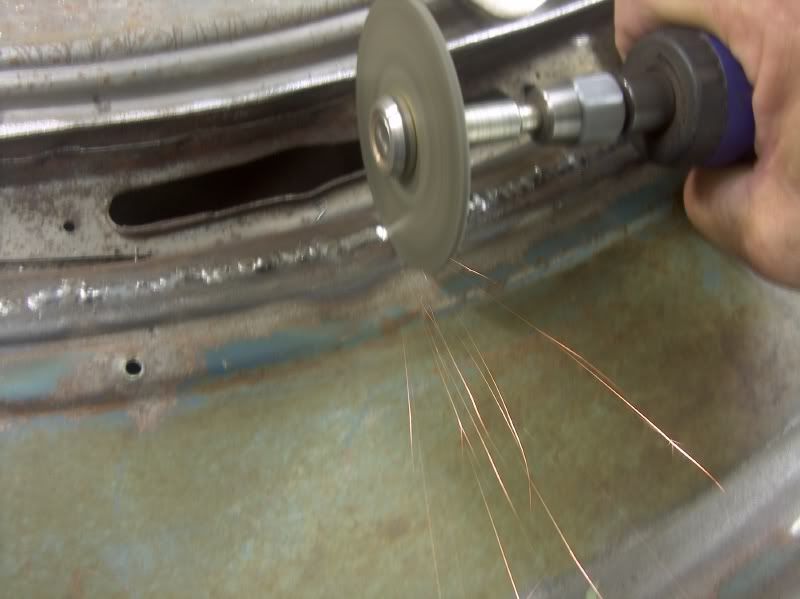
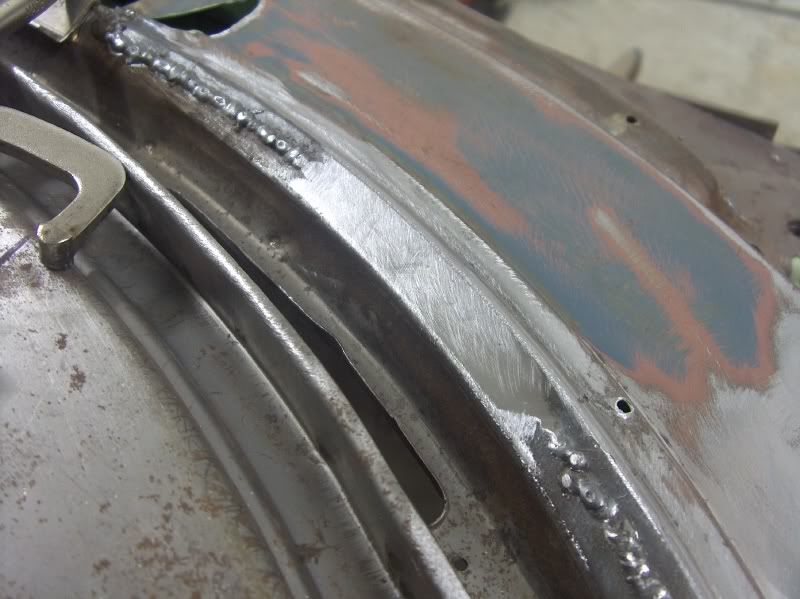
I use a 3" cutoff wheel, 1/16 thick, and hold it perpendicular to the weld bead. I work this back and forth along the weld bead, covering about a 1/2" area. Don't sit in one spot or it will tend to cut and not grind. next, if we just stayed in the center of the weld bead, you would wind up with a concave depression in the middle of the weld when done, so make a few passes down the middle, then work toward one side, then the other, in attempt to keep what you are grinding fairly flat. Try to stop when you are just above the surface of the sheet metal, or otherwise you will have grinding gouges, like some of the ones shown here:
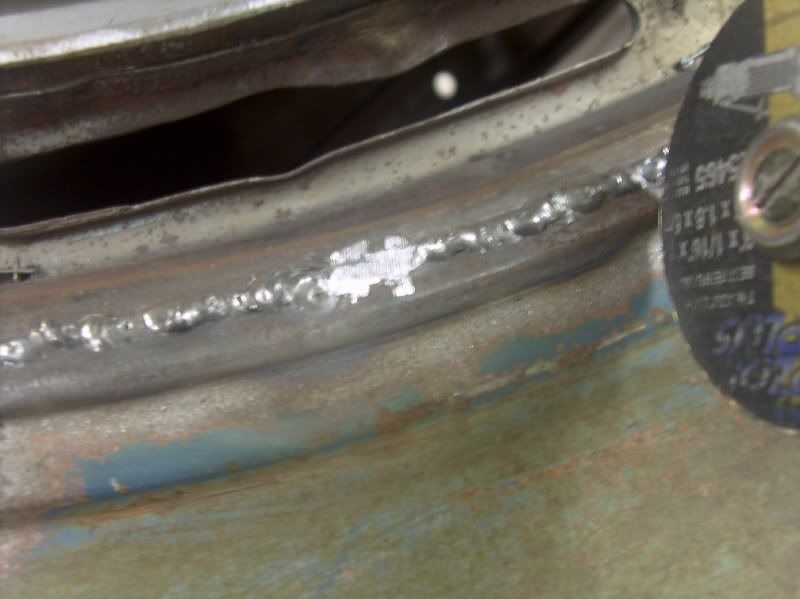
This takes a bit of patience and finesse (something I'm still working on), but getting rid of the bulk of the weld in this fashion seems to make the sanding discs last quite a bit longer. Plus, the 1/16" wide contact area of the cutoff wheel will generate less heat than any sanding disc, flap wheel, etc. After the welds are down to a workable level, then switch to the 3" angle sander (I use a 60 grit sanding disc). I find that although a 4-1/2 grinder with a sanding pad works quicker, it also can get carried away a lot quicker.
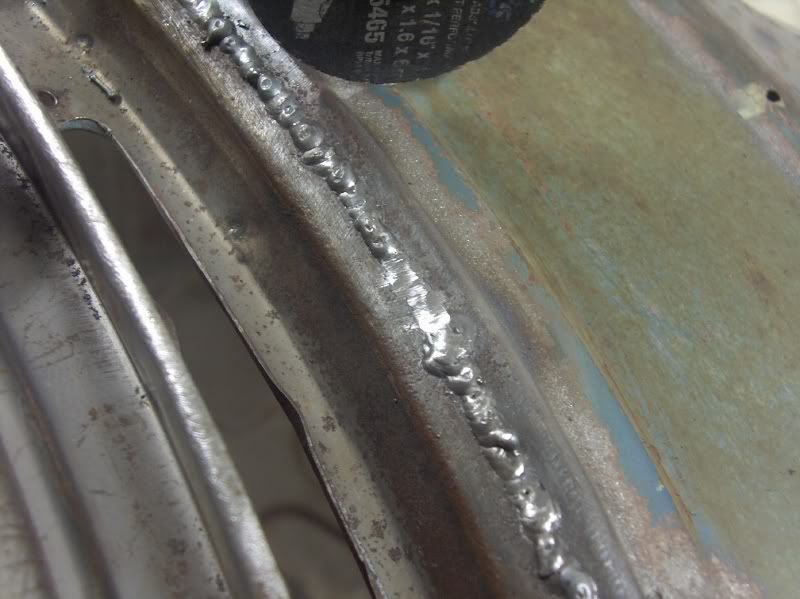
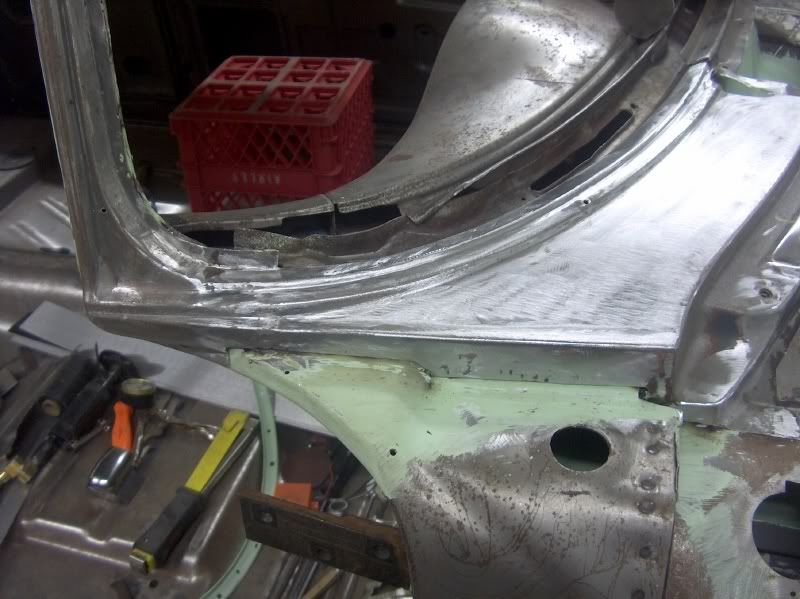
Now we'll skip ahead and finish the rest up.
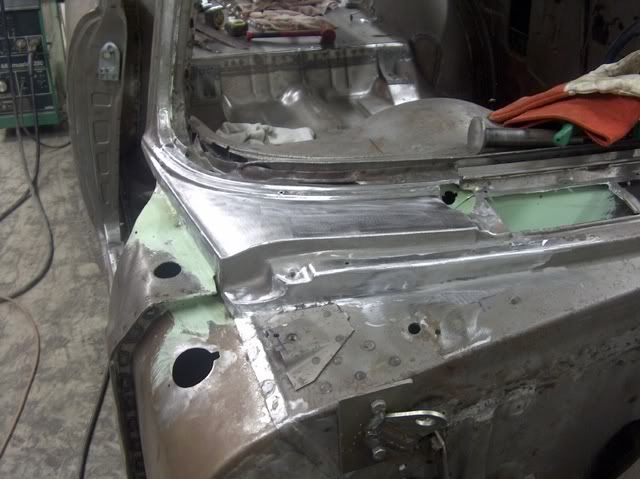
Looks factory!
Prior to grinding welds, it never hurts to check the back side of the welds to see if you have full penetration.
Here's my process for grinding down the welds. It's kinda hard to take pictures and grind at the same time, but we'll do the best we can.
I use a 3" cutoff wheel, 1/16 thick, and hold it perpendicular to the weld bead. I work this back and forth along the weld bead, covering about a 1/2" area. Don't sit in one spot or it will tend to cut and not grind. next, if we just stayed in the center of the weld bead, you would wind up with a concave depression in the middle of the weld when done, so make a few passes down the middle, then work toward one side, then the other, in attempt to keep what you are grinding fairly flat. Try to stop when you are just above the surface of the sheet metal, or otherwise you will have grinding gouges, like some of the ones shown here:
This takes a bit of patience and finesse (something I'm still working on), but getting rid of the bulk of the weld in this fashion seems to make the sanding discs last quite a bit longer. Plus, the 1/16" wide contact area of the cutoff wheel will generate less heat than any sanding disc, flap wheel, etc. After the welds are down to a workable level, then switch to the 3" angle sander (I use a 60 grit sanding disc). I find that although a 4-1/2 grinder with a sanding pad works quicker, it also can get carried away a lot quicker.
Now we'll skip ahead and finish the rest up.
Looks factory!
Trending Topics
Thread Starter
|
Posting Guru
Joined: Oct 2007
Posts: 1,130
Likes: 0
From: Bloomfield Hills, MI
Wow - that is an artwork! Its also very helpful. I have always thought that people who are skilled with metal work are so talented. thx
FTE Stories
Ford Trucks for Ford Truck Enthusiasts

10 Best Ford Truck Engines We Miss the Most!
Joe Kucinski
2026 Shelby F-150 Off-Road: Better Than a Raptor R?
Brett Foote
2027 Super Duty Carhartt Package First Look: 12 Things You NEED to Know!
Michael S. Palmer
10 Most Surprising 2026 Ford Truck Features!
Joe Kucinski
Top 10 Ford Trucks Coming to Mecum Indy 2026
Brett Foote
5 Best / 5 Worst Ford Truck Wheels of All Time
Joe Kucinski
Ford Super Duty: 5 Things Owners LOVE, 5 Things They LOATHE!
Joe Kucinski
Every 2026 Ford Truck Engine RANKED from WORST to FIRST!
Michael S. Palmer
The Best F-150 Deal of Every Trim Level (XL through Raptor)
Joe Kucinski
Senior User
Joined: Sep 2007
Posts: 129
Likes: 0
From: Baton rouge, Louisiana
nice job on grinding the welds. I too used that technique on the many many welds i ground on my 50. Until i used a sanding flap disc for a grinder, im not sure if that is the proper name but it works fantastic and quick. Its designed to take of metal but in little amount. It is just a wonderful tool for grinding welds/

Thread
Thread Starter
Forum
Replies
Last Post