


New '47 COE idea
Thread Starter
|
More Turbo
Joined: Jan 2007
Posts: 593
Likes: 15
From: Wichita, KS
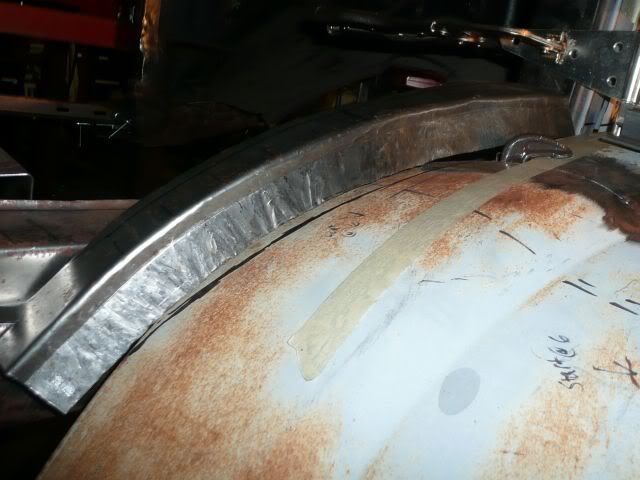
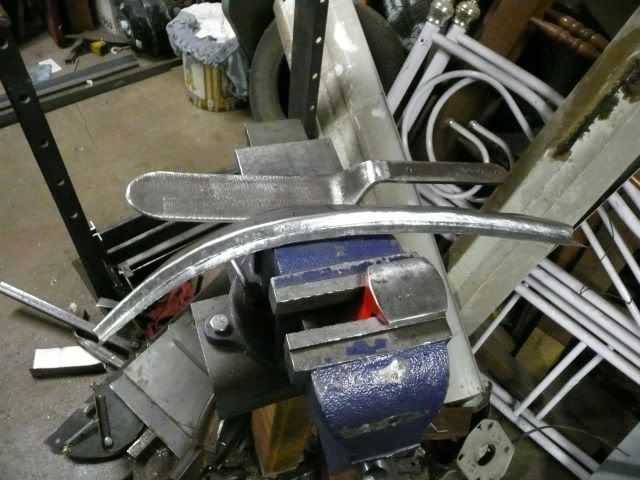
Well, I had some frustration to take out on something, so I decided to try a different approach to the leading edge of the fenders. This time, I shrunk the lip that will bolt to the grill instead of the visible part of the fender. I like it better, even though only about 1/2" to 3/4" of the smooth part will be used. In response to the other tutorial that I disagree with, here is my method and results for tuck shrinking without heat. I have not planished this yet on the wheel or planishing hammer.
I started with a piece of 18 ga sheetmetal 18" long by about 4" wide. I put a bend in it about an inch from one edge on the brake. Then using these tucking forks started to shrink the edge.
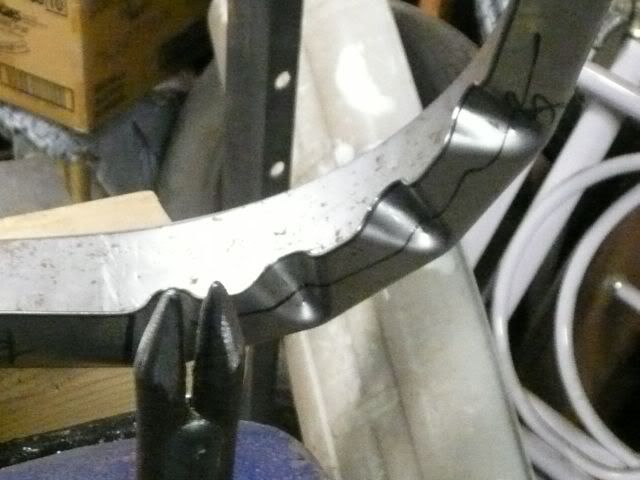
Here is the first set of tucks formed.
Another view of the first set of tucks before crushing them.
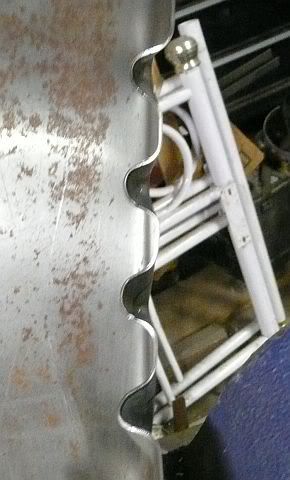
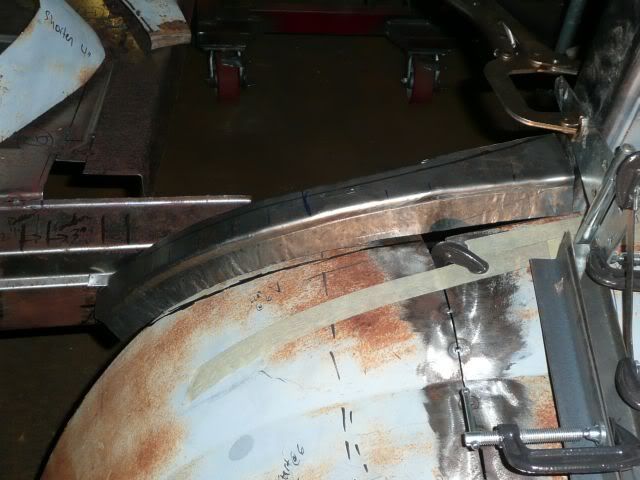
After a few swings of the hammer, the tucks are crushed and ready to be smoothed over a bit with a slapper and a dolly. This was taken after the second or third set of tucks was done.
This pic is after a few swings of the slapper, on dolly. I think this one too is after the second or third set of tucks has been crushed.

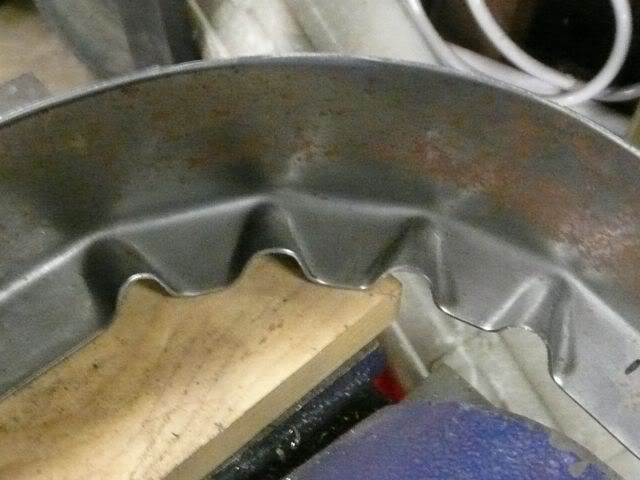
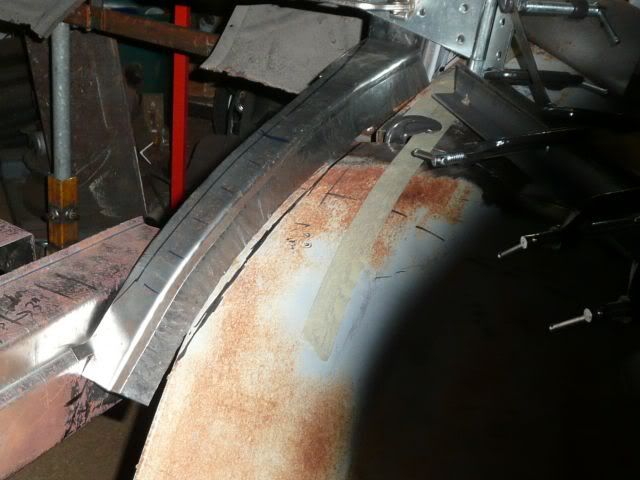
This is what it looks like after about a half hour of shrinking and a little planishing with the slapper and dolly. I will probably either wheel it or run it through the planishing hammer, after which it may need a little more shrinking.
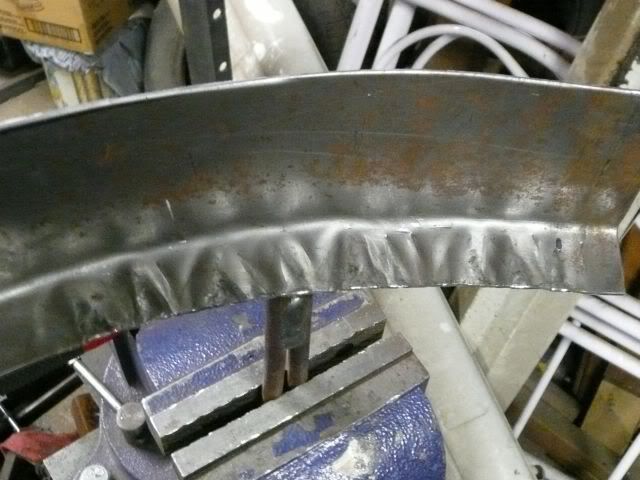
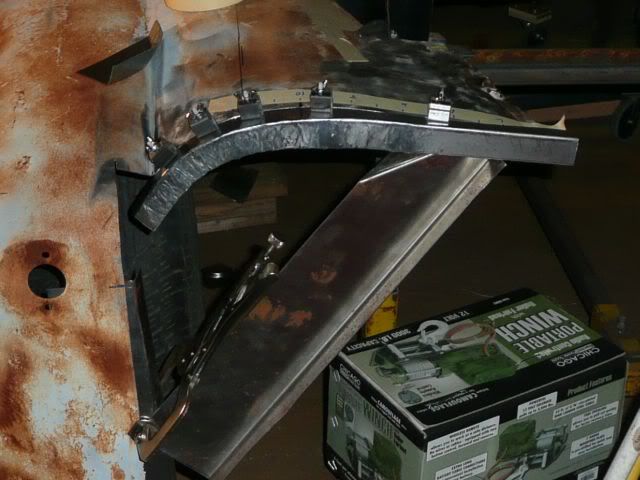
For comparison, here is tonight's effort sitting behind the rough piece I made a couple of nights ago.
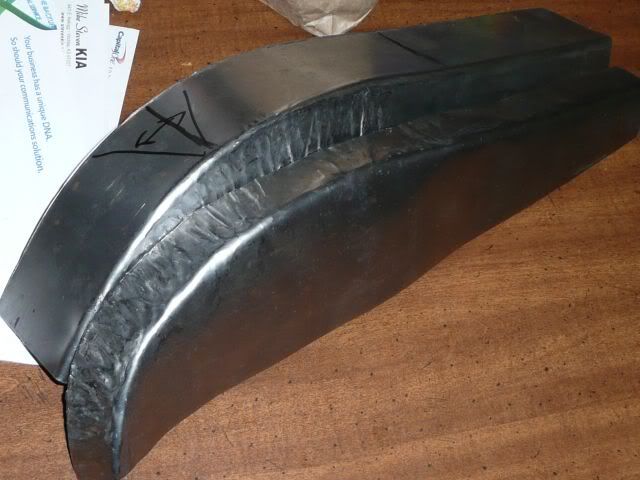
I like these results better. As mentioned before, I'll only use a little of the smooth portion, but needed a wider area to hold the shape better.
Dave
I started with a piece of 18 ga sheetmetal 18" long by about 4" wide. I put a bend in it about an inch from one edge on the brake. Then using these tucking forks started to shrink the edge.
Here is the first set of tucks formed.
Another view of the first set of tucks before crushing them.
After a few swings of the hammer, the tucks are crushed and ready to be smoothed over a bit with a slapper and a dolly. This was taken after the second or third set of tucks was done.
This pic is after a few swings of the slapper, on dolly. I think this one too is after the second or third set of tucks has been crushed.
This is what it looks like after about a half hour of shrinking and a little planishing with the slapper and dolly. I will probably either wheel it or run it through the planishing hammer, after which it may need a little more shrinking.
For comparison, here is tonight's effort sitting behind the rough piece I made a couple of nights ago.
I like these results better. As mentioned before, I'll only use a little of the smooth portion, but needed a wider area to hold the shape better.
Dave
Thread Starter
|
More Turbo
Joined: Jan 2007
Posts: 593
Likes: 15
From: Wichita, KS
So, small steps is still steps. I managed to cut down the piece I made the other day and stretch, shrink, re-stretch and shrink somewhere else to get it close. Still need to fine tune it a little, but need to verify the shape of the grill first. (Also got to use my new panel clamps.)
Dave
Dave
Thread Starter
|
More Turbo
Joined: Jan 2007
Posts: 593
Likes: 15
From: Wichita, KS
Well! Time permitted...
I didn't get as much done as I'd hoped, but I was productive. It's always nice to be able to hold something up in the air and say... Yep, I did something!
I still need to finish tipping the edge over and then tipping it back down to get the zig zag profile desired. But I think this is going to work.
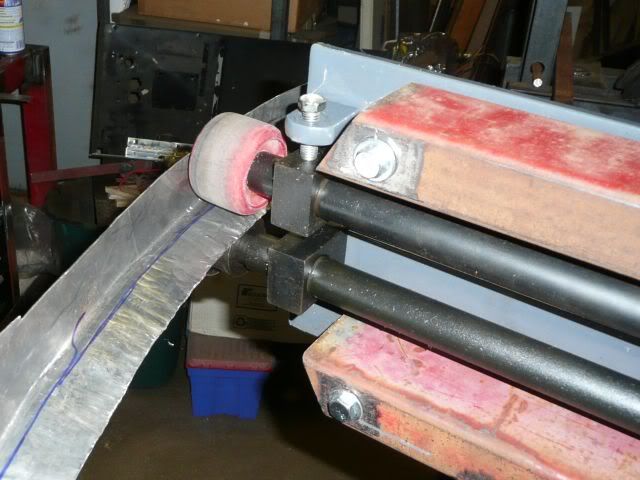
I am using a urethane skateboard wheel to tip the edge over an offset die in the bead roller. I don't have a set of dies that will go 1/2" deep. And because the edge is curved, I need to stretch the metal now and then shrink it again.
Here you can see the urethane wheel pressing the metal down over the edge of the offset die.
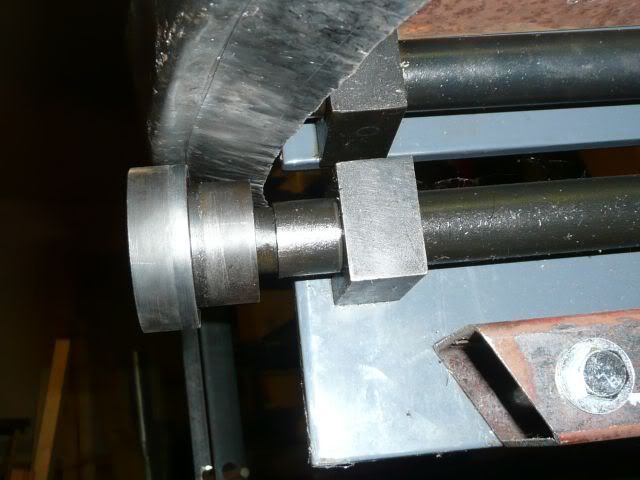
This is what it looks like from the bottom. I've already run this through a couple times at this point.
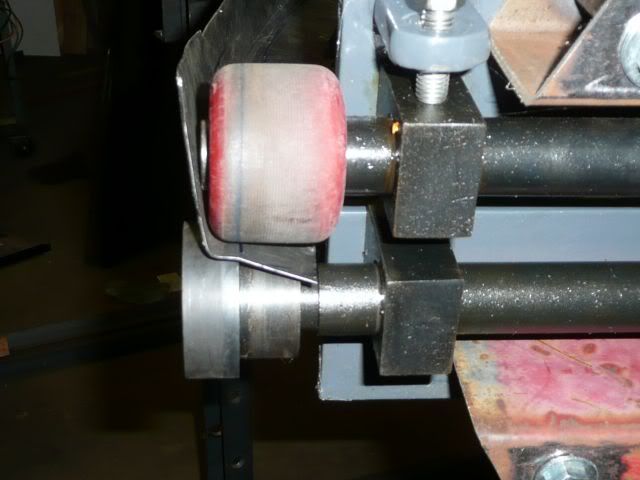
Here you can see just what is happening as the metal exits the bead roller.
Dave
I didn't get as much done as I'd hoped, but I was productive. It's always nice to be able to hold something up in the air and say... Yep, I did something!
I still need to finish tipping the edge over and then tipping it back down to get the zig zag profile desired. But I think this is going to work.
I am using a urethane skateboard wheel to tip the edge over an offset die in the bead roller. I don't have a set of dies that will go 1/2" deep. And because the edge is curved, I need to stretch the metal now and then shrink it again.
Here you can see the urethane wheel pressing the metal down over the edge of the offset die.
This is what it looks like from the bottom. I've already run this through a couple times at this point.
Here you can see just what is happening as the metal exits the bead roller.
Dave
Thread Starter
|
More Turbo
Joined: Jan 2007
Posts: 593
Likes: 15
From: Wichita, KS
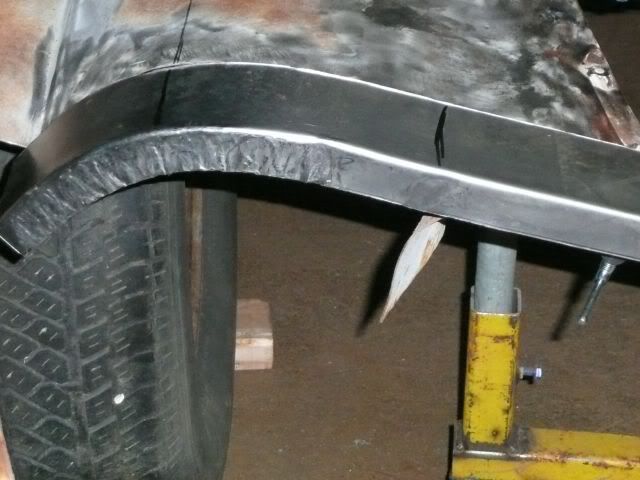
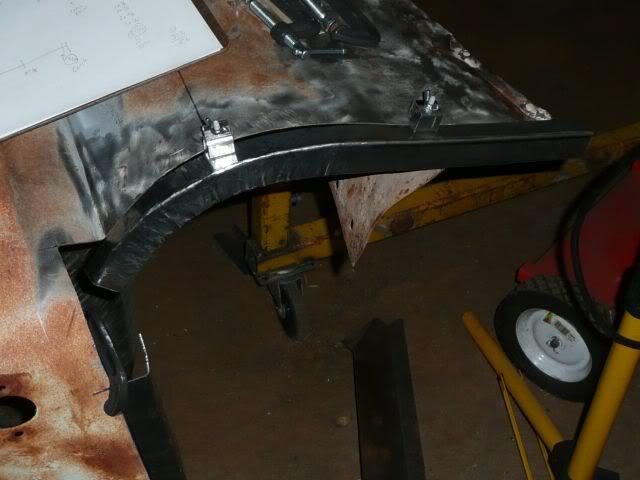
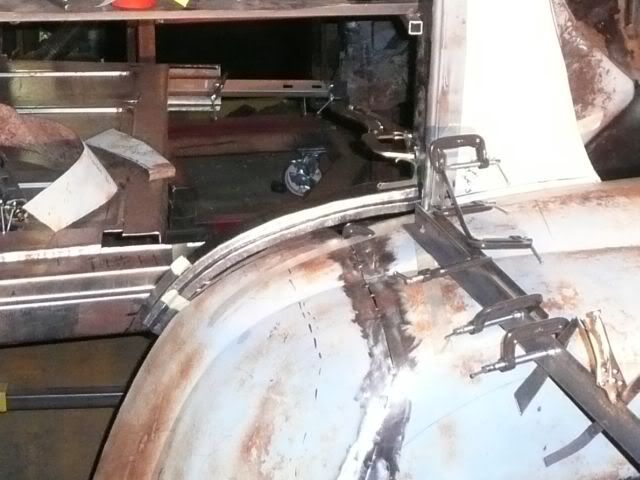
Just to give you an idea what I am trying to do here, here is a pic of where the new piece will go. I will eventually make this from 14 ga sheet, I think. This has to be strong enough to support some weight. The piece I'm making now, though will help with the profile and fitting of the door.
Here is where it will go. The "real thing" will extend down to the lower edge of the fender lip, so the fender will have a place to bolt.
Dave
Here is where it will go. The "real thing" will extend down to the lower edge of the fender lip, so the fender will have a place to bolt.
Dave
Thread Starter
|
More Turbo
Joined: Jan 2007
Posts: 593
Likes: 15
From: Wichita, KS
BTW, when it comes time to make the piece from 14 ga, I may end up making it in several pieces and welding them together. I can't imagine trying to shrink 14 ga CRS this much.
Dave
Dave
Thread Starter
|
More Turbo
Joined: Jan 2007
Posts: 593
Likes: 15
From: Wichita, KS
Still making baby steps it seems. Hope the pics aren't getting monotonous. Sure seems like I've been working on a couple of pieces a long time.
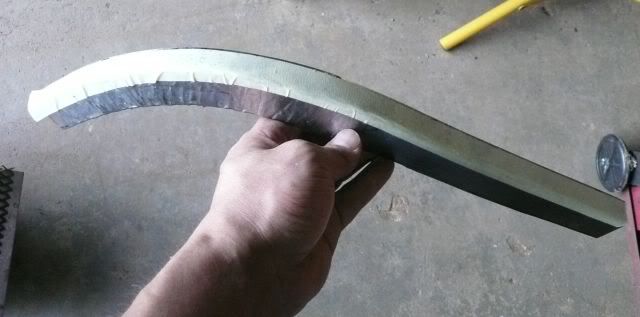
I picked up stuff to make the linear stretching die for my planishing hammer, but I'm not sure when I'll actually get it made. In the mean time, I decided to just get on with it, so with hammer and dolly I did. Made a better pattern from the original fender lip and matched the new edge to that. Things are looking better. You can see that it is a lot flatter toward the outer edge and I've got it all arranged about how it will be here. Still not done, but closer.
...
Thread Starter
|
More Turbo
Joined: Jan 2007
Posts: 593
Likes: 15
From: Wichita, KS
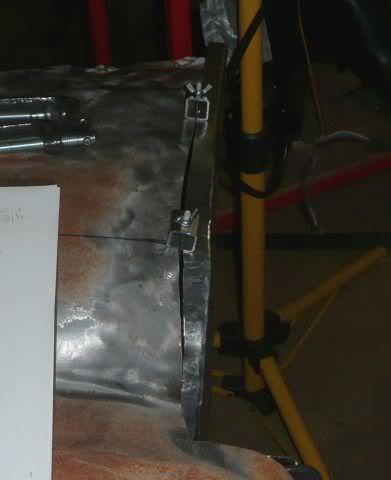
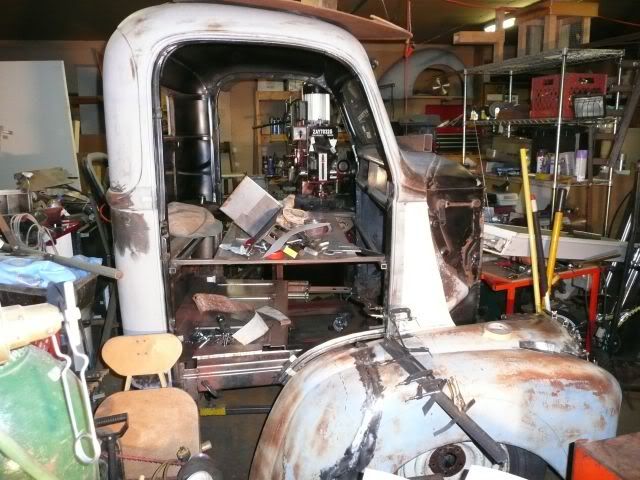
Also managed to make another prototype. Well, actually I finished the one I started. And it has led me to think I need another. I really ought to use foam for this part, but I'm using this as a learning opportunity for making offset flanges. (Somewhere on the to-do list is cab corners...) And it's not as bad as I expected.
It is amazing to me how a single, insignificant piece can change the look of something so dramatically. Well, maybe it's only dramatic to me, but after getting this piece "finished", I taped it in place, and even though it doesn't fit right, it really makes the cab look like a cab. Having a full door opening really seems to have an effect.
Dave
FTE Stories
Ford Trucks for Ford Truck Enthusiasts

10 Things Every Truck Owner NEEDS (2026 Edition)
Michael S. Palmer
Rezvani's Latest Post-Apocalyptic Monster Is a Ford F-150 Raptor Underneath
Verdad Gallardo
Top 10 Most Expensive Ford Trucks Ever Sold on Bring a Trailer
Joe Kucinski
2027 Ford Super Duty Buyer's Guide (Every Model, Engine, & Package)
Brett Foote
Top 10 Ford Truck Tragedies
Joe Kucinski
AEV FXL Super Duty - the Super Duty Raptor Ford Doesn't Make
Brett Foote
Lobo Vs Lobo: Proof the F-150 Lobo Should Be Even Lower!
Michael S. Palmer
Ford's 2001 Explorer Sportsman Concept Looks For a New Home
Verdad Gallardo
10 Best Ford Truck Engines We Miss the Most!
Joe KucinskiThread Starter
|
More Turbo
Joined: Jan 2007
Posts: 593
Likes: 15
From: Wichita, KS
Officially hit a snag last night. Prior to pulling the floor from the cab, we braced it well. Turns out, we would have been better off pulling the floor, squaring the cab, then bracing it. So, I now know why the doors didn't close properly before, and why I had such a hard time getting a square floor to fit in a round, er, un-square cab. At least I don't have to start from scratch! Argh!
Dave
Dave
Thread Starter
|
More Turbo
Joined: Jan 2007
Posts: 593
Likes: 15
From: Wichita, KS
Cut most of the bracing out so I could re-brace today. Went pretty well. I'm re-using the tubing, so I had to splice a couple pieces together. Cab is now square. Still need to cut out the last piece so I can check the fit of the doors before continuing with the floor.
Thanks again Steve (Christensen) for the measurements.

Dave
Thanks again Steve (Christensen) for the measurements.
Dave


Thread
Thread Starter
Forum
Replies
Last Post
tinman52
1948 - 1956 F1, F100 & Larger F-Series Trucks
689
Mar 26, 2018 10:00 PM
jmadsen
1947 and Older Ford Trucks
27
Oct 19, 2012 12:11 PM