When you click on links to various merchants on this site and make a purchase, this can result in this site earning a commission. Affiliate programs and affiliations include, but are not limited to, the eBay Partner Network.
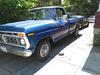
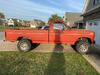
Getting ready to do some bed rust repair on my 78 F150. Picked up some panels from LMC. They were a mix of Tabco and Goodmark panels. I picked up both wheel arches, rear lower quarters and front lower quarters. I am still debating what to do with the wheelhouses. This will be my first attempt at metal bodywork. I have a crappy little Campbell Hausfield 120V welder that I have had for 30 years and hardly use.. I picked up some solid .023 instead of the .035" Flux-core that came with it. The .023" wire seems to be what I see in the searches as easiest to use for this job. I will keep at it till its done with updates on occasion. Anyone else have fitment issues with the body panels they have bought? I did this part of the post so someone buying panels will know what to expect or maybe someone else can point us in the right direction for panels that fit better.
This is what I am working with. The driver side is not as bad. I cut out some of the rust and you can see the wheelhouse is rusted out also. Little closer shot. This is the rear arch. It seems to fit OK. I will not be cutting into the dent. At least there is no rust that high up. This is a Goodmark panel. This is the arches lip. It is about 1/2" shorter than the factory lip. This is the lower rear quarter. It is a Tabco. I fits kinda strange. Its almost like it is too long. Notice the over hang at the rear. It is missing the same 1/2" on the lip. It also does not cover the whole section under the tail light. It is pressed up against the body as tight as it would go. Looks like I will need to fab that small section. With the arch lip against the factory lip the panel is about 1/2 to 3/4" too long. Will need to fab this to fit also. Driver side is the same. The lower front quarter is a Tabco also and the body mold is very severe compared to the factory body lines. Same 1/2" missing from lip. The front is missing about 3/4" of material compared to what is there. For some reason these 2 panels feel way heavier than the others. They are only .002" thicker than the others but feel very sturdy where the others feel flimsy. Maybe its the body mold giving it some strength. Also there is a lip on the bottom of this panel that points down instead of pointing under the truck like factory.
I live in the great state of denial....err SW Ohio. Rust free bed? Not around here. Mainly doing it for the experience. Its never going to be a show truck. Wife just wants it one color....lol. So do I if I'm being honest. I saw the thread on here about the rustoleum paint job......I might give that a try ....I'll be the last owner of it anyways.
The rust paints work to some degree, but they're not a cure. I use the very best marine paints on my fertilizer equipment and it's a never ending battle.
If you're just trying to keep it alive for a while with lots of time and effort you're probably on the right track. my experience with panels like you have has been they're better than forming your own from scratch, but still require a lot of alterations to make them usable. just accept it and proceed.
At the risk of running operation extreme redundancy I'll say it again. before you spend too much money and time add up what you're going to spend half azz fixing it with chinese parts then look at craigslist out west and see what rust free vehicles or parts sell for then add f freight and see where you're at. you might be surprised.
So I attached the panels to the truck. Cut the panels to replace what I wanted to replace. Got the panels mounted and ready to weld. Discovered I am not a welder.....lol. I blew a lot of holes in the panels. I tried various settings but regardless of the setting some welds were great others not so much. Any advice? My gap could have probably been smaller. I am sure that contributed to a lot of my issues. I will try off setting the panel a little lower on the other side when I attach it for cutting. Live and learn. It is almost welded up. There are a lot of pinholes to fill in. Still trying to figure out the welder. Its a small 120v Campbell Hausfeld. Using the .035 flux core. Tried some .023 straight wire. Had no luck with that at all went back to the flux core. Did warp a few spots. Will need to massage it a bit but I think the level of bondo I will need will still be reasonable. filling all the pinholes is what will get me. How to make sure I got them all. Is there another way to make sure moisture doesnt get into the bondo from behind? I plan on undercoating the back of the panel. I didnt do the whole lower quarter due to the fitment of that particular panel. I will cut out that rust and fix the panels shortcomings for covering the whole section under the tail light as shown in a previous post. Maybe by then I'll figure out how to weld better.....lol.
I have used a product called "Metal to Metal" as the first coat (or second) of filler over welded panels. It is claimed to be waterproof which would be the advantage over plastic fillers (bondos) accepting moisture through pinholes.I have had very good results with this method over the years. Made by Evercoat. Maybe $40-$50 a qt. if I recall.
When using .023 solid wire, you need to use gas. I find it welds much better than flux core.
Tighten up on the gaps, I prefer to have them as close to butting as possible. Grind more of the black primer off close to where you are welding. Personally, I would strip it all off, front & back..
Duraglas is another product that works well over welded patches.
Paint the back of all patches with Rustoleum Rusty Metal primer, then a coat of regular Rustoleum. Then undercoat.
I treat the front & back of all patches, before & after welding, with a conversion coating, such as Ospho. There are lots of similar products out there.
Getting ready to do some bed rust repair on my 78 F150. Picked up some panels from LMC. They were a mix of Tabco and Goodmark panels. I picked up both wheel arches, rear lower quarters and front lower quarters. I am still debating what to do with the wheelhouses. This will be my first attempt at metal bodywork. I have a crappy little Campbell Hausfield 120V welder that I have had for 30 years and hardly use.. I picked up some solid .023 instead of the .035" Flux-core that came with it. The .023" wire seems to be what I see in the searches as easiest to use for this job. I will keep at it till its done with updates on occasion. Anyone else have fitment issues with the body panels they have bought? I did this part of the post so someone buying panels will know what to expect or maybe someone else can point us in the right direction for panels that fit better.
I'm with scottscott. With autobody sheetmetal I like to keep the gaps tight. The panel clamps tend to prohibit that unless you just relieve the edge area where the clamp passes through and keep the rest of the gap tight. Using a heat sink of non ferrous [copper or aluminum] behind the tack can also help from blowing through the metal.
I'm not a fan of flux core for autobody sheet metal. I'm also not a fan of buying expensive Argon/CO2 mix gas. I use straight CO2 gas. Works well and is very inexpensive compared to Argon/CO2. I also prefer .023 wire on autobody sheet metal [.030 max]. I am not a professional welder. This is just my experience after 3 vehicle projects.
This is the rear corner that I needed to add some length to. I used a couple of pieces cut off the patch panel I used earlier and mocked one up. It doesnt really look like it but my welds are improving. Still blowing holes but now better than half my welds are decent....before maybe a third. Practice makes ............for a long day. Here is the next section I am replacing. Tried cutting the patch panel a little differently. It fit better but there were still some gaps bigger than I wanted. Well that section is almost in. Still need to fill pinholes in both, but this section went in easier. I discovered if I cut the end off the wire after every spot it seemed to work out for me better. It would weld instantly instead of pushing off the steel then sparking. Takes longer but reachable objects have less chance of flying across the garage.....lol. Not sure if it shows up well but I plainly warped the panel across the top. How does one remove the wave?
Thanks for looking. I have never done this type of body work before. I have done fiberglass before but not metal. Definately not welding. Its been trying....lol. But I am learning as I go. Hopefully by the time I get to the other side I will have at least a grasp of what I am doing. Putting the TBI on it was way easier.......
I do body work as a hobby on my stuff... have done quite a few vehicles over the years. You are going to be doing some hammer and dolly work with the panel and then some filler work to straighten it all out... not so terrible really. Hope you learn to love block sanding as much as I have over the years.
Also ya may want to invest in a DA sander... Harbor Freight actually has a great starter for about 90 bucks. Baxter is the product manufacturer. Hard to go wrong for a cheap but decent DA for that price.
And I say this not knowing if YOU are going to paint it, or if you are going to have another source for paint? Or if you are just gonna straighten and prime?
If you plan on getting it painted somewhere, pass that dolly work and filler job on to the paint shop... can't imagine it's more than 3 hrs or so to get the panel paint straight, filler/ sand and then poly primer surfacer dtm.
I'm sorta an in for a penny, in for a pound guy. I will probably try and paint it myself. Its never going to be a show truck. I just want to see it solid and one color. I have been reading the thread about the Rustoleum paint job some other member did. Not sure if that is me or not. I had plans of finding a cab an redoing it while I drove this one and just swapping the cabs. My cab is pretty shot also. It needs "real" floors not the patches I did. Rockers and cab corners and mounts. Also it has a Lund visor on it and it leaks so the windshield pinch weld is bubbled all along the top. P.O.s did that for some reason. I am not a fan of the visor. Been looking for a cab for awhile but they are all pretty much wrecked and out of my skill set to fix. Hoping this gives me some confidence and practice to say "What the Hell" and go for it.
I am not a pro by any means, but have been doing it off and on for 30 years or so... if you are going to get after it, then start watching every decent instructional video out there and go for it. I prefer single stage paint on anything pre 89 or so... and honestly, it isn't to much cost to absorb for a decent single stage urethane paint job. This one I spent a little on to color match the og paint... all in at just under 600 bucks when it's all said and done for filler/ dtm primer surfacer/ and enamel single strage (matches the paint used on this truck). I also bake it in my shop with heat lamps though...
With just a plain jane catalog color and decent primer surfacer to block down- include other knick knacks like, filler (decent one like evercoat z grip, not to much $$) blocks/ paper, GOOD respirator and cartridges, and a $85 spray gun you would be in it about 600 bucks or so. What's the rustoleum job gonna set ya back for paint? $50 or 60 bucks? plus all the other stuff you are gonna use anyways minus the cost difference in paint and a decent gun... would only set ya back another 200-250 for a paint coat that would last you quite a bit longer.
I get being on a budget though... just keep in mind if you decide to upgrade paint later it's gonna be a headache. Laquer paint sucks to try and paint over, so there will be added work.
Just my humble .02 man.
So at the very least you need a set of dollies, a decent hammer to knock with, filler and sanding block/ materials (at least a 16", a 6" and some that you can make from scratch out of wood, etc. for different shapes), a bunch of rattle can primer that rustoleum will stick to (spray bomb laquer base will work), pan/ rollers and rustoleum paint.. ballparking that around $350 + or -.
Let us know how it works out whatever way ya go!
My jalopy in progress... TONS of dents, but no more than an 1/8" of filler anywhere... body work is just that... WORK. lol
Sorry its taken so long to get back....had some family issues pop up. What is the best way to prepare the back of the panel after welding on the patch panels. I am also having a problem with pinholes. What is the way to seal those?
This Hennessey Takes the Expedition Tremor's Off-Roading Capability to the Next Level
Slideshow: The VelociRaptor Expedition gains a lift, upgraded suspension, Brembo brakes, and trail-ready equipment while retaining the stock 440-horsepower EcoBoost V6.