


alternator upgrade


Thread Starter
|
Mountain Pass
Joined: May 2008
Posts: 241
Likes: 0
From: Oregon
alternator upgrade
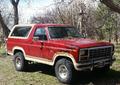
So was wondering if/how it's possible to put a higher output alternator on my 84 Bronco? I've heard of it being done before just not sure what year/model to get an alternator to get and if any wiring upgrades are needed to the pigtail or voltage regulator (I have an external one now) areneeded.
Thread Starter
|
Mountain Pass
Joined: May 2008
Posts: 241
Likes: 0
From: Oregon
alternator upgrade
So was wondering if/how it's possible to put a higher output alternator on my 84 Bronco? I've heard of it being done before just not sure what year/model to get an alternator to get and if any wiring upgrades are needed to the pigtail or voltage regulator (I have an external one now) areneeded.
Moderator


Joined: Dec 2007
Posts: 7,987
Likes: 104
From: Boise, Idaho

Hi Hayden,
Yes there is.
I put a 130amp 3G alternator into my '85 Bronco.
I got the alternator out of a 1995 Ford Windstar with a 3.8L V6. This is a perfect fit for the '80 - '86 as it has nearly the same bolt pattern.
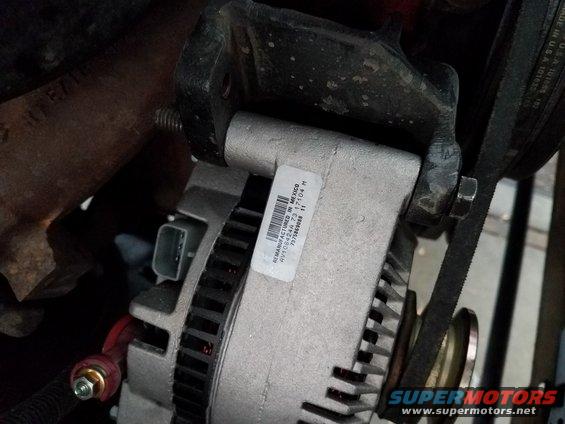
If your current alternator only has a single belt, you'll want to source a dual belt pulley, as the 3G takes a lot more effort to spin. Otherwise, it'll squeal.
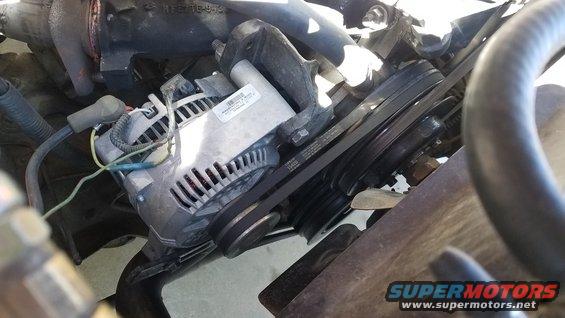
I got mine from a junk yard and then had it bench tested at an autoparts store before putting it in. They're a pricey alternator new, so used is a good way to go since they last a long time.
You'll also want to grab the big 8 gauge wire that goes to the fuse box that has the fusible link in it. You'll run this from the alternator to your battery positive. It needs to be a big wire to handle all the juice.
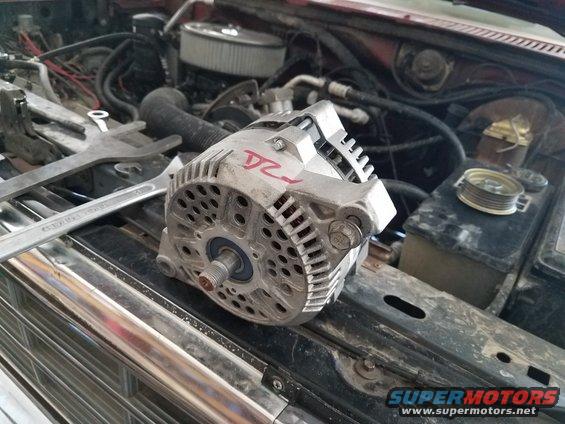
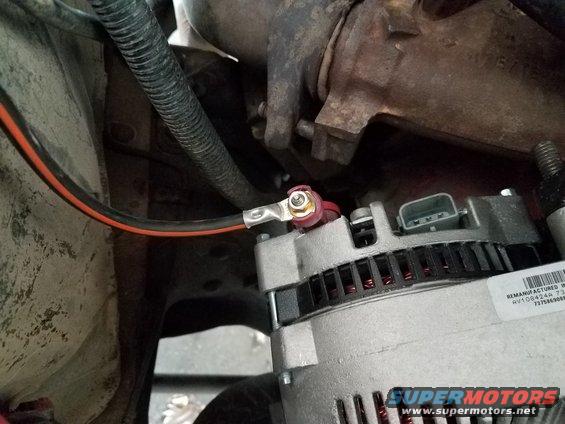
(You can see the orange and black wire if you look closely. It turns into a dual wire fusible link that is going to the left side of the starter relay)
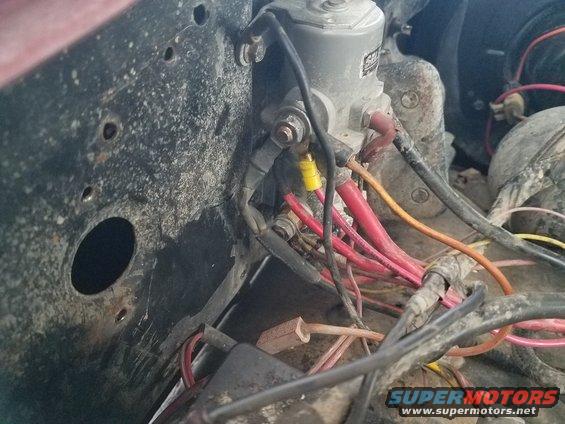
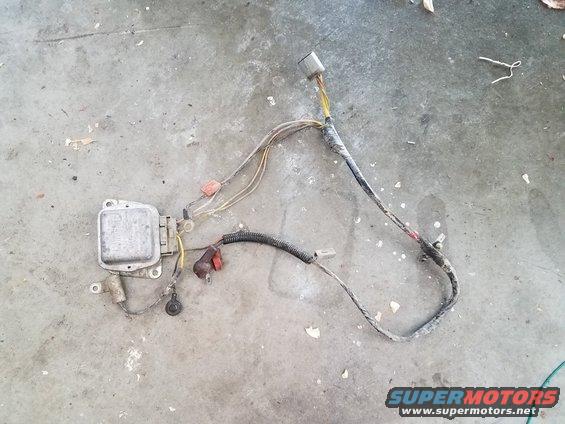
It's internally regulated, so you can remove all of your 1G alternator wiring. The only thing you'll want to save is the plug on the right as well as a length of the big yellow wire from it. You'll see why below.
One thing to note is that you do NOT want to hook up your ammeter in the cab. It'll fry it. You can have this converted to a voltmeter if you want to restore it to working again. There's some places online that'll do it. I haven't done it yet.
One thing to note is that when you remove the stock wiring for the voltage regulator, you will lose power to the cab. It's all tied together in some really wonky wiring splices.
This is the wiring diagram for the 1G

Here's the diagram for the 3G

The 3G wiring is extremely simple. Most of it connects to itself.
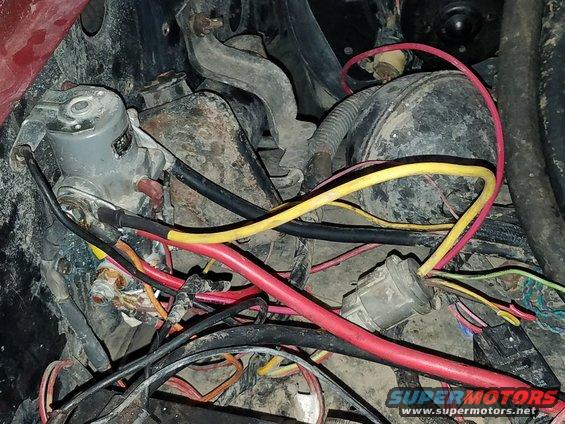
To restore power to the cab, find the original plug with the big yellow wire and connect that to direct power (this is the power to the cab).
Then, run the green/red (LG/R) wire to the green/red (LG/R) wire on the 3G and it should be good to go. The plug will have 2 other connections on it that you can leave disconnected. They're for the ammeter.
Like this:
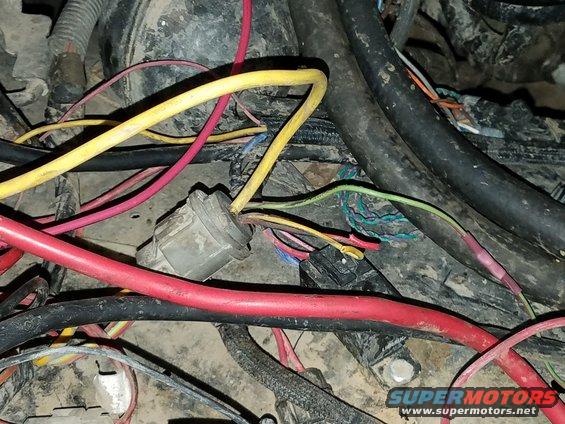
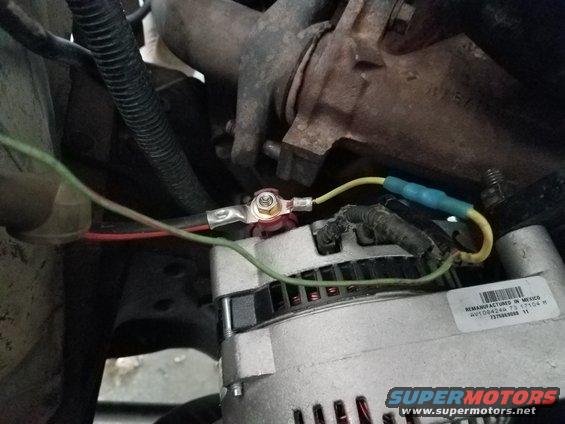
Hopefully that helps. I know pictures can be a little confusing, but I think they'll make sense when you get in there and start looking at it.
It's a very worthwhile upgrade.
Yes there is.
I put a 130amp 3G alternator into my '85 Bronco.
I got the alternator out of a 1995 Ford Windstar with a 3.8L V6. This is a perfect fit for the '80 - '86 as it has nearly the same bolt pattern.
If your current alternator only has a single belt, you'll want to source a dual belt pulley, as the 3G takes a lot more effort to spin. Otherwise, it'll squeal.
I got mine from a junk yard and then had it bench tested at an autoparts store before putting it in. They're a pricey alternator new, so used is a good way to go since they last a long time.
You'll also want to grab the big 8 gauge wire that goes to the fuse box that has the fusible link in it. You'll run this from the alternator to your battery positive. It needs to be a big wire to handle all the juice.
(You can see the orange and black wire if you look closely. It turns into a dual wire fusible link that is going to the left side of the starter relay)
It's internally regulated, so you can remove all of your 1G alternator wiring. The only thing you'll want to save is the plug on the right as well as a length of the big yellow wire from it. You'll see why below.
One thing to note is that you do NOT want to hook up your ammeter in the cab. It'll fry it. You can have this converted to a voltmeter if you want to restore it to working again. There's some places online that'll do it. I haven't done it yet.
One thing to note is that when you remove the stock wiring for the voltage regulator, you will lose power to the cab. It's all tied together in some really wonky wiring splices.
This is the wiring diagram for the 1G
Here's the diagram for the 3G
The 3G wiring is extremely simple. Most of it connects to itself.
To restore power to the cab, find the original plug with the big yellow wire and connect that to direct power (this is the power to the cab).
Then, run the green/red (LG/R) wire to the green/red (LG/R) wire on the 3G and it should be good to go. The plug will have 2 other connections on it that you can leave disconnected. They're for the ammeter.
Like this:
Hopefully that helps. I know pictures can be a little confusing, but I think they'll make sense when you get in there and start looking at it.
It's a very worthwhile upgrade.

Lead Driver

Joined: Sep 2002
Posts: 9,182
Likes: 12
From: Gateway to the West
You can always do a single wire conversion with an aftermarket unit. There a a few companies out there making OEM-style retrofit units that allow you to lose all of the external regulator wiring and nly concern yourself with the charge cable between the alternator and the battery. I'd name names but when I do I get slapped for "advertising". So, lt your favorite search engine do the research for you.

Thread
Thread Starter
Forum
Replies
Last Post
Josethef100
1961 - 1966 F-100 & Larger F-Series Trucks
34
Aug 10, 2020 12:43 AM
sciondude09
1948 - 1956 F1, F100 & Larger F-Series Trucks
7
Mar 15, 2009 05:59 AM


