When you click on links to various merchants on this site and make a purchase, this can result in this site earning a commission. Affiliate programs and affiliations include, but are not limited to, the eBay Partner Network.
Sorry guys. The format looked better in my Word document. I tried to upload it as well but it is too large. Getting late tonight so I will try to figure it out and post it up later.
If you want the Word version before I get it attached here then just let me know.
EDIT: 12/10/2022@Cshep73replied with some extra tips based on his E99 install experience. Quoting him up here so it flows with the original install write up and doesn’t get lost in the thread 4 pages later. Thanks for the addition Cshep73!
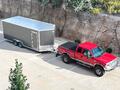
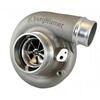
This is my first post here on the forum, but I have been a long time puruser of the site. I have an early 1999 7.3 with the ZF6 manual, stock AB code injectors, a PHP hydra, Tymar/Donaldson intake, and MBRP 4" exhaust. A few months ago, I upgraded to a T4 363/.68/.91 BorgWarner SXE. I had the Riff Raff billet wheel in the stock turbo and just felt like the turbo performed poorly on the low end. I felt like the lack of low-end boost was costing a significant amount of power. My up-pipes were leaking and needed to be replaced which was another reason to just go T4 and be done with it. My main reason for the upgrade, however, was to lower EGTs as I couldn't really use even the 25T PHP tune while towing in the Utah mountains without having to back off of the accelerator on the longer hills. While I haven't been able to tow very much since starting medical school in Texas shortly after the install, I can say that the EGTs are easily 200 degrees lower than before. Even on the 120 performance tune EGTs don't surpass 1150 degrees. Boost, as others have said, comes on early and power feels great from 1500 RPM-redline.
First off, this install write up is phenomenal and really covers the T4 install process well. I just wanted to add some things that I learned while doing the upgrade. As many others have here, I called Carson Stauffer from CSD and ordered the T4 install kit, turbo, and turbo boots from him. I was concerned with downpipe fitment issues that others have talked about and discussed it with him. He was aware of the issue and assured me the problem had since been resolved. I can confirm that this is the case as the downpipe fitment was perfect, just as everything else was in the kit. I had Carson add the 3.5-4" adapter. I used titanium exhaust wrap from Autozone (50') which was enough to wrap the up pipes and downpipe. As mine is the early 99, I elected to use the Riff Raff billet intake plenums. Rather than bending my fuel lines, I also used the flexible fuel lines Riff Raff recommends and sells for people with T4 kits that want to retain the factory fuel bowl.
Overview of the install:
The install went as detailed in this amazing write-up. I will include only additional details about my particular install that I feel might be useful for anyone considering this project.
Removal of old system: As stated in the write-up, just cut the old downpipe about a foot from where it enters the rest of the exhaust system. Cut the down pipe itself as the full length of the first straight piece is needed to mate up with the new down pipe (without flexible exhaust tubing which is not needed with the properly made CSD down pipe).
Plenums: As stated in Riff Raff's instructions, the passenger side bolt that contacts the engine front cover when removing it will need to have the head cut off in order for the new plenums to fit (I tried without and the new plenums are just too thick to fit without it being cut). I recommend leaving the old plenum on with the hole covered when cutting the bolt head. I didn't and nearly lost the bolt head down into the engine. I used a sawzall with a long metal blade (actually a short metal blade fastened to a long wood blade in a homemade contraption to avoid a trip to the hardware store). This worked great. I held the sawzall handle towards the rear of the truck where the turbo would have been before removal.
T4 kit: Followed the write-up almost exactly. As the write-up states, try to get the turbo clocked before installing. Mine ended up being clocked perfectly which saved me from having to hassle with the hard-to-reach bolts after it was installed. I elected to maintain the factory CCV so I followed the instructions here to accomplish making a small section of intake boots/exhaust tubing to connect the turbo to the CCV housing as in the stock configuration. Worked perfectly. I actually requested to CSD not to send their intake tube and they were kind enough to oblige and credit the savings towards the purchase.
Summary: CSD is a great company to work with. Carson is great to answer questions and his kit really is top notch. I would order his kit from him again. As the write-up pictures show, fit and finish make it look like it came this way from the factory. If any of you are on the fence about this upgrade and it is in your budget, I would definitely say that it is worth it. The truck is much more enjoyable to drive, and I no longer have to worry about EGTs. The truck now has a broad, USEABLE, power range and has plenty of pulling power. Maybe enough to hang with some of the newer diesels in the hills. I also noticed that the truck is SIGNIFICANTLY quieter in the exhaust drone department. The 4" downpipe from MBRP is just a little too big and contacted the valve cover and transmission in some spots which I believe caused a lot of the drone. The new downpipe doesn't contact in these places. I was worried the new SXE turbo wouldn't whistle like the old one (I'm still a young'n and like the whistle) but I was pleasantly surprised with the new sound. The whistle is less obnoxious than the factory turbo, but still very audible. The exhaust sound is different too, but still sounds great. Thats a wrap! Hope someone finds this useful!
Thanks guys. I’ll do my best to get the Word document downsized so it can be attached. It’s currently 8MB so I may have to cut out the photos to make it small enough for the 5MB limit.
My vision is that you could print it and use as instructions while in the garage.
The forum format doesn’t play so nice for pretty printing.
I also finally figured out how to put smaller photos in the thread. Which involves resizing BEFORE attaching them to the thread. I plan to go back and edit my previous posts to make those photos smaller so the thread is easier to view. Not so bad on the phone, but when trying to look at the thread on a laptop they are huge!
Hit me up if you want the Word version before I get this all sorted out. Hope it helps.
On a side note, is the file size of the Word document GB or MB? If it is 8MB, you can send it to me via email and I can work with it to get it resized and properly formatted if you like? I am here to help...
I think the large pictures are a good thing and would not change them if it were me. When people are looking for details, bolts or straps, they are usually pressed up against their screen if looking at smaller pictures.
That said, I took notice of your plenum boots and you could benefit from longer ones for longevity and reliability sake. My plenum boots go to the base of the plenum port and then to the stop peg on the Y-pipe. Although, if you are happy with the install and like the way it goes, then leave it be and leave well enough alone.
Nice looking truck!
I see you take pictures like I do, with your toes making an appearance. I usually have Keen sandals on, so at least you are wearing shoes.
I like the idea for the intake from Eswift and may have used that method if I thought about it or was aware. Although, I do like the rigidity of the CSD intake pipe mated to the OEM accordion hose then to the 6637 filter. I remove the entire assembly as a single piece after loosening the turbo clamp and filter clamp. I have not removed anything though since the few times I did when installing it. Either way will work well and with your method you get to keep the OEM CCV port, so that is good if someone is not wanting to source another 90* hose like I did.
Your MAP sensor port on the Y-pipe appears to have a bit of a downward angle to it. I looked at your hose in the total engine pictures, but it is hard to see the routing and angle. I have seen two (only two) cases of oil getting trapped in the MAP sensor tube due to a dip which caused erroneous readings from the MAP to the PCM which caused erratic performance. If you end up taking your Y-pipe off again for any reason, maybe try to make a gradual slope from the MAP to the Y-pipe fitting in a fashion that if any oil was to get in there it would drain back into the intake. Just a thought, not a must...
My advice is to convert said Word .doc in to a .pdf. But your mileage may vary.
Awesome idea Dan. Not sure why I didn’t think of that. (Facepalm). I also figured out that if I just make the photos physically smaller within Word it will also reduce the file size. But I like your idea better.
Sous it doesn’t sound like I need an assist on the file upload now. Thanks for the offer. By the way, brain fart on the GB. You’re correct it should have read MB. It’s been edited now.
@Sous glad to hear you understand my plenum boot issue. Don’t they just look short compared to others? lol I currently plan to leave them since they passed the boost leak check but also order a hose like you told me about in your thread. I’ll throw it in my spare parts bin in the truck to have on hand until I get around to changing it out.
That’s the first I’ve heard of the MAP line dip issue. I’ll keep that in mind and see about correcting. Not sure exactly what it looks like at the moment though since I had the 90* fitting out to seal it. I didn’t think the PCM did much with the MAP sensor when using a tune, at least on the max end of the spectrum since it tops out pretty quickly.
I like the thought of using the stock CCV since it allows use of any “standard” air filter option. Most aftermarket filters will be using that point as a reference. So this should make running any filter you want a breeze. Thanks to Eswift for sharing his method just in time for me to use in the write up.
Again, my apologies about the view of the installation instructions. It looked good (my opinion) in Word but copy and paste into the forum didn’t work as well as I’d hoped. I was also hoping the photos would copy/paste over but that was a hard NO. lol
As for the photo size within the forum, the huge ones make it really hard to look at on my pc. I don’t care for when you have to scroll the screen to see the whole picture. I’ll try to correct those tonight. It seems crazy the forum doesn’t have a sizing option built in.
Again, many thanks to all those who chipped in to help me with the install.
Awesome idea Dan. Not sure why I didn’t think of that. (Facepalm). I also figured out that if I just make the photos physically smaller within Word it will also reduce the file size. But I like your idea better.
Sous it doesn’t sound like I need an assist on the file upload now. Thanks for the offer. By the way, brain fart on the GB. You’re correct it should have read MB. It’s been edited now.
That was going to be one of my methods of reducing the size, once the GB/MB details were worked out.
Originally Posted by RacinJasonWV
@Sous glad to hear you understand my plenum boot issue. Don’t they just look short compared to others? lol I currently plan to leave them since they passed the boost leak check but also order a hose like you told me about in your thread. I’ll throw it in my spare parts bin in the truck to have on hand until I get around to changing it out.
Yes, they look to be at least 1/2" shorter just by looking at the pictures. That 1/2" is a lot of clamping real-estate when you are looking at a 3" boot. I would probably take the same approach you are now and leave it unless you go back in or it becomes a problem. I am doing the same thing with my leaking pedestal o-ring...
Originally Posted by RacinJasonWV
That’s the first I’ve heard of the MAP line dip issue. I’ll keep that in mind and see about correcting. Not sure exactly what it looks like at the moment though since I had the 90* fitting out to seal it. I didn’t think the PCM did much with the MAP sensor when using a tune, at least on the max end of the spectrum since it tops out pretty quickly.
Like I mentioned, it is very rare and almost never happens. One FTE'r it took forever to nail down because the oil would move inside the vacuum hose and cause an intermittent issue. 99.9% of 7.3L truck will never experience this, but just something to be aware of.
Originally Posted by RacinJasonWV
I like the thought of using the stock CCV since it allows use of any “standard” air filter option. Most aftermarket filters will be using that point as a reference. So this should make running any filter you want a breeze. Thanks to Eswift for sharing his method just in time for me to use in the write up.
I agree with you and a big thanks to @ESwift for bringing this method to light. That is why we post here and share ideas so that our procedures and processes can be refined and tuned in order to complete the task in the most efficient way.
Originally Posted by RacinJasonWV
Again, my apologies about the view of the installation instructions. It looked good (my opinion) in Word but copy and paste into the forum didn’t work as well as I’d hoped. I was also hoping the photos would copy/paste over but that was a hard NO. lol
As for the photo size within the forum, the huge ones make it really hard to look at on my pc. I don’t care for when you have to scroll the screen to see the whole picture. I’ll try to correct those tonight. It seems crazy the forum doesn’t have a sizing option built in.
Again, many thanks to all those who chipped in to help me with the install.
No apology necessary sir! You did an outstanding job!
I’m amazed daily at the knowledge and ingenuity breath as well as the willingness to help the fellow enthusiast here. Great write up Bravo.
And to a more important question everybody wants to know. Have you been out with it and How did it run for you ? ☺️😋
I’m amazed daily at the knowledge and ingenuity breath as well as the willingness to help the fellow enthusiast here. Great write up Bravo.
And to a more important question everybody wants to know. Have you been out with it and How did it run for you ? ☺️😋
Thanks. I've had it out but still working the bugs out right now. Currently waiting on a new IAT sensor since I found the old one to leak through under boost. Boost leak check device still attached.
I'll come back and give a better judgment once I get some real time behind the wheel. Due to COVID all the tracks around here are closed.
This truck is my garage queen with only 100k on the clock. It's not a good commuter vehicle so it doesn't see much action unless it's being worked. But I'll get it out some and put some moles on it for testing purposes.
PDF file has been attached to the 1st post in the thread. This version should be easier to view and print.
Thanks for the recommendation @Dan V and @Sous .
@FordTruckNoob & @slowsure You may be the testers for this write up. Let me know if you find any issues and I'll correct them.
This Hennessey Takes the Expedition Tremor's Off-Roading Capability to the Next Level
Slideshow: The VelociRaptor Expedition gains a lift, upgraded suspension, Brembo brakes, and trail-ready equipment while retaining the stock 440-horsepower EcoBoost V6.