When you click on links to various merchants on this site and make a purchase, this can result in this site earning a commission. Affiliate programs and affiliations include, but are not limited to, the eBay Partner Network.
Looking good
How did you like the SEM textured paint? I bought 2 cans to do my panels as I know I will have to sand them to get the chalk off and that will leave the sanding marks or be too smooth.
Thinking the textured paint should give it a little something to look more like factory.
Once the outside of mine is done I will move to the inside panels. I also need to fix the tabs on the dash frame where the dash pad screws to and I have some on the gauge bezels that need fixing too.
The supplies for that have been ordered so just waiting.
Dave ----
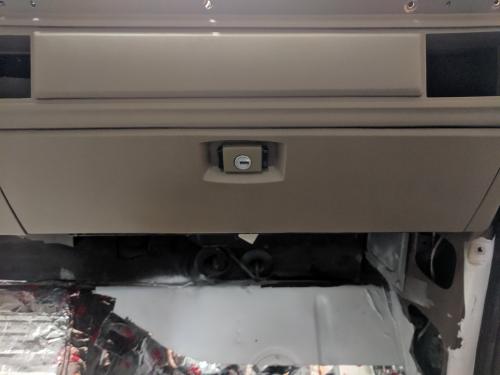
It goes pretty far. The texture is not the same as the leather grain but it doesn't look half bad. The seat belt panels and latch for the glove box have the SEM texture for reference.
My passenger kick board area panel has a couple spots that had the texture but I did not texture the entire panel. It's not to bad looking. You can see the original seat belt covers were pretty bad.
I bought 2 cans of everything. Not needed in the long run. I still have a fairly full can of adhesion promoter, prep cleaner and SEM texture. I have burned through a can of paint and started the next and clear coat. When you get low on the clear stop, it will spit. I would definitely buy one can of adhesion promoter, texture and cleaner only if anyone reading this hasn't and it will be enough to do the whole cab for sure (less door panels).
This is an awesome thread. I�m amazed at how far you�ve gotten.
Thanks sadly only the top of the iceberg. I really wanted to get the I side done up so I knew everything was safe to drive (doors and seatbelts were toast). I don't want to do anything twice so this meant fixing everything in the cab.
The plan is to finish up the interior then pulled the bed off to fix the cab mount rust and clean up the frame.
I'll then have plenty of access for new fuel and brake systems without having to crawl under anything.
When the bed is off I'll start pulling dents and try my hand at painting the bed.
It goes pretty far. The texture is not the same as the leather grain but it doesn't look half bad. The seat belt panels and latch for the glove box have the SEM texture for reference.
My passenger kick board area panel has a couple spots that had the texture but I did not texture the entire panel. It's not to bad looking. You can see the original seat belt covers were pretty bad.
I bought 2 cans of everything. Not needed in the long run. I still have a fairly full can of adhesion promoter, prep cleaner and SEM texture. I have burned through a can of paint and started the next and clear coat. When you get low on the clear stop, it will spit. I would definitely buy one can of adhesion promoter, texture and cleaner only if anyone reading this hasn't and it will be enough to do the whole cab for sure (less door panels).
Thanks for the reply.
I will have to go back and look at the pictures again.
I did not use clear on the dash frame and may not on any of the other but I do have a can from another project if it is still good think I also have some of the adhesion promoter.
Once the tabs are fixed for the dash I can get that together and start looking more like a truck on the inside too.
Well the new carpet is enroute. I'll ha e a vent window assembly, new driver door and a new carpet to try to sell off.
In the mean time I tore down the crusty old wire harness that runs from the driver's kick panel to the seat belt and done lights.
Found a green wire pulled and thought I found my light issue... Until I realized it was for map lights. Ordered some pins and a depin tool so I can fix it. Hopefully I got the right size.
For the harness as I unwrapped the old junky dirt ridden tape I used colored electrical tape to mark each clip and it's location on the harness so I could put it back screw clips got yellow, push clips blue etc.
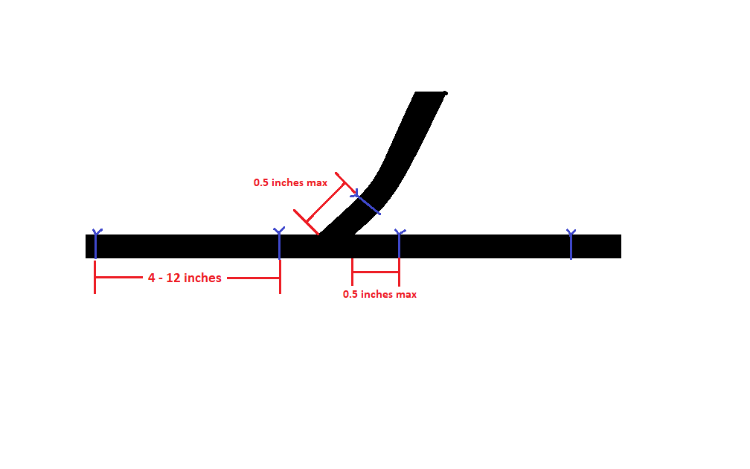
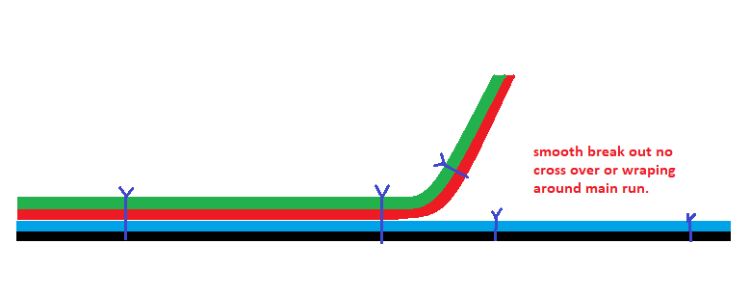
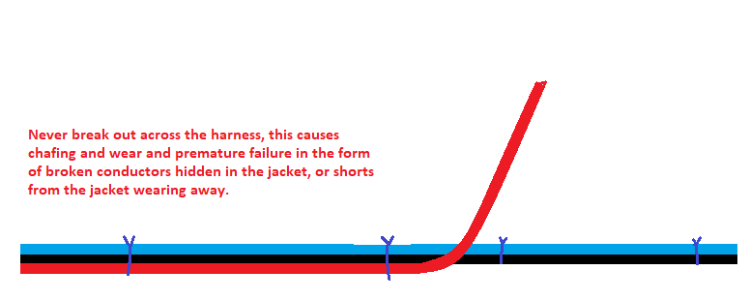
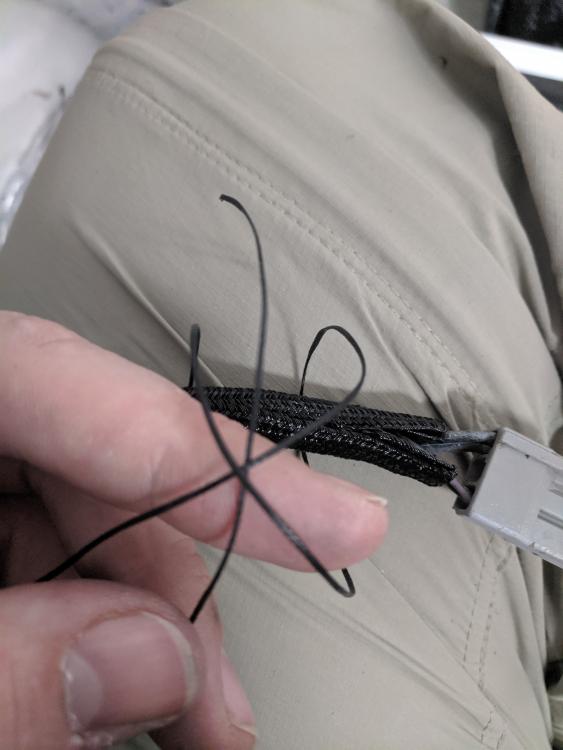
After I was satisfied with the condion of the harness they were put back on with lacing tie and tape. The breakout for the seat belt wire was laced at 0.5in on all 3 legs. High temp expando sleeving replaced the tape, properly spliced at each Branch for a smooth transition and finished with more lacing tie. She is ready to go back in.
Even though it's a hidden wire I know it's now bullet proof. Where it isn't hidden in the cab it will look more presentable as I do not have B pillar covers.
OK so plugs, corrosion sealing and waterproofing. I used a combination of the pricier OEM plugs and the cheap 95 cent plugs from LMC.
Lesson learned the cheap 95 cent plugs worked fine, even bigger lesson learned you can get them super cheap in kits on Amazon if you search body plugs and probably get 50 for what I paid for a handful.
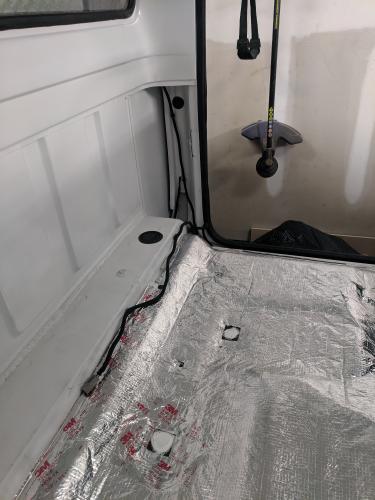
We don't want our newly installed carpet pad to become a sponge like the last one due to weeping water etc. NO MORE RUST.
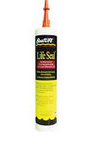
Enter the poly sulfide sealant. Poly sulfide sealant is used in corrosion proofing, fuel tank sealing, and water proofing in military, aviation and marine applications. It creates a strong seal resistant to chemicals and water that can be removed if necessary with some scraper work and solvents to soften it. It is used pretty much on every body join, every bolt installation and electrical seal like ground studs on aircraft (Yea these commercial planes have a 50 year warranty for a reason... take that 36month 60,000k miles). I found Boat Life poly sulfide sealant on Amazon for $22 a tube. Pricey but not as pricey as a sem kit of PR-1776 or PR-1826 like used commercially. Those range from $30-$130 respectively for a 6 oz tube. It also cures in 2 hours. So there is no "leftovers" if you don't use that sem kit. Boat life makes more than one sealant and it looks the same, if your going polysulfide, make sure to read the fine print.
There are a few application methods referring to placement of the seal.
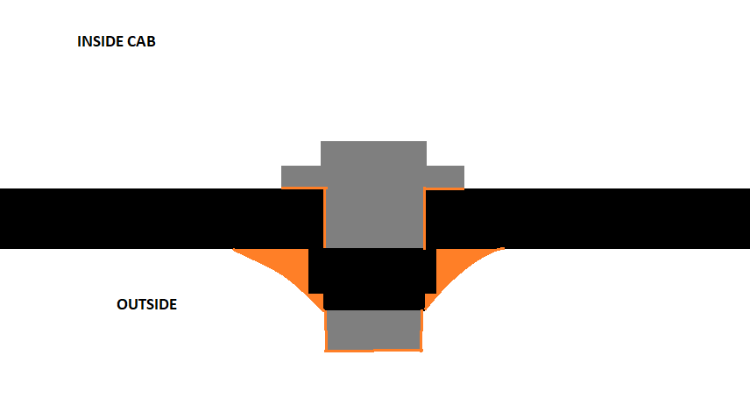
Fay sealing is where you apply sealant between the two mating sides of a joint. In this case the underside of the plug and the floor of the cab. When you do that excess will squeeze out and you can smooth it out around the periphery. You don't need a lot of sealant, imagine if you bolted two pieces of metal together, how much space is there? More sealant =more squeeze out = more mess. Granted these plugs are not fastened so it wont be as bad. If my door hinges were fay sealed, there would be zero rust issues under them.
Here is a rough sketch of a fay seal. Orange being the sealant, black the structure and grey the plug not fully installed.
Fillet sealing is where you go around the periphery with seal and fair to a fillet typically a 45 degree angle. Think of your typical caulking job. When you apply a bead here push the bead do not pull the bead, this pushes out air pockets. i shudder when I see people pull or draw caulk towards the gun, that is how you get corrosion and bad seals.
I used a combination of both, then encapsulated the plug completely by smoothing it over the top. This method pushes some sealant into the hole (why I mentioned earlier that I don't like gasket maker as it would put contamination into your engine etc), gives me a fay seal, then the squeeze out can be faired around the edge into a filet. This offers the maximum protection and bonding. A gloved finger works fine to do this. I did not have my sealing spoons/tools, or this would look a lot smoother and factory.
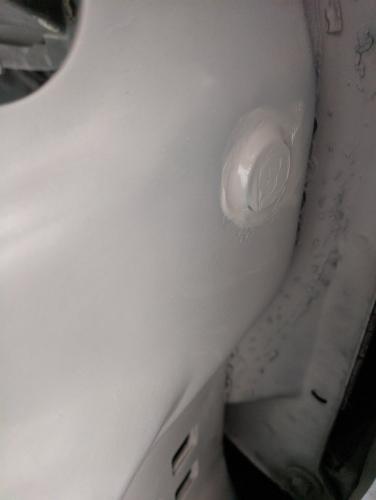
Final seal surfaces will be like this.
Actual plug on truck.
A similar method will be used on the bolts and screws, its called a wet install where you brush some seal on the threads so it seals the threads, nutplate, hole and under the head of the fastener.
When all is said and done it will look like such. Grey is the bolt, orange seal, black structure/nutplate.
I use lacing tie in place of zip ties, zip ties can slide, cut or they become brittle over time. The lacing tie is used to dress a bundle of wire, secure a break out, attach sleeving etc in place of tape or zip ties.
I also prefer silicone tape to traditional adhesive backed electrical tape. In the picture of my alternator harness that yellow run is yellow silicone. You can use silicone tape for build up under clamps or ties etc, better for sealing and protecting.
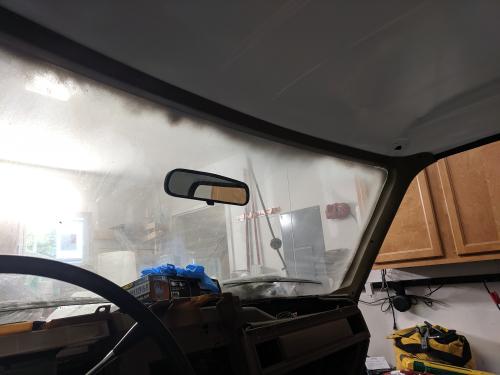
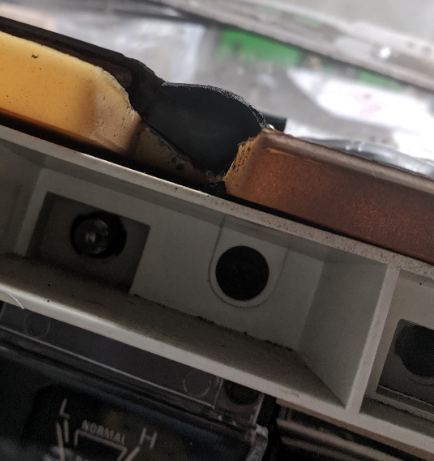
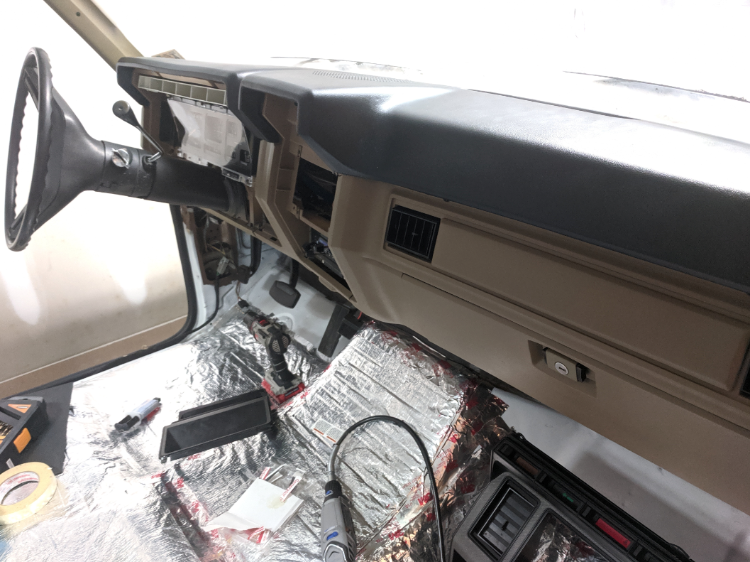
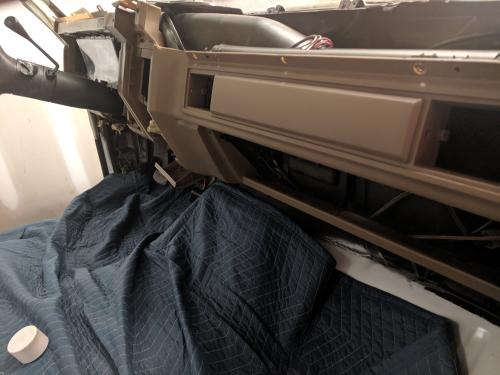
The dash is officially repainted.
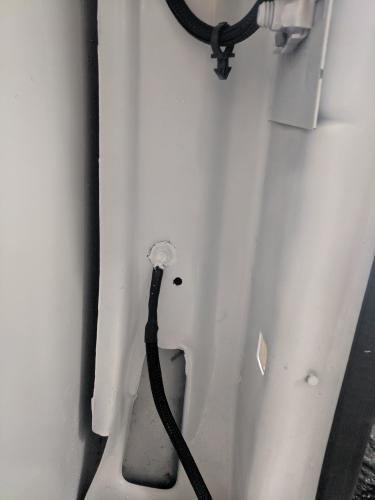
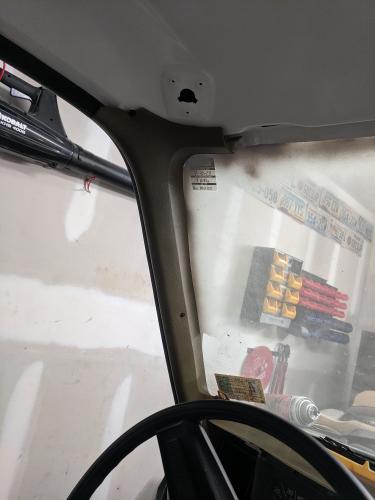
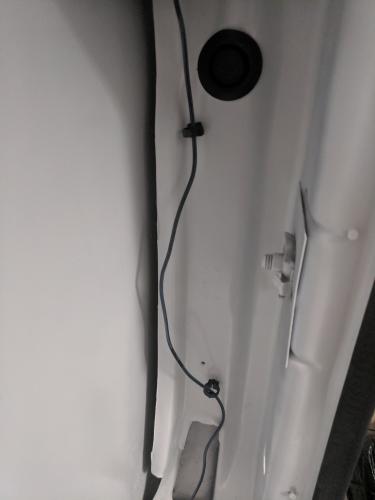
The wire coming down from the dome light is a bit unsightly.
I'm going to install sleeve on this run up to the loom in the ceiling.
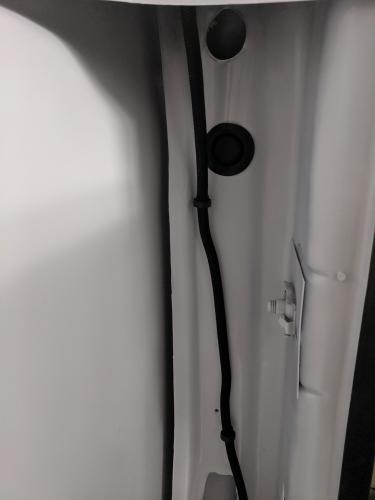
After:
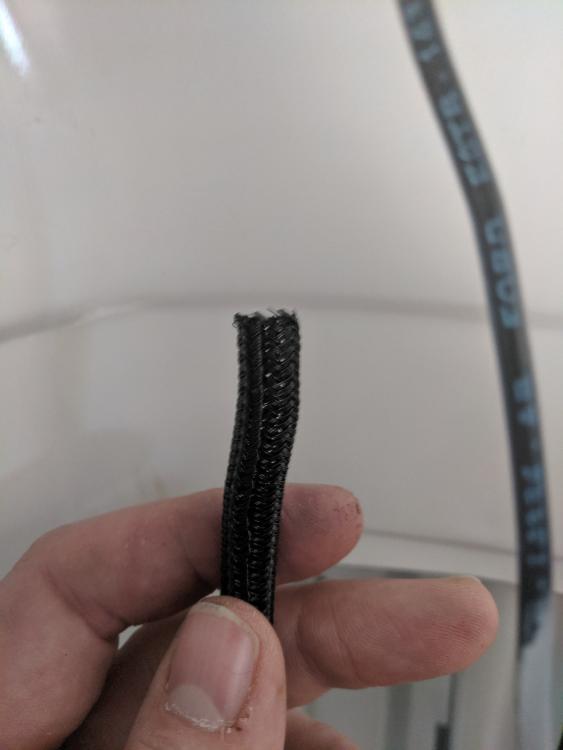
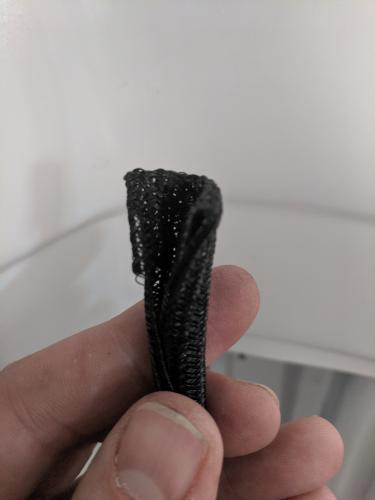
Start with a clean cut, these can be melted together but the next step really makes that unnecessary.
Fold it over inside. This creates a nice smooth round over that will not come unbraided and will not scratch anything.
The knot of choice is a clove hitch finished off with a square knot. I like putting two ties on a fold over.
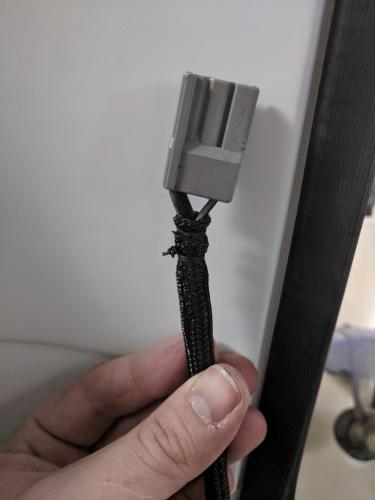
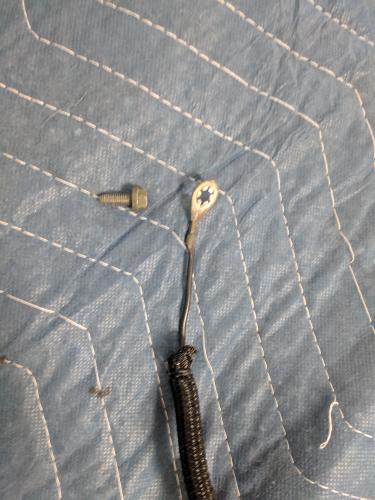
While the coats on the dash were drying I worked on harness from the other day and got her installed. Still needs a little paint touch up around the ground stud.
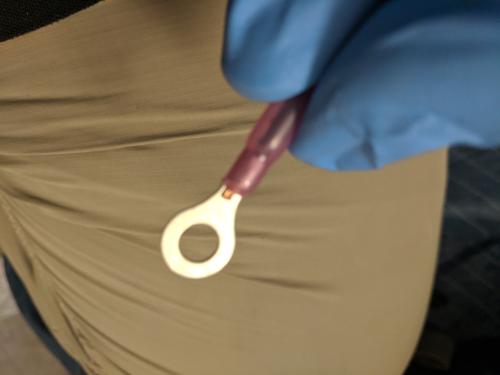
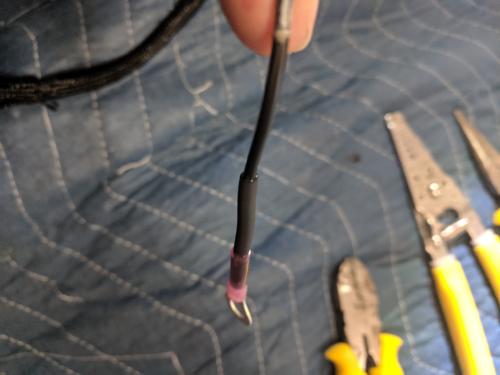
I was looking at the terminal and the corrosion it had and decided I will replace it and give it a nice strain relief and make the sleeve transition look better in the process. This type of terminal is made to bite into the metal for contact and also acts like a lock washer to keep the screw from backing out. I don't have those so I did a wet install and sealed the terminal to the truck. It looks better when done right and also will keep the terminal from corroding.
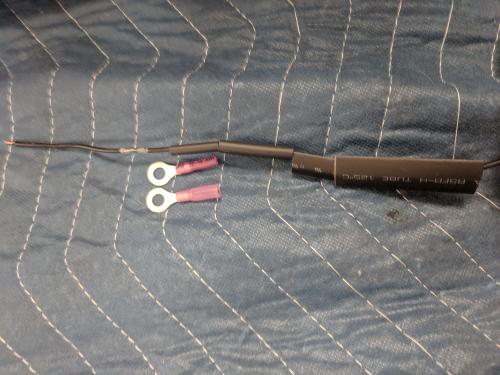
As the new terminal already has built in enviromental shrink and the wire is significantly thinner than the sleeve we need to build up the jacket with layers of heat shrink. When doing a heat shrink build up strain relief the lowest layer should extend father than the proceeding layers.
I am using double walked shrink for this part it will seal the wire and provide more strength than normal shrink. Also because the terminal needs to sit flush on the B pillar I can trim the underside of double wall shrink without it falling apart.
You can tell double wall shrink by it not being flat and it has a shiny layer inside. This is the adhesive/sealer.
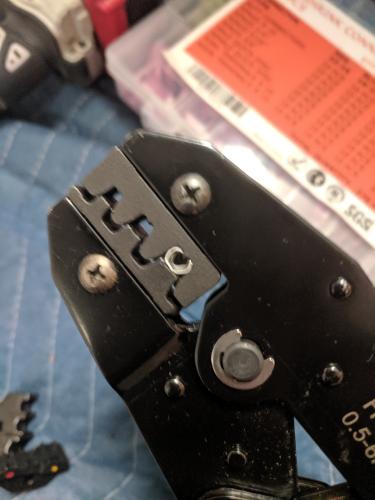
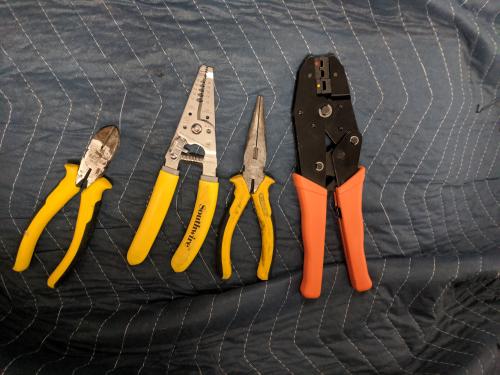
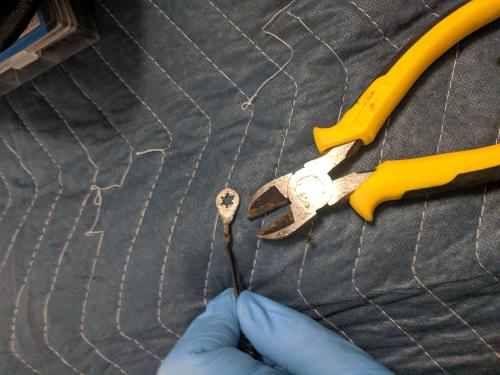
Before I go further here are the hand tools I broke out of the kit for this. Only ONE of these is used for crimping things onto wires. Hint it's not yellow.
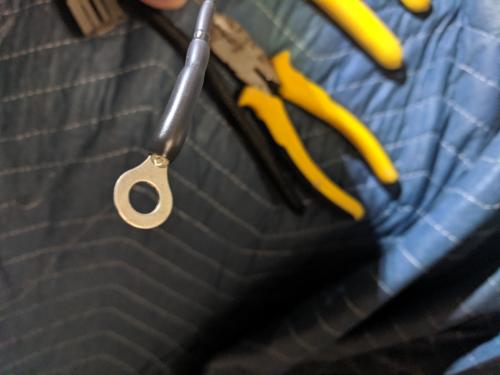
Whack off the old terminal with some alternative lifestyle pliers. p
Strip the wire and check for corrosion, broken and mising strands. If necessary trim back again.
The strip dimension should sit in the crimp area of the terminal and should be flush to both ends. It is ok to let it protrude about 0.1 inch but that's about it. The jacket of the wire should butt up against the metal crimp portion under the sleeve. This is an example of too much protrusion.
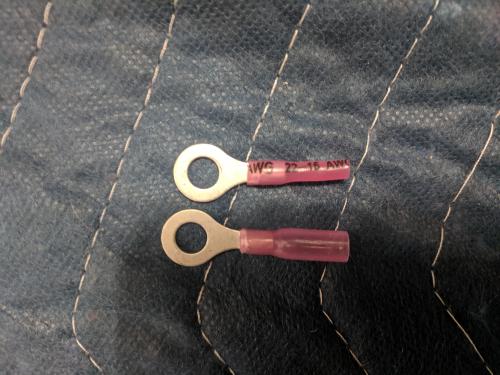
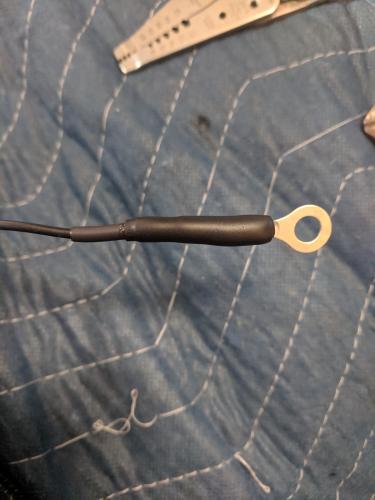
We're going to build up the layers as shown. We need to make sure we put all of this on the wire in reverse order because after the terminal is on it won't fit. If this terminal was not already insulated either double wall shrink the first layer would go from the terminal end back to its current end point
**Tip**. You may not know what your final diameter is on your shrink and thus have a hard time picking build up layers. Shrink one terminal of each size and leave it with your terminal kit. This way you have a reference on hand every time you open the box.
Remember I said only one of those tools was for crimping things on wires. Select the correct dies and have at it. You will see it crimps the terminal and leaves a specific mark on the insulation, a single dot. Some dies will imprint the gauge especially in larger wires for example an "8" for 8awg.
On the topic of proper tools a BIC lighter is not the per tool for heat shrink and more often than not cause more harm then good The melt temp on that braid is about 470 degrees. The BIC-1000 will destroy it.
Use a heat gun at just enough temp to melt what you need. Don't set it to max off the bat as some heat guns can get up to 1100 degrees. If you have money to waste get an IR gun... Those things are champs.
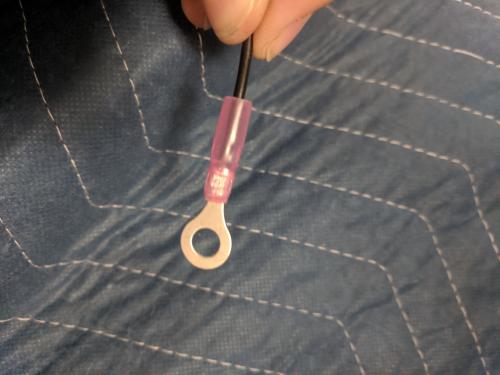
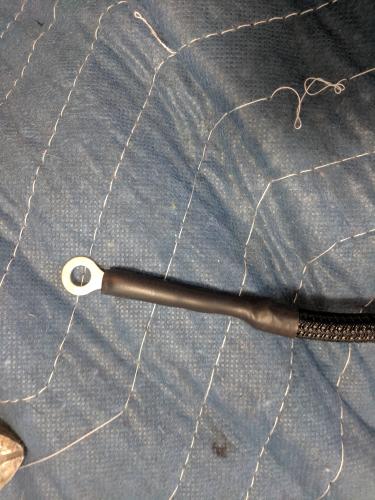
On the next layers of shrink you can see the sealer coming out, this is what you want. That wire is now completely encased, no water going there.
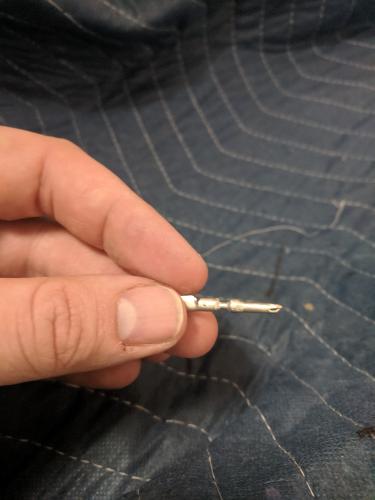
The Ford connectors use "wedgelock" pins. Clips and Fasteners sells these in boxes of 25.
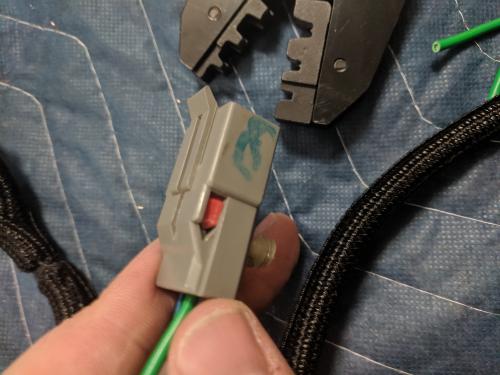
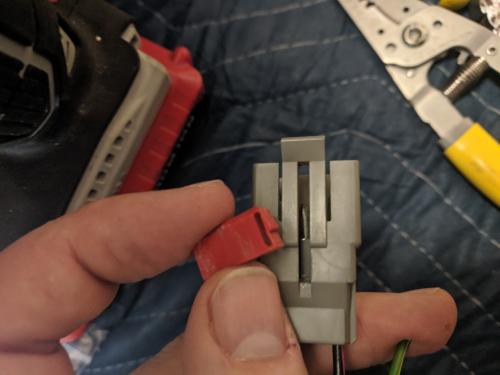
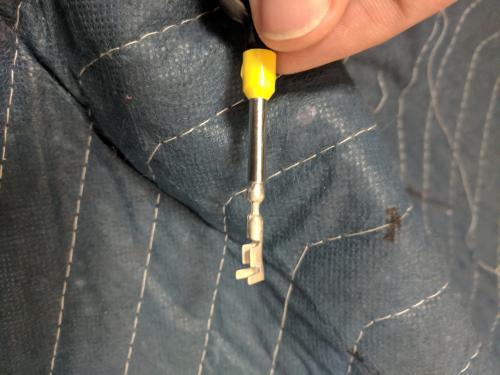
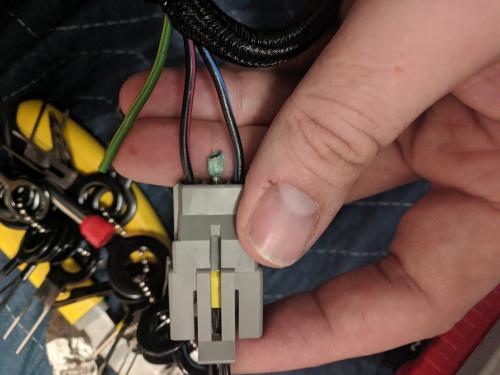
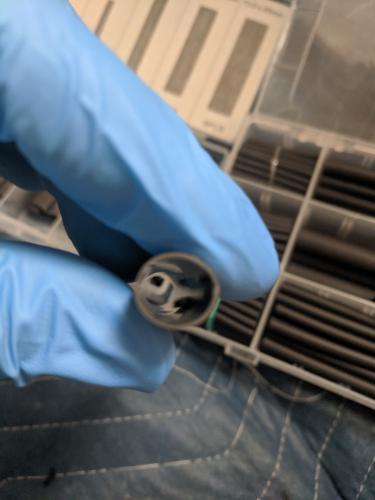
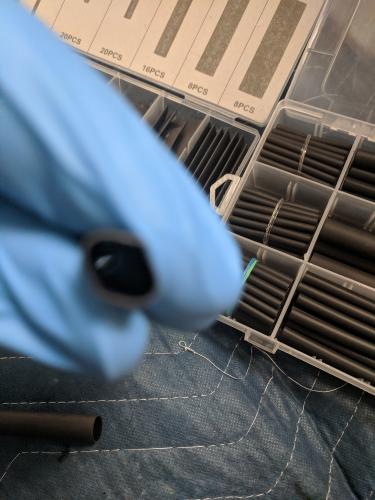
There is a gray lock tab that clicks over a bulge in the pin then a red "wedge" that locks over that. To remove this red wedge you need to depress the tab on the side of the connector while pushing it out from the top with a small thin flat head screwdriver. To remove the pin you need a depin in tool to release the lock tab without breaking it
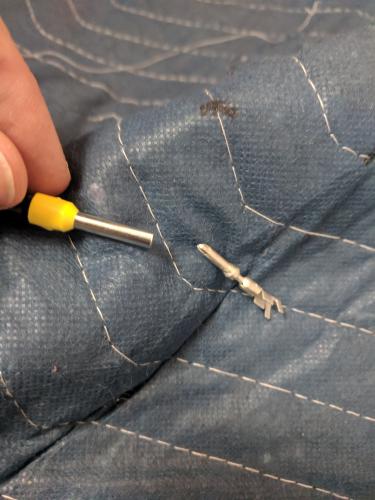
The removal tool fits over the pin and releases the lock
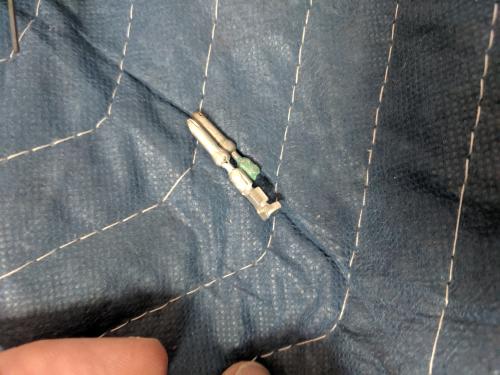
You can see how corroded this pin was. The tab holding the wire corroded completely off leaving the pin/cavity behind. This got down into the wire too I ended up cutting off a few inches. I had some 16awg laying around to splice in. I think the truck is running 18awg but it will do the job.
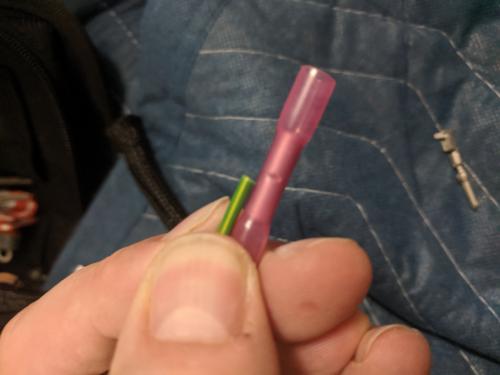
When using a but splice work it just like a terminal. The strip length is from the inspection slot/stop in the middle to the end of the metal. When you put the wire into the splice the jacket should be butted up against the metal and the wire visible in that slot.
Onto the pin. We need to change out our crimp dies. these are open cavity contacts and these dies are designed to curve the "wings" of the pin aka insulation grip, back into the jacket of the wire. I will crimp this twice once in the large cavity then once in the middle cavity. You can lube the dies with silicone dry lube or IPA. The first set of "wings" (smaller set) is intended to grab bare metal conductor, the second pair grabs the jacket. It's hard to see so I crimped a piece of scrap in without the jacket removed so you could see what happens. I know some guys also like to put solder into the cavity and use the first set of wings as a second insulation grip.(I'll add annotated picture later).
You can put heat shrink over this as well. I may pull all the pins later and put double wall shrink on them to keep corrosion out.
I also recommend using dielectric grease in these connectors to keep corrosion down and well.
The truck was painted and we have that flat terminal so we need to get to bare metal. The cleaned area needs to be slightly bigger than the terminal so we know we have no paint under it.
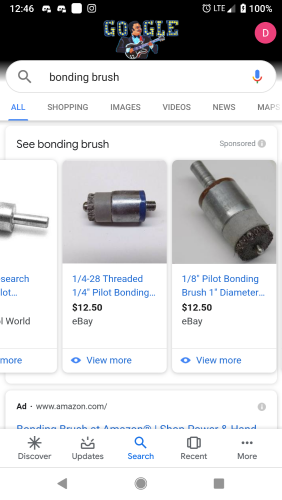
If you have used them before or are feeling the need for a new tool you can buy a piloted bonding brush. If you have never used one you could gall the metal and also this being a tapped hole you could mess up the hole
So use a combination of red and grey scotch brite or Coarse and 0000 steel wool. I would avoid sand paper,it is not pliable enough.
After the metal was clean, gloves on and cleaned it and the terminal with IPA.
I didn't have my sealing spoons so I improvised a sub par one with a cut ziptie.
Polysulfide sealant was applied to the threads.and pushed through the terminal and into the structure. As the screw turns in the sealants beads up on the structure. It's a super thin amount needed. This seal then goes between the structure and the terminal.
What!?!
Yes I put seal between the bonding surfaces...
But why!
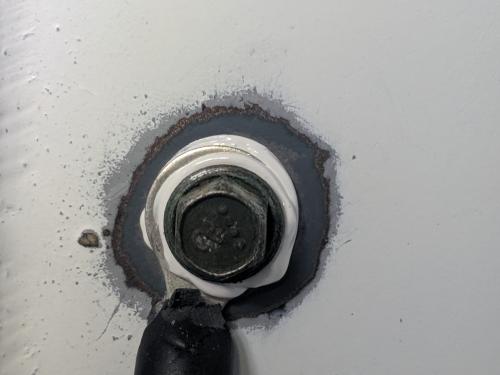
Corrosion. What happens when you tighten down the screw the poly sulfide will squeeze out around the edges. It will fill any tiny voids and dimples in the metal but where the metal is smooth it makes contact. This is why galling is bad. And we step up from coarse to smooth removal media(scotchbrite). You can see here the squeeze out from under the terminal and under the head of the fastener.
I failed to mention I used a razor to trim the heat shrink so it would sit flush.
This method now keeps water or moisture working up the threads or nutplate under the terminal, and from the head side as well.
Now to check continuity. To measure the actual resistance value of this you would need a special unit capable of measuring milliohms. The bond will be that good.
I don't have one at home so I am just using a digital multi meter to do a basic check in the ohms range.
But how?
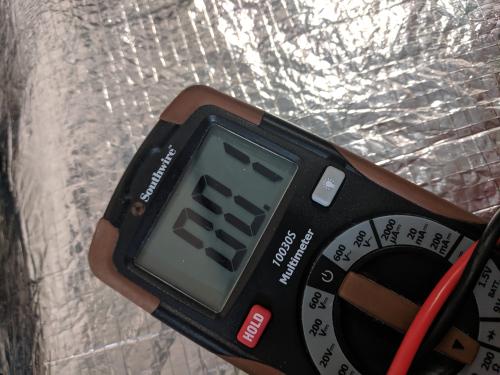
Well after the meter is on touch the ends together. In my case I get 0.1 ohms. This is the natural resistance of the leads. If my bond is less than this it will read 0.1ohms or 100 milliohms. If it reads higher, we got a problem. In actuality. I expect this bond to be in the 0.05 - 0.1ish milliohm range.
Probe the terminal to nearby bare metal... Should still have some exposed. I got 0.1 so I know I've got solid connection with resistance under the range of my meter.
You could smooth the squeeze out around the periphery and be done. I decided to encapsulate, because why not. It's a little rough, but I used a ziptie, not a sealing spoon. Will touch up the paint later. This sealant can or painted over as well.
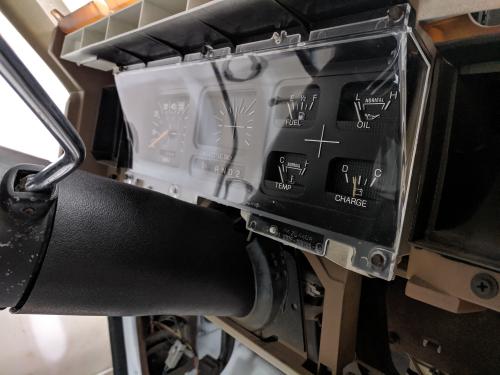
OK so last night started getting trim back into place.
Got the glove box back in and aligned. If you are doing this just keep all the hinge screws barely loose so you can adjust the gaps then tighten down.
Replaced the old crumbling gauge assembly lens with a new one. And despite using a zip lock managed to loose one of the screws to the ether. It must have gotten caught on my cloths and lost when I got out of the truck. I cannot seem to find replacements for these, may need to get creative here.
Steering column bezel is back in as well.
I did take note that there are some cracks forming in the corners of the dash and the support piece the screw goes through is cracked off. This is the same for my gauge cluster bezel and radio bezel. I ordered some 1/16 and 1/8 thick abs plastic sheets. I am going to try to cut supports and epoxy weld this into place. If this does not work I am going to try Kydex. I have never used kydex but I hear it is easy to work with, strong, and molds easy with a heat gun.
This is my second time writing this as my phone refreshed as I as adding pictures. So typing this on the computer and adding pictures as an edit later.
The shop lights are very bright so it made these pictures come out dark. Does not do the new look any justice. I have a calculus test today, if I get through that quickly I think I will go ahead and put the dash pad back in today. I ordered a box of the free spinning washer head screws but I should have enough to get this guy started and on there.
I accidentally ordered the wrong carpet (again) somehow ended up with extended cab, I double checked my end so I think something went sideways. Need to wait for Rock Auto to accept the return from fedex and issue store credit before i get replacement.... third time is a charm right?
My heater/fan/ac control unit could use some love. The metal on the sliders is rusty, and it looks like the red for heat is kinda faded. I was looking at the face plate and I think i can get it off but I am worried I would break it or cause more harm. If I could get it off I could potentially restore those colors and get access to clean up that metal. Has anyone done this? anyone have the PN of that unit? I may make a separate post on that.
OK so Sunday was the first day off of work I have had in a couple weeks and I got some work done.
The ABS sheets came in Saturday I ended up using the 1/8 inch thick piece. I wish I had taken pictures of this process but my phone was dead.
OK so how did I do this.
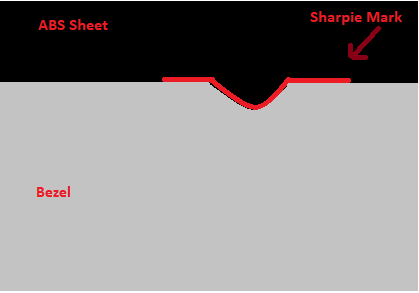
First I laid the dash bezel over the ABS on the smooth side. I traced the damaged section onto the ABS with a sharpie to include the flat portion prior to and after the break.
I have one good screw mount left so I then laid that over the marks on the ABS using the horizontals I drew as guides to line it up correctly.
This left me with a mark like such.
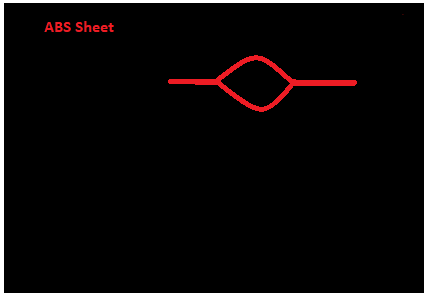
I took my sheet of ABS and cut it on a scroll saw at low rpm to try to minimize melting. It still melted a bit but was able to use a pair of pliers to gently break it loose.
With the rough cut done I resorted to using a razor and a dremel to clean it up. Applied 5ton epoxy, held it in place, turned on some music and waited... and waited.
I was left with something that looks like this:
I profiled the hump down a bit with a dremel. I am letting it cure for 24 hours before attempting to drill the hole out.
a similar process was followed with the dash mount, except in this case I used a micrometer to get the measurements of the damage and just hack sawed out a piece to match the break. After it was dry I then used a dremel to round out the top to match the metal plate it attaches to and drilled out the hole.
Then onto the dash, this is where it really is going to look like it is coming together.
I bought the dash from JBG and by the paper work it is made by dashes direct. I dont remember if the old dash had nut clips on it or not. I hope someone can clarify but I think it did. This dash seems rather thick where the screws go almost like its intended to just be screwed into directly. Can someone verify this, and possibly provide a link/PN for the nut clips?
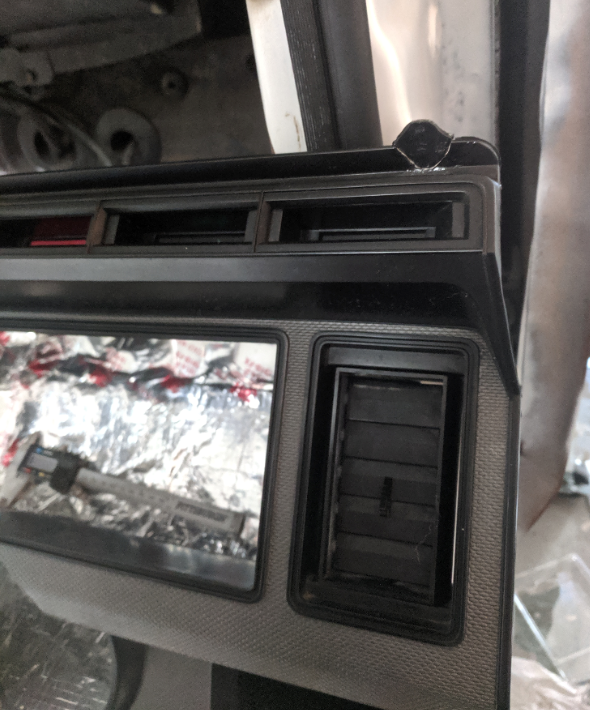
Also there are no holes in the defrost vents for the screws you have to make them yourself. Locating holes here will be tricky
Went ahead and did a dry fit on the dash and to locate holes in the vent side.
On my phone but it looks like you made new tabs to replace the broken ones is that right?
I never though of that as I got a lit, Plastex, That you can build a forum and make them.
Dave ----
 09-08-2019, 05:02 PM


 p
p