


parts question 2
Post Fiend
Joined: Apr 2005
Posts: 5,720
Likes: 5
From: Washington state
If you're going to keep it, Spicer or SKF only from Rockauto if they still have them for the Aero.
Otherwise, if you're going to dump it soon, cheapy Chinese crapolas are fine.
Make sure the inner race surface on the axle shaft is good, no grooves or rough chattered surface. They're only induction surfaced hardened, wear out early, weak cheap design but all the manufs did it.
If the axle race surface is gone, get the offset aka "repair" bearings, they move the bearings in toward the diff, called offset rear wheel bearings. Expensive but cheaper than new axles and bearings. Only if it's not had repair bearings before or the new axle shaft race surface is ok

Thread Starter
|
Freshman User
Joined: Sep 2015
Posts: 48
Likes: 0
If you're going to keep it, Spicer or SKF only from Rockauto if they still have them for the Aero.
Otherwise, if you're going to dump it soon, cheapy Chinese crapolas are fine.
Make sure the inner race surface on the axle shaft is good, no grooves or rough chattered surface. They're only induction surfaced hardened, wear out early, weak cheap design but all the manufs did it.
If the axle race surface is gone, get the offset aka "repair" bearings, they move the bearings in toward the diff, called offset rear wheel bearings. Expensive but cheaper than new axles and bearings. Only if it's not had repair bearings before or the new axle shaft race surface is ok
Otherwise, if you're going to dump it soon, cheapy Chinese crapolas are fine.
Make sure the inner race surface on the axle shaft is good, no grooves or rough chattered surface. They're only induction surfaced hardened, wear out early, weak cheap design but all the manufs did it.
If the axle race surface is gone, get the offset aka "repair" bearings, they move the bearings in toward the diff, called offset rear wheel bearings. Expensive but cheaper than new axles and bearings. Only if it's not had repair bearings before or the new axle shaft race surface is ok
Ordered first bunch of parts last night. Rock auto has a lot of stuff.
T-minus two weeks until new bearings. Fingers crossed she makes it.
FTE Community Team


Joined: Nov 2001
Posts: 1,867
Likes: 275
From: Oak Harbor, Washington

I'm doing this job now on my '97. For about the last year I've had some increased noise from in back, and I suspected an axle bearing. Reading up, I anticipated damaged axles: by the time you hear noise, it's too late to assume the bearing surfaces of the axles are going to be salvageable. I ordered a pair of repair bearings in anticipation (SKF R1563 (Thanks, 96_4wdr) or equivalent, and NO, 1563 is NOT equivalent to R1563); I figured, even if I don't need them, I'll still be covered by using them. I'm glad I did, because both axles are damaged (203k miles on this '97 AWD 7.5").
I'm going to add a couple of pics to Rojo's excellent collection.
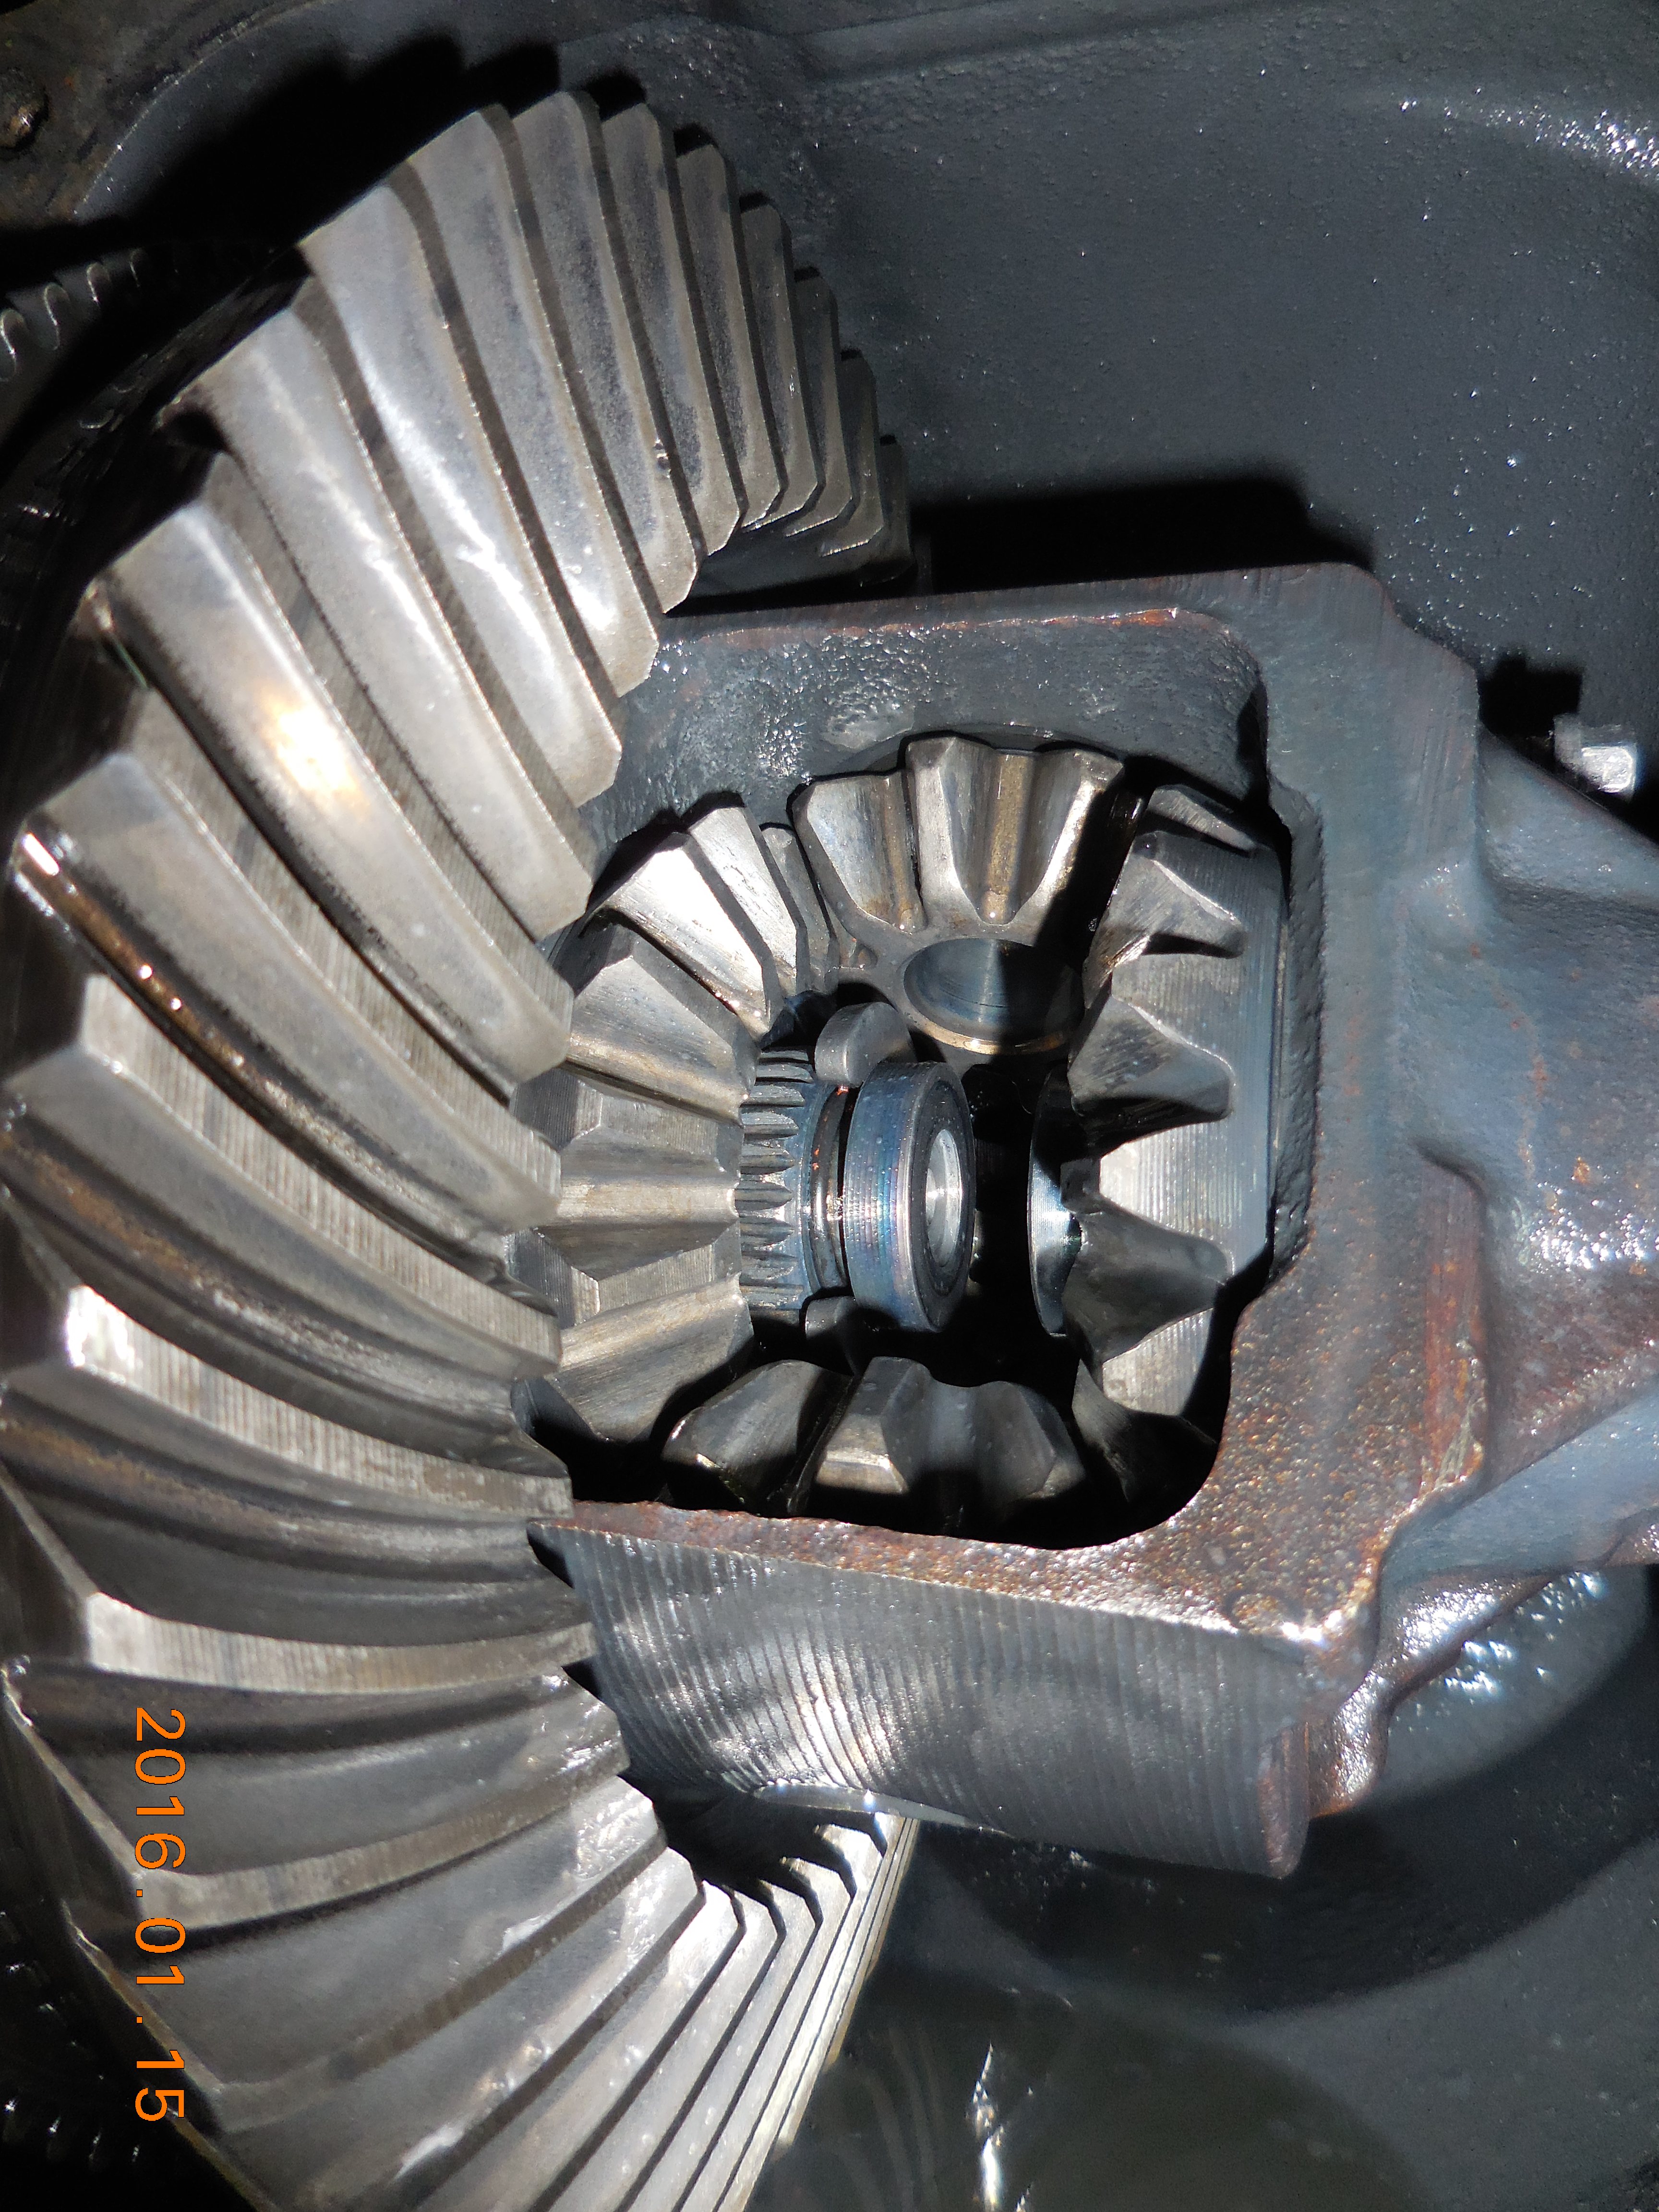
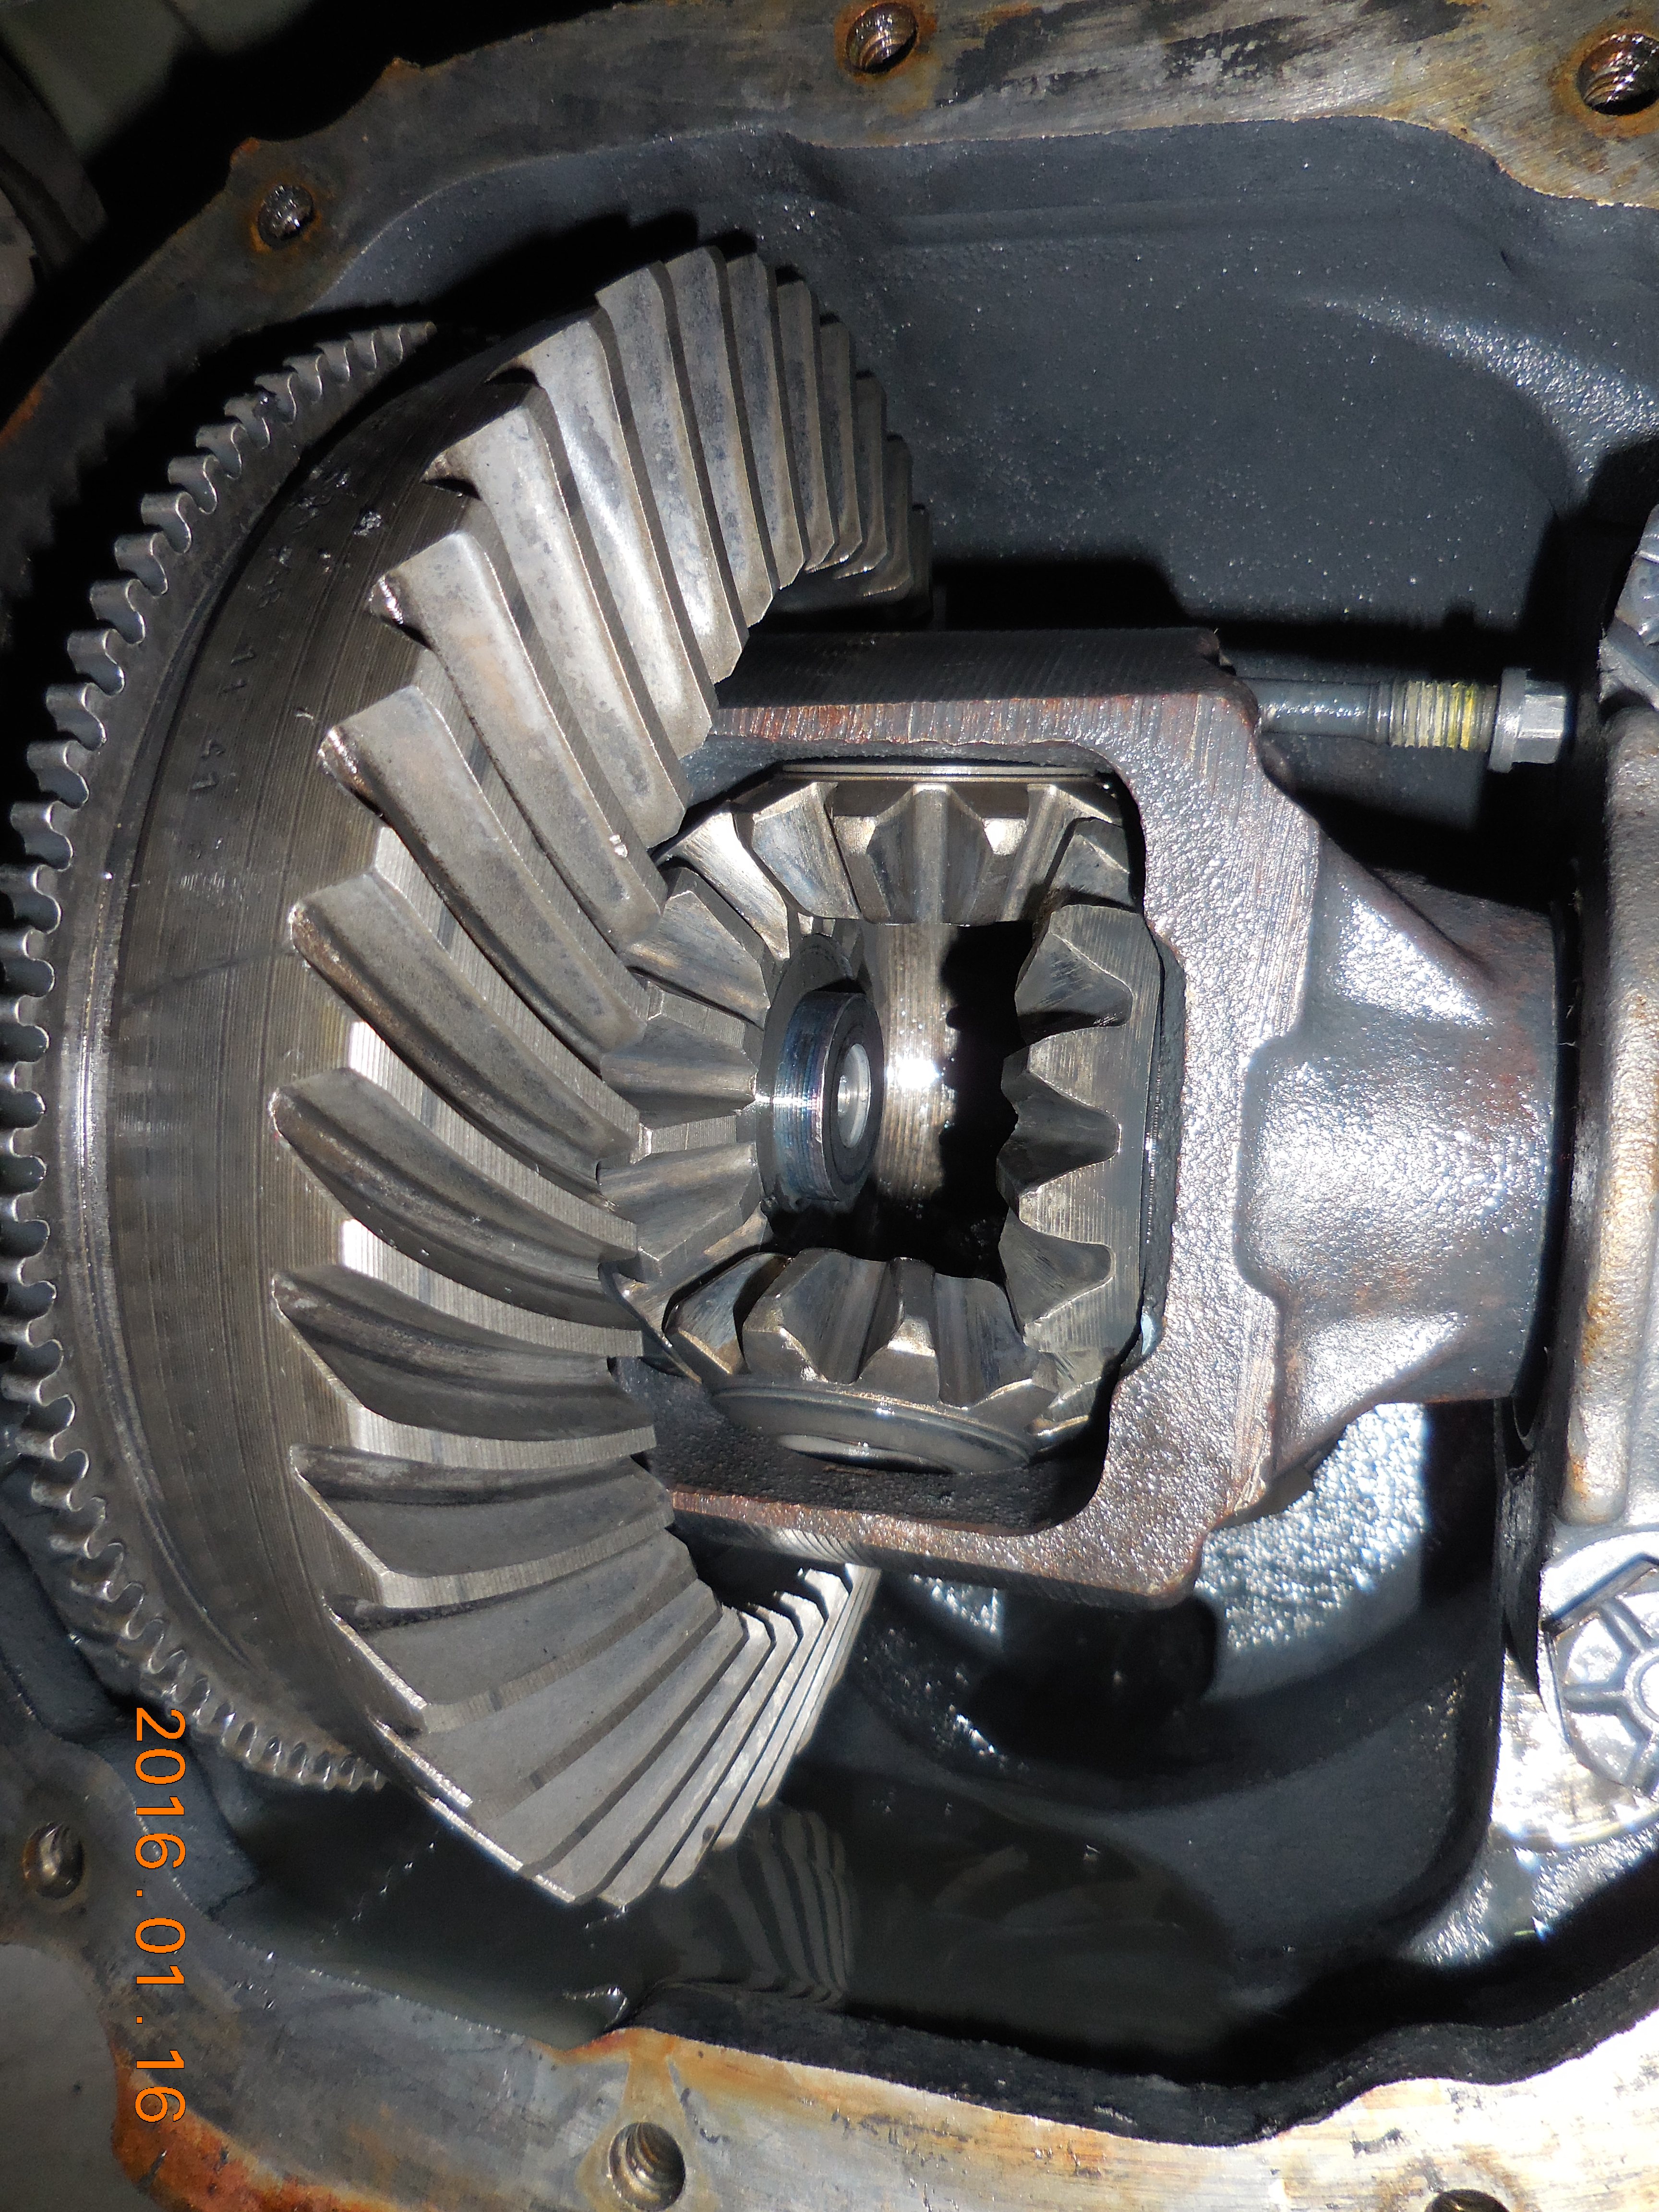
His differential is the Trak-Loc, so it looks a bit different than the open diff. What follow are pics of my non-Trak-Loc diff ("open" differential). In order to be able to rotate the ring gear, and carrier, and hence the axle gears and spider gears to get at the bits you need to access, you have to have the e-brakes off, and the trans in neutral, so block your wheels accordingly.
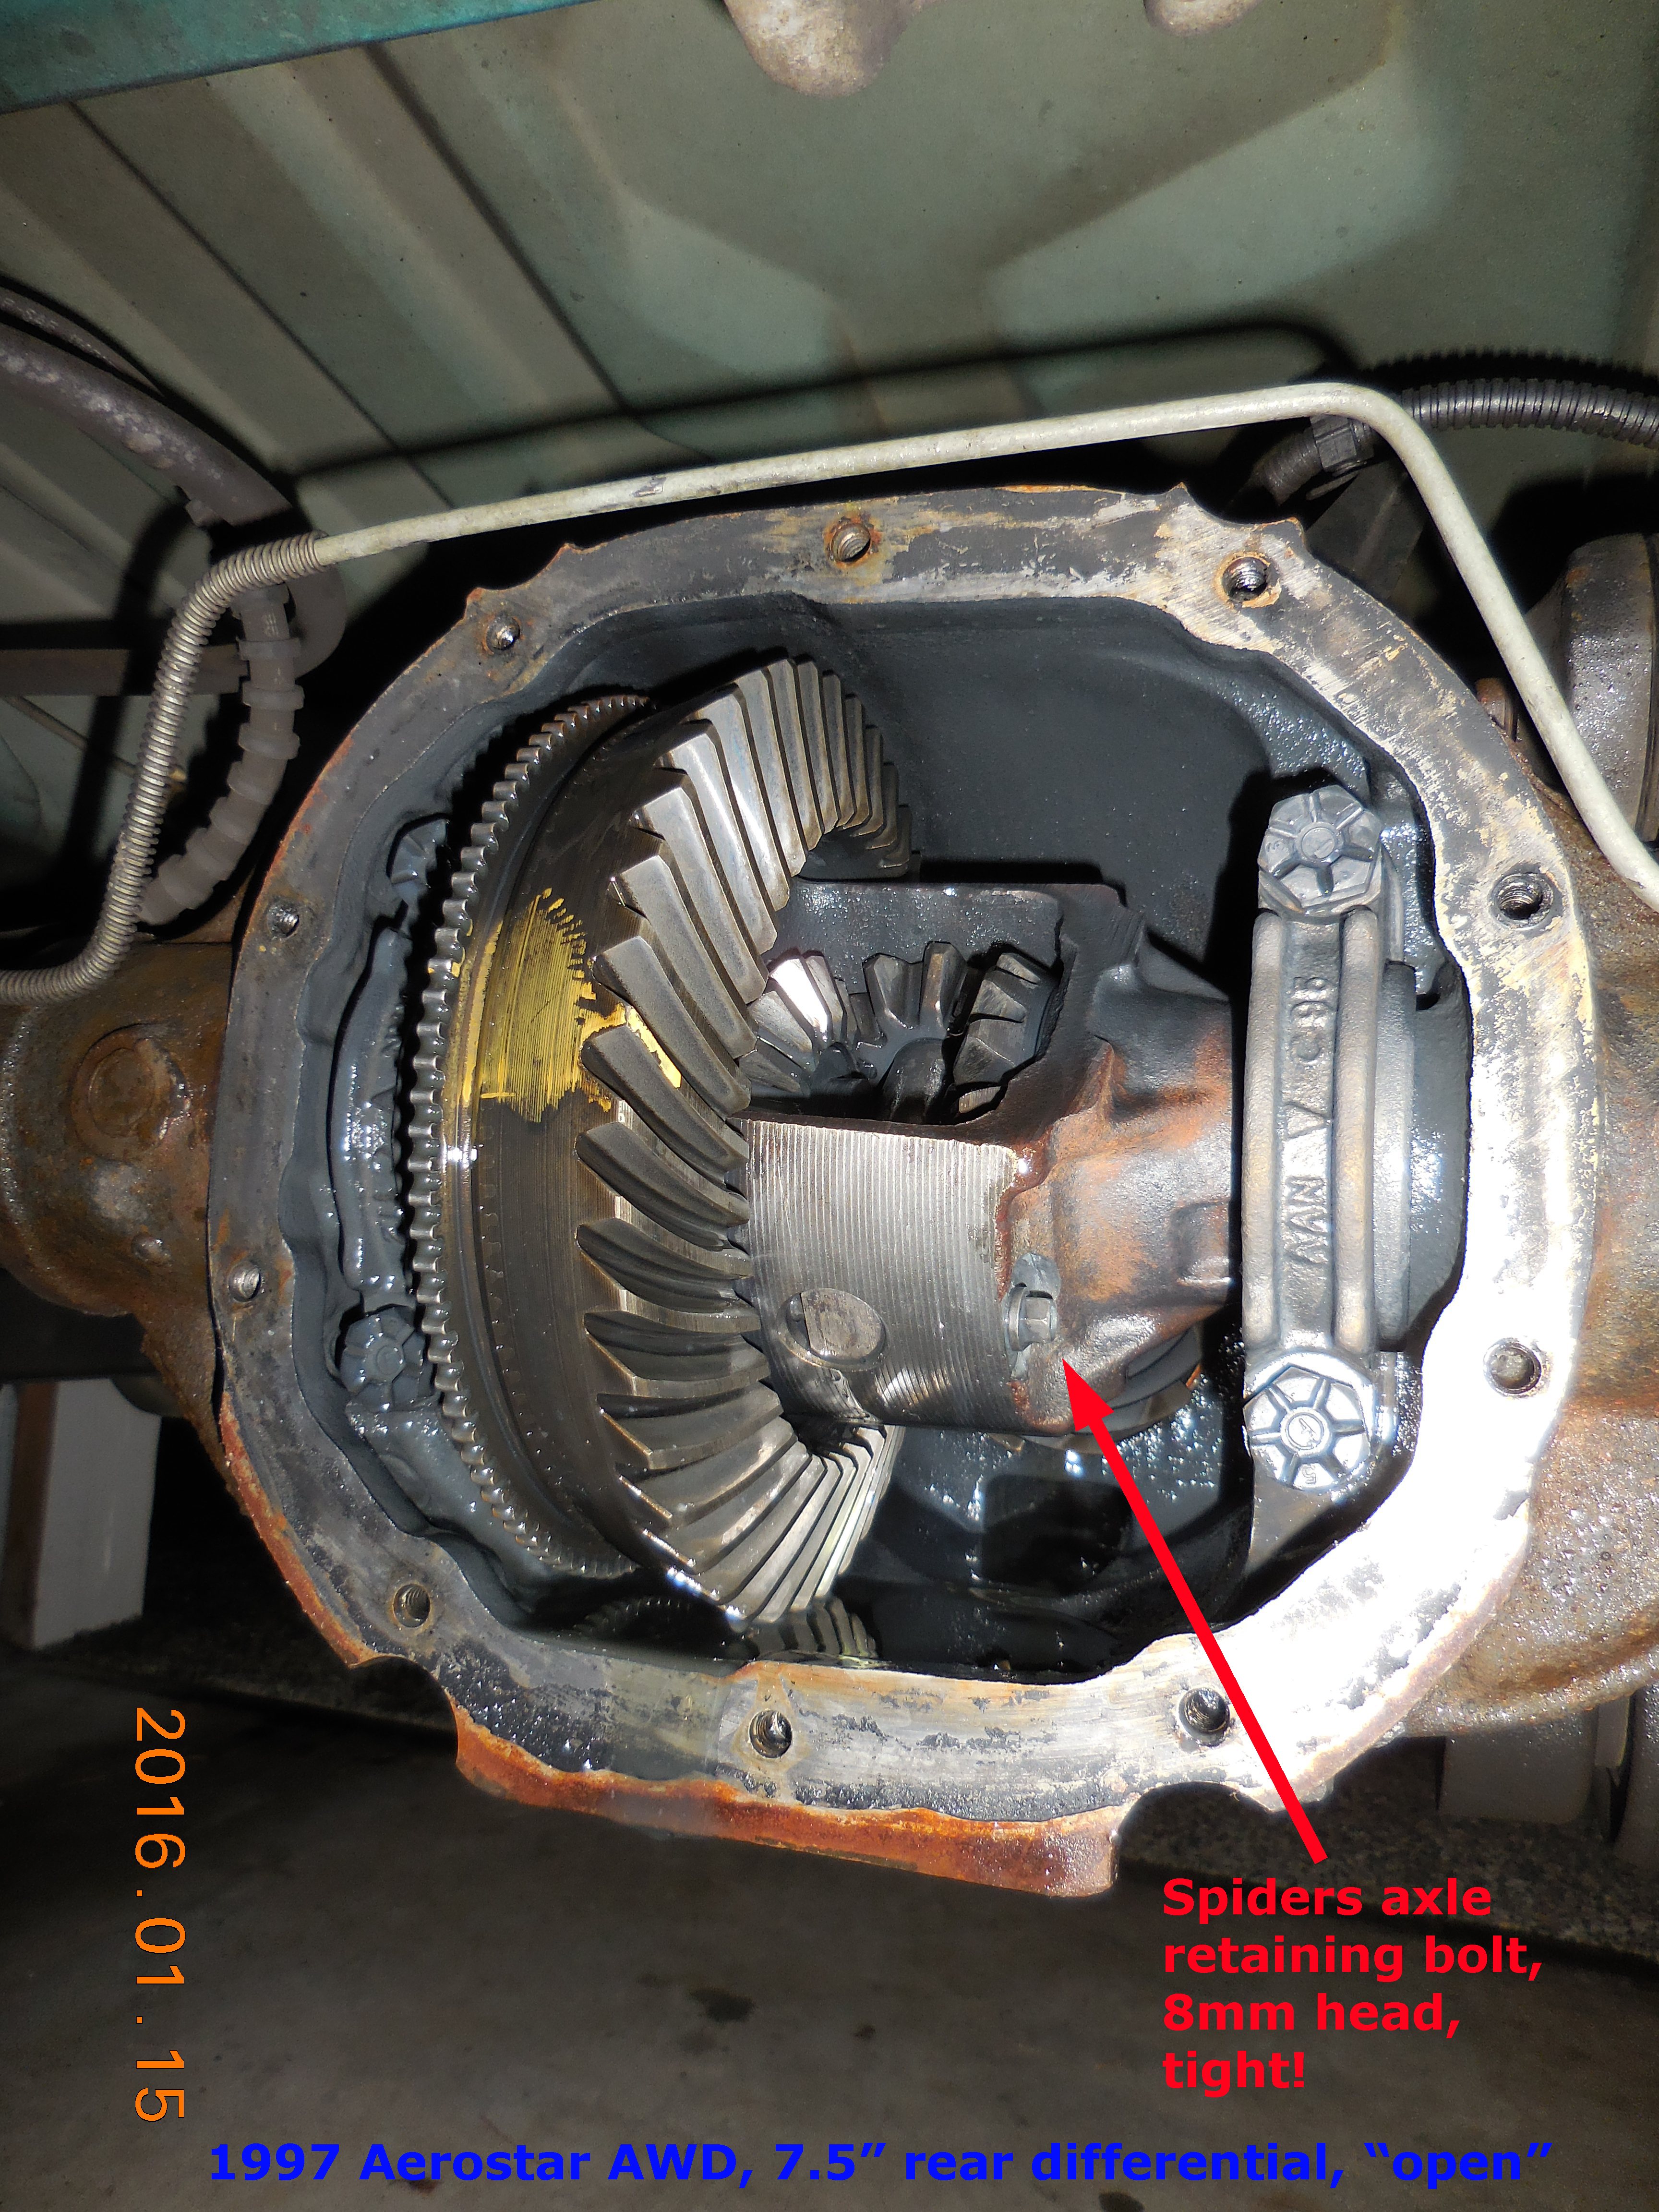
I needed quite a bit of torque to get this bolt loosened. Note the locktite on the threads from the factory:
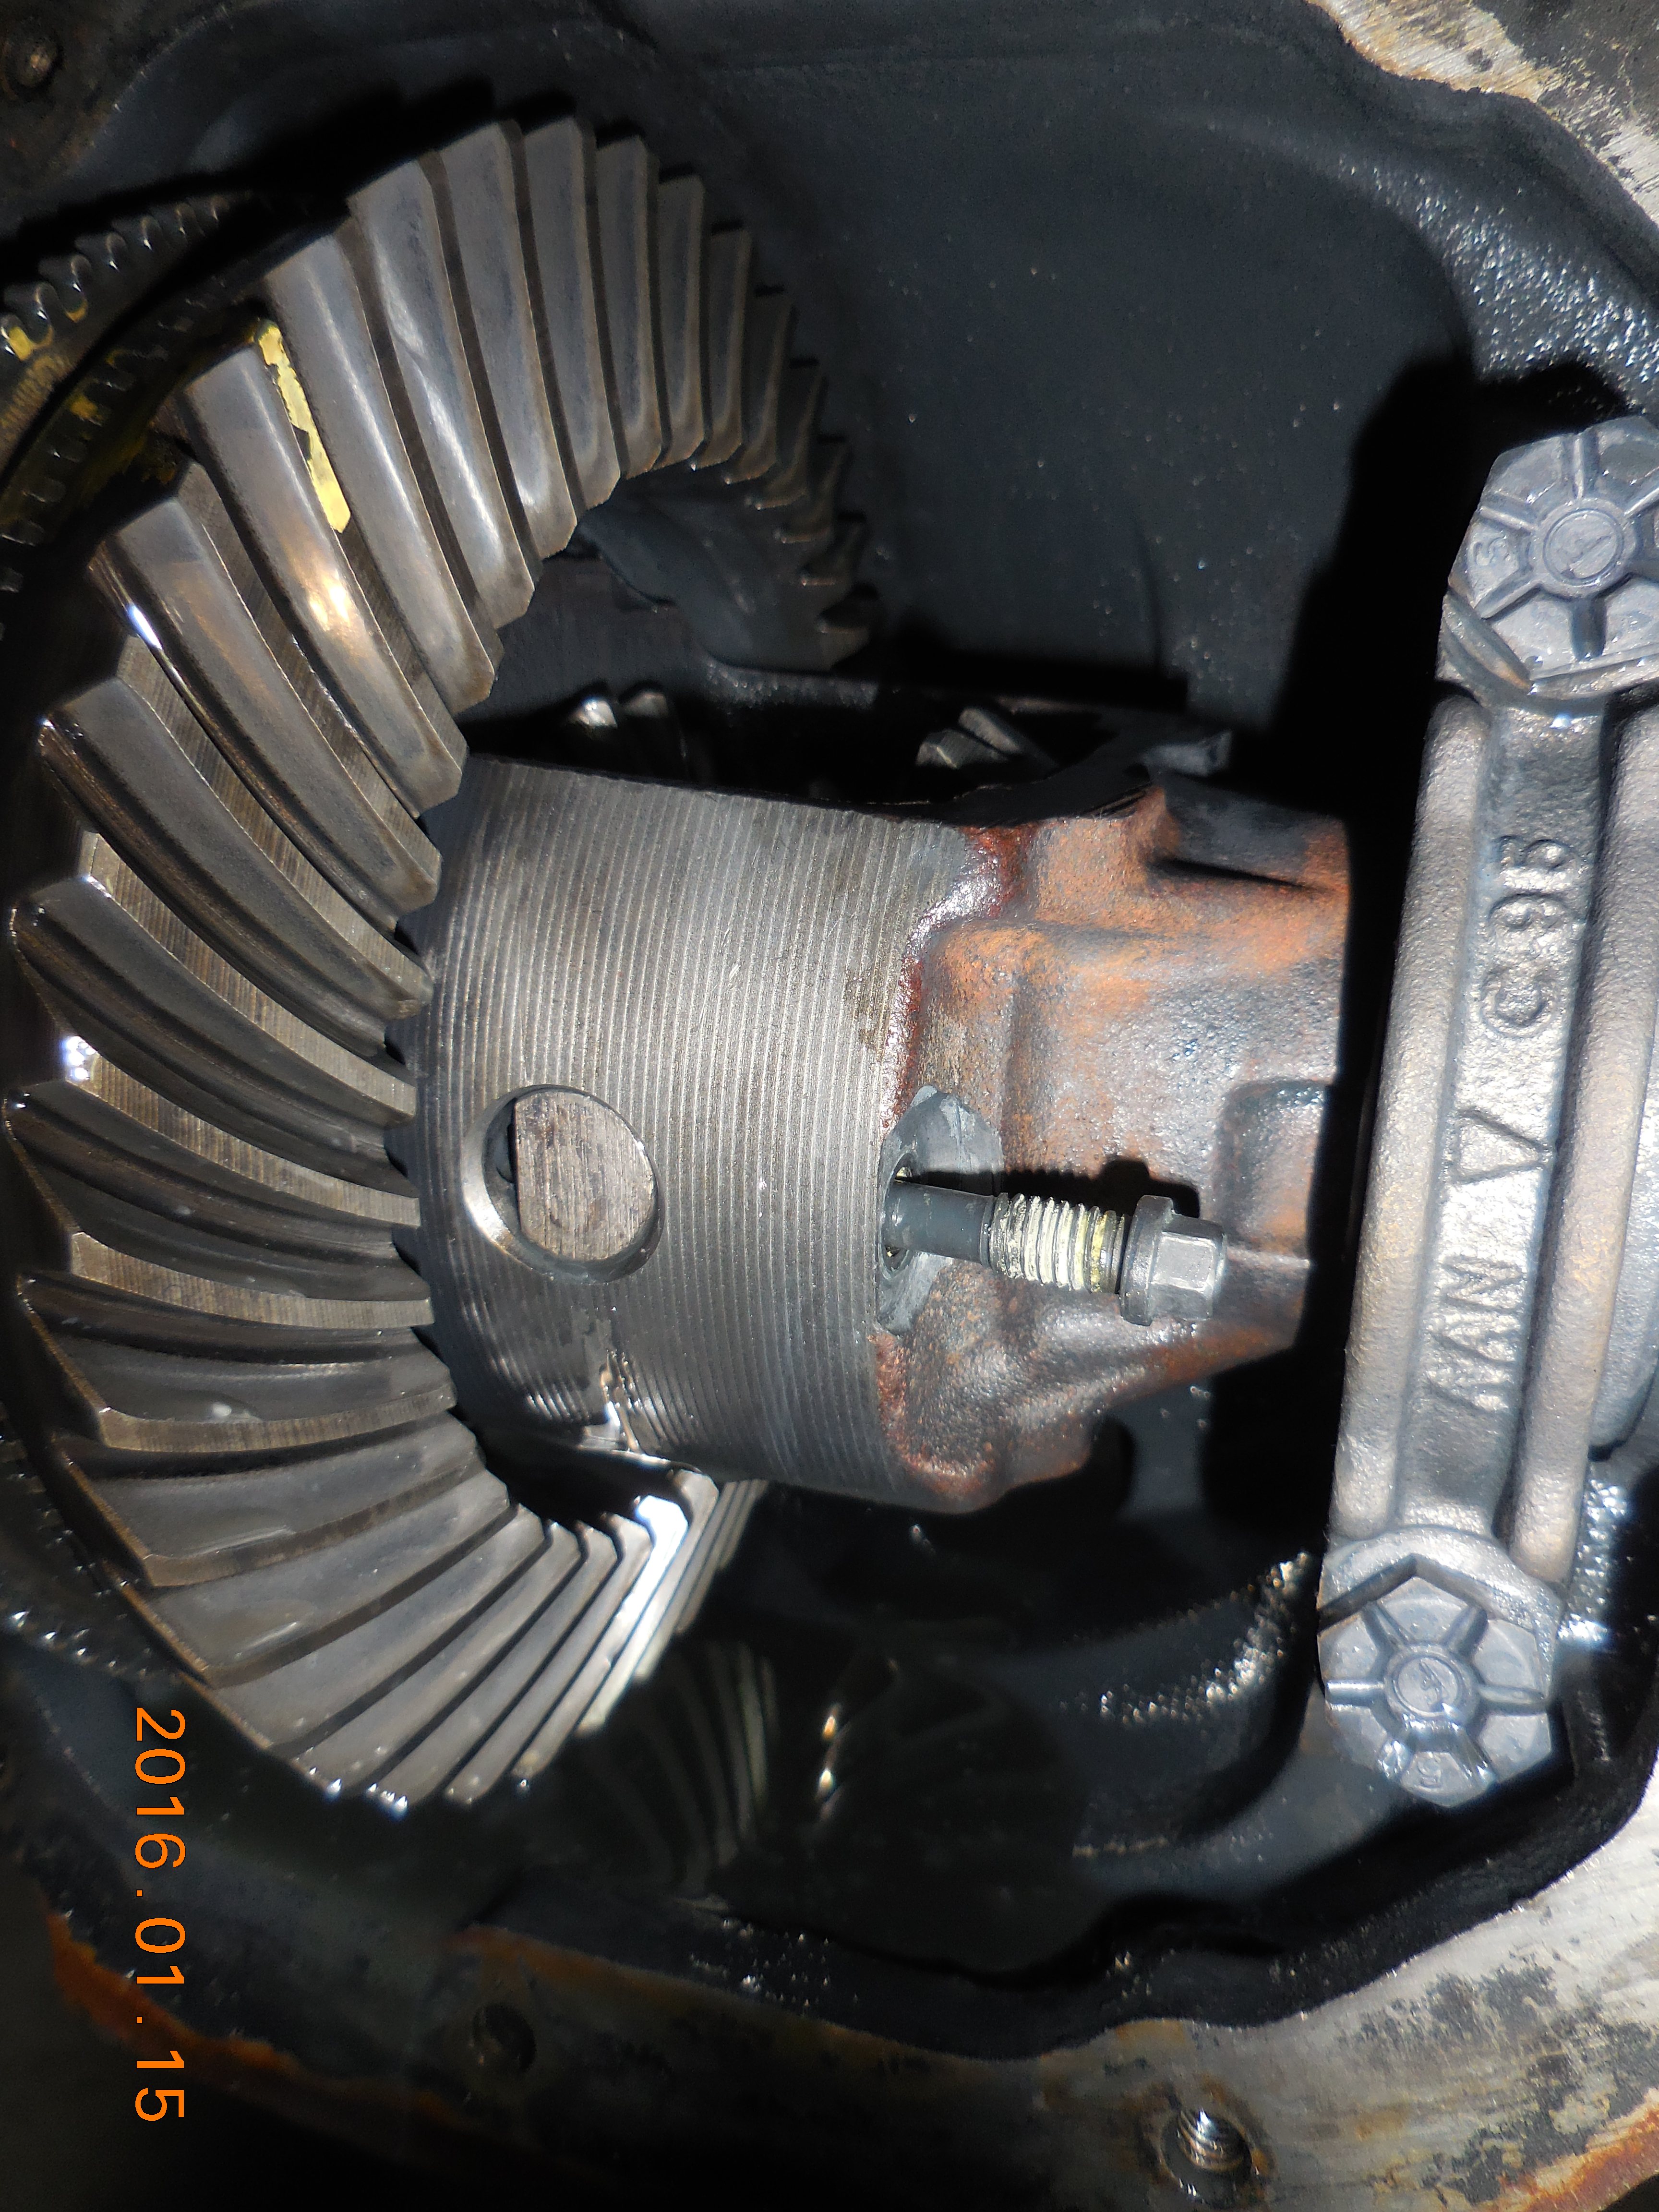
The bolt can't be removed, only slid back a ways, enough to clear the spiders axle. However, the axle won't come out this direction, and it does need to be removed completely. [later edit: looking at this pic again, perhaps I'm wrong: it sure looks like I could have removed that clip!]
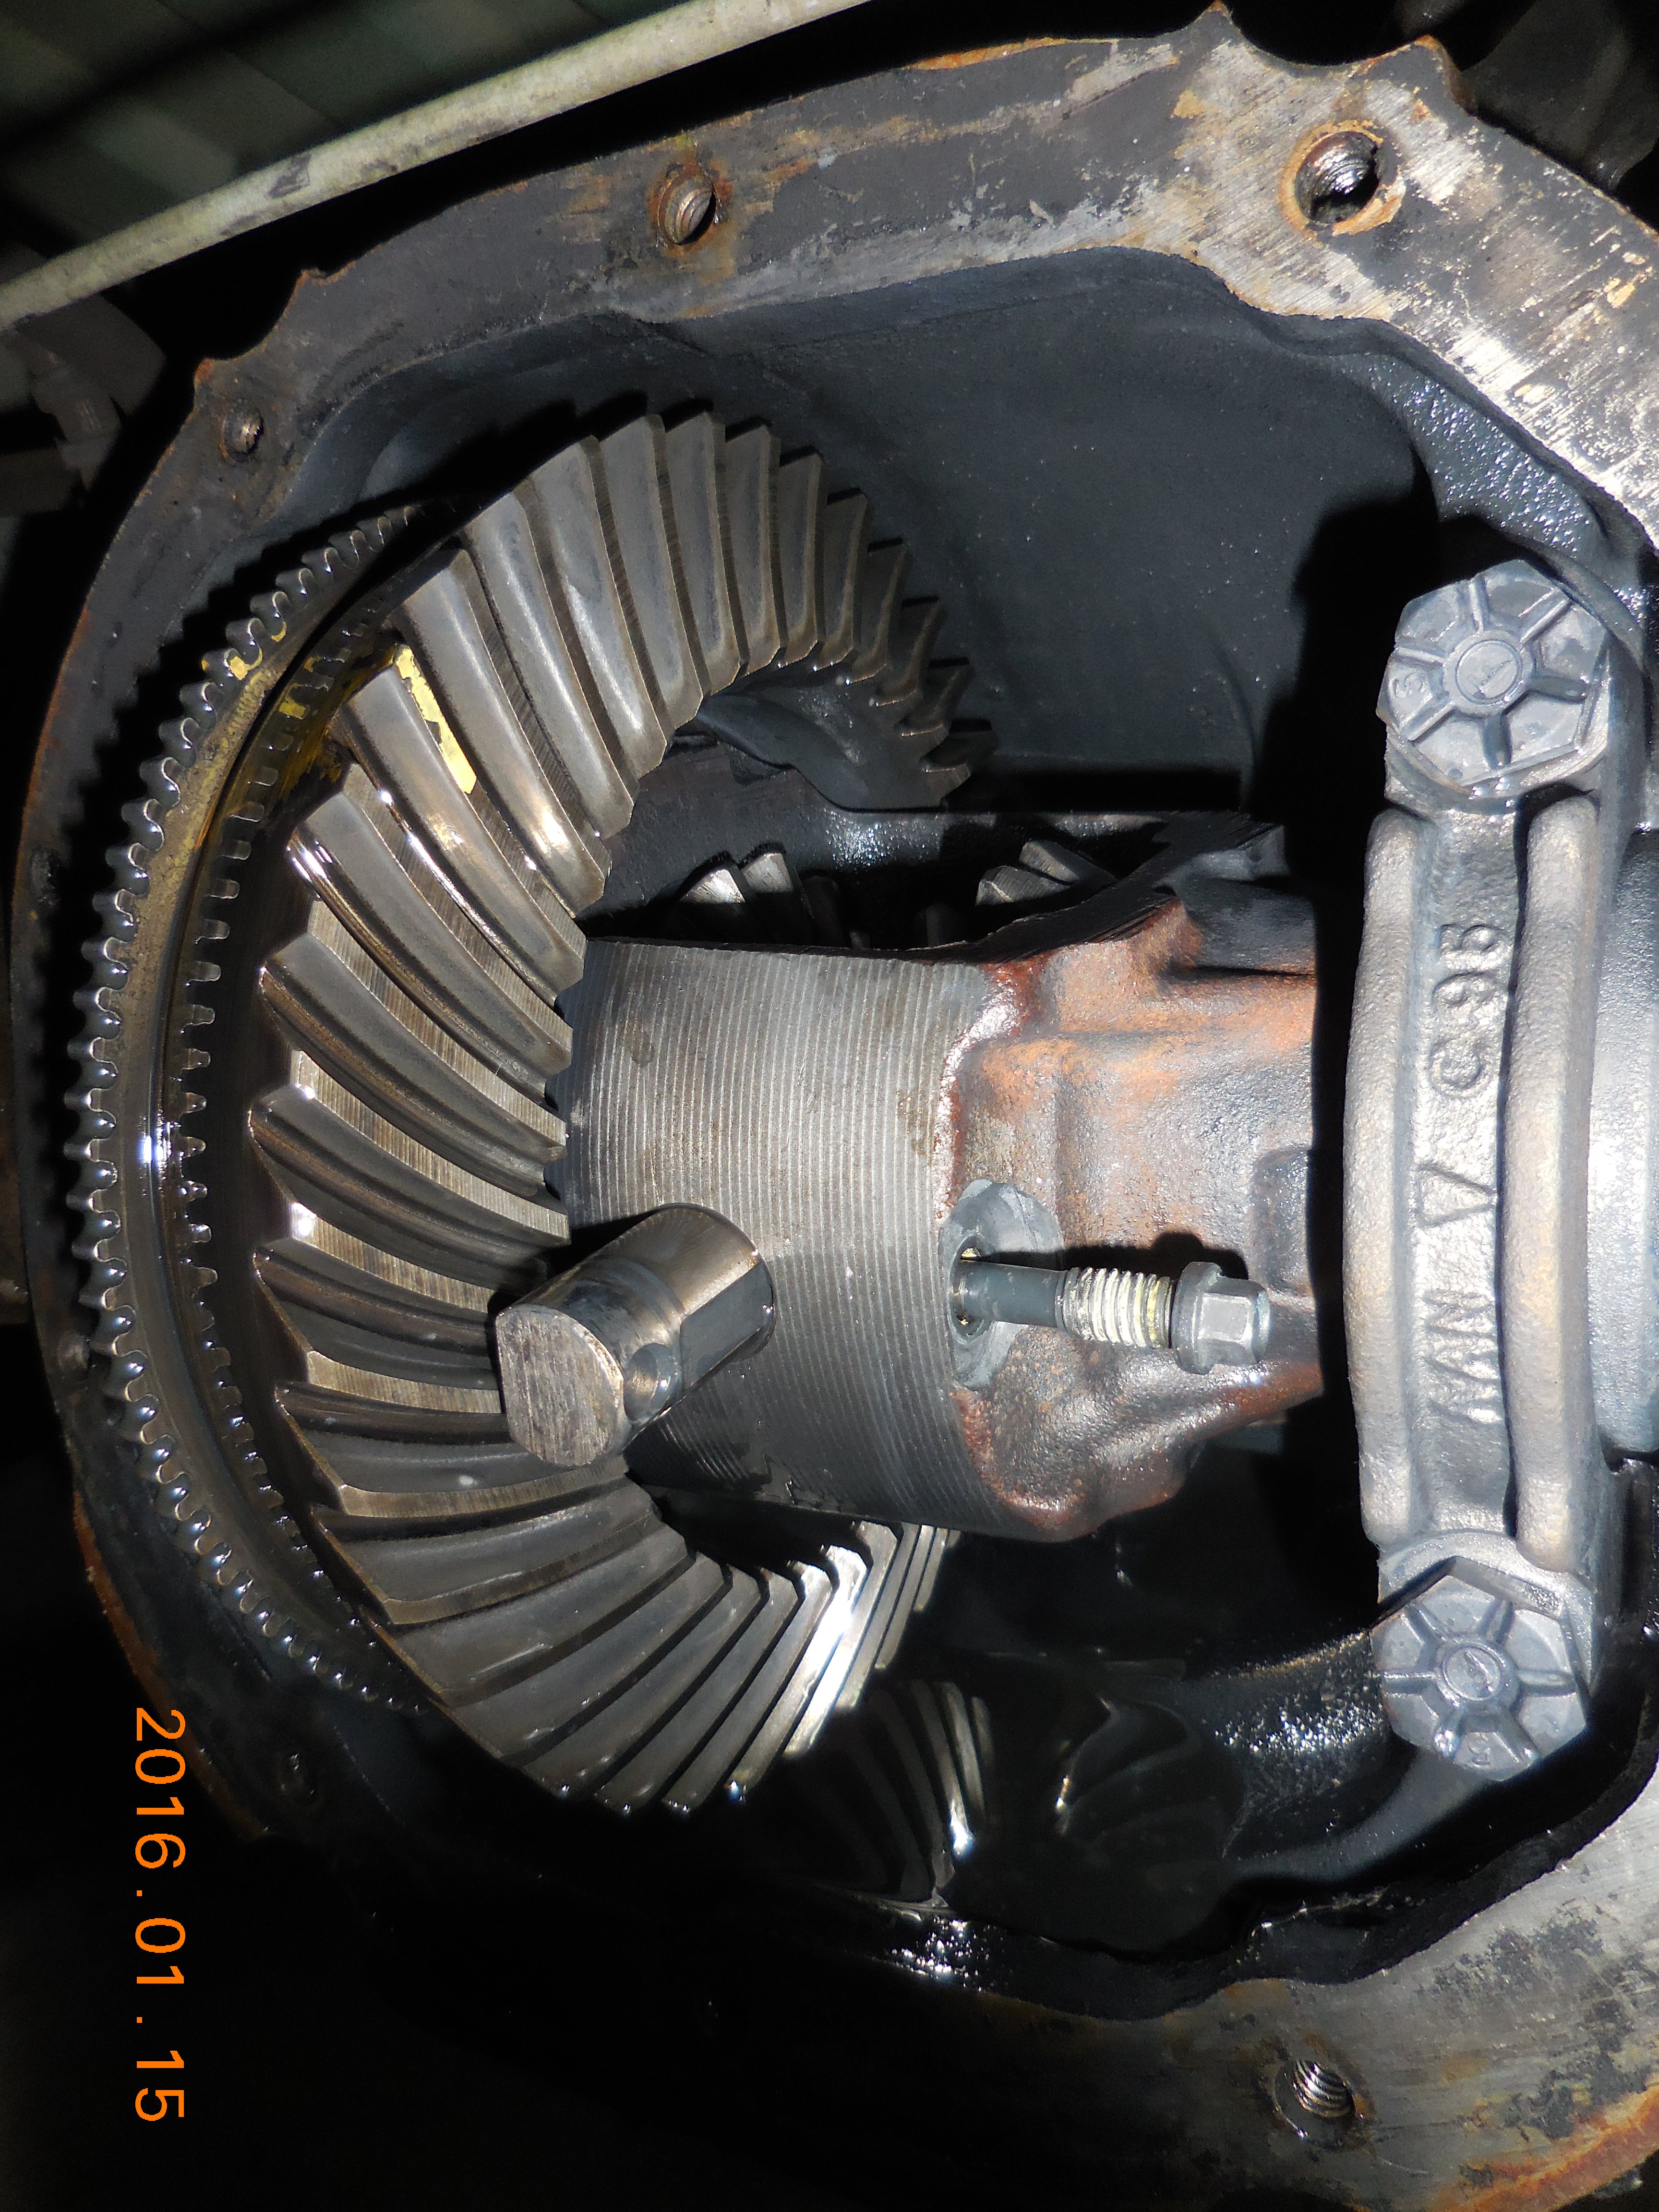
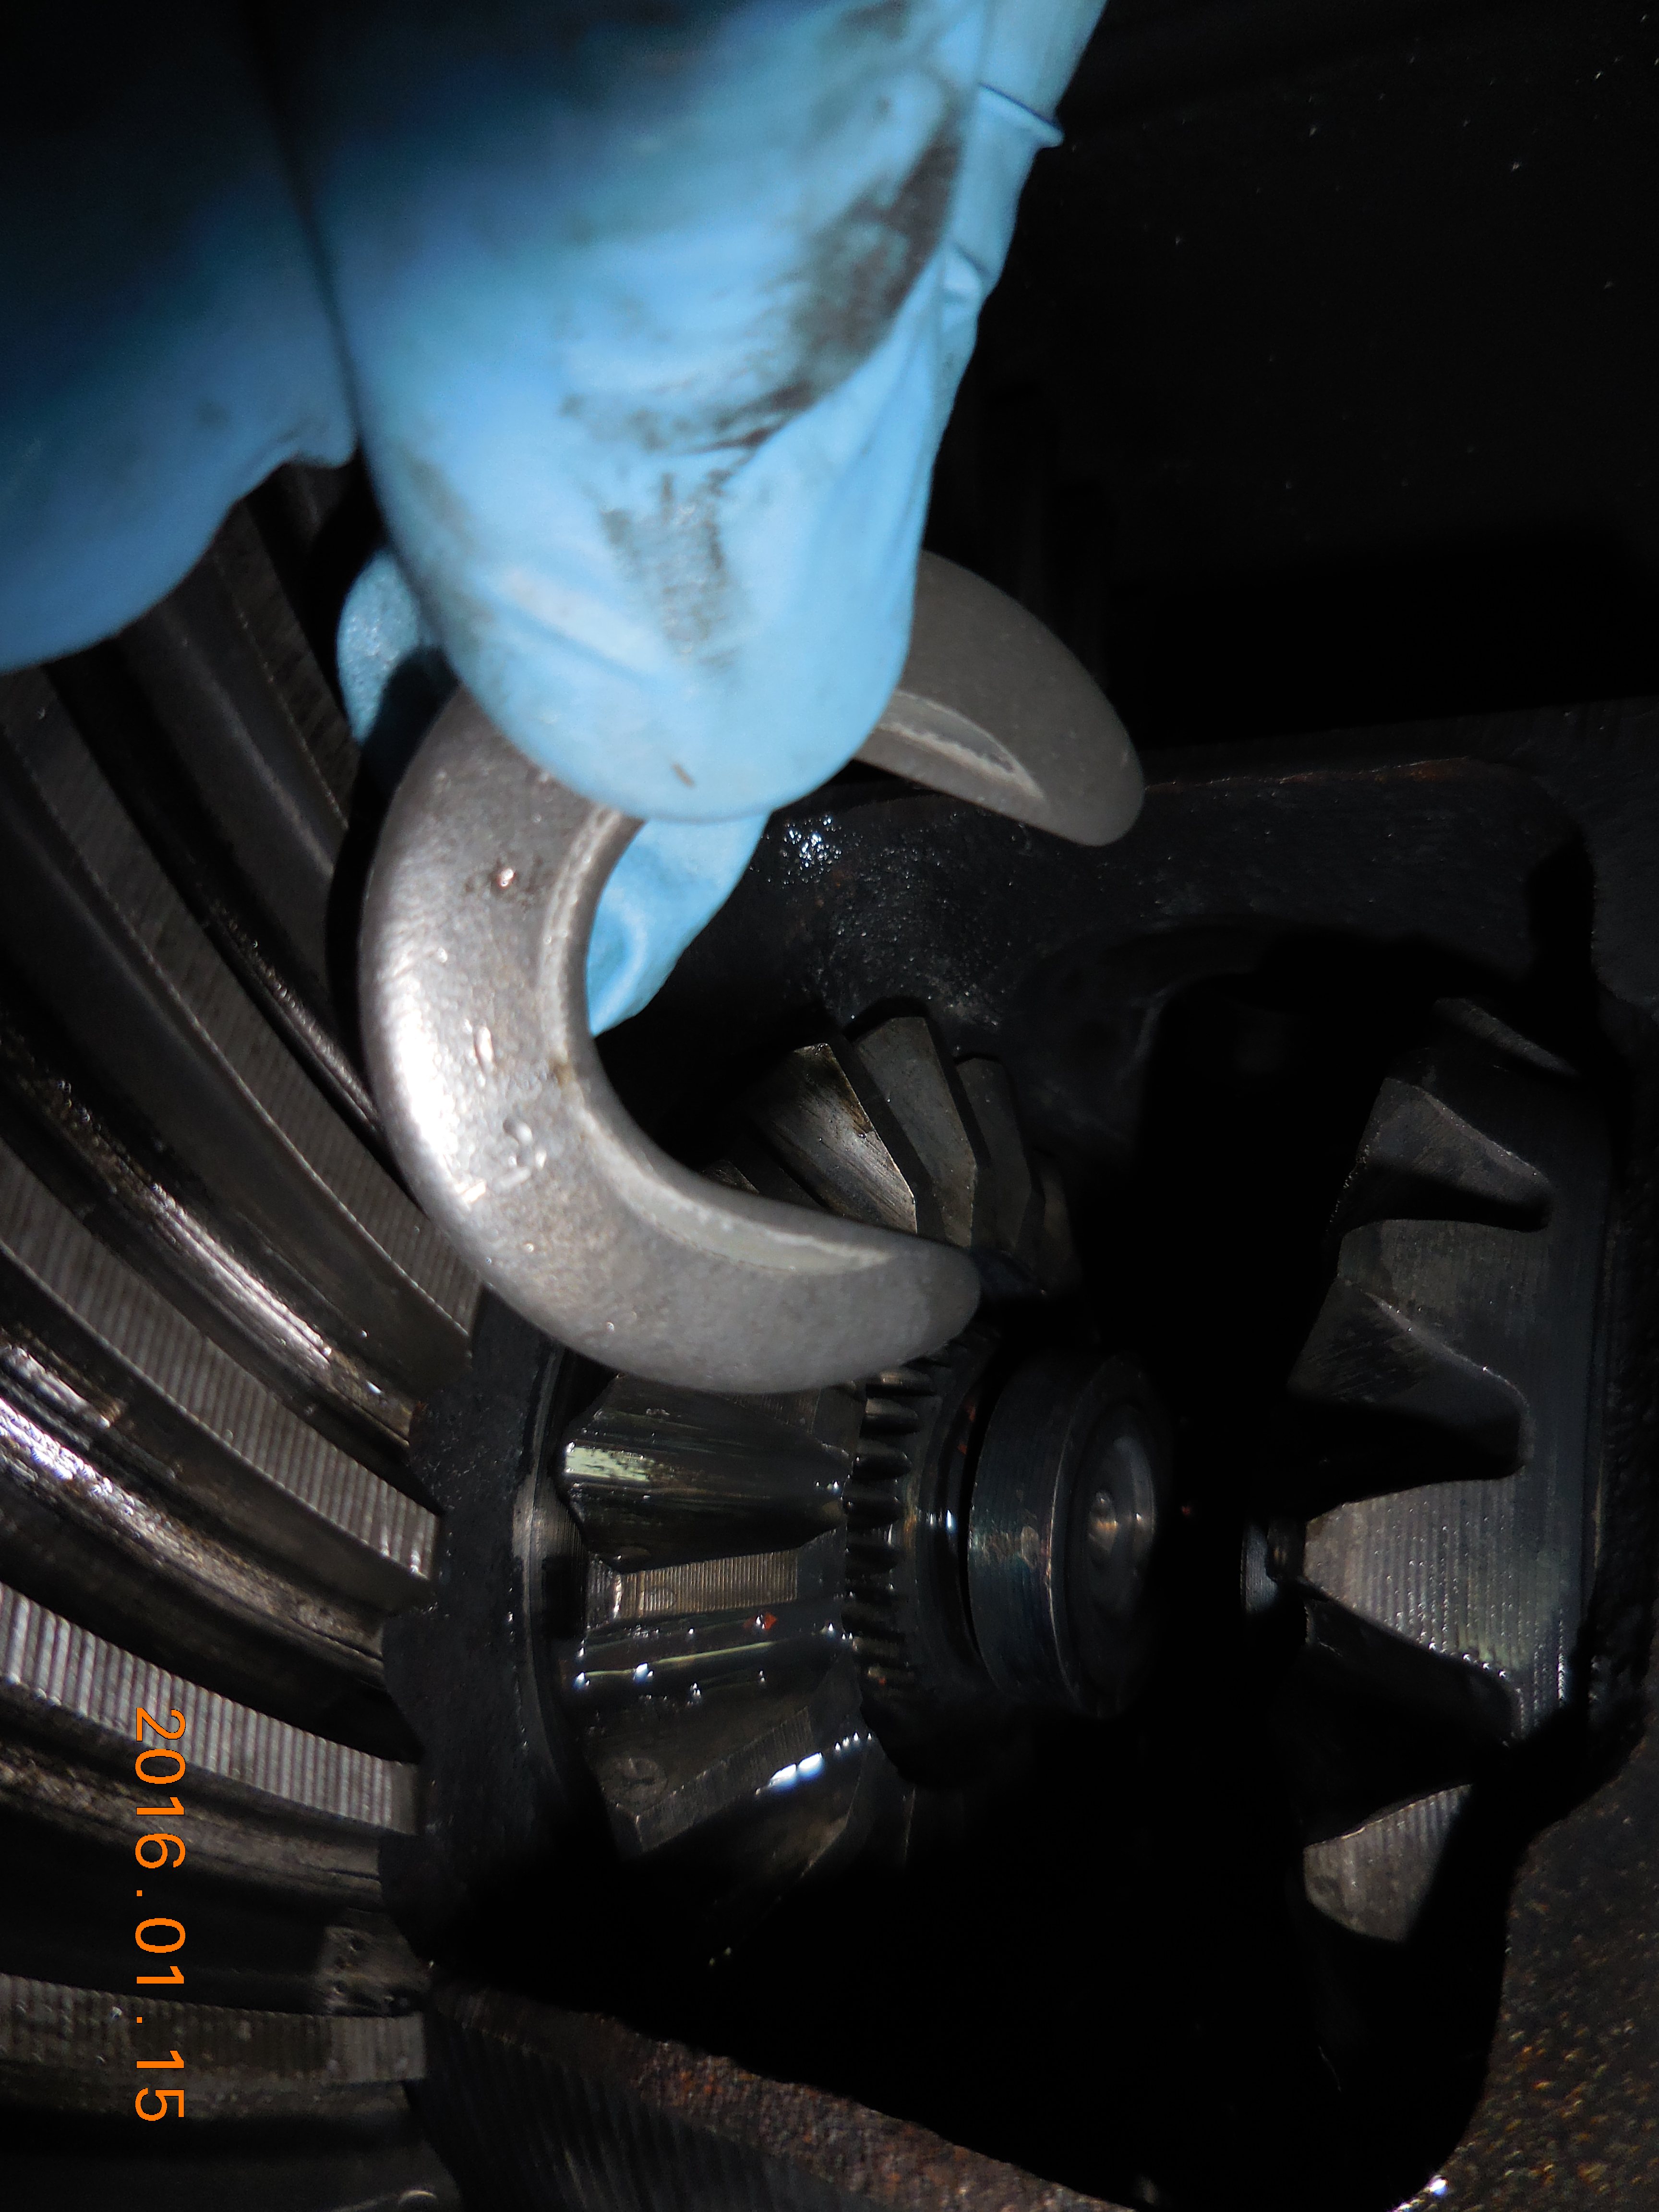
This is as far as the spiders axle will move this direction, and that's not enough to clear the ends of the wheel axles:
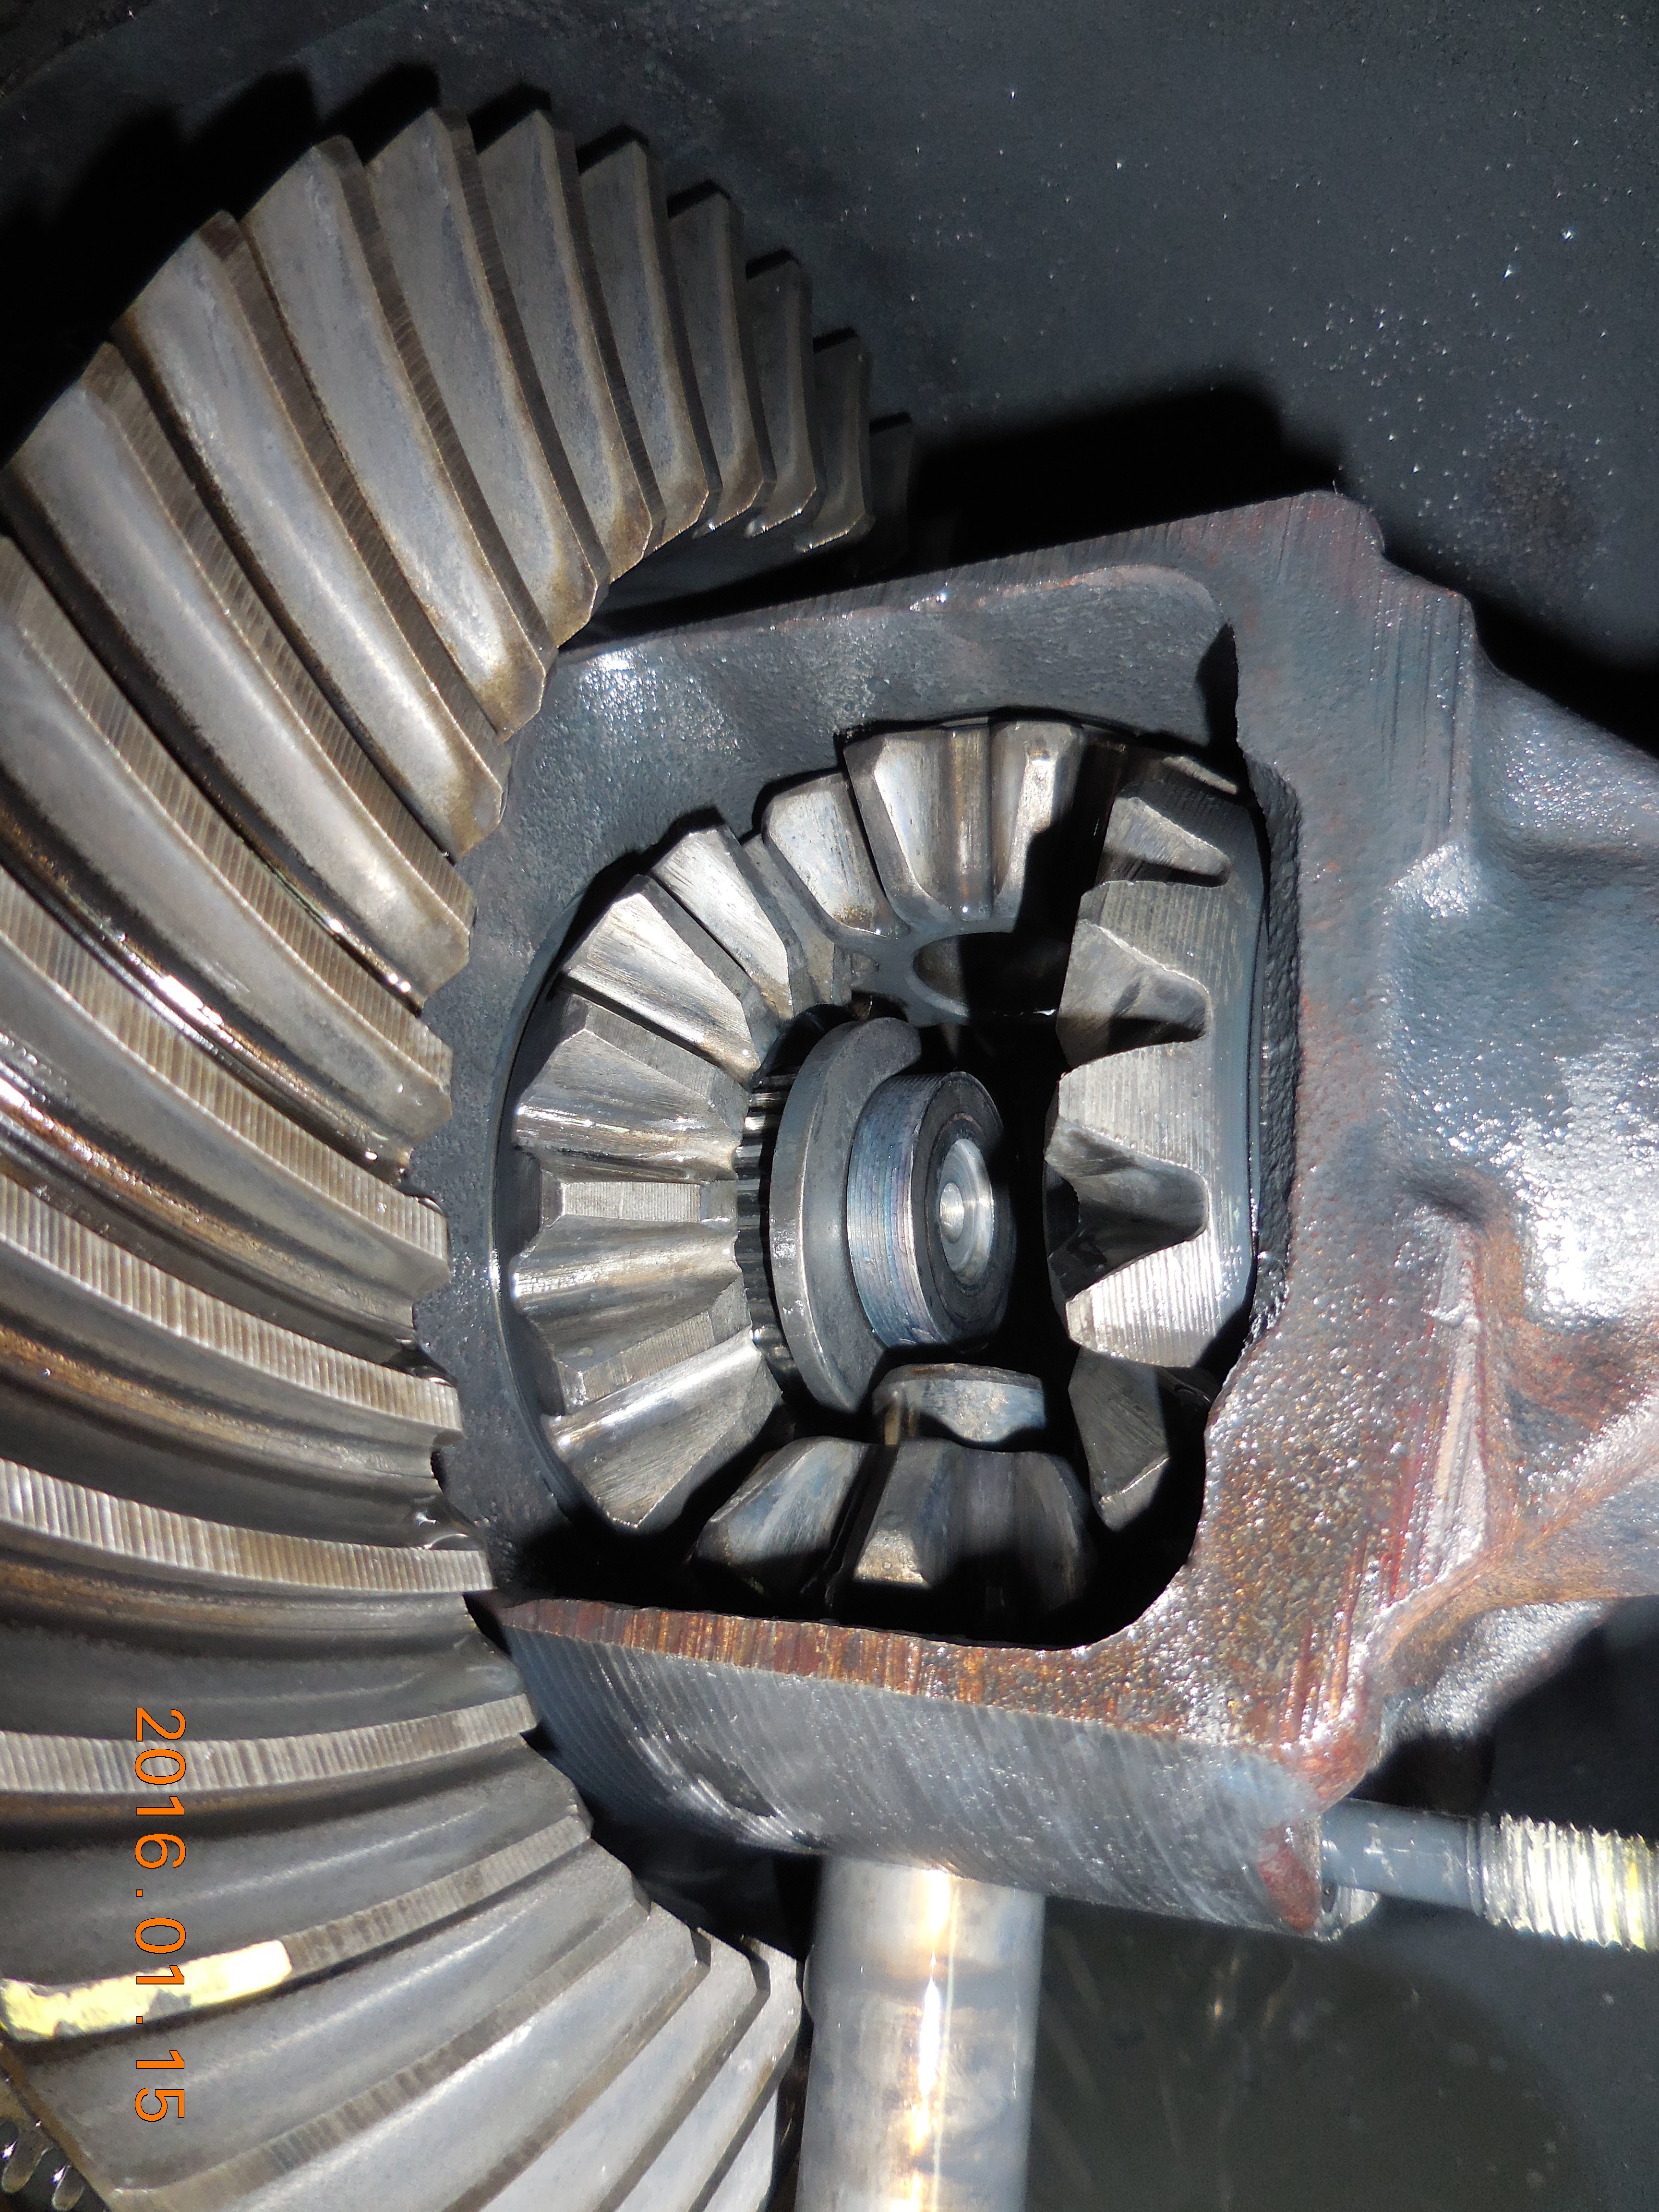
Rotate the ring gear carrier and remove the spiders axle. You can slide the spiders out at this time or later, but chances are they're going to fall out at some point so you may as well do it now. The spider gears do not need to be reinstalled at their previous locations, so you don't need to mark where they go. The next pic is with the spiders axle removed, the spiders still in place, and the left wheel axle pushed inward to expose the clip. This whole section looks different if you have Trak-Loc, though the actual axle & clip are the same:
Axle clip slides right off. That's what holds the axle in. Note that the spider gears are no longer in place (top is removed, bottom is slid back); that's what I was talking about above. Removing the right axle clip is the same as the left.
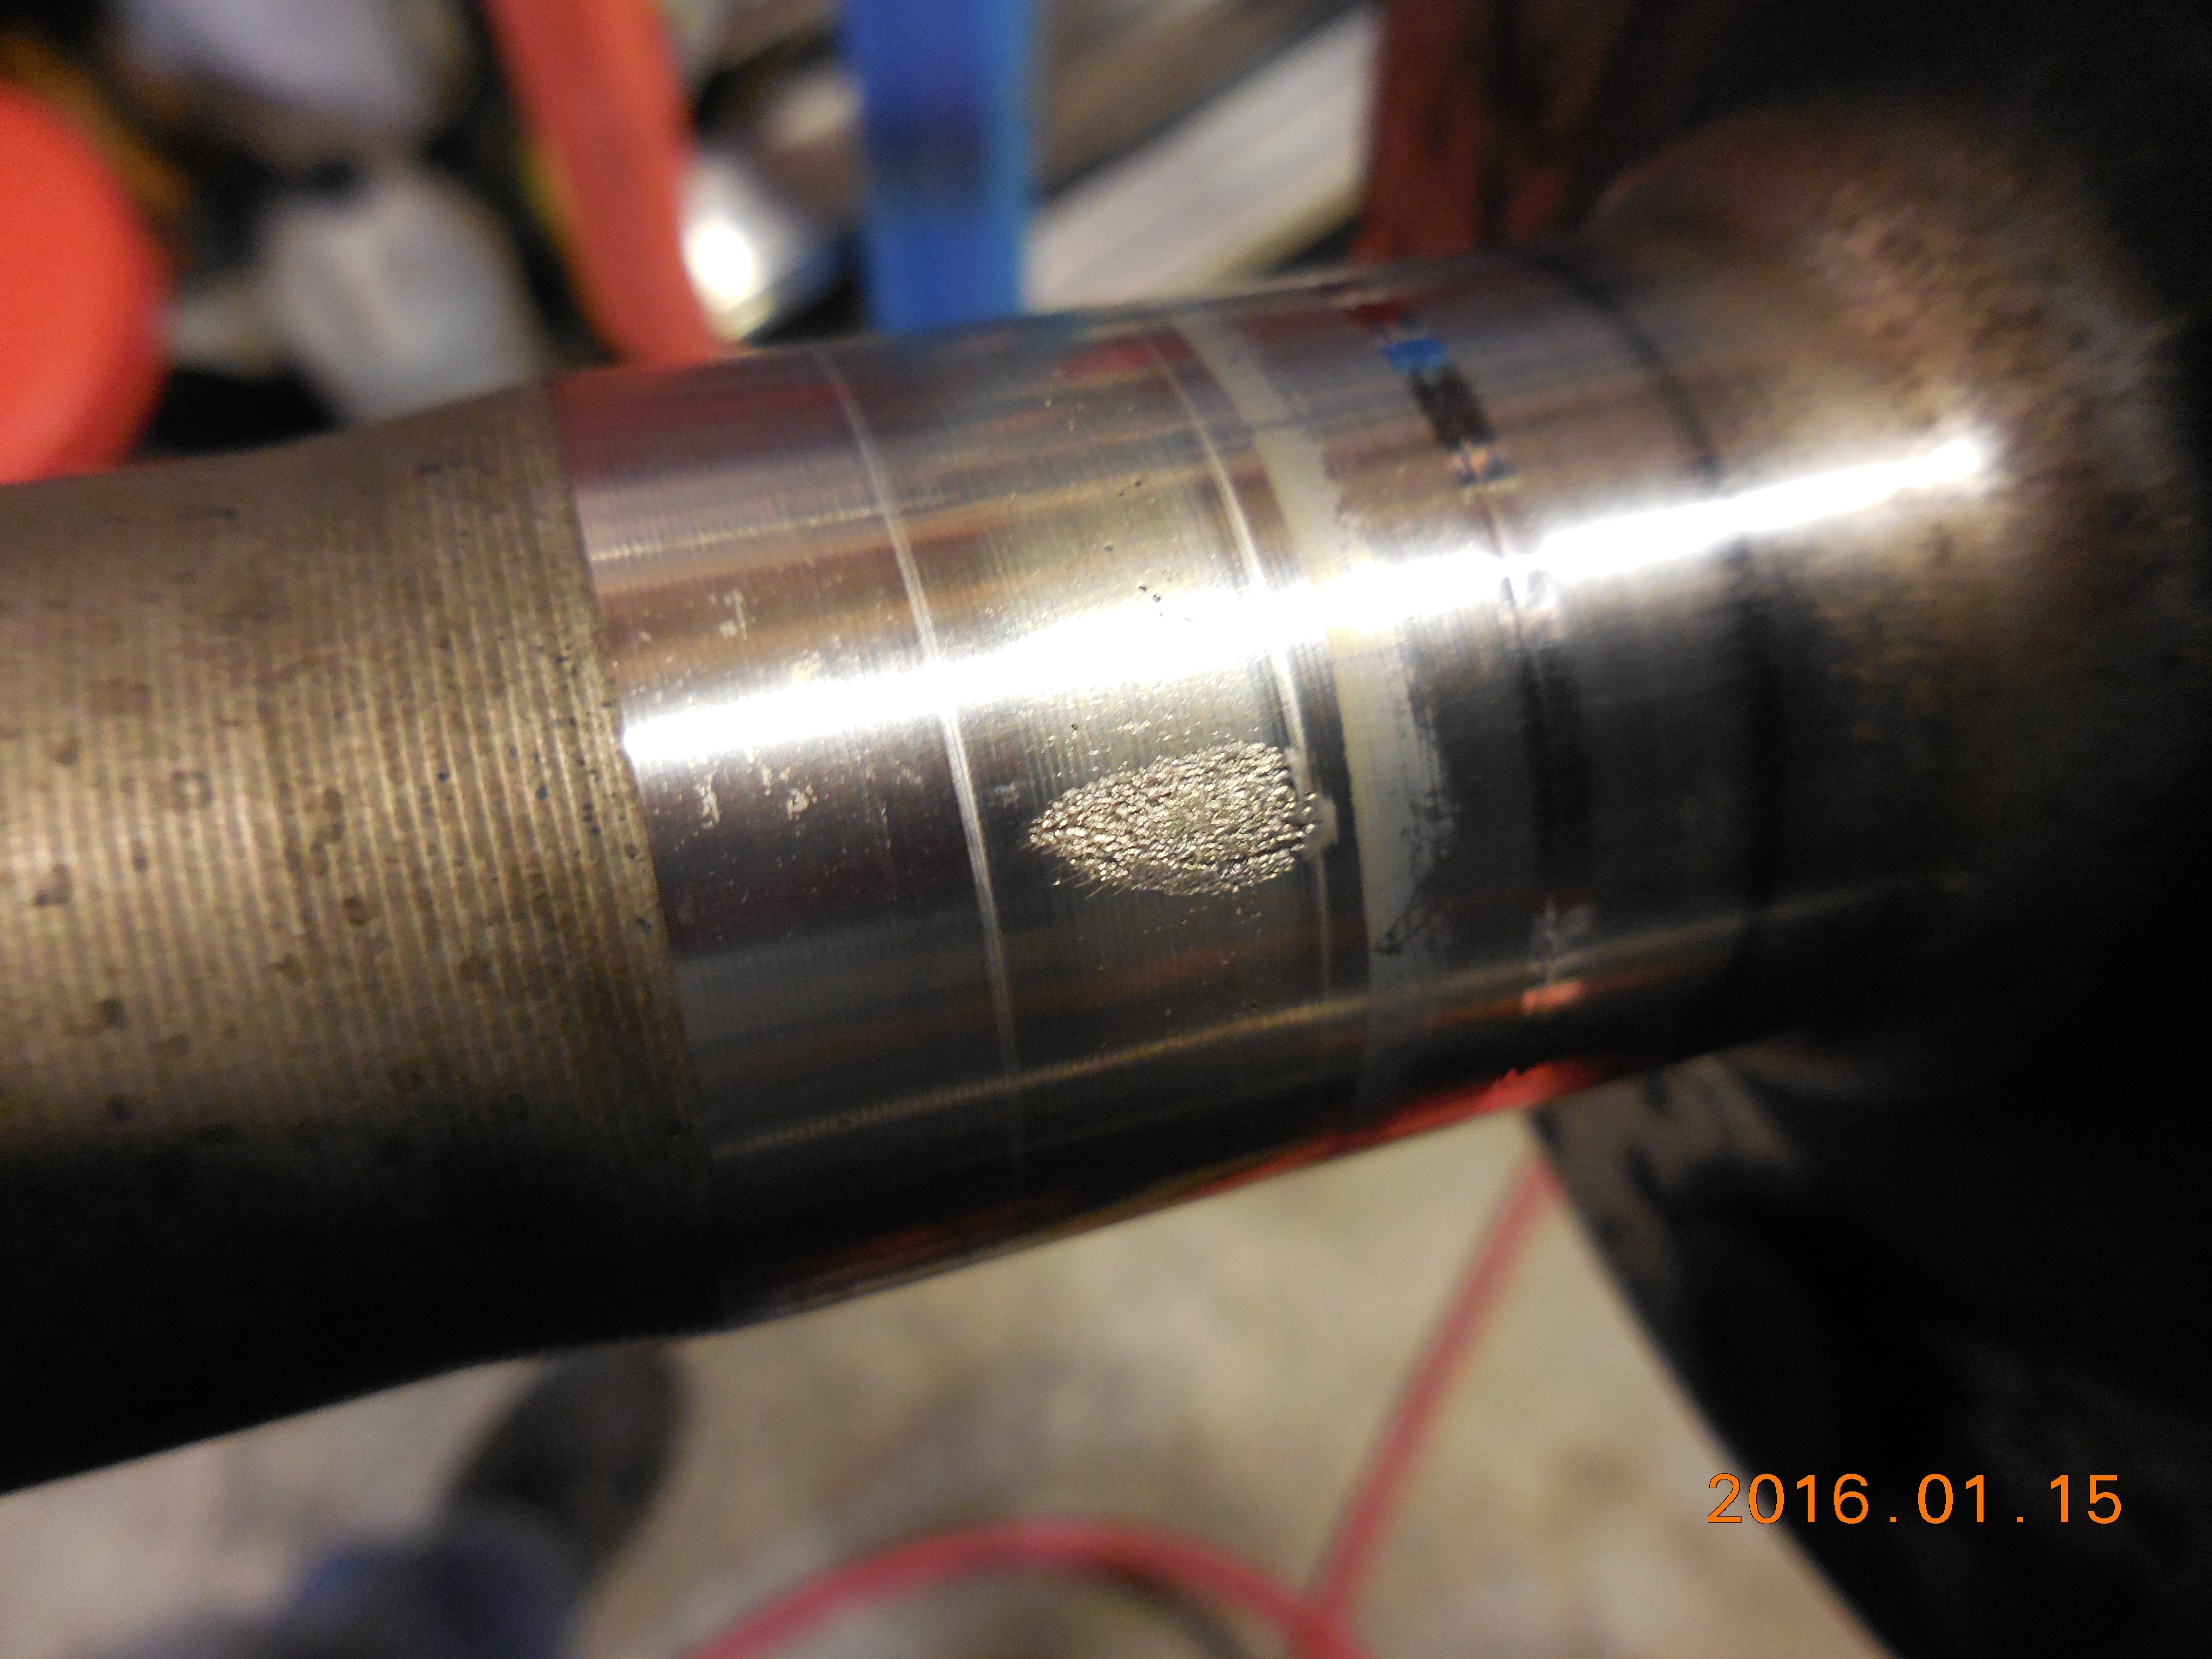
With the axle clips removed, here's the right axle slid out a few inches, illustrating the brinnelled bearing surface.
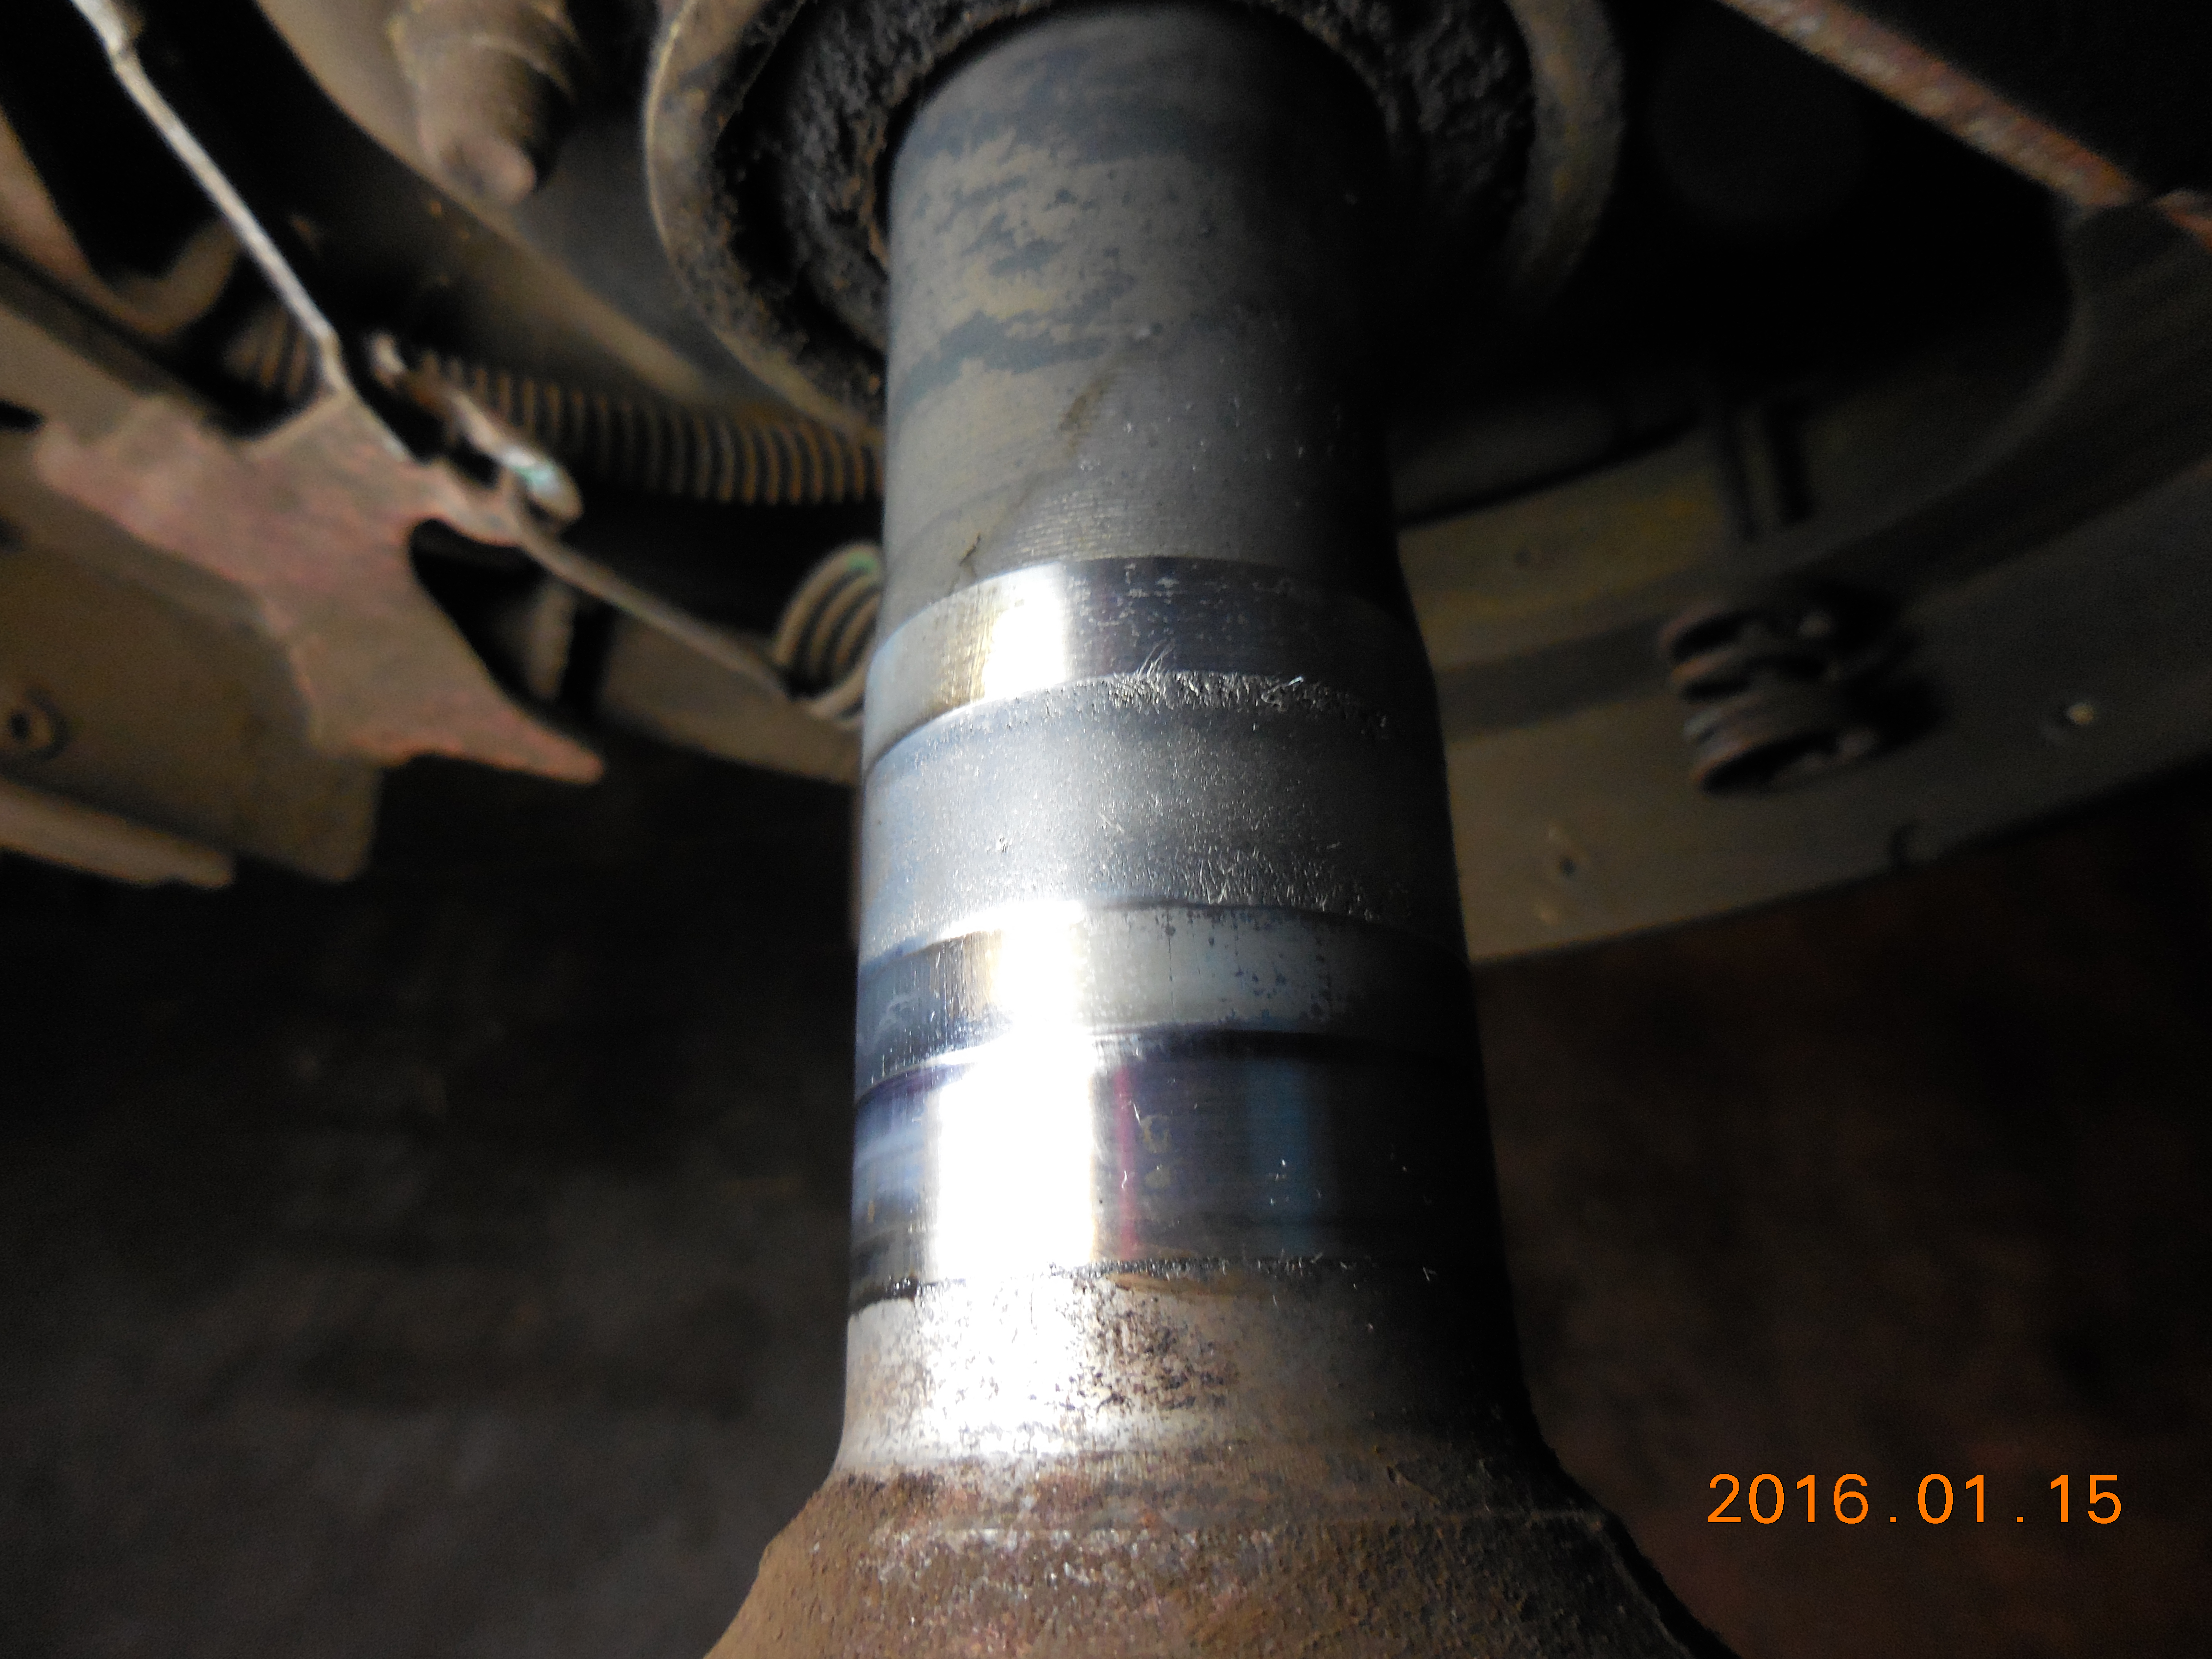
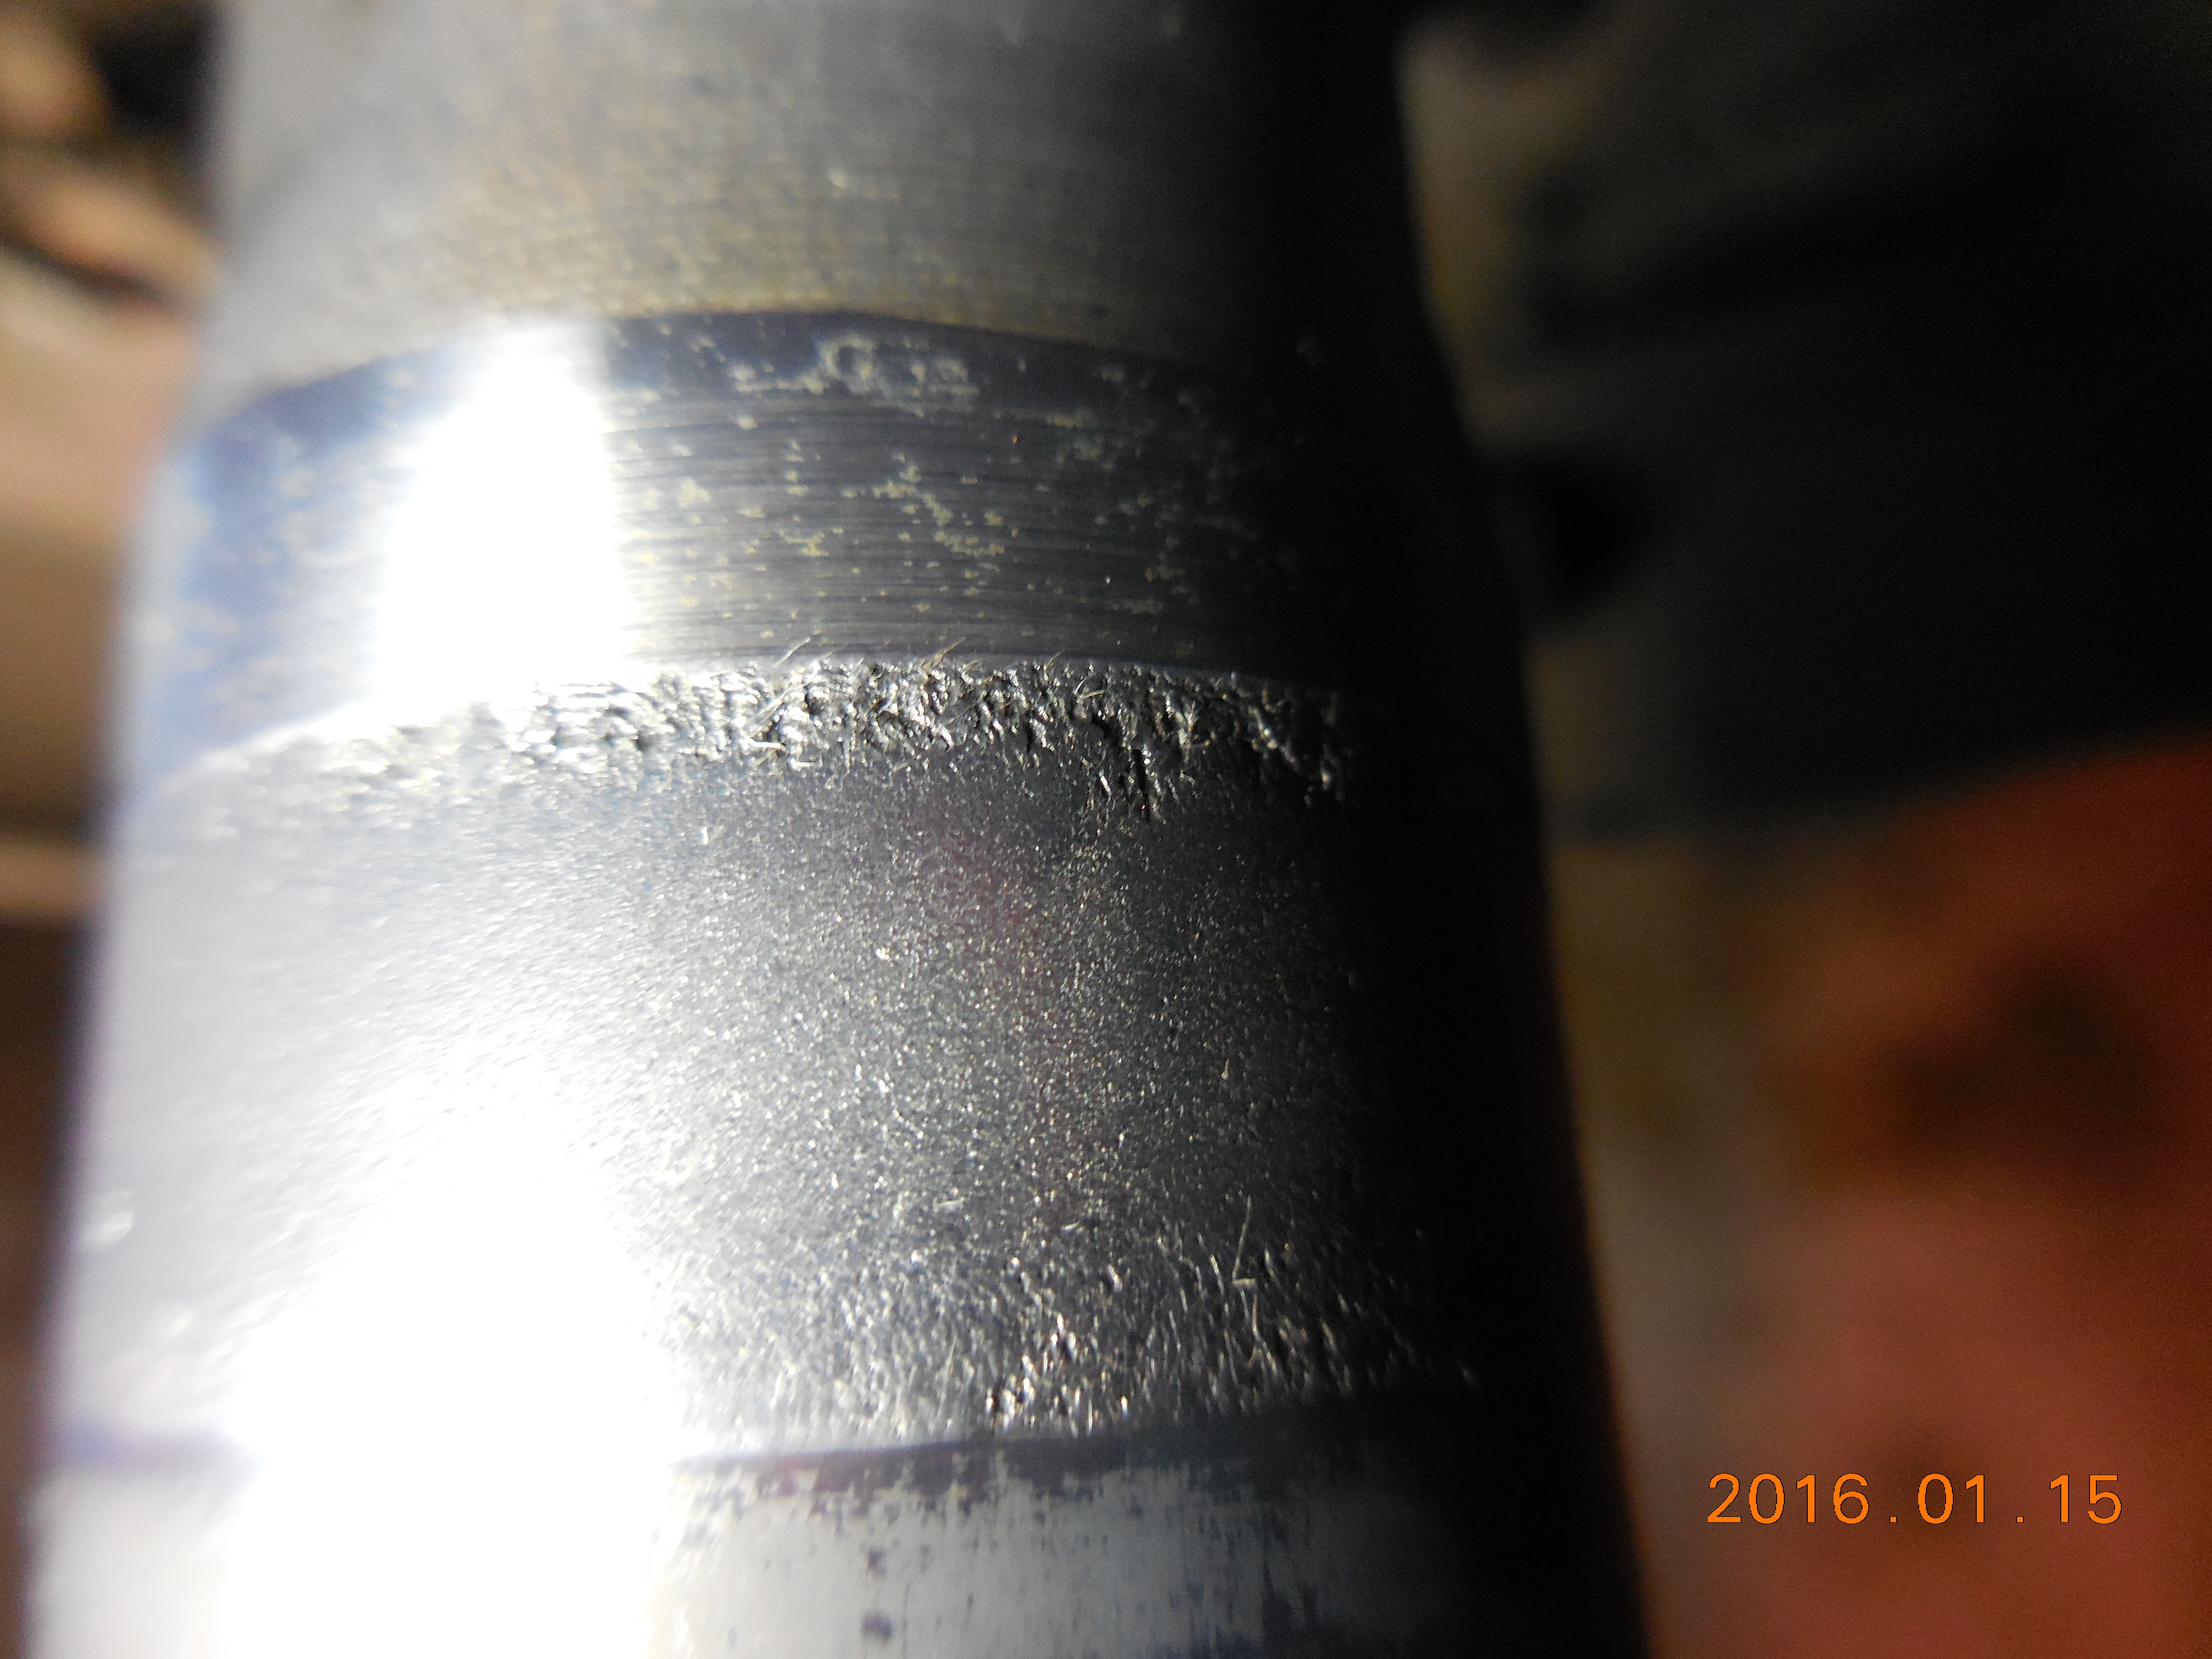
The left axle fared much better, but still has a bad patch. It's useless to put a new bearing against this surface.
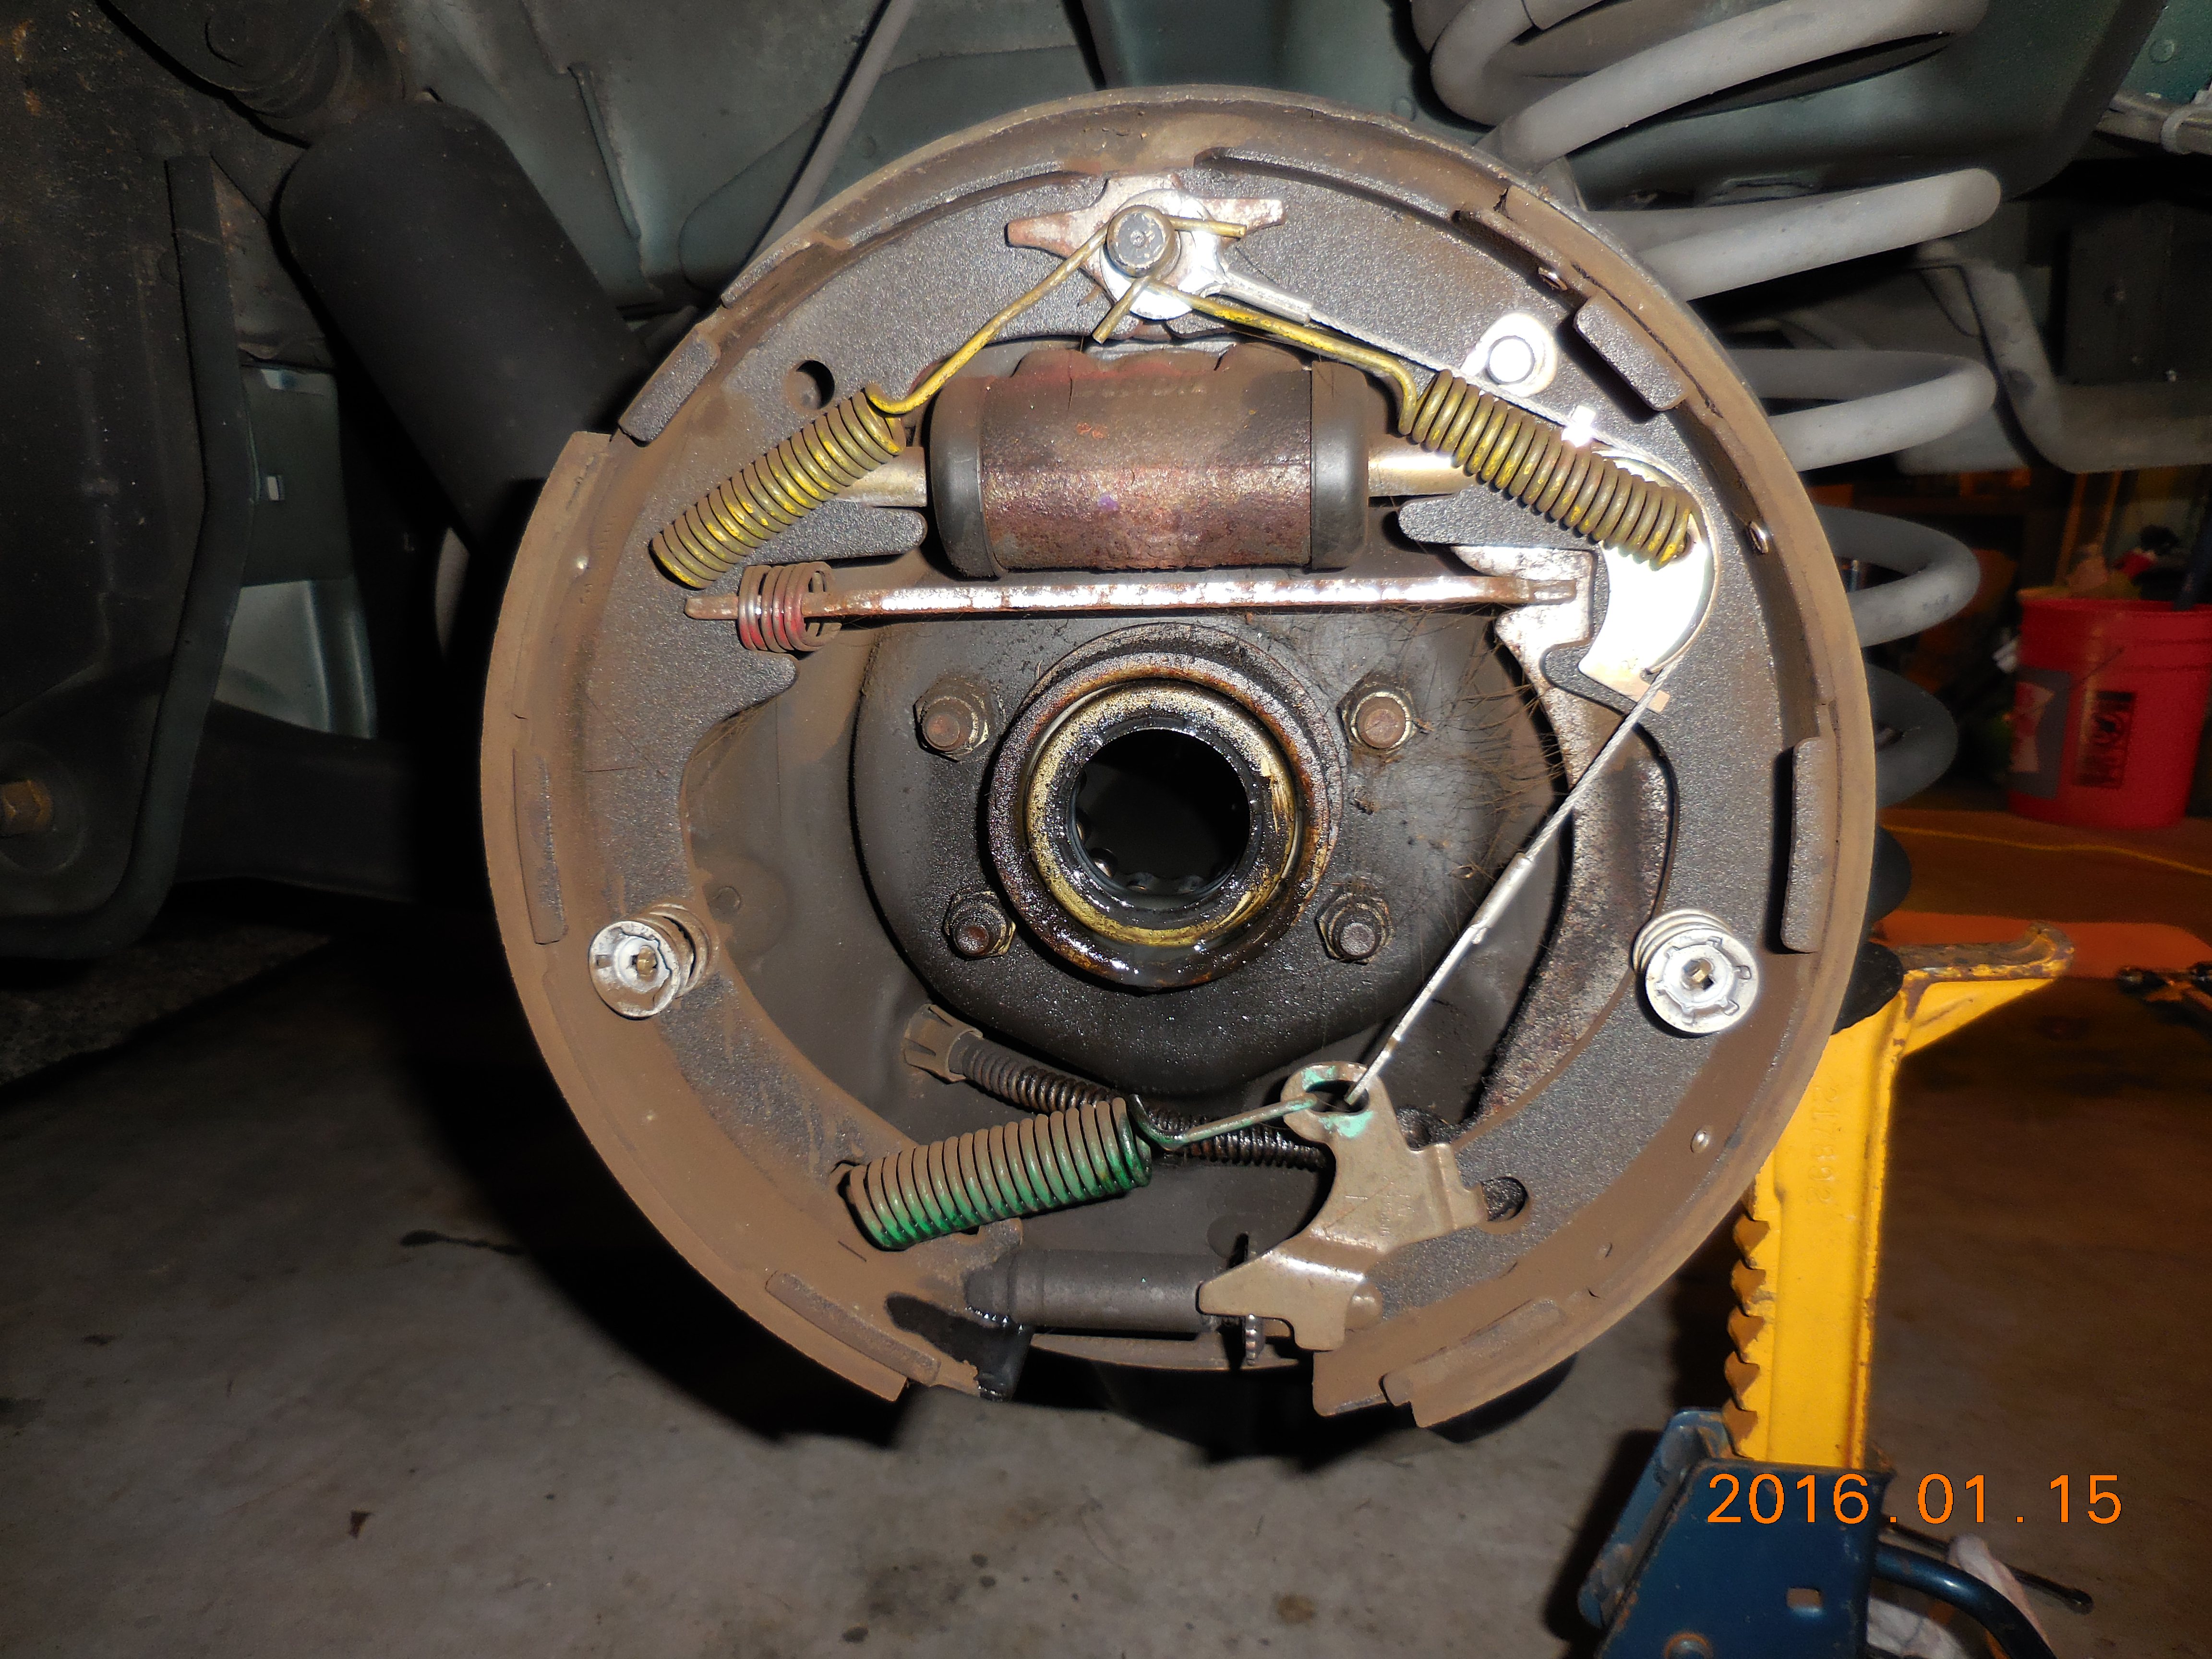
Left side brakes with axle removed. Evidence of gear lubricant, this side was leaking.
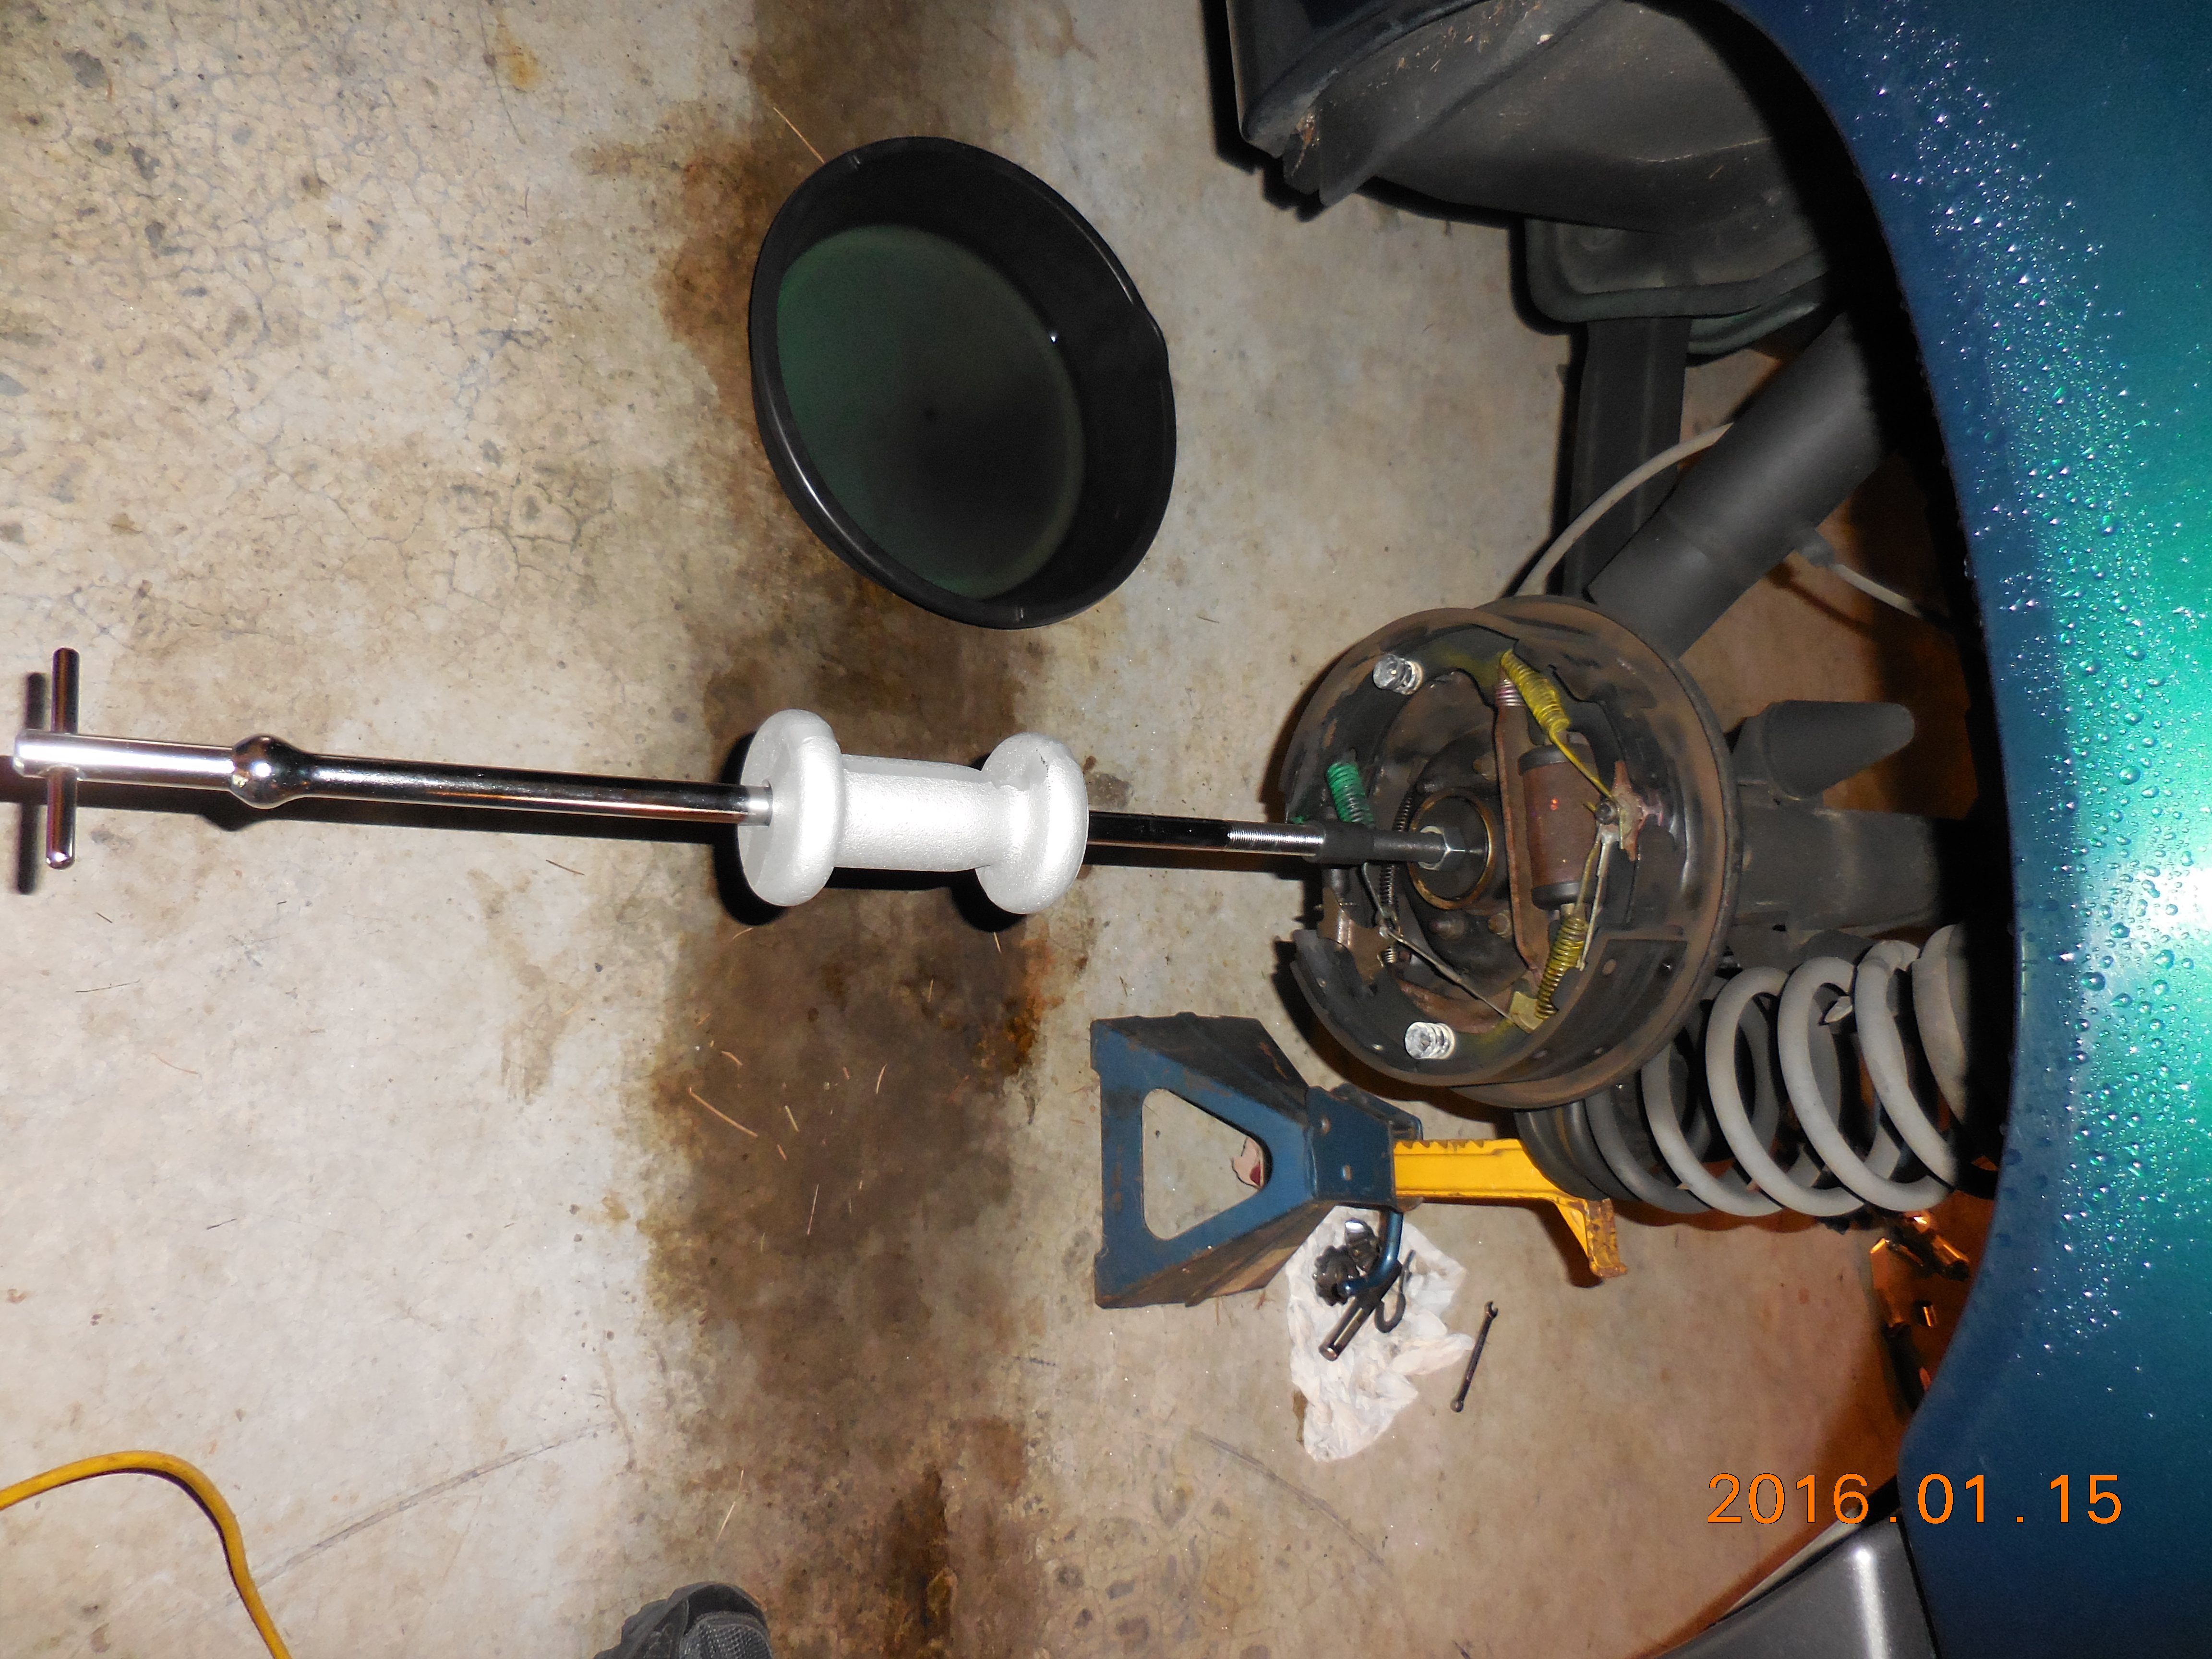
I used an OTC 7948 slide hammer puller set plus an OTC 7494A Rear Axle Bearing set accessory to remove both axle bearings. I'm a tool junky; I've wanted these pullers for years but have been able to get by without. This time, I planned ahead and bought them, about $270 for both. I suggest renting if you only do this sort of thing casually.

Usually, you'd remove the axle seal, then use this gizmo to hook the slide hammer behind the bearing, then apply the slide hammer. BTW, the smallest bearing adapter is the only one in the set that will work for this job: OTC 7495A.

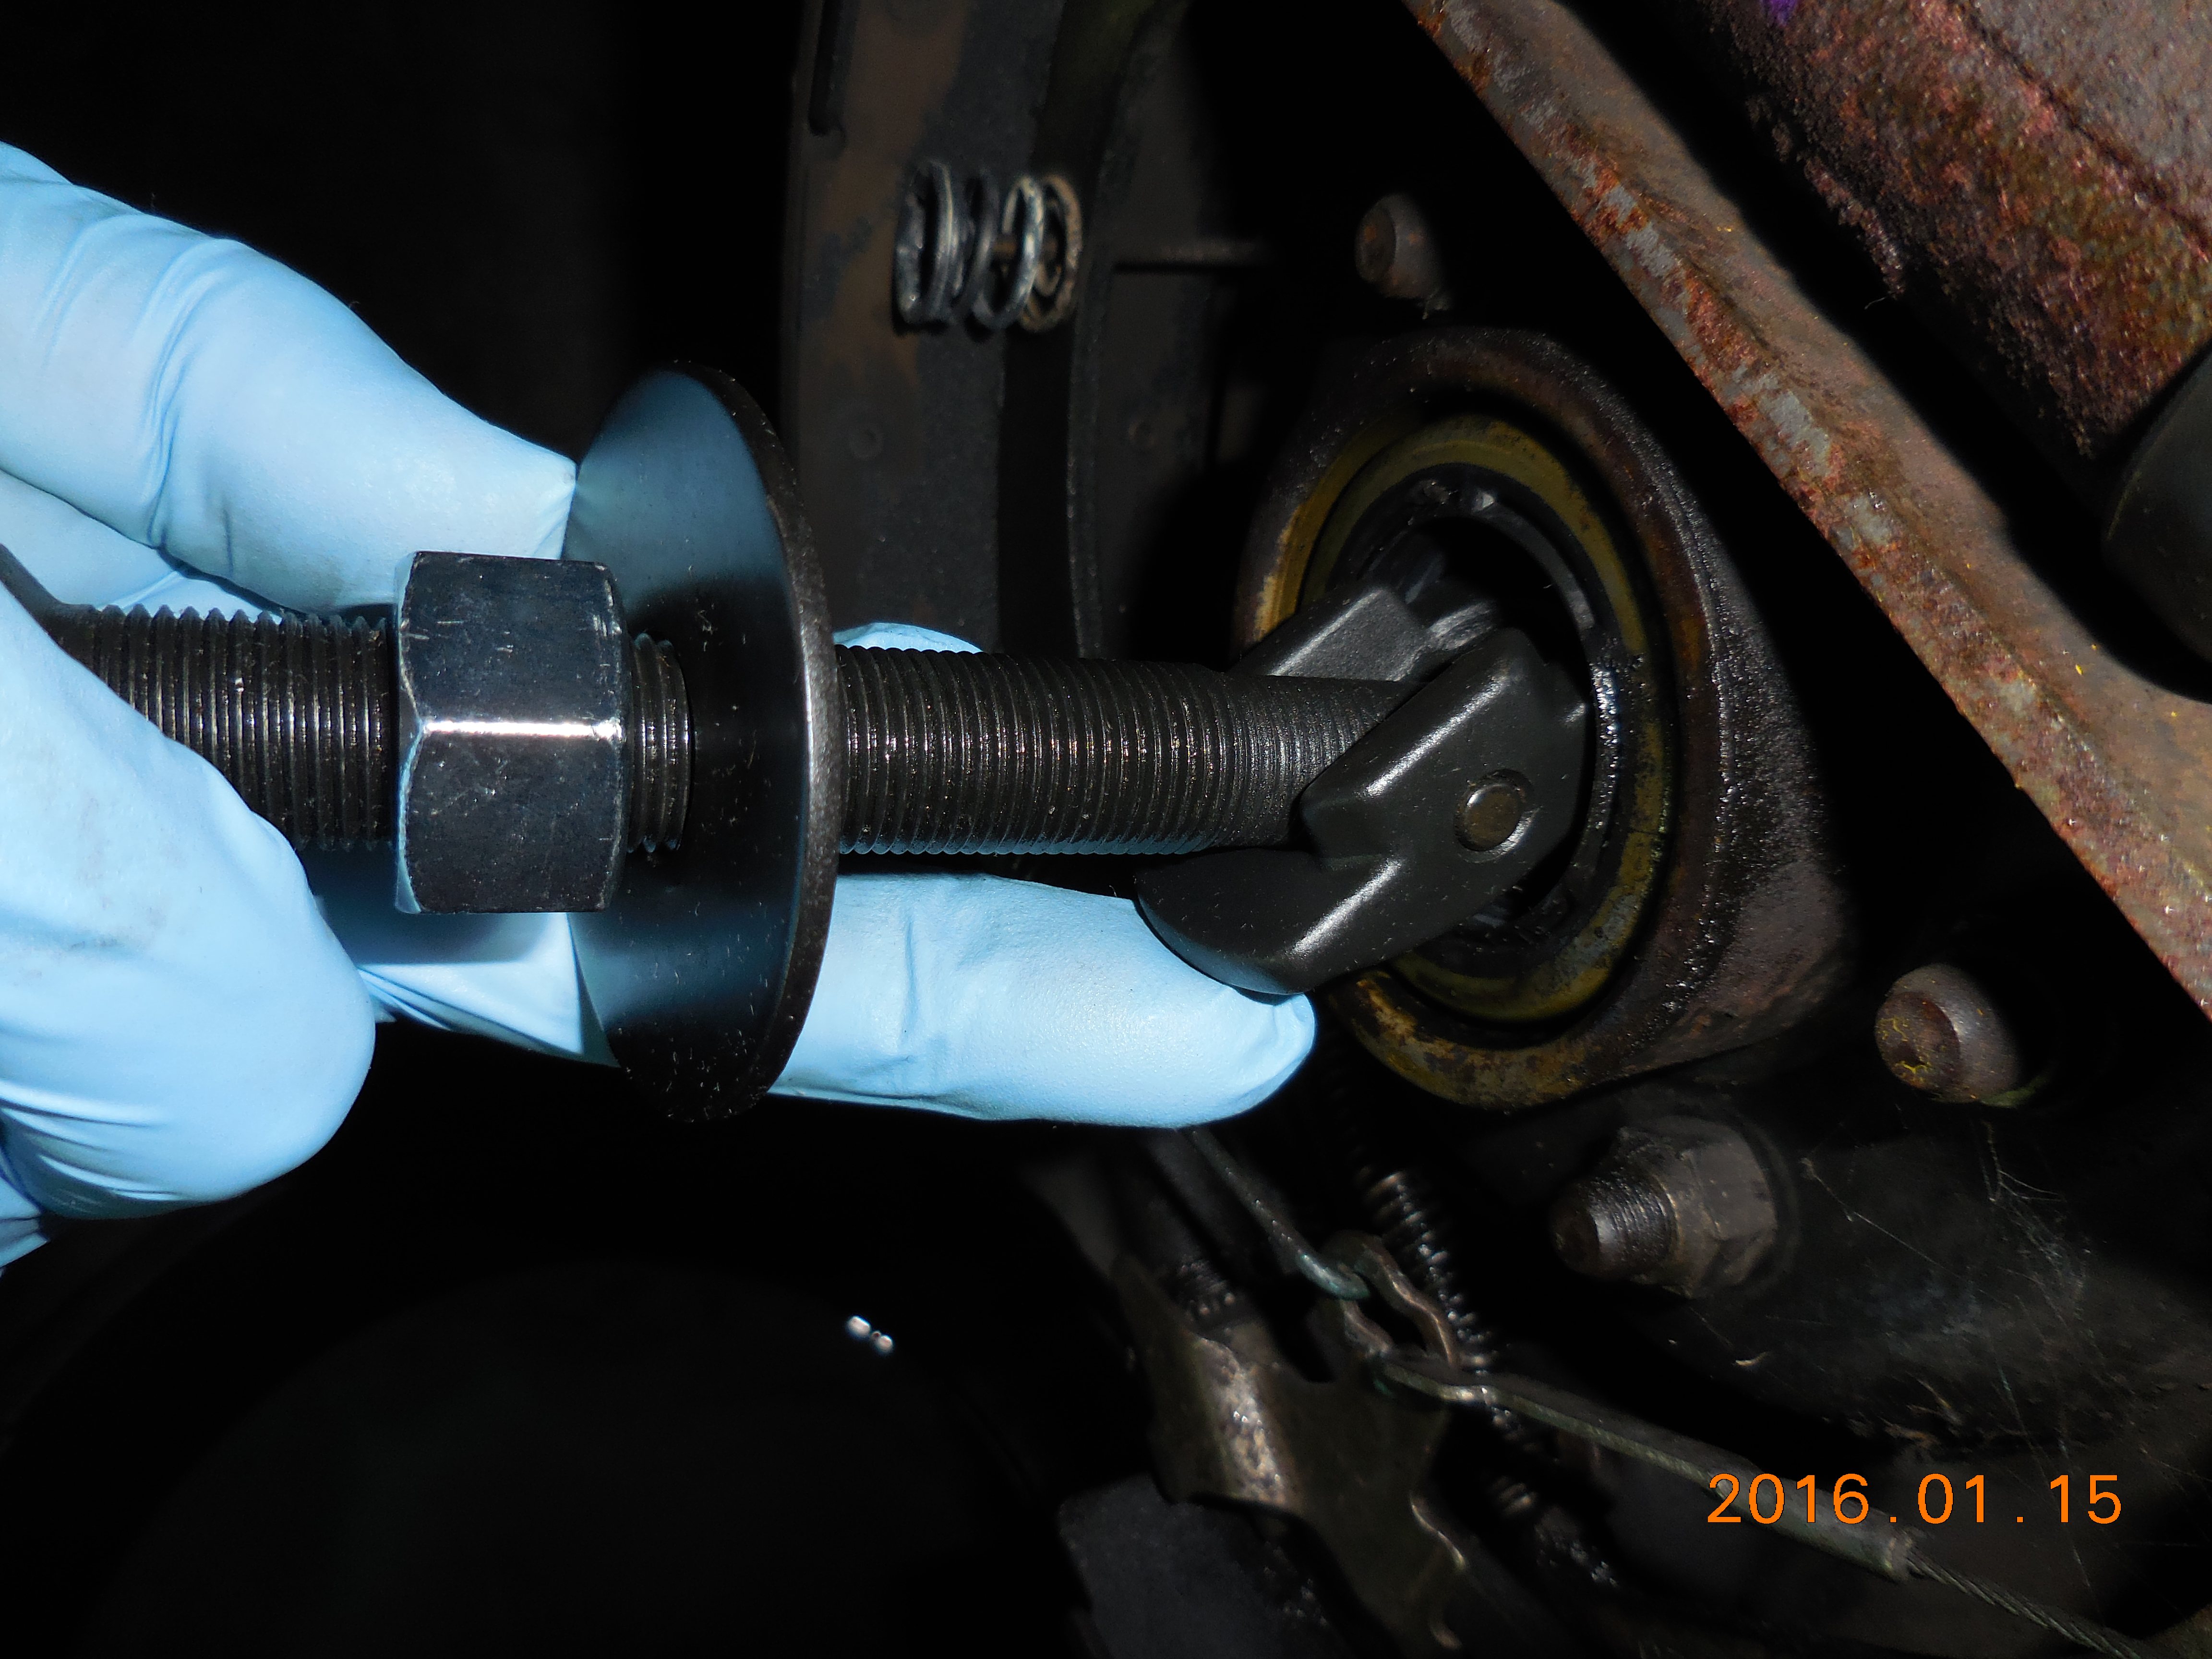
I did this pull with the axle seal in place; normally, you would remove the seal first. It's an easier pull with the seal already removed.
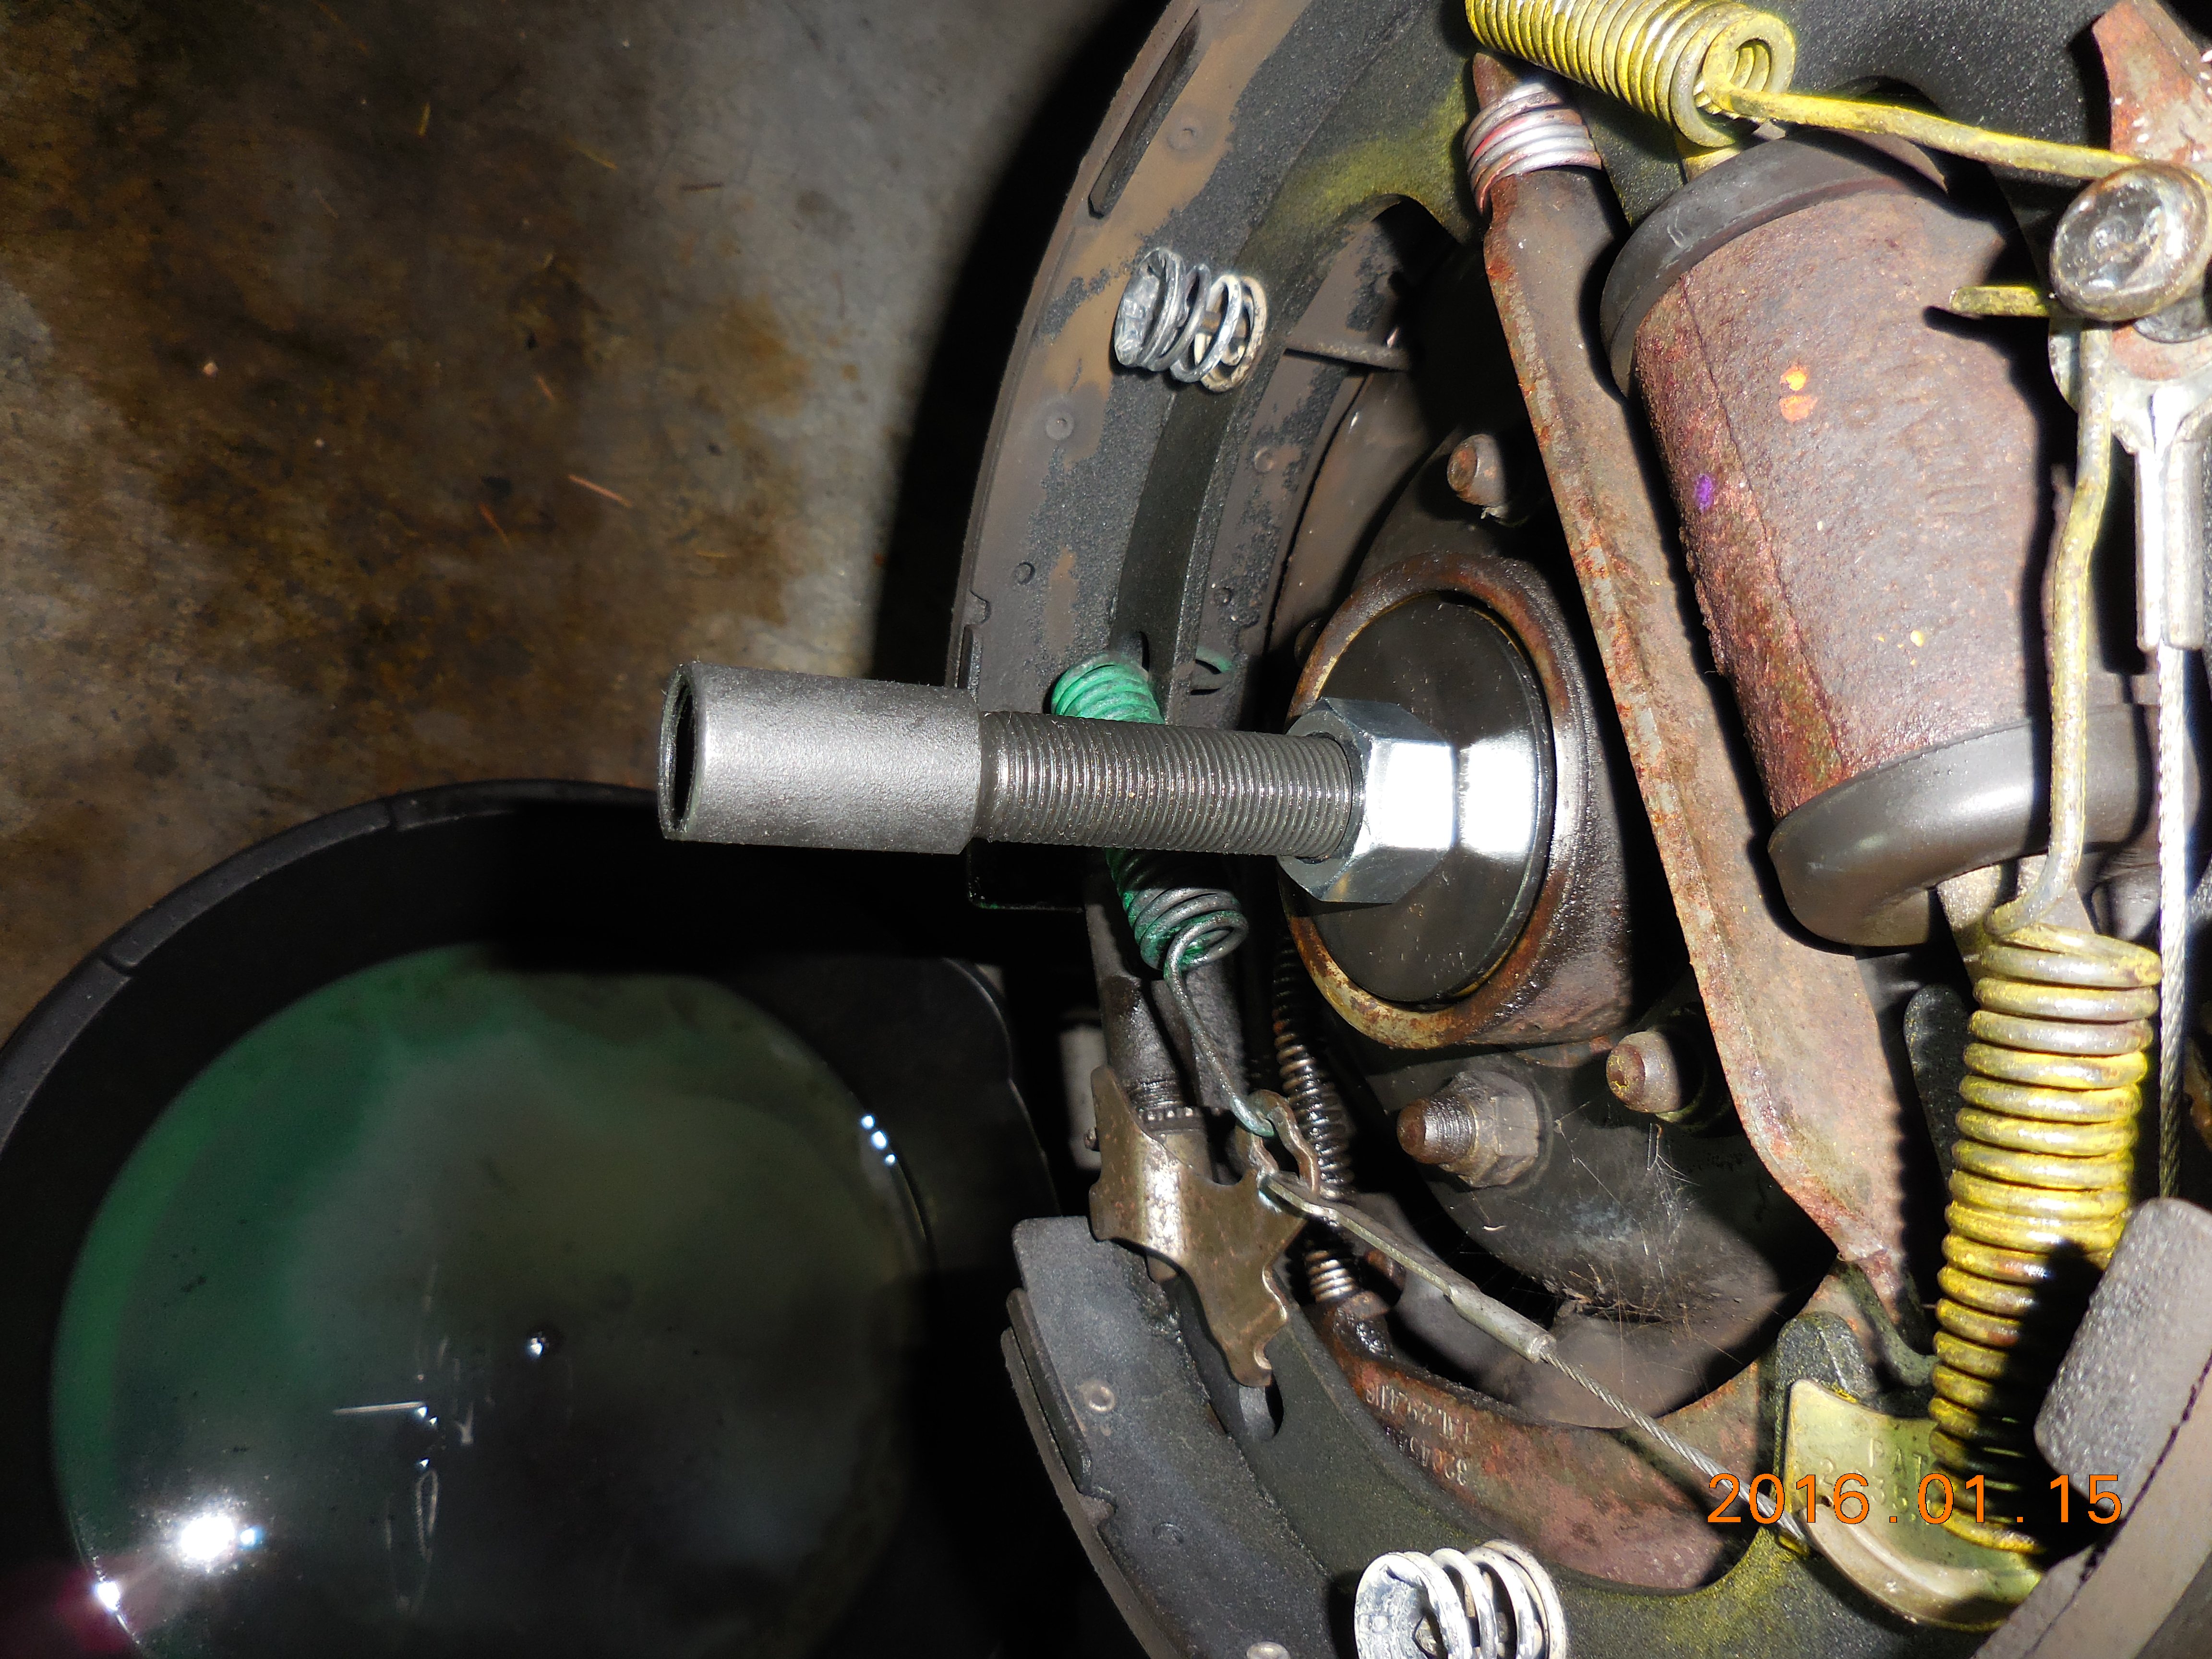
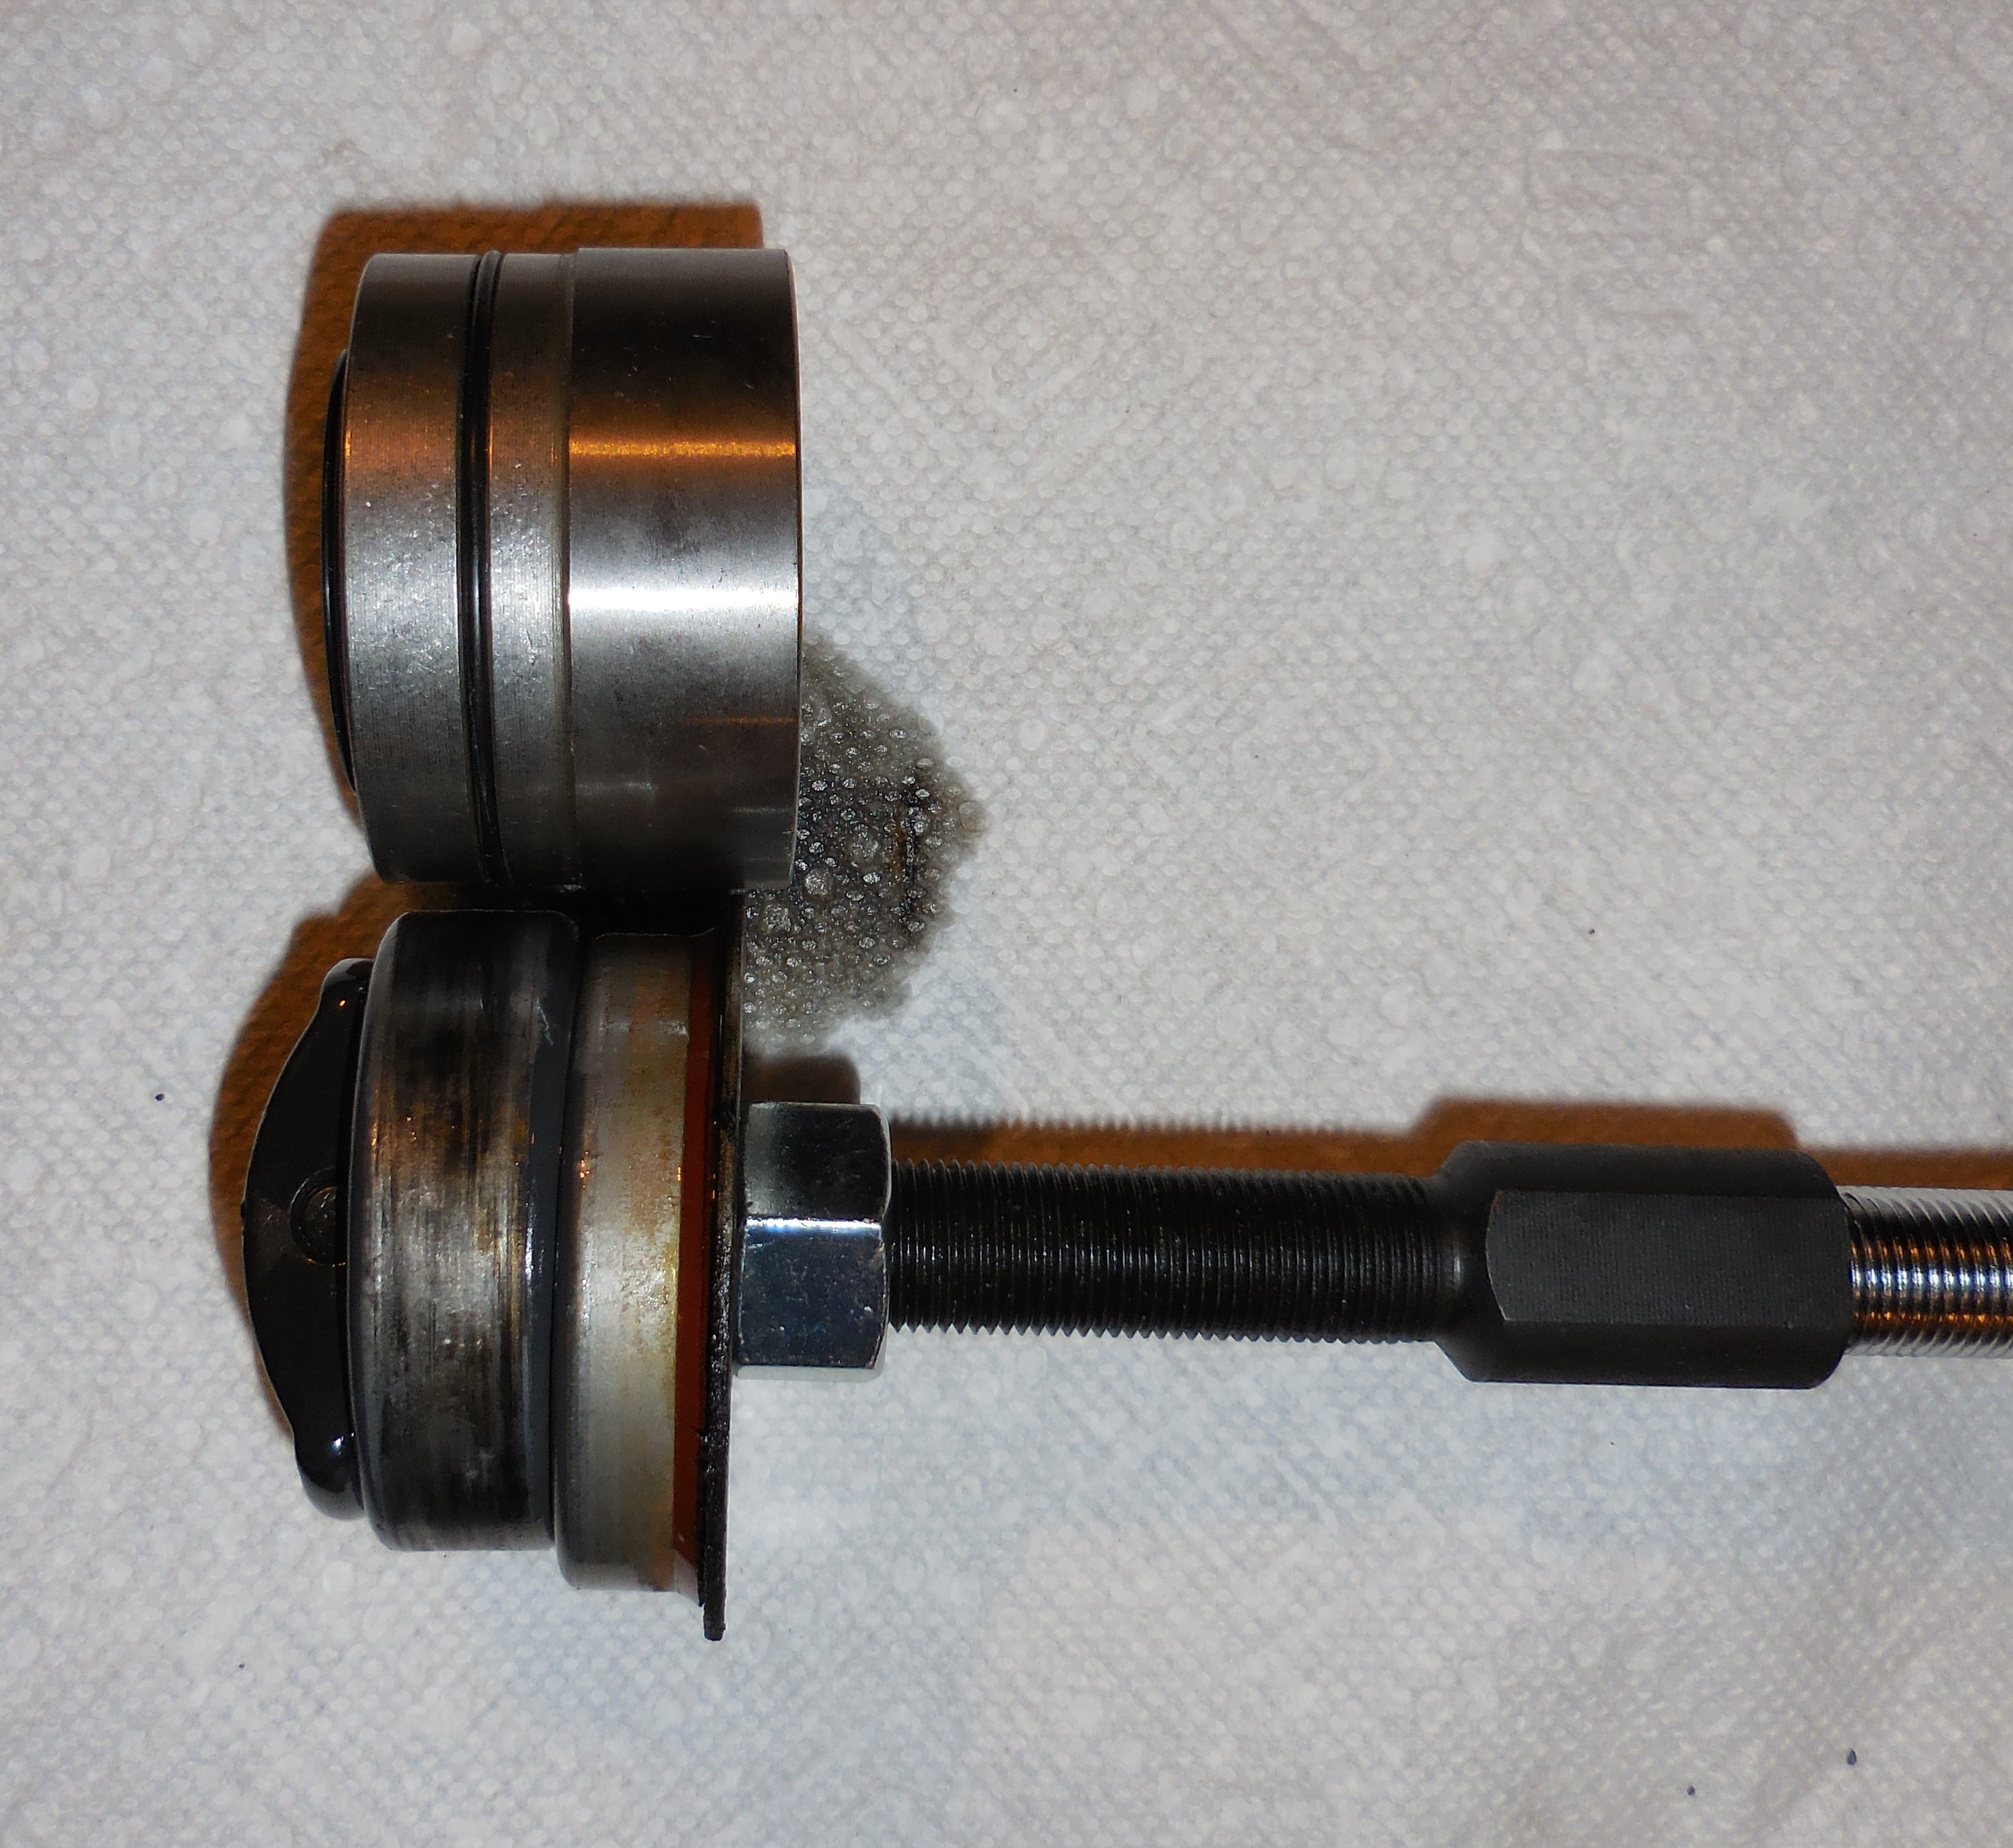
With this kind of puller, it's no work at all to remove the bearing (or, a heck of a lot less work; I've improvised pullers for this kind of repair before, and it's no fun). For this one side, I pulled the seal & bearing together, but it's really easier to pry out the seal first and remove the bearing separately. The pics below are the reason I wanted to pull one side this way.
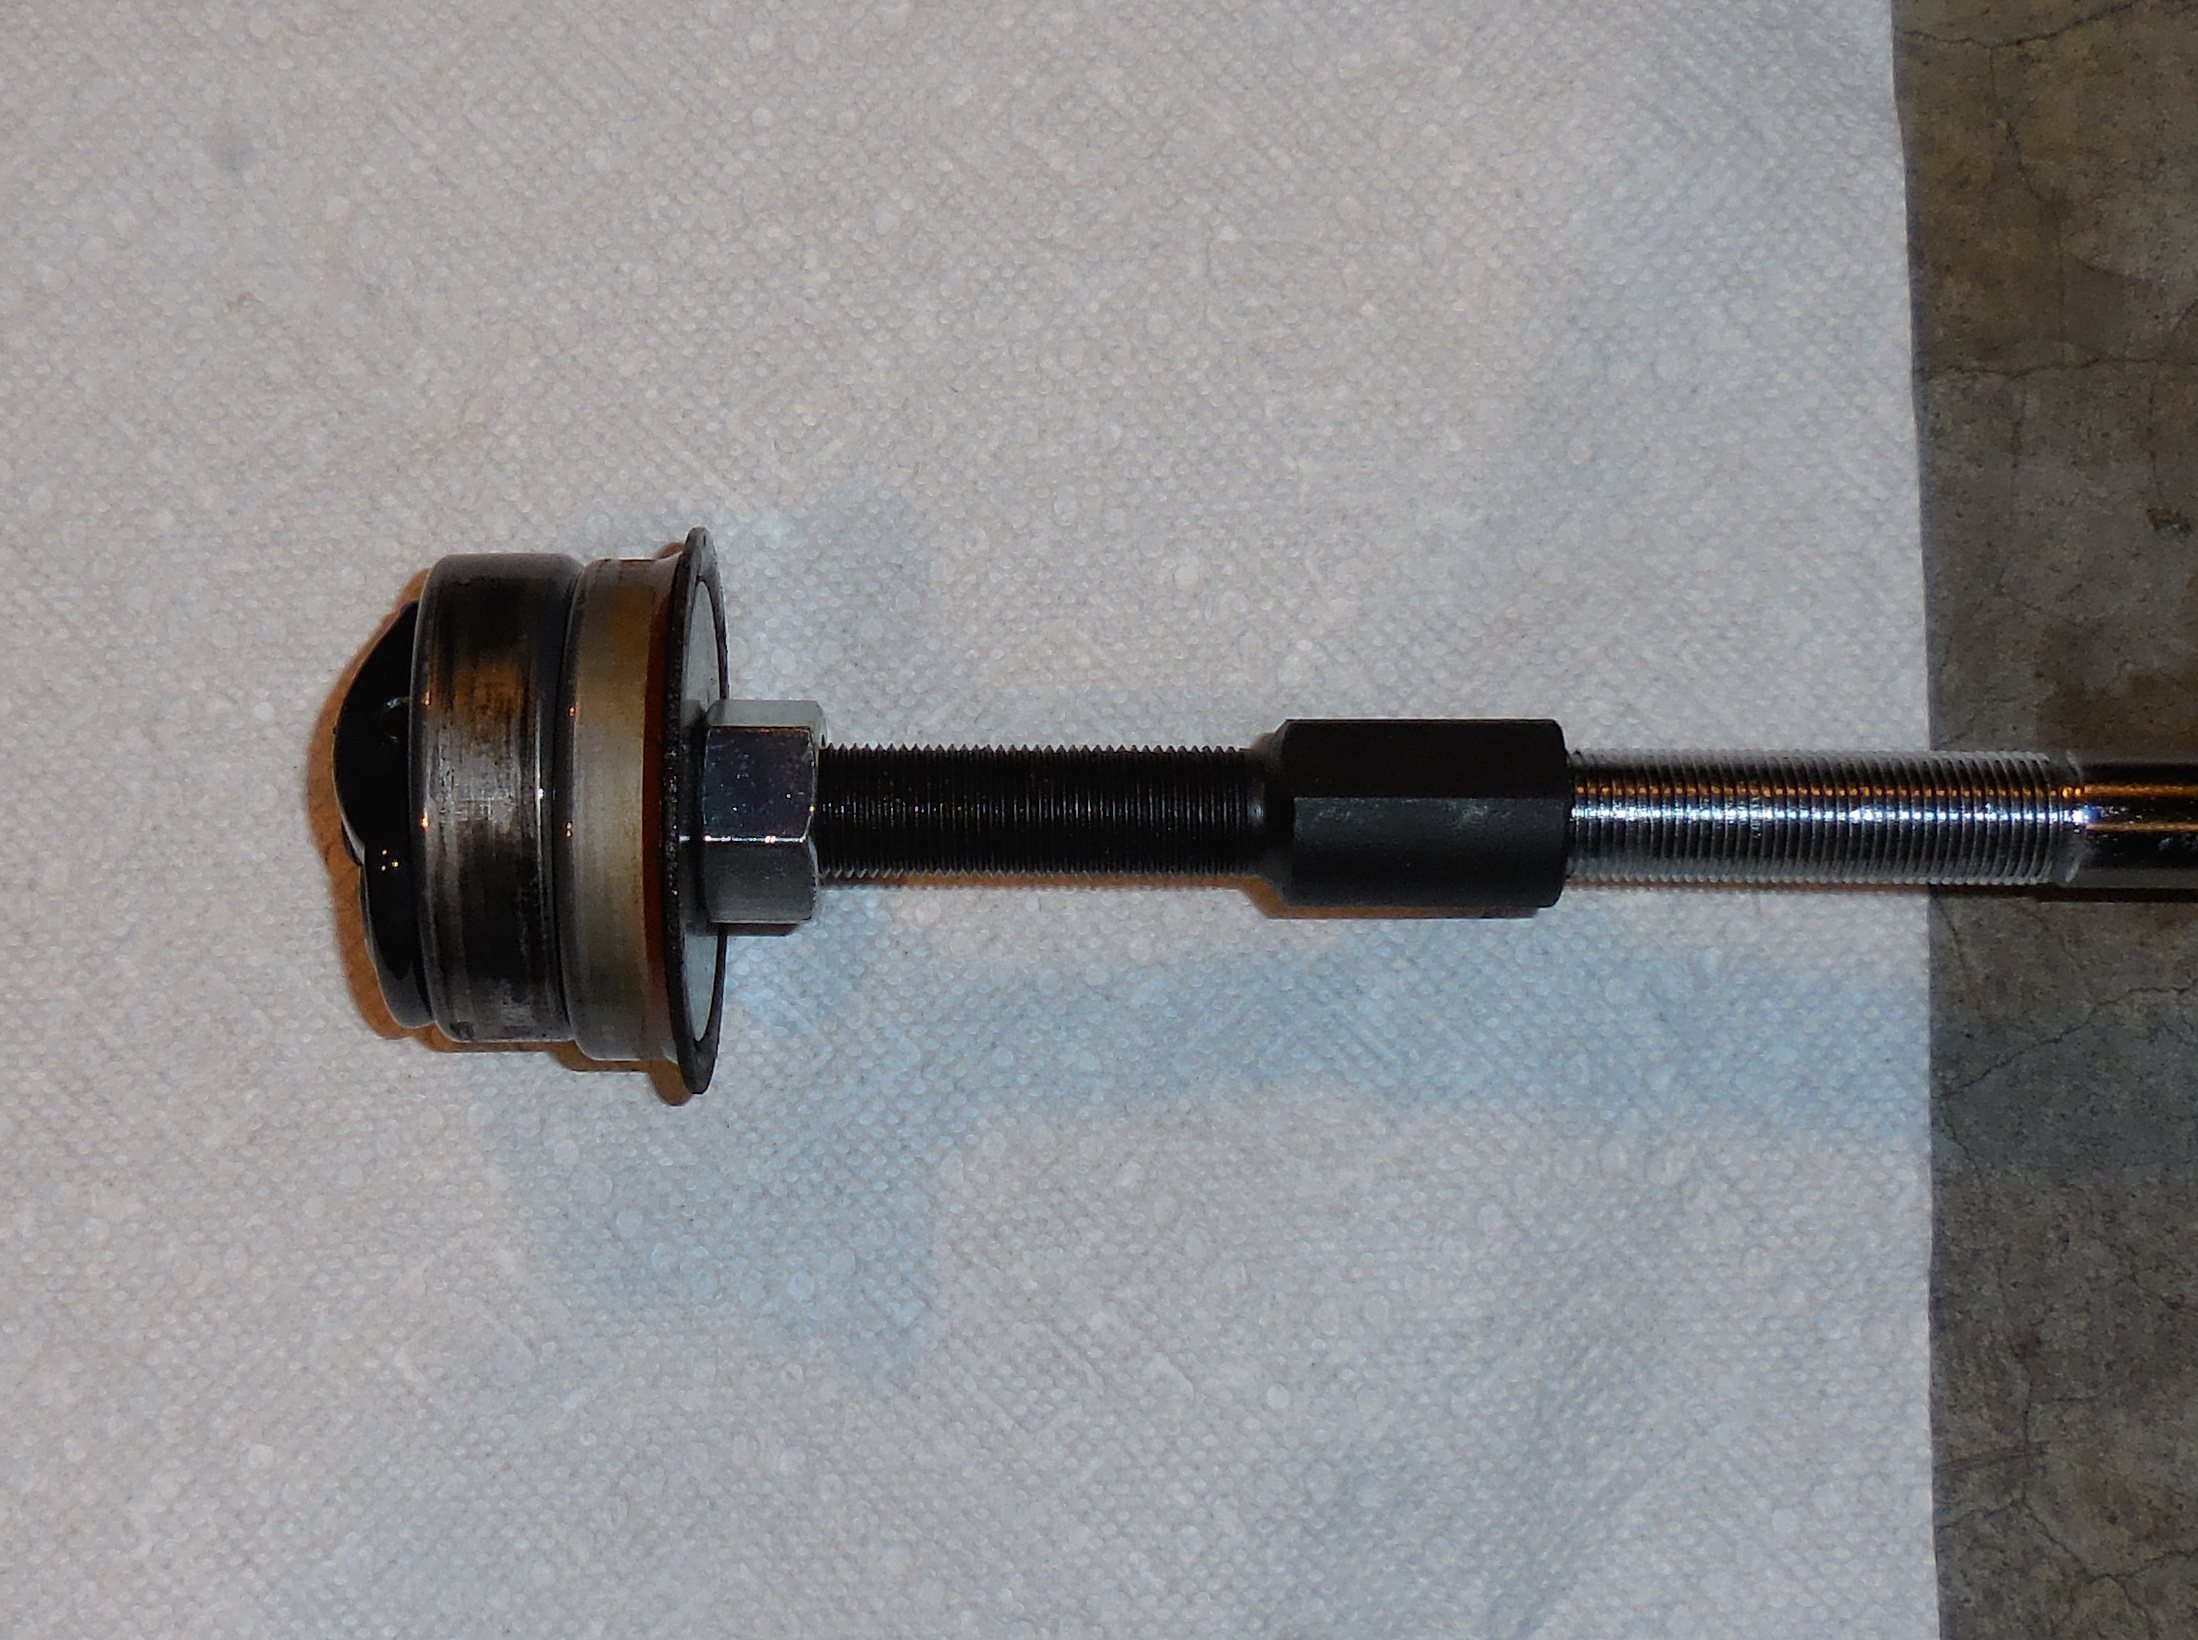
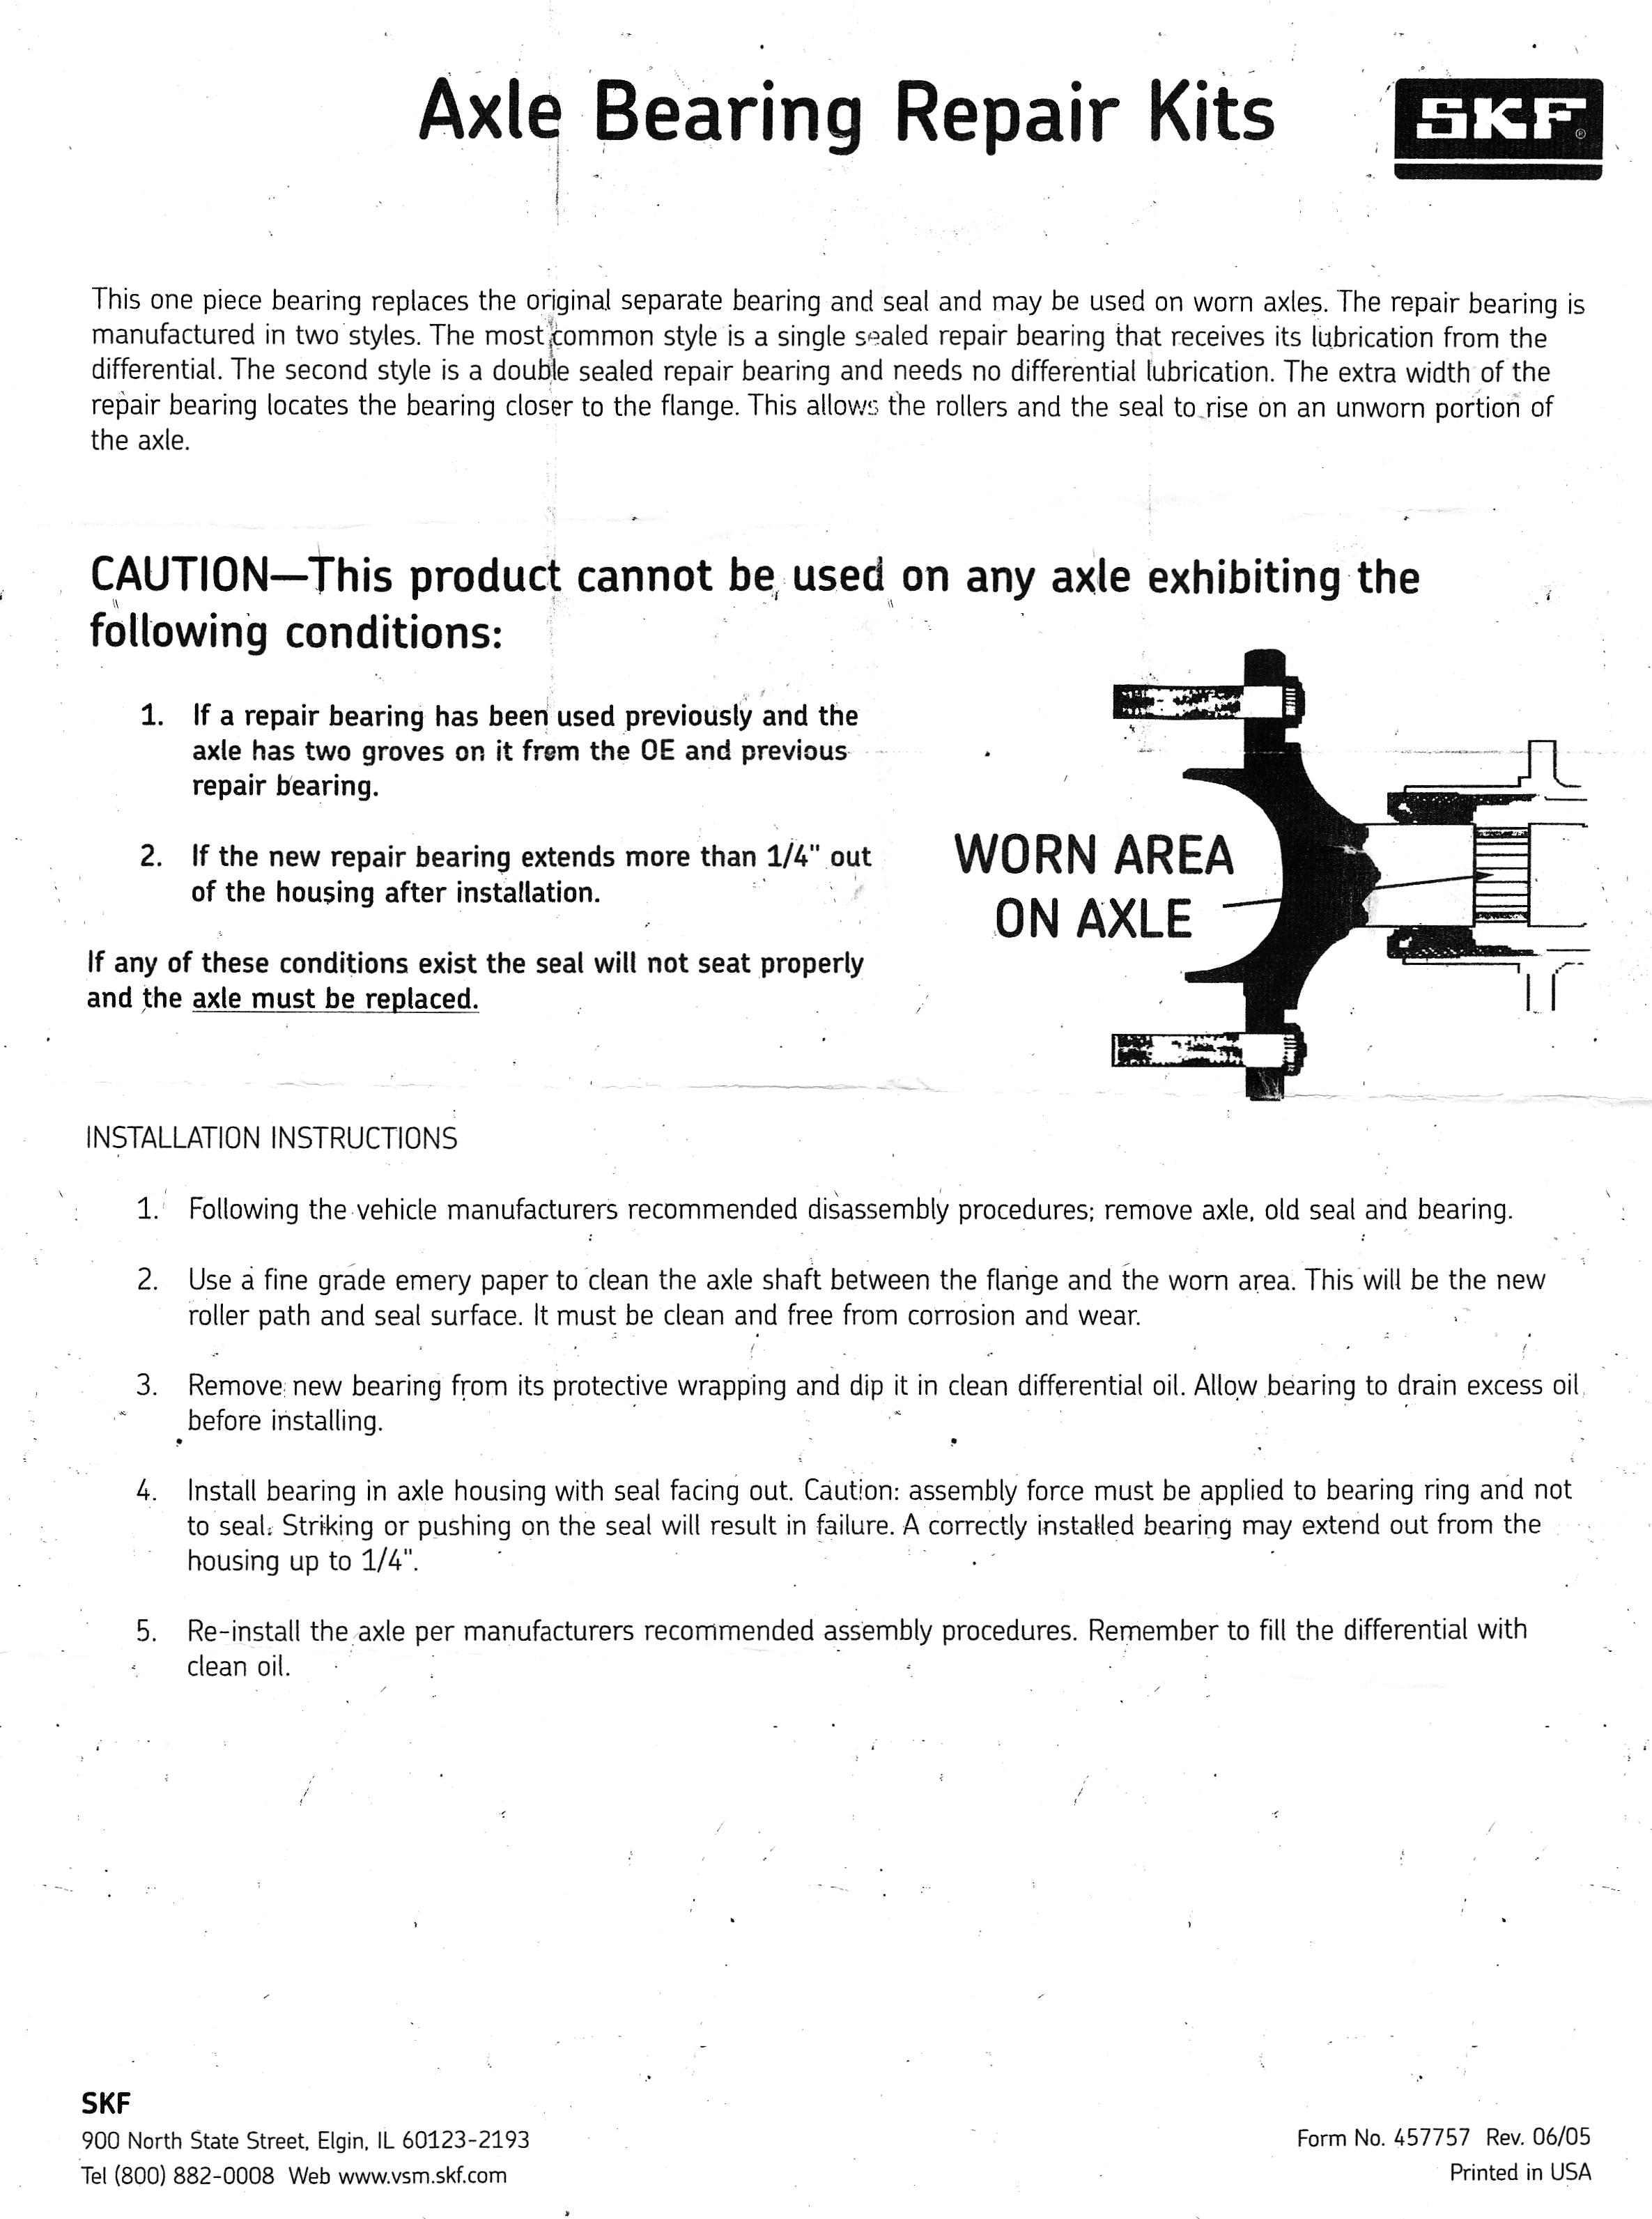
This is the repair axle bearing. It is special and different than the original bearing in that it moves the bearing about a half-inch outboard from where the old one sat, which puts the new bearing's rollers on a comparatively unworn section of the axle. Here's a comparison of the OEM setup: bearing plus separate axle seal, with a repair bearing/seal assy. next to it.
These are the repair axle bearings (two different manufacturer's packages, but purportedly both actual SKF bearings):

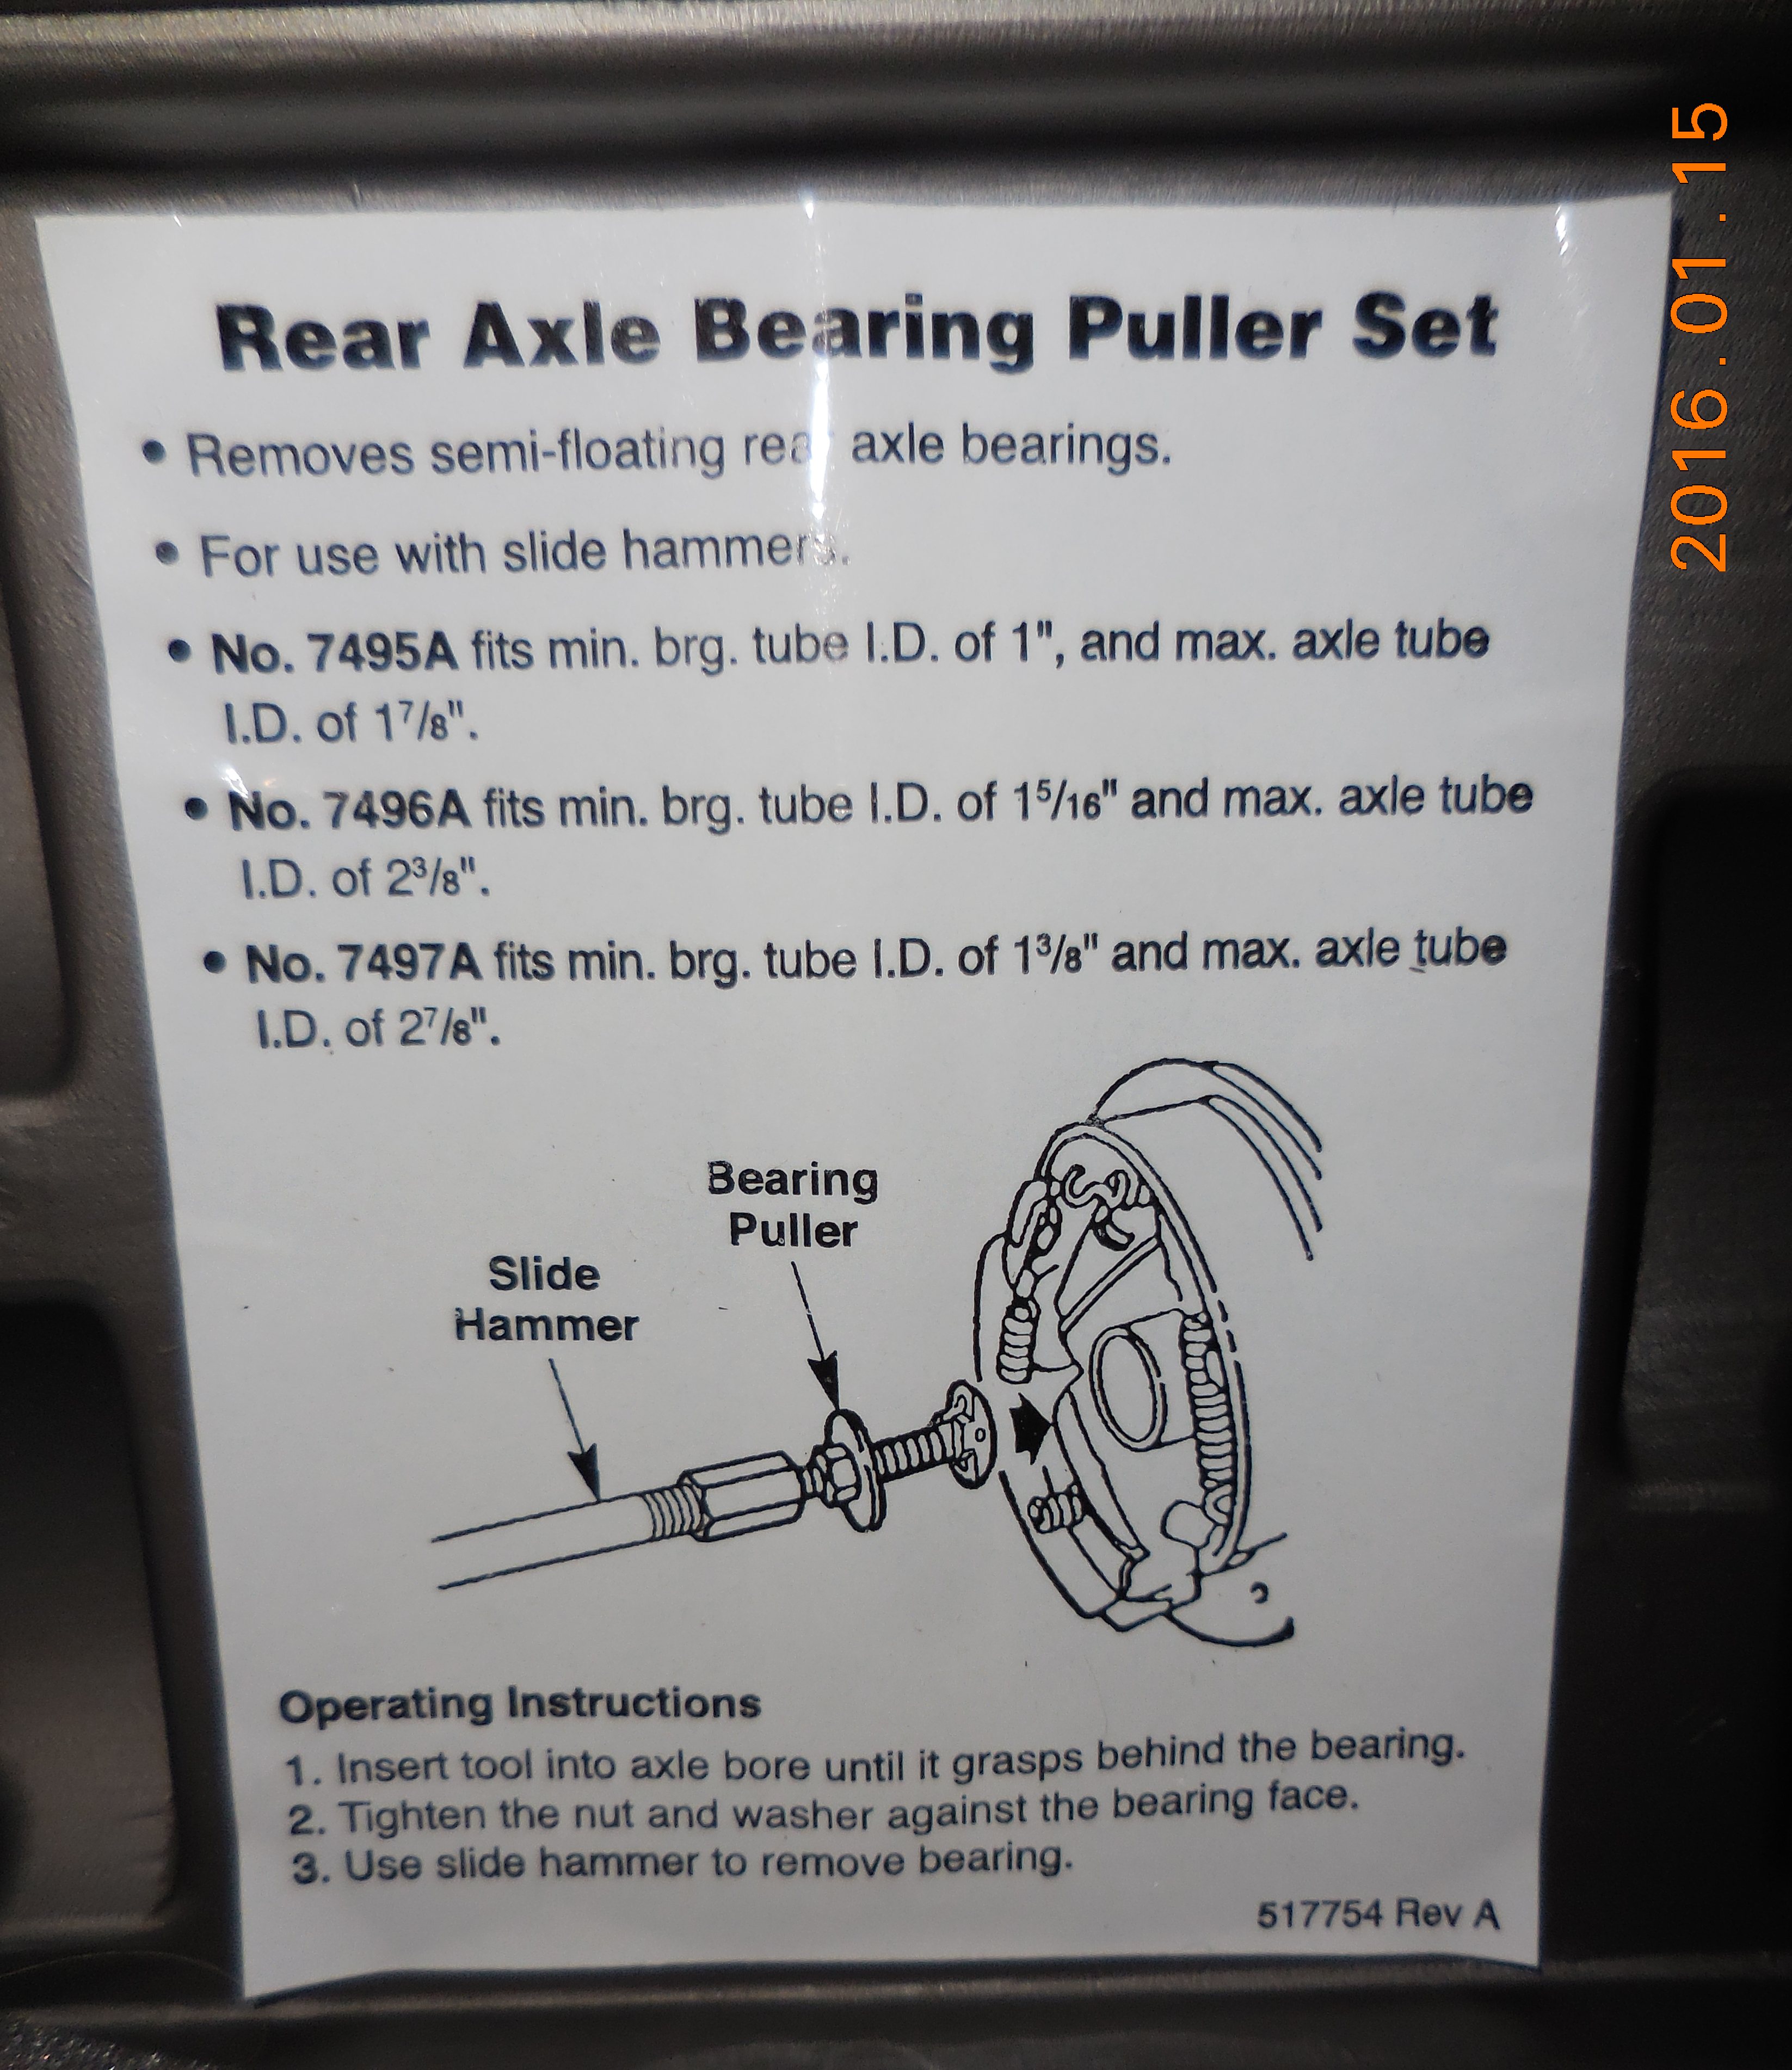
Here's the surprisingly-hard-to-find instruction sheet. You can find a form like this on SKF's site, but it doesn't include the graphic, and pictures help explain a lot.
I ran out of steam for tonight, and I need more aerosol cleaner to clean up parts tomorrow, so I'll post more later.
I'm going to add a couple of pics to Rojo's excellent collection.
His differential is the Trak-Loc, so it looks a bit different than the open diff. What follow are pics of my non-Trak-Loc diff ("open" differential). In order to be able to rotate the ring gear, and carrier, and hence the axle gears and spider gears to get at the bits you need to access, you have to have the e-brakes off, and the trans in neutral, so block your wheels accordingly.
I needed quite a bit of torque to get this bolt loosened. Note the locktite on the threads from the factory:
The bolt can't be removed, only slid back a ways, enough to clear the spiders axle. However, the axle won't come out this direction, and it does need to be removed completely. [later edit: looking at this pic again, perhaps I'm wrong: it sure looks like I could have removed that clip!]
This is as far as the spiders axle will move this direction, and that's not enough to clear the ends of the wheel axles:
Rotate the ring gear carrier and remove the spiders axle. You can slide the spiders out at this time or later, but chances are they're going to fall out at some point so you may as well do it now. The spider gears do not need to be reinstalled at their previous locations, so you don't need to mark where they go. The next pic is with the spiders axle removed, the spiders still in place, and the left wheel axle pushed inward to expose the clip. This whole section looks different if you have Trak-Loc, though the actual axle & clip are the same:
Axle clip slides right off. That's what holds the axle in. Note that the spider gears are no longer in place (top is removed, bottom is slid back); that's what I was talking about above. Removing the right axle clip is the same as the left.
With the axle clips removed, here's the right axle slid out a few inches, illustrating the brinnelled bearing surface.
The left axle fared much better, but still has a bad patch. It's useless to put a new bearing against this surface.
Left side brakes with axle removed. Evidence of gear lubricant, this side was leaking.
I used an OTC 7948 slide hammer puller set plus an OTC 7494A Rear Axle Bearing set accessory to remove both axle bearings. I'm a tool junky; I've wanted these pullers for years but have been able to get by without. This time, I planned ahead and bought them, about $270 for both. I suggest renting if you only do this sort of thing casually.
Usually, you'd remove the axle seal, then use this gizmo to hook the slide hammer behind the bearing, then apply the slide hammer. BTW, the smallest bearing adapter is the only one in the set that will work for this job: OTC 7495A.
I did this pull with the axle seal in place; normally, you would remove the seal first. It's an easier pull with the seal already removed.
With this kind of puller, it's no work at all to remove the bearing (or, a heck of a lot less work; I've improvised pullers for this kind of repair before, and it's no fun). For this one side, I pulled the seal & bearing together, but it's really easier to pry out the seal first and remove the bearing separately. The pics below are the reason I wanted to pull one side this way.
This is the repair axle bearing. It is special and different than the original bearing in that it moves the bearing about a half-inch outboard from where the old one sat, which puts the new bearing's rollers on a comparatively unworn section of the axle. Here's a comparison of the OEM setup: bearing plus separate axle seal, with a repair bearing/seal assy. next to it.
These are the repair axle bearings (two different manufacturer's packages, but purportedly both actual SKF bearings):
Here's the surprisingly-hard-to-find instruction sheet. You can find a form like this on SKF's site, but it doesn't include the graphic, and pictures help explain a lot.
I ran out of steam for tonight, and I need more aerosol cleaner to clean up parts tomorrow, so I'll post more later.
Last edited by asavage; Jan 19, 2016 at 01:09 PM. Reason: Add SKF part No.; change "right" to "left" on one axle description.
Lead Driver

Joined: Sep 2003
Posts: 7,018
Likes: 210
From: SoCal

Some time ago I read the instructions for taking out the axle shafts, and the first thing they tell you is to hit the bolt with a blow torch for a few seconds to soften the thread lock. Otherwise, many people have rounded off the head of the bolt and still not been able to remove it.
I did my 8.8" traction-lok many years ago, but I don't recall having trouble removing the bolt. I think I had to rotate the diff until the bolt cleared the bearing retainers. The trac-lok clutch kit came with a new bolt, and it would have to go in the same way the old one would come out, only in reverse.
I did my 8.8" traction-lok many years ago, but I don't recall having trouble removing the bolt. I think I had to rotate the diff until the bolt cleared the bearing retainers. The trac-lok clutch kit came with a new bolt, and it would have to go in the same way the old one would come out, only in reverse.
Trending Topics
FTE Community Team
Joined: Nov 2001
Posts: 1,867
Likes: 275
From: Oak Harbor, Washington
While I didn't try real hard, a casual look didn't find me a position where I could completely remove the lock pin bolt. Since I didn't need to completely remove it, I stopped trying.
I used a 6-point 8mm wrench and while I did have to use considerable force, I didn't have any trouble loosening nor tightening.
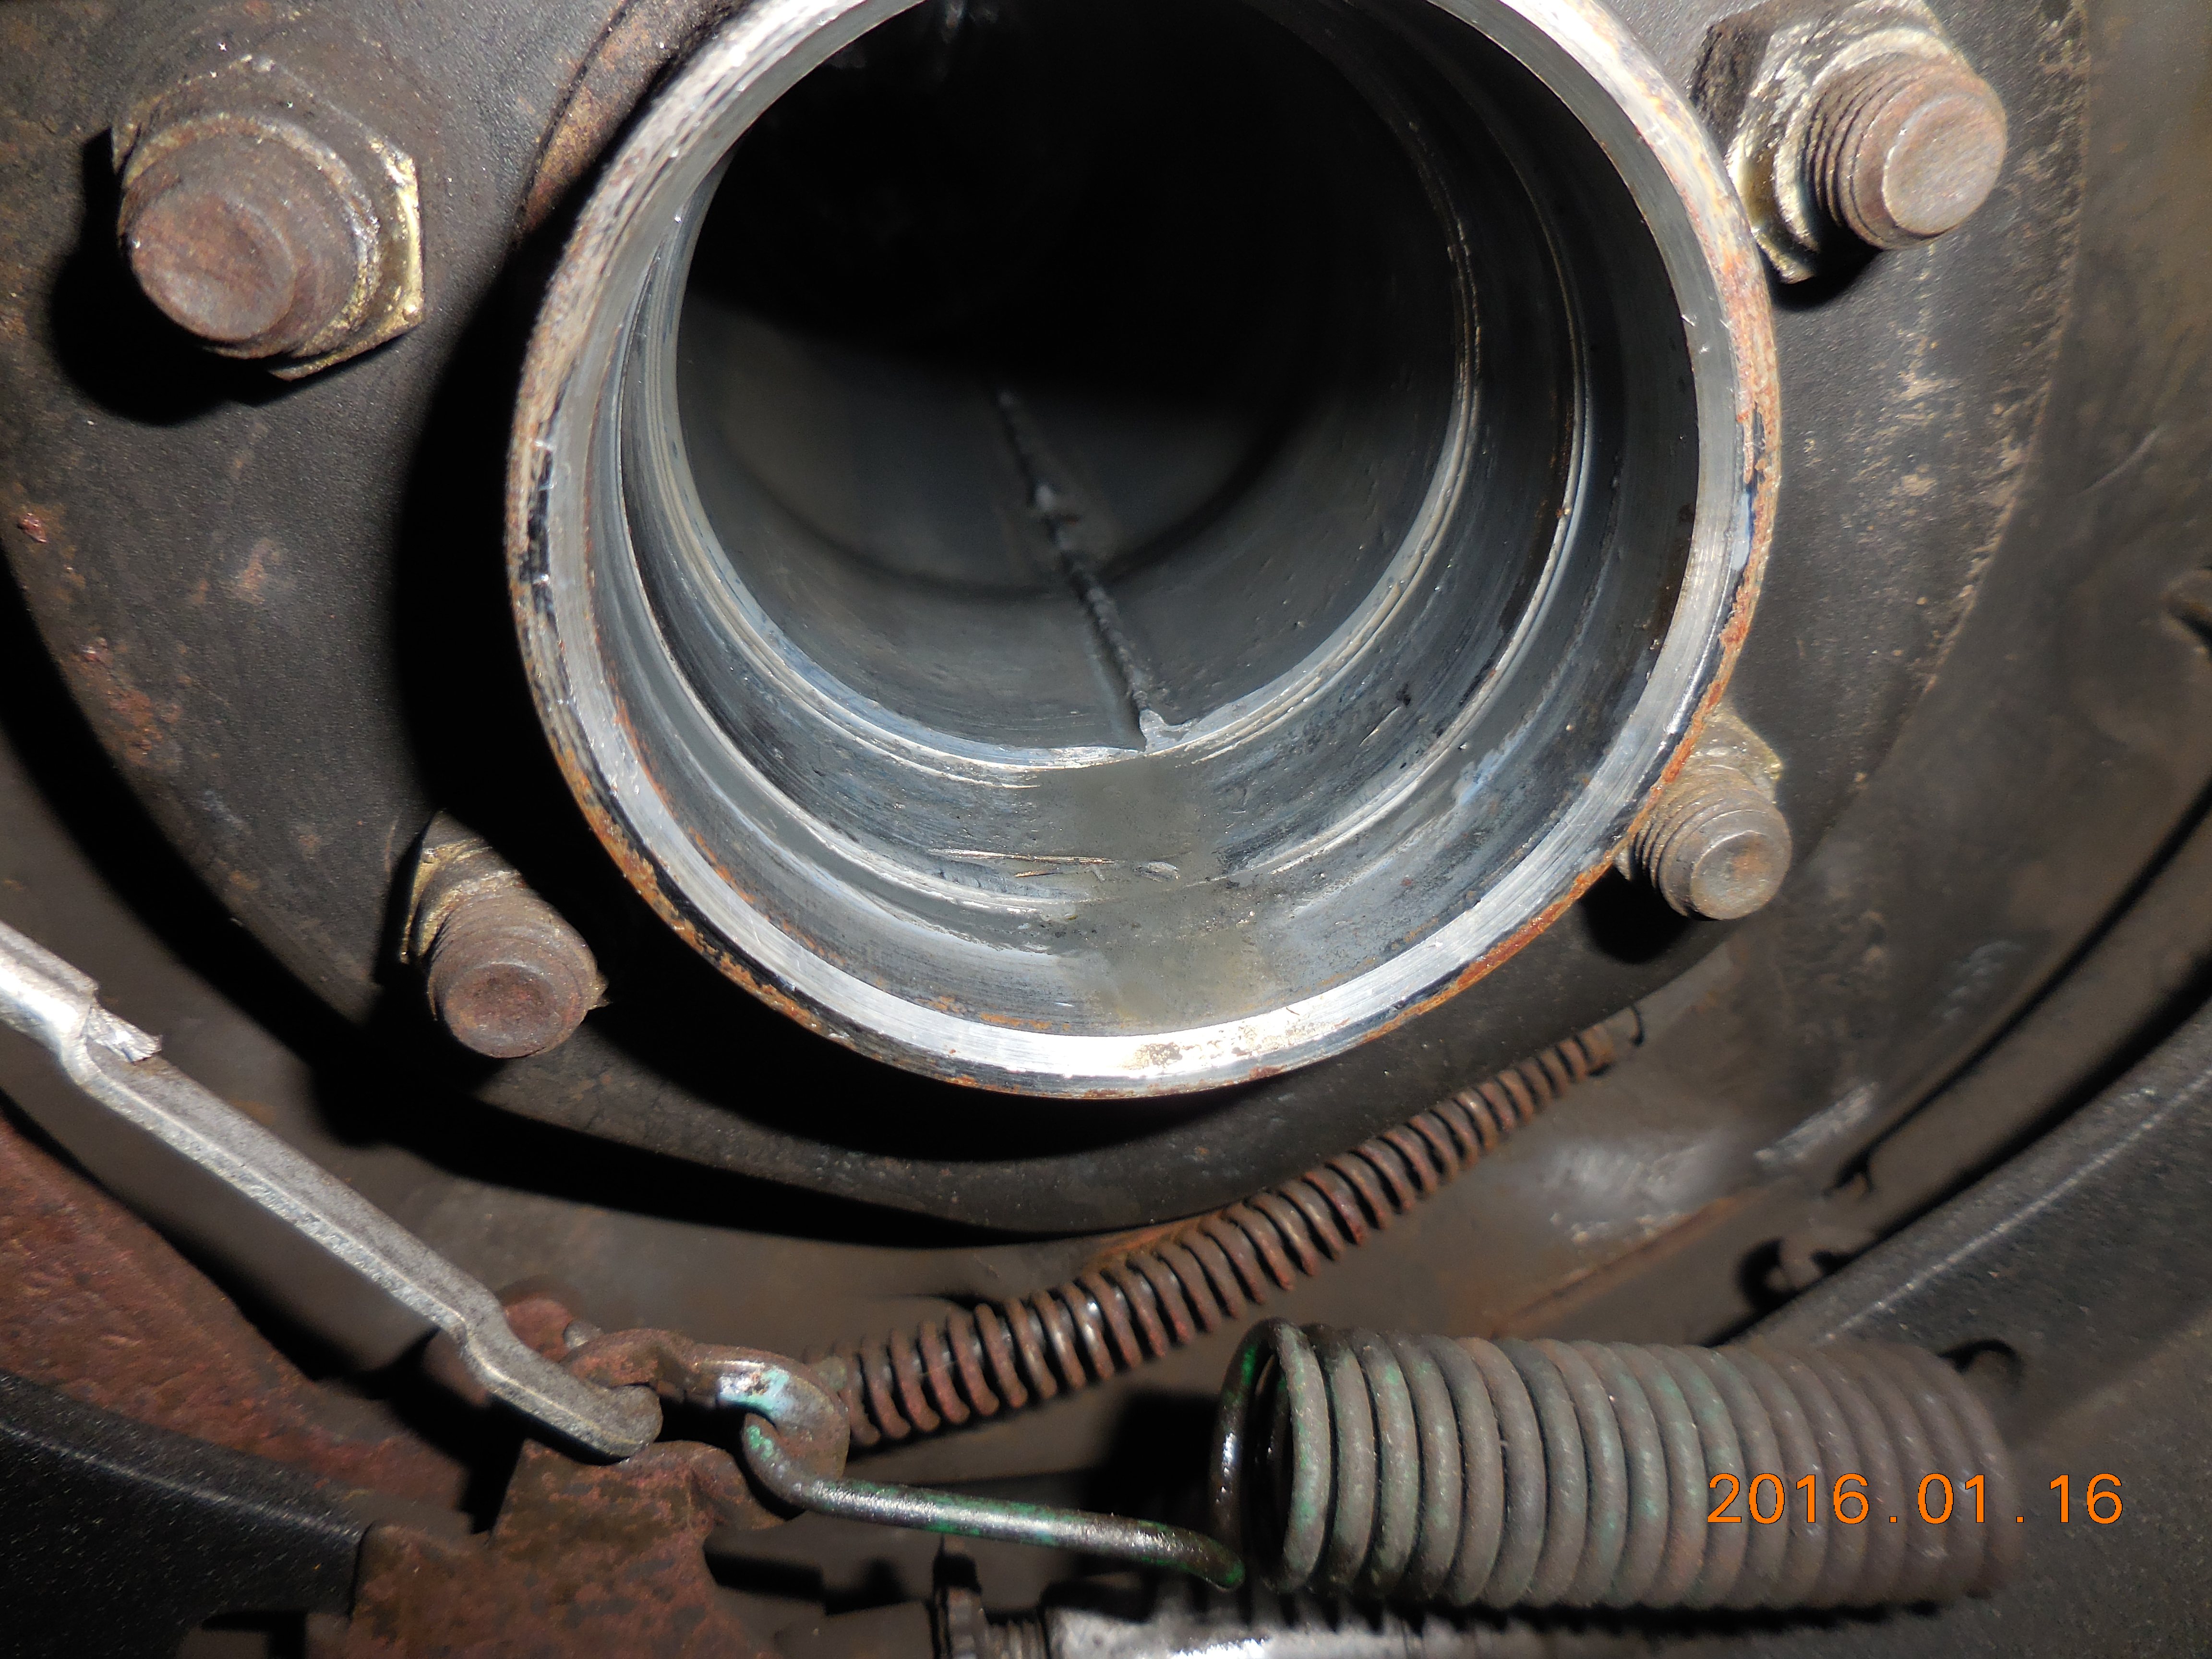
On the right side, there was considerable metal chaff from the axle's bearing surface to clean:
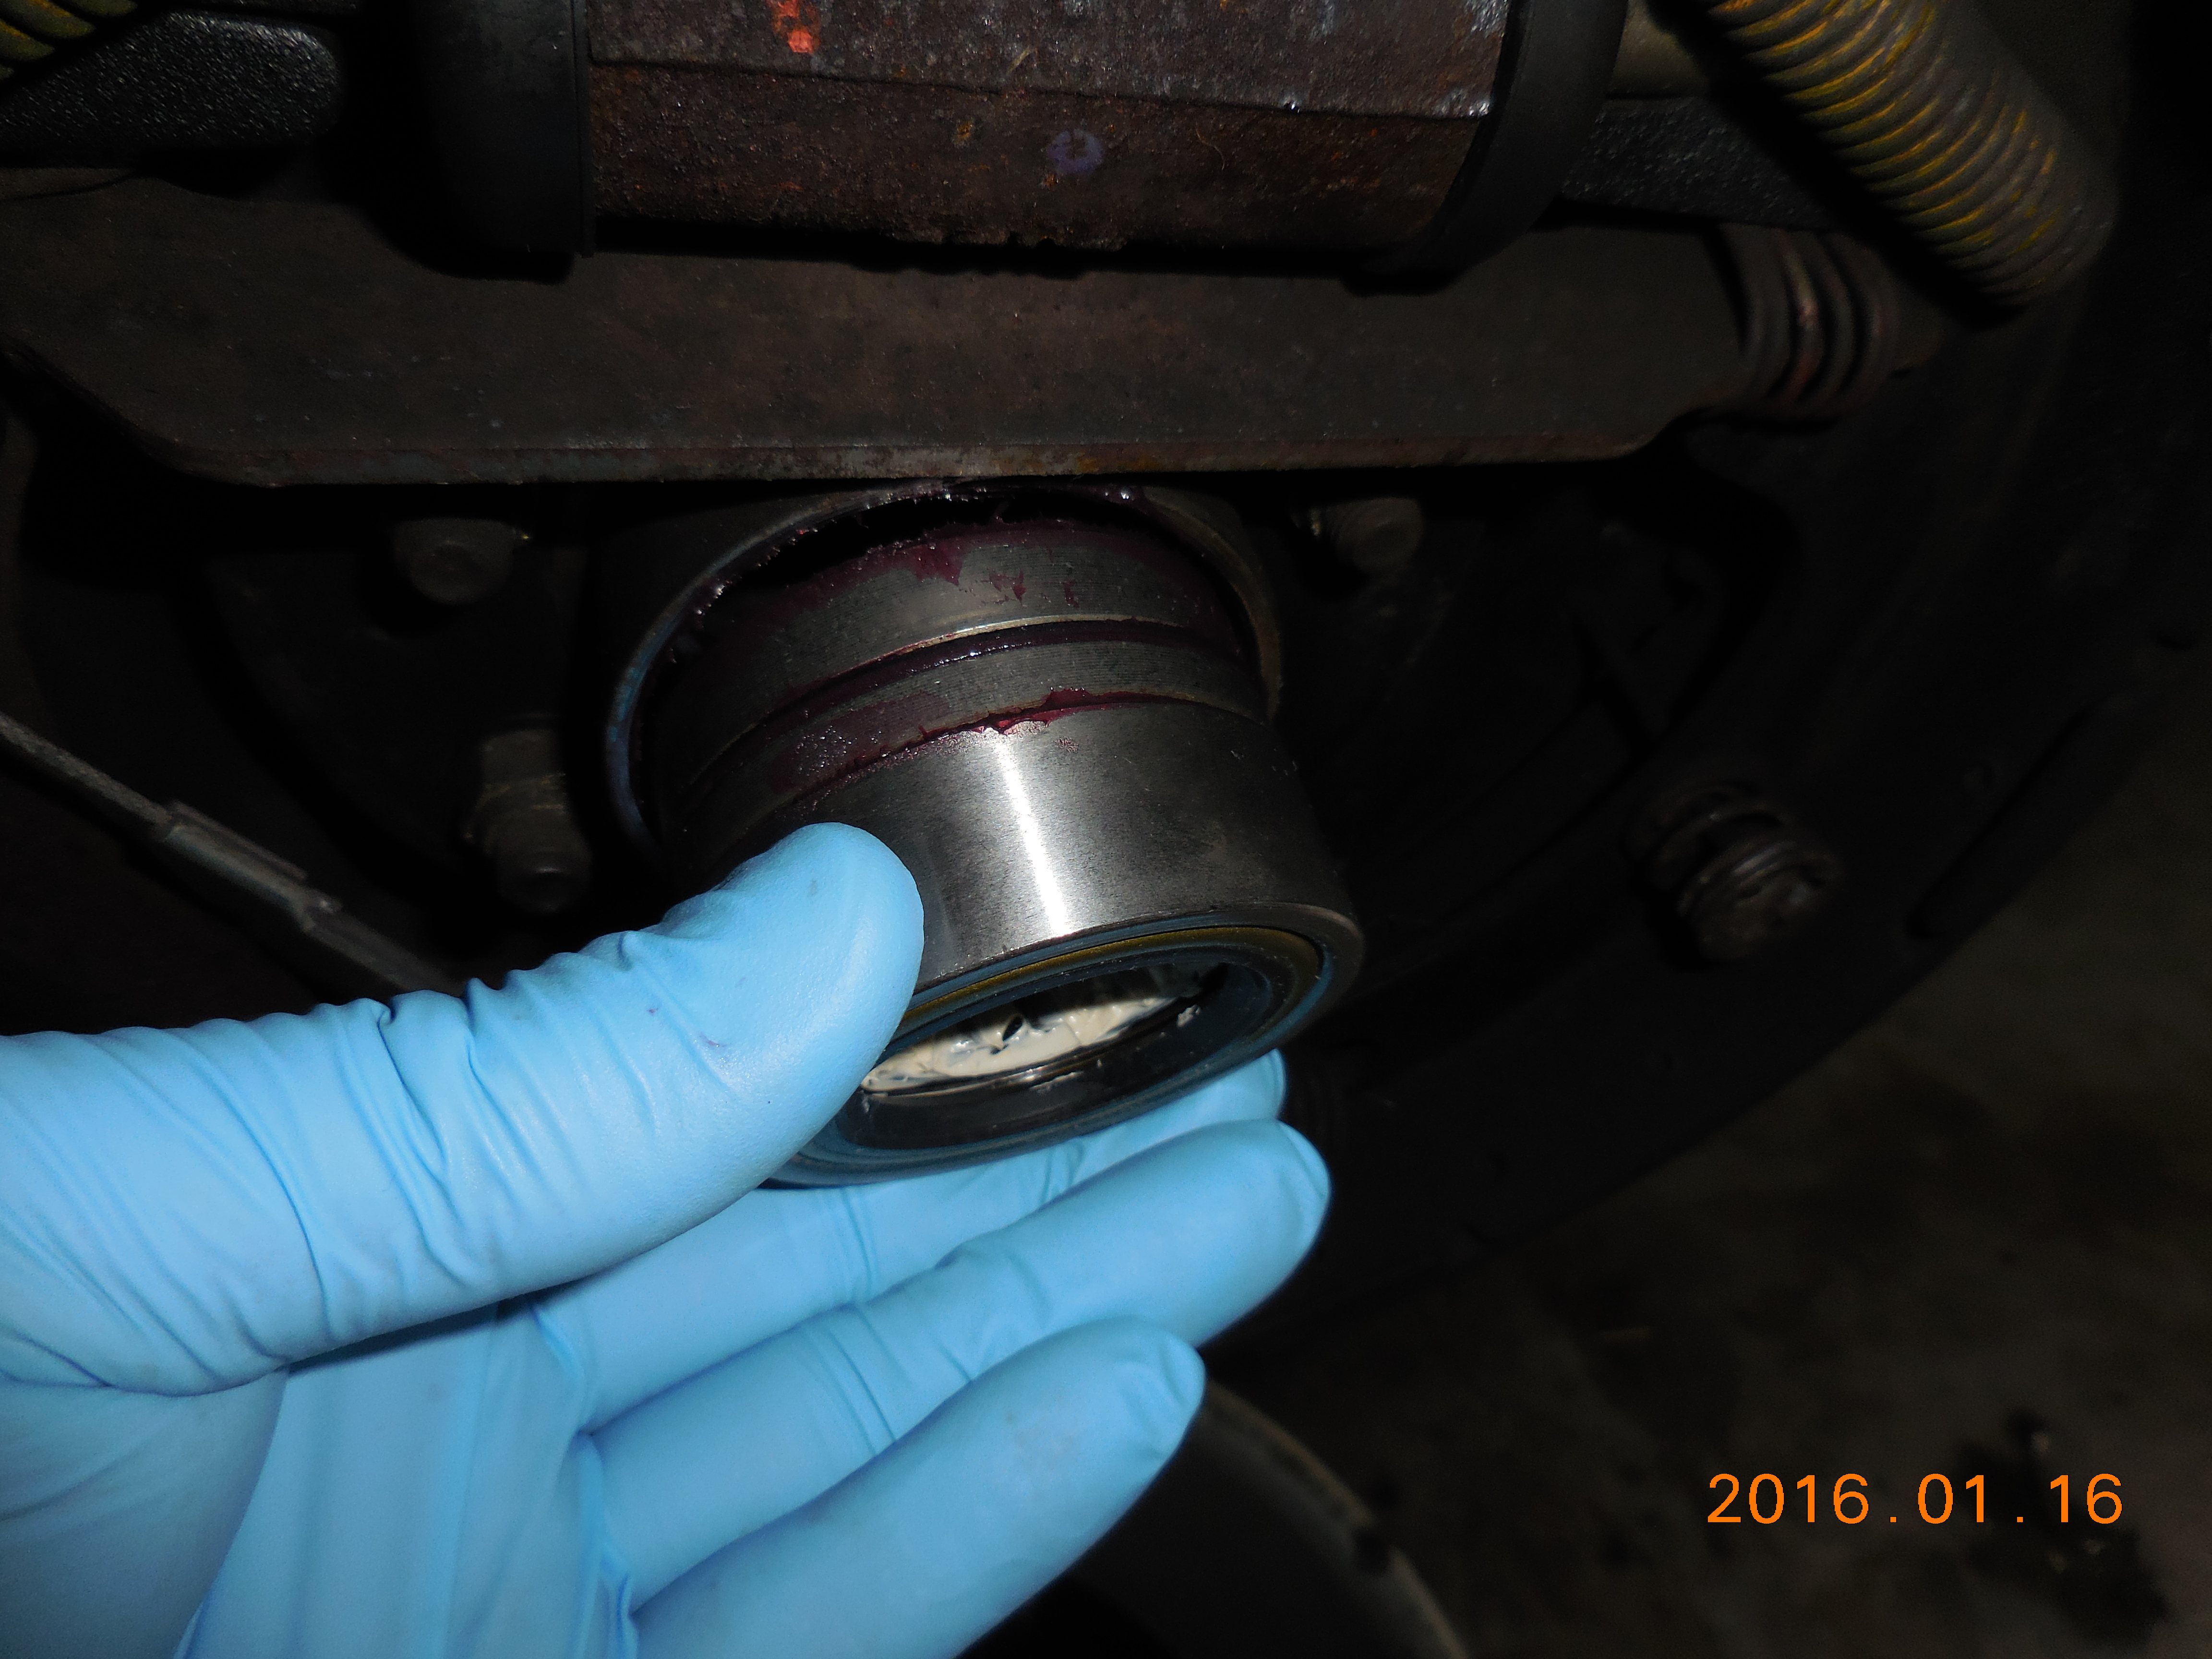
The SKF R1563 is a dual-seal unit: a seal on both sides, and lubricated exclusively by the grease placed at installation. The other bearing I purchased is a "Made in USA" no-name and does not have the inner seal, so it's designed to be lubricated by the diff oil. This is the SKF:

With the axle housing cleaned of the metal debris, then coated with grease, I offer up the SKF:
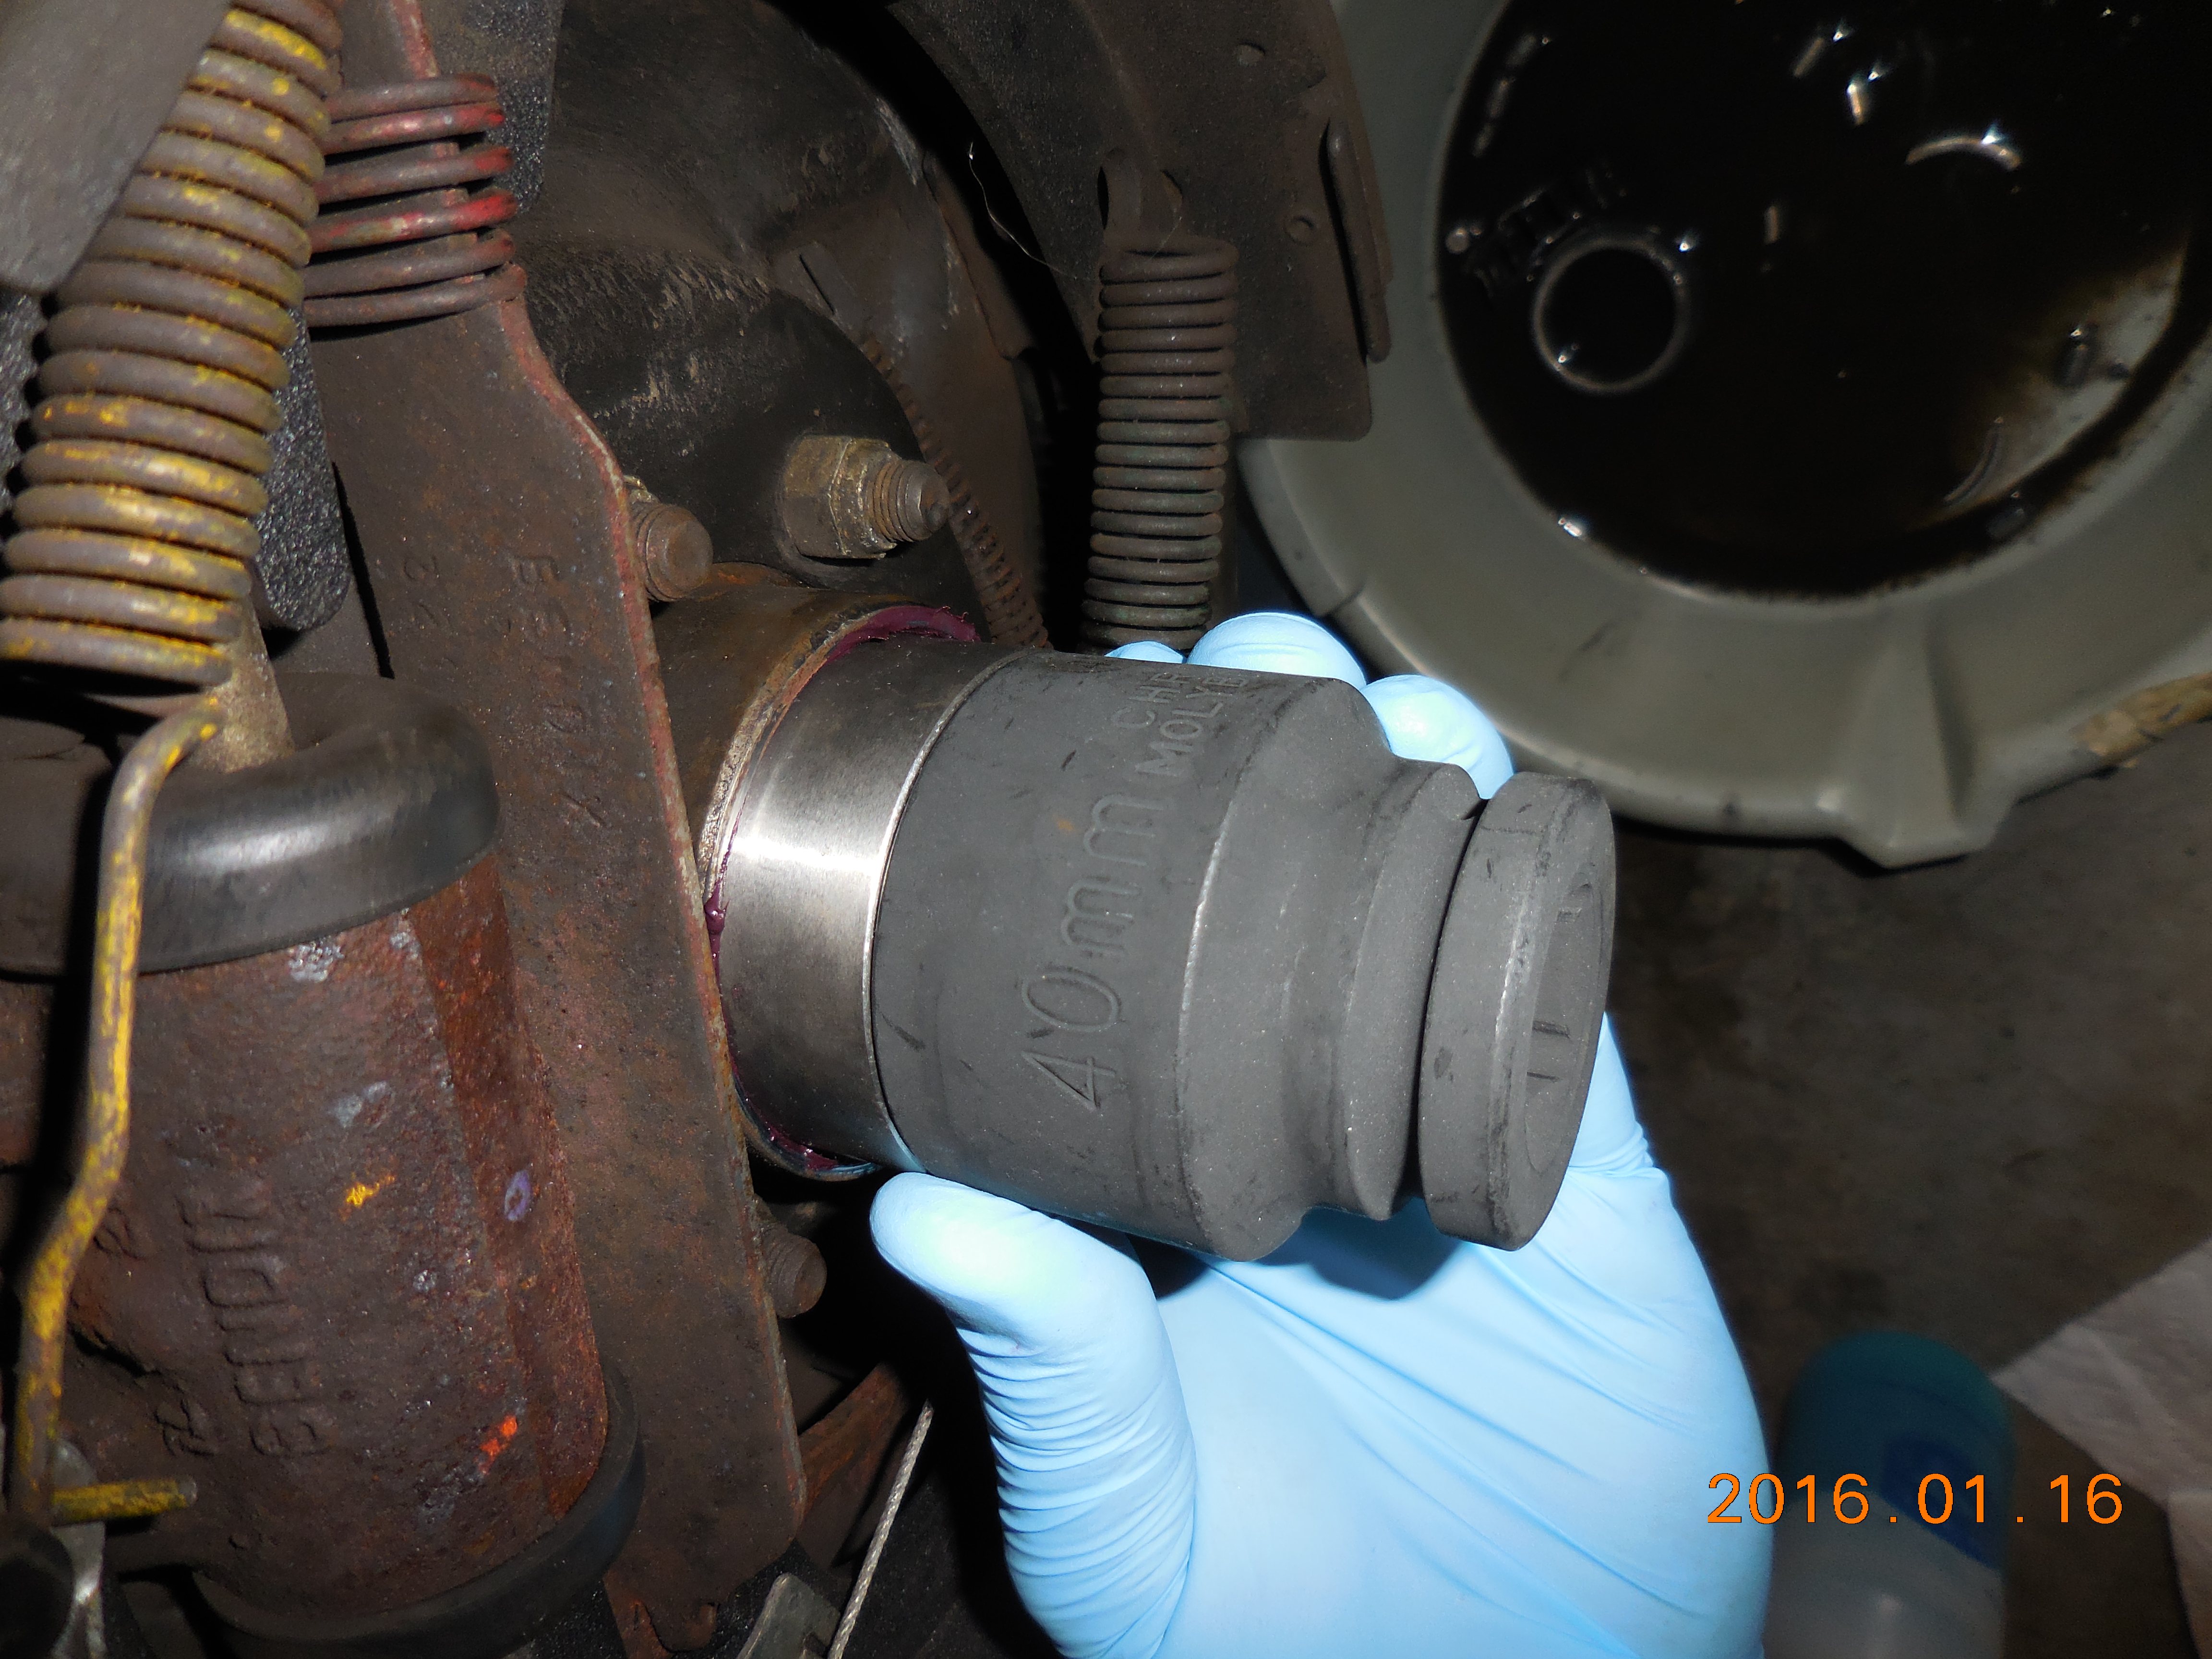
I was unable to find my bearing driver set, so I picked up a non-name impact socket at the local FLAPS for $15 and beat on it instead. The 40mm version of this socket was a perfect OD to prevent seal damage:
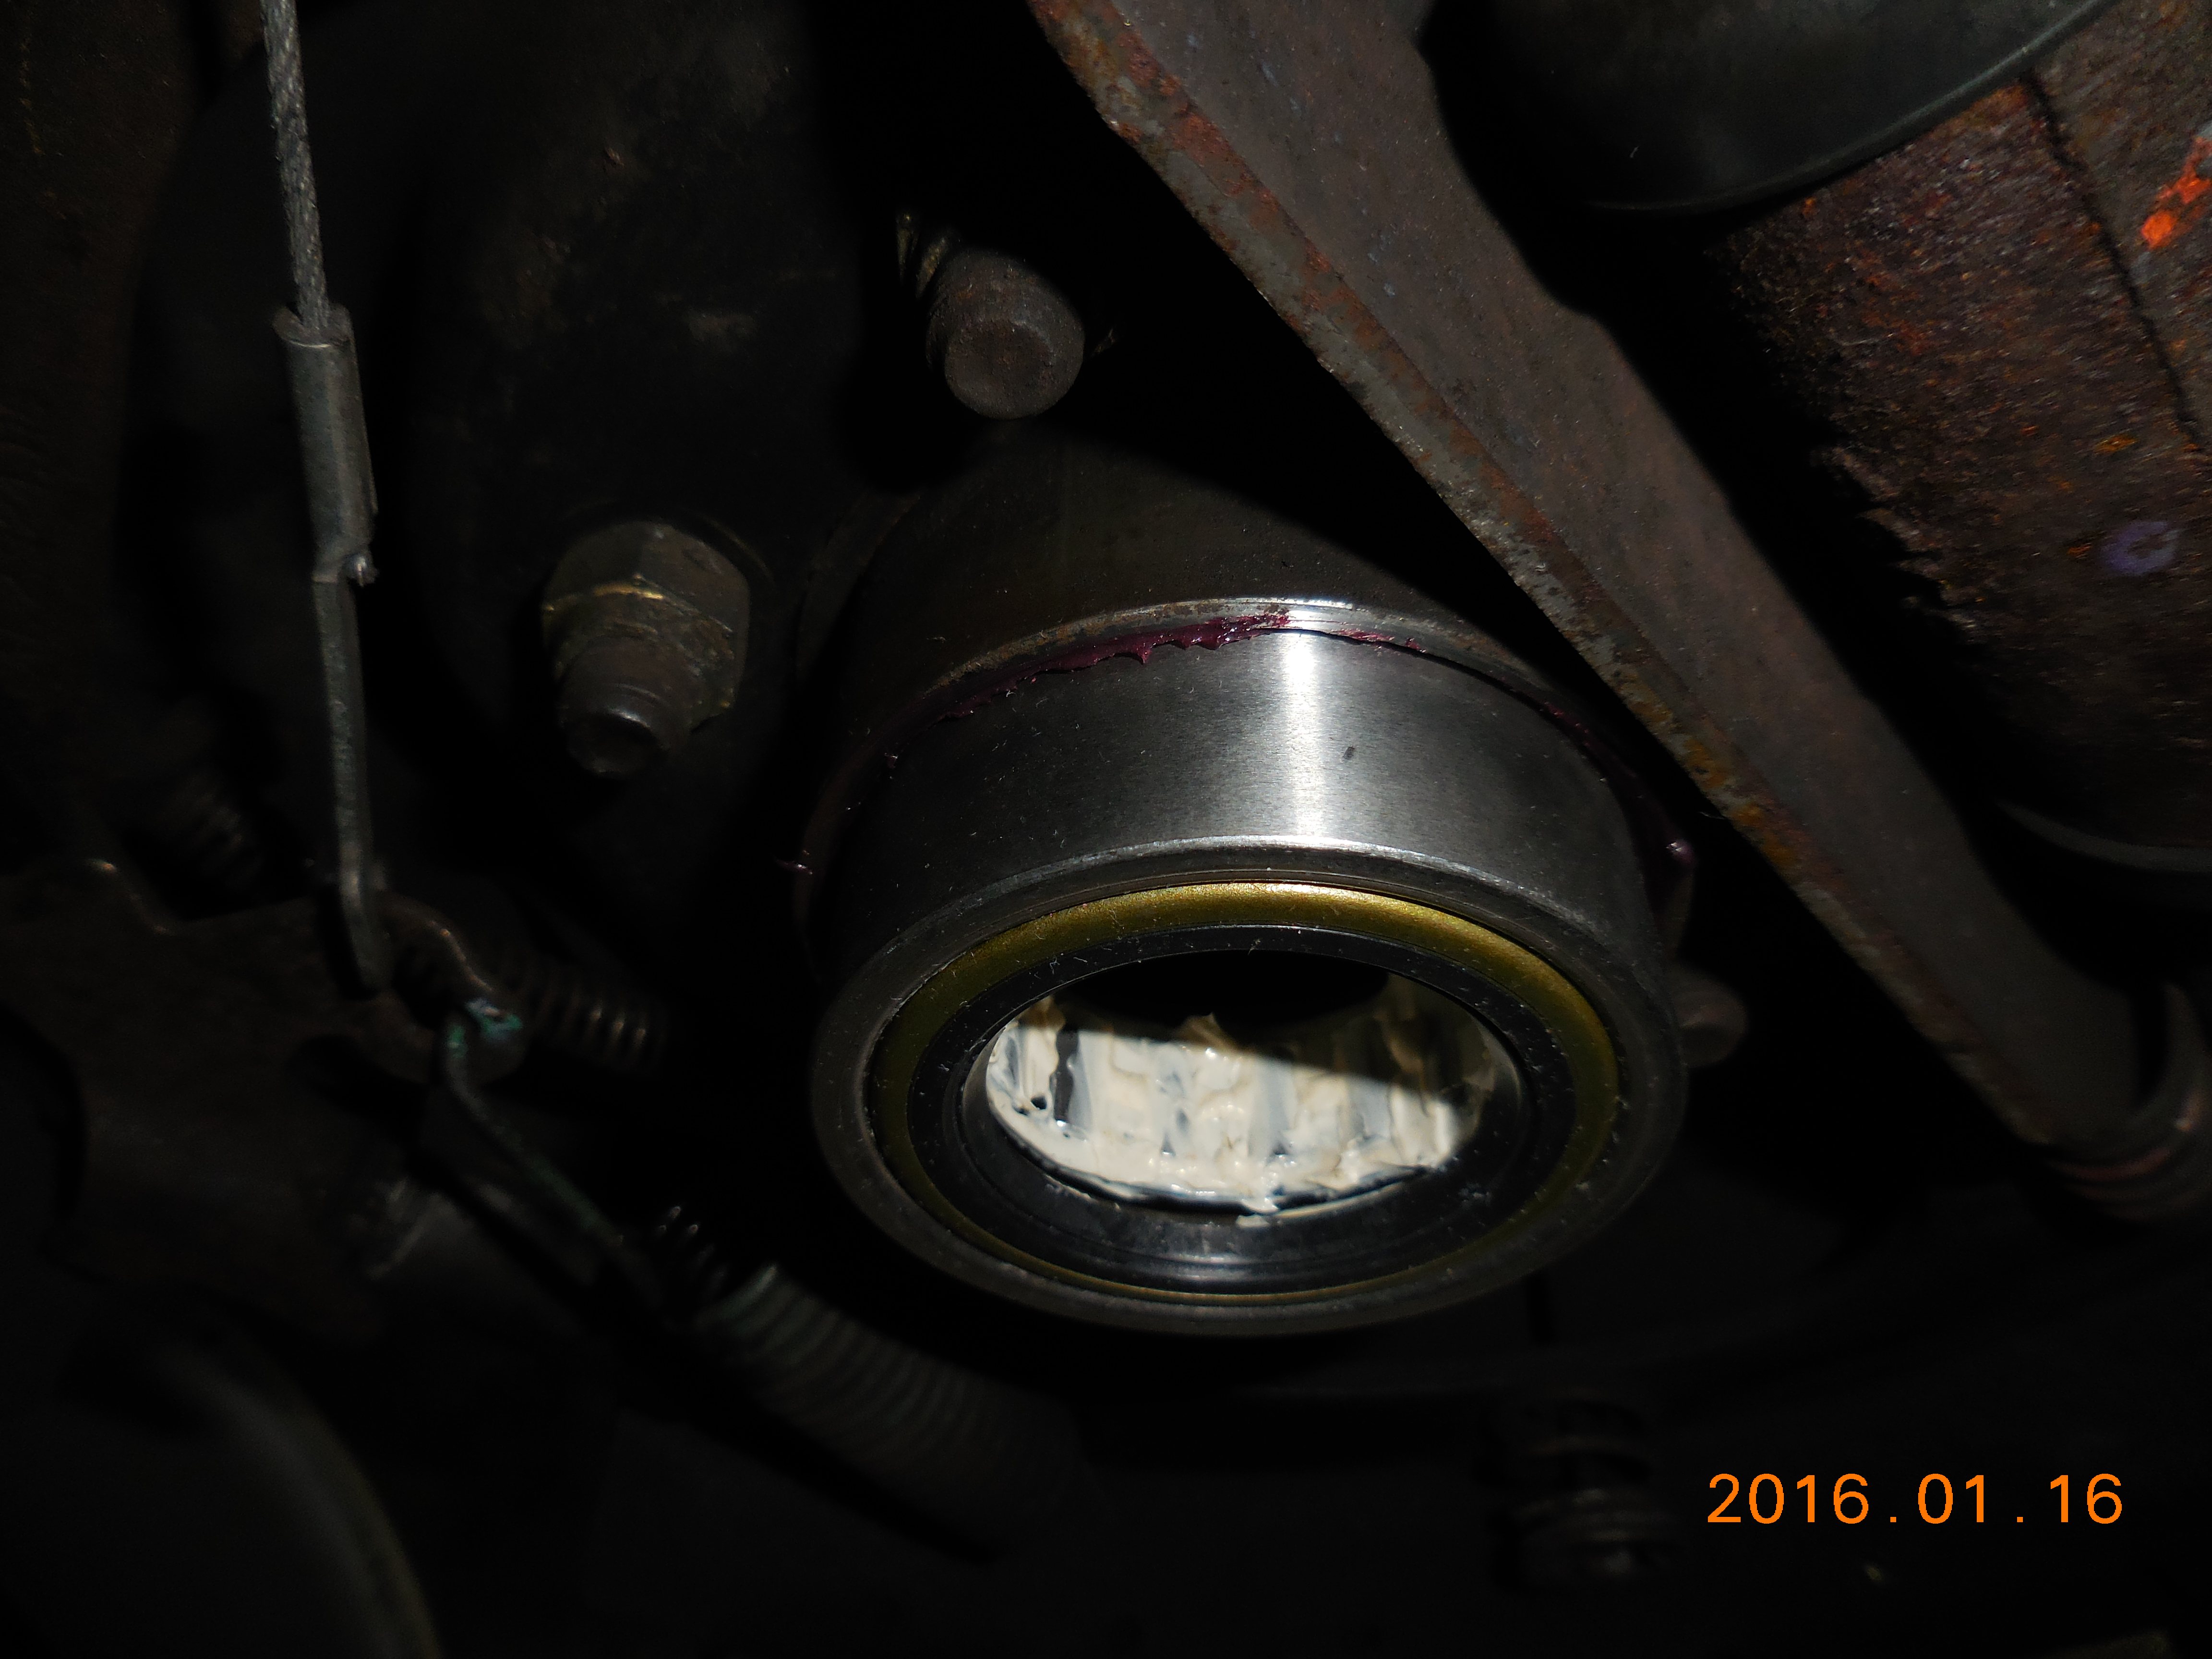
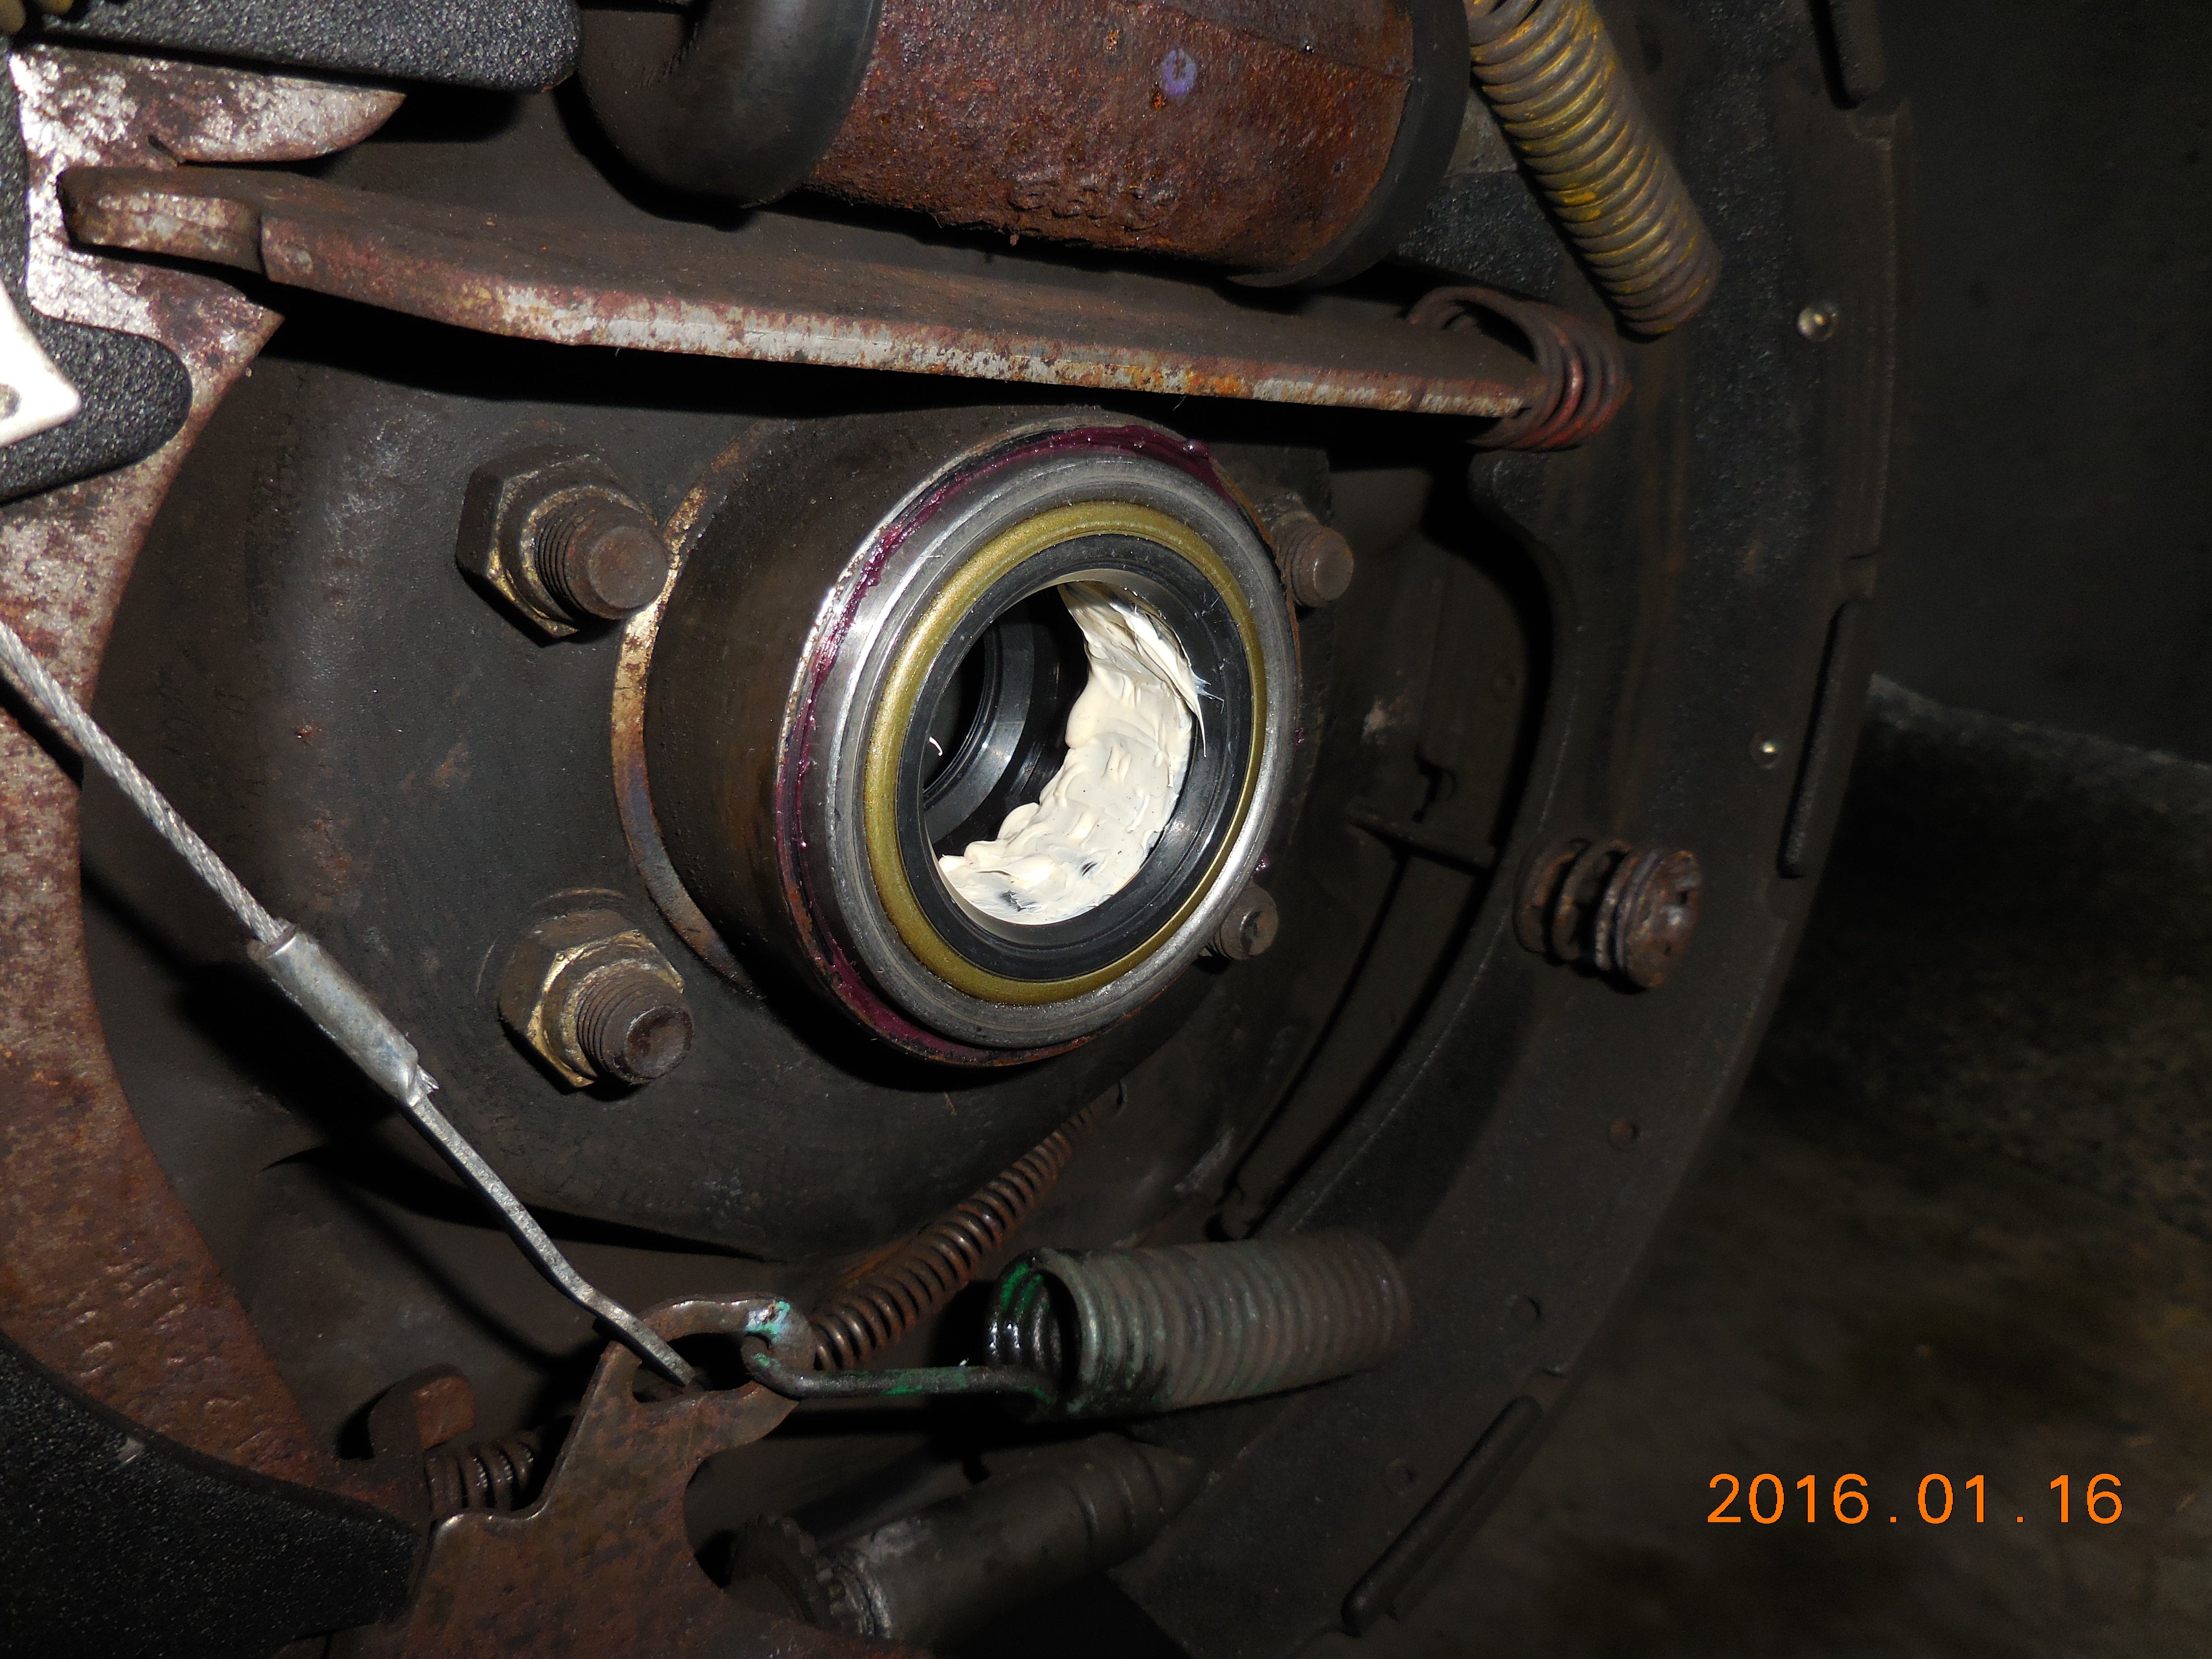
The SKF after installation. The projection is 1/8", well under the 1/4" max.:
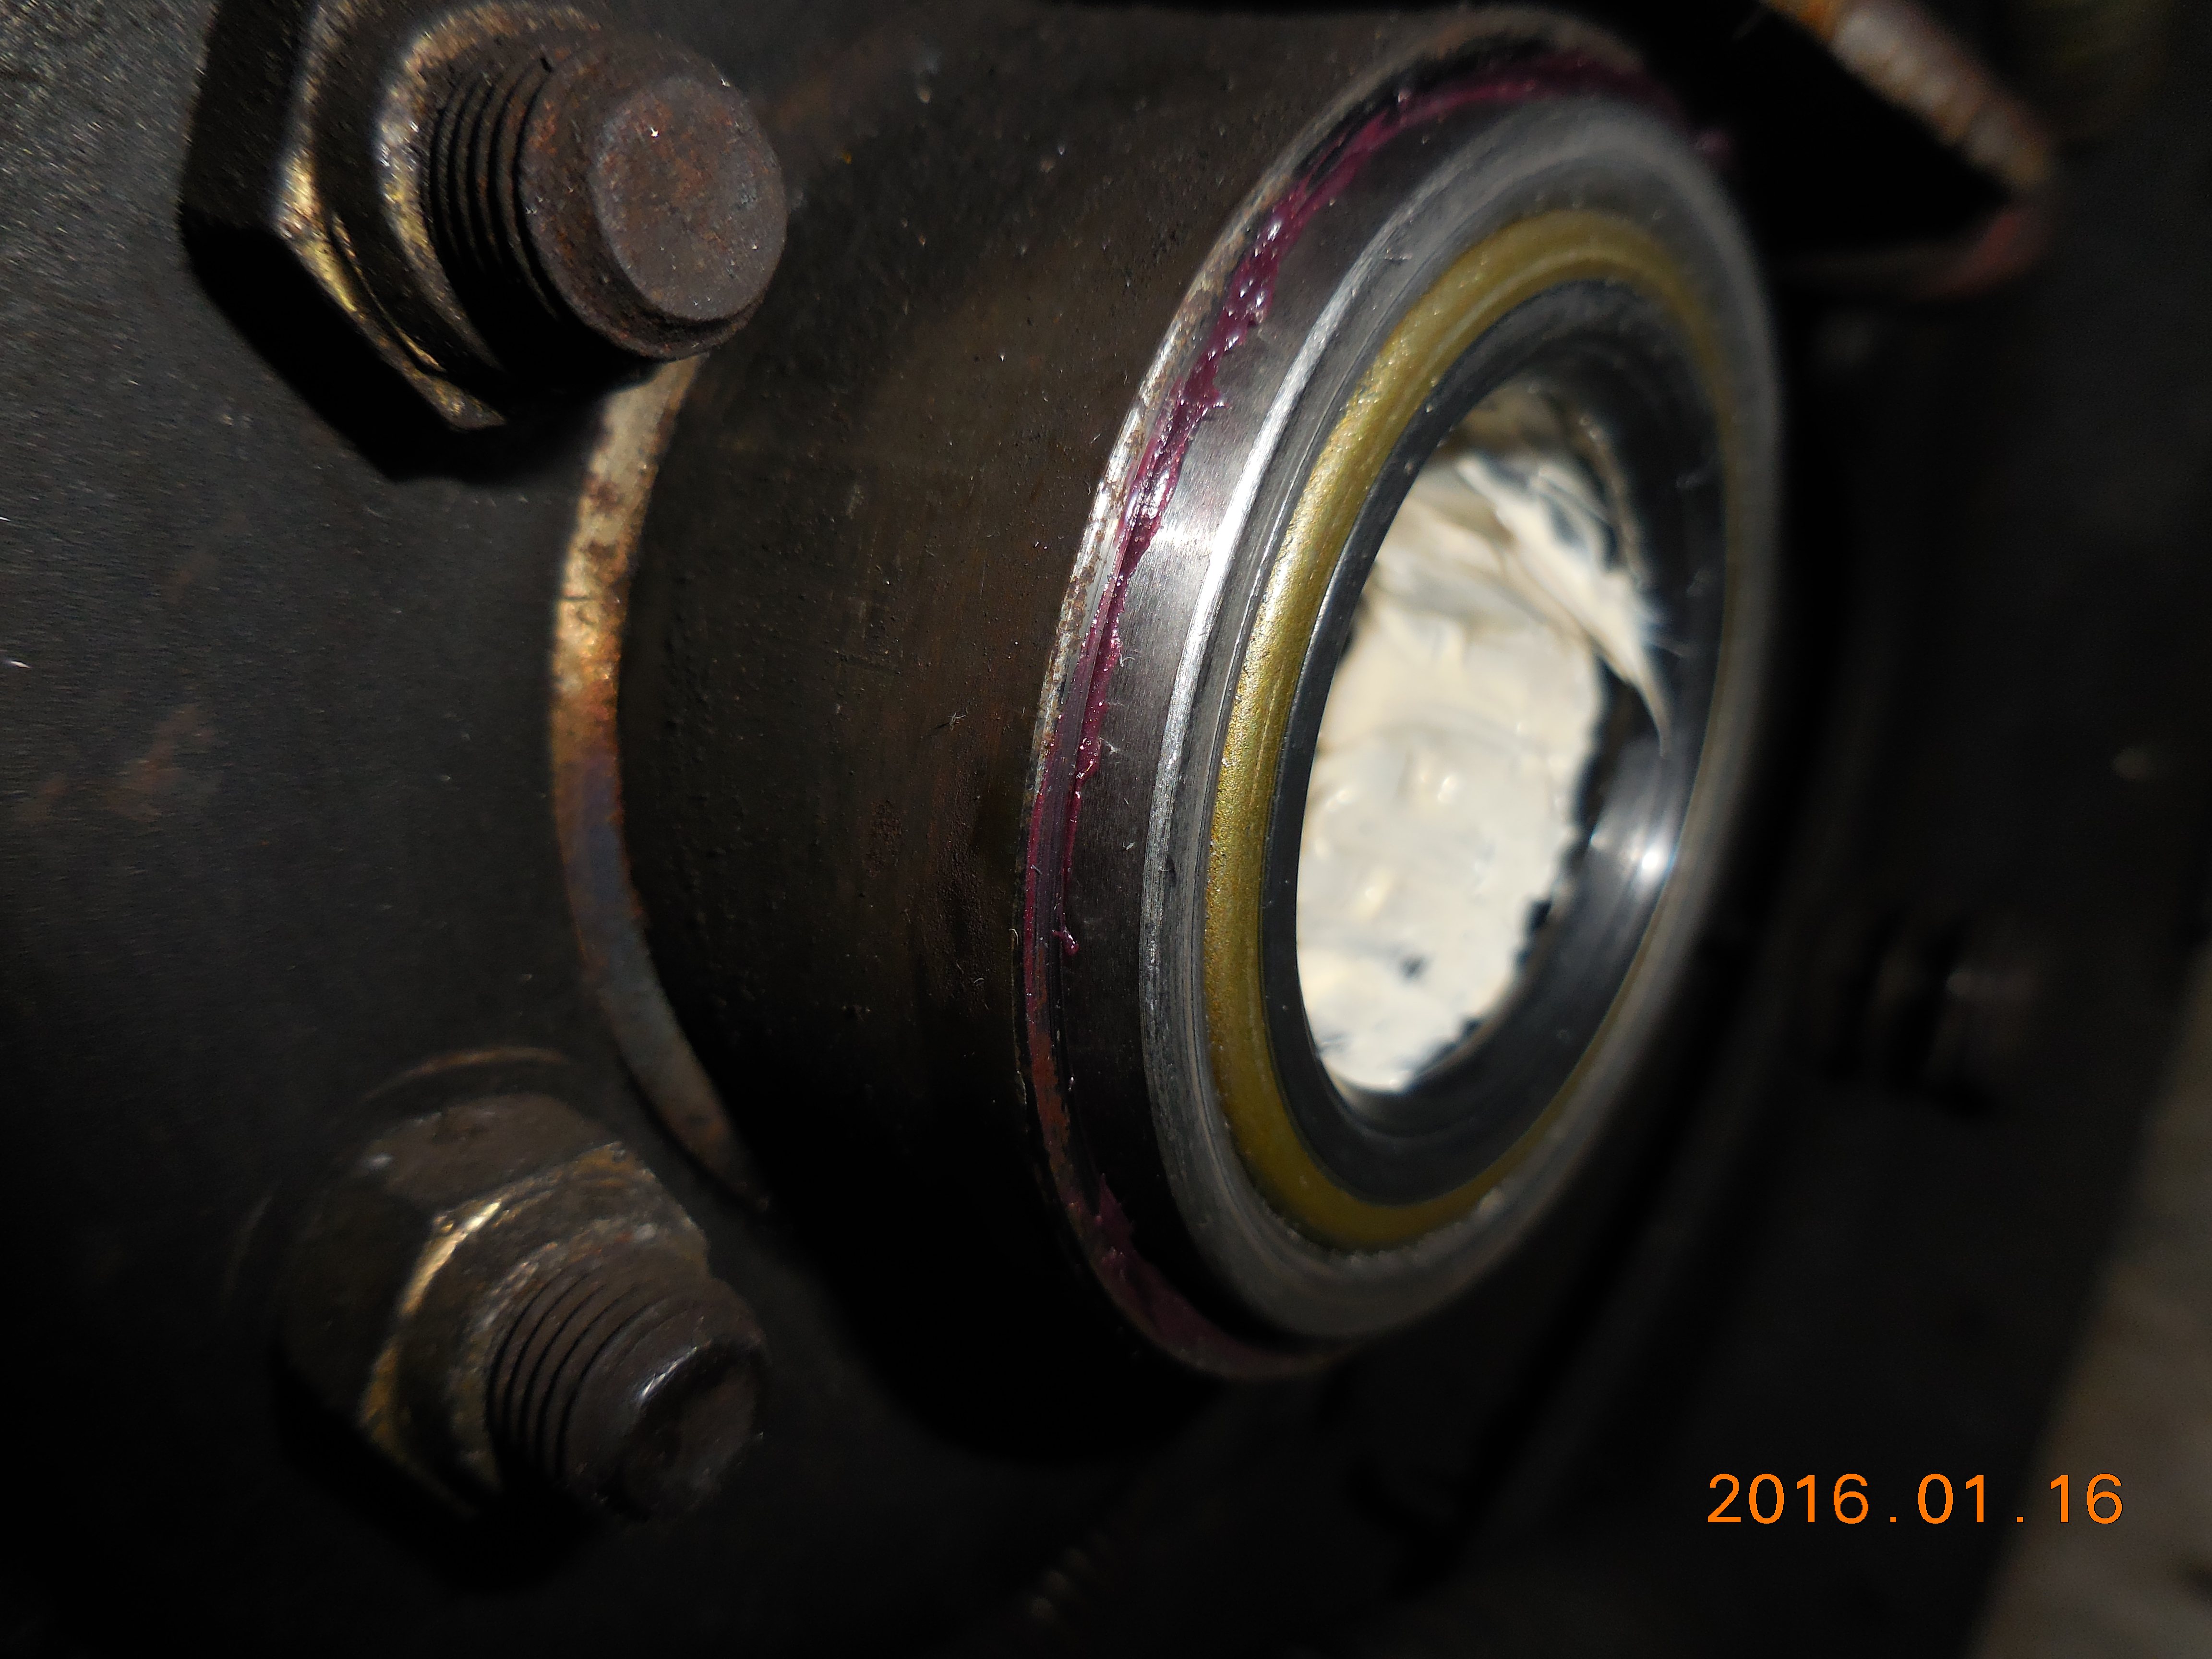
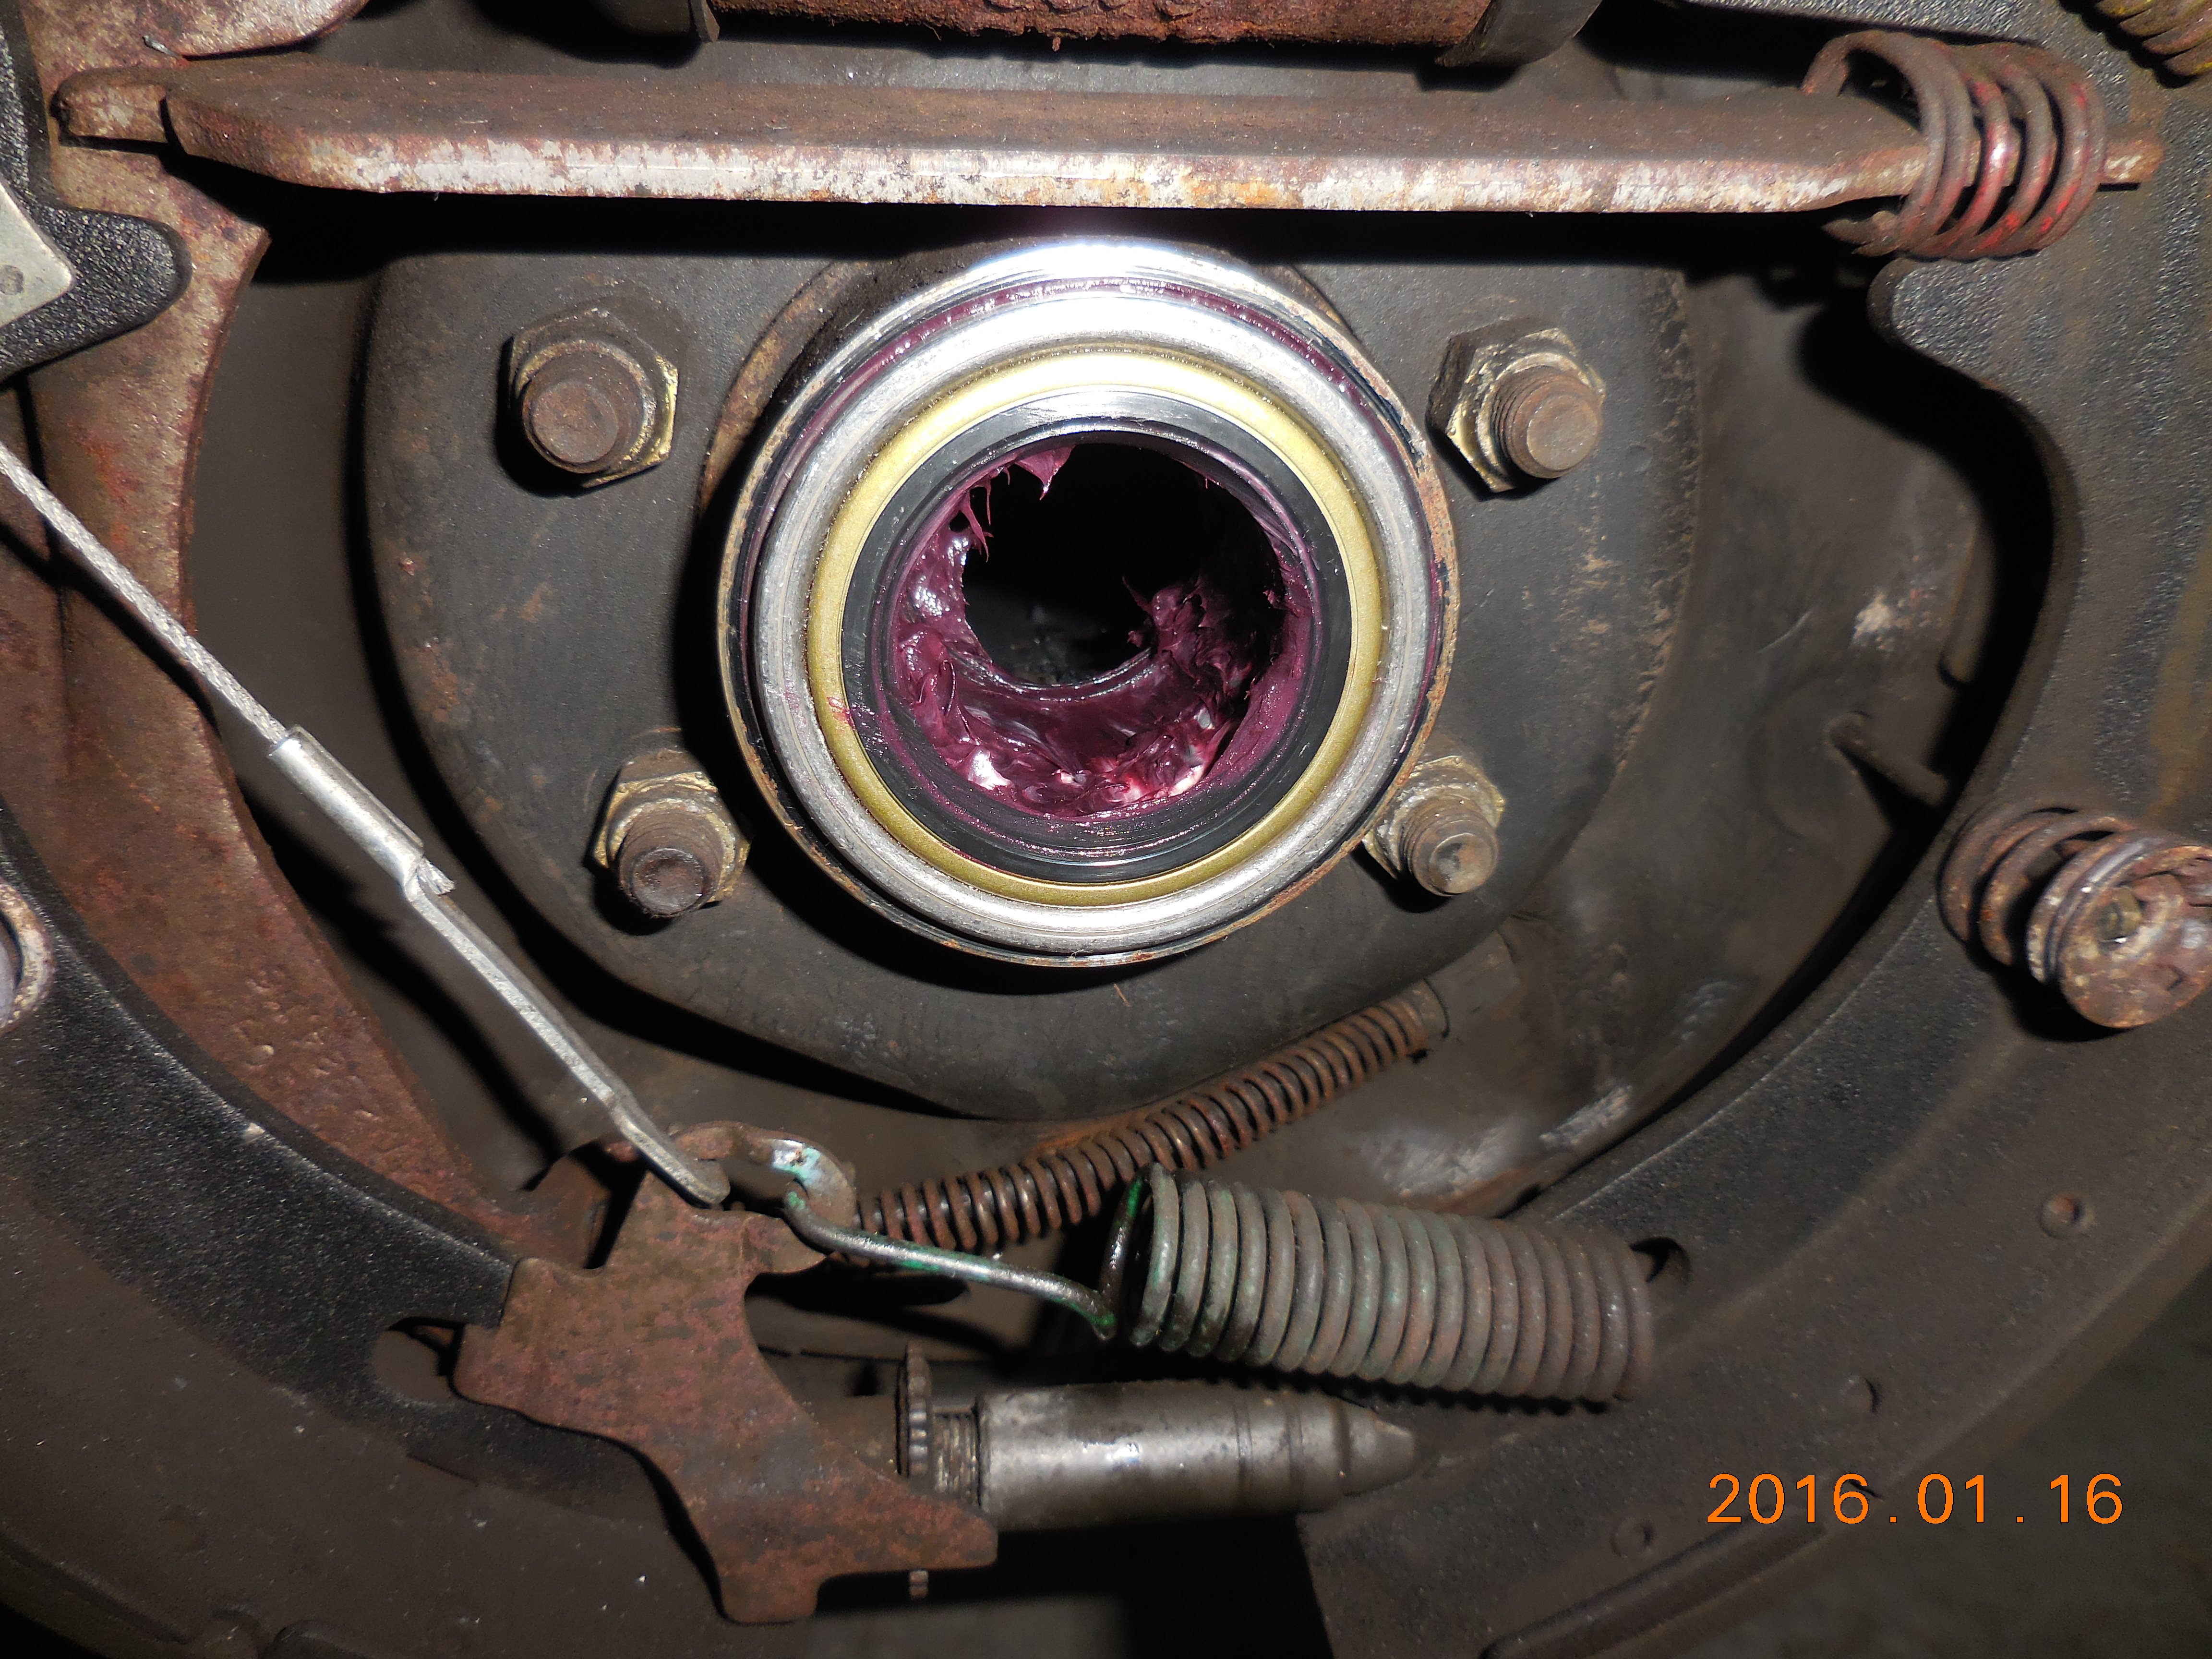
I removed as much of the factory SKF lube as reasonable and added my own synthetic grease instead, being particular about packing all spaces between the seals.
Getting the spider gears back in place was a little trickier than I expected, but eventually I learned the trick of rotating everything into place simultaneously. A bit of Locktite on that newly-sprayed-off lock pin bolt, and the rest was, as they say, the reverse of disassembly.
I drove one mile and at low speeds (under 30) it is fine. I have to drive a considerable distance to get to a road where I can drive faster, so that will have to await my 54 mile commute tomorrow, but so far I'm pleased to know that I'm not adding more metal debris to the diff lube.
I used a 6-point 8mm wrench and while I did have to use considerable force, I didn't have any trouble loosening nor tightening.
On the right side, there was considerable metal chaff from the axle's bearing surface to clean:
The SKF R1563 is a dual-seal unit: a seal on both sides, and lubricated exclusively by the grease placed at installation. The other bearing I purchased is a "Made in USA" no-name and does not have the inner seal, so it's designed to be lubricated by the diff oil. This is the SKF:
With the axle housing cleaned of the metal debris, then coated with grease, I offer up the SKF:
I was unable to find my bearing driver set, so I picked up a non-name impact socket at the local FLAPS for $15 and beat on it instead. The 40mm version of this socket was a perfect OD to prevent seal damage:
The SKF after installation. The projection is 1/8", well under the 1/4" max.:
I removed as much of the factory SKF lube as reasonable and added my own synthetic grease instead, being particular about packing all spaces between the seals.
Getting the spider gears back in place was a little trickier than I expected, but eventually I learned the trick of rotating everything into place simultaneously. A bit of Locktite on that newly-sprayed-off lock pin bolt, and the rest was, as they say, the reverse of disassembly.
I drove one mile and at low speeds (under 30) it is fine. I have to drive a considerable distance to get to a road where I can drive faster, so that will have to await my 54 mile commute tomorrow, but so far I'm pleased to know that I'm not adding more metal debris to the diff lube.
FTE Stories
Ford Trucks for Ford Truck Enthusiasts

Top 6 Best Deals Available on New Fords & Lincolns Right Now
Brett Foote
This Hennessey Takes the Expedition Tremor's Off-Roading Capability to the Next Level
Verdad Gallardo
Top 10 Fords at 2026 Carlisle Ford Nationals
Joe Kucinski
3 Best / 3 Worst Parts of Modern Ford Ownership
Brett Foote
10 Amazing Upgrades That Solve Common Ford Truck Owner Headaches
Pouria Savadkouei
Every 2026 Ford Engine Explained
Brett Foote
10 Ugly Ford Trucks That We Still Kinda Love
Joe Kucinski
10 Things Every Truck Owner NEEDS (2026 Edition)
Michael S. Palmer
Rezvani's Latest Post-Apocalyptic Monster Is a Ford F-150 Raptor Underneath
Verdad GallardoFTE Community Team
Joined: Nov 2001
Posts: 1,867
Likes: 275
From: Oak Harbor, Washington
I've put ~150 miles on it, and it's much quieter. As usual with problems that get gradually worse, you don't notice just how much noisier it is until the noise is gone.
I'm very pleased with this repair.
I'm very pleased with this repair.

Thread
Thread Starter
Forum
Replies
Last Post
banned
1948 - 1956 F1, F100 & Larger F-Series Trucks
15
Nov 25, 2012 06:16 PM
CPUNeck
1999 - 2003 7.3L Power Stroke Diesel
25
Mar 1, 2011 06:24 AM