
Extend Cab- Doors


Thread Starter
|
Senior User
Joined: Jan 2005
Posts: 356
Likes: 0
Extend Cab- Doors
I have a 2003 F-350, Its the extend cab so the back door is not a full size. The one behind the drivers side door is rusted out at the bottom.
Do they make a door skin or something to put on the bottom? or am I stuck buying a used door for $400?
thanks
Do they make a door skin or something to put on the bottom? or am I stuck buying a used door for $400?
thanks
Tuned


Joined: Aug 2007
Posts: 459
Likes: 123
From: Maryland
LMC has a lower door patch for 89.
Truck Parts and Truck Accessories
If you can find a used rust free at a salvage yard in your color, then paying the 400 would likely be cheaper than buying a patch, welding, bodywork, and painting. Have you priced paint supplies lately?
If you have other rust issues to address, then the paint supplies will be less of an issue..
Thread Starter
|
Senior User
Joined: Jan 2005
Posts: 356
Likes: 0
Thank you for that link. 
I've shopped around and the best price I can get a used one, exact color is for $540, Next one is a white door for $485
I do have a couple of spots to do and I'm thinking the skin, even though a bit a welding(bummer) and using the duplicolor exact match as the paint. Its not perfect I know but it should be close.
Have you ever done just the skin before? The door is rusted at the bottom to the point where the weather strip doesn't hold on. Any info you may have for the actual repair would be a great help.
thanks
Tuned
Joined: Aug 2007
Posts: 459
Likes: 123
From: Maryland
This is on a much older vehicle, but the process should be similar...
Inner door repairs:
Inner door repairs:
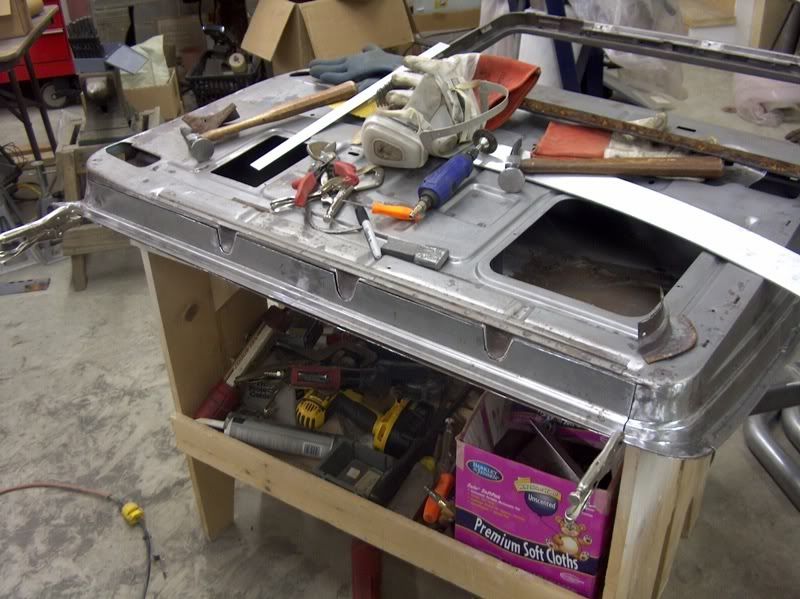
If your outer skin is rusty but still somewhat intact, I prefer to do the inner first and use the outer as a guide for locating the inner. Then remove the door skin in it's entirety (as much as needed) for replacing the door skin. While these pictures are of a wagon and not your truck, hopefully they'll help out..
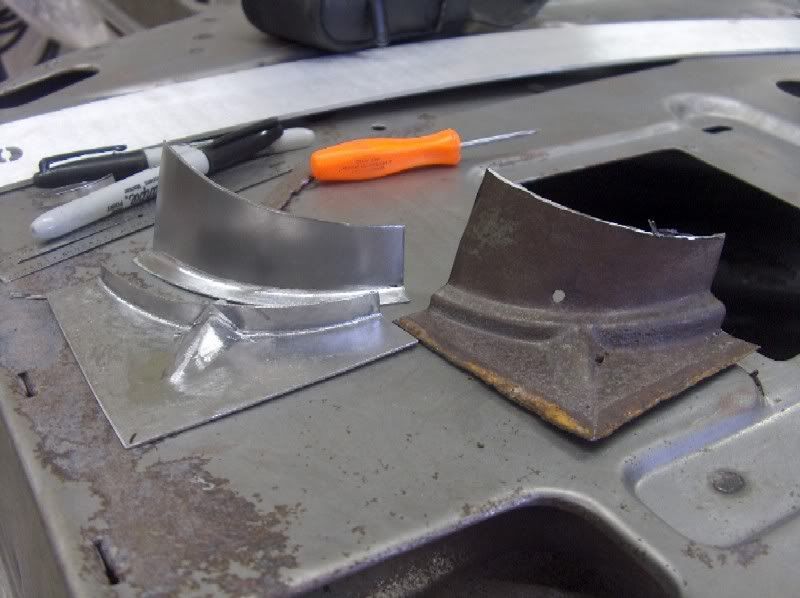
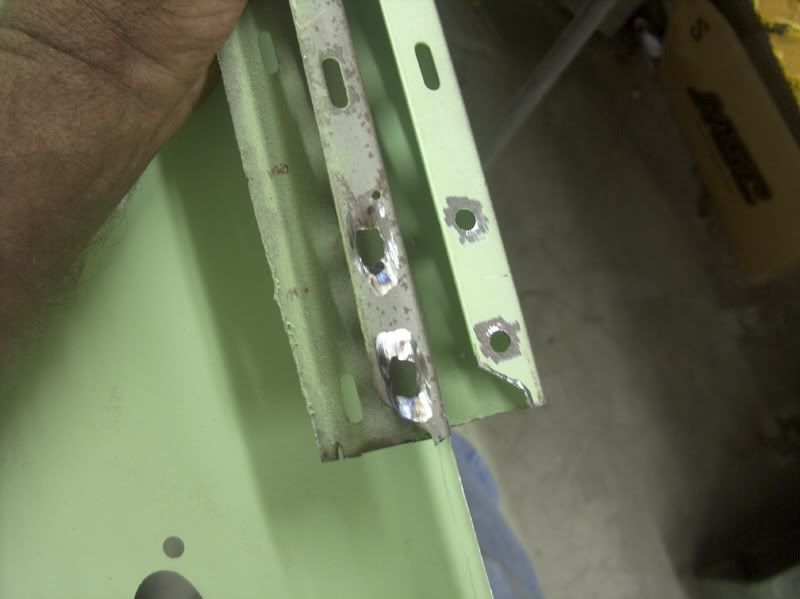
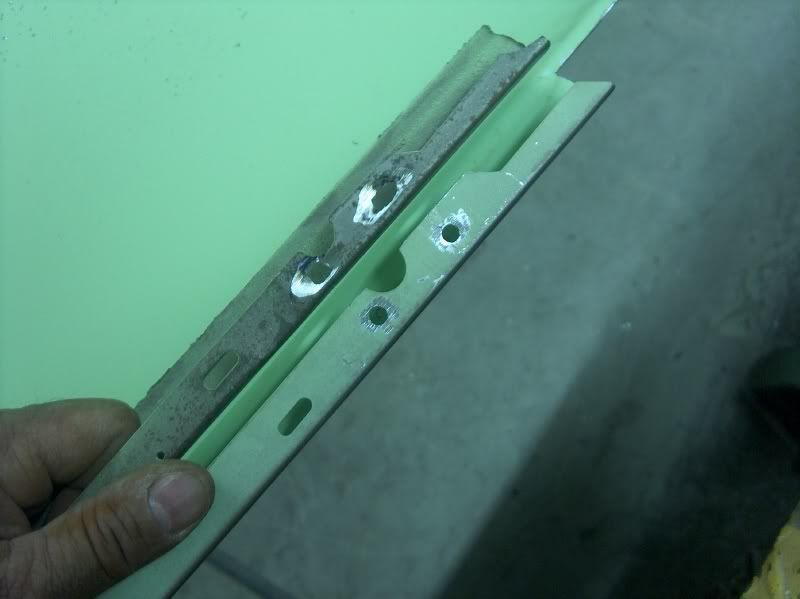
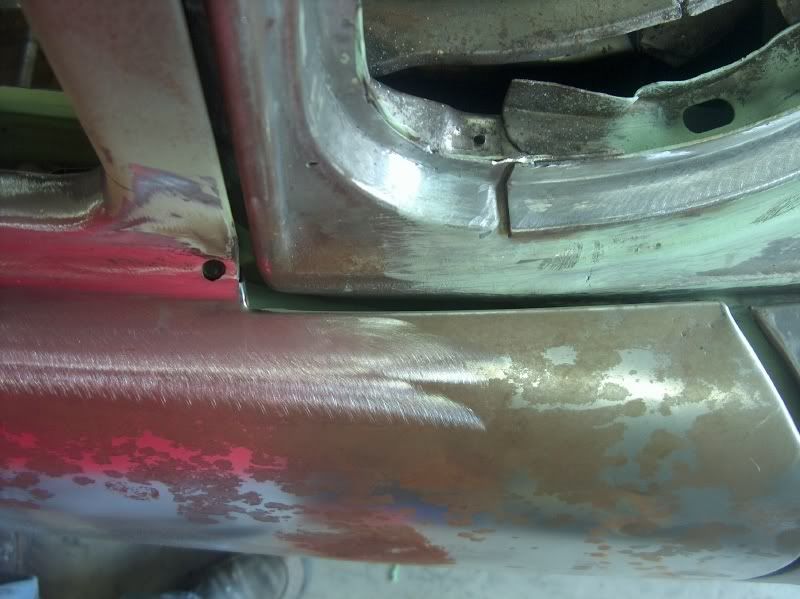
Looking at this passenger door, it will need some corner work.....
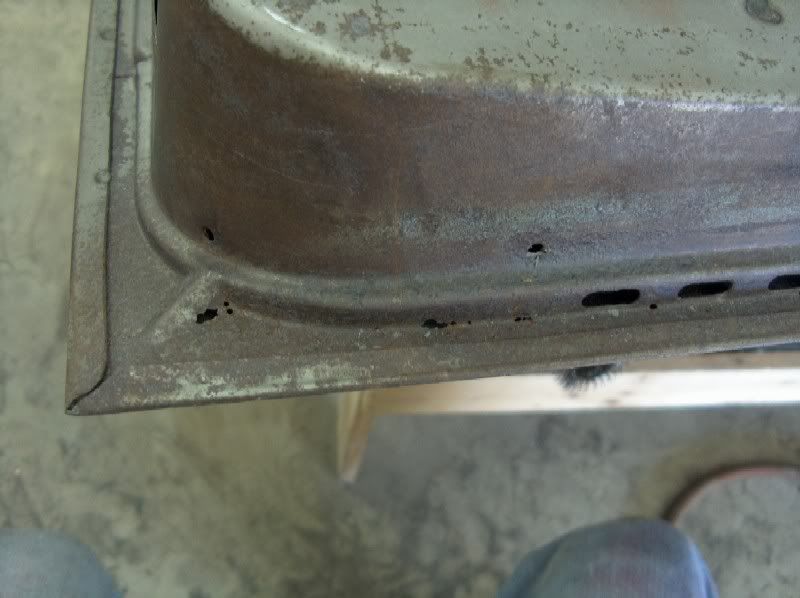
The corners will need to be made in two pieces, and will use the Lancaster stretcher. Here's the old being cut out of the front corner.

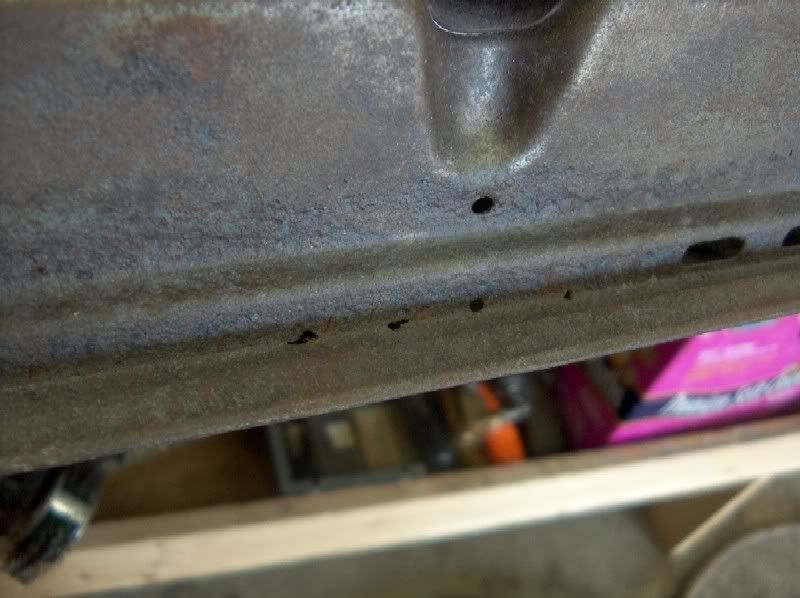
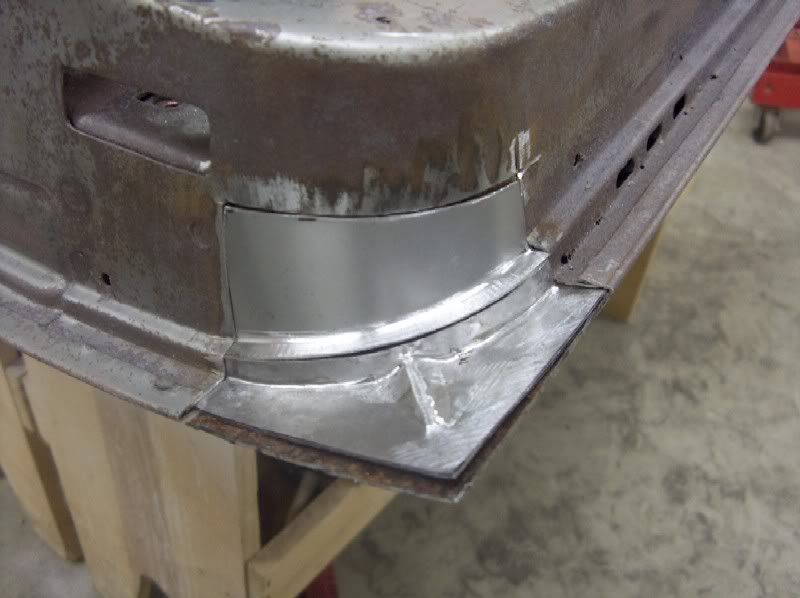
The flange for the outer corner was hammer formed.

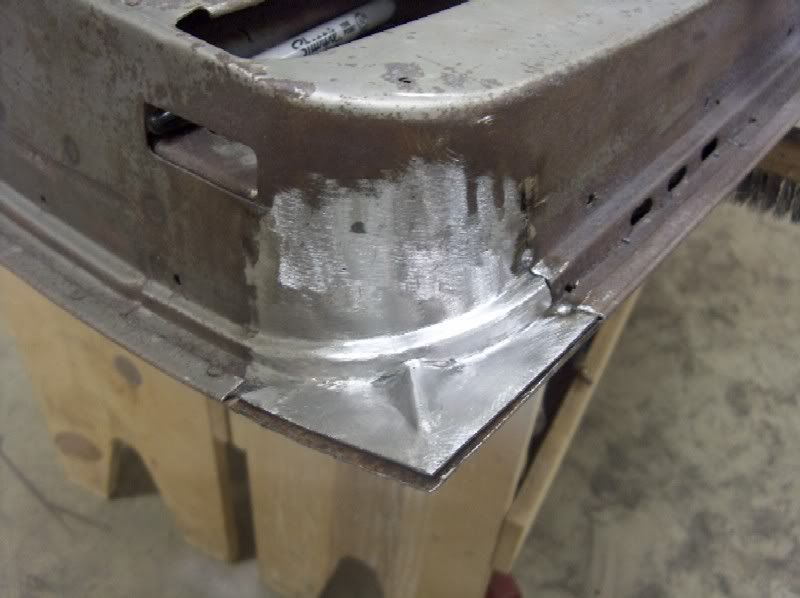
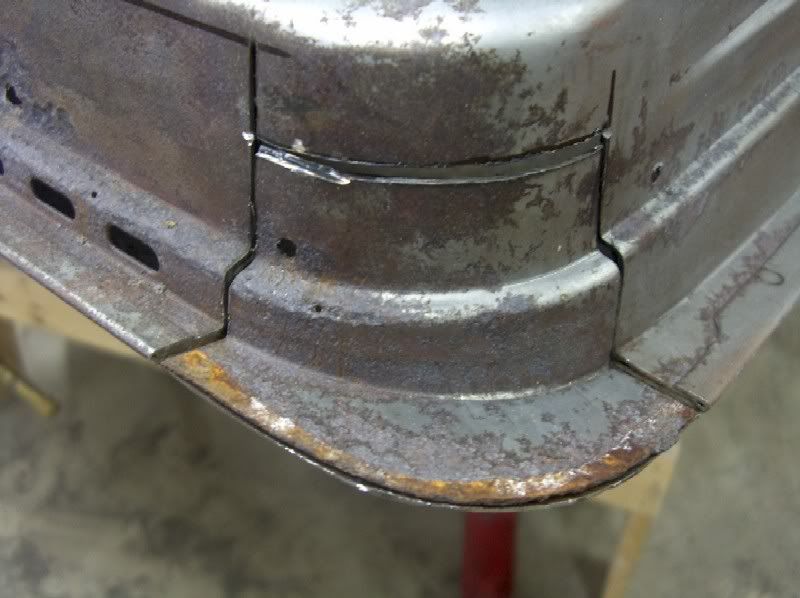
And now for the back corner.
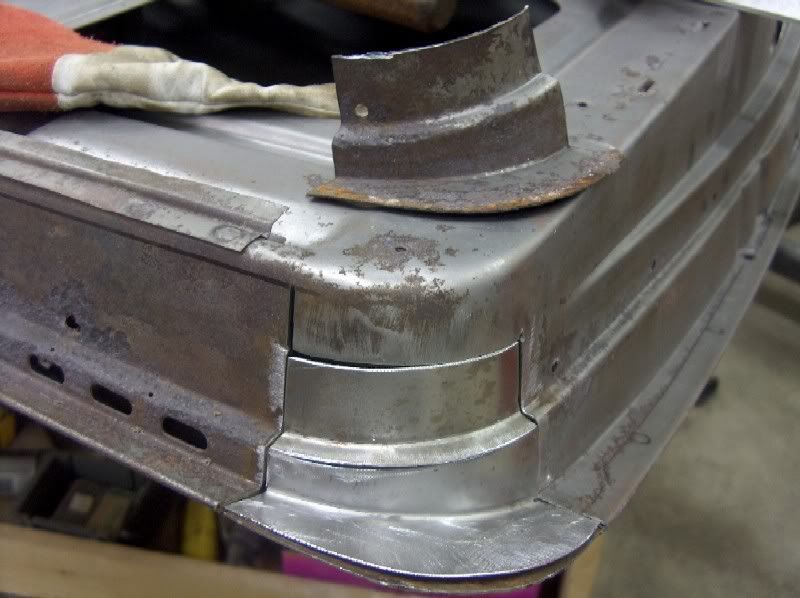

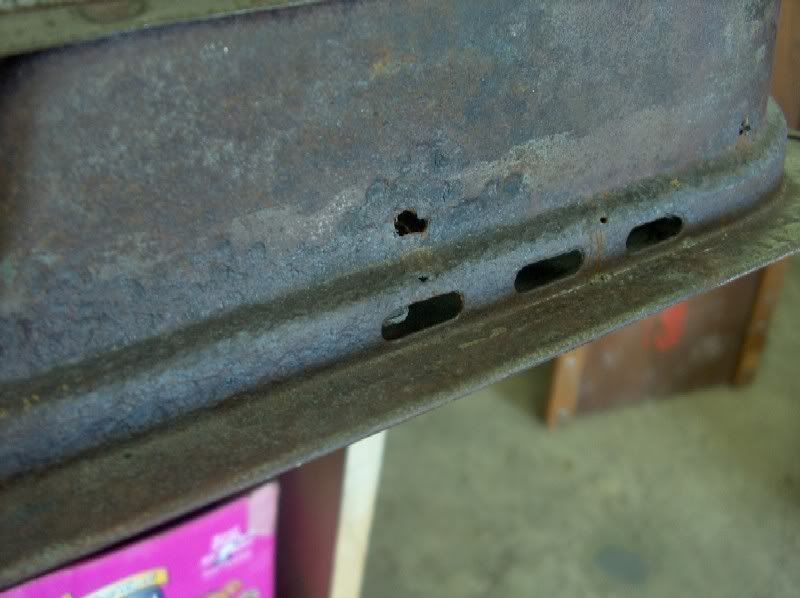
It likely would have been just as easy to order the inner door repair panel, but this will hopefully help to guide someone else in tackling some of those curved repairs when replacements aren't available.
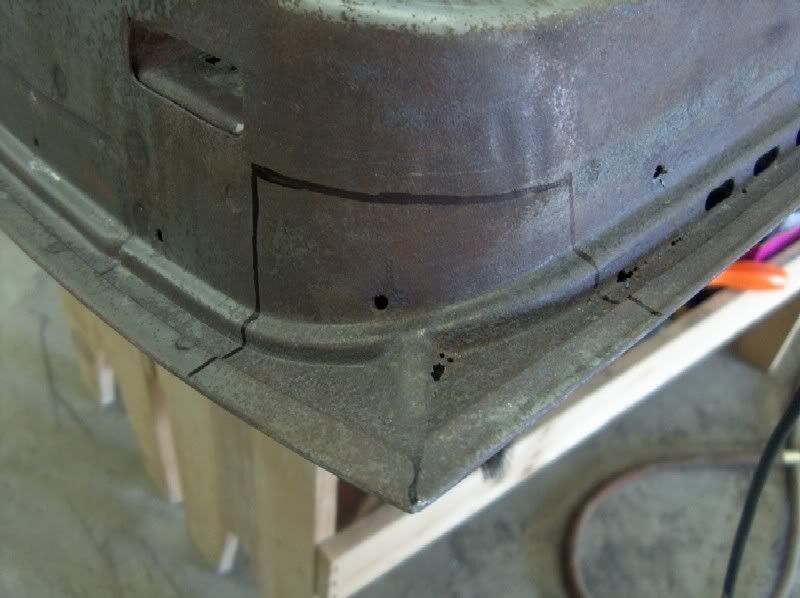
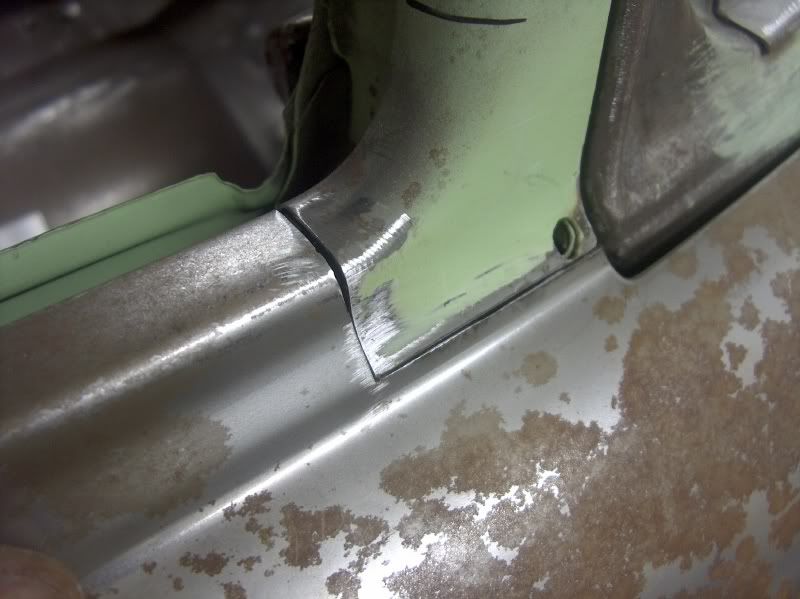
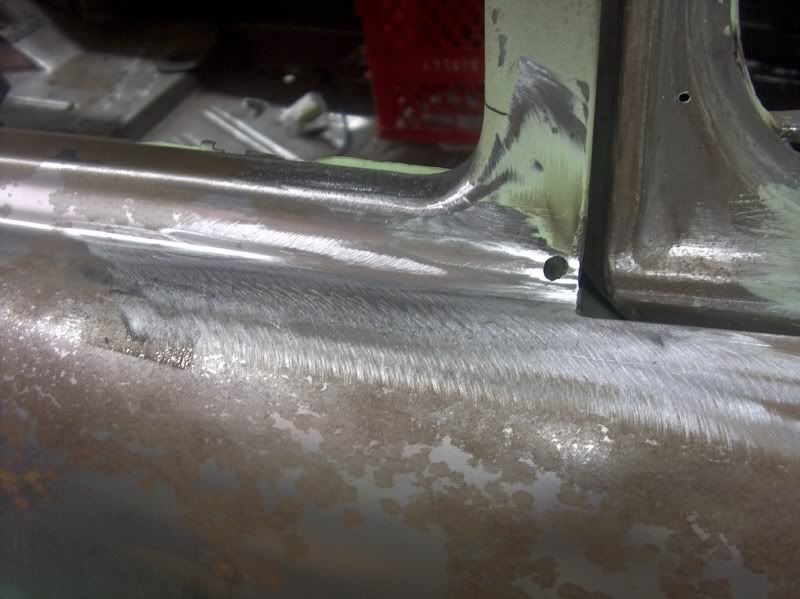
Bent up a patch panel to go between the two new corners. The bottom was done in two pieces and welded together, as the shorter sections bend easier when you're exceeding the capacity of your brake!
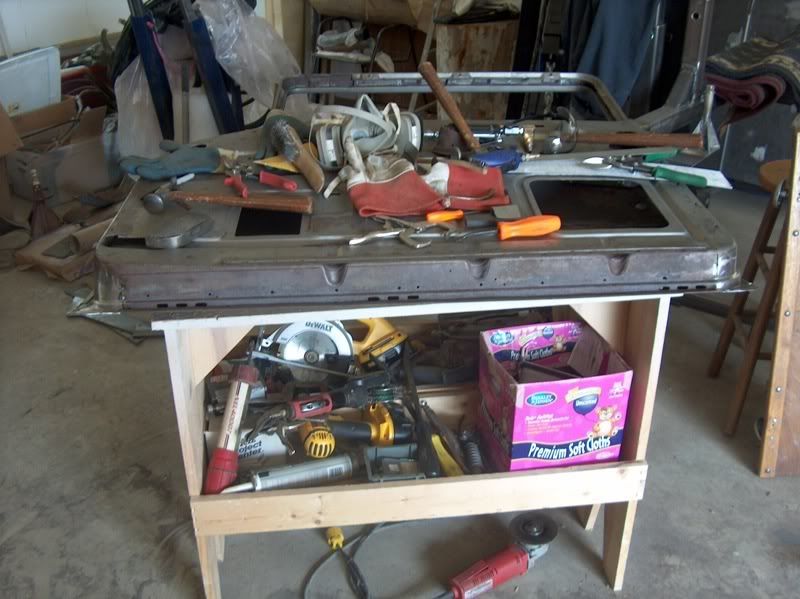
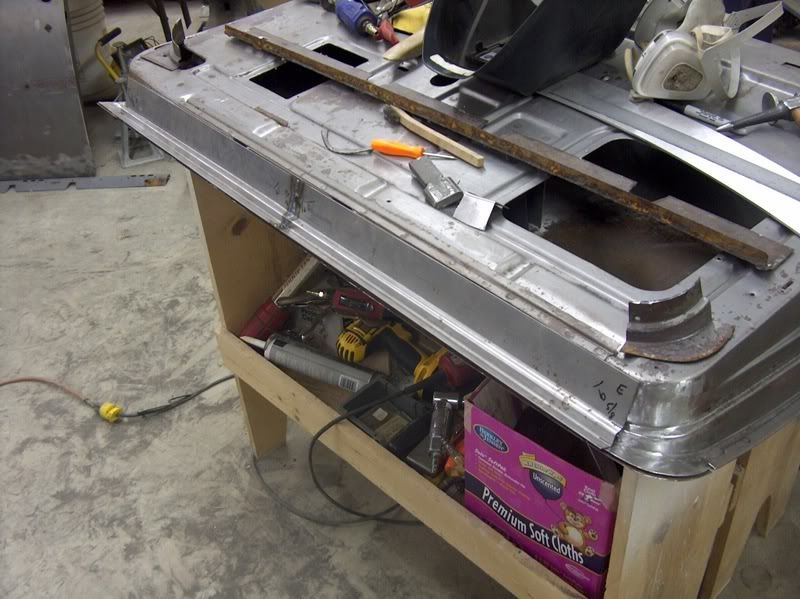
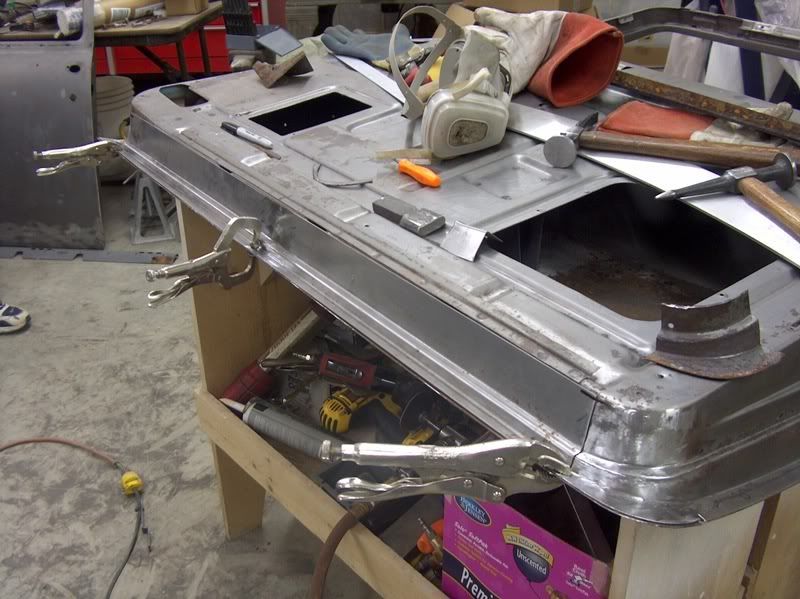
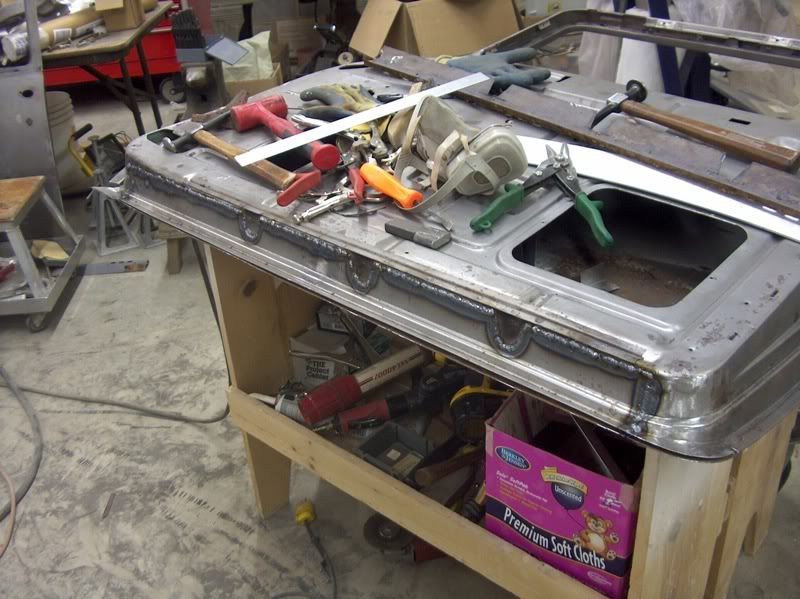
Next we'll dress the welds, get the old door skins cut off, sand blast and epoxy prime the inside..
Looking at this passenger door, it will need some corner work.....
The corners will need to be made in two pieces, and will use the Lancaster stretcher. Here's the old being cut out of the front corner.
The flange for the outer corner was hammer formed.
And now for the back corner.
It likely would have been just as easy to order the inner door repair panel, but this will hopefully help to guide someone else in tackling some of those curved repairs when replacements aren't available.
Bent up a patch panel to go between the two new corners. The bottom was done in two pieces and welded together, as the shorter sections bend easier when you're exceeding the capacity of your brake!
Next we'll dress the welds, get the old door skins cut off, sand blast and epoxy prime the inside..
Tuned
Joined: Aug 2007
Posts: 459
Likes: 123
From: Maryland
Outer skins....
Once skin is completely on and test fit to opening, if any tweaks (twisting) is needed to fit opening better, do those, then spot weld or plug weld skin flanges to inner door.
Continuing....
The passenger door, which lost its skin some time ago, will be the first candidate.
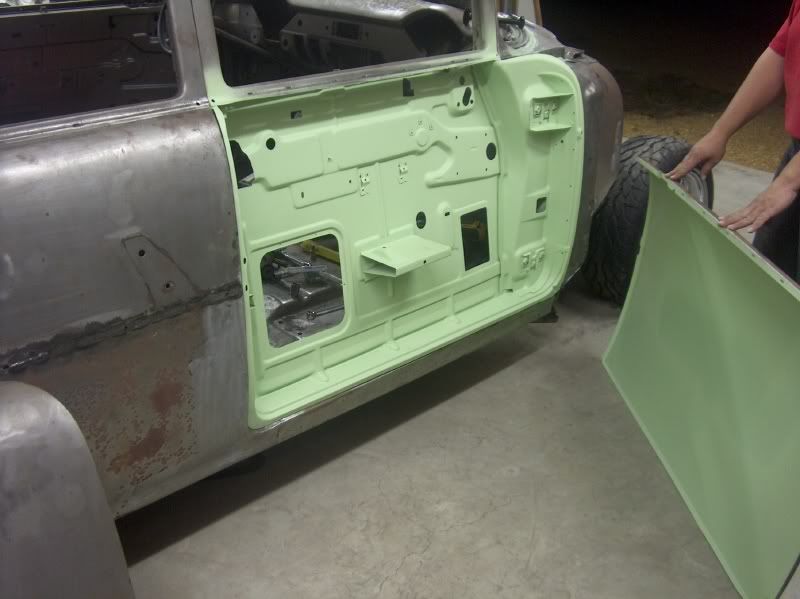
And now for a test fit of the new skin:

It was a bit of a stretch hooking the new skin over the old window opening, but necessary to scribe the cut locations:

The old center section was removed, four spot welds still held it to some inner bracing. Holes were drilled into the new skin for plug welds.
Test fit, and tack welded:

About here was where I got in a mad rush and forgot pictures until I was done.
The inset radius just below the window opening is not as crisp as the original, but installing it as I did gives you much less welds to contend with than if the original was saved. I'll be making another tool later, a hand held punch and die, to persuade the radius into correct shape.
Plug welds:
Next on the list will be to try our hand at setting the skin in place.
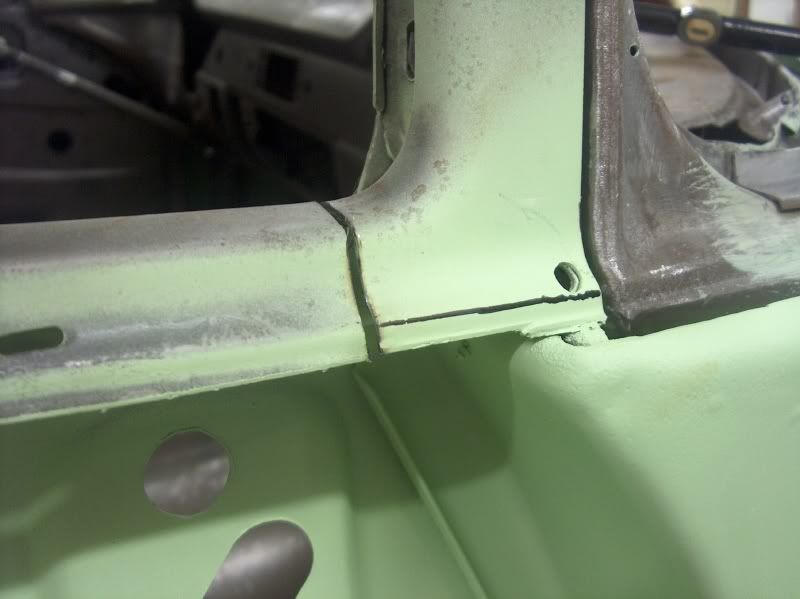
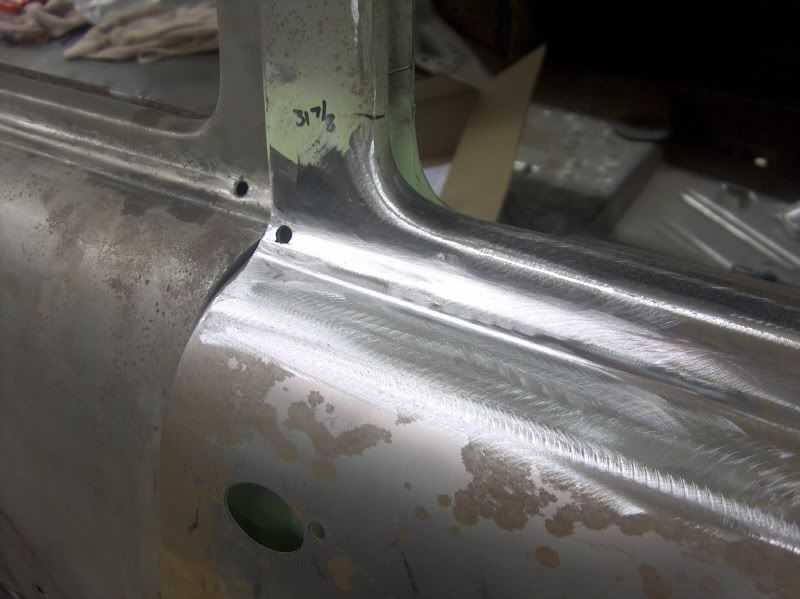
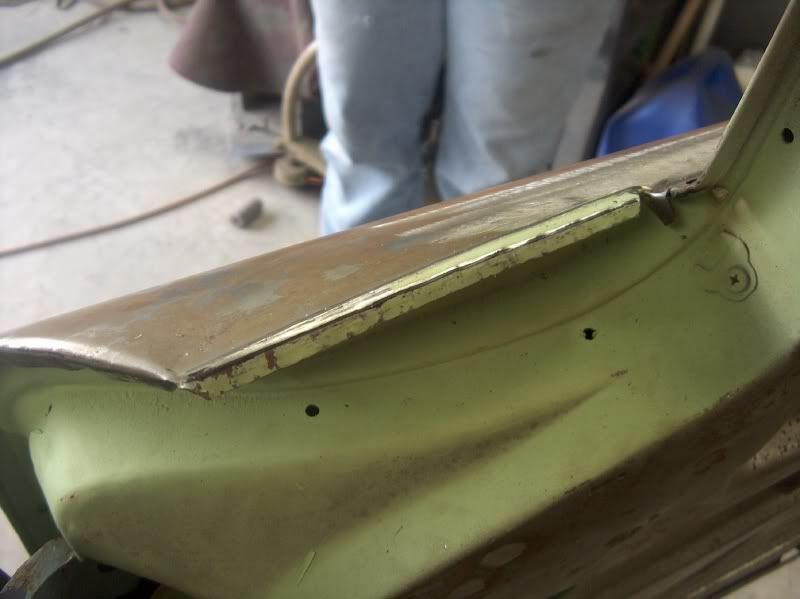
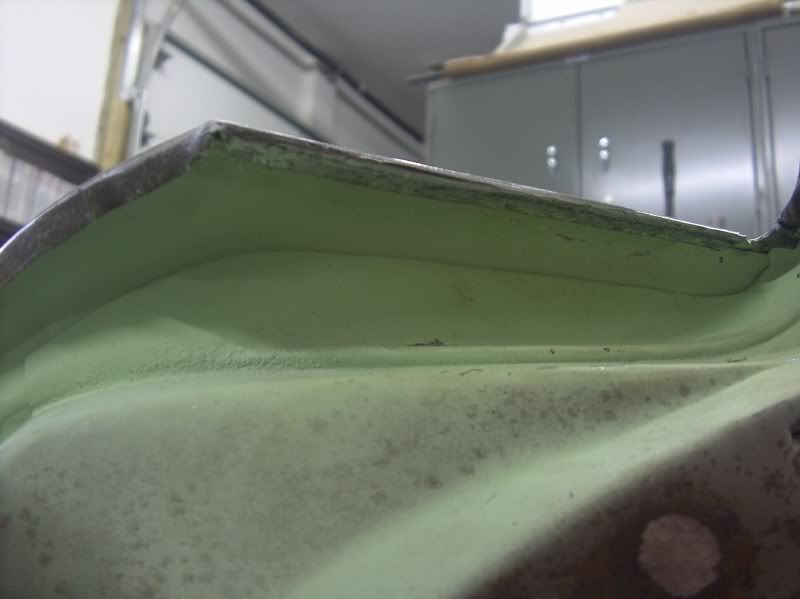
We left off last time with the top of the new skin being welded into the window posts. As this is my first time for installing door skins, I consulted with a couple individuals I knew had done it before to gather some helpful hints. The first thing we'll check is the fit to the A pillar-cowl area. I was told by Steve Fountain that this area of the skin is not perfect, and many times he will leave the original (depending on condition, of course) and graft the new skin in below this edge. Here's what we have for a gap, verifying what Steve had said:
As I had already removed the old skin before talking to Steve, the first order of business will be to straighten out this fold and relocate it for a more consistent gap.
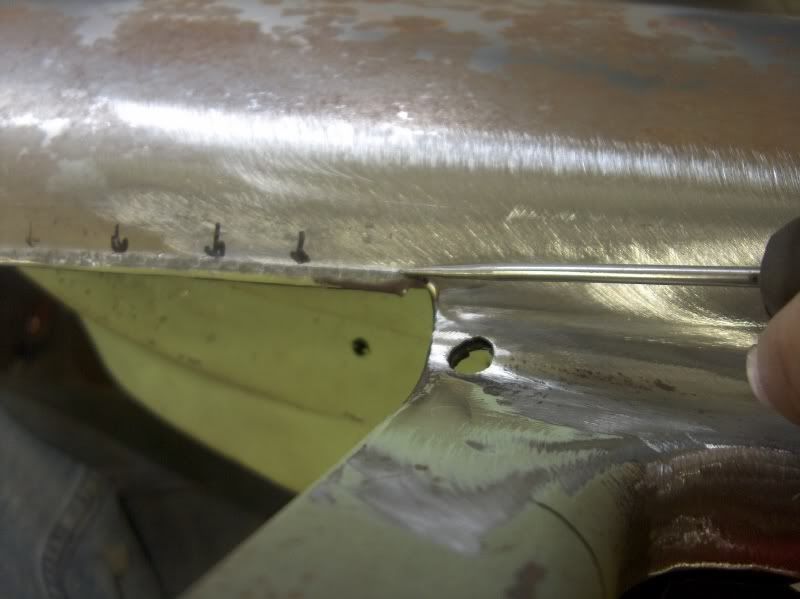
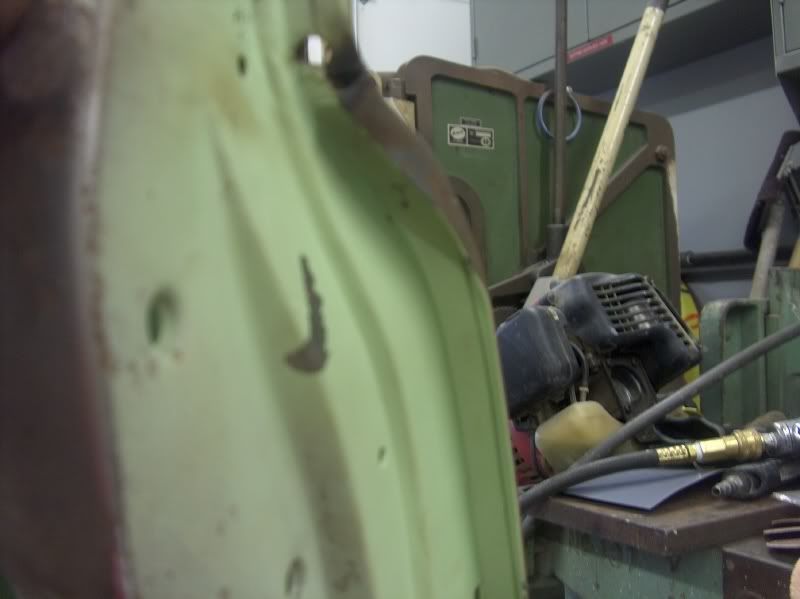
A line to mark the proposed bend:
Here the pick (my rust detector) points out where the bend was originally:
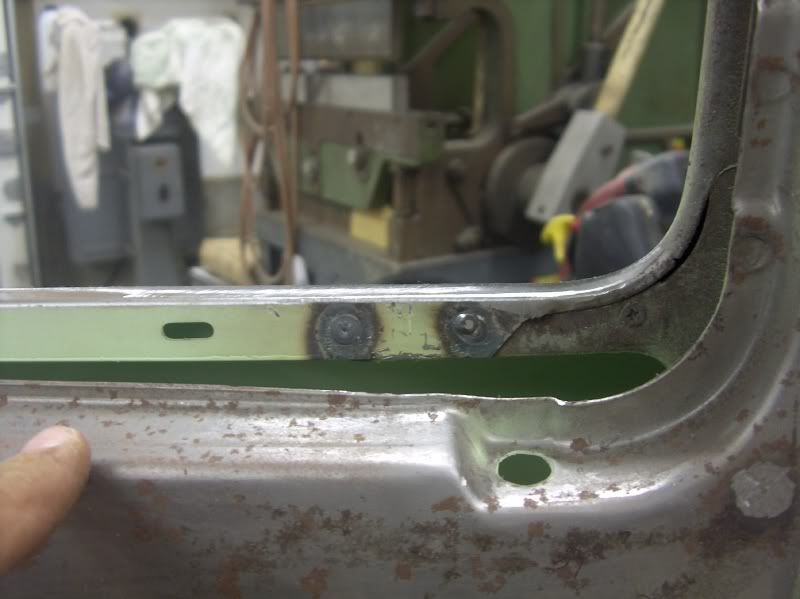
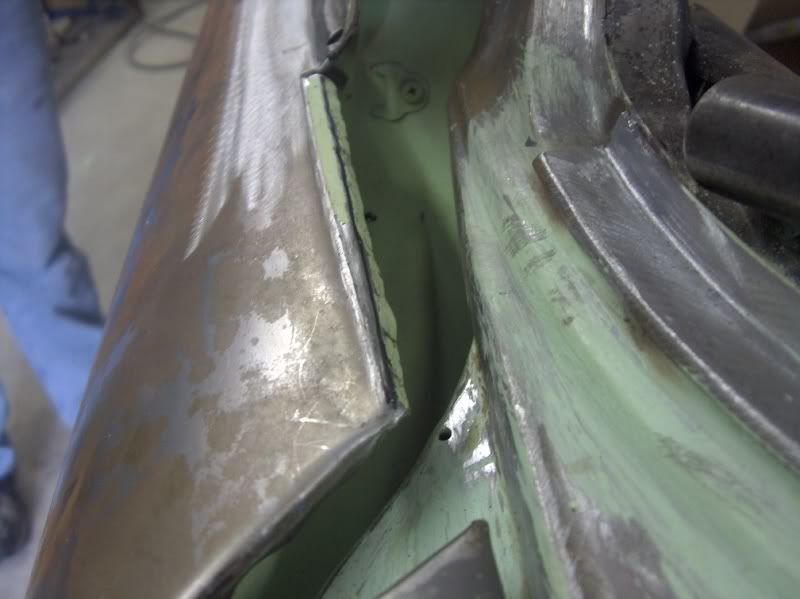
With the flange folded under nice and snug, we'll move on the the back edge to hopefully align it with the door opening:
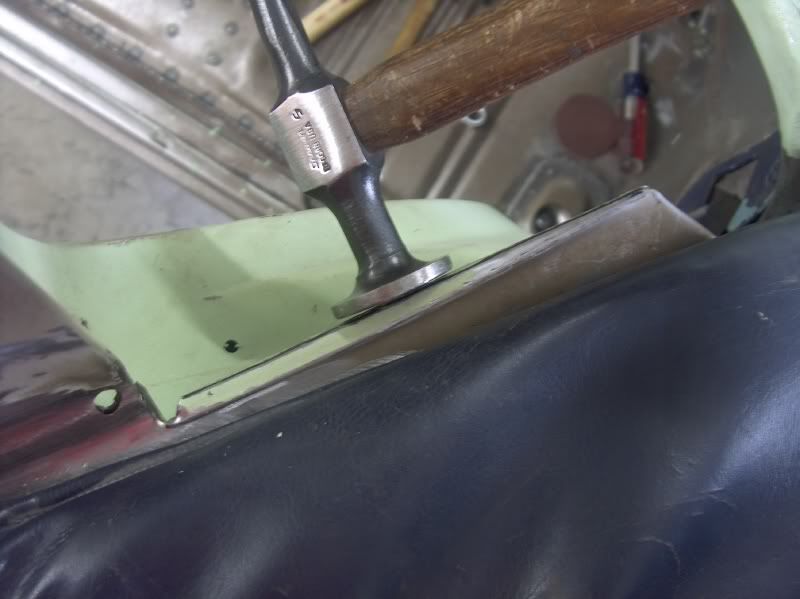
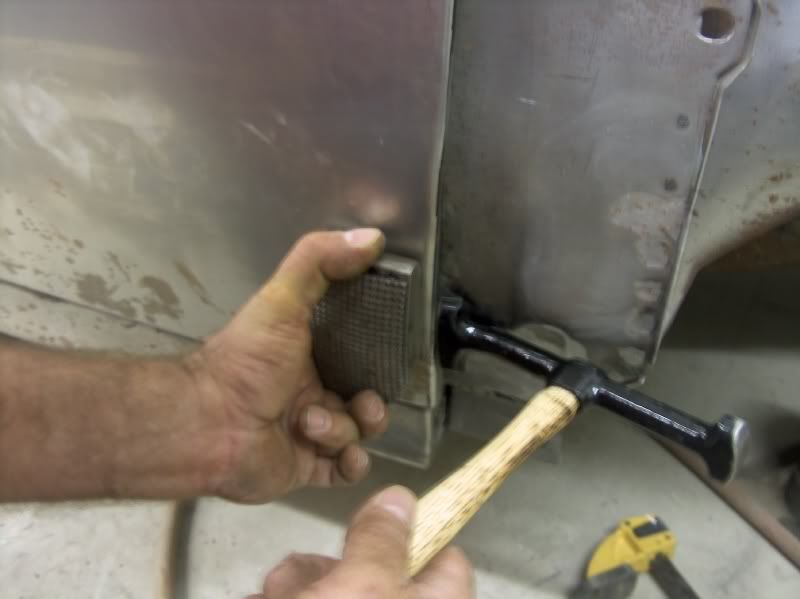
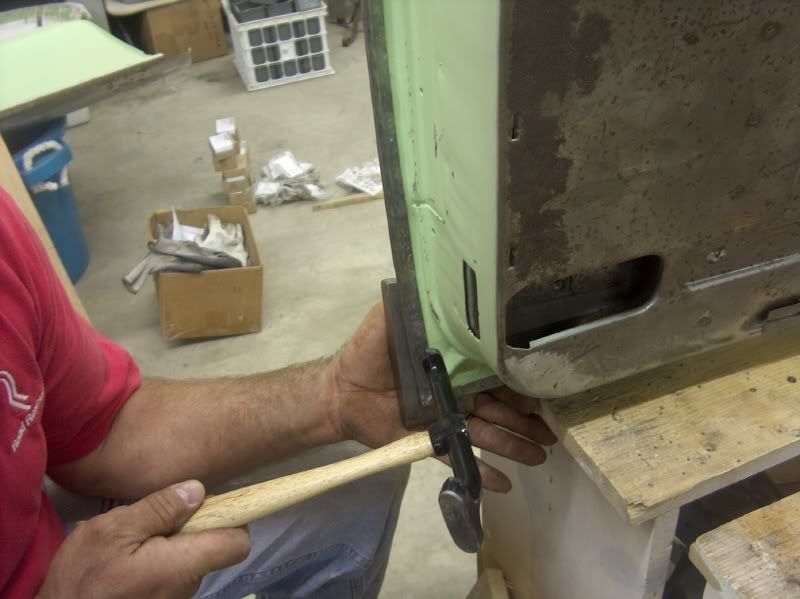
A small pair of visegrips and a piece of aluminum (to prevent leaving marks in the skin) kept the skin tight to the inner door while folding over the rear flange. Jay (Wagonman100) has done quite a few door skins and told me he has better luck with just a body hammer and dollies to match the contour. I had recently purchased a door skin hammer and skinner tool, prior to receiving this advice, so in true exploratory fashion, to see what I had better luck using, I tried all of the above. This shows using the door skin hammer and a small bag of #8 Lead shot as a dollie. The shot bag works pretty good at supporting the panel and leaving no marks, especially the rounded areas of the skin where it's hard to get a dollie that matches the contour. Be sure to work the flange a bit at a time, come back and work it down some more. In between, reference the door opening to insure that the skin is wrapped around consistently to fit the opening.
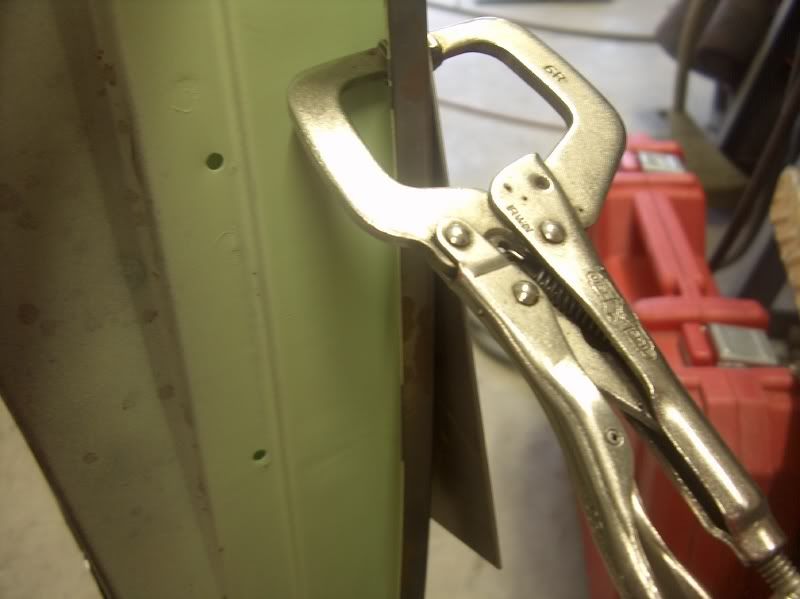

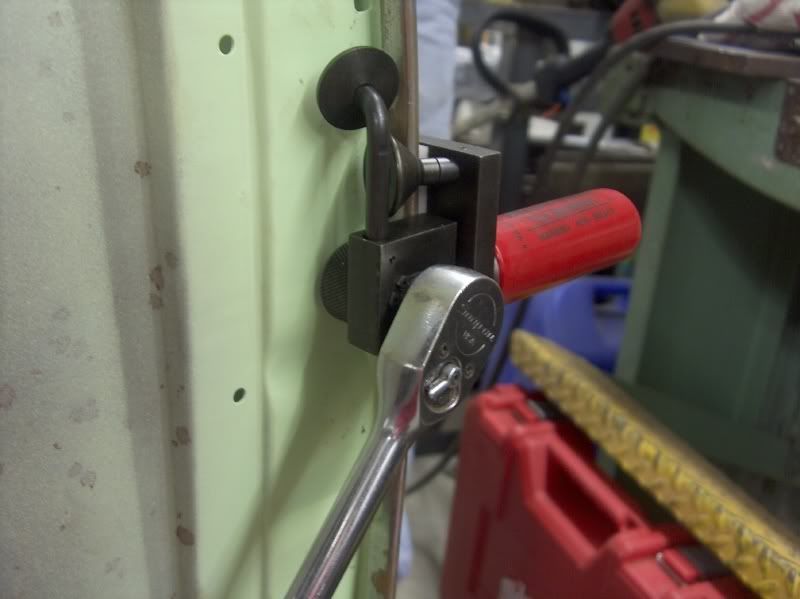
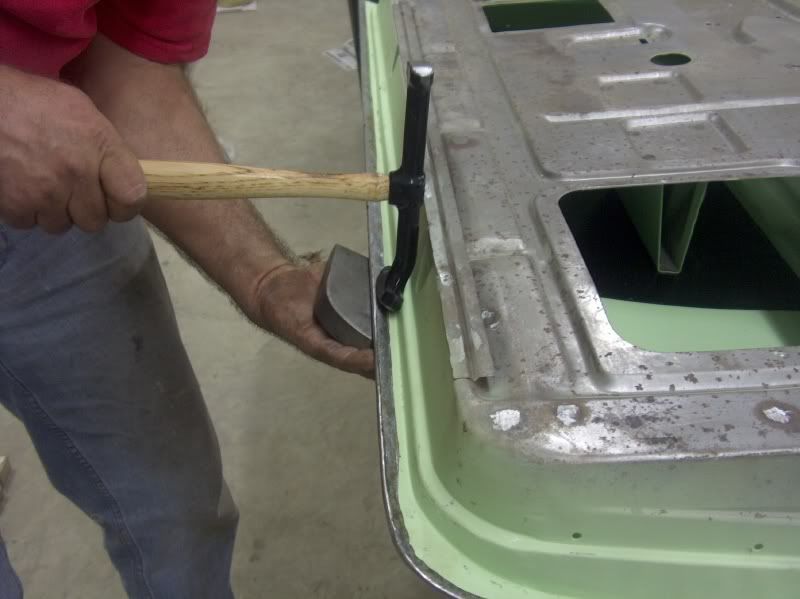
After the flange was folded around fairly close, and matched the door opening as best we could, I decided to try the skinner tool. It uses a 3/8 ratchet to turn a knurled wheel that flattens out the flange on the back side, with adjustable tension as well, so you can make multiple passes to tighten the flange progressively. It did a pretty good job as well, went around some slight radiuses, but will be challenging for real tight ones. Overall, you could accomplish the same thing with hammer & dollie.
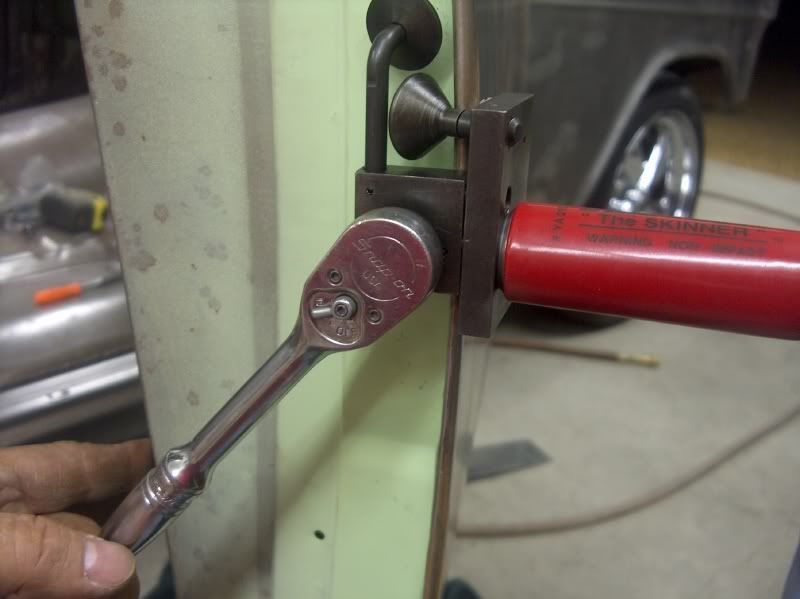
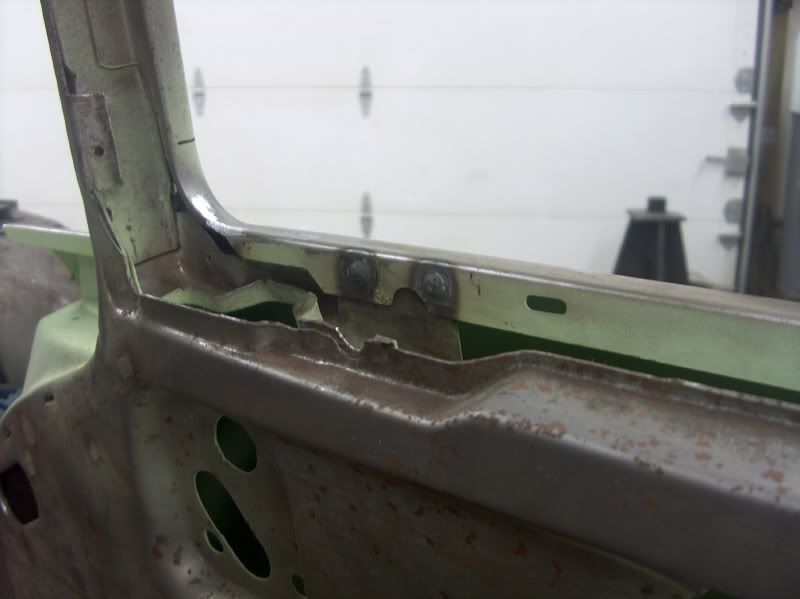
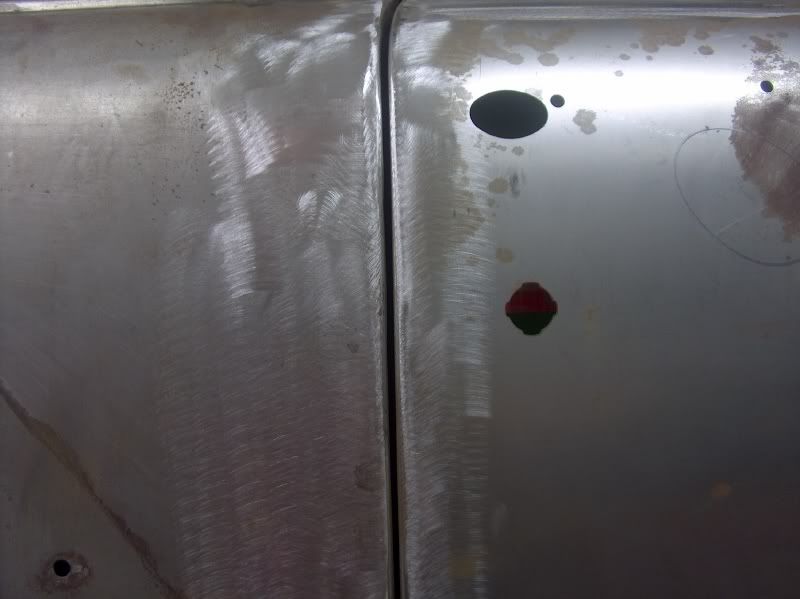
This gave us a nicely folded edge, with a good consistent gap.
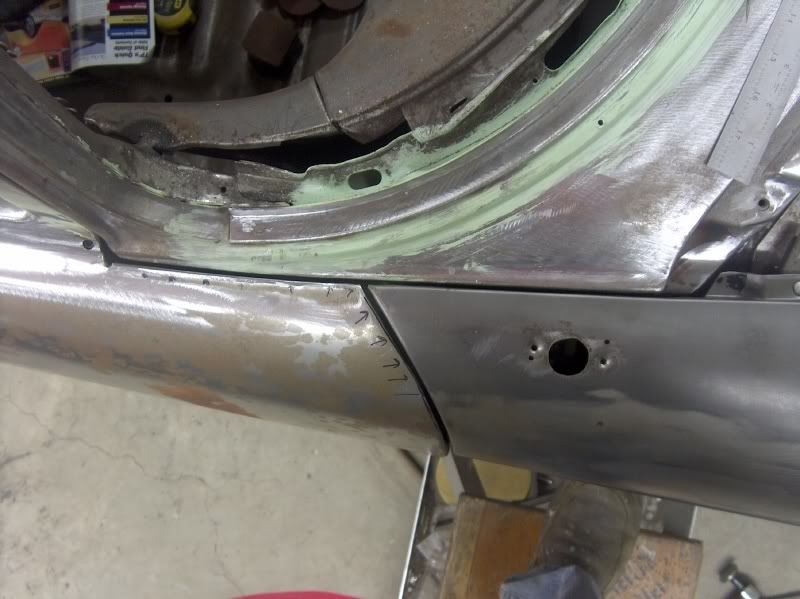
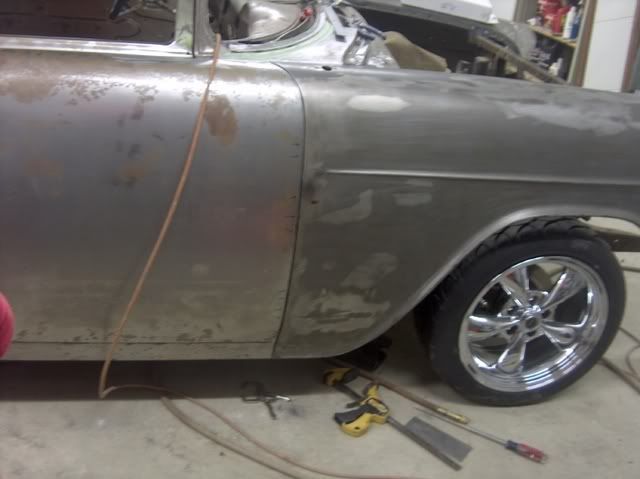
Then we moved on to the front edge, and the front fenders were hung to give us a reference edge. Note the much better fit of the cowl gap.
After marking the door skin for the bend to match the rear edge of the fender, the fender was removed and the door skin hammer was used with a flat dollie to move the fold around to where it was needed. Once we had the crease started, the door was removed and the flange finished on the bench.
And fit tested again:
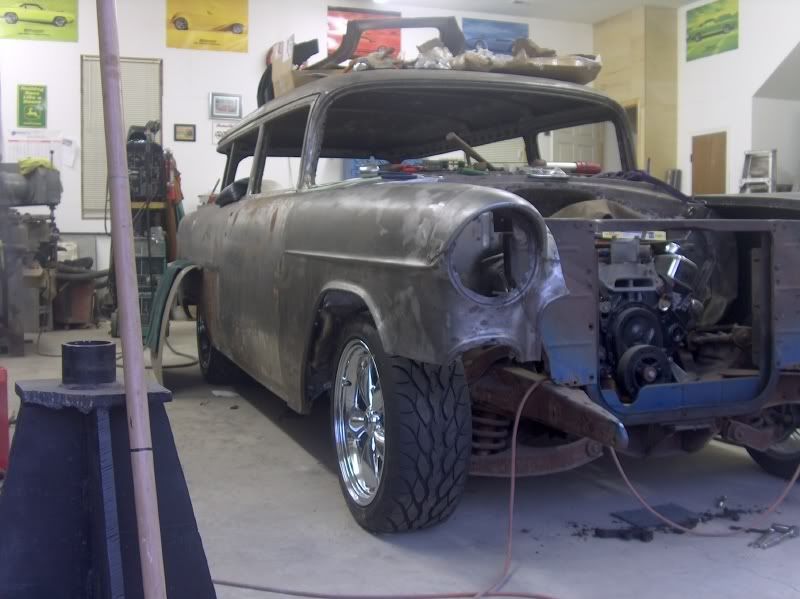
Car looks a bit better with fenders back on:
The passenger door, which lost its skin some time ago, will be the first candidate.
And now for a test fit of the new skin:
It was a bit of a stretch hooking the new skin over the old window opening, but necessary to scribe the cut locations:
The old center section was removed, four spot welds still held it to some inner bracing. Holes were drilled into the new skin for plug welds.
Test fit, and tack welded:
About here was where I got in a mad rush and forgot pictures until I was done.
The inset radius just below the window opening is not as crisp as the original, but installing it as I did gives you much less welds to contend with than if the original was saved. I'll be making another tool later, a hand held punch and die, to persuade the radius into correct shape.
Plug welds:
Next on the list will be to try our hand at setting the skin in place.
We left off last time with the top of the new skin being welded into the window posts. As this is my first time for installing door skins, I consulted with a couple individuals I knew had done it before to gather some helpful hints. The first thing we'll check is the fit to the A pillar-cowl area. I was told by Steve Fountain that this area of the skin is not perfect, and many times he will leave the original (depending on condition, of course) and graft the new skin in below this edge. Here's what we have for a gap, verifying what Steve had said:
As I had already removed the old skin before talking to Steve, the first order of business will be to straighten out this fold and relocate it for a more consistent gap.
A line to mark the proposed bend:
Here the pick (my rust detector) points out where the bend was originally:
With the flange folded under nice and snug, we'll move on the the back edge to hopefully align it with the door opening:
A small pair of visegrips and a piece of aluminum (to prevent leaving marks in the skin) kept the skin tight to the inner door while folding over the rear flange. Jay (Wagonman100) has done quite a few door skins and told me he has better luck with just a body hammer and dollies to match the contour. I had recently purchased a door skin hammer and skinner tool, prior to receiving this advice, so in true exploratory fashion, to see what I had better luck using, I tried all of the above. This shows using the door skin hammer and a small bag of #8 Lead shot as a dollie. The shot bag works pretty good at supporting the panel and leaving no marks, especially the rounded areas of the skin where it's hard to get a dollie that matches the contour. Be sure to work the flange a bit at a time, come back and work it down some more. In between, reference the door opening to insure that the skin is wrapped around consistently to fit the opening.
After the flange was folded around fairly close, and matched the door opening as best we could, I decided to try the skinner tool. It uses a 3/8 ratchet to turn a knurled wheel that flattens out the flange on the back side, with adjustable tension as well, so you can make multiple passes to tighten the flange progressively. It did a pretty good job as well, went around some slight radiuses, but will be challenging for real tight ones. Overall, you could accomplish the same thing with hammer & dollie.
This gave us a nicely folded edge, with a good consistent gap.
Then we moved on to the front edge, and the front fenders were hung to give us a reference edge. Note the much better fit of the cowl gap.
After marking the door skin for the bend to match the rear edge of the fender, the fender was removed and the door skin hammer was used with a flat dollie to move the fold around to where it was needed. Once we had the crease started, the door was removed and the flange finished on the bench.
And fit tested again:
Car looks a bit better with fenders back on:
Once skin is completely on and test fit to opening, if any tweaks (twisting) is needed to fit opening better, do those, then spot weld or plug weld skin flanges to inner door.

Thread
Thread Starter
Forum
Replies
Last Post
mazdab2600
1948 - 1956 F1, F100 & Larger F-Series Trucks
12
Apr 18, 2009 08:11 PM


