



Yeti gets her claws sharpened... (Build Thread)

Thread Starter
|
Junior User
Joined: Sep 2013
Posts: 82
Likes: 0
Yeti gets her claws sharpened... (Build Thread)
Ok gang... So this is a bit premature but I thought I will consolidate all planning and execution stages of my build into a single thread. I am still a few weeks from starting proper due to working some logistics out and the like but thought I would laydown what my stated goals are for the various phases this project will go through. Be great to get some feedback along the way to draw on the experience and support of the community. I should also add that this is going to be a first for me in many ways, not in terms of wrenching, but in where and how. First off, I am doing this in the carport of my apartment. It has quite a bit of space and will be fine for the majority of things minus things like engine building or body painting. Good side is its my brother apt. complex so I have the support of the landlord on my side, bad side I wish I had a nice garage... oh well, we do what me must and I need a project lest I devolve into some type of sickly creature who spends all of his time in front of the computer. Secondly, in all my years of building cars, engines, and the like I have never worked on an American car. My specialties were always the German breed of iron, mostly old Volkswagen's and BMW's. Probably why I am so excited about this.... Same technique, totally blank canvas.
As I mentioned in my introduction thread, this project is going to be conducted in phases, mostly to facilitate still being able to drive the truck around and due to space and financial constraints. I think I have come up with a rather conservative plan moving forward in terms of time and money that will improve the overall drivability, reliability, and of course fun of my Yeti beast. Of prime concern... That she is up and running next summer for jaunts and romps where she belongs... in the Sierra Nevada
So begins Phase 1:
It is the intention of the first phase of this effort to stem any future or developing rust issues on the main frame, solidify the overall mechanical condition of Yeti in terms of suspension-steering-braking (SSB), as well as provide a very granular level of inspection of every nut, bolt, line, and provide a list of future tasks and the best order to accomplish them.
After crawling around on the creeper for a few hours last night, and researching the past couple of weeks on suspension, and popular upgrades in terms of steering and braking, I have outlined the following plan for phase 1:
1. Begin by removing the bed to provide access to rear of frame, and begin stripping, painting (POR-15) everything from the T-Case back. This will allow me to build funds for the more financially intense front systems update with regards to SSB, in exchange for the time consuming tasks of labour. Rear brakes will be rebuilt, and rear axel inspected. Any deficiencies found will be fixed and new shocks,leaf springs, and lines will be installed. Drivelines were recently rebuilt and are in excellent condition, so will most likely just be stripped and painted.
2. T-Case and Tranny will be dropped, cleaned, inspected, and painted. If I can source a fair condition np205 before this I may perform the swap at this stage as I like the idea of the stronger gear driven unit with the versatility of a twin stick set-up. Both the tranny and the T-Case feel excellent in terms of mechanical condition, but both leak a fair amount and will need to have new seals installed to clean up the mess that is developing on them. I will also take this chance to install a dedicated tranny cooler and run it forward using Earl's soft lines to the cooler mounted on the pass. side in front of the rad. Frame sections in this area will be stripped and painted with POR-15. I will most likely at this stage raise the cab on some saw horses a foot or so that I can really sort the frame sections in that area and install new cab mounting rubbers.
3. Bed will be reattached with refreshed mounts, and front "dog house" will be removed to provide access to front steering system, suspension, and engine. engine will be removed to facilitate a thorough cleaning and painting of the area. Front axel, braking system, and steering system will be removed for refurb. In terms of this, the intention is to fit a 2WD PS steering box with an upgraded Saginaw pump to remove the problematic "ram-assist" system. I am also going to take the opportunity to install a hydro assist system from a mid-90's F-Super Duty and do a full rebuild on the braking system with removal of the stock prop valve in lieu of the Wilwood aftermarket option (HIO I am going to steal your bracket idea below the master, it looks so clean), and pump the whole PS through a dedicated cooler mounted on the driver's side in front of the rad. I don't even want to mess around with this and rebuild the whole brake system only to not feel it isn't up to par still, and based on what I have seen everyone that has done it has been massively impressed. I am going to fab my own bracket for the PS box along an ideal similar to the b*****s kit, to allow bolt-on bolt-off with no welding required. When I get a design working and aligned correctly, I am going to produce plans and freely give them to community. Finally with all that complete, new headers and exhaust will be installed and the tired ol' 360 will go back in and I will be back on the road.
...then it will be on to phase 2...the new powerplant
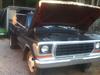
Unfortunately, there me be an interim stage as well... As nice as the paint and body look in the pictures, the seems are beginning to weep red-brown as the body caulking cracks and peels back, and we all know what that means. So I may be at time stripping the seems and door frames for preventative maint., until the time comes when I can proceed with a full exterior repaint (this time not miracle)
So there it is broken down, and ready for comment. I am sure there will be other threads I start with some of the more detailed questions about specific items, but I will reserve a couple of spaces under this initial post so that I can post links up to relevant information pertaining to the build, as well as important information or commentaries that occur within.
I am looking most forward to this "little" project and the feedback from all those on this wonderful forum. Please feel free to comment on anything pertaining to methodology, technique, or component selection...knowledge is power, and best to do it right the first time.

As I mentioned in my introduction thread, this project is going to be conducted in phases, mostly to facilitate still being able to drive the truck around and due to space and financial constraints. I think I have come up with a rather conservative plan moving forward in terms of time and money that will improve the overall drivability, reliability, and of course fun of my Yeti beast. Of prime concern... That she is up and running next summer for jaunts and romps where she belongs... in the Sierra Nevada
So begins Phase 1:
It is the intention of the first phase of this effort to stem any future or developing rust issues on the main frame, solidify the overall mechanical condition of Yeti in terms of suspension-steering-braking (SSB), as well as provide a very granular level of inspection of every nut, bolt, line, and provide a list of future tasks and the best order to accomplish them.
After crawling around on the creeper for a few hours last night, and researching the past couple of weeks on suspension, and popular upgrades in terms of steering and braking, I have outlined the following plan for phase 1:
1. Begin by removing the bed to provide access to rear of frame, and begin stripping, painting (POR-15) everything from the T-Case back. This will allow me to build funds for the more financially intense front systems update with regards to SSB, in exchange for the time consuming tasks of labour. Rear brakes will be rebuilt, and rear axel inspected. Any deficiencies found will be fixed and new shocks,leaf springs, and lines will be installed. Drivelines were recently rebuilt and are in excellent condition, so will most likely just be stripped and painted.
2. T-Case and Tranny will be dropped, cleaned, inspected, and painted. If I can source a fair condition np205 before this I may perform the swap at this stage as I like the idea of the stronger gear driven unit with the versatility of a twin stick set-up. Both the tranny and the T-Case feel excellent in terms of mechanical condition, but both leak a fair amount and will need to have new seals installed to clean up the mess that is developing on them. I will also take this chance to install a dedicated tranny cooler and run it forward using Earl's soft lines to the cooler mounted on the pass. side in front of the rad. Frame sections in this area will be stripped and painted with POR-15. I will most likely at this stage raise the cab on some saw horses a foot or so that I can really sort the frame sections in that area and install new cab mounting rubbers.
3. Bed will be reattached with refreshed mounts, and front "dog house" will be removed to provide access to front steering system, suspension, and engine. engine will be removed to facilitate a thorough cleaning and painting of the area. Front axel, braking system, and steering system will be removed for refurb. In terms of this, the intention is to fit a 2WD PS steering box with an upgraded Saginaw pump to remove the problematic "ram-assist" system. I am also going to take the opportunity to install a hydro assist system from a mid-90's F-Super Duty and do a full rebuild on the braking system with removal of the stock prop valve in lieu of the Wilwood aftermarket option (HIO I am going to steal your bracket idea below the master, it looks so clean), and pump the whole PS through a dedicated cooler mounted on the driver's side in front of the rad. I don't even want to mess around with this and rebuild the whole brake system only to not feel it isn't up to par still, and based on what I have seen everyone that has done it has been massively impressed. I am going to fab my own bracket for the PS box along an ideal similar to the b*****s kit, to allow bolt-on bolt-off with no welding required. When I get a design working and aligned correctly, I am going to produce plans and freely give them to community. Finally with all that complete, new headers and exhaust will be installed and the tired ol' 360 will go back in and I will be back on the road.
...then it will be on to phase 2...the new powerplant
Unfortunately, there me be an interim stage as well... As nice as the paint and body look in the pictures, the seems are beginning to weep red-brown as the body caulking cracks and peels back, and we all know what that means. So I may be at time stripping the seems and door frames for preventative maint., until the time comes when I can proceed with a full exterior repaint (this time not miracle)
So there it is broken down, and ready for comment. I am sure there will be other threads I start with some of the more detailed questions about specific items, but I will reserve a couple of spaces under this initial post so that I can post links up to relevant information pertaining to the build, as well as important information or commentaries that occur within.
I am looking most forward to this "little" project and the feedback from all those on this wonderful forum. Please feel free to comment on anything pertaining to methodology, technique, or component selection...knowledge is power, and best to do it right the first time.

Postmaster
Joined: Oct 2010
Posts: 4,656
Likes: 4
From: Northern and Southern Cal

Boy, you have a hell of a first phase planned.
Let me ask you a question.
How is a the running gear now? Does everything work right?
Brakes, tranny, engine (carb/choke), steering, interior, instruments.
Let me ask you a question.
How is a the running gear now? Does everything work right?
Brakes, tranny, engine (carb/choke), steering, interior, instruments.
Thread Starter
|
Junior User
Joined: Sep 2013
Posts: 82
Likes: 0
Overall I would say still the truck is in great condition, just not the state I would like it to be where I can feel comfortable knowing that I have touched and inspected everything. To me the stripping and painting is just something you do while you are there. Most of the replacements will be what I consider "consumables", things like soft lines and brake parts.
However the steering and braking do need attention, which will take me a while to get there which is good. I can take my time with the more time intensive task of the cleaning stripping and painting while I accumulate the parts I need for the front. Financially it really does not seem to intense an objective but I do have the realistic expectation it will take 2-3 months to finish.
Do you think it seems unreasonable?

Logistics Pro

Joined: Aug 2003
Posts: 4,701
Likes: 6
I think you are on the right track. I have always thought that doing the SSB as one of the first items is the smartest. A lot of times I will get people telling me that old trucks just don't handle/brake as well as the new ones, but with new parts, generally they are actually pretty good. I think this is also why people sometimes get discouraged with their projects. They put all the time and $$ in to looks, and the thing still wanders and barely stops. A few hundred dollars in new parts can really freshen up the feel and make you much more happy.
Keep with the plan
Keep with the plan
Postmaster
Joined: Oct 2010
Posts: 4,656
Likes: 4
From: Northern and Southern Cal
I think you are on the right track. I have always thought that doing the SSB as one of the first items is the smartest. A lot of times I will get people telling me that old trucks just don't handle/brake as well as the new ones, but with new parts, generally they are actually pretty good. I think this is also why people sometimes get discouraged with their projects. They put all the time and $$ in to looks, and the thing still wanders and barely stops. A few hundred dollars in new parts can really freshen up the feel and make you much more happy.
Keep with the plan
Keep with the plan
If it doesn't work right you get awfully tired of it.
Trending Topics
Thread Starter
|
Junior User
Joined: Sep 2013
Posts: 82
Likes: 0
Temp Cab Relocation
Ok Guys... so here is an interesting question. I was poking around under the Yeti monster this weekend, tracking systems and just getting more familiar with how everything is laid out and with the logistics of my project. It occurred to me how easy the tranny/T-case/motor work would be if the cab was not on. Now this is not logistically possible for me due to space constraints, however I had an idea....
After I finish painting the back of the frame (the bed would not be there as I have found a storage location for it), would it be possible to undo the cab mounting point and disconnect the systems, bolt a couple of 4x4 runners across the frame between the cab mounting points for support, and "slide" the cab to a temp location on the rear of the frame to give me access to front/mid section of the frame?
How much does the cab weigh?
Thoughts?
After I finish painting the back of the frame (the bed would not be there as I have found a storage location for it), would it be possible to undo the cab mounting point and disconnect the systems, bolt a couple of 4x4 runners across the frame between the cab mounting points for support, and "slide" the cab to a temp location on the rear of the frame to give me access to front/mid section of the frame?
How much does the cab weigh?
Thoughts?
Last edited by 1970 Yeti; Oct 7, 2013 at 02:17 PM. Reason: Addded detail and fixed gramatical errors
FTE Stories
Ford Trucks for Ford Truck Enthusiasts

Rezvani's Latest Post-Apocalytic Monster Is a Ford F-150 Raptor Underneath
Verdad Gallardo
Top 10 Most Expensive Ford Trucks Ever Sold on Bring a Trailer
Joe Kucinski
2027 Ford Super Duty Buyer's Guide (Every Model, Engine, & Package)
Brett Foote
Top 10 Ford Truck Tragedies
Joe Kucinski
AEV FXL Super Duty - the Super Duty Raptor Ford Doesn't Make
Brett Foote
Lobo Vs Lobo: Proof the F-150 Lobo Should Be Even Lower!
Michael S. Palmer
Ford's 2001 Explorer Sportsman Concept Looks For a New Home
Verdad Gallardo
10 Best Ford Truck Engines We Miss the Most!
Joe Kucinski
2026 Shelby F-150 Off-Road: Better Than a Raptor R?
Brett Foote
Senior User
Joined: Mar 2013
Posts: 388
Likes: 2
From: Sandy Eggo
they aren't that heavy. but i wouldn't want to try moving it with 2 people...you would definitely want to remove the front clip first.
dropping the trans/transfer case is easier in my opinion. i would do them one at a time to make it easier. there should be an inspection cover on the trans tunnel which you can remove to get better access to the bellhousing bolts. when i had a BW1356 in my bronco, i regularly put it in and out by myself without a jack, they only weigh about 80lbs. an np 205 on the other hand....you'll probably want some help.
dropping the trans/transfer case is easier in my opinion. i would do them one at a time to make it easier. there should be an inspection cover on the trans tunnel which you can remove to get better access to the bellhousing bolts. when i had a BW1356 in my bronco, i regularly put it in and out by myself without a jack, they only weigh about 80lbs. an np 205 on the other hand....you'll probably want some help.
Thread Starter
|
Junior User
Joined: Sep 2013
Posts: 82
Likes: 0
they aren't that heavy. but i wouldn't want to try moving it with 2 people...you would definitely want to remove the front clip first.
dropping the trans/transfer case is easier in my opinion. i would do them one at a time to make it easier. there should be an inspection cover on the trans tunnel which you can remove to get better access to the bellhousing bolts. when i had a BW1356 in my bronco, i regularly put it in and out by myself without a jack, they only weigh about 80lbs. an np 205 on the other hand....you'll probably want some help.
dropping the trans/transfer case is easier in my opinion. i would do them one at a time to make it easier. there should be an inspection cover on the trans tunnel which you can remove to get better access to the bellhousing bolts. when i had a BW1356 in my bronco, i regularly put it in and out by myself without a jack, they only weigh about 80lbs. an np 205 on the other hand....you'll probably want some help.
...And I have a np203 divorced in mine, heard somewhere they weight like 185! Still getting used to the fact I have a truck now, and unlie my old Volkswagen bus, can't just carry the engine/tranny anything around by myself!

Logistics Pro
Joined: Aug 2003
Posts: 4,701
Likes: 6
Going off memory, the cab, without anything, is probably 300# or so. For some reason, they seem front heavy, so consider that when you go to lift it.
I lifted my Dodge crew cab using a cherry picker and cargo straps crossed inside the cab.
I would say to do it that way. Redoing the frame without the body in the way sure is nice.
I lifted my Dodge crew cab using a cherry picker and cargo straps crossed inside the cab.
I would say to do it that way. Redoing the frame without the body in the way sure is nice.
Thread Starter
|
Junior User
Joined: Sep 2013
Posts: 82
Likes: 0
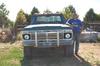
Well After a little more research into the matter off lifting the cab, it does not seem it is too much of an issue. I am working now on talking my parking neighbor out of their space (he is a close friend) so that I can just place the bed and cab in the space next to my work area and remove the cab via cherry picker. Seems the most straight forward way and I figure he will only be put out for a month or two at most. With the doghouse pieces in the bed, and the hood sitting on 2x4's across the bed I actually think this can be done with minimal space. After all working on a rolling chassis would be the far preferred method and provide me the most efficient use of time I think. Thanks for the input guys, always nice to have more than one way to do things!
Senior User
Joined: May 2012
Posts: 112
Likes: 0
From: Taunton, MA
Ill throw my own experience with cab moving in here, it can be done with just two people. I am not a large person, 5-9 and barely 140 and my brother is not much better, but the pair of us could lift the cab from my 73 F350 and (barely clearing the steering box) set it on the frame. That said it was very stupid, even more so since it was dark out, and if doing it again atleast 4 people is recommended. Sliding back however would be much easier and I would say two people of reasonable physical strength could do it, slowly. Or do what i did and buy a forklift 

Thread
Thread Starter
Forum
Replies
Last Post
checksix
1973 - 1979 F-100 & Larger F-Series Trucks
6
Jul 8, 2011 08:02 PM
Lukas42104
1948 - 1956 F1, F100 & Larger F-Series Trucks
15
May 18, 2011 09:13 AM
hazardousdrew
1961 - 1966 F-100 & Larger F-Series Trucks
8
Dec 11, 2003 06:25 PM
