


introduction and basics

Thread Starter
|
Junior User
Joined: Nov 2012
Posts: 89
Likes: 1
Well one thing I was also wondering in addtion to the question about the mid 70's tanks fitting the 67, was what apbout the AC units? I found a truck with a complete AC unit under the dash. It has the ugly woodgrain trim, but will it fit under my current dash without major modding? AC would be nice.
How much is the unit worth if I just pulled and sold on eBay?
How much is the unit worth if I just pulled and sold on eBay?

Senior User
Joined: Mar 2006
Posts: 148
Likes: 0
You asked about a steering column earlier. I've been looking at the ones on eBay. You should buy one and be the Guinea pig..... Report back on the quality
Ps. Not sure on which length. This is just the first one I found
New Hot Rod Chrome Tilt Auto Automatic Steering Column 32" GM No Key | eBay
Ps. Not sure on which length. This is just the first one I found
New Hot Rod Chrome Tilt Auto Automatic Steering Column 32" GM No Key | eBay
Thread Starter
|
Junior User
Joined: Nov 2012
Posts: 89
Likes: 1
While that column is pretty and all, I have just made the OEM ones work.
I went to the local junkyard and the owner who is friends with my father in law let me go take one from an auto. Sadly it was all messed up at the wheel end, because someone welded on a steeringwheel from a go-cart.
However I used that and the old manual one from my truck and got it all to work.
It currently shifts fine, although final location of the shift cable is unknown until the brakebooster issue is resolved.
To make the column work I used basically an auto trans column, the end of the crush/colapsing tube from the Crown Vic and the old inner shaft from the auto steering column. As the one end was all tore up, it was useless otherwise.
One of the videos below should explain some of it and where i am at with most of this project.
I would have it done in a few days if I had the gas tank issue resolved, and the time to work on it. Living 100 miles away from the project means I have to pick my days carefully.
Here is part 5 in my poorly made series detailing the work being done. this video shows the new driveshaft I had worked out, It also shows my solutions for the rear shocks, which later videos show did not work out very well at all.
This video shows how well the CV radiator fits, and where to get your gas pedal and how it works out. Brake pedal.
Also, it shows why the Mustang tank i bought did not fit well.
Next will be part 7... it details issues with the O2 sensor, how to make your steering column fit the CV IFS. One thing of note is that you must pull the further most U-joint on the Cv linakge out a bit. Too far in and it binds up really bad.
I will upload it at a later date. Maybe tomorrow if i get the free time.
So again, if anyone knows why the 75 rear tank won't fit my 67, please speak up. I might buy one soon, and don't want to waste my cash.
I went to the local junkyard and the owner who is friends with my father in law let me go take one from an auto. Sadly it was all messed up at the wheel end, because someone welded on a steeringwheel from a go-cart.
However I used that and the old manual one from my truck and got it all to work.
It currently shifts fine, although final location of the shift cable is unknown until the brakebooster issue is resolved.
To make the column work I used basically an auto trans column, the end of the crush/colapsing tube from the Crown Vic and the old inner shaft from the auto steering column. As the one end was all tore up, it was useless otherwise.
One of the videos below should explain some of it and where i am at with most of this project.
I would have it done in a few days if I had the gas tank issue resolved, and the time to work on it. Living 100 miles away from the project means I have to pick my days carefully.
Here is part 5 in my poorly made series detailing the work being done. this video shows the new driveshaft I had worked out, It also shows my solutions for the rear shocks, which later videos show did not work out very well at all.
This video shows how well the CV radiator fits, and where to get your gas pedal and how it works out. Brake pedal.
Also, it shows why the Mustang tank i bought did not fit well.
Next will be part 7... it details issues with the O2 sensor, how to make your steering column fit the CV IFS. One thing of note is that you must pull the further most U-joint on the Cv linakge out a bit. Too far in and it binds up really bad.
I will upload it at a later date. Maybe tomorrow if i get the free time.
So again, if anyone knows why the 75 rear tank won't fit my 67, please speak up. I might buy one soon, and don't want to waste my cash.
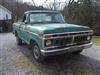
Junior User
Joined: Dec 2012
Posts: 92
Likes: 0
From: Here
 Awesome man... This is a great write up. Thanks for taking the time to do this and the vids.
I have a 77 f-100, (ClifFORD) a 99 CV, and picked up an 04 subframe the other day. Maybe get started on it next week, maybe.

Got any pics of the cv cluster mounted in the truck and how you did it. If you already posted it, I missed it some where.
Thread Starter
|
Junior User
Joined: Nov 2012
Posts: 89
Likes: 1
This video shows that you get about 15 inches between the top of the fender arch and the center of the wheel hub.
How to make the cluster fit......
First off, it looks like only the 67 version is viable. Not sure of all the changes from year to year, but most the later year ones I have seen are the split level type. Mine is one large single pane plexi window and the 2004 CV cluster is almost identical width wise. It is a tiny bit narrower, so about 1/16th inch on each side is not perfectly covered.
Basically, you remove the clear cover from the CV cluster, and cut the bottom off it. The photo below is one i just snitched off eBay for this and I used the classic MSpaint in true interwebz fashion.
Also the thin wall on the sides. I labeled them "wings". Removing them allows you to bring the face of the cluster closer to the trucks stock cluster window. The reason this is so important is that if you don't it will hit the vertical wishbone like bracket behind the dash. The welded in one that stablizes the drivers side dash. Otherwise the cluster is too thick to fit and would require further modding to make work.

You need to drill out the one single screw hole to a larger size to allow the trip meter button to fit through. Or you could cut that off and retain a tiny bit more stock look. I figured I'd reather leave it as it is functional still.
You lose the gear selector option though. I could not figure out a viable way of making it work.
Sorry for the poor quality videos guys, but after about 5 years of making videos now, I doubt I'll start making nice ones now.
I have a few more and a few photos, but really most everything not covered in these is pretty simple stuff that you will easily figure out once you begin to do it.
After going though all this I am pretty sure I could make a drivable truck within about 1 weeks time of working on it.
The single most time consuming part is the wiring harness and the stupid way I am going about it.
Today i picked up a brake pedal, booster and master cylinder that I am pretty sure can and will fit the truck with minimal modding. (a few new bolt holes for the booster and pedal) I got it all from a 1999 Continental. Really easy to pull. took about 15 minutes. I then took it over to a 1970 truck, and after removing the brake parts on that truck test fit things at the junkyard. Looks like the bore of the booster that enters the firewall is the same diameter. Not sure if the trucks pedal will have the correct stroke, so if it doesn't, I'll convert to the Lincolns pedal assembly, which is much smaller and easier to mount. The booster pushrod looks to fit the F100s pedal though.
I also scored on a pretty dent free and clean front panel that fits behind the bumper. Plus a bunch of nice stainless window trim, and fender trim. I was amazed at how many trucks they had that still had the side trim. Sadly I went today hoping to pull the nice complete underdash AC unit the one truck had. Someone beat me to it though.
How to make the cluster fit......
First off, it looks like only the 67 version is viable. Not sure of all the changes from year to year, but most the later year ones I have seen are the split level type. Mine is one large single pane plexi window and the 2004 CV cluster is almost identical width wise. It is a tiny bit narrower, so about 1/16th inch on each side is not perfectly covered.
Basically, you remove the clear cover from the CV cluster, and cut the bottom off it. The photo below is one i just snitched off eBay for this and I used the classic MSpaint in true interwebz fashion.
Also the thin wall on the sides. I labeled them "wings". Removing them allows you to bring the face of the cluster closer to the trucks stock cluster window. The reason this is so important is that if you don't it will hit the vertical wishbone like bracket behind the dash. The welded in one that stablizes the drivers side dash. Otherwise the cluster is too thick to fit and would require further modding to make work.
You need to drill out the one single screw hole to a larger size to allow the trip meter button to fit through. Or you could cut that off and retain a tiny bit more stock look. I figured I'd reather leave it as it is functional still.
You lose the gear selector option though. I could not figure out a viable way of making it work.
Sorry for the poor quality videos guys, but after about 5 years of making videos now, I doubt I'll start making nice ones now.
I have a few more and a few photos, but really most everything not covered in these is pretty simple stuff that you will easily figure out once you begin to do it.
After going though all this I am pretty sure I could make a drivable truck within about 1 weeks time of working on it.
The single most time consuming part is the wiring harness and the stupid way I am going about it.
Today i picked up a brake pedal, booster and master cylinder that I am pretty sure can and will fit the truck with minimal modding. (a few new bolt holes for the booster and pedal) I got it all from a 1999 Continental. Really easy to pull. took about 15 minutes. I then took it over to a 1970 truck, and after removing the brake parts on that truck test fit things at the junkyard. Looks like the bore of the booster that enters the firewall is the same diameter. Not sure if the trucks pedal will have the correct stroke, so if it doesn't, I'll convert to the Lincolns pedal assembly, which is much smaller and easier to mount. The booster pushrod looks to fit the F100s pedal though.
I also scored on a pretty dent free and clean front panel that fits behind the bumper. Plus a bunch of nice stainless window trim, and fender trim. I was amazed at how many trucks they had that still had the side trim. Sadly I went today hoping to pull the nice complete underdash AC unit the one truck had. Someone beat me to it though.
Thread Starter
|
Junior User
Joined: Nov 2012
Posts: 89
Likes: 1
Ok kids, I have not been updating this site as much as my Isuzu site on this project.
I'll try and explain a few things I've done to make it all work.
Fuel delivery proved the hardest issue to overcome. I wanted to retain the emissions as an extra level of difficulty. Sadly time constraints and my limited metal working abilities precluded this from happening. Putting ports in the tank that were not gonig to leak and adding a raised section to my tank I selected was not gonig to happen.
I bought a tank for a 1975 truck. just the small 19.5 gallon off eBay. $65 shipped. I also bought an electric fuel pump that flows 130gph. Low pressure too meant for a carb. I then routed line from the front incab tank to the pump, then to the rear tank.
A flick of a switch moves the gas as your pumping into the front tank to the rear tank. Takes a good 10 minutes to fill the back tank. I suggest you watch the videos on youtube I made showing how I made it all work, so you get a visual.
To make the mustang pump work was pretty easy. Once I figued out the wiring. I did it according to the color codes but it did not work right. Took 2 hours to figure out the issue.
I took my new tank, cut a hole in it, (covered in video) tack welded the pump mounting plate to the bottom of the tank. sealed up the top of the tank and made some custom staps to securing the tank to the truck. Sits up pretty high. Not off-roader high, but enough for normal truck usage.
I also created a great new method of making nice center caps for people running Bullitt wheels after doing this swap. Info included in the videos.
Dash is semi-mounted. Still need a small bit of modding to ft better, but nothing major. All gauges work fine though, including the fuel level. Volage reads a bit under half way up, but the alt is working fine. Not sure exactly why yet. No problems though.
Still need to wire up reverse lights, they did not work when I bought the truck so not a major concern.
Here is the mustang tank drilled to remove the mounting welded for the pump:

This is the mounting plate for your pump. The advantage of this pump is it mounts on the bottom of the tank. As such, it does not matter how deep your tank is, the level sending unit will work!

here is where i opened the tank for the upper plate for the pump unit:

My first set of straps. These were aluminum, but I oped later for some galvanized 20ga. Easy to make if you have a shear.

3/8 fuel line. I bought 30 feet to make sure I had enough:

Ricer parts off eBay:

Hole saw and where I cut her open:

There is an off-center low point in the new tank that fits the bottom mount for your new pump. It is a BITCH to fish the pump into this. It can be done, but plan ahead to know where direction your pump need to be, an it required some triming. I covered this in videos. The mount has a metal base, so you can then tack weld it in. Lowest setting, and be careful. I was lucky enough to be able to braze my burn through hole up.

This was how i flattened the tank for the new upper plate:

My only **** up was this. I used threaded rivets, but should hve spaced them further from the edge of my hole. Note the one in the lower right side.... It all worked out though.

Note the angle the lower mount is to the hole. This is unavoidable if you use that low point in the tank. It makes installing the pump stupid hard.

Pump mounted up though. The plug off to the right is for the pressure transducer... un needed unless you run emissions
Note the metal plate i used for the stock sending unit location. Just a round plate. The new tank came with a gasket and lock ring. Woot!:

New stance:


Where the tank sits..... not too bad.

I'll try and explain a few things I've done to make it all work.
Fuel delivery proved the hardest issue to overcome. I wanted to retain the emissions as an extra level of difficulty. Sadly time constraints and my limited metal working abilities precluded this from happening. Putting ports in the tank that were not gonig to leak and adding a raised section to my tank I selected was not gonig to happen.
I bought a tank for a 1975 truck. just the small 19.5 gallon off eBay. $65 shipped. I also bought an electric fuel pump that flows 130gph. Low pressure too meant for a carb. I then routed line from the front incab tank to the pump, then to the rear tank.
A flick of a switch moves the gas as your pumping into the front tank to the rear tank. Takes a good 10 minutes to fill the back tank. I suggest you watch the videos on youtube I made showing how I made it all work, so you get a visual.
To make the mustang pump work was pretty easy. Once I figued out the wiring. I did it according to the color codes but it did not work right. Took 2 hours to figure out the issue.
I took my new tank, cut a hole in it, (covered in video) tack welded the pump mounting plate to the bottom of the tank. sealed up the top of the tank and made some custom staps to securing the tank to the truck. Sits up pretty high. Not off-roader high, but enough for normal truck usage.
I also created a great new method of making nice center caps for people running Bullitt wheels after doing this swap. Info included in the videos.
Dash is semi-mounted. Still need a small bit of modding to ft better, but nothing major. All gauges work fine though, including the fuel level. Volage reads a bit under half way up, but the alt is working fine. Not sure exactly why yet. No problems though.
Still need to wire up reverse lights, they did not work when I bought the truck so not a major concern.
Here is the mustang tank drilled to remove the mounting welded for the pump:
This is the mounting plate for your pump. The advantage of this pump is it mounts on the bottom of the tank. As such, it does not matter how deep your tank is, the level sending unit will work!
here is where i opened the tank for the upper plate for the pump unit:
My first set of straps. These were aluminum, but I oped later for some galvanized 20ga. Easy to make if you have a shear.
3/8 fuel line. I bought 30 feet to make sure I had enough:
Ricer parts off eBay:
Hole saw and where I cut her open:
There is an off-center low point in the new tank that fits the bottom mount for your new pump. It is a BITCH to fish the pump into this. It can be done, but plan ahead to know where direction your pump need to be, an it required some triming. I covered this in videos. The mount has a metal base, so you can then tack weld it in. Lowest setting, and be careful. I was lucky enough to be able to braze my burn through hole up.
This was how i flattened the tank for the new upper plate:
My only **** up was this. I used threaded rivets, but should hve spaced them further from the edge of my hole. Note the one in the lower right side.... It all worked out though.
Note the angle the lower mount is to the hole. This is unavoidable if you use that low point in the tank. It makes installing the pump stupid hard.
Pump mounted up though. The plug off to the right is for the pressure transducer... un needed unless you run emissions
Note the metal plate i used for the stock sending unit location. Just a round plate. The new tank came with a gasket and lock ring. Woot!:
New stance:
Where the tank sits..... not too bad.

Logistics Pro


Joined: Nov 2012
Posts: 4,308
Likes: 19
From: Las Vegas, NV

Heck of a truck you got there. You put a lot of work into it.
I like the stance but not so much how low the tank is.
Hell, I don't like where mine is either.
Keep doing what you do and keep the updates coming.
I like the stance but not so much how low the tank is.
Hell, I don't like where mine is either.
Keep doing what you do and keep the updates coming.
Thread Starter
|
Junior User
Joined: Nov 2012
Posts: 89
Likes: 1
To put the tank any higher would have required a different tank. Also I'd have had to get rid of my hitch and that was not acceptable. I use that all the time.
Here is a video of my first drive with it and my initial feelings:
Here is a video of my first drive with it and my initial feelings:
FTE Stories
Ford Trucks for Ford Truck Enthusiasts

2027 Ford Super Duty Buyer's Guide (Every Model, Engine, & Package)
Brett Foote
Top 10 Ford Truck Tragedies
Joe Kucinski
AEV FXL Super Duty - the Super Duty Raptor Ford Doesn't Make
Brett Foote
Lobo Vs Lobo: Proof the F-150 Lobo Should Be Even Lower!
Michael S. Palmer
Ford's 2001 Explorer Sportsman Concept Looks For a New Home
Verdad Gallardo
10 Best Ford Truck Engines We Miss the Most!
Joe Kucinski
2026 Shelby F-150 Off-Road: Better Than a Raptor R?
Brett Foote
2027 Super Duty Carhartt Package First Look: 12 Things You NEED to Know!
Michael S. Palmer
10 Most Surprising 2026 Ford Truck Features!
Joe Kucinski
Thread Starter
|
Junior User
Joined: Nov 2012
Posts: 89
Likes: 1
I have been driving this everywhere right now and might make a trip back up north to Detroit next month in it. Truck runs fine.
Issues are currently limited to tire clearance in the rear. I am getting a bit of rubbing if stuff is loading down the rear end. The fact that I have a broken leaf on each side is not helping things at all. The local junkyard has a few F250's I can scavenge from, but lack of time and extra cash is holding me back. I am looking into rolling the rear fenders a touch to buy a bit of room. Not much, but enough to take the inner lip to the point it cannot cut my tires.
Stops many times better than before. Handles much better without struggling to turn the wheel at low speeds. Getting out the driveway was a chore.
Issues are currently limited to tire clearance in the rear. I am getting a bit of rubbing if stuff is loading down the rear end. The fact that I have a broken leaf on each side is not helping things at all. The local junkyard has a few F250's I can scavenge from, but lack of time and extra cash is holding me back. I am looking into rolling the rear fenders a touch to buy a bit of room. Not much, but enough to take the inner lip to the point it cannot cut my tires.
Stops many times better than before. Handles much better without struggling to turn the wheel at low speeds. Getting out the driveway was a chore.
Thread Starter
|
Junior User
Joined: Nov 2012
Posts: 89
Likes: 1
I have now put about 250 miles on this, and the only issue is that you cannot overfill the rear tank or the tophat will leak. 
Truck runs perfect, and no major issues at all. I think I have a very fine leak near the thermostat. Not sure. I saw residue of coolant in an valley near the area.
I got a bit more wiring done. I added some LED lights for blinkers as the Crown Vic green arrows were very dim from the angle. The new lights are in old screw holes on the bezel. You would not notice them.
I also finally got my design done for the center caps.

Truck runs perfect, and no major issues at all. I think I have a very fine leak near the thermostat. Not sure. I saw residue of coolant in an valley near the area.
I got a bit more wiring done. I added some LED lights for blinkers as the Crown Vic green arrows were very dim from the angle. The new lights are in old screw holes on the bezel. You would not notice them.
I also finally got my design done for the center caps.
Thread Starter
|
Junior User
Joined: Nov 2012
Posts: 89
Likes: 1
I figured it was time to update this thread.
I pretty much drive this truck as a daily and have put about 2100 miles on it since the swap. I took it on a trip to Michigan. The truck ran fine, and handles superb on the interstate. I was amazed at how much in control you feel at 100 MPH. Where before anything above 60 and the truck felt a bit scary.
Only major issue was the incab tank is rusty and it clogged up my transfer pump. Rust scale.
One of my rear swaybar end links snapped off a while back. It happened because the rear end hung for so long it fatigued the links. I replaced the broken one. I had used a set of links from a 2001 Sable. The first ones were from Advance Auto..... they are a joke compared to the cheap ones at Autozone. Seriously, this was a rare occurance that Autozone had a better product.
I also picked up a sliding rear window for it off CL for $40. So when I buy the weather strip for the windshield when I install my new one I'll do that too.
The stopping ability of this truck is light years head of the old 4 wheel drums. It does not stop as well as my BMW, but better than my wifes 04 Malibu.
I pretty much drive this truck as a daily and have put about 2100 miles on it since the swap. I took it on a trip to Michigan. The truck ran fine, and handles superb on the interstate. I was amazed at how much in control you feel at 100 MPH. Where before anything above 60 and the truck felt a bit scary.
Only major issue was the incab tank is rusty and it clogged up my transfer pump. Rust scale.
One of my rear swaybar end links snapped off a while back. It happened because the rear end hung for so long it fatigued the links. I replaced the broken one. I had used a set of links from a 2001 Sable. The first ones were from Advance Auto..... they are a joke compared to the cheap ones at Autozone. Seriously, this was a rare occurance that Autozone had a better product.
I also picked up a sliding rear window for it off CL for $40. So when I buy the weather strip for the windshield when I install my new one I'll do that too.
The stopping ability of this truck is light years head of the old 4 wheel drums. It does not stop as well as my BMW, but better than my wifes 04 Malibu.
Senior User
Joined: Jun 2008
Posts: 158
Likes: 0
Found your build. Looks great. I have questions for you for sure! I am attempting to go through the wiring harness of my CV like you did. Mine is a 2005 and was wondering if your 04 is a three plug computer or a two plug computer. I have been told there are major differences between the two. One for sure is I have to use the gas pedal due to a change in drive by electronic signal not by throttle cable. I am also wondering what you did to get around the returnless system and the fuel pressure system that is on the fuel rail. I am also still working on the steering column issue. I am looking for a 78 t 79 tilt auto column and will figure out how to connect it to the CV steering box at that time.
SS
SS
Thread Starter
|
Junior User
Joined: Nov 2012
Posts: 89
Likes: 1
My PCM was a large single plug. However nearly all the wiring you will need will already be done for you.
Just going through it all to eliminate all the extra stuff is what takes so long.
All you end up needing is fuel control, switched power, starting power, and wiring for any gauges you opt to run.
The throttle pedal can be done with the CV one modded to fit, or you can buy all sorts of after market pedals that have the variable position pick-up already installed.
One issue I found with the steering column is that the F100 auto does not have as much degrees of turn. So if you max out the arm to the top for park, you will not be able to drop the trans all the way to low gear.
Also, the shift points on the trans are very soft. So it is hard to tell which gear you are putting the truck into.
I have more videos and tons of photos, and documented nearly every aspect of this build with all the numbers but did not post it all up. There are so many other people who have done this swap, it seemed like a waste of time.
Just going through it all to eliminate all the extra stuff is what takes so long.
All you end up needing is fuel control, switched power, starting power, and wiring for any gauges you opt to run.
The throttle pedal can be done with the CV one modded to fit, or you can buy all sorts of after market pedals that have the variable position pick-up already installed.
One issue I found with the steering column is that the F100 auto does not have as much degrees of turn. So if you max out the arm to the top for park, you will not be able to drop the trans all the way to low gear.
Also, the shift points on the trans are very soft. So it is hard to tell which gear you are putting the truck into.
I have more videos and tons of photos, and documented nearly every aspect of this build with all the numbers but did not post it all up. There are so many other people who have done this swap, it seemed like a waste of time.
Senior User
Joined: Jun 2008
Posts: 158
Likes: 0
Did you say you did not change your motor over from a returnless system to a return system? If you did what did you do with the fuel pressure regulation that the PCM wants to do? Did you have the computer changed?
SS
SS
Thread Starter
|
Junior User
Joined: Nov 2012
Posts: 89
Likes: 1
I retained the returnless and wired in the fuel pump control module. It went very easy honestly wiring wise. You can get your PCM flashed to use the return style. Check your local Mustang tuners. They can usually help.
I did not want to spend the cash at the time to do that. In retrospect, I probly should have as it would have cost the same as my system, but required towing and a whole series of extra steps. I hope to get mine reflashed to eliminate more of the emissions at some point for performance.
Changing the PCM would have required a bit more wiring work than I wanted, nearly doubling an already complex task, and then still being stuck with a PCM that had spark and fuel tables for a different compression ratio, and cam profile.
I did not want to spend the cash at the time to do that. In retrospect, I probly should have as it would have cost the same as my system, but required towing and a whole series of extra steps. I hope to get mine reflashed to eliminate more of the emissions at some point for performance.
Changing the PCM would have required a bit more wiring work than I wanted, nearly doubling an already complex task, and then still being stuck with a PCM that had spark and fuel tables for a different compression ratio, and cam profile.