




Retro-Solutions HID Kit Installed
Thread Starter
|
Cargo Master


Joined: May 2010
Posts: 3,047
Likes: 10
From: Snohomish, WA

Retro-Solutions HID Kit Installed
Well after upgrading to '05 Harley Edition Headlights I have noticed that my lights were not as bright as my original '02 headlights with Silverstars. I contemplated buying Silverstars to fit into the '05 buckets but decided to try HID's after seeing how bright they were on Ken's (pwerstroke99) truck with Harley Headlights.
One thing about HID kits available was some people have noticed interference with radio's, tuners and PCM's. This was a deterring factor for me as I didn't want to add something that caused negative effects. There have been lots of discussions about how certain chips couldn't handle HID's, but nobody has ever really nailed down why? After all of my research I concluded that cheap HID kits off of eBay or the net are most likely to blame and the install is another key factor. I decided to go with Retro-Solutions 55W Digital Kit as many other 7.3L owners have had positive results with this kit.
I ordered the Bixenon bulbs in 5000K. The 5000k is a whiter light and is what I was looking for. You can go with a yellowish color (3000K and 4300K) to a blueish color (8000K to 15000K). The lower the number, the better your lights will illuminate the night. As the light color changes, you will loose effectiveness. 4300K-6000K seems to be the "normal" colors most of the people who want more light install. 10000K and above is the HID's that are installed to "look cool"
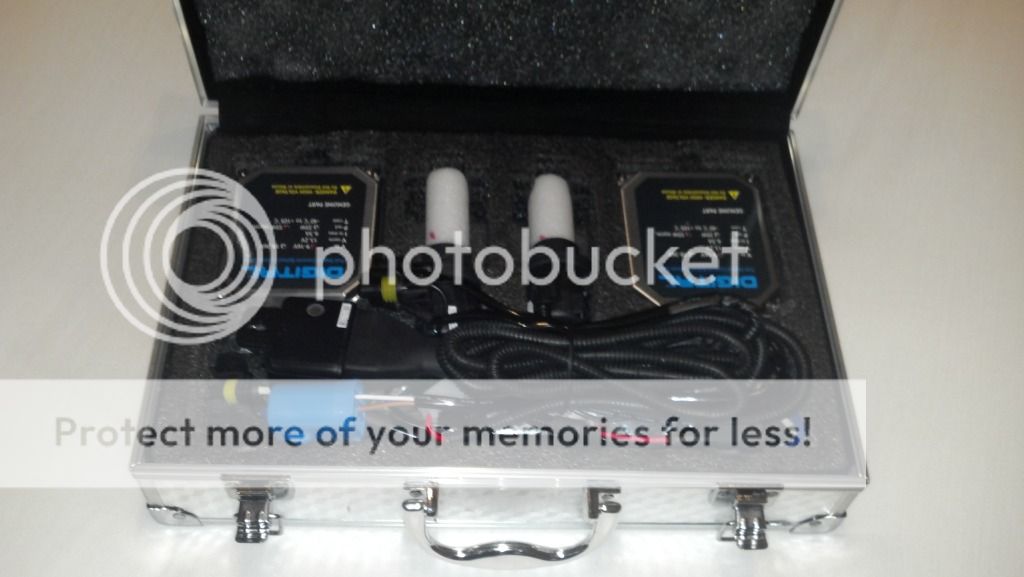
The kit is well put together and includes everything to install. The wiring harness uses an OEM connector headlight connector to turn the system on. All the other connections are completely idiot proof and can only be hooked up one way. All you need to do is connect a fused power wire (part of the harness) to the batteries positive terminal. I was fully ready to get out my wiring tools and "install" this kit when I lifted the hood. I was surprised when I laid out the components and the harness to find everything was going to work with existing ground locations and no modification would be needed.
One thing I have read over the hundreds of posts on HID's is to use the passenger battery on our trucks for the power. Apparently using the drivers battery can effect the PCM when turning on the HID's. To those who know how the batteries are connected via a large gauge wire it makes no sense that it would matter, but I wasn't going to risk it, so I went off the passenger battery.
For access, I removed the grille and the rubber shroud on top of the header panel. I did not remove the headlights and only removed the passenger battery to get access to what I needed to install the whole kit. I did use self tapping screws to mount the ballasts and relay in lieu of the bolts and nuts provided in the kit.
The ballasts and relay need to be mounted to the structure of the truck. I found on the passenger side that removing the battery and installing it between the battery and the fender provided a great location that is out of the way. On the drivers side, I mounted the ballast to the front cross-member just forward of the battery. The relay was also mounted on the cross-member forward of the battery between the radiator and the windshield washer on the passenger side. This allowed hooking up the fused power wire to the passenger battery simple and straight forward. The grounding is very important in electrical installations. Many people ignore the importance of a ground and have difficulty keeping electrical devices working properly. Each ballast needs to be grounded. On the drivers side there was an existing ground location on the cross-member and that is what I used. Making sure there was a cleaned surface, I removed the bolt, and installed the ringed terminal off of the ballast to this location. On the passenger side there are two ground locations just behind the battery on the fender inner panel. This worked out perfectly to use since the ballast was mounted there also.
Install of the bulbs is as simple as inserting them in the bucket and turning them to lock into the tabs as you do any bulb.
Beyond that, it is as simple as hooking up the connectors and securing the harness to the truck to keep from moving around. You will need to cover the drivers side headlight plug to prevent any shorting or corrosion. I used a piece of wide electrical tape over the end. (This connector is not used as the passenger side connector is only energizing the relay for the kit).
Hope this helps everyone decide or not decide on if they want to go this route. Mostly I wanted it to be out there for everyone to share my experience and to help steer others to a good product that will hopefully save them pain and anguish of buying "cheaper" kits that don't work as well or cause issues.
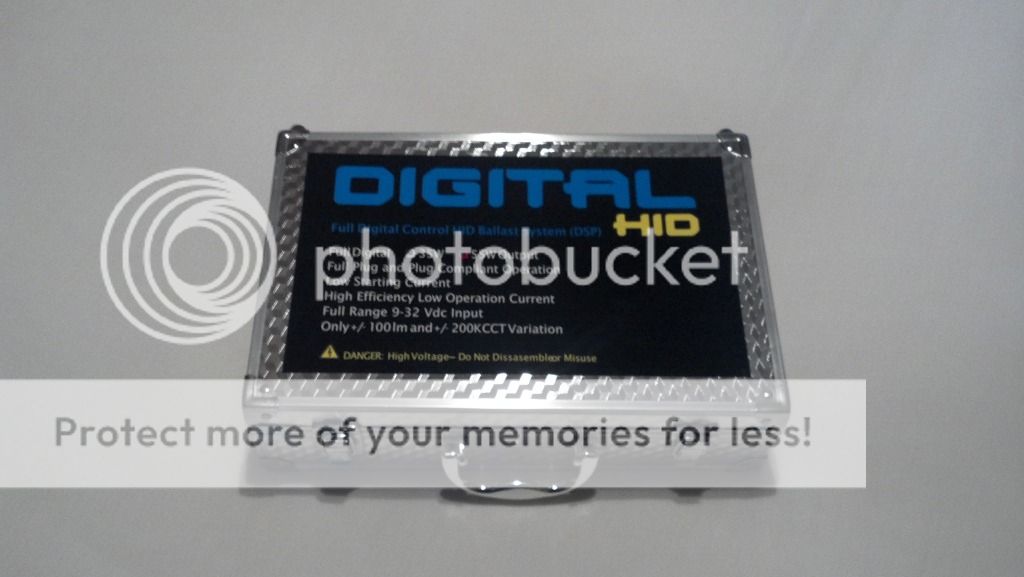
Here are a few pictures of the kit and the install.
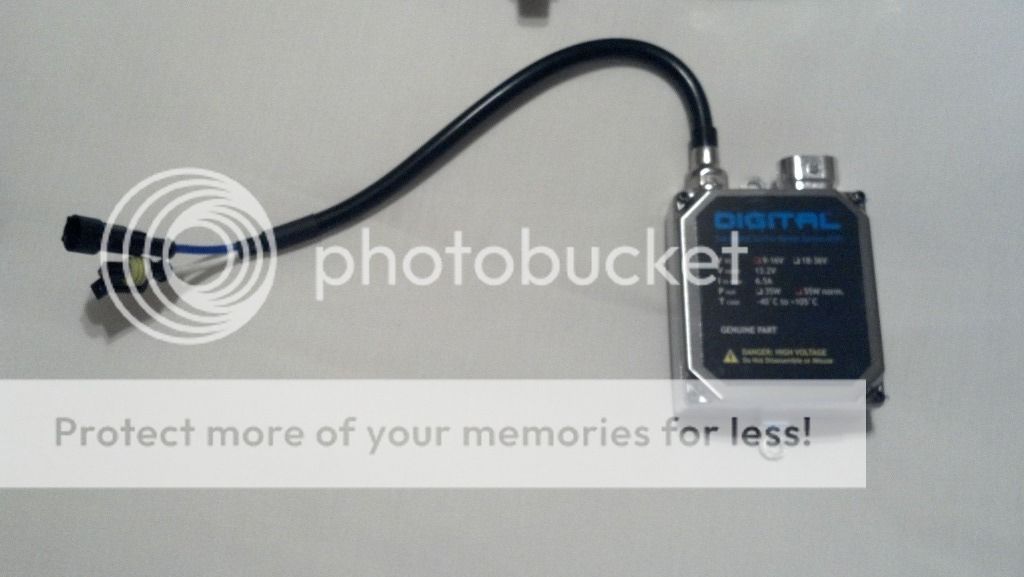


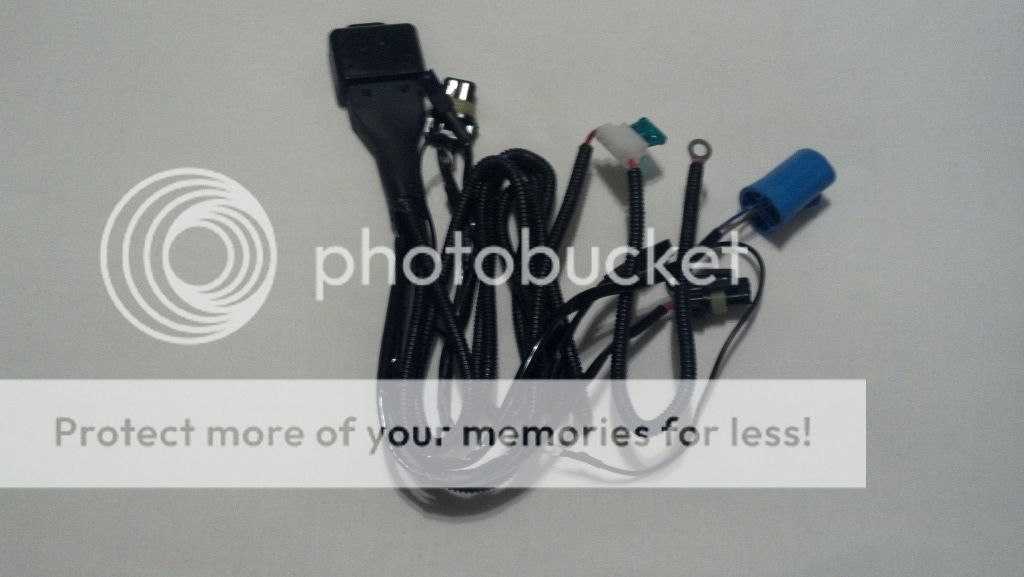
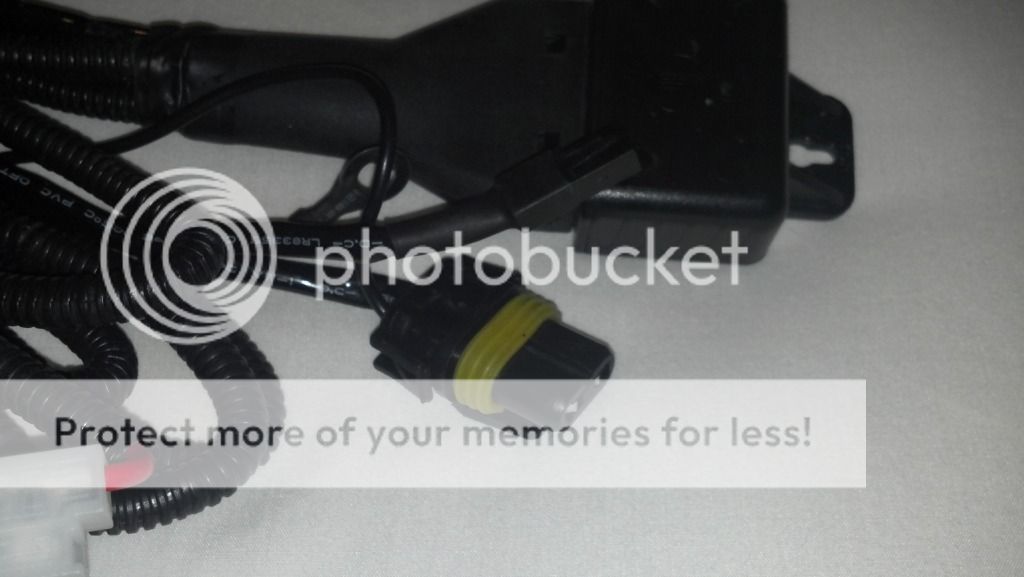
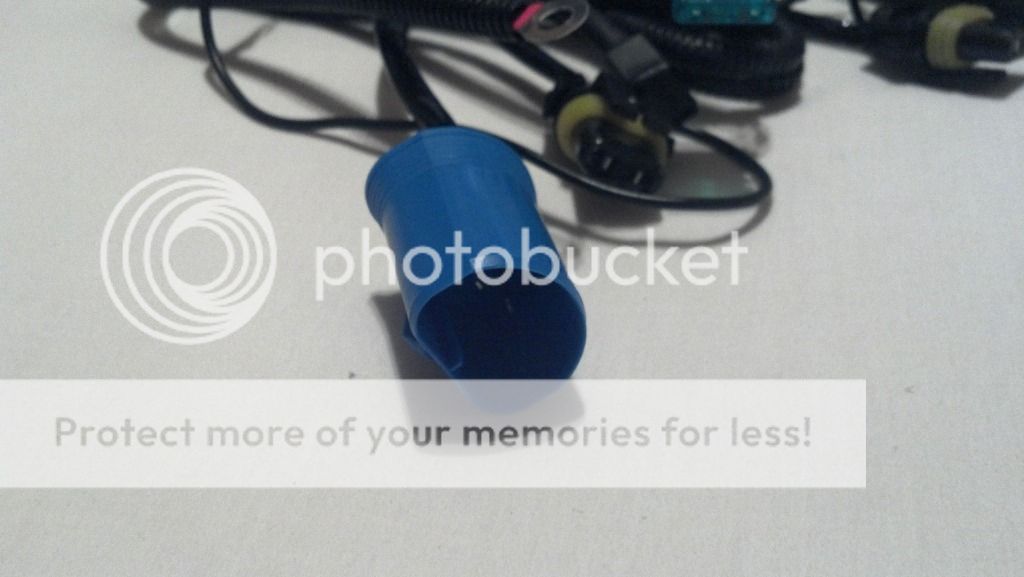
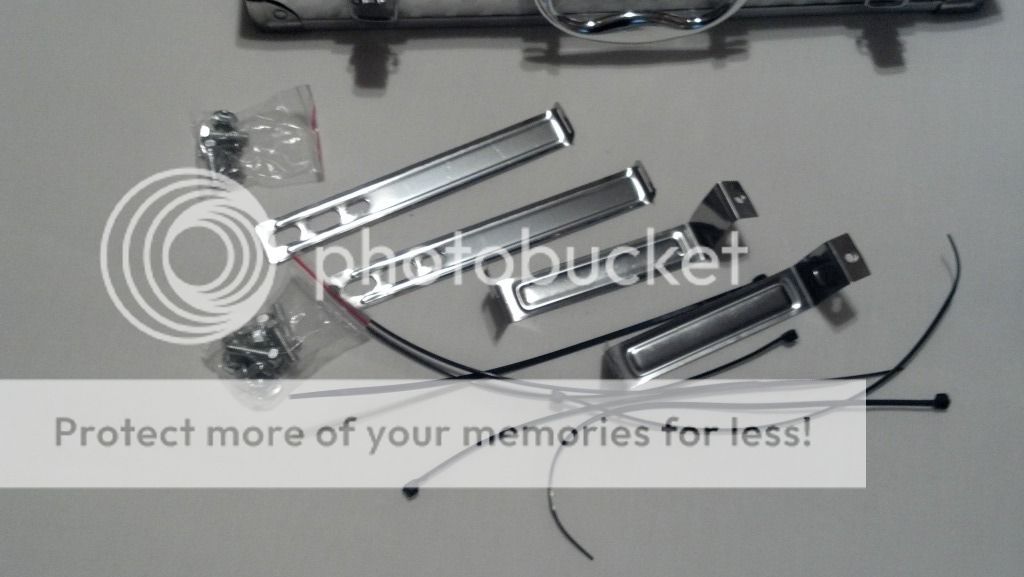


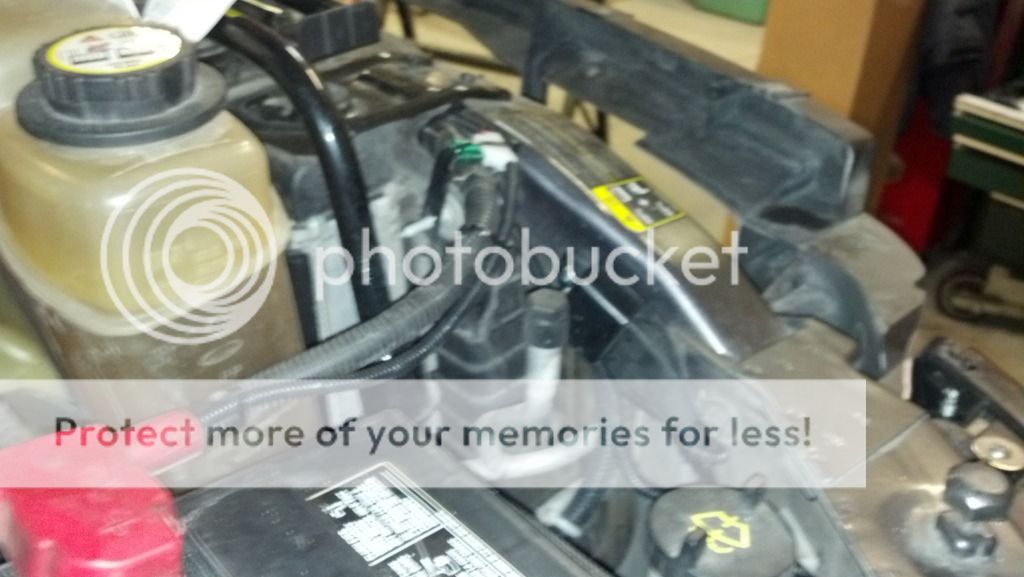
You can see the difference in the new bulbs to the ones in the fog lights. Much whiter light emitted.

Low Beams

High Beams

One thing about HID kits available was some people have noticed interference with radio's, tuners and PCM's. This was a deterring factor for me as I didn't want to add something that caused negative effects. There have been lots of discussions about how certain chips couldn't handle HID's, but nobody has ever really nailed down why? After all of my research I concluded that cheap HID kits off of eBay or the net are most likely to blame and the install is another key factor. I decided to go with Retro-Solutions 55W Digital Kit as many other 7.3L owners have had positive results with this kit.
I ordered the Bixenon bulbs in 5000K. The 5000k is a whiter light and is what I was looking for. You can go with a yellowish color (3000K and 4300K) to a blueish color (8000K to 15000K). The lower the number, the better your lights will illuminate the night. As the light color changes, you will loose effectiveness. 4300K-6000K seems to be the "normal" colors most of the people who want more light install. 10000K and above is the HID's that are installed to "look cool"
The kit is well put together and includes everything to install. The wiring harness uses an OEM connector headlight connector to turn the system on. All the other connections are completely idiot proof and can only be hooked up one way. All you need to do is connect a fused power wire (part of the harness) to the batteries positive terminal. I was fully ready to get out my wiring tools and "install" this kit when I lifted the hood. I was surprised when I laid out the components and the harness to find everything was going to work with existing ground locations and no modification would be needed.
One thing I have read over the hundreds of posts on HID's is to use the passenger battery on our trucks for the power. Apparently using the drivers battery can effect the PCM when turning on the HID's. To those who know how the batteries are connected via a large gauge wire it makes no sense that it would matter, but I wasn't going to risk it, so I went off the passenger battery.
For access, I removed the grille and the rubber shroud on top of the header panel. I did not remove the headlights and only removed the passenger battery to get access to what I needed to install the whole kit. I did use self tapping screws to mount the ballasts and relay in lieu of the bolts and nuts provided in the kit.
The ballasts and relay need to be mounted to the structure of the truck. I found on the passenger side that removing the battery and installing it between the battery and the fender provided a great location that is out of the way. On the drivers side, I mounted the ballast to the front cross-member just forward of the battery. The relay was also mounted on the cross-member forward of the battery between the radiator and the windshield washer on the passenger side. This allowed hooking up the fused power wire to the passenger battery simple and straight forward. The grounding is very important in electrical installations. Many people ignore the importance of a ground and have difficulty keeping electrical devices working properly. Each ballast needs to be grounded. On the drivers side there was an existing ground location on the cross-member and that is what I used. Making sure there was a cleaned surface, I removed the bolt, and installed the ringed terminal off of the ballast to this location. On the passenger side there are two ground locations just behind the battery on the fender inner panel. This worked out perfectly to use since the ballast was mounted there also.
Install of the bulbs is as simple as inserting them in the bucket and turning them to lock into the tabs as you do any bulb.
Beyond that, it is as simple as hooking up the connectors and securing the harness to the truck to keep from moving around. You will need to cover the drivers side headlight plug to prevent any shorting or corrosion. I used a piece of wide electrical tape over the end. (This connector is not used as the passenger side connector is only energizing the relay for the kit).
Hope this helps everyone decide or not decide on if they want to go this route. Mostly I wanted it to be out there for everyone to share my experience and to help steer others to a good product that will hopefully save them pain and anguish of buying "cheaper" kits that don't work as well or cause issues.
Here are a few pictures of the kit and the install.
You can see the difference in the new bulbs to the ones in the fog lights. Much whiter light emitted.
Low Beams
High Beams

It's a Van Gogh


Joined: Feb 2010
Posts: 7,812
Likes: 1,335
From: Elk Grove, CA

Nice install and write-up! The light output on these 55w HIDs is pretty amazing. It's like driving down a different road at night. Silverstars with stock harness doesn't really compare.
Do you need to re-aim your headlights? That is a frequent HID issue.
If you do encounter tuner interference a RF choke or two will solve it.
Do you need to re-aim your headlights? That is a frequent HID issue.
If you do encounter tuner interference a RF choke or two will solve it.
Thread Starter
|
Cargo Master
Joined: May 2010
Posts: 3,047
Likes: 10
From: Snohomish, WA
Nice install and write-up! The light output on these 55w HIDs is pretty amazing. It's like driving down a different road at night. Silverstars with stock harness doesn't really compare.
Do you need to re-aim your headlights? That is a frequent HID issue.
If you do encounter tuner interference a RF choke or two will solve it.
Do you need to re-aim your headlights? That is a frequent HID issue.
If you do encounter tuner interference a RF choke or two will solve it.
Thanks for the link to the RF Choke. I may pick up a few to try some tests out.

Posting Guru
Joined: Dec 2003
Posts: 2,392
Likes: 0
From: NW Arkansas
Trending Topics

Senior User
Joined: Apr 2010
Posts: 268
Likes: 0
From: Walla Walla, Wa
I've wanted HID's for a while too now, does anbyody know if the bright box will work with HID's?
FTE Stories
Ford Trucks for Ford Truck Enthusiasts

Top 10 Most Expensive Ford Trucks Ever Sold on Bring a Trailer
Joe Kucinski
2027 Ford Super Duty Buyer's Guide (Every Model, Engine, & Package)
Brett Foote
Top 10 Ford Truck Tragedies
Joe Kucinski
AEV FXL Super Duty - the Super Duty Raptor Ford Doesn't Make
Brett Foote
Lobo Vs Lobo: Proof the F-150 Lobo Should Be Even Lower!
Michael S. Palmer
Ford's 2001 Explorer Sportsman Concept Looks For a New Home
Verdad Gallardo
10 Best Ford Truck Engines We Miss the Most!
Joe Kucinski
2026 Shelby F-150 Off-Road: Better Than a Raptor R?
Brett Foote
2027 Super Duty Carhartt Package First Look: 12 Things You NEED to Know!
Michael S. Palmer
Posting Guru
Joined: Feb 2005
Posts: 1,319
Likes: 1
From: Oregon
I found the 3000k are perfect for fog. They have enough yellow to enhance the contrast. I also have just the 35watt in the fog position.
Last edited by milleroutdoors; Jun 13, 2012 at 08:38 AM. Reason: spelling

Mountain Pass
Joined: Sep 2009
Posts: 230
Likes: 1
From: Lower Mainland BC
Power Draw
Great install writeup as usual Ken. I was wondering about how much power these draw compared to my Silver stars? At times with my Pac brake air comprssor, Silver stars, stereo etc my batteries have trouble keeping up especially if truck isn't driven that much in a week.

Logistics Pro


Joined: Apr 2010
Posts: 4,446
Likes: 25
From: Panama City, FL
I would say you need a higher amp alternater, like a 200 amp if your drawing that much juice.
Thread Starter
|
Cargo Master
Joined: May 2010
Posts: 3,047
Likes: 10
From: Snohomish, WA
Dave, I am thinking your batteries are probably getting weak or your alternator is on it's last leg. The batteries should be able to support the headlights on, especially while the engine is running.
Mountain Pass
Joined: Sep 2009
Posts: 230
Likes: 1
From: Lower Mainland BC
Ken I didn't do a very good job of describing my situation. Have no problem with battery capacity or head lights when driving. Batteries are about 3 years old and are fine with daily driving. Have had alt checked out in last little while and was OK. Challenge is when only driven a couple of times a week for short distances. Wondered if draw from your new lights was much different from my Silverstars?