
Headlight Switch Connector Replacement, '92-on

Thread Starter
|
FTE Community Team


Joined: Nov 2001
Posts: 1,843
Likes: 252
From: Oak Harbor, Washington

Headlight Switch Connector Replacement, '92-on
For about a year, I would occasionally get a overheated-plastic type of smell when I'd drive a long time. I assumed from the stink (a smell I've encountered in other vehicles) that wiring was overheating.
Given the propensity of Fords of a certain vintage to melt their headlight switch connector down, I assumed that that was what I was smelling.
Well, last week the taillights failed my lights check (I do a walk-around and check all the exterior lights while filling the petrol tank). Fuse good.
So, here's the quick rundown on how to fix this on a 1993 Aerostar XL without automatic headlights (the auto-HL version has a different switch). AFAIK, this should be the same procedure on any Aerostar 1992 and newer.
(click on any image for larger)
All all of the screws to be removed were 7mm head on my rig.
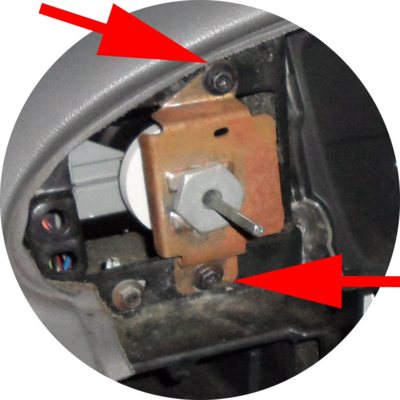
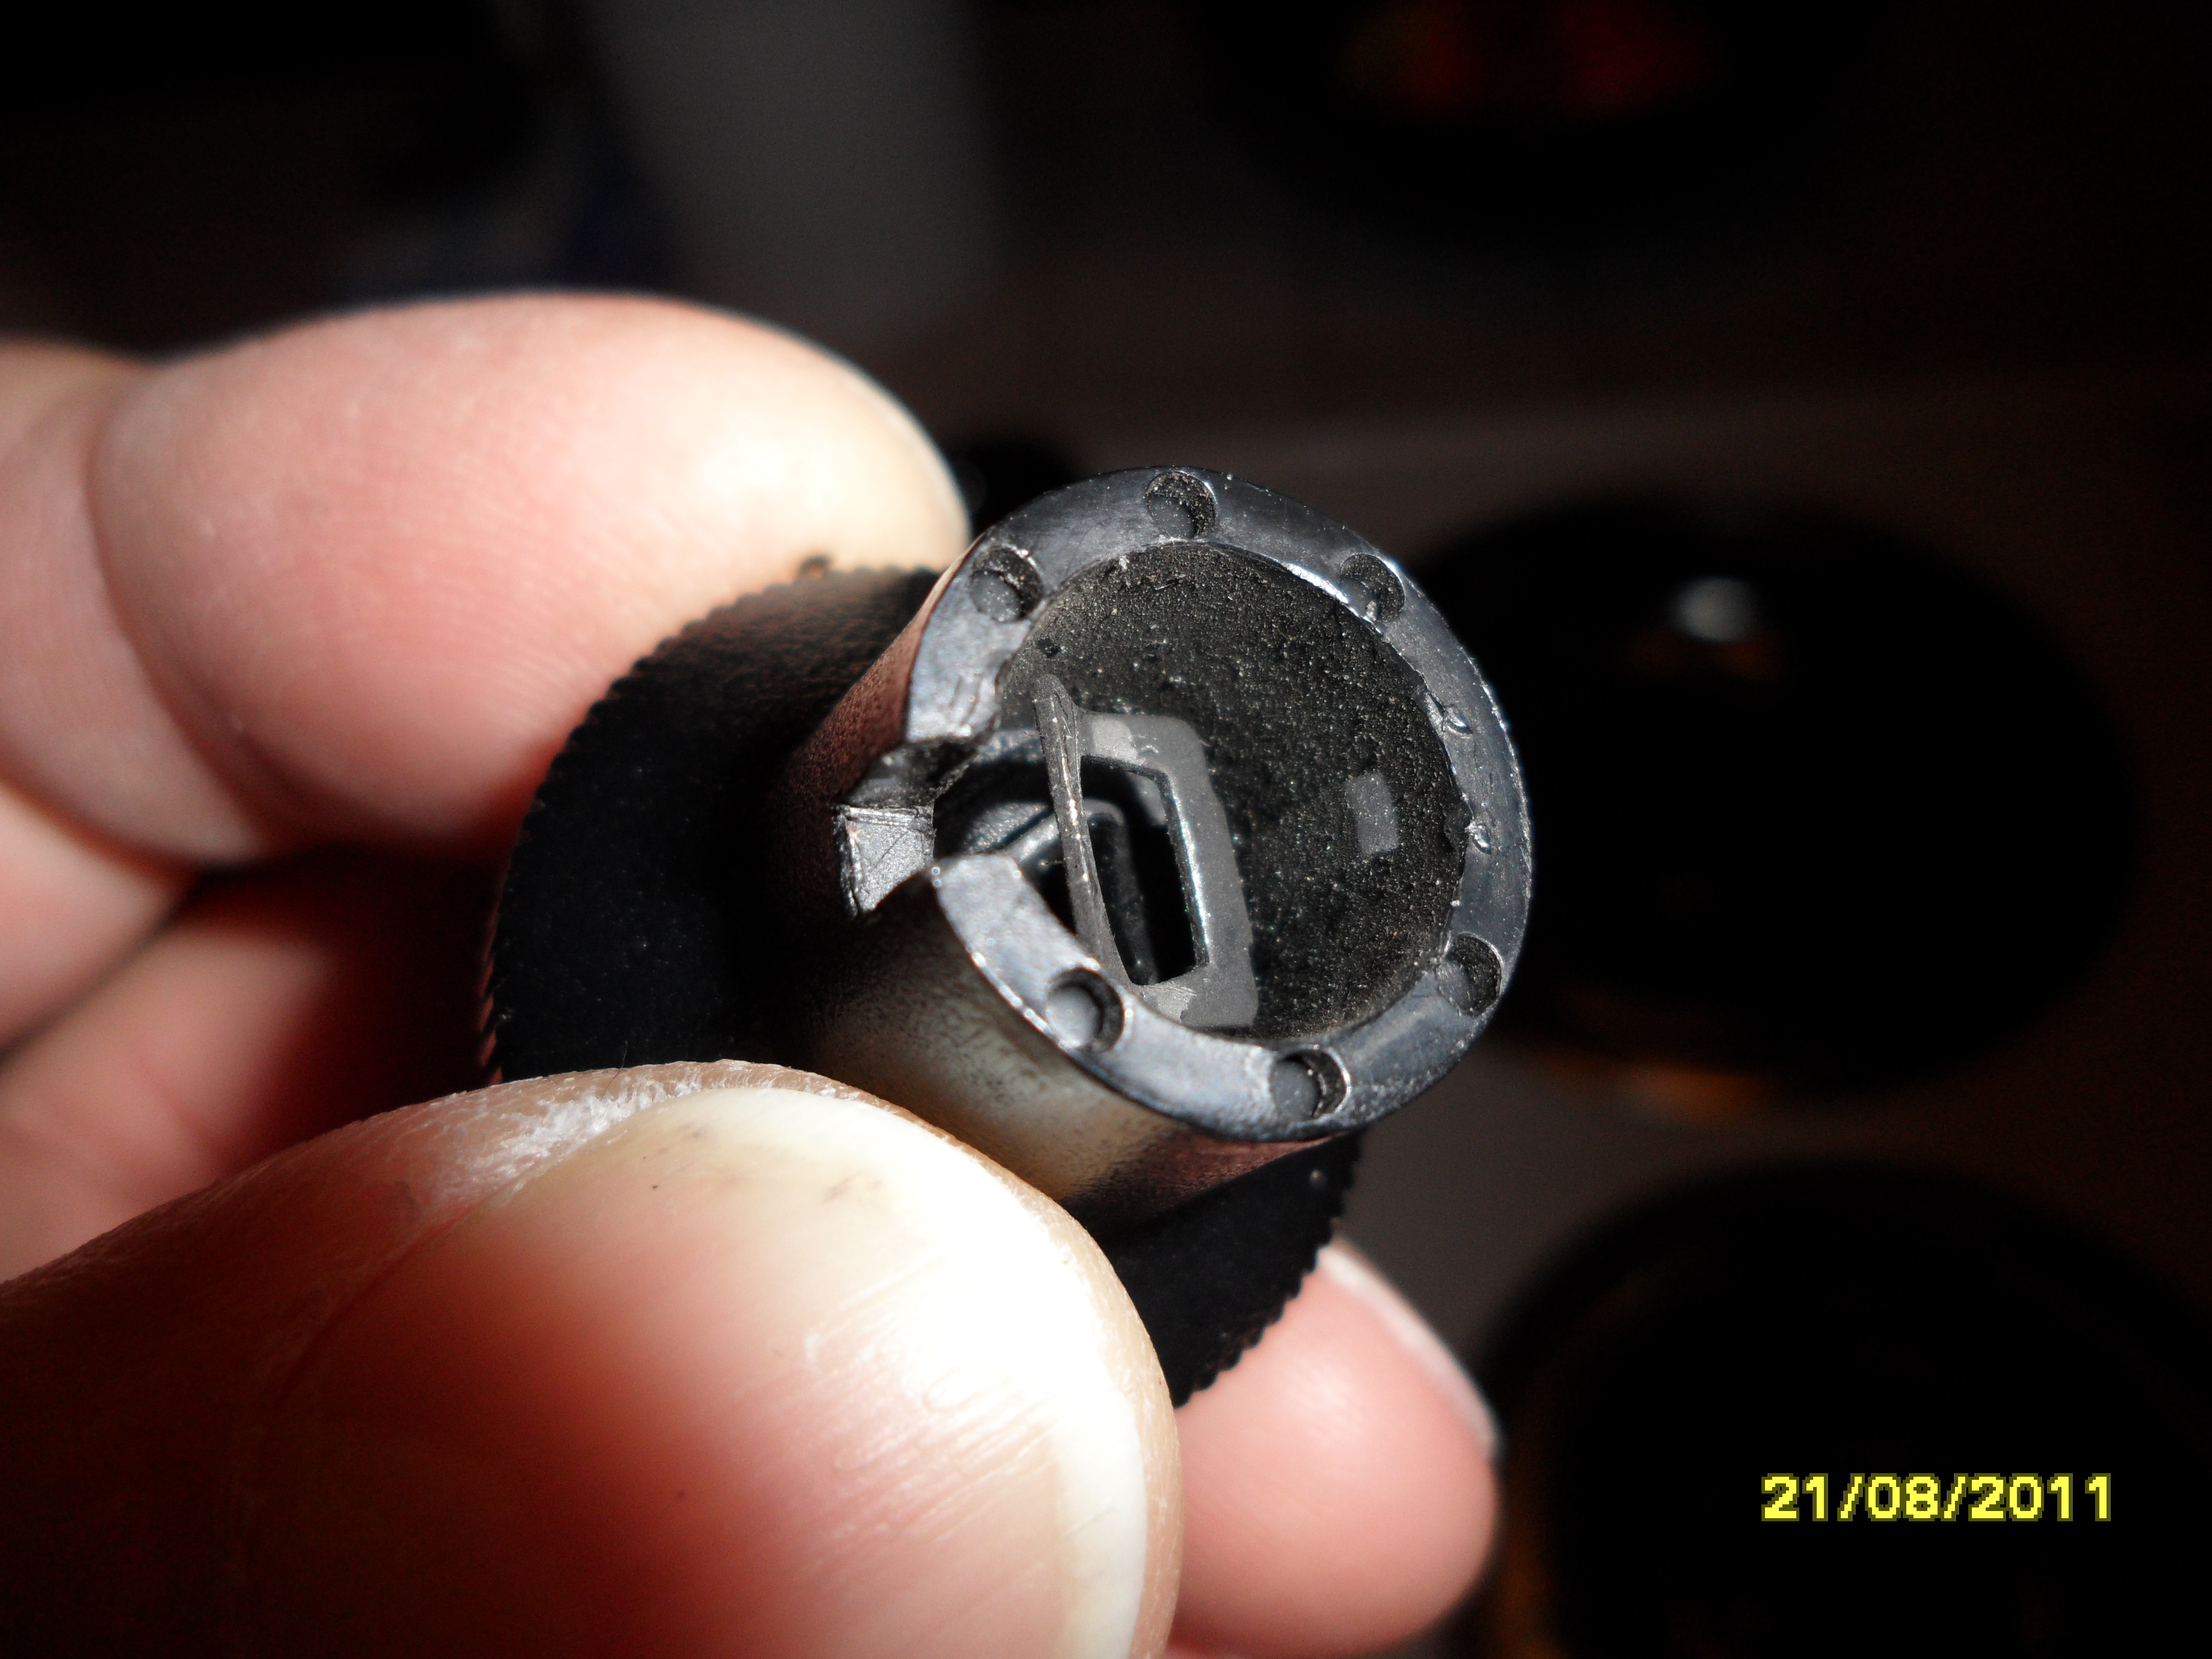
The first hurdle is to remove the headlight switch ****. It's not obvious how that's done.
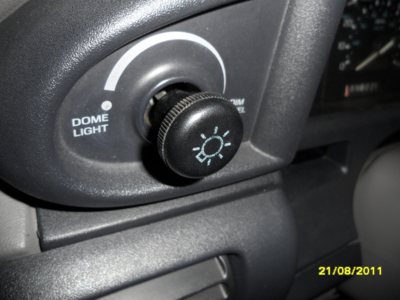
Here's what you're fighting: a spring clip.

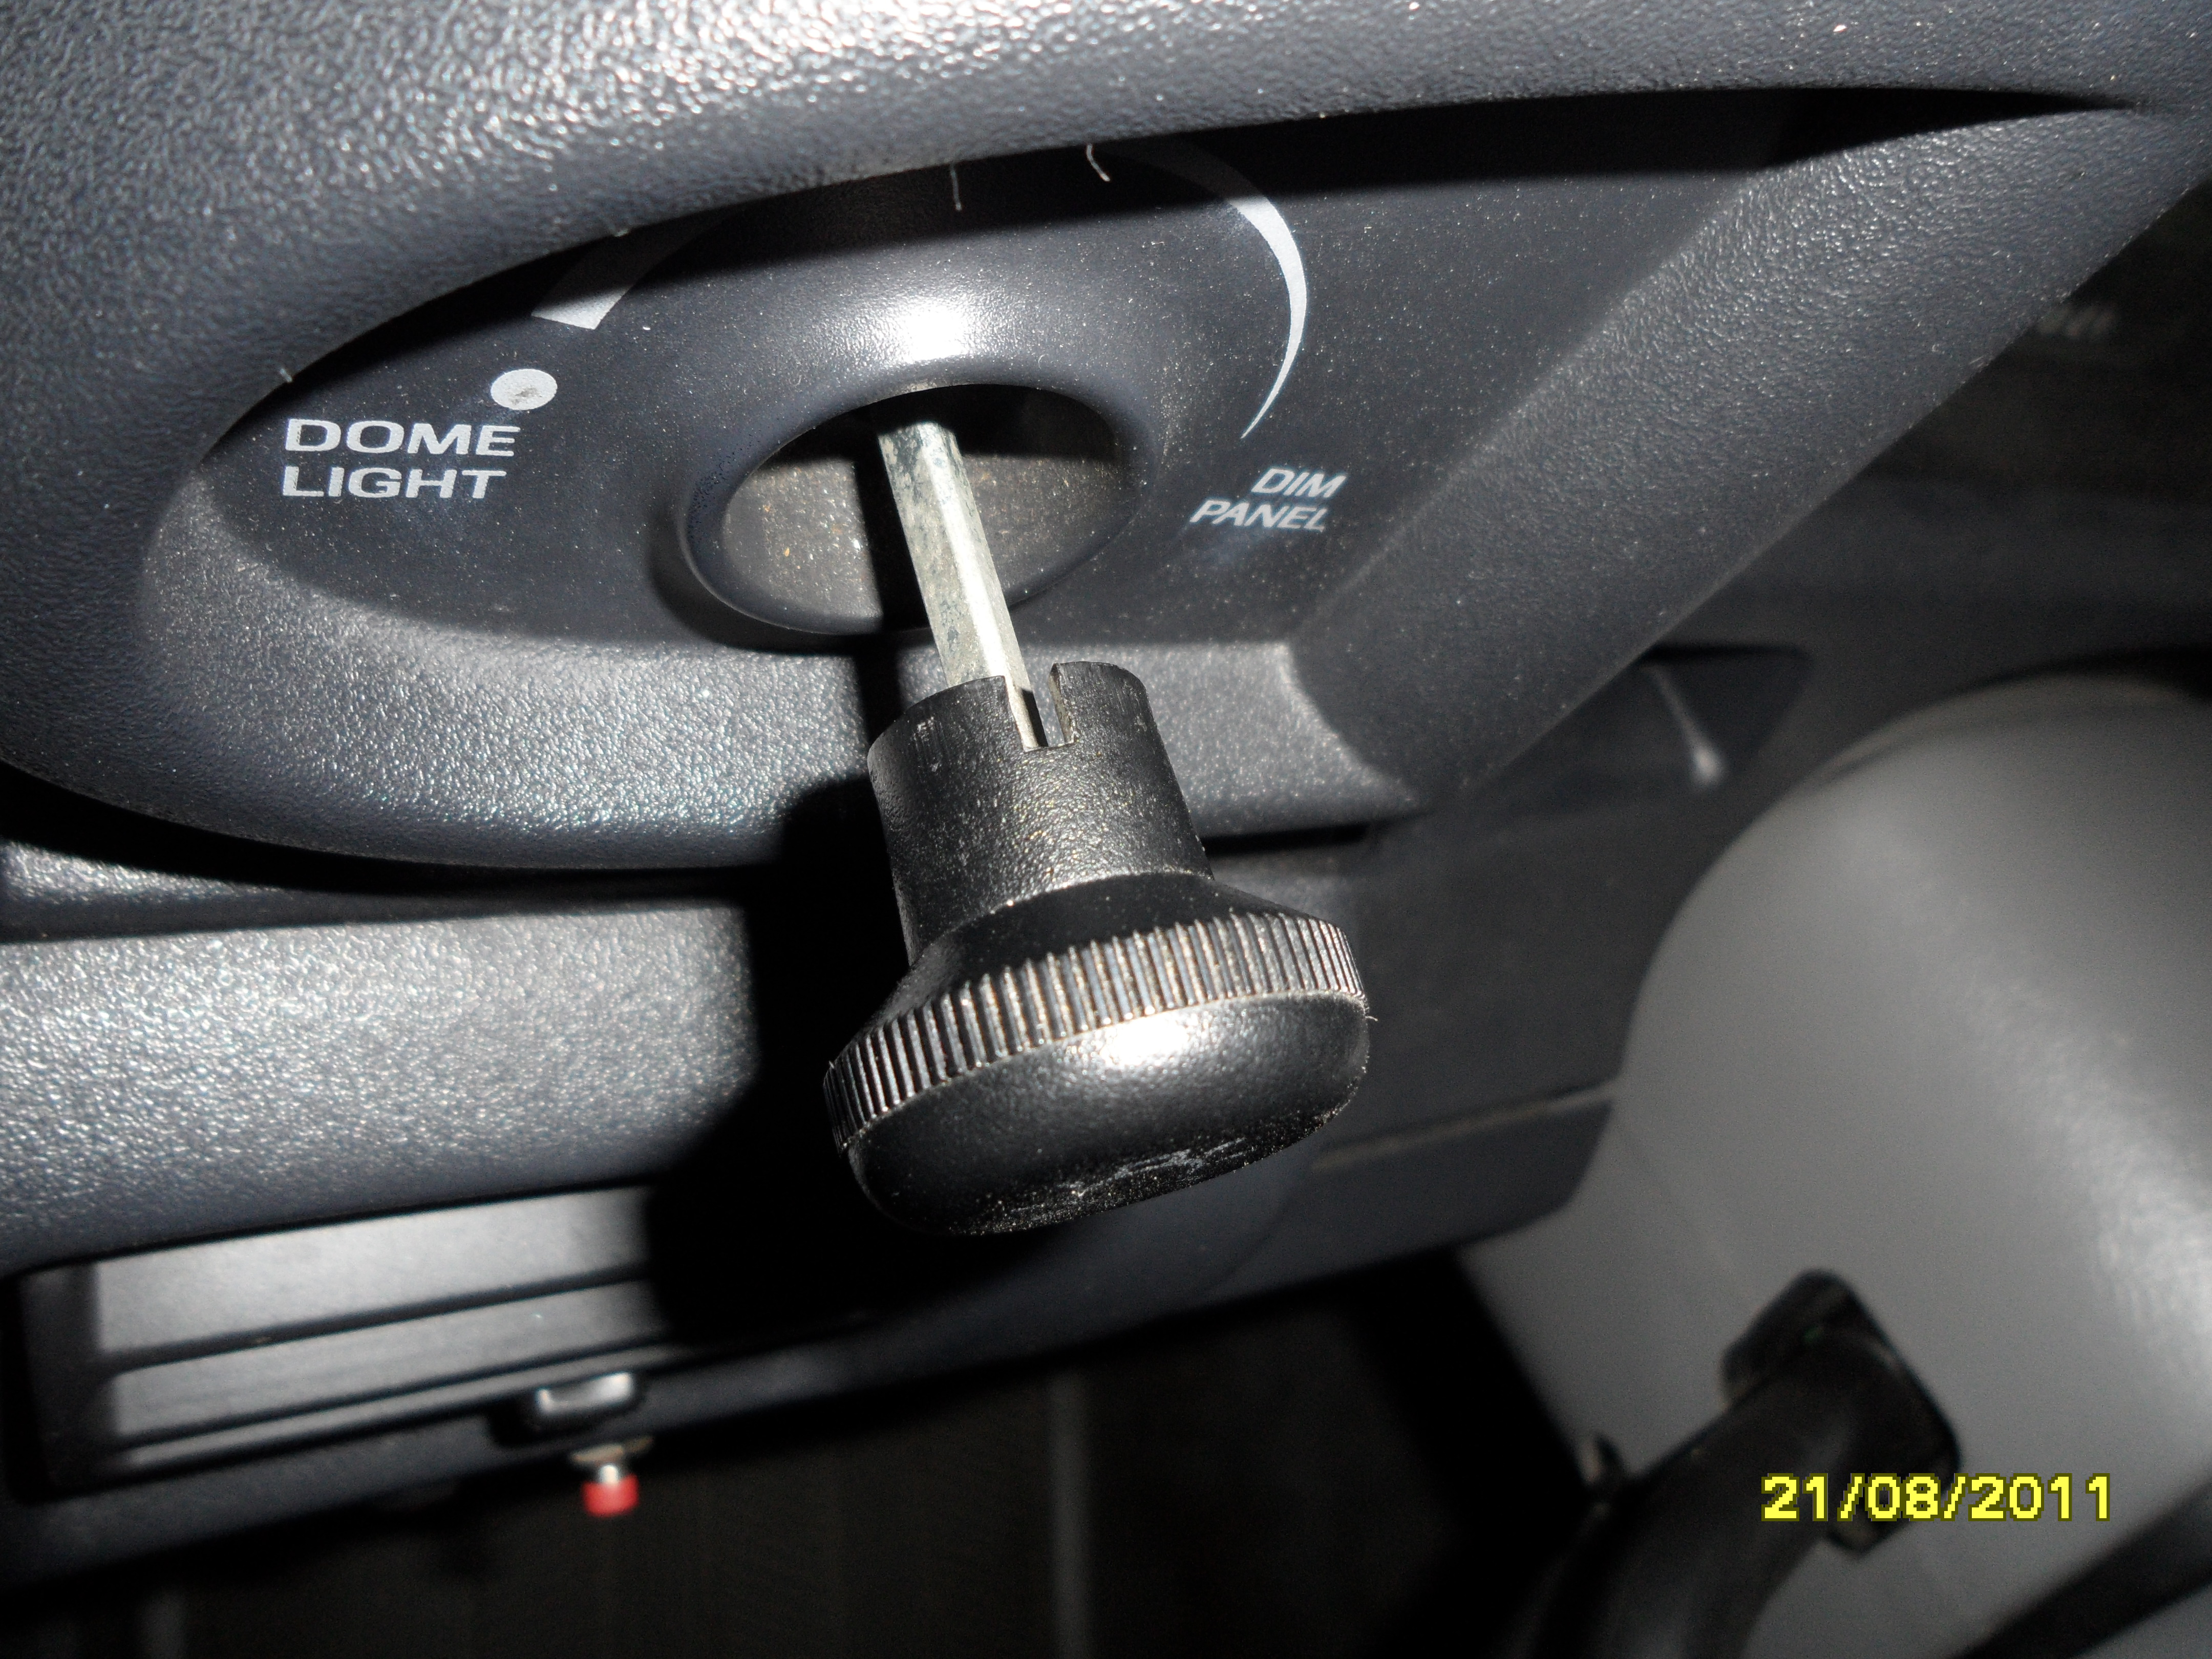
Turn the dimmer **** to reveal the notch on the side.

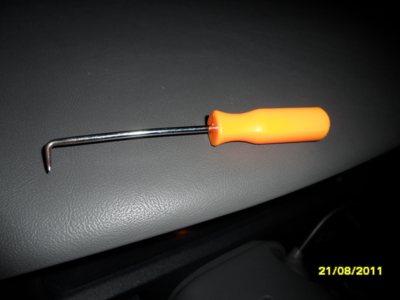
You'll need a steel tool of some sort to push that spring clip towards the back of the vehicle. I used this, but I've done it before with a No. 1 (or smaller) flathead screwdriver.
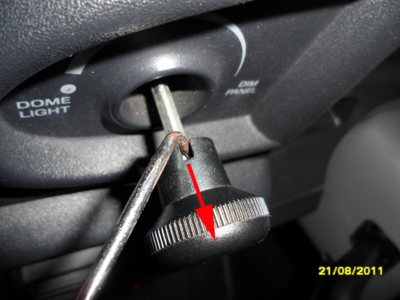
Pull (or push) the clip toward the head of the ****. When you do it right, the **** will fall off the end of the shaft.
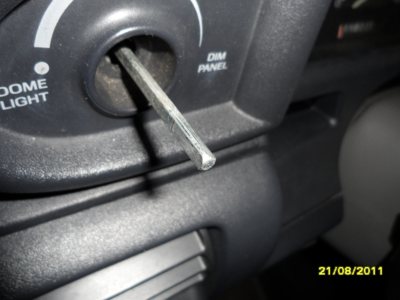
The plain shaft. This will get transferred to the new switch.
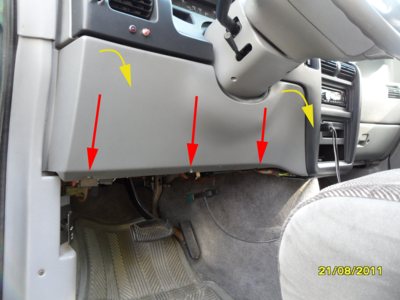
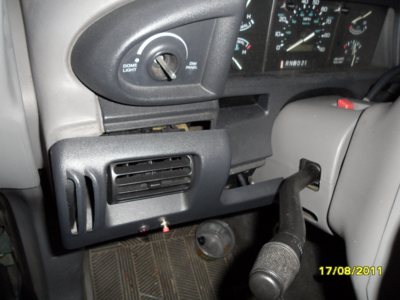
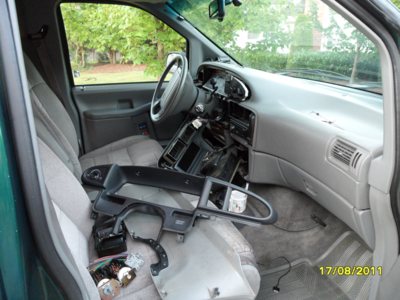
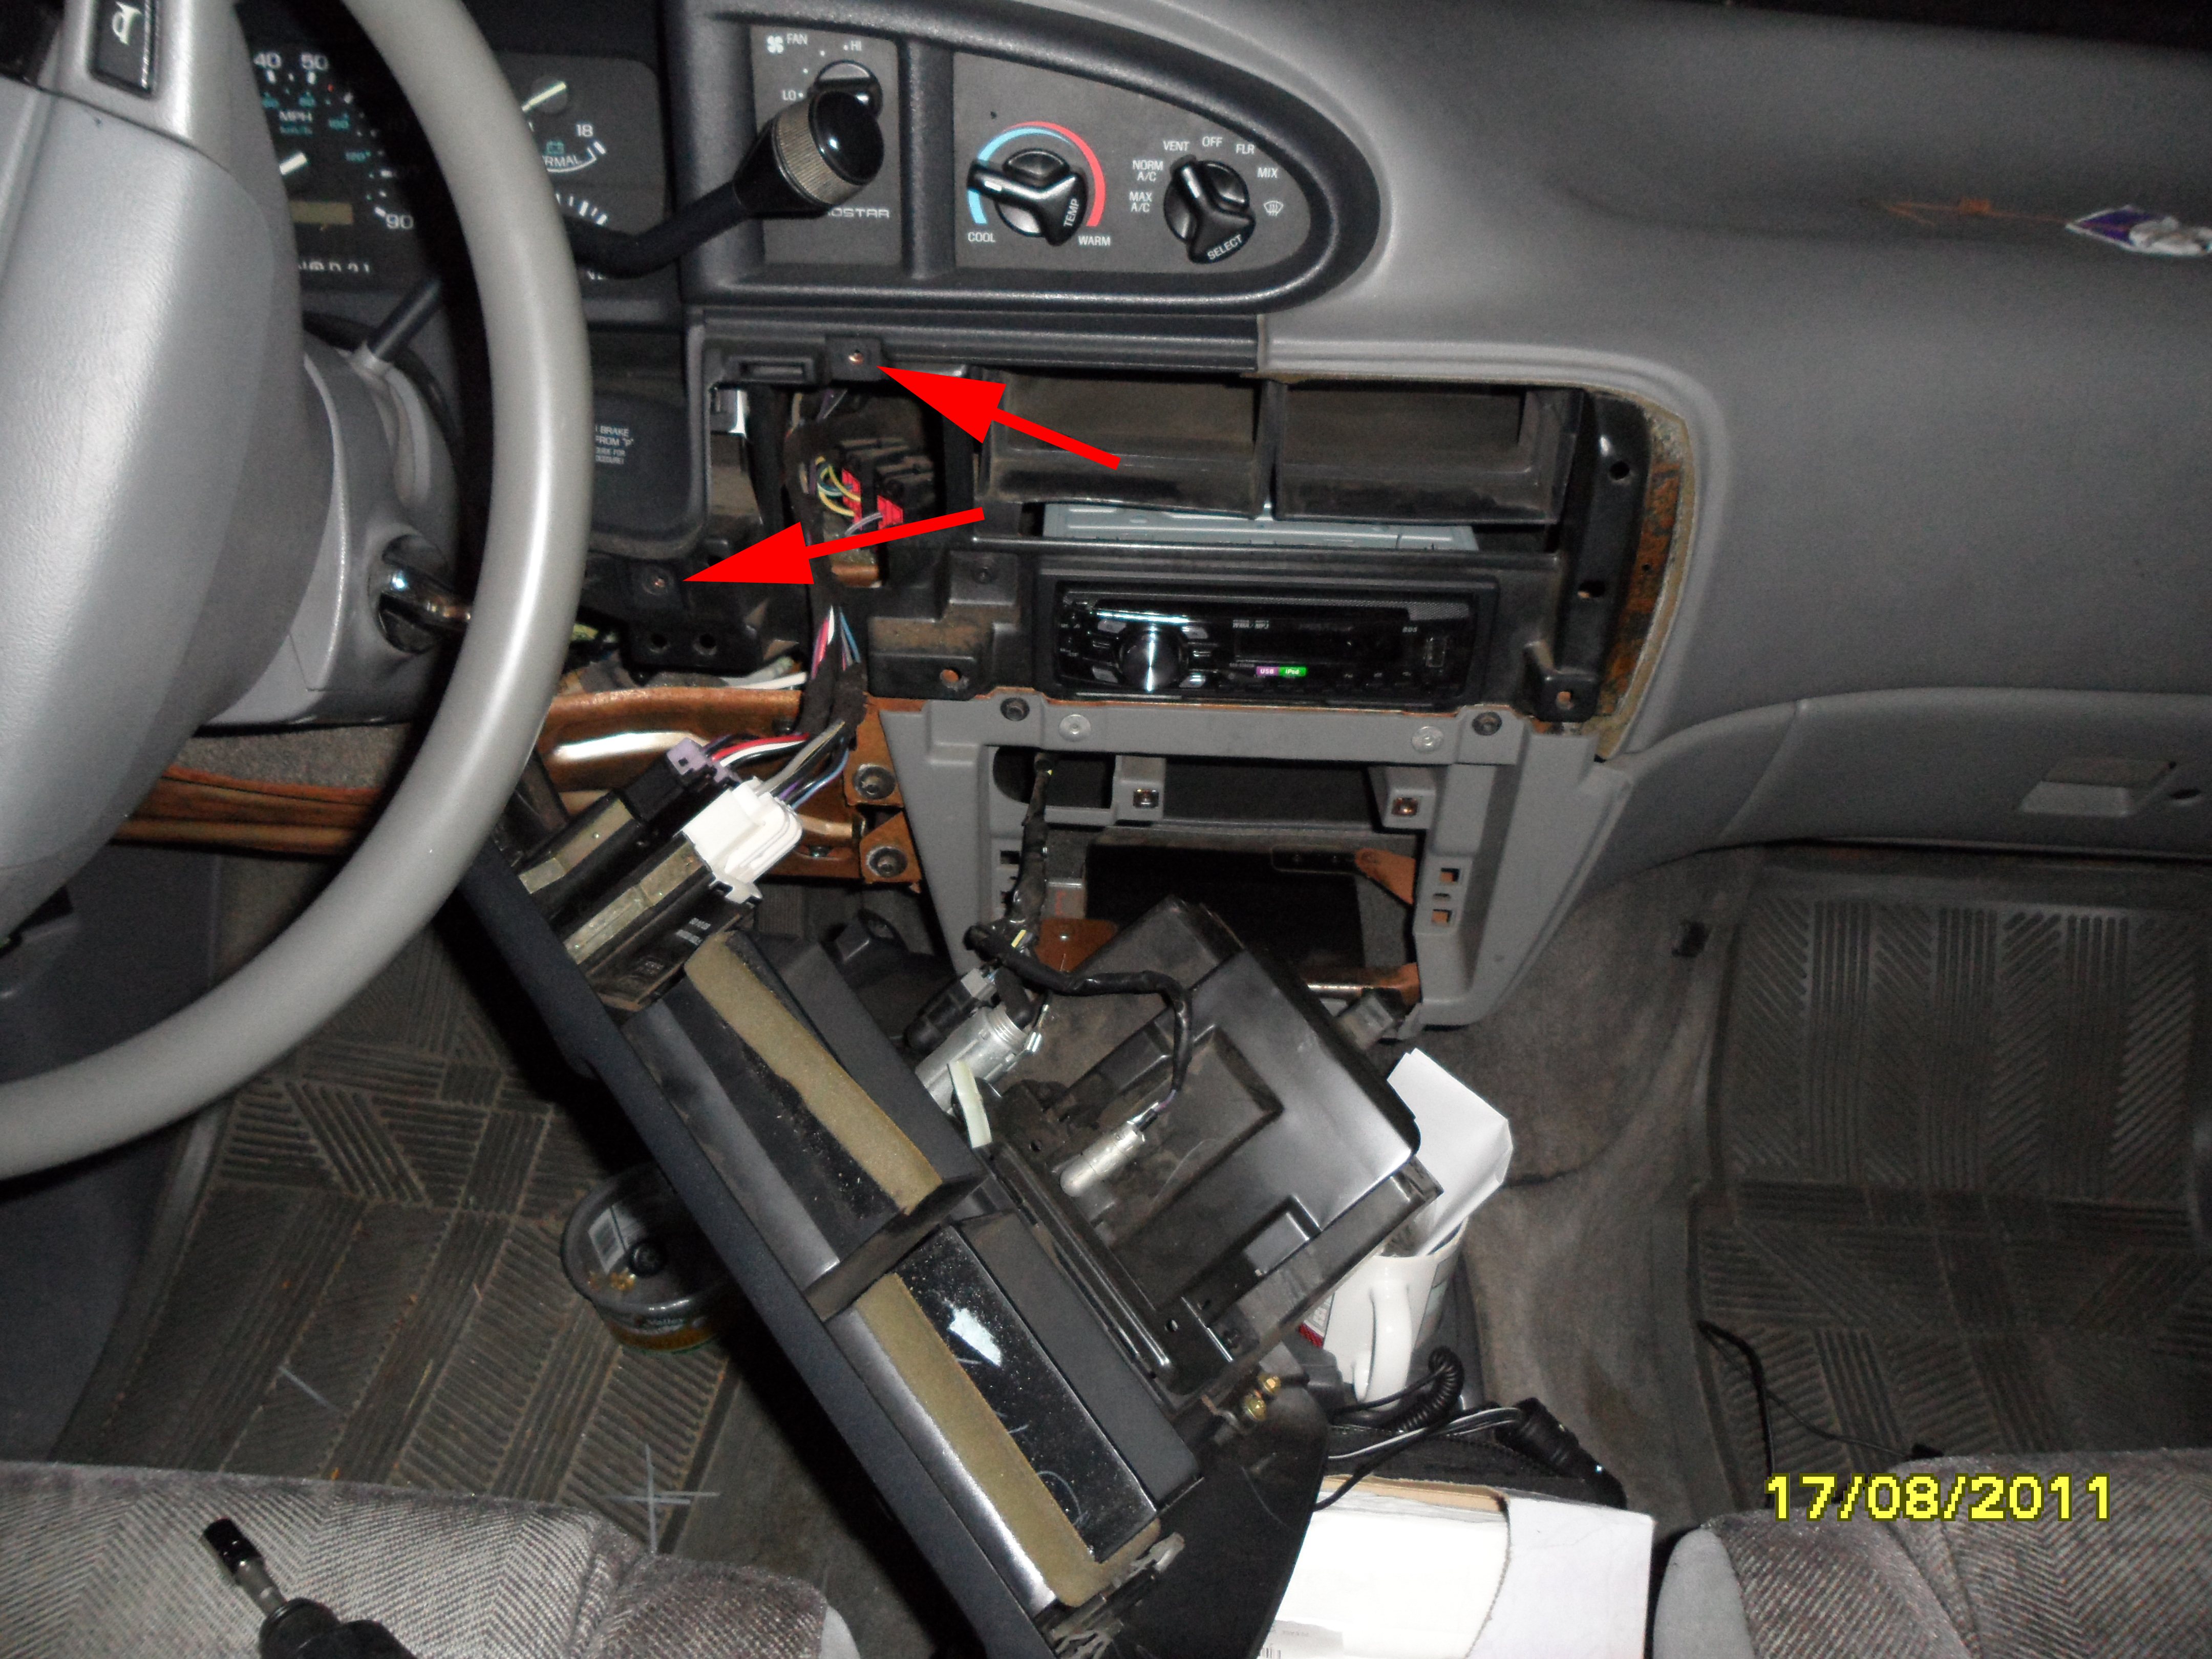
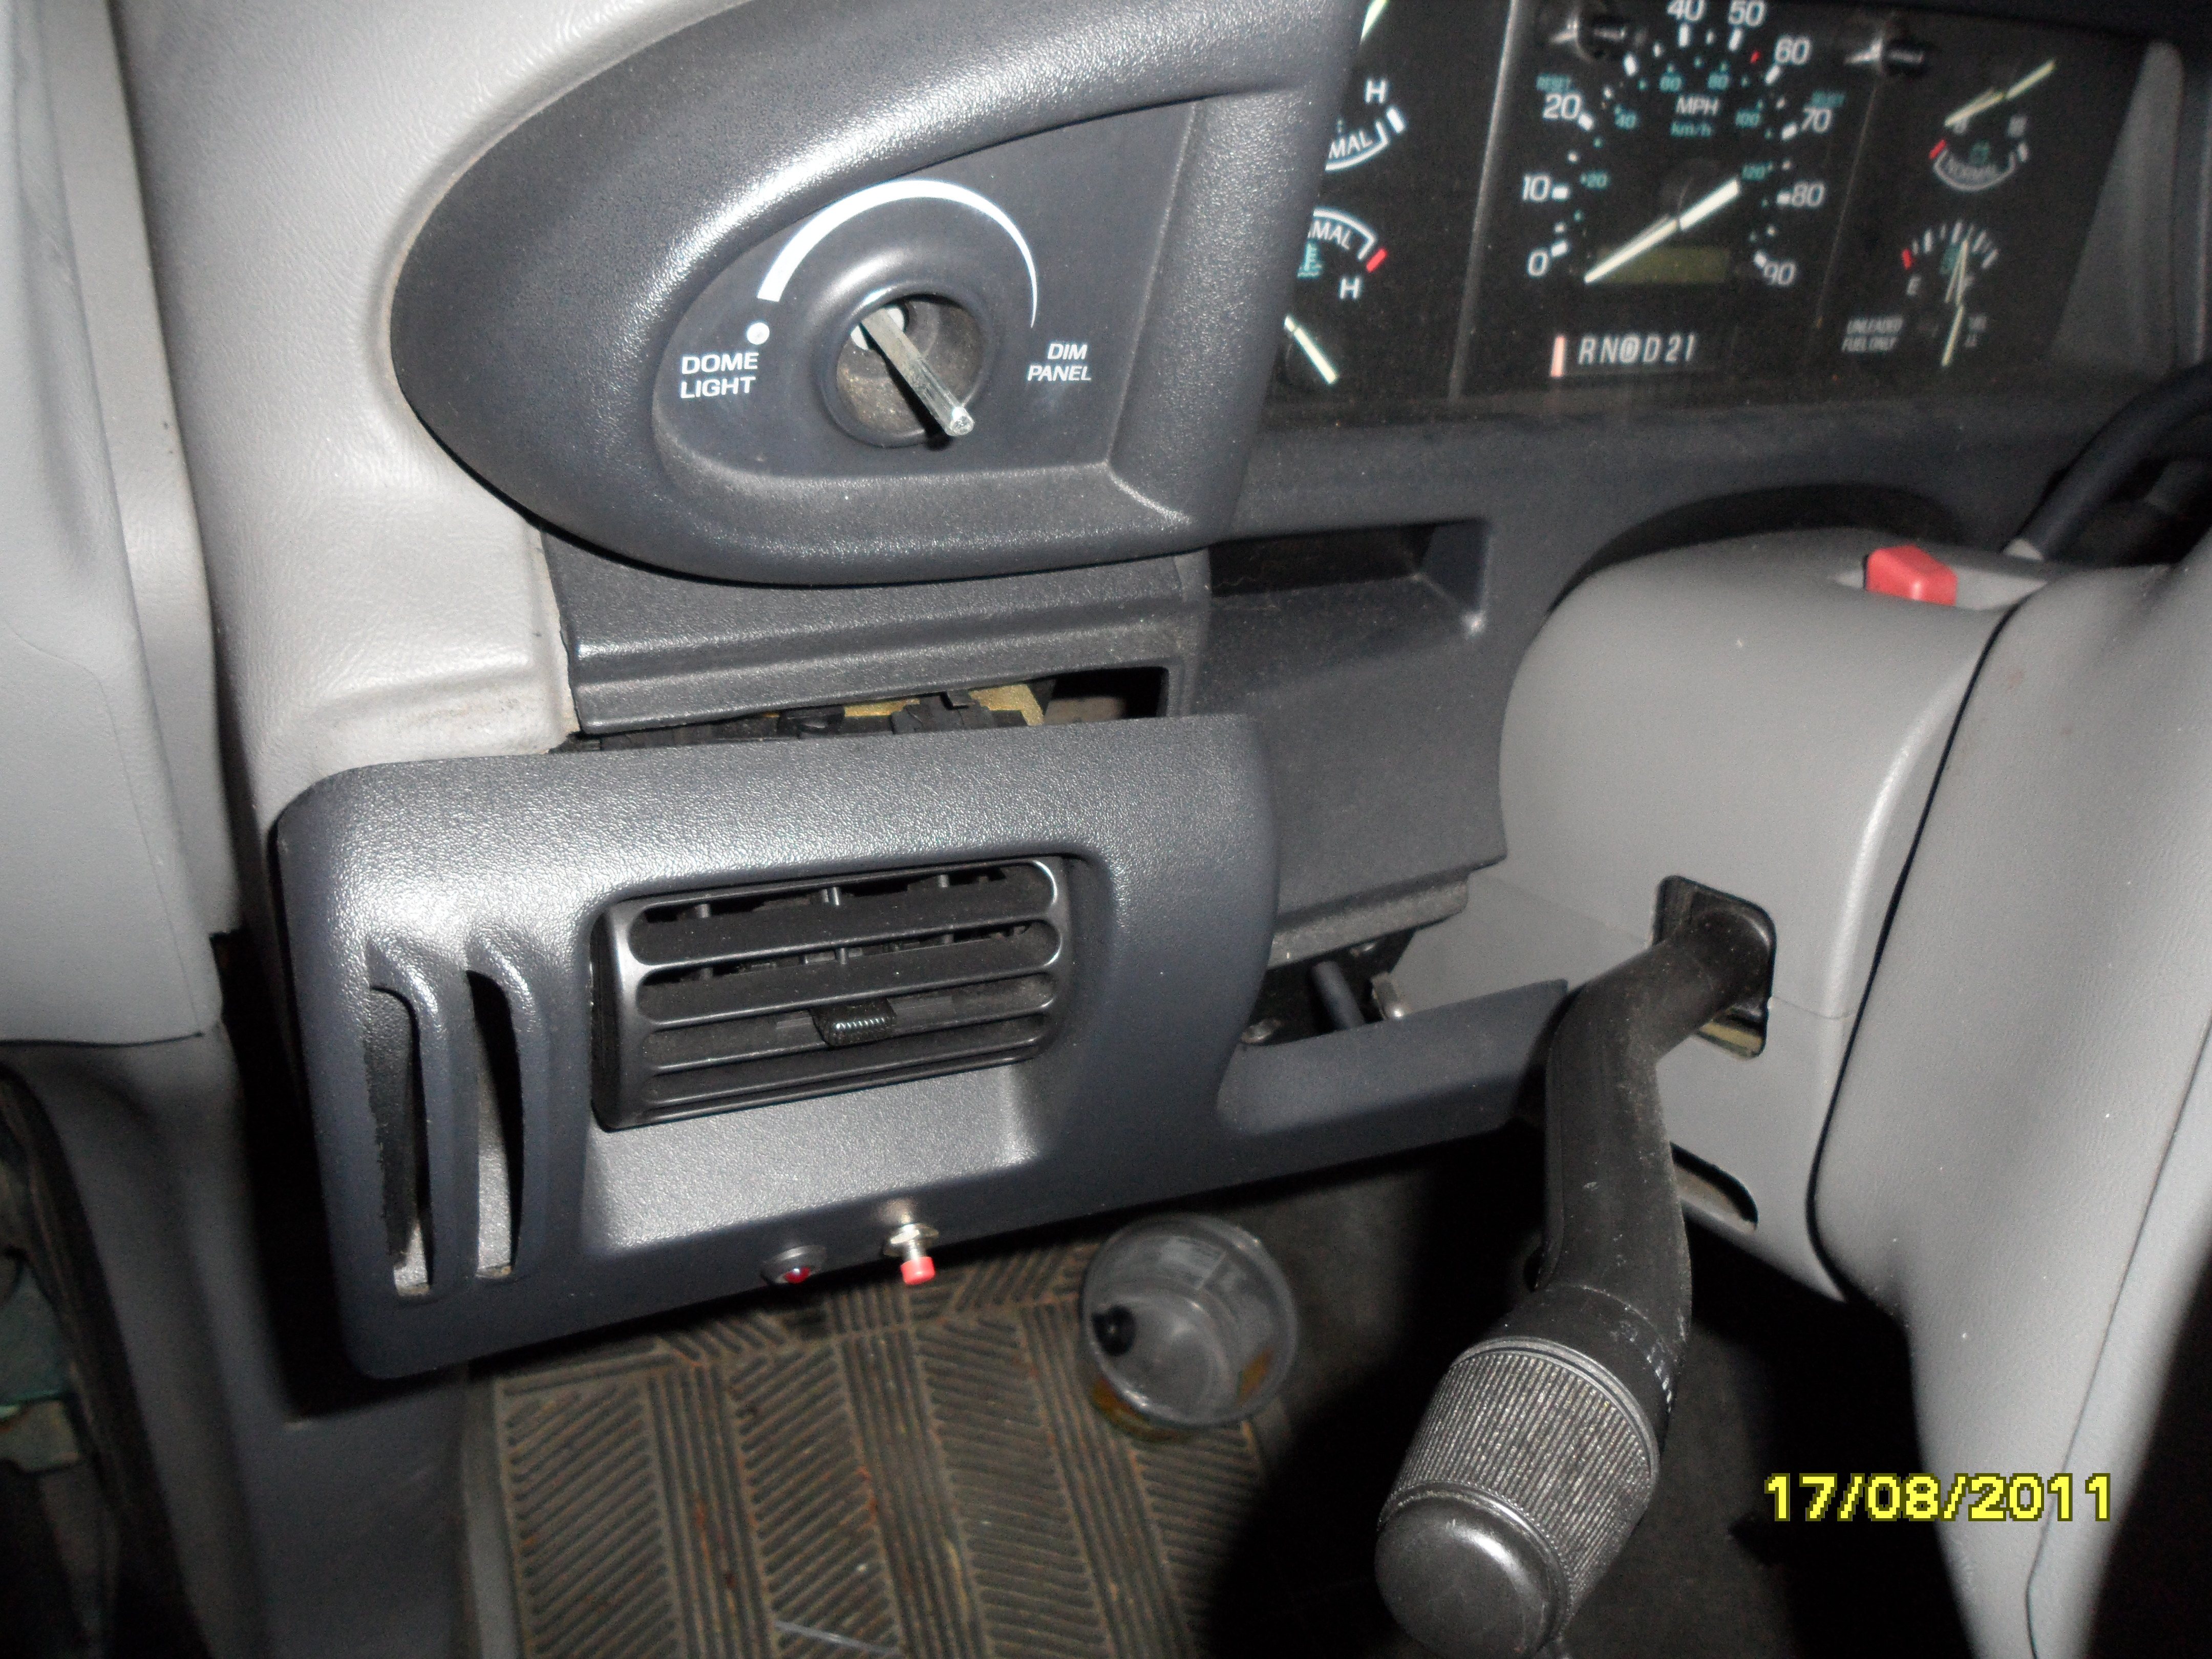
Remove the three screws under the knee trim panel (red arrows), then use your fingers to work around the right side and unpop the panel from the right side first. When the right side is free, work on the left side. The left end is nested behind the left kick panel, and has to be finessed a bit.
Next, the radio surround must be removed. Remove the ashtray, then remove the two screws behind the ashtray. Carefully work your fingers around the entire surround, popping it loose one clip at a time.
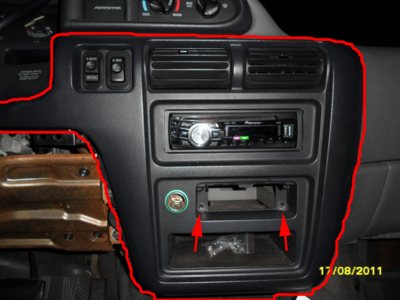
Leave all the wiring (cigar lighter, rear wiper switch, rear defrost) connected, you don't need to move the radio surround too far.
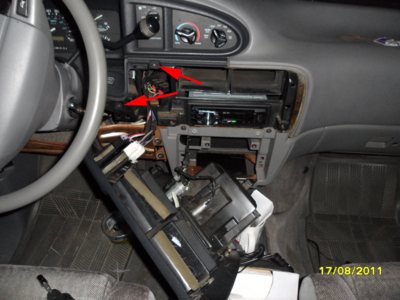
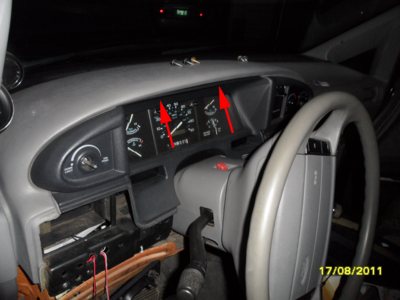
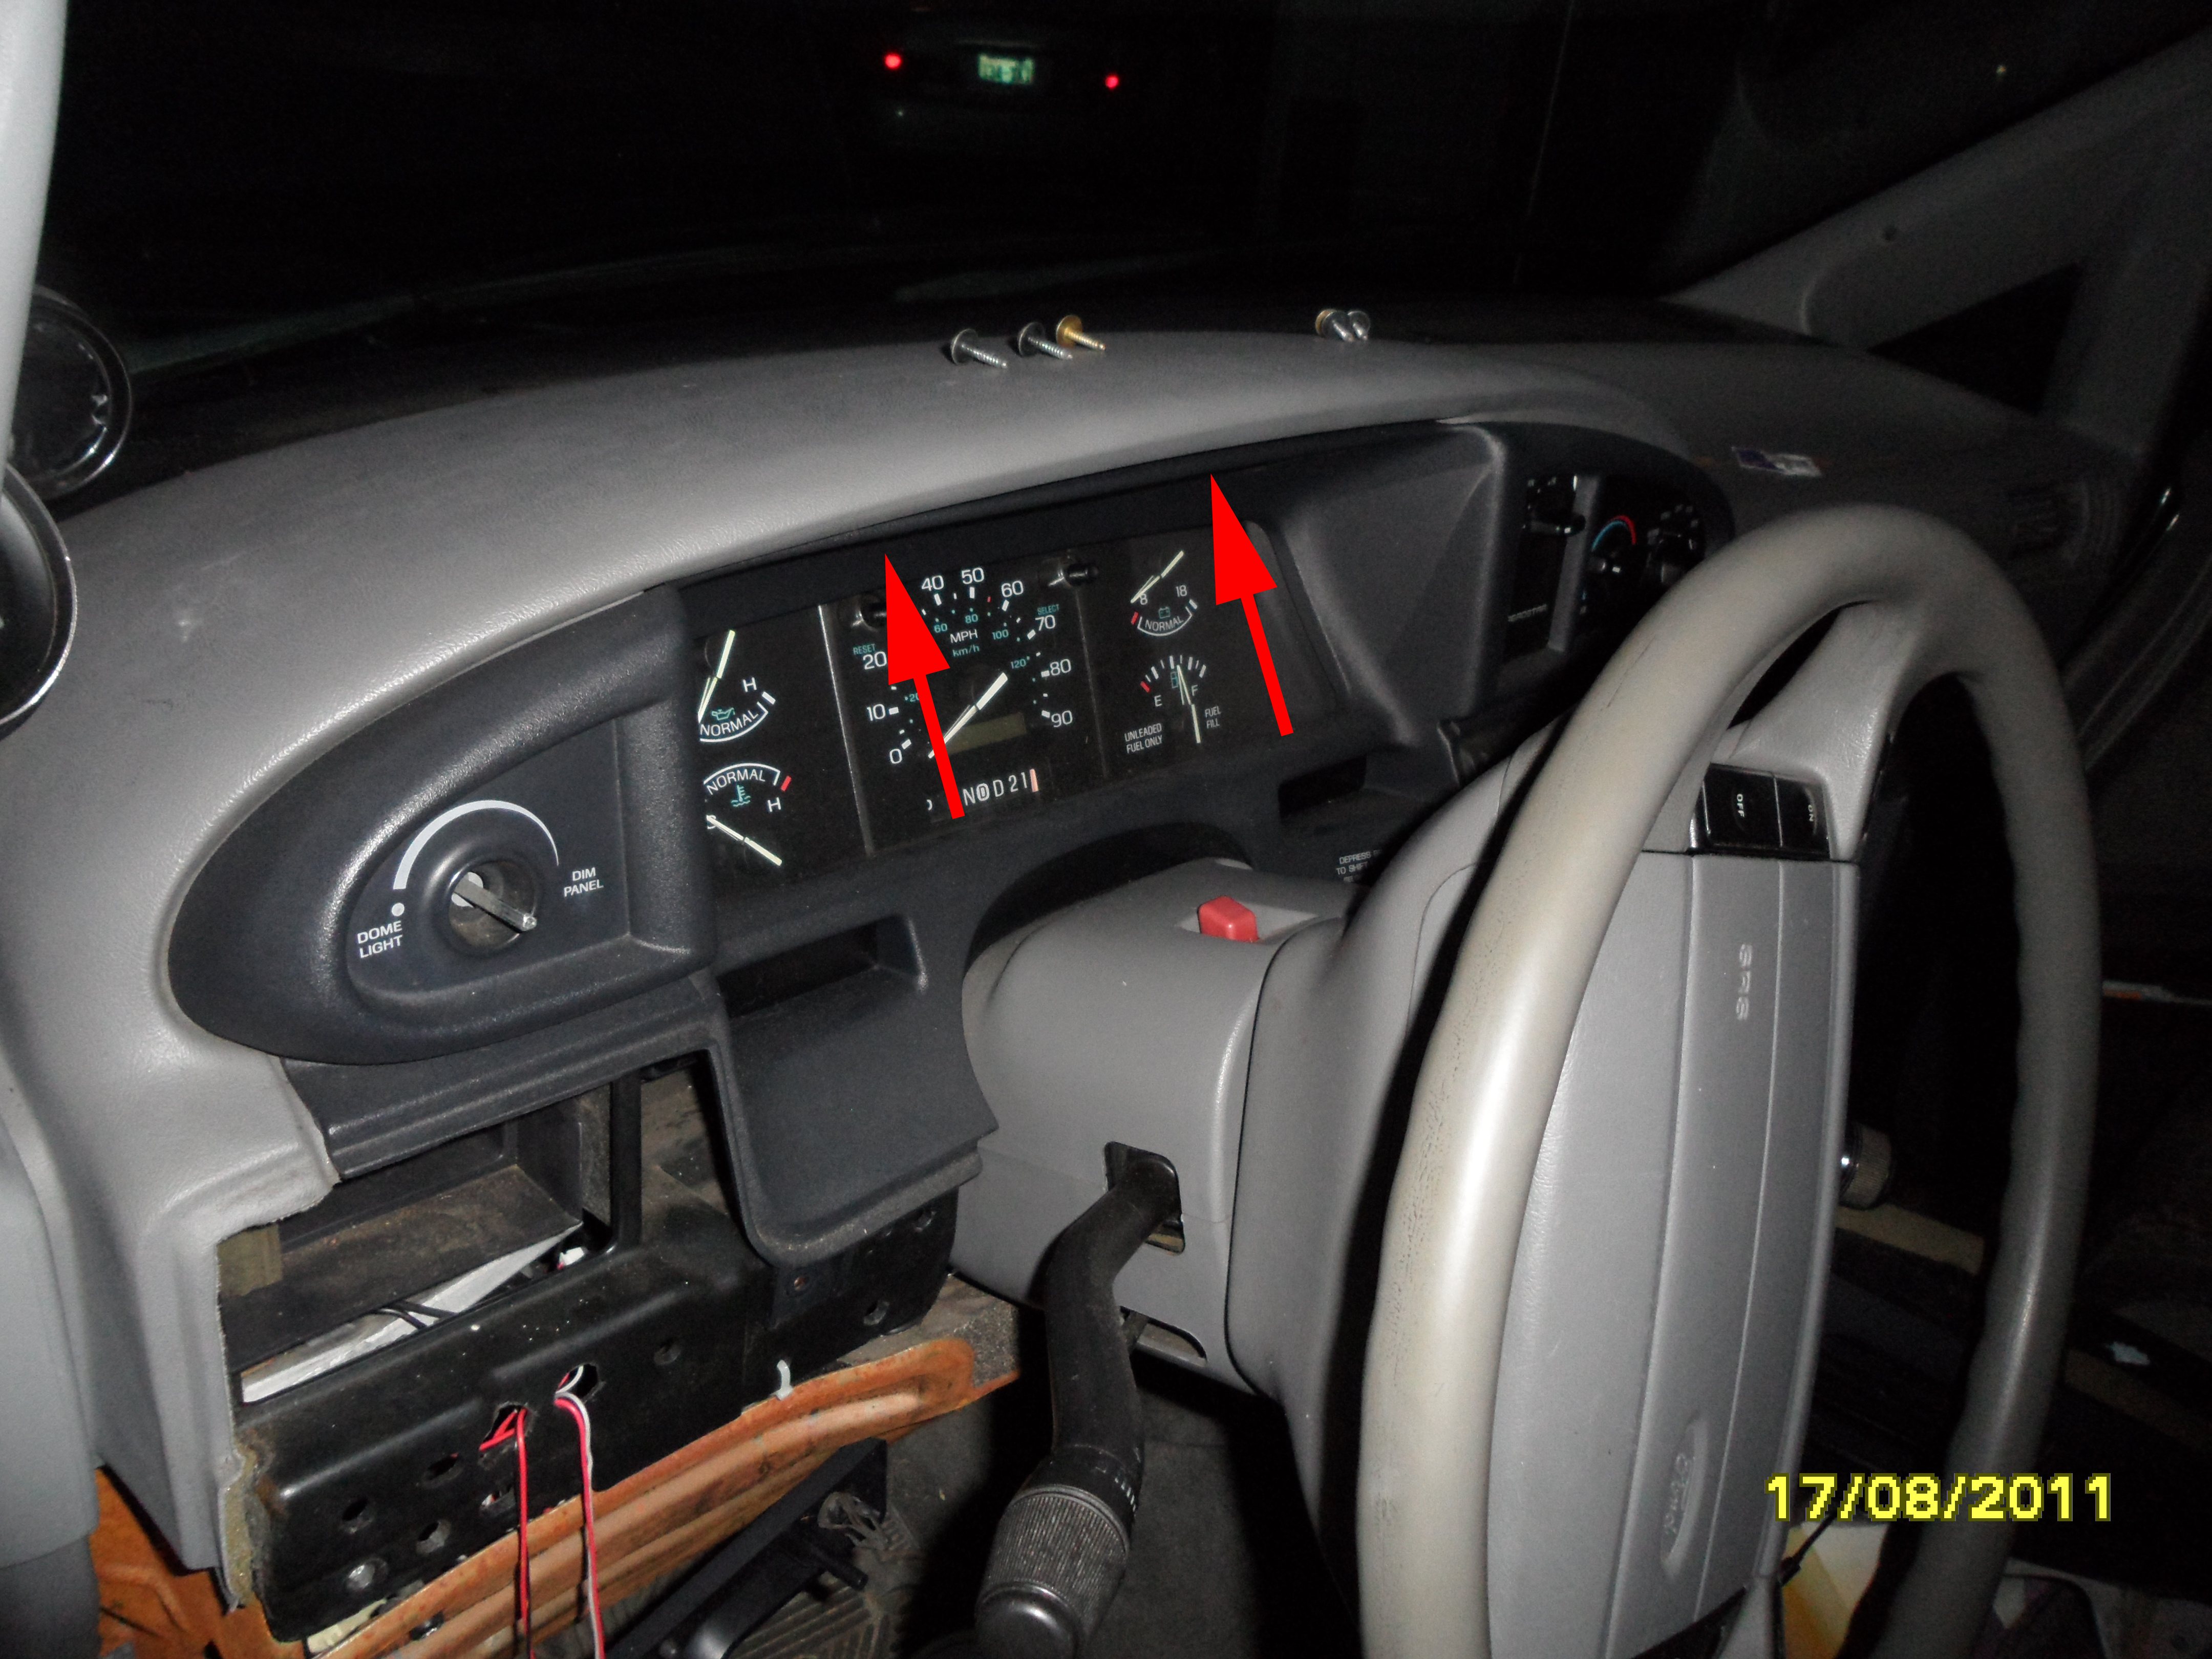
You now have access to the two right-side lower screws for the instrument cluster surround. Remove them.

On the left of the column, carefully unpop the left vent assy. No screws hold it in place.
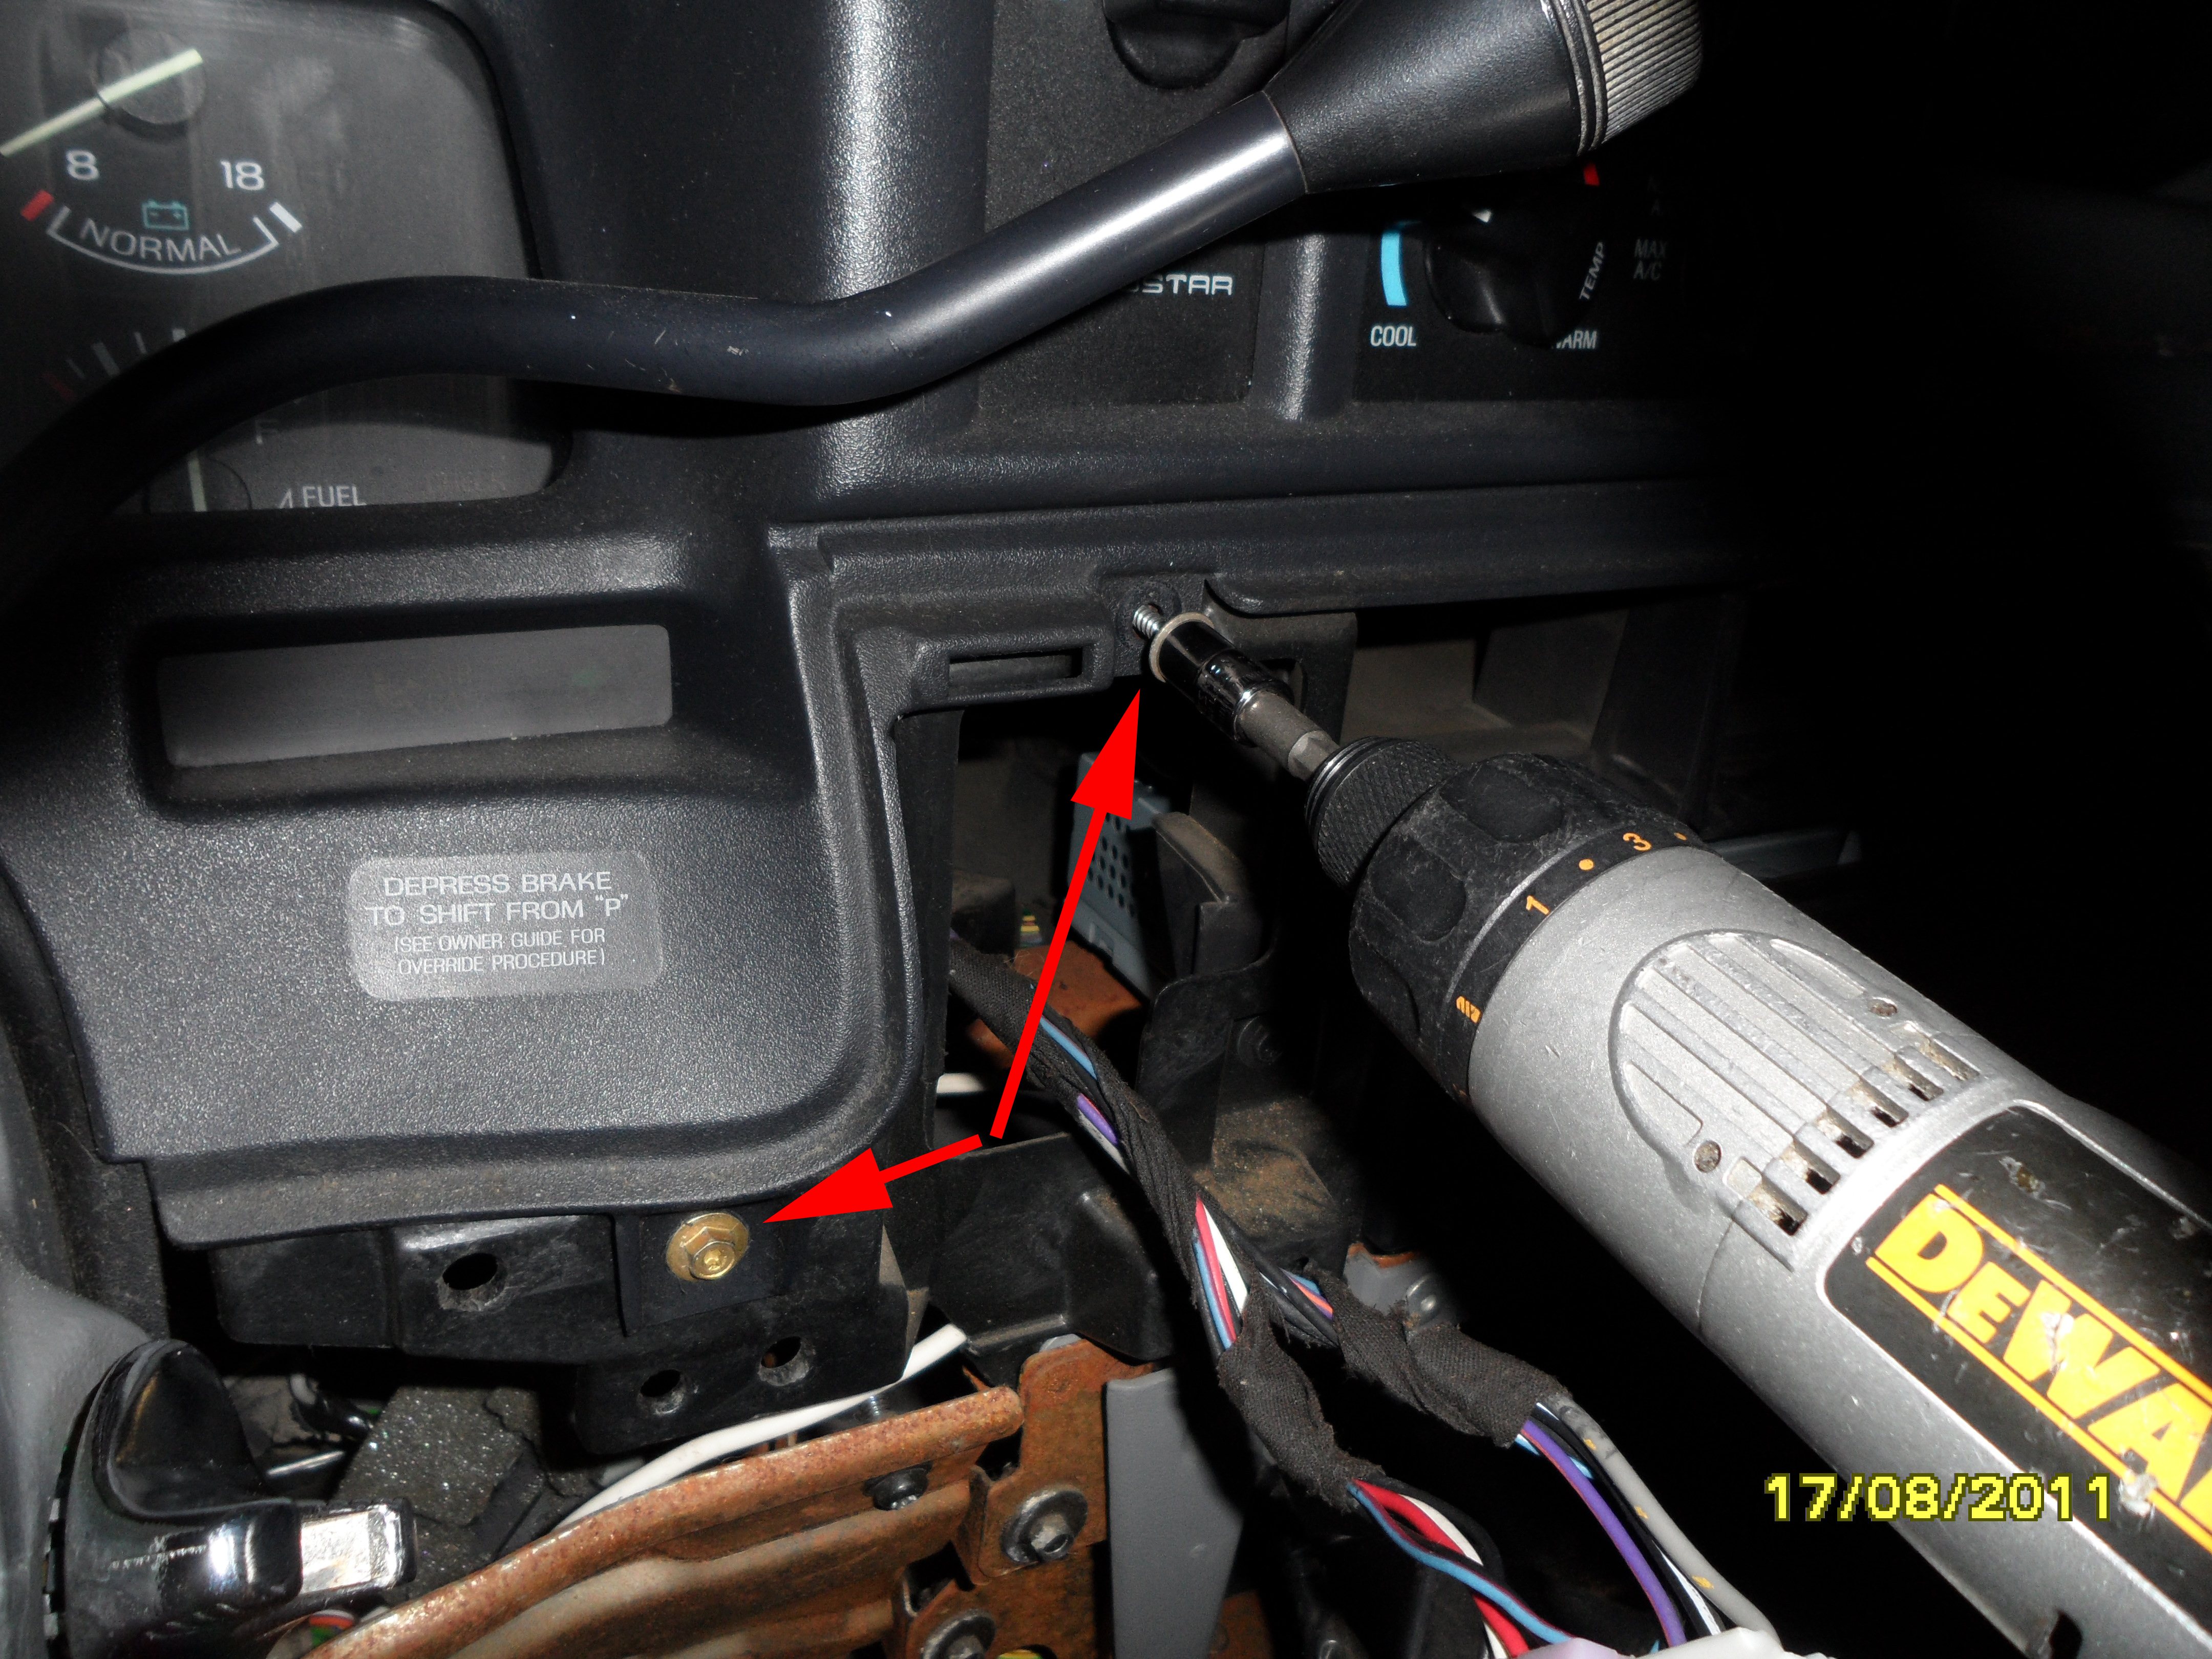
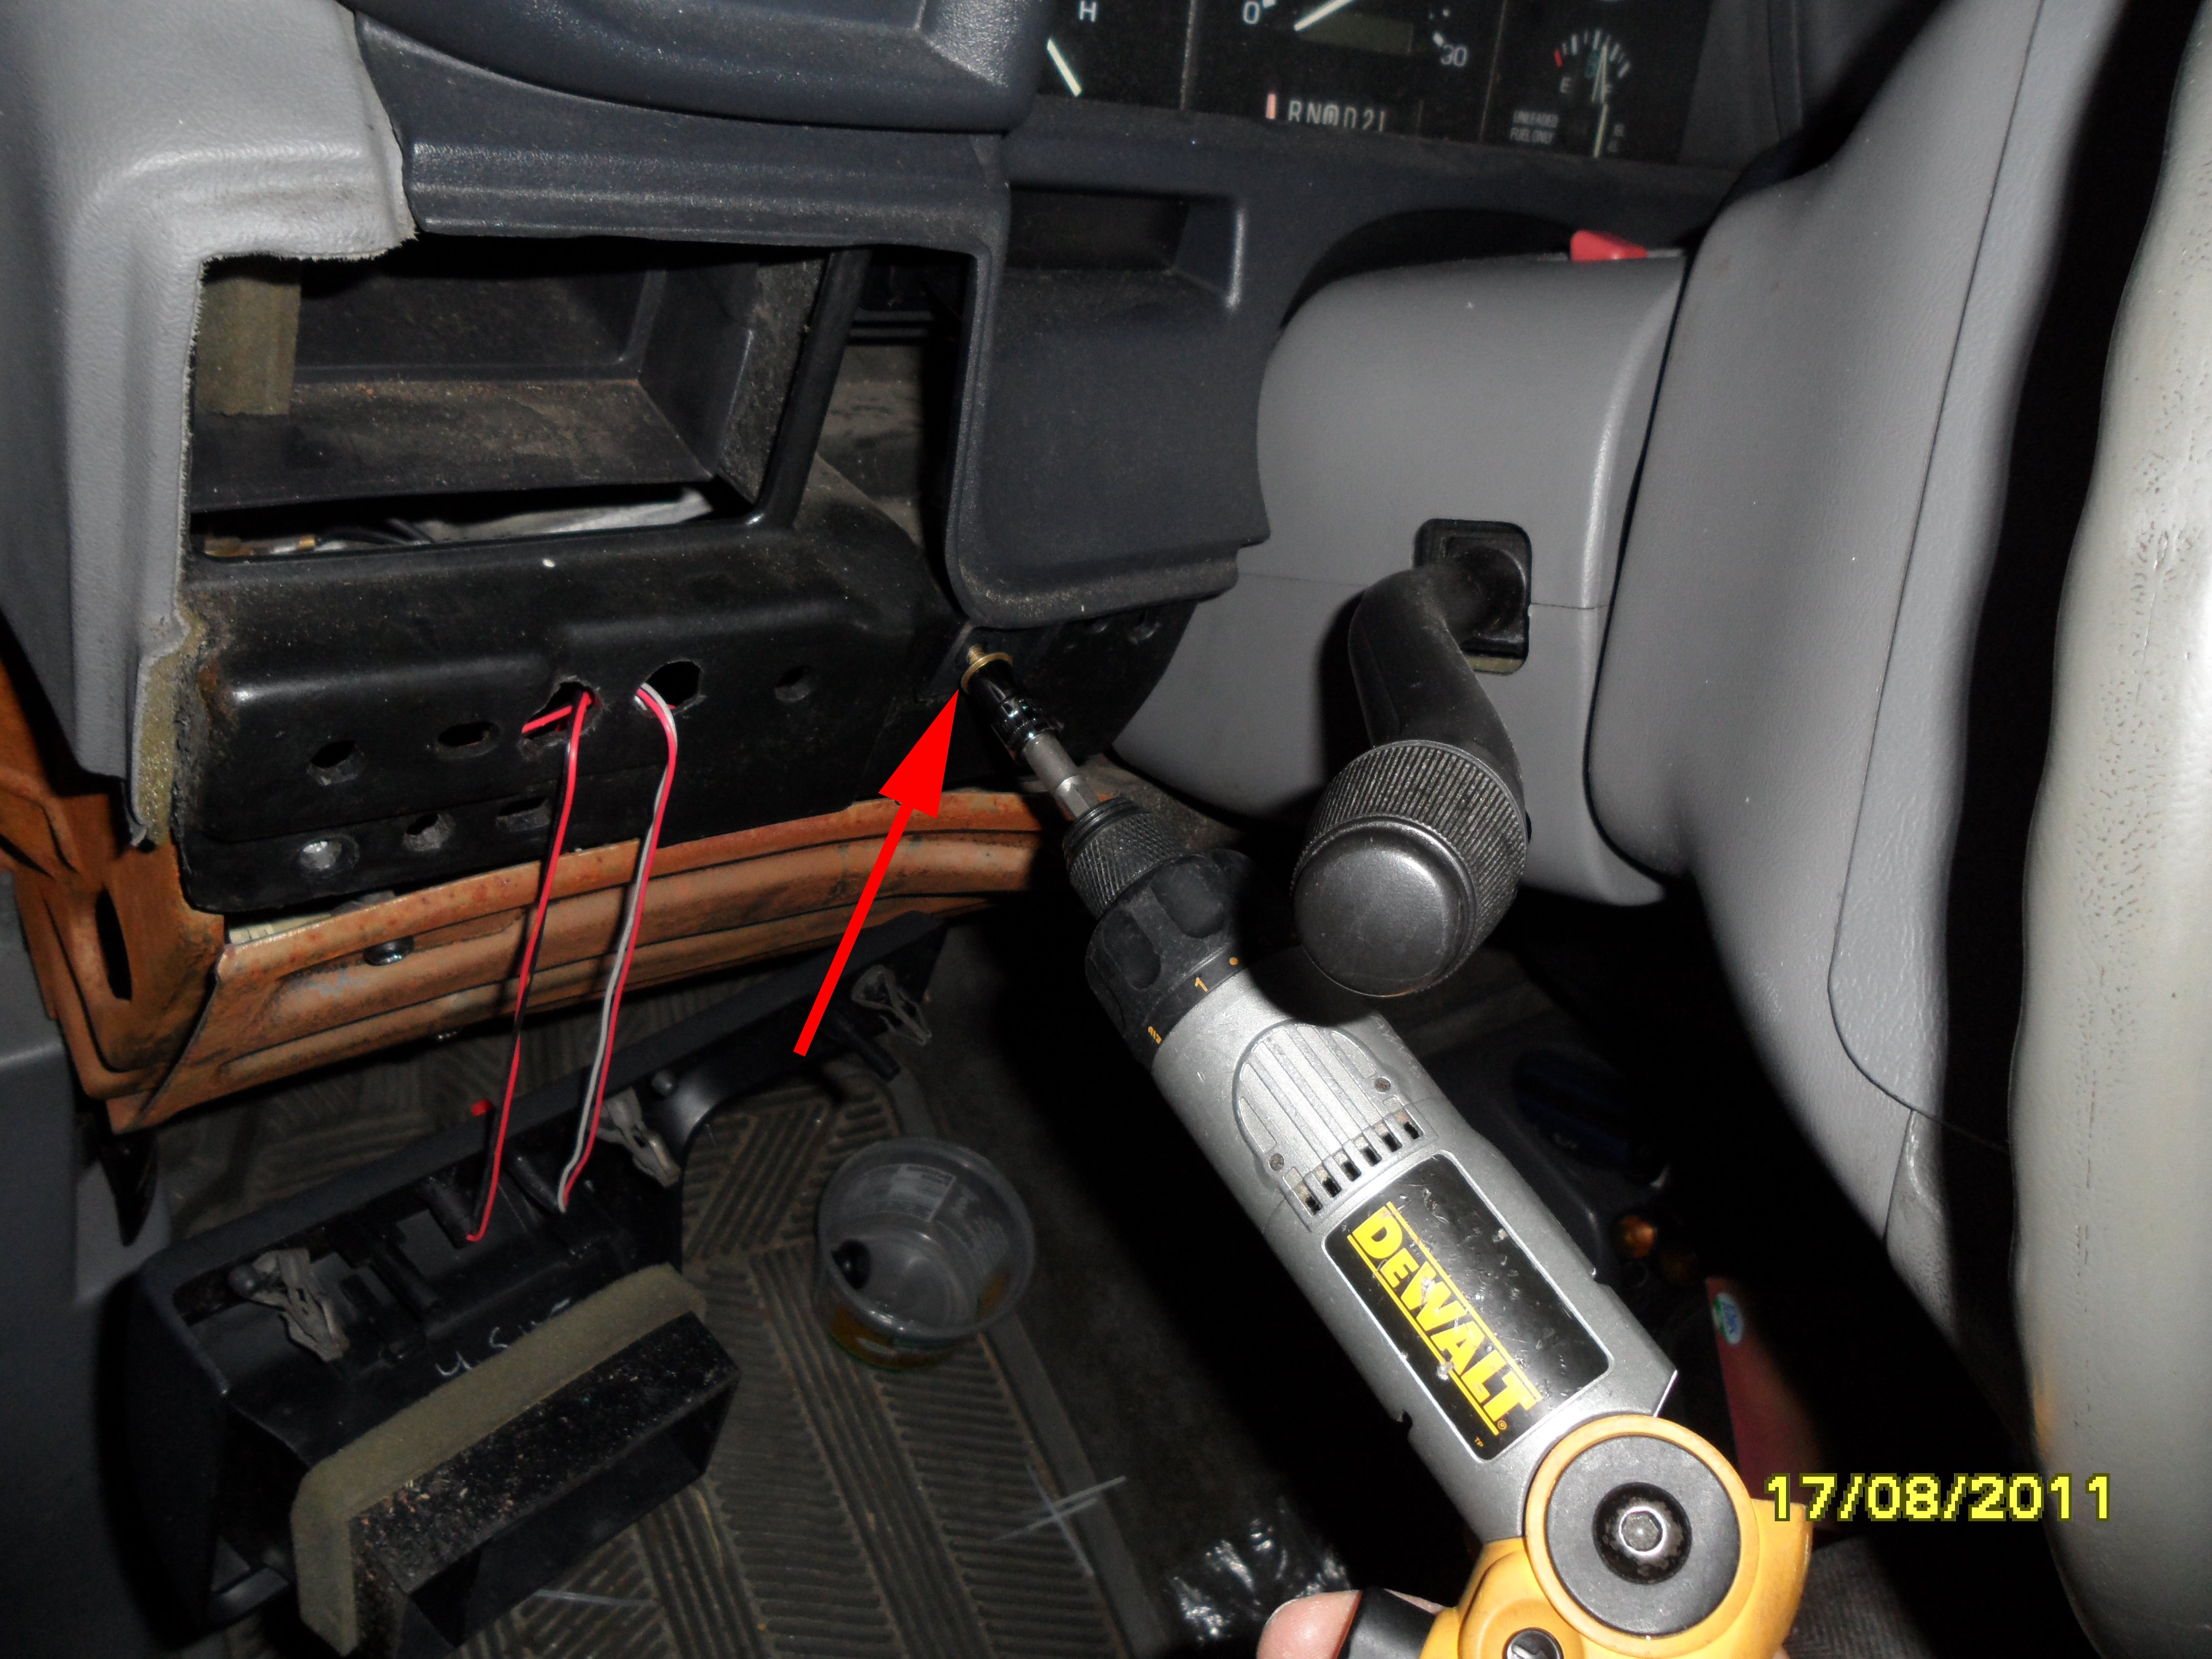
You now have access to the single left-side lower screw for the instrument cluster surround. Remove it.

Remove the two upper instrument cluster surround screws. A 1/4" socket and ratchet works well here. Tilt the steering wheel down, turn the key to ON, shift to Low, then the surround can be removed. Put the shifter back in Park, turn key off.
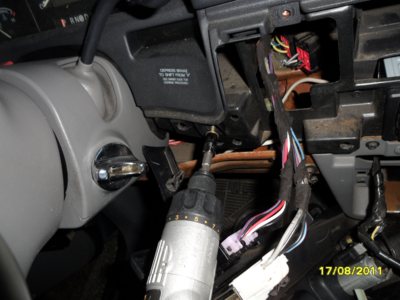
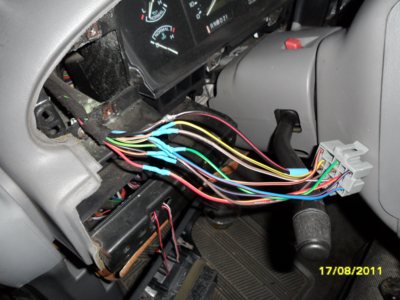
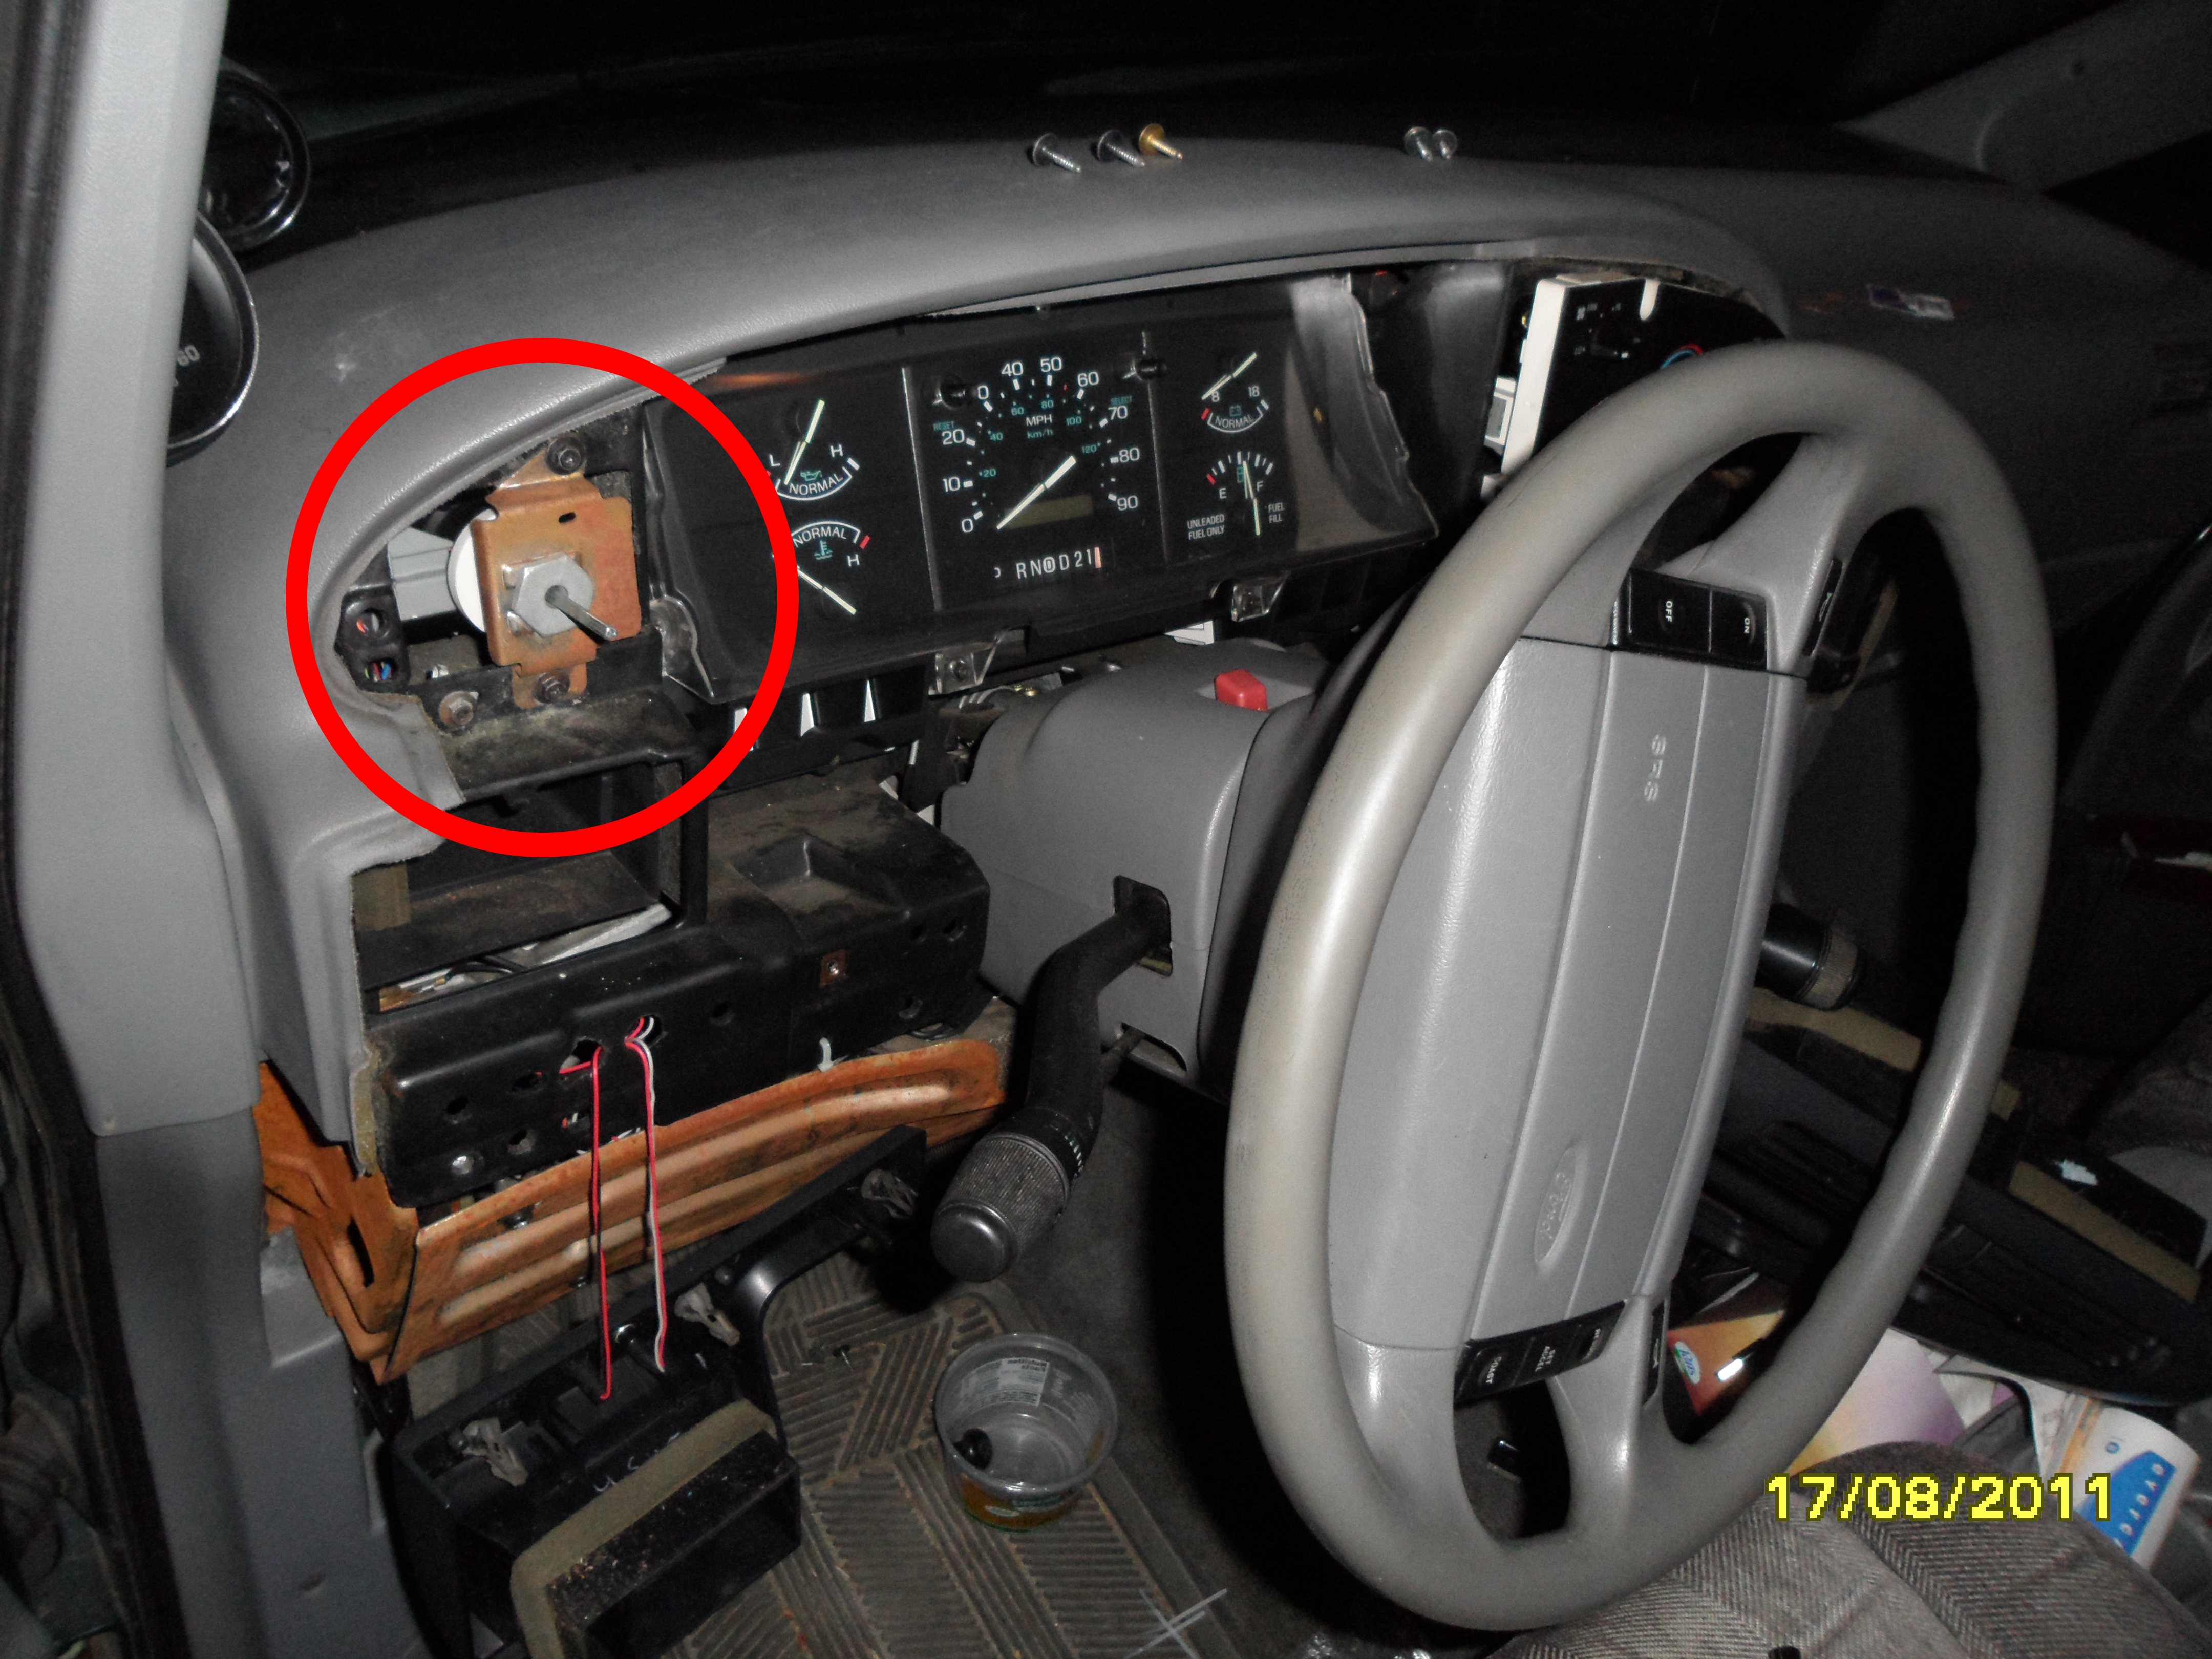
There's the switch in its adapter bracket.
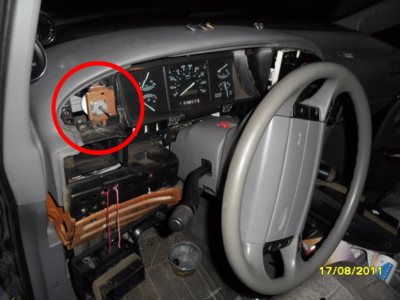
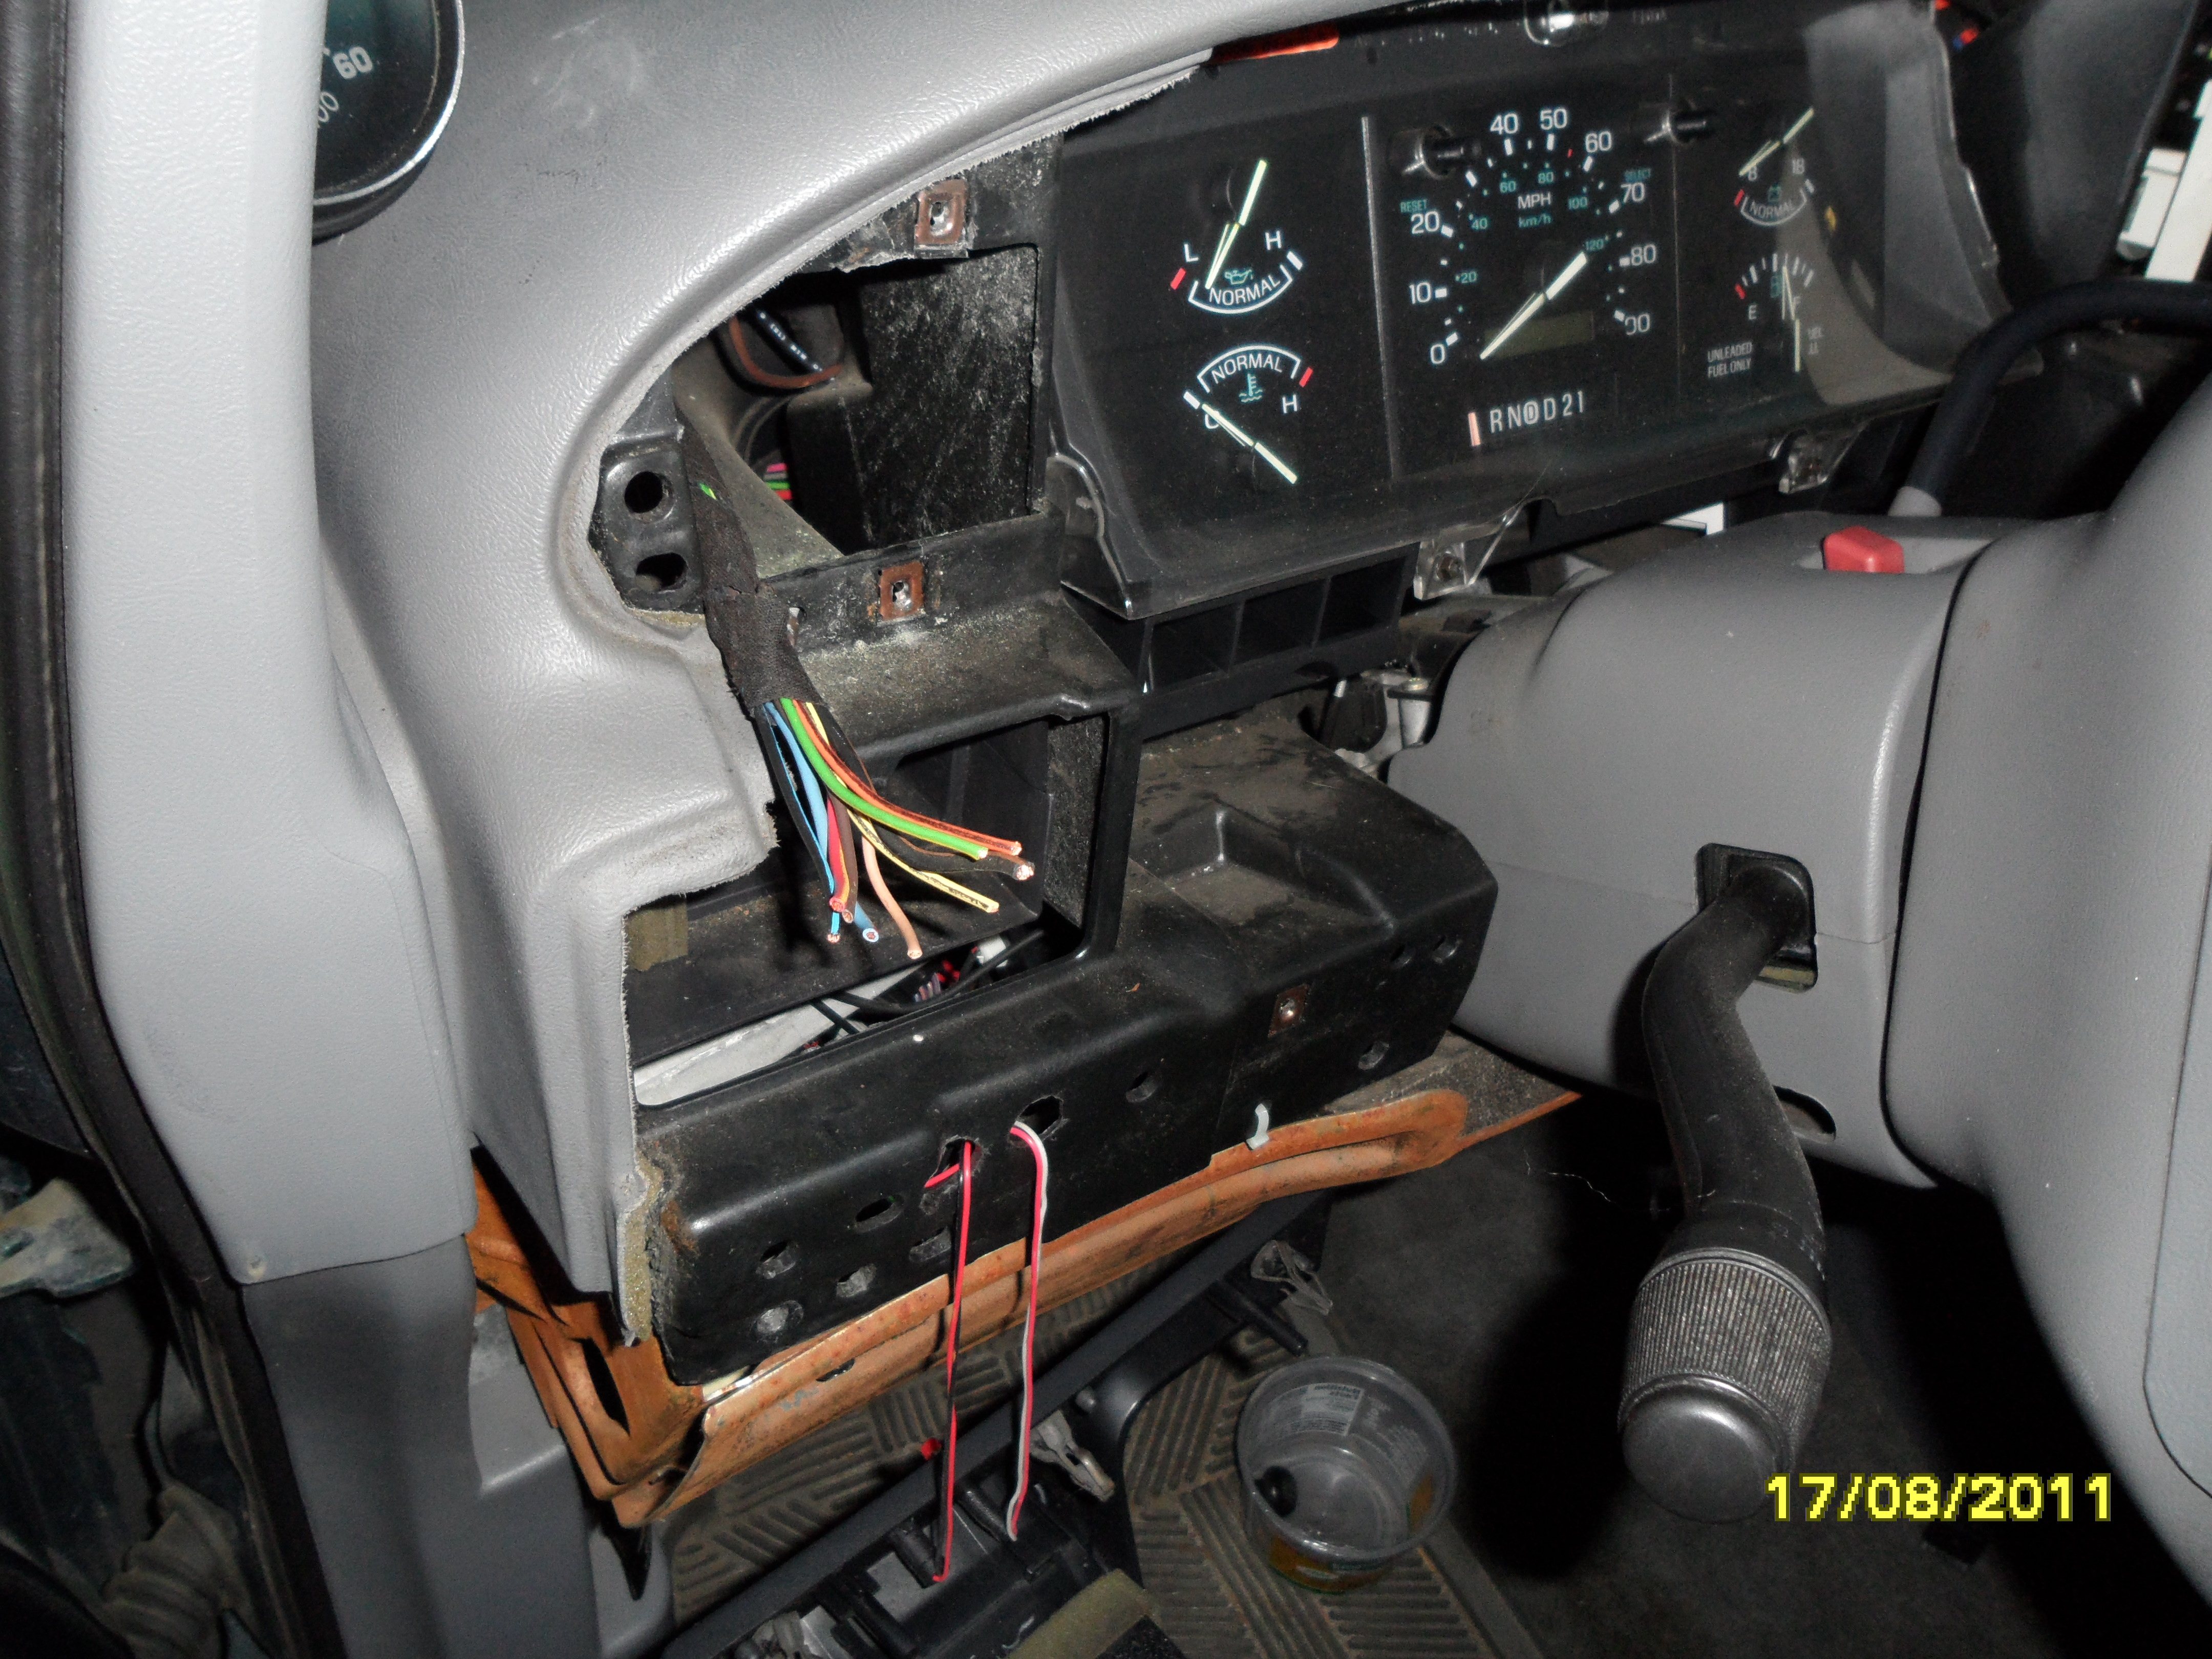
Remove the last two screws, and withdraw the switch from the dash.
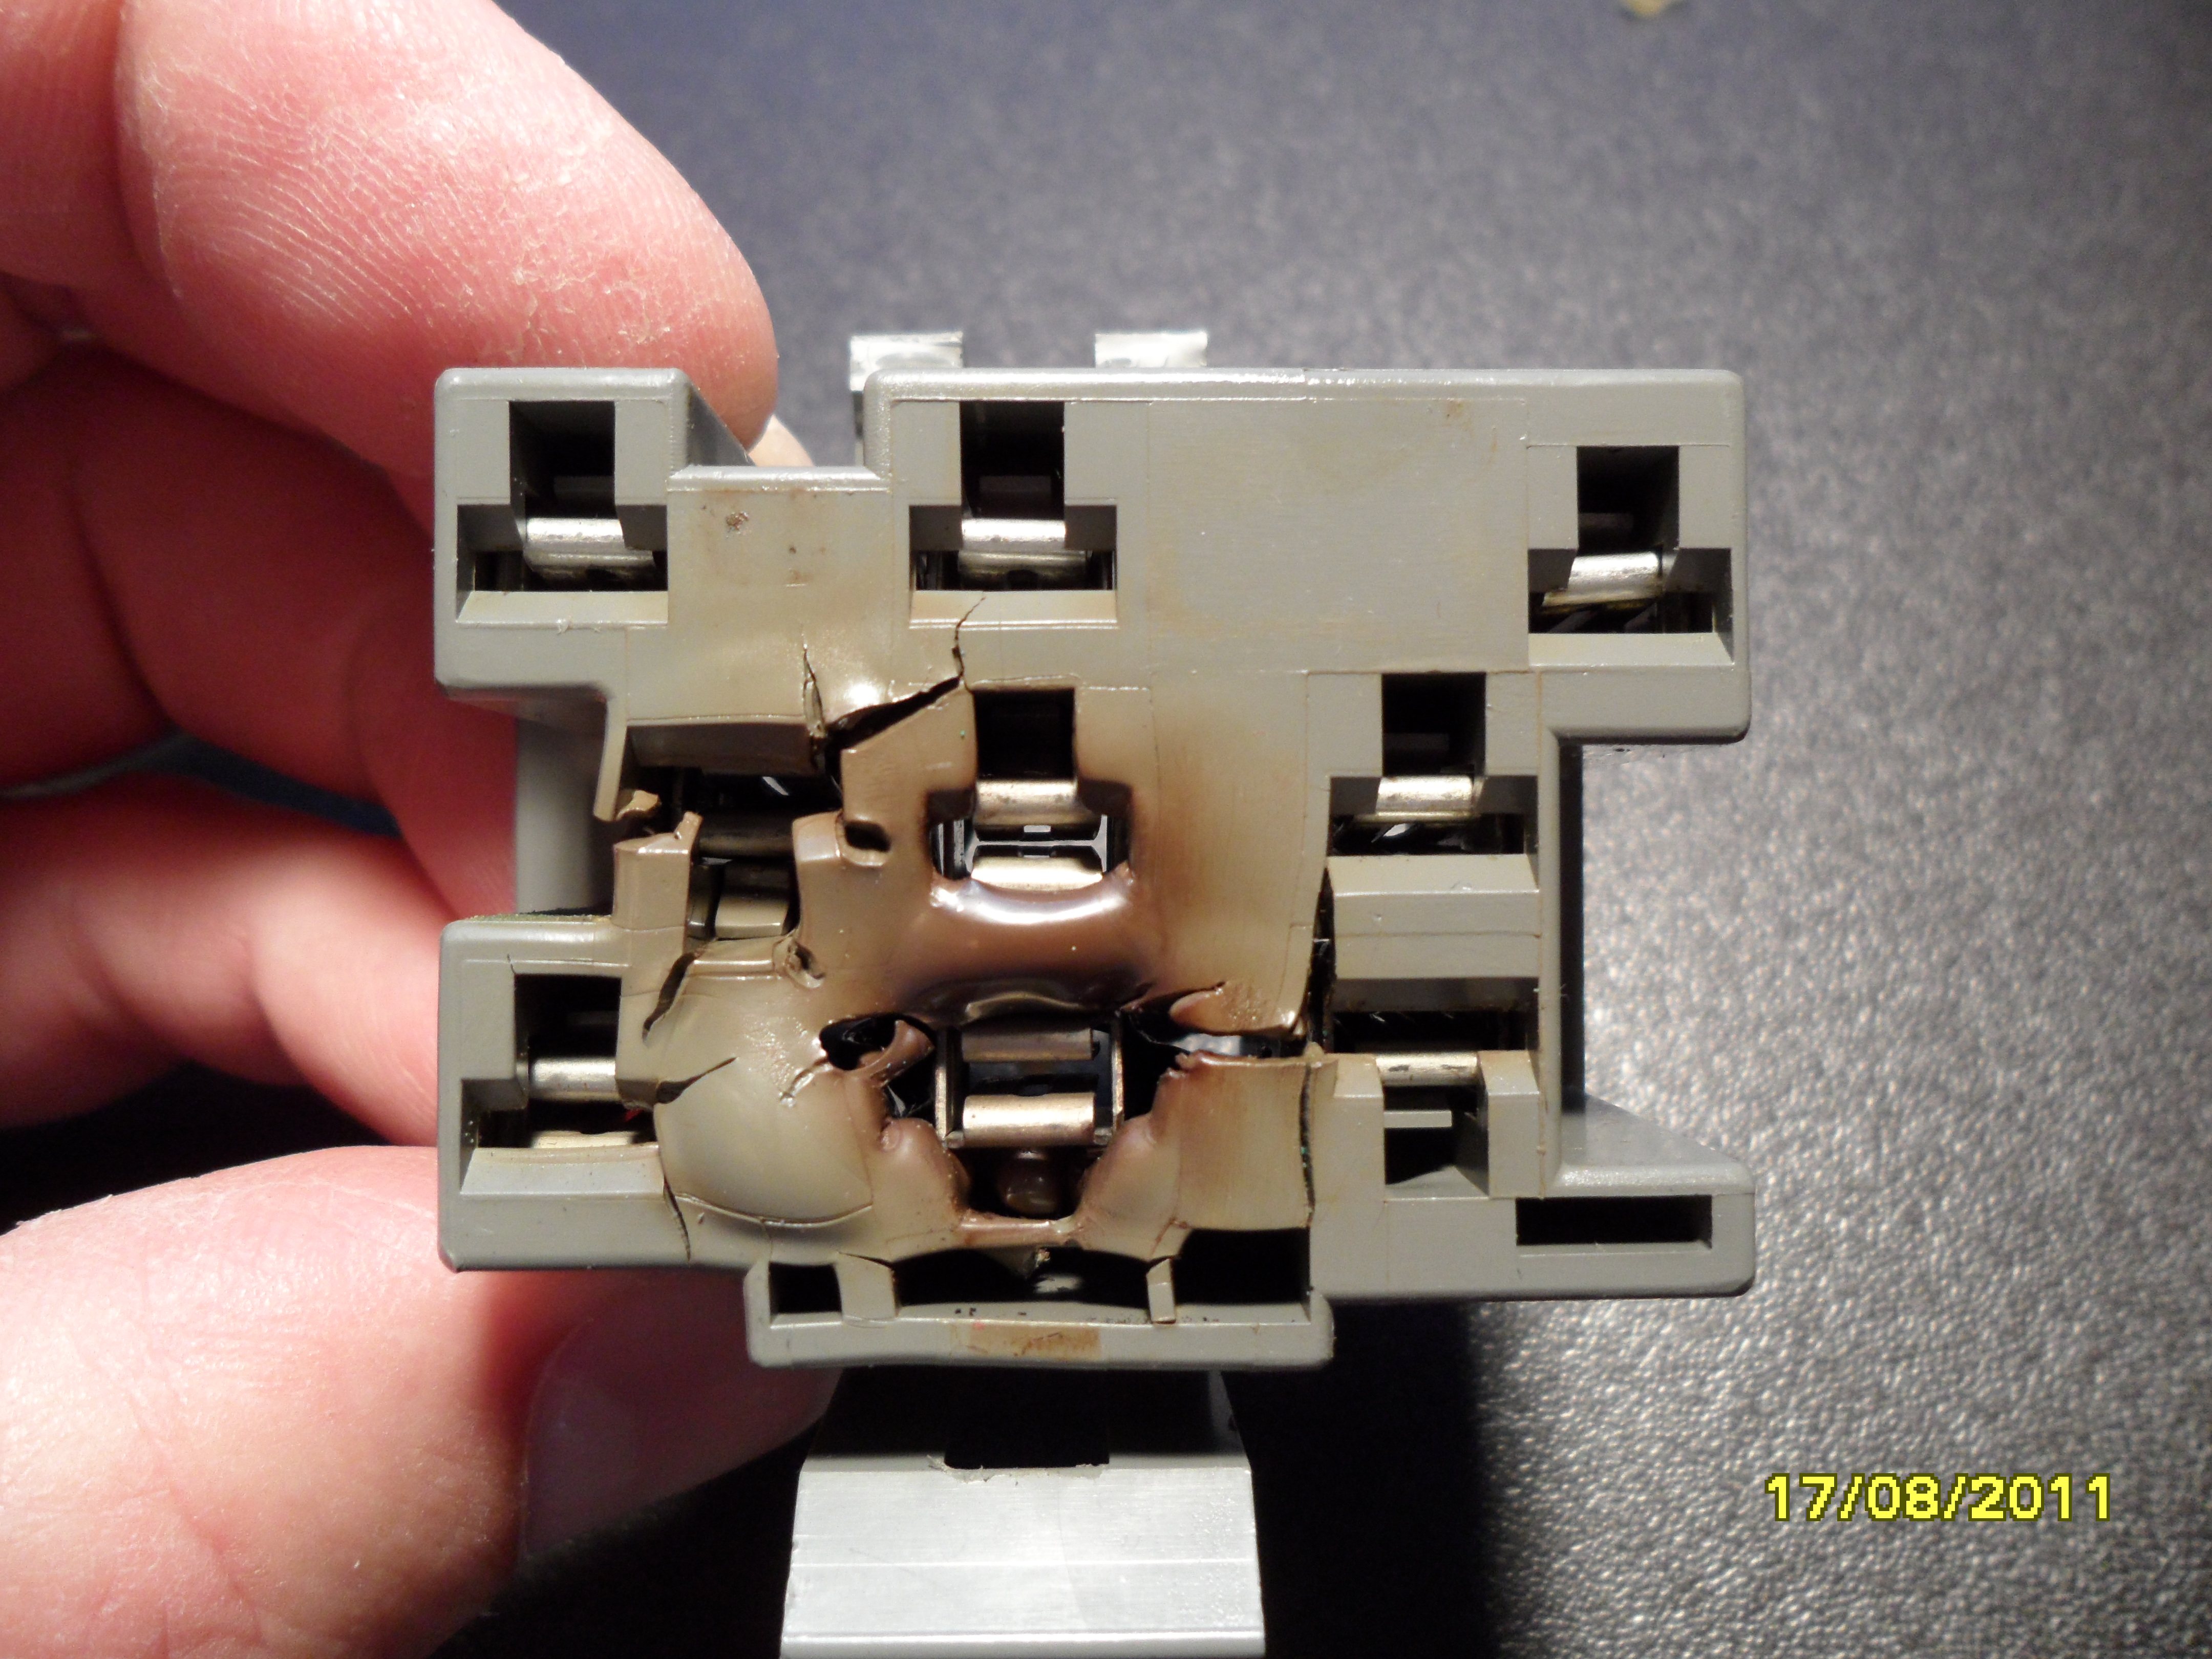
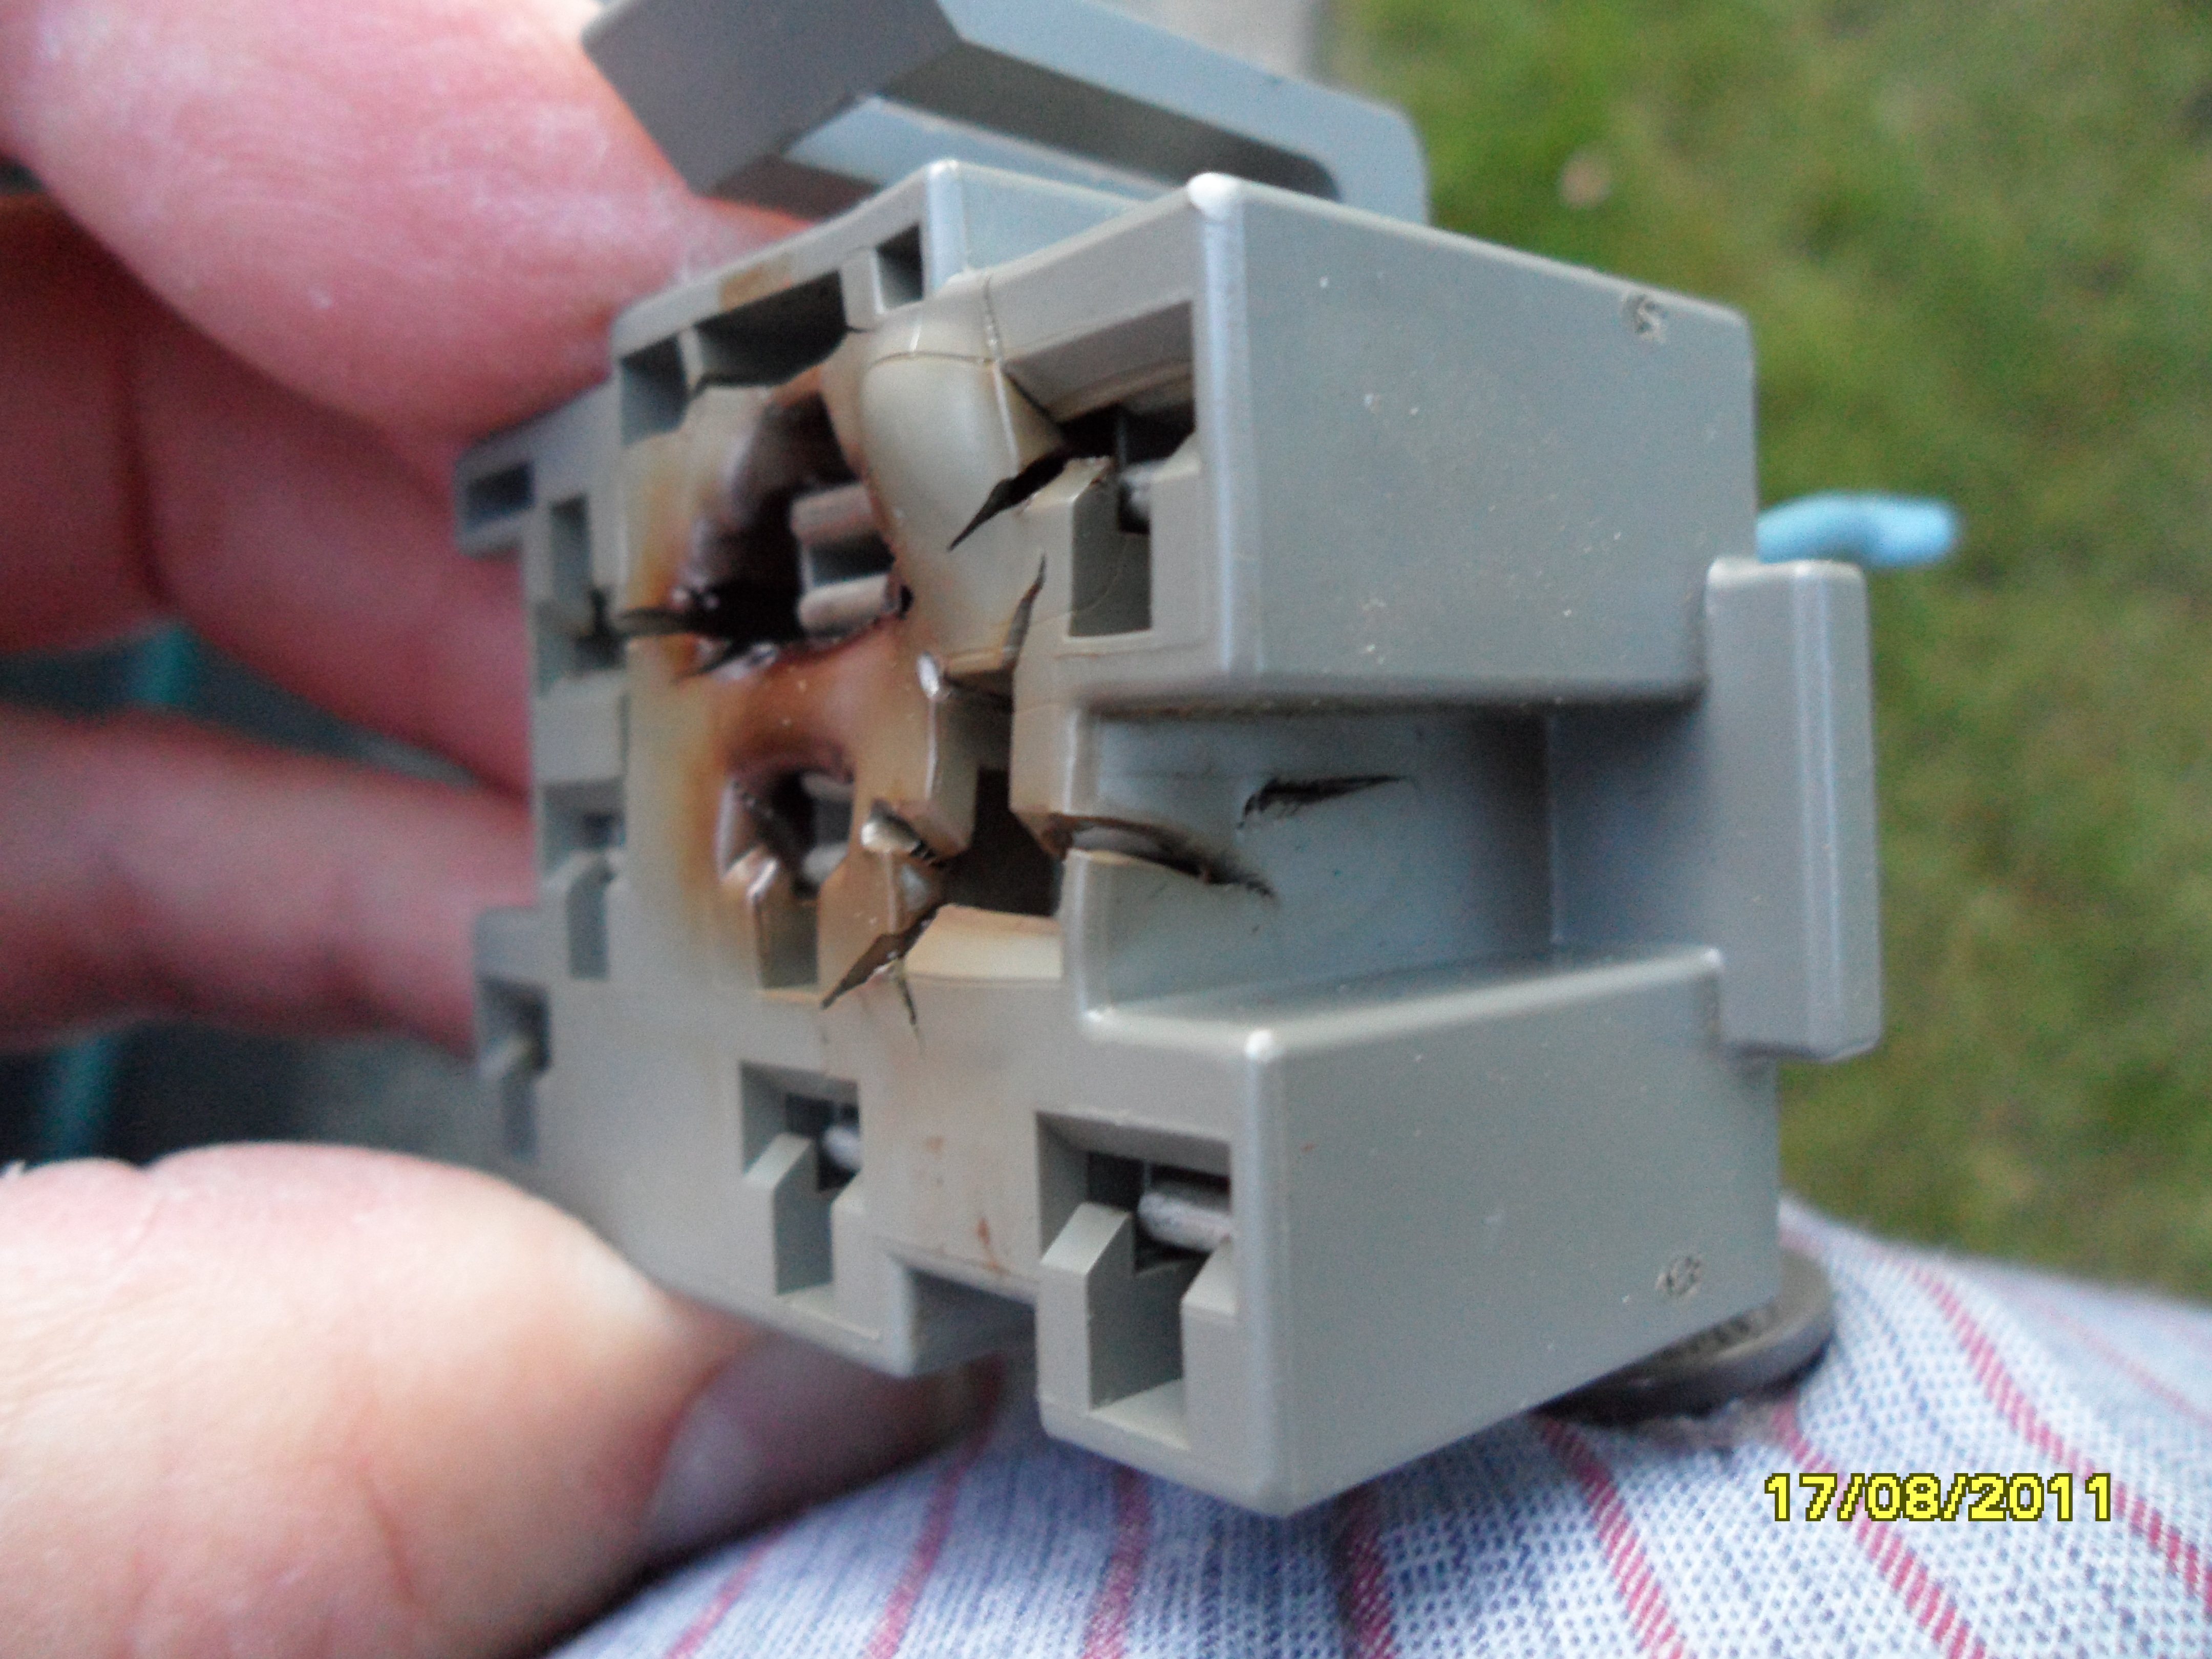
The bits laying all over.
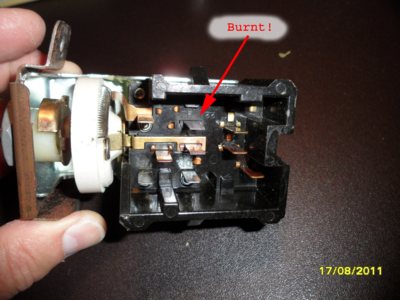
When I removed the switch from the connector, this is what I saw:
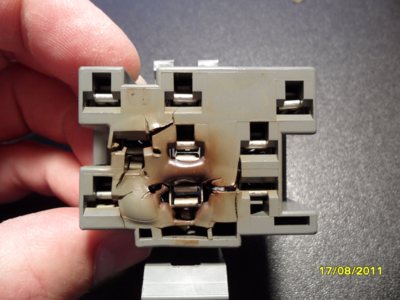
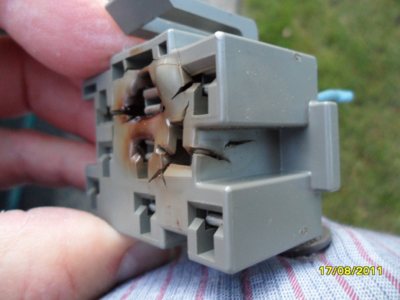
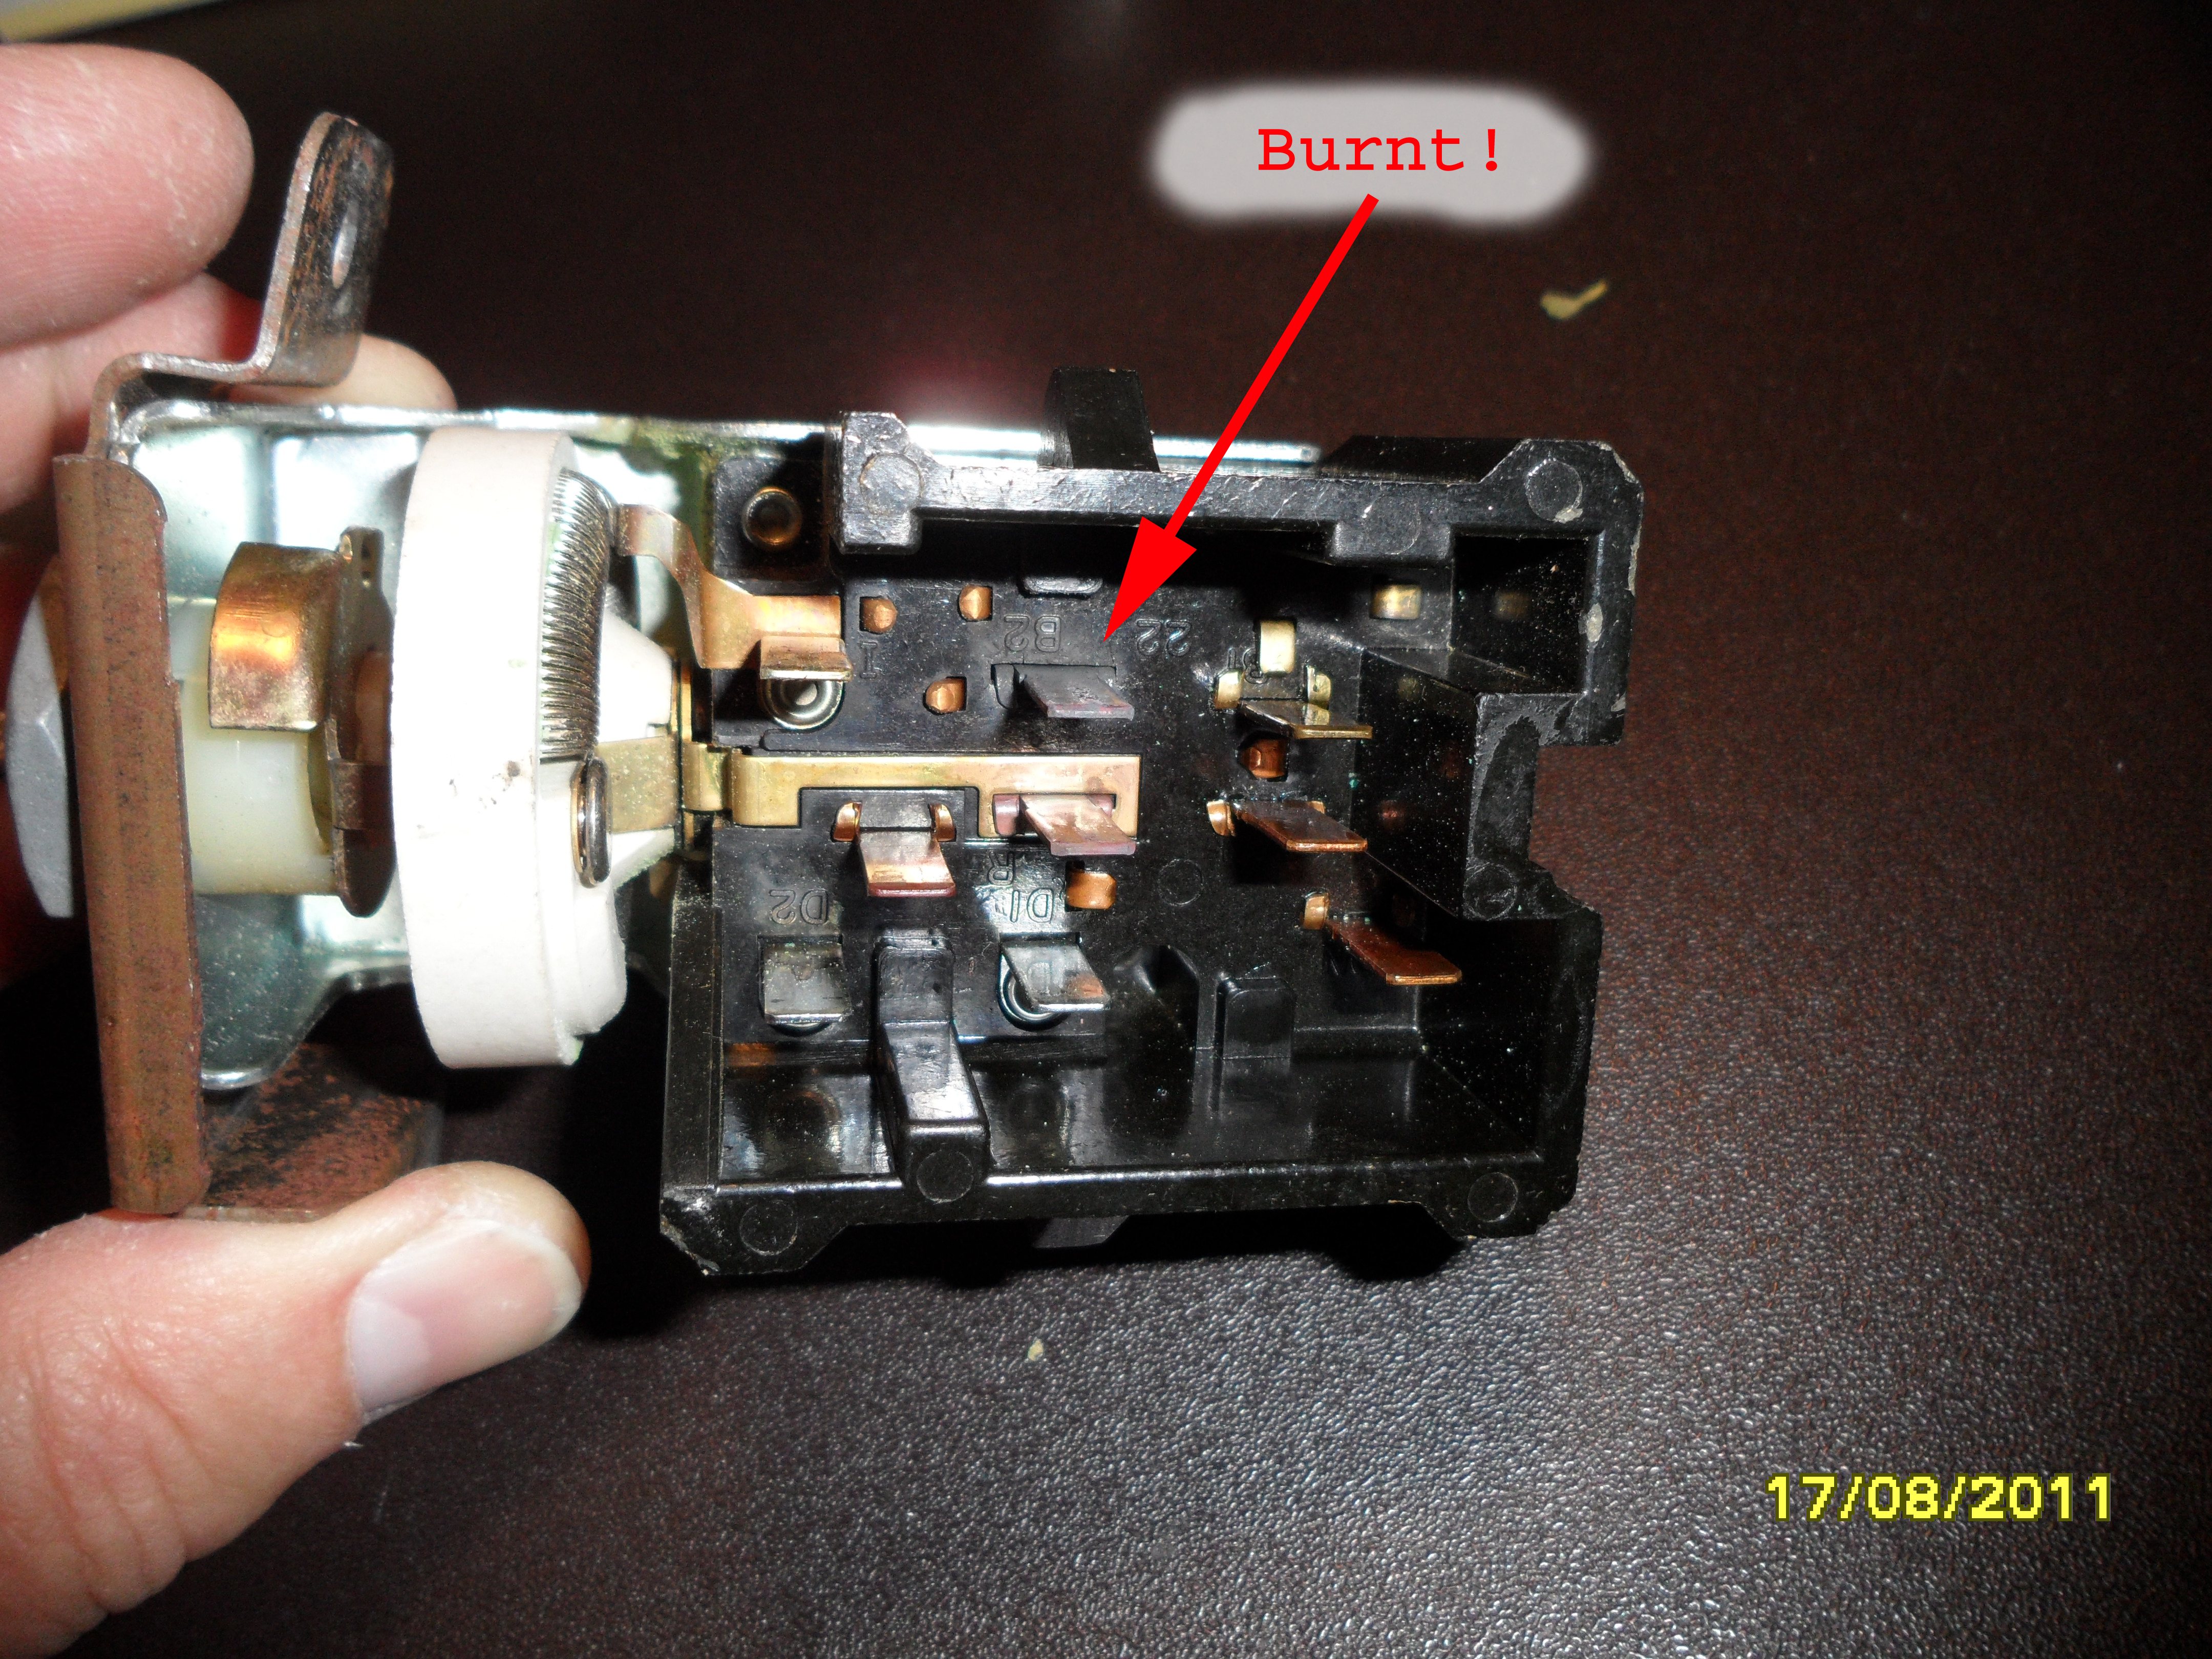
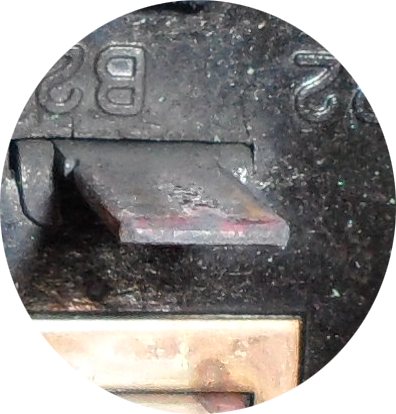
The contact for the taillights was burnt badly:

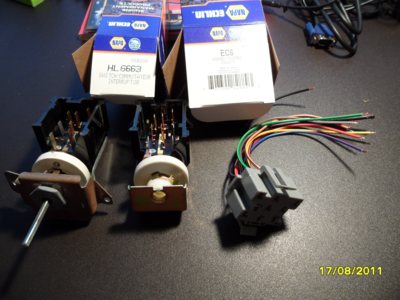
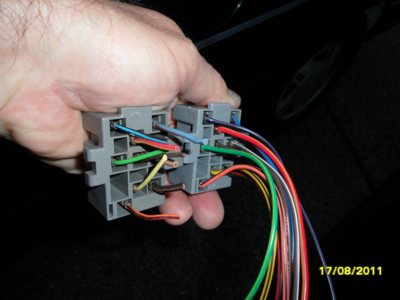
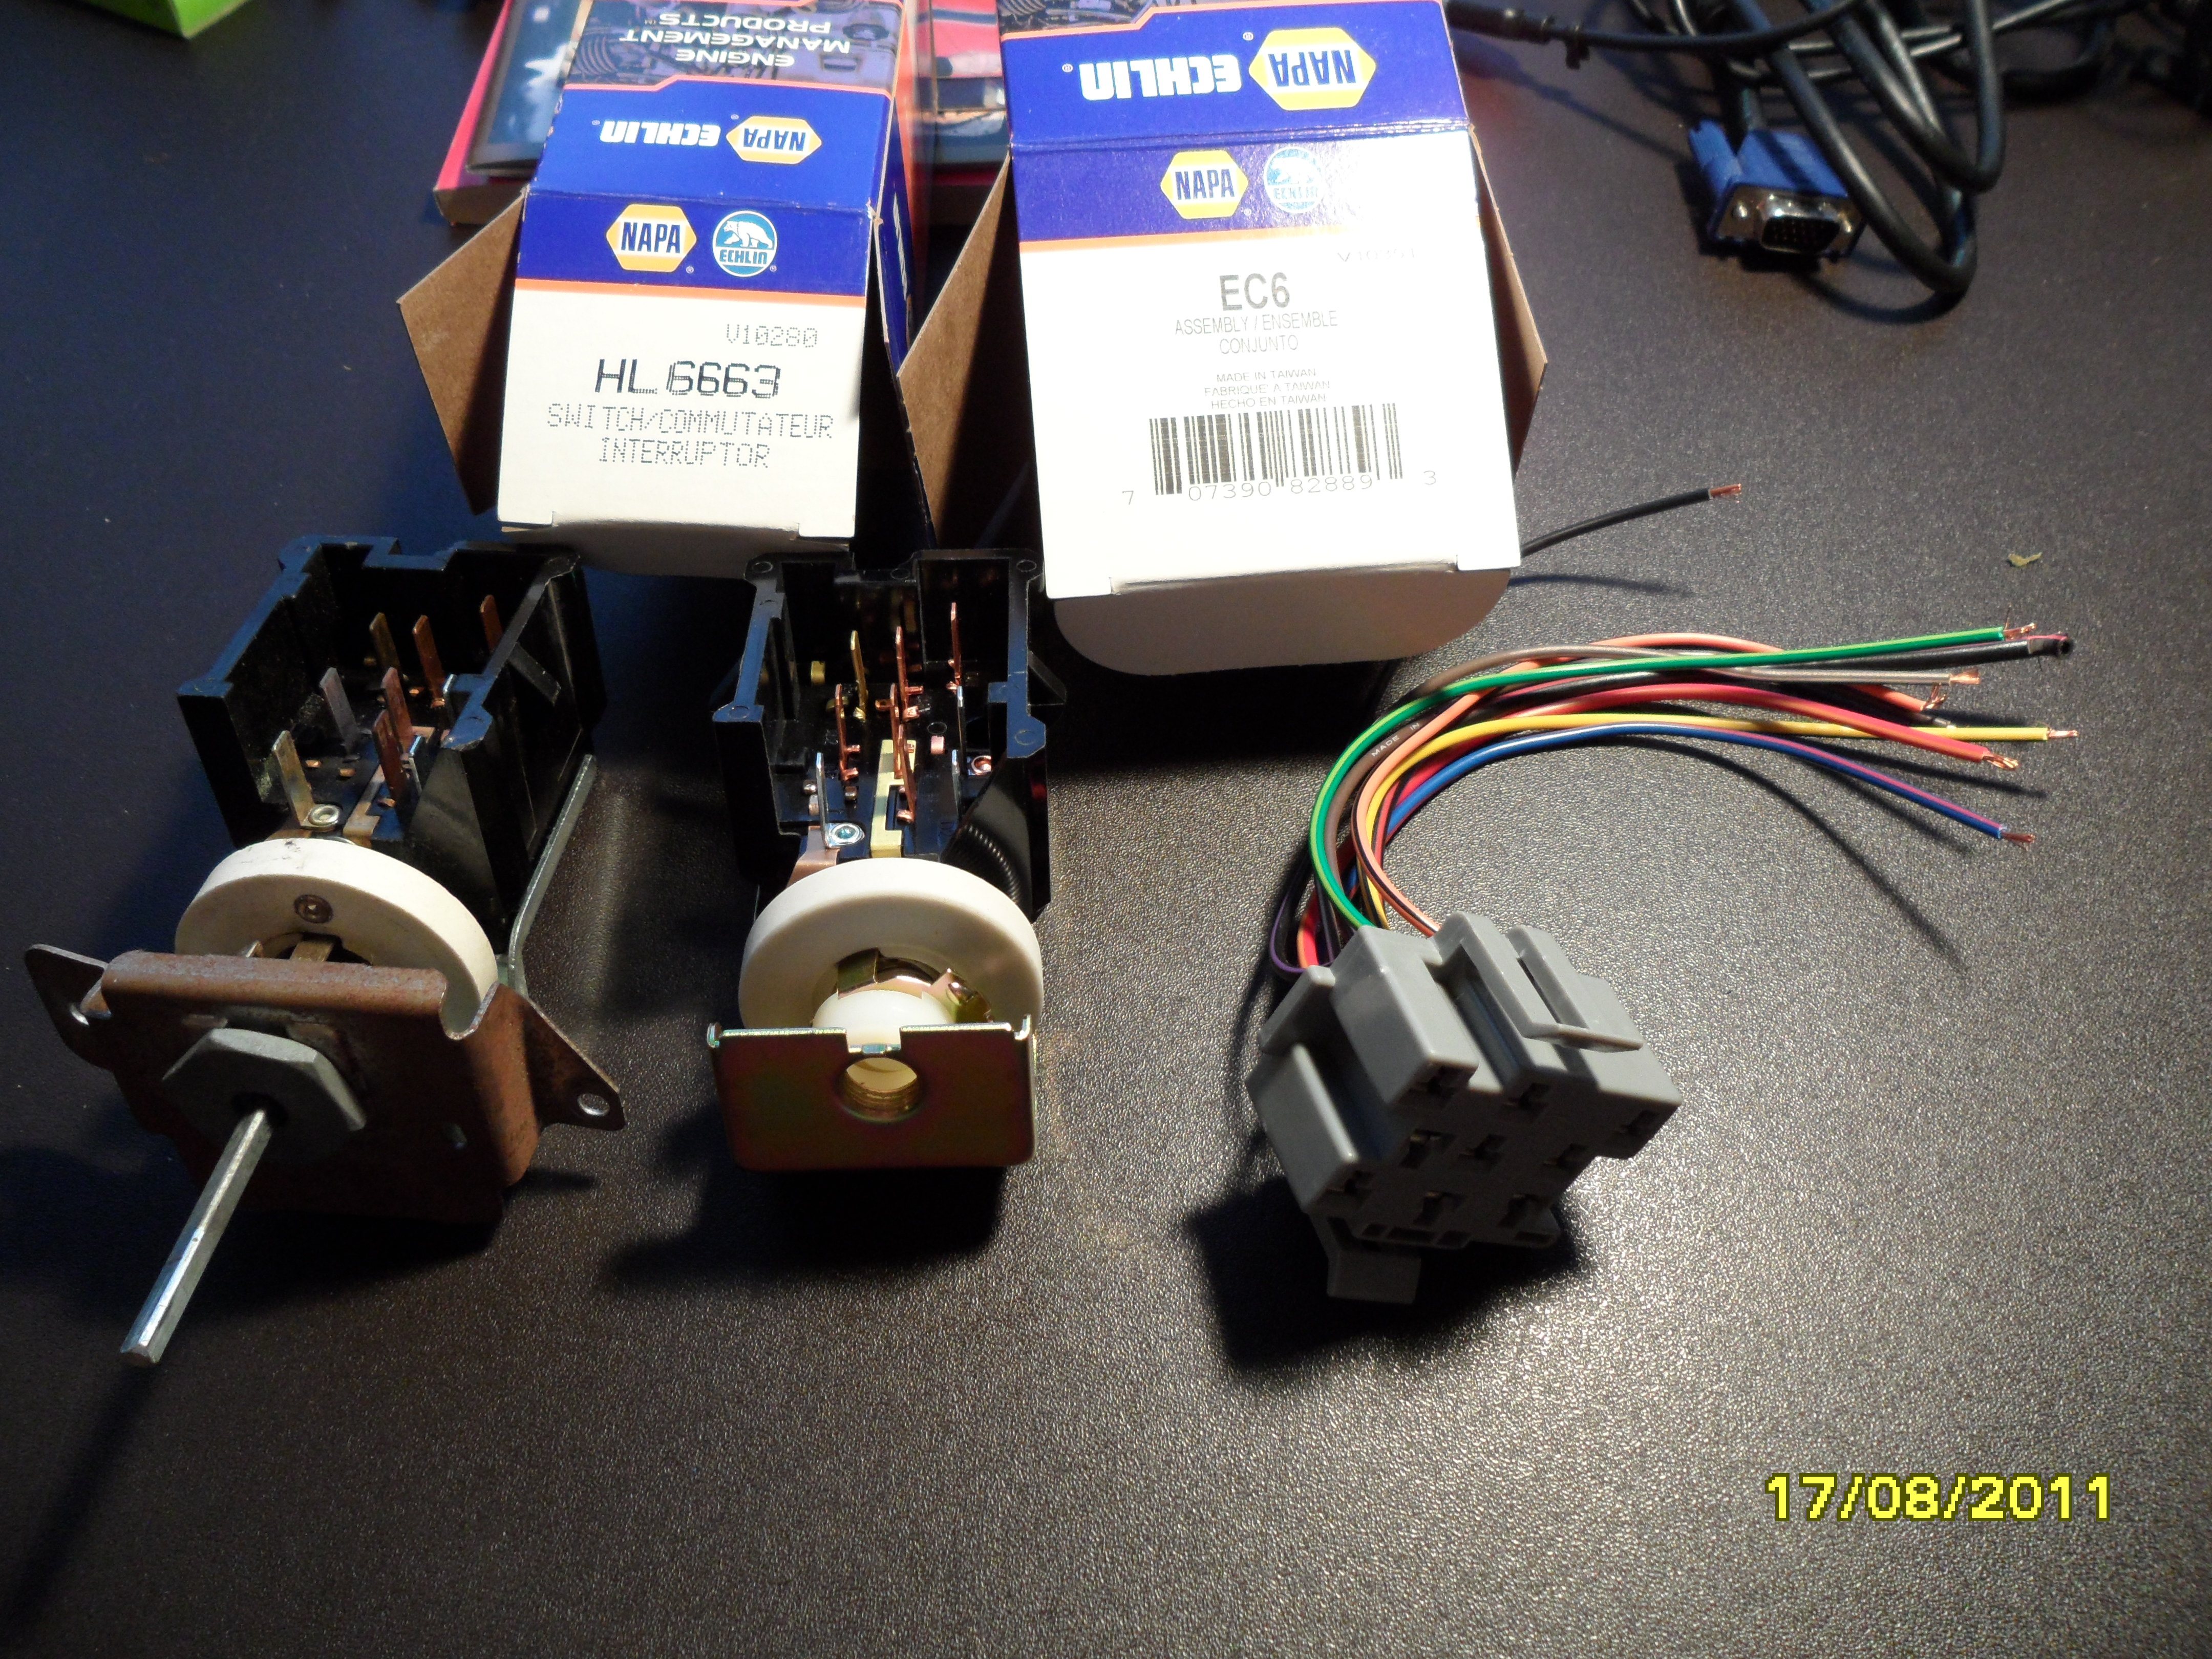
From left: old switch, new switch, new connector.
NAPA (Echlin) No. HL6663 headlight switch, $20
NAPA (Echlin) No. EC6 connector w/pigtail, $12
Note that Standard and BWD have connectors listed, but the years of models covered seem to vary widely.
NAPA had NO listing for my '93 Aerostar. However, I gave them the BWD No. PT767, which they crossed-referenced into the Echlin BC6, and when he used his computer to tell him what models that part covered, my '93 Aero is listed. Go figure.
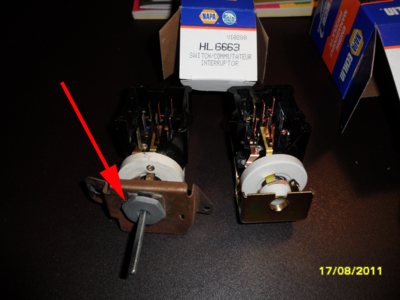
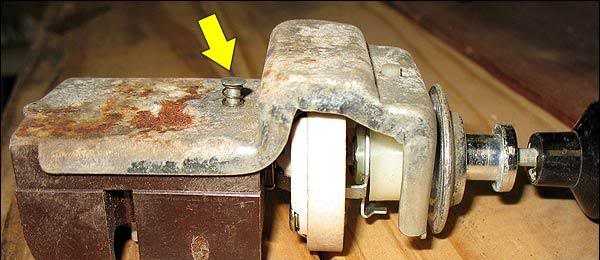
Use a 15/16" box-end wrench to unscrew the threaded retainer that holds the steel adapter plate to the front of the switch.
Transfer the shaft from the old switch to the new. I didn't get a picture of the release button, but here's someone else's pic. Pull the shaft out as far as it will go, then depress the button shown and pull the shaft out completely. To install, just push it fully into the new switch; it will self-lock in place.

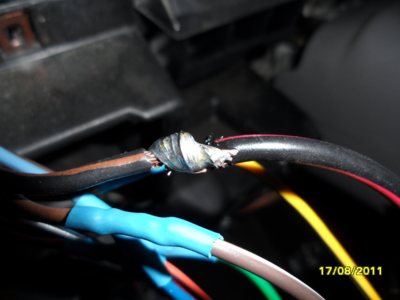
Cut off the old connector

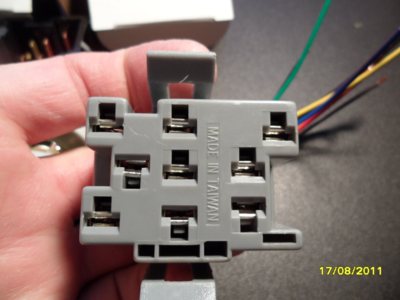
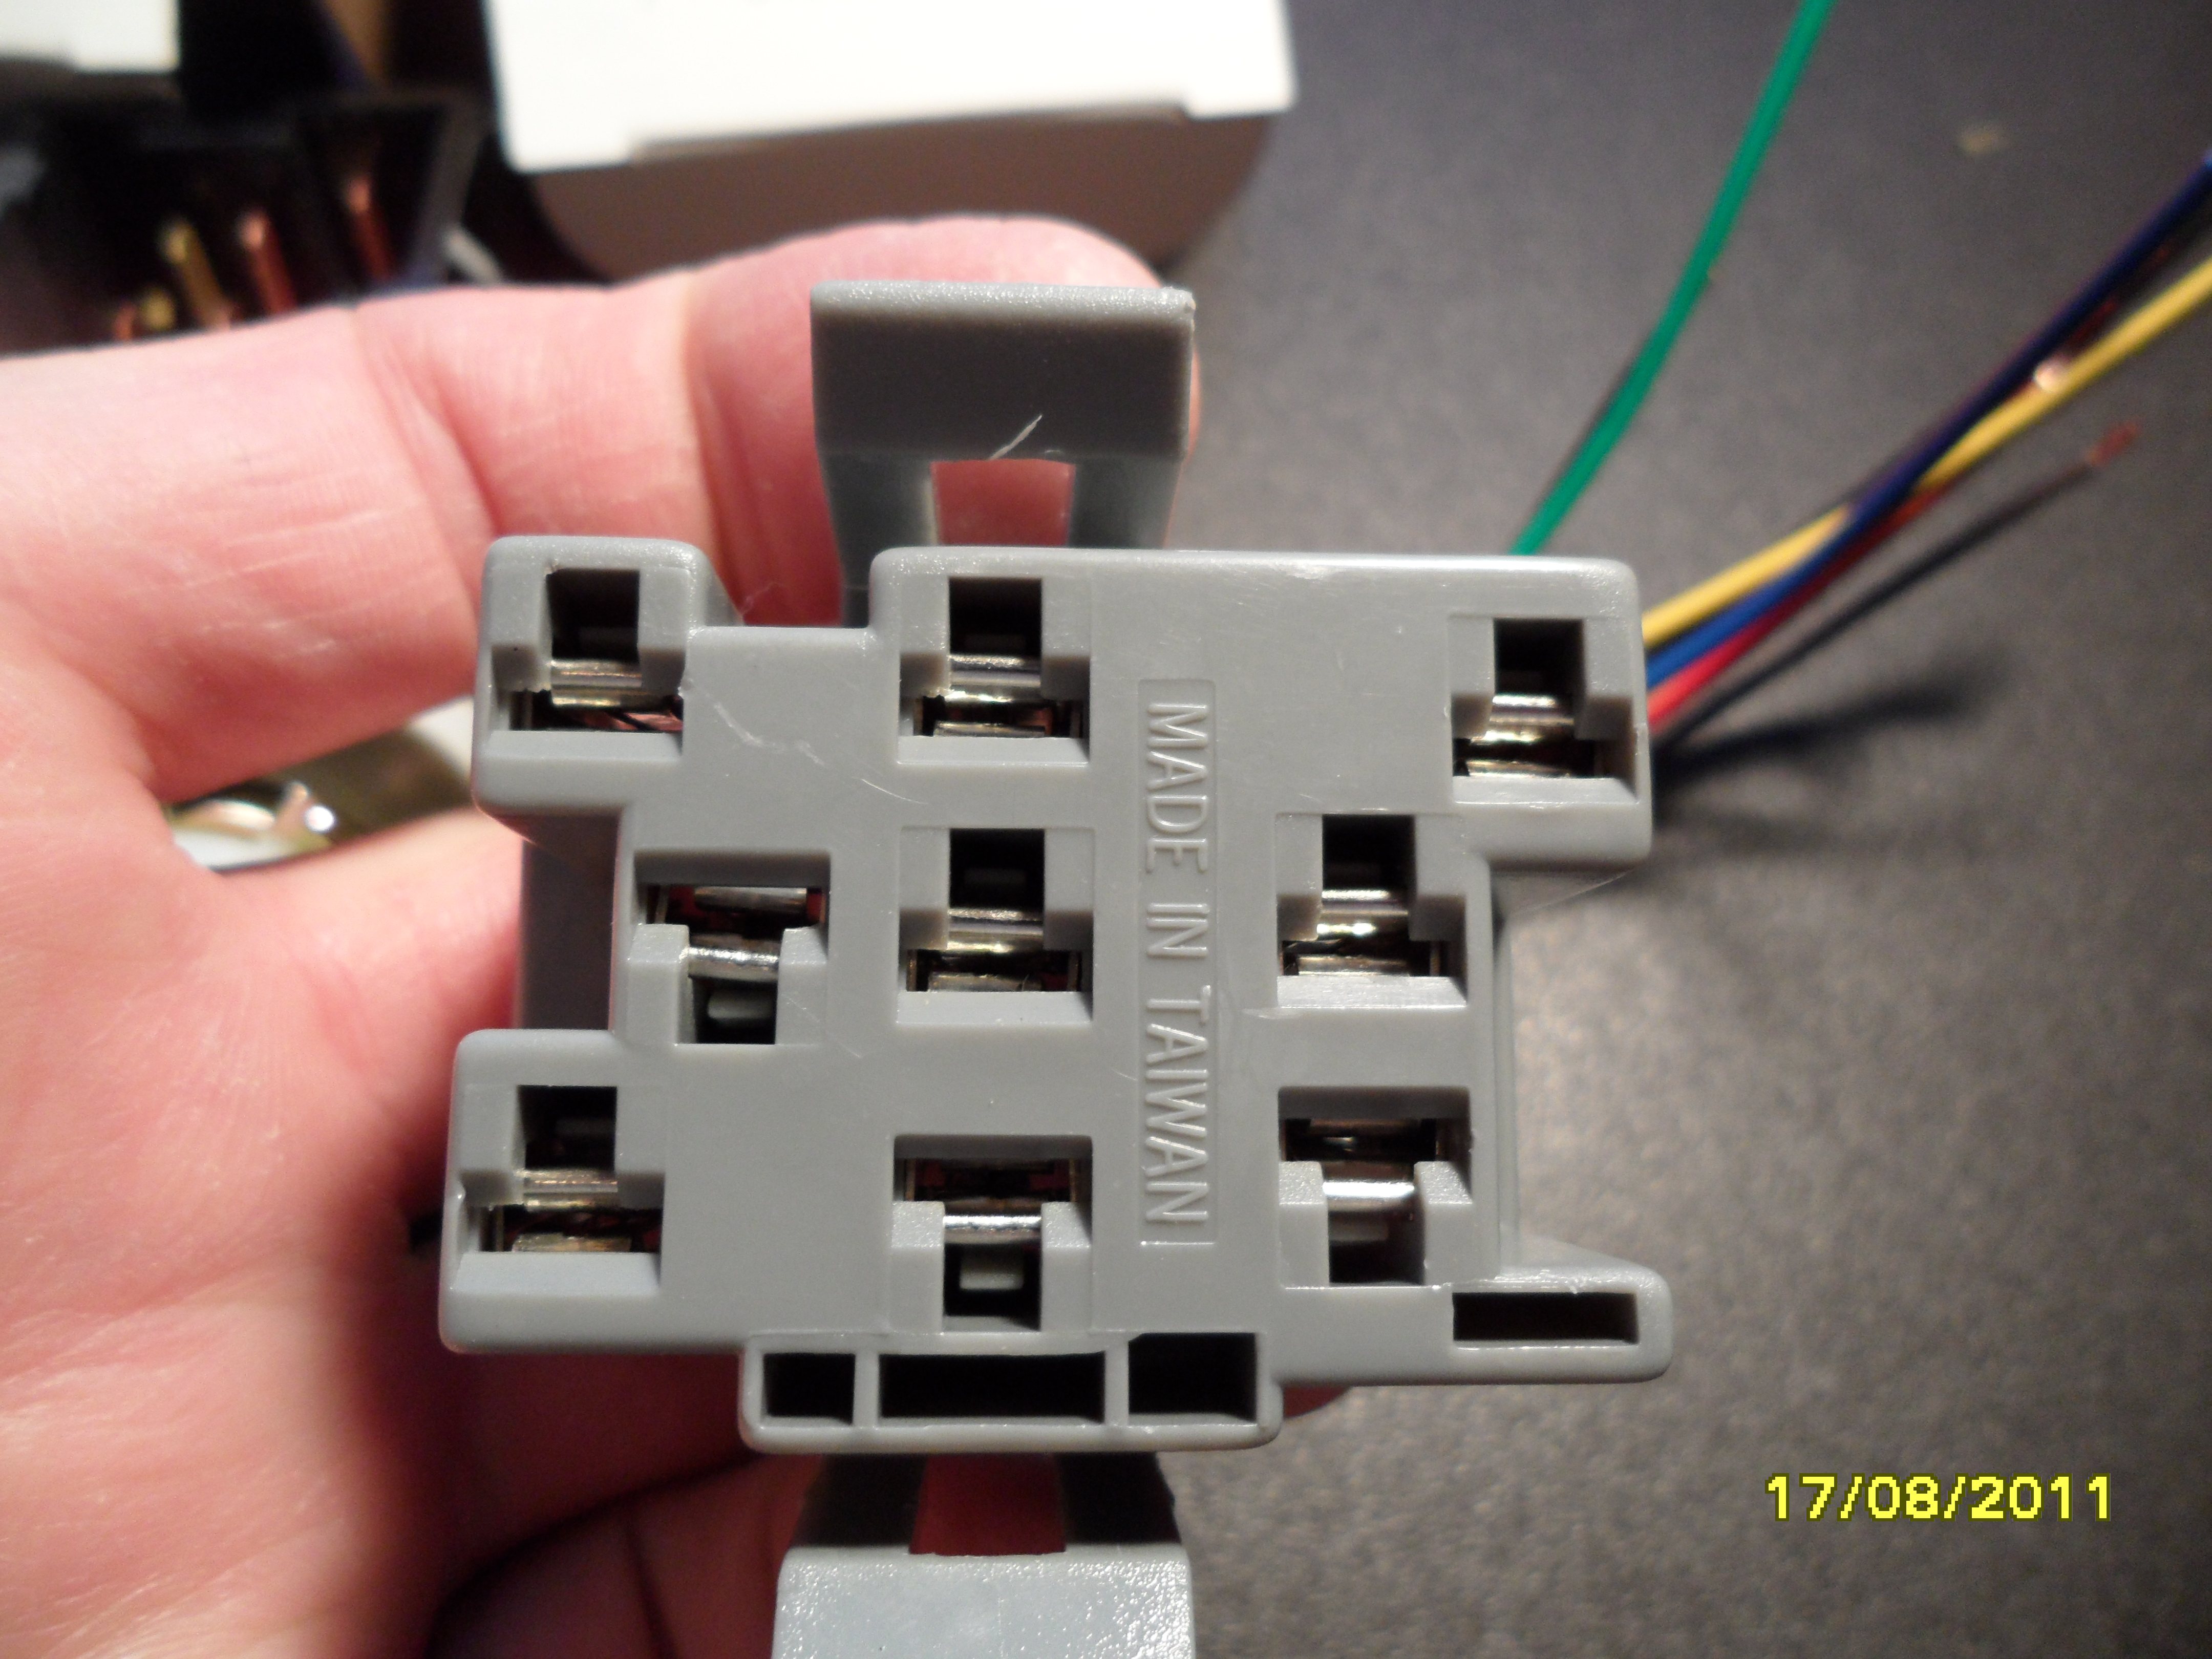
Connectors comparison
Soldering the nine wires

Reassembly is, as they say, the reverse of disassembly.
Given the propensity of Fords of a certain vintage to melt their headlight switch connector down, I assumed that that was what I was smelling.
Well, last week the taillights failed my lights check (I do a walk-around and check all the exterior lights while filling the petrol tank). Fuse good.
So, here's the quick rundown on how to fix this on a 1993 Aerostar XL without automatic headlights (the auto-HL version has a different switch). AFAIK, this should be the same procedure on any Aerostar 1992 and newer.
(click on any image for larger)
All all of the screws to be removed were 7mm head on my rig.
The first hurdle is to remove the headlight switch ****. It's not obvious how that's done.

Here's what you're fighting: a spring clip.
Turn the dimmer **** to reveal the notch on the side.
You'll need a steel tool of some sort to push that spring clip towards the back of the vehicle. I used this, but I've done it before with a No. 1 (or smaller) flathead screwdriver.

Pull (or push) the clip toward the head of the ****. When you do it right, the **** will fall off the end of the shaft.

The plain shaft. This will get transferred to the new switch.

Remove the three screws under the knee trim panel (red arrows), then use your fingers to work around the right side and unpop the panel from the right side first. When the right side is free, work on the left side. The left end is nested behind the left kick panel, and has to be finessed a bit.

Next, the radio surround must be removed. Remove the ashtray, then remove the two screws behind the ashtray. Carefully work your fingers around the entire surround, popping it loose one clip at a time.

Leave all the wiring (cigar lighter, rear wiper switch, rear defrost) connected, you don't need to move the radio surround too far.
You now have access to the two right-side lower screws for the instrument cluster surround. Remove them.

On the left of the column, carefully unpop the left vent assy. No screws hold it in place.
You now have access to the single left-side lower screw for the instrument cluster surround. Remove it.
Remove the two upper instrument cluster surround screws. A 1/4" socket and ratchet works well here. Tilt the steering wheel down, turn the key to ON, shift to Low, then the surround can be removed. Put the shifter back in Park, turn key off.
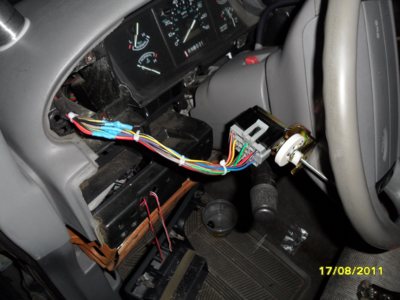
There's the switch in its adapter bracket.
Remove the last two screws, and withdraw the switch from the dash.

The bits laying all over.

When I removed the switch from the connector, this is what I saw:
The contact for the taillights was burnt badly:
From left: old switch, new switch, new connector.
NAPA (Echlin) No. HL6663 headlight switch, $20
NAPA (Echlin) No. EC6 connector w/pigtail, $12
Note that Standard and BWD have connectors listed, but the years of models covered seem to vary widely.
NAPA had NO listing for my '93 Aerostar. However, I gave them the BWD No. PT767, which they crossed-referenced into the Echlin BC6, and when he used his computer to tell him what models that part covered, my '93 Aero is listed. Go figure.

Use a 15/16" box-end wrench to unscrew the threaded retainer that holds the steel adapter plate to the front of the switch.
Transfer the shaft from the old switch to the new. I didn't get a picture of the release button, but here's someone else's pic. Pull the shaft out as far as it will go, then depress the button shown and pull the shaft out completely. To install, just push it fully into the new switch; it will self-lock in place.
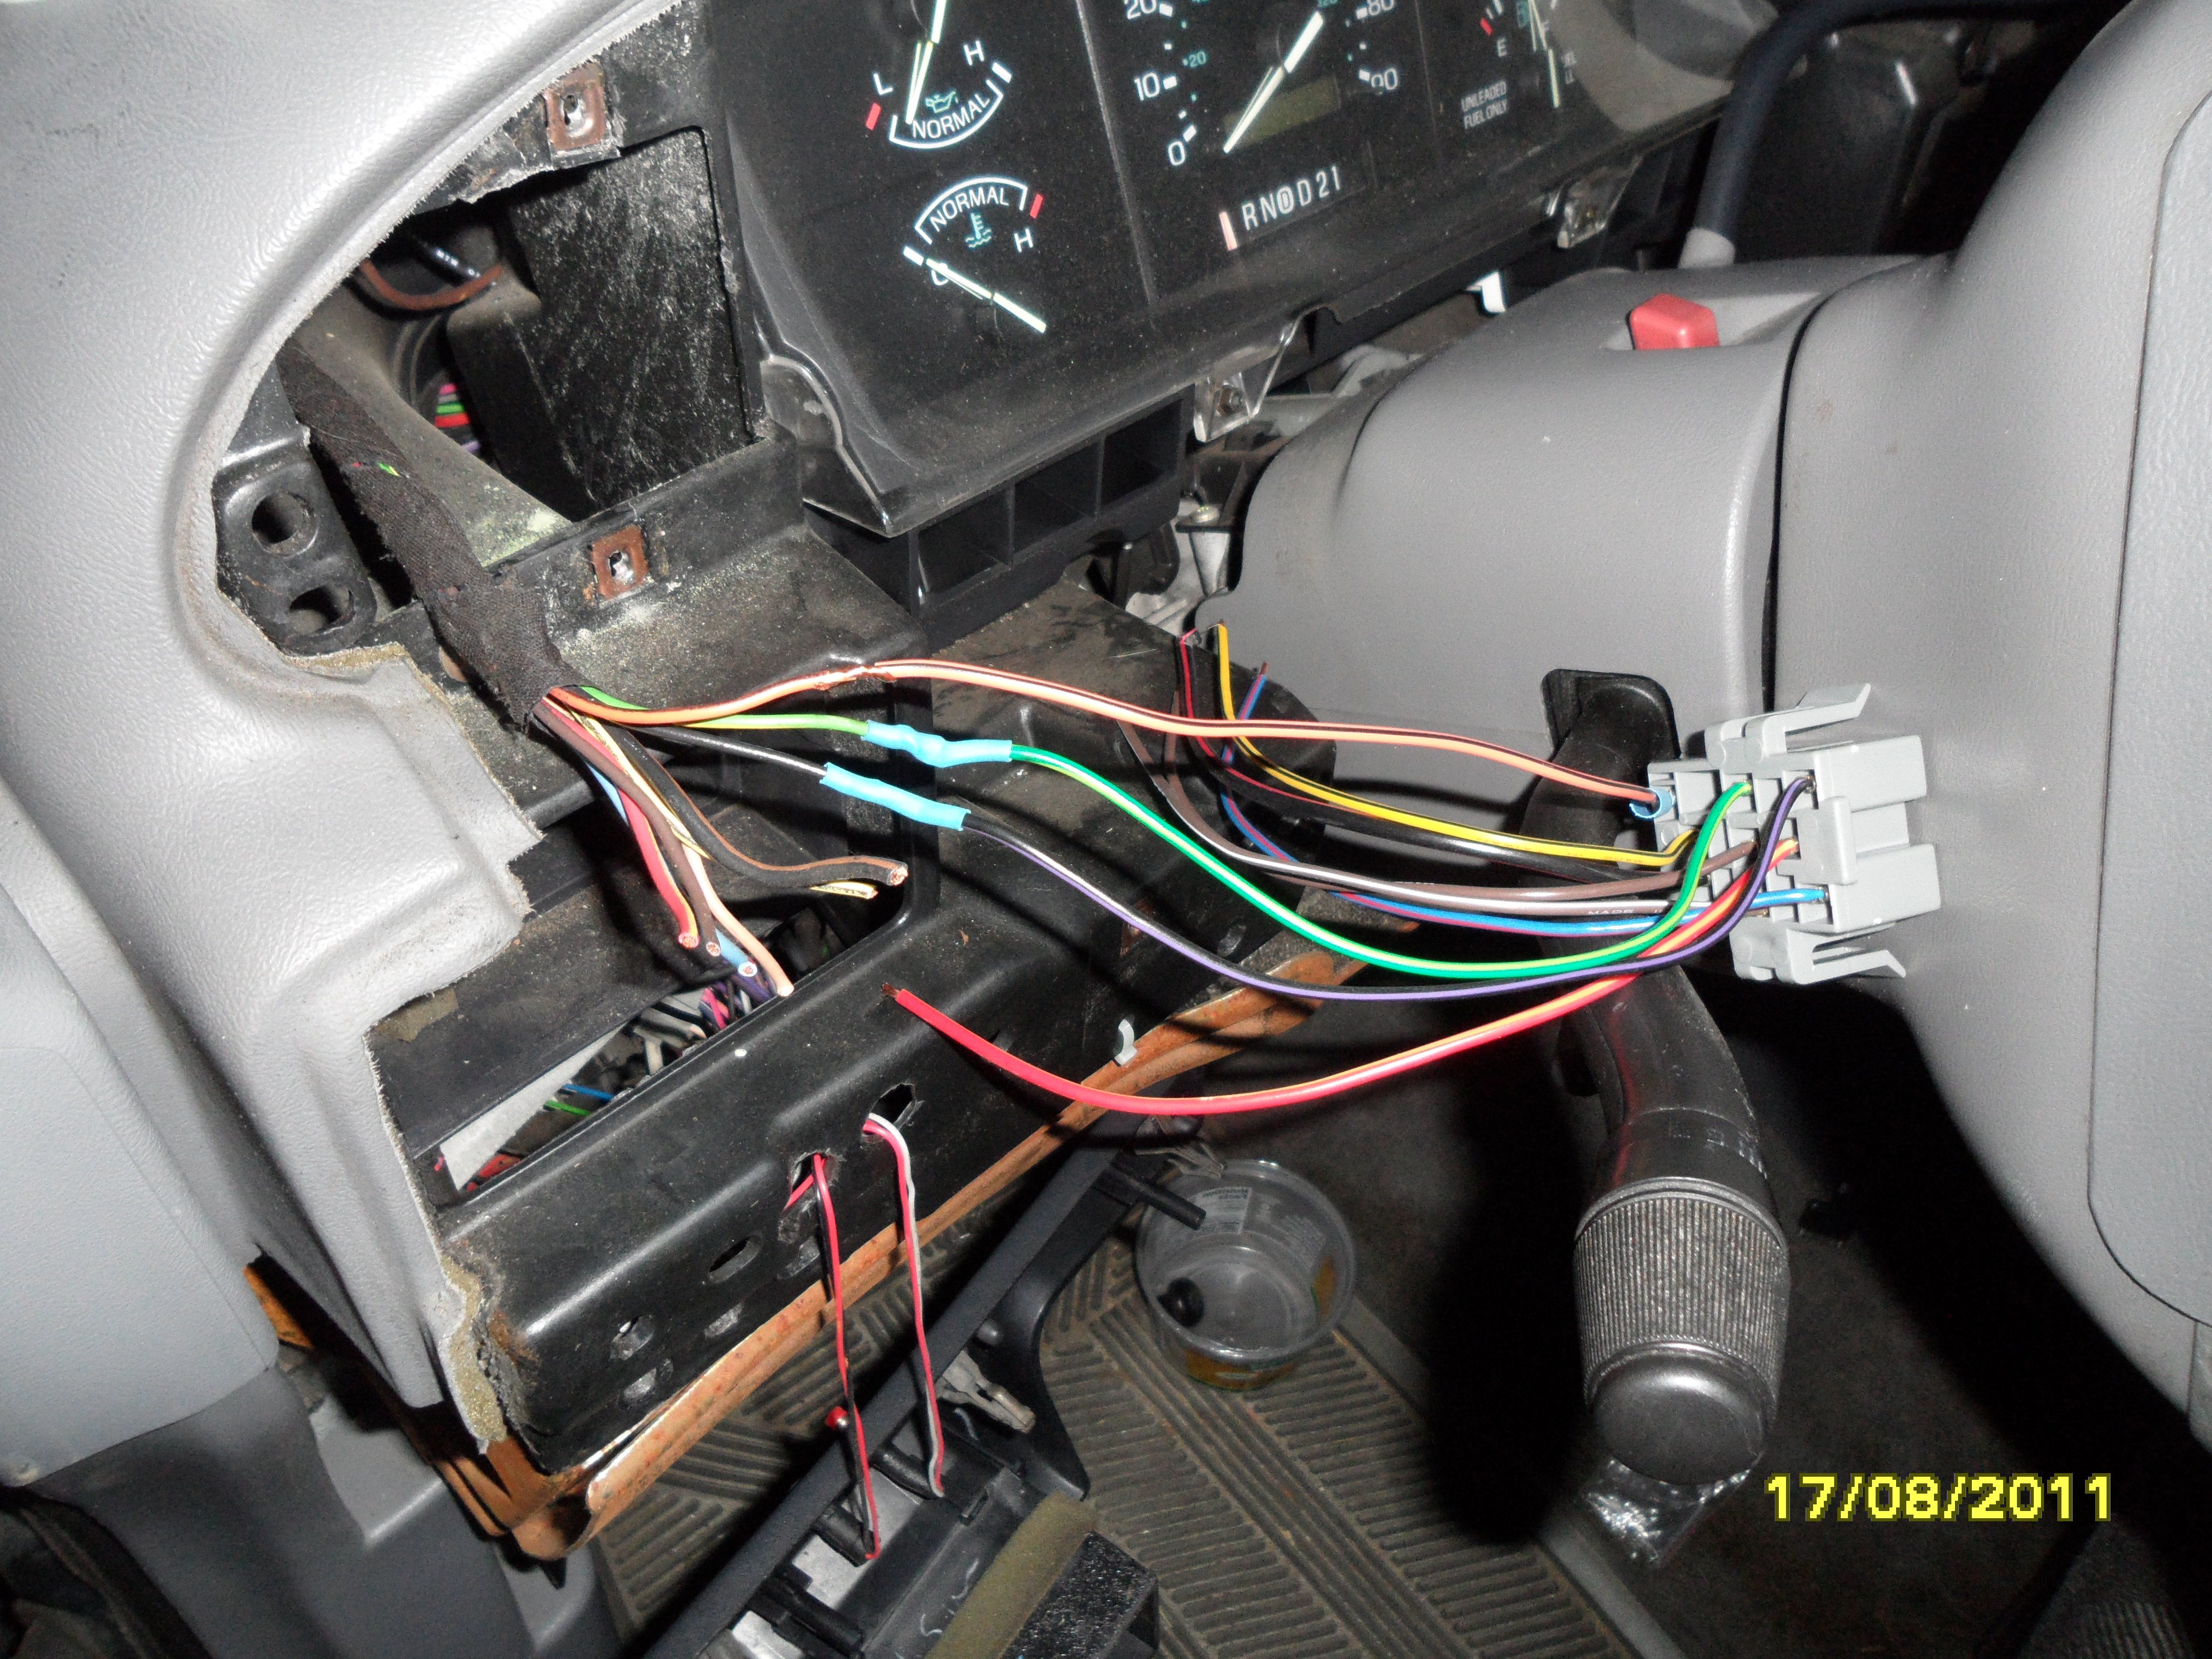
Cut off the old connector
Connectors comparison
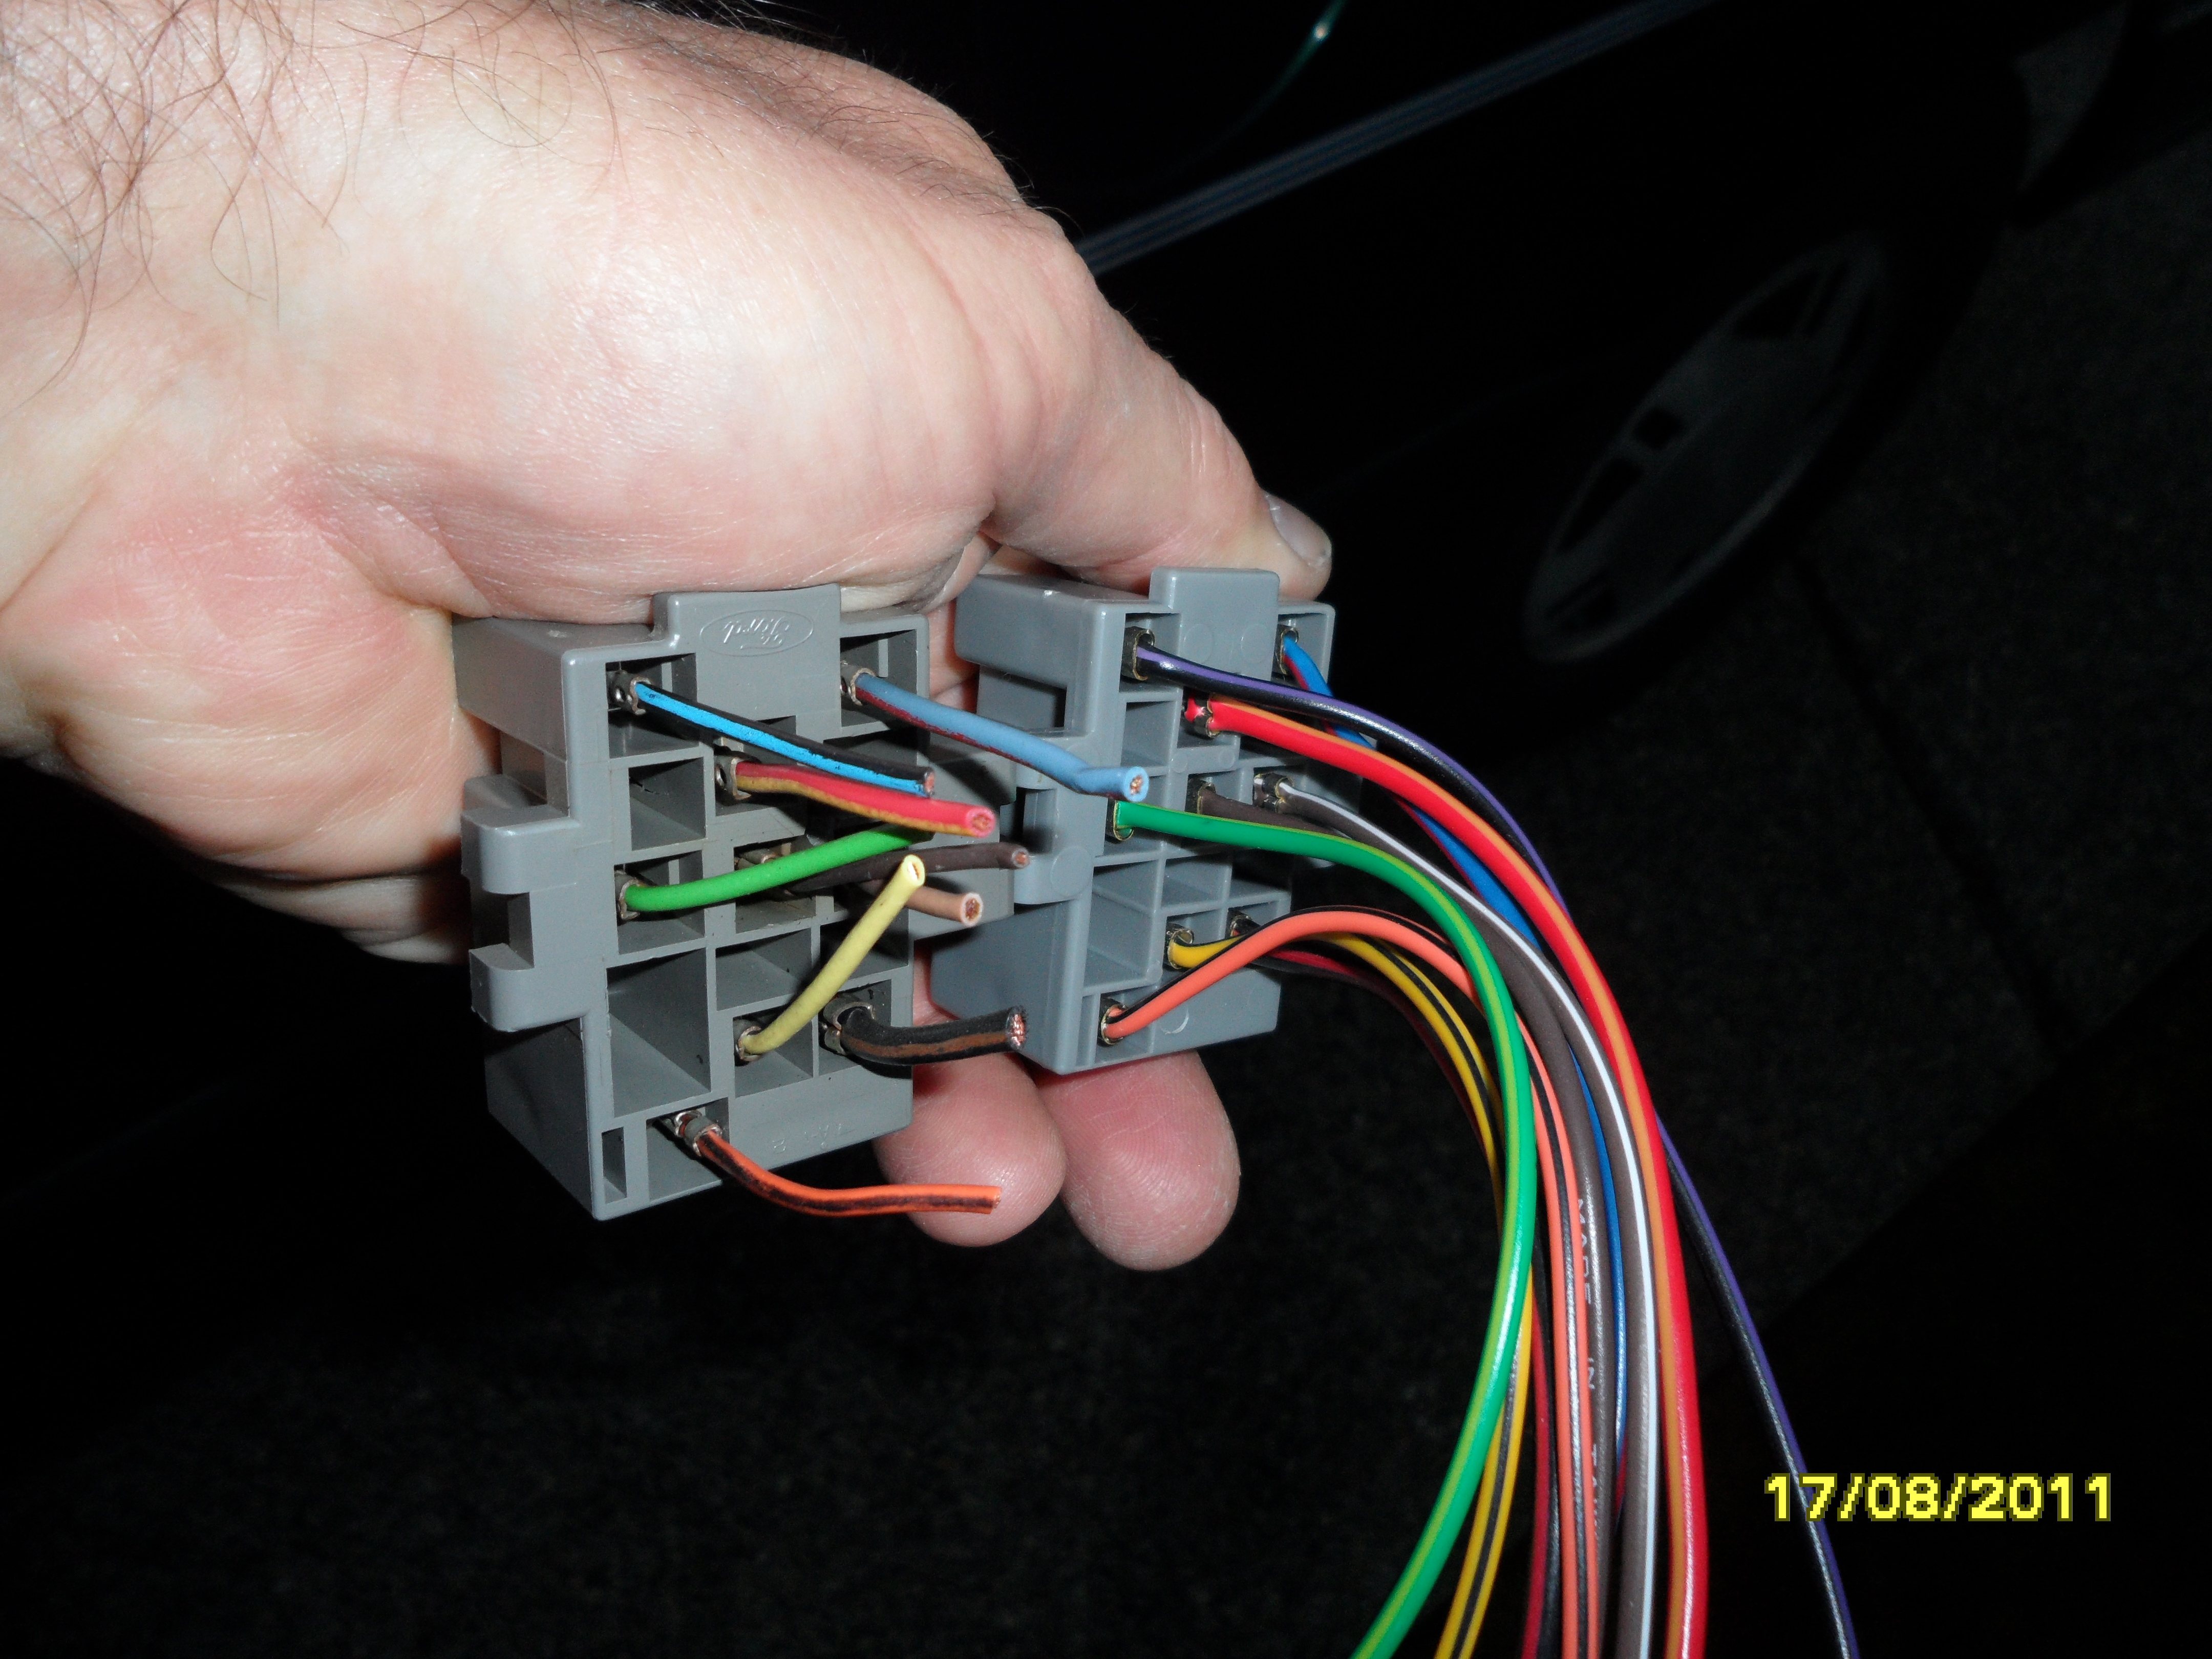
Soldering the nine wires
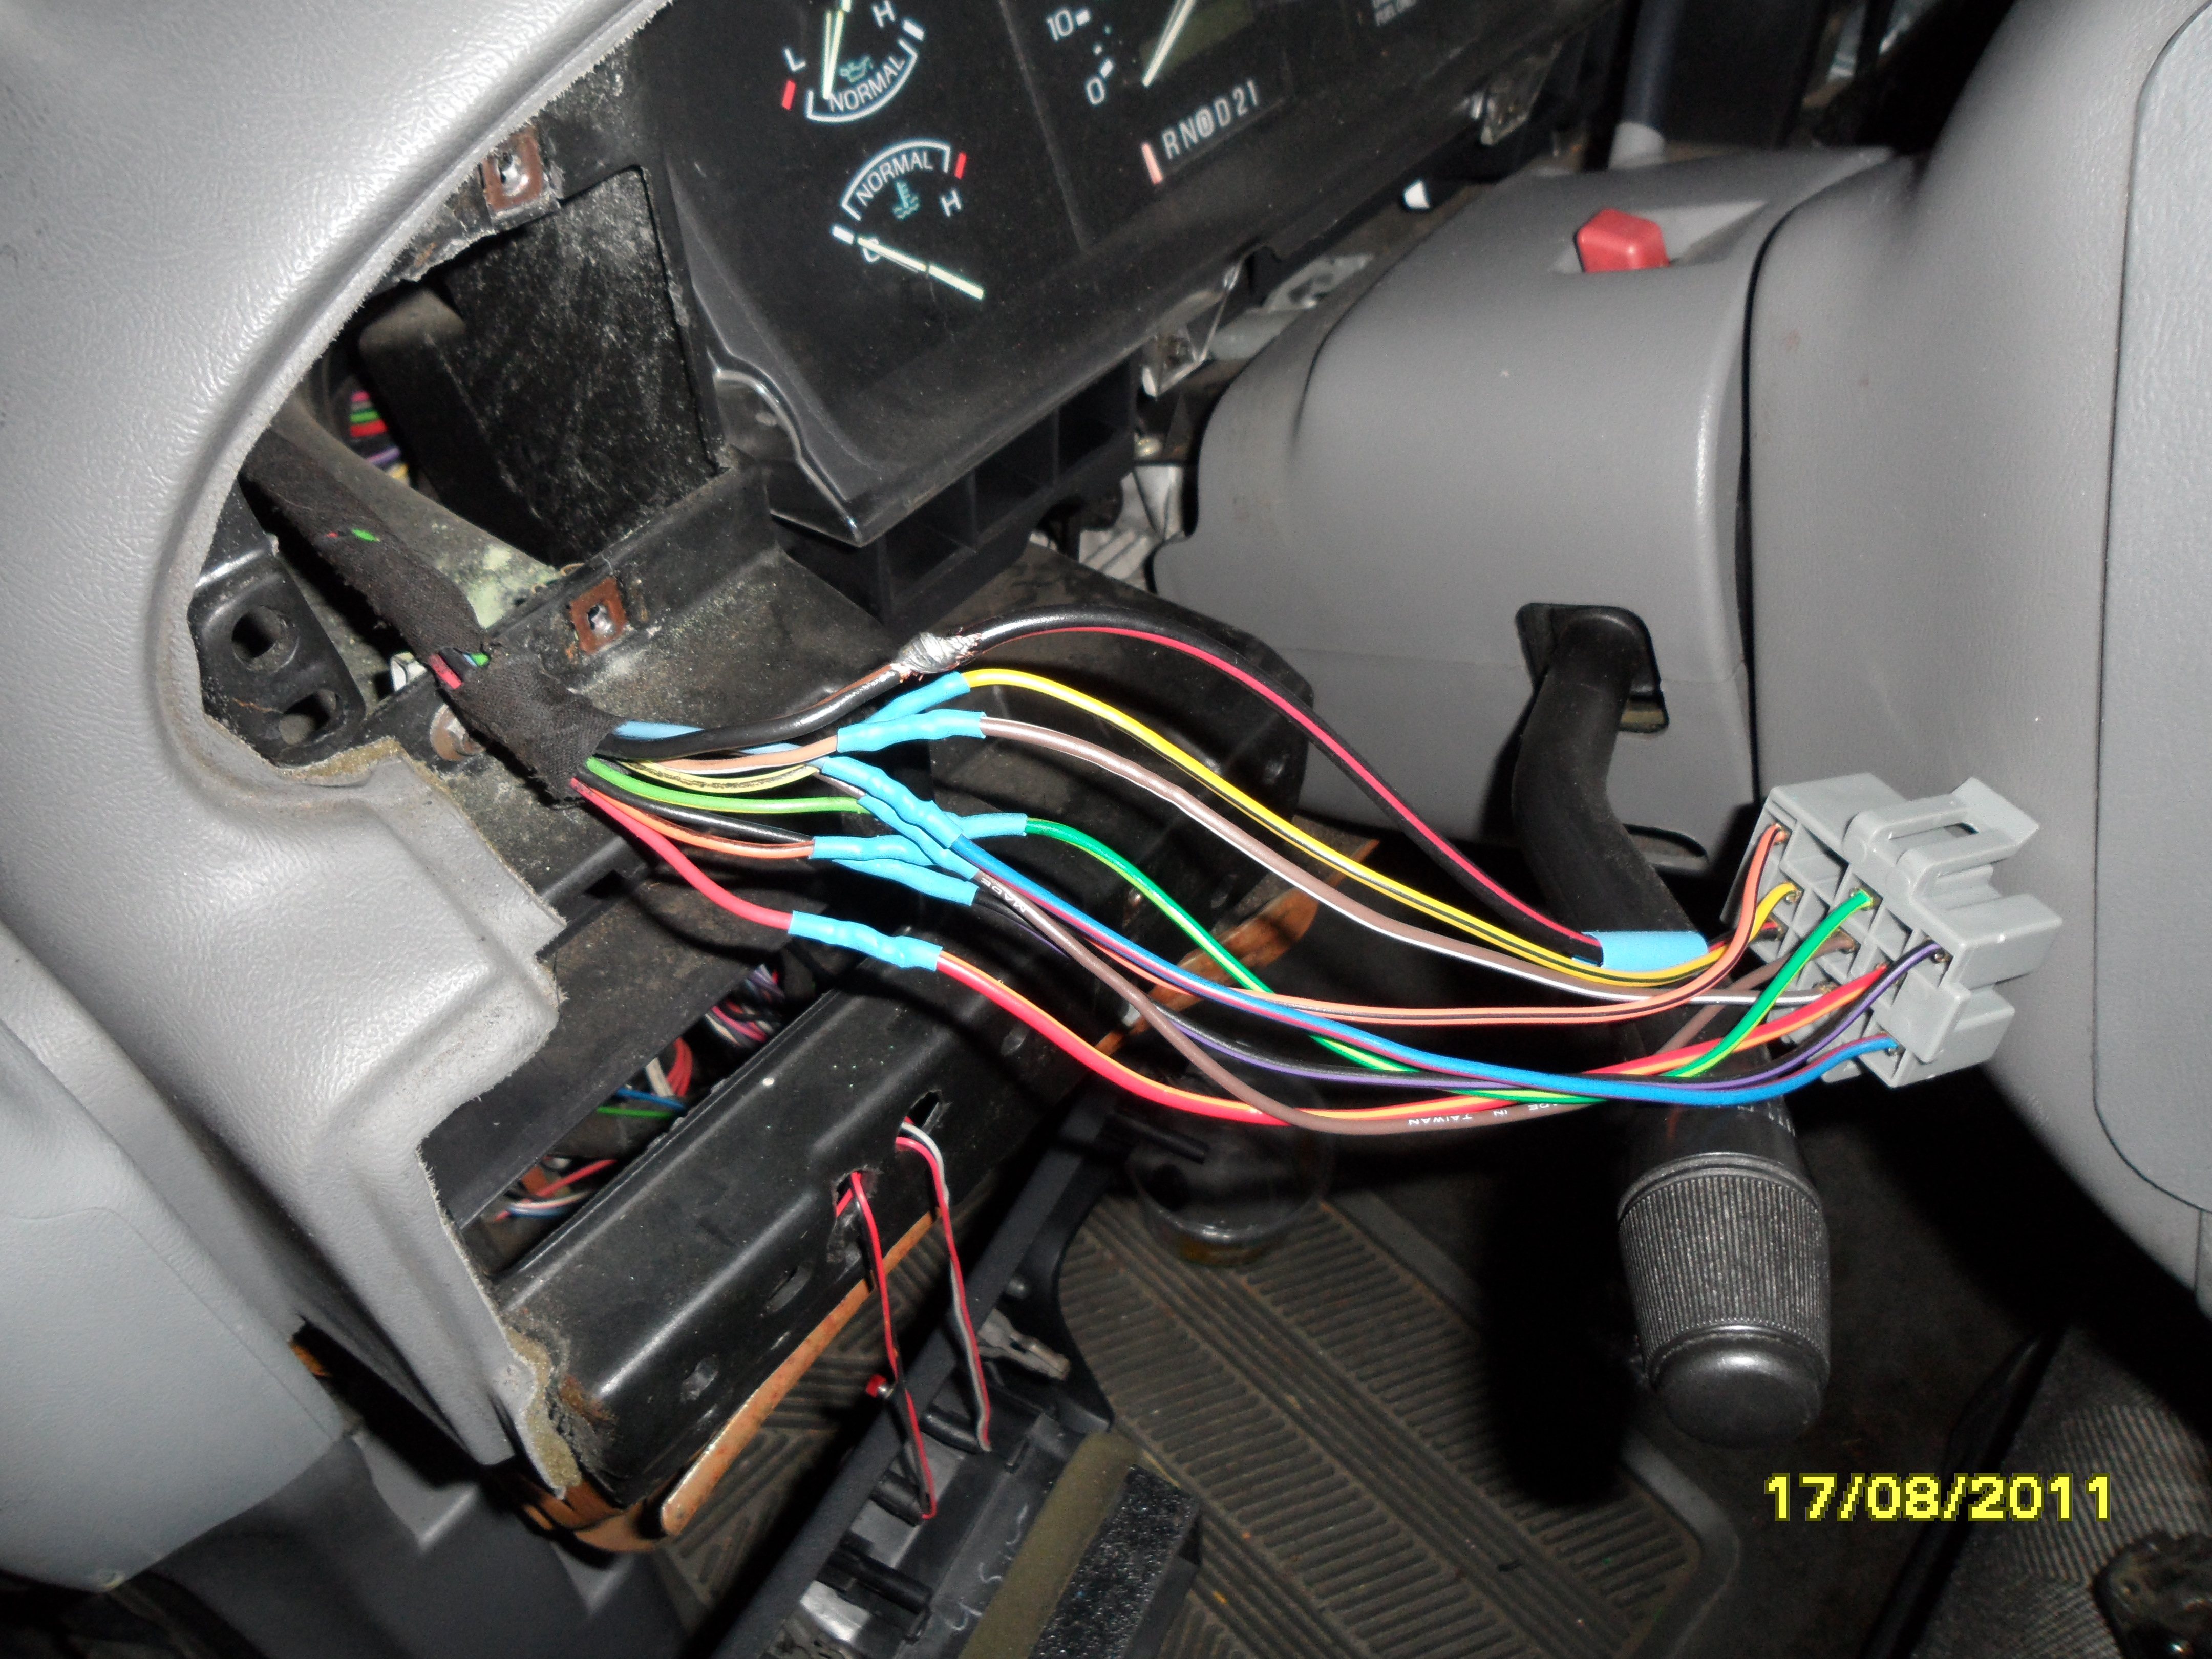

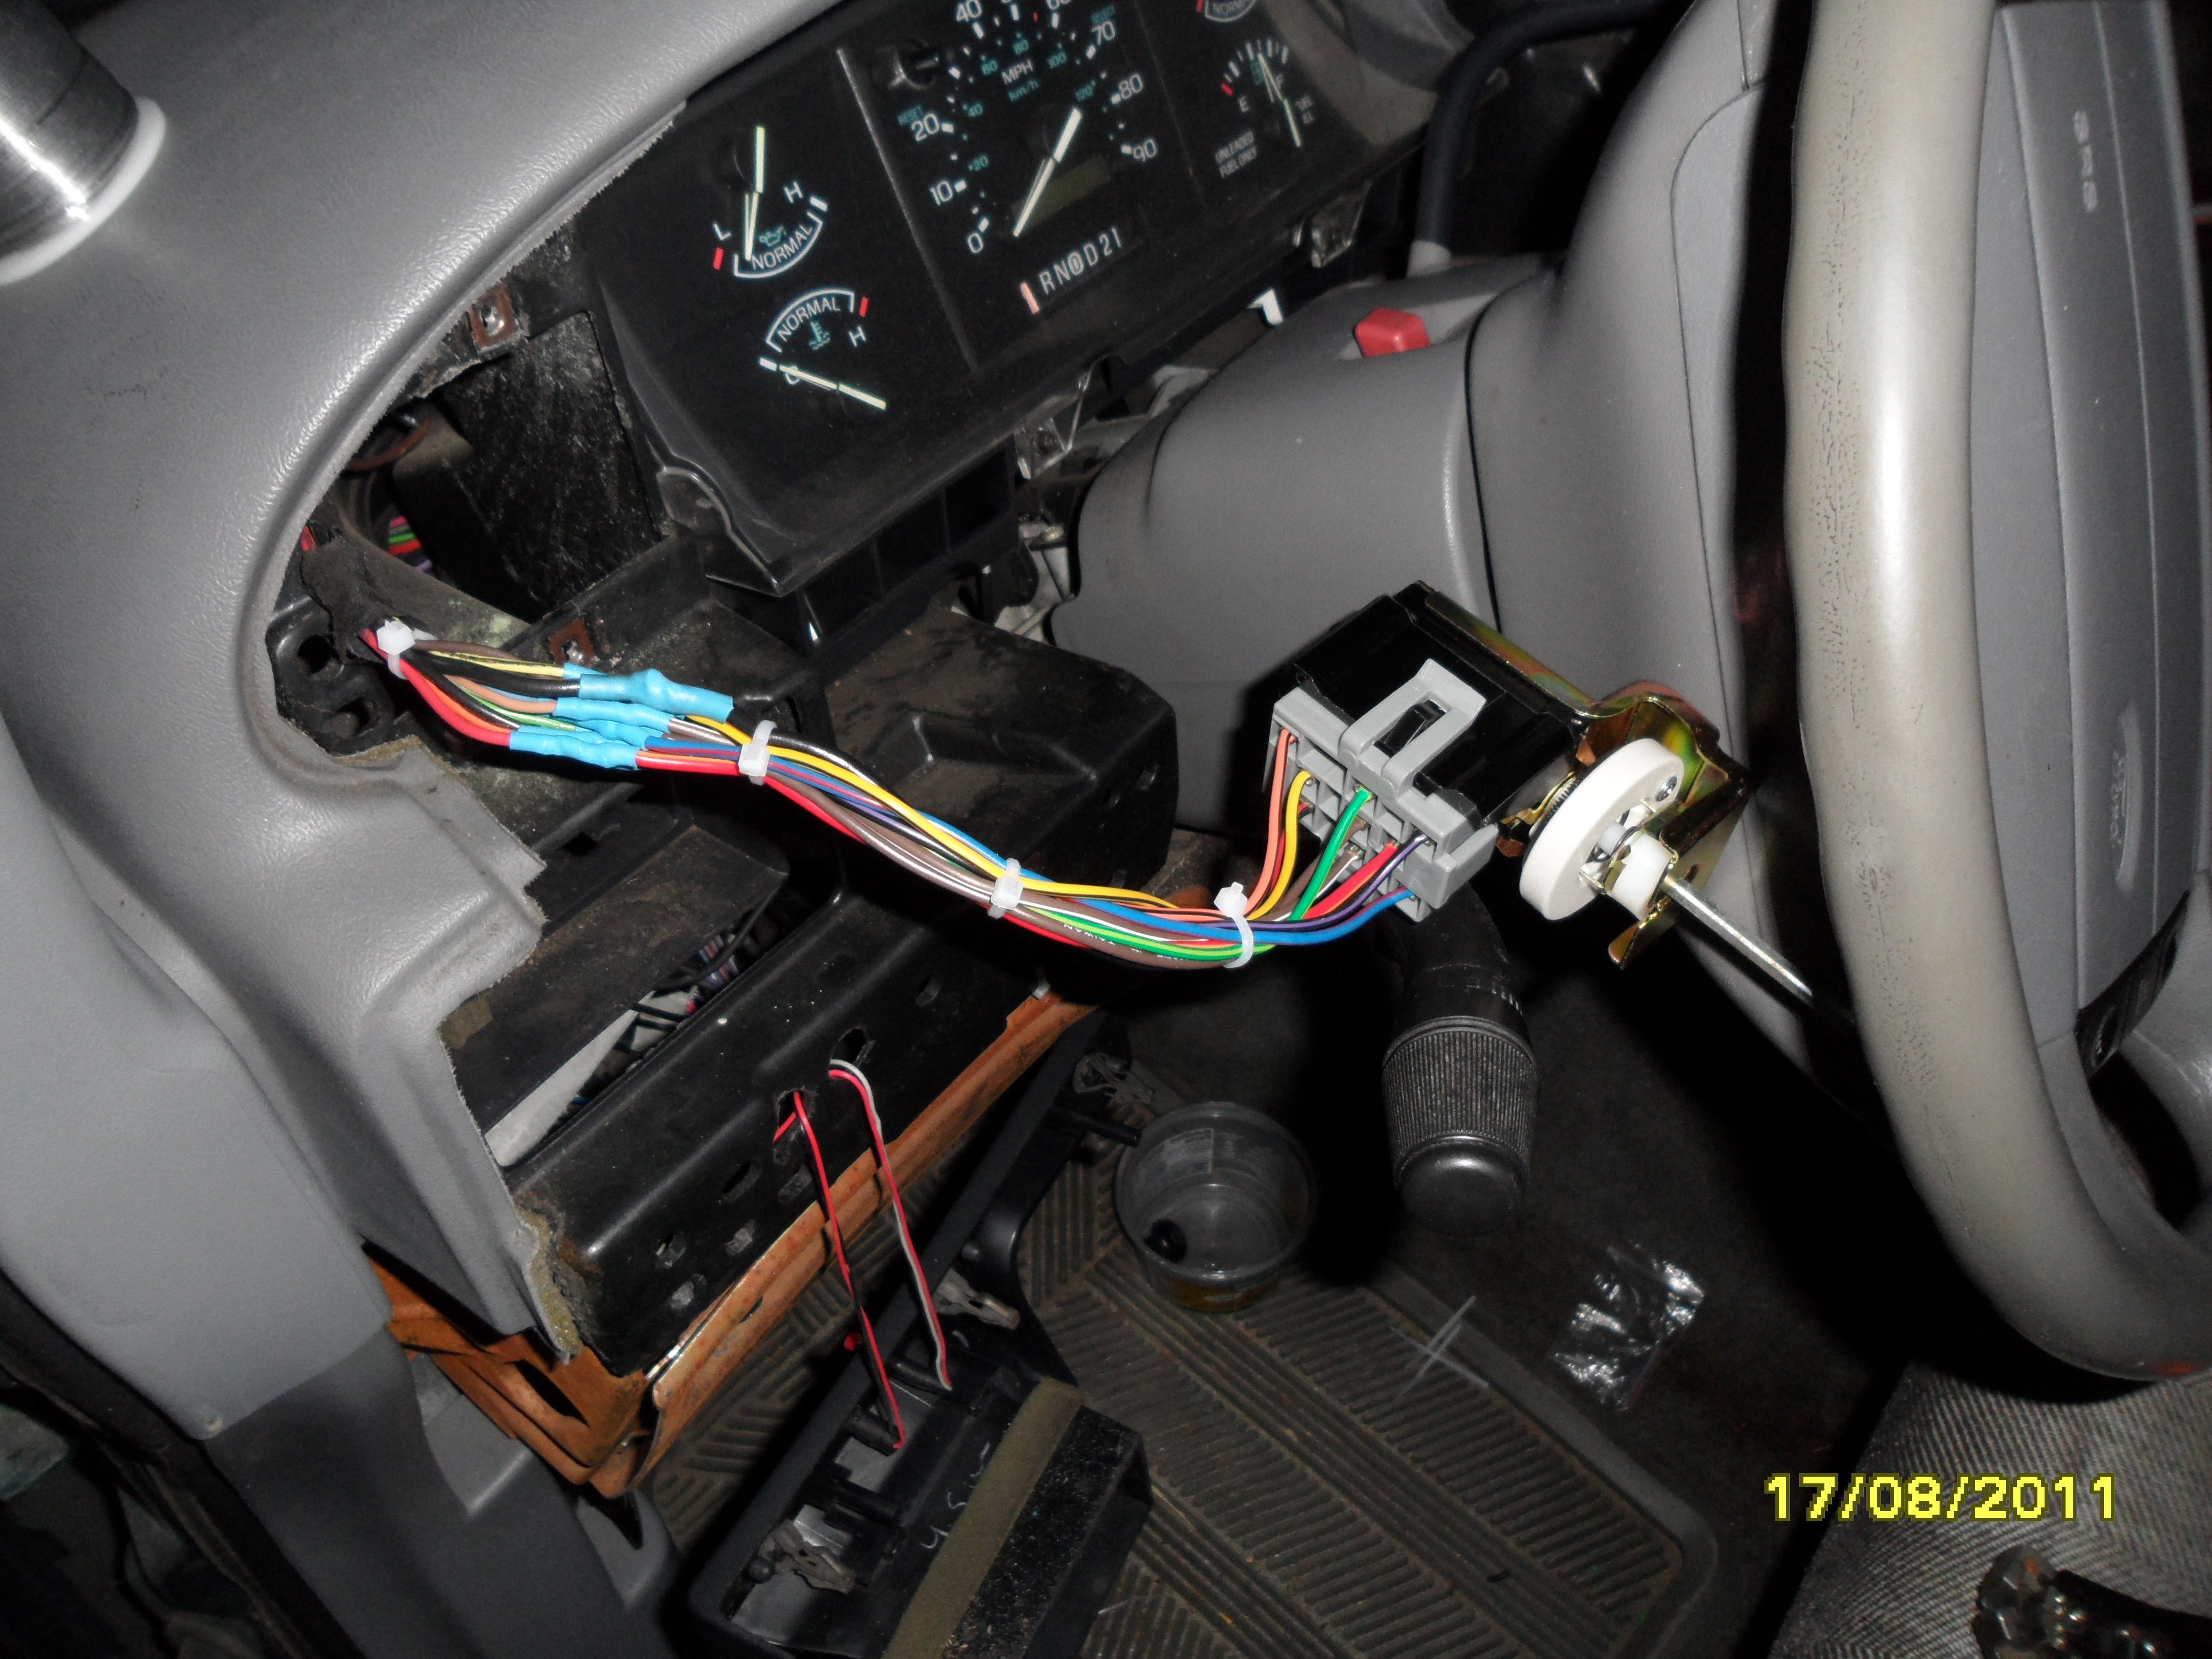
Reassembly is, as they say, the reverse of disassembly.
Lead Driver

Joined: Sep 2003
Posts: 7,015
Likes: 208
From: SoCal

Al, that's got to be the most thoroughly detailed description I've ever seen. I'm sure everyone here greatly appreciates your taking the time to post this procedure.
We all know about how the headlights can overheat the light switch, but this is the first time I've seen marker lights (parking lights) do that. The solution for the headlight problem is relatively simple; install a relay at the headlights to switch the high currents going to the bulbs to take the load off of the the headlight switch and the Hi/Lo switch. But it looks like the parking lights may also need to be protected by relays.
We all know about how the headlights can overheat the light switch, but this is the first time I've seen marker lights (parking lights) do that. The solution for the headlight problem is relatively simple; install a relay at the headlights to switch the high currents going to the bulbs to take the load off of the the headlight switch and the Hi/Lo switch. But it looks like the parking lights may also need to be protected by relays.

Senior User
Joined: Jun 2004
Posts: 208
Likes: 1
From: Brooklyn, NY
I was trying to push the release button while the **** was pulled out, and thus the lights were on. I burned myself on the large round heat sink attached to the switch. I realized that it is where the extra power to the lights are being wasted when the dashboard lights are dimmed. I had been turning the **** to get to the notch. When I turned the **** back to full brightness, the switch cooled off.
So maybe keeping your dash lights dimmed has something to do with the switch melting.
So maybe keeping your dash lights dimmed has something to do with the switch melting.
Lead Driver
Joined: Sep 2003
Posts: 7,015
Likes: 208
From: SoCal
Keeping your dash lights VERY dim should not overheat the switch. Keeping them slightly dim can burn up the rheostat or blow its thermal fuse; it's pushing almost full current through a very few windings on the rheostat. So if you want to dim the dash lights, either dim them a lot, or don;t dim them at all, where the rheostat wiper is on the direct contact.
Thread Starter
|
FTE Community Team
Joined: Nov 2001
Posts: 1,843
Likes: 252
From: Oak Harbor, Washington
Once the metal female spring terminals get hot, they lose their spring
 Which further increases the joint's resistance, generates more heat, melts the plastic around the connectors, etc. I think that the taillight/marker terminal was just in a very hot place at the time other terminals were generating heat of their own. Usually, of course, the headlight terminals themselves go south.
I have seen more failed connectors than switches. Probably a dozen? I'm of the opinion that the connector sizes should have been spec'd heavier-duty, and the gauge of the HL wiring should have been one size larger. I don't point fingers at the switch itself, I think it's plenty heavy.
The solution for the headlight problem is relatively simple; install a relay at the headlights to switch the high currents going to the bulbs to take the load off of the the headlight switch and the Hi/Lo switch.
But it looks like the parking lights may also need to be protected by relays.
Trailer towing lights is a situation where a relay is warranted, and that's what Ford did for the factory tow pkg . . . reference this post for pics of the heavy-duty relay tow packages Ford installed in the earlier Aeros.
Then there's the LED replacement lamps. For all but the headlamps, LED lamps could more than halve the current draw. But watch out for the LED brake lamps -- there's a thread here somewhere about needing enough draw to toggle the ECM properly, and there's a special part or lamp to make that happen. I'm just too lazy to go look it up.

Thread
Thread Starter
Forum
Replies
Last Post
Gottalovethemf100s
1973 - 1979 F-100 & Larger F-Series Trucks
2
Apr 1, 2009 11:09 PM
chaynes171
1994.5 - 1997 7.3L Power Stroke Diesel
3
Oct 26, 2002 01:37 PM


