


Another Manual Lumbar Fix

Thread Starter
|
New User
Joined: Aug 2011
Posts: 8
Likes: 0
Another Manual Lumbar Fix
I recently purchased my 01 F150 from my mother and her husband. I was discussing with him the fact that the lumbar support sucked because it hurt my back. He informed me that the support had broken at some point during his ownership. I decided to pull the cover off my driver's seat today to take a look and see if I could figure out what failed. When I got the cover pulled up I found that the plastic lumbar "ladder" was busted at the bottom.
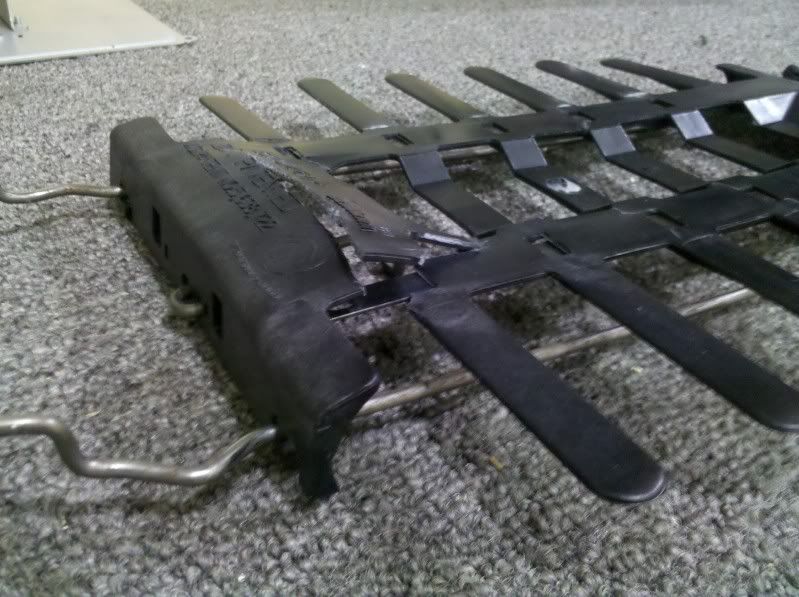

Here is a picture of the spring steel metal stays that create tension on the cable as you rotate the **** and force the "ladder" back to the flat position when you release the tension on the ****.
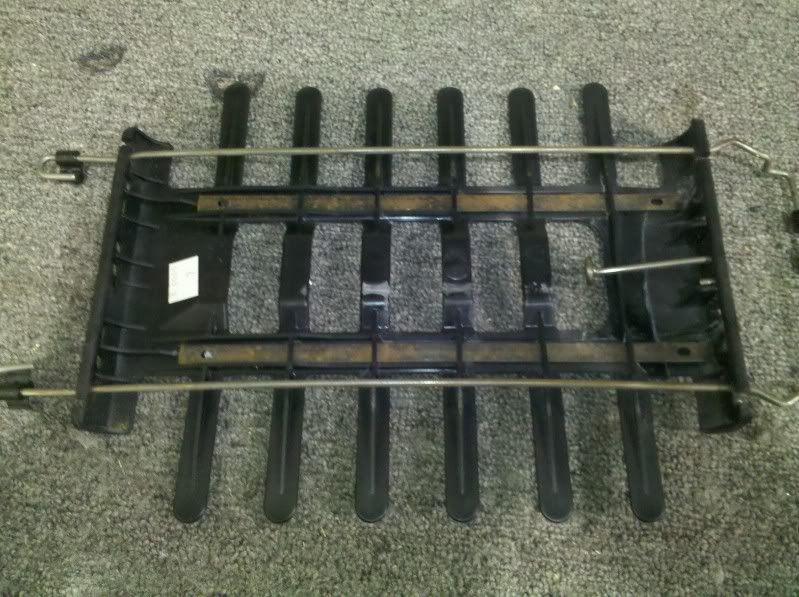
I kinda thought for a bit on how I wanted to tackle fixing this and decided to remove the spring steel stays on either side and support the entire length of the "ladder" with 1/8" abs plastic. It seemed flexible enough and offered roughly the same resistance and the two metal stays that I removed.
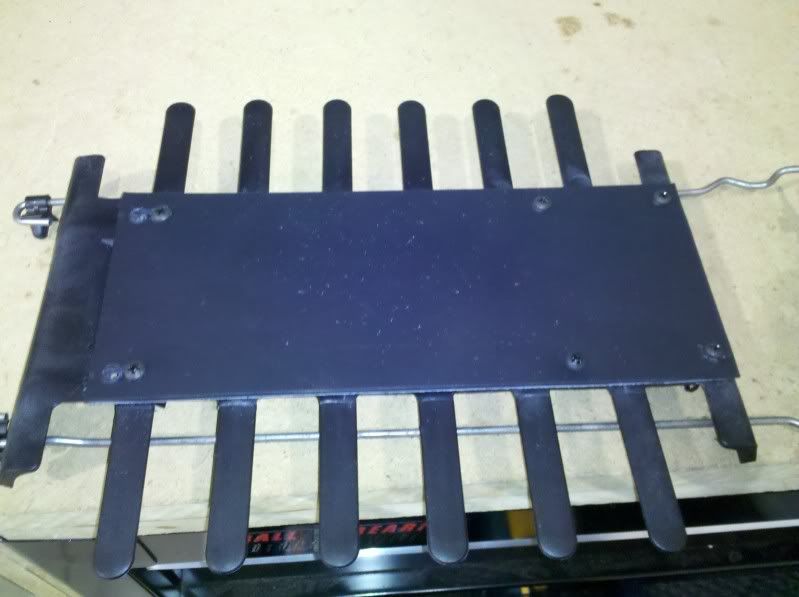
On the other side, I put speed clips to secure the screws so the couldn't just pull through the plastic over time. You can see how positioned the screws so the plastic would hold the busted area of the "ladder" together and keep it strong.

Also, it's hard to tell, but the top two screw holes were slotted so that when the **** was cranked and the unit flexed, it would allow it to glide some and wouldn't stress the plastic at those screw points. You can see the repaired part and the two stays that were removed.
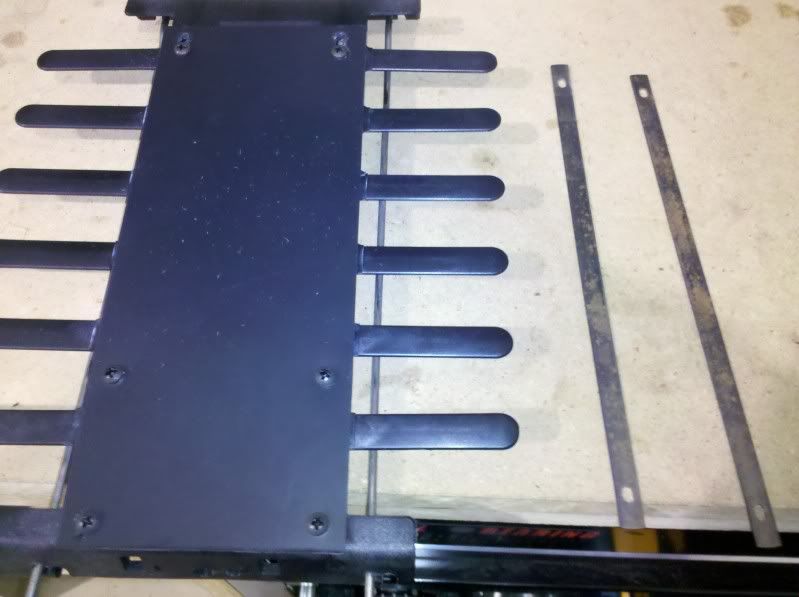
I reinstalled the whole assembly into the seat back and attached the cable and it seems to work like a dream. Hopefully this might help someone else save $95 which I read is the replacement cost of the new support.
Here is a picture of the spring steel metal stays that create tension on the cable as you rotate the **** and force the "ladder" back to the flat position when you release the tension on the ****.
I kinda thought for a bit on how I wanted to tackle fixing this and decided to remove the spring steel stays on either side and support the entire length of the "ladder" with 1/8" abs plastic. It seemed flexible enough and offered roughly the same resistance and the two metal stays that I removed.
On the other side, I put speed clips to secure the screws so the couldn't just pull through the plastic over time. You can see how positioned the screws so the plastic would hold the busted area of the "ladder" together and keep it strong.
Also, it's hard to tell, but the top two screw holes were slotted so that when the **** was cranked and the unit flexed, it would allow it to glide some and wouldn't stress the plastic at those screw points. You can see the repaired part and the two stays that were removed.
I reinstalled the whole assembly into the seat back and attached the cable and it seems to work like a dream. Hopefully this might help someone else save $95 which I read is the replacement cost of the new support.
Thread Starter
|
New User
Joined: Aug 2011
Posts: 8
Likes: 0

Thread Starter
|
New User
Joined: Aug 2011
Posts: 8
Likes: 0
Yea, I noticed that also. I actually think the way it works is pretty slick, but I agree it's probably not the best designed lumbar support in the world. This truck has 168K miles on it, not sure when it broke, but it's still a lot of seat time. At least it's fairly easy to work on.

New User
Joined: Nov 2002
Posts: 12
Likes: 0
How does this work?
Could someone explain how this lumbar assemble works? I just don't see where the cable hooks up or what is even the top or bottom. I have to pull mine apart and fix it this weekend.
Thanks
Thanks
Trending Topics
Thread Starter
|
New User
Joined: Aug 2011
Posts: 8
Likes: 0
Sorry for the delayed response. I't actually so simple it's hard to explain. Once you pull the cover up on the seat it will be pretty self explanatory.
FTE Stories
Ford Trucks for Ford Truck Enthusiasts

10 Things Every Truck Owner NEEDS (2026 Edition)
Michael S. Palmer
Rezvani's Latest Post-Apocalyptic Monster Is a Ford F-150 Raptor Underneath
Verdad Gallardo
Top 10 Most Expensive Ford Trucks Ever Sold on Bring a Trailer
Joe Kucinski
2027 Ford Super Duty Buyer's Guide (Every Model, Engine, & Package)
Brett Foote
Top 10 Ford Truck Tragedies
Joe Kucinski
AEV FXL Super Duty - the Super Duty Raptor Ford Doesn't Make
Brett Foote
Lobo Vs Lobo: Proof the F-150 Lobo Should Be Even Lower!
Michael S. Palmer
Ford's 2001 Explorer Sportsman Concept Looks For a New Home
Verdad Gallardo
10 Best Ford Truck Engines We Miss the Most!
Joe Kucinski
New User
Joined: Nov 2002
Posts: 12
Likes: 0
<a href="http://s136.photobucket.com/albums/q194/Drives31/?action=view&current=image010.jpg" target="_blank"><img src="http://i136.photobucket.com/albums/q194/Drives31/image010.jpg" border="0" alt="Photobucket"></a>
Little different but an easy fix.
<a href="http://s136.photobucket.com/albums/q194/Drives31/?action=view&current=image011.jpg" target="_blank"><img src="http://i136.photobucket.com/albums/q194/Drives31/image011.jpg" border="0" alt="Photobucket"></a>
My ziptie repair, I might take it apart again and leave it looser, it always was a little tight even when the **** was completely loosened.
More Turbo

Joined: Oct 2005
Posts: 560
Likes: 7
From: MICHIGAN
Off topic but what kind heated seats did you install?

Thread
Thread Starter
Forum
Replies
Last Post
hasteranger
Excursion - King of SUVs
20
Dec 23, 2015 11:45 AM