
Pulled out the tester and found out my parking brake problem.
#1
 11-03-2010, 07:42 PM


Pulled out the tester and found out my parking brake problem.
Sure enough, the parking brake switch isn't grounding. I apply ground to the connector and on comes the dash warning light. Twice I've driven off without releasing the parking brake since there's so much torque that it's hard to tell that it's still engaged.
I've got an order in with parts guy ed for a new switch.
How do you remove and replace this switch? It might be more obvious when looking at the new switch? Seems a little tight up in there.
I've got an order in with parts guy ed for a new switch.
How do you remove and replace this switch? It might be more obvious when looking at the new switch? Seems a little tight up in there.
Last edited by thordehr; 11-03-2010 at 09:33 PM. Reason: spelling
#2
11-03-2010, 08:29 PM

#3
11-03-2010, 09:32 PM
First gear and more gas... it would have to be a big stomp. Once it gets rolling, there's no noticing it. I need the idiot light.


#5
11-04-2010, 01:24 AM
#6
11-15-2010, 11:43 PM
Update! Parking brake switch removal/installation instructions included! Save $8.54
I got my new parking brake warning switch....
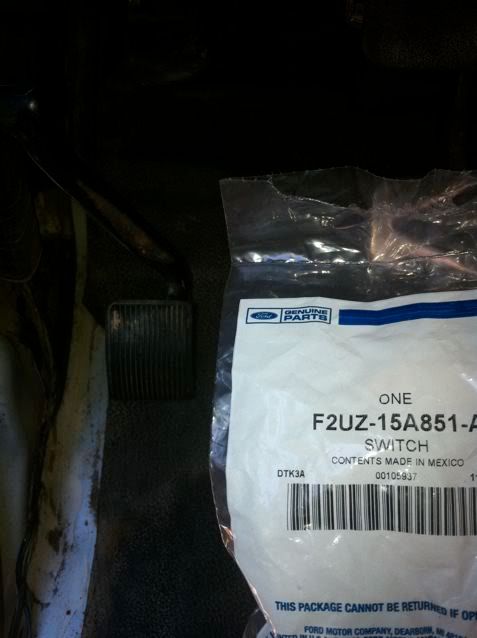
Partsguy ed came through of course! The switch is cheap at $8.54. It is a really simple switch, so actually really easy to fix up if you want to go that route rather than buy a new one. I was already putting in an order for some more expensive parts so threw one in. I also wasn't sure if I was going to break it removing it to clean the contacts.
Looking at the switch (this is the old one) it became obvious that there is a hidden screw/bolt that attaches through the most forward portion of the switch. There is also a locating tang on the switch that goes into a hole in the parking brake bracket that helps locate it. (right above my middle finger in this picture)
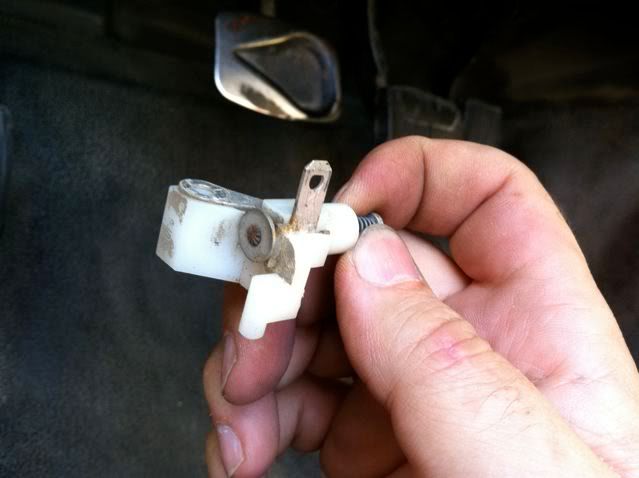
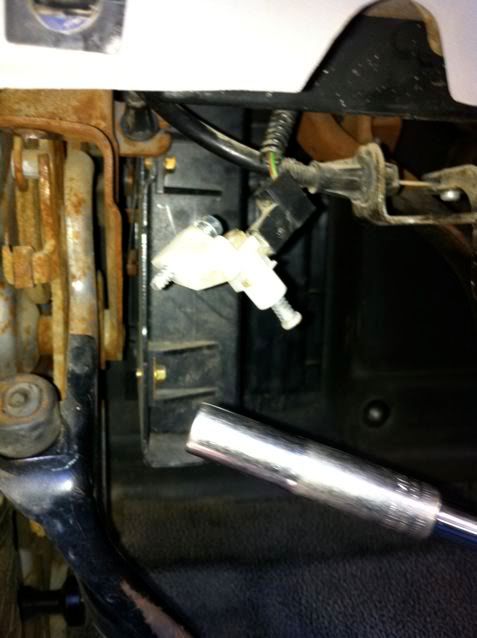
The bolt is easily accessible. It is actually a 7mm self tapping screw. I used a socket and a straight 1/4" drive handle. It could just as easily be accessed with an extension and a ratchet, but it's really not that tight.
Here I accessed it from below the dash. I removed the panel that covers the fuse box to more easily see things but might not be necessary at all.
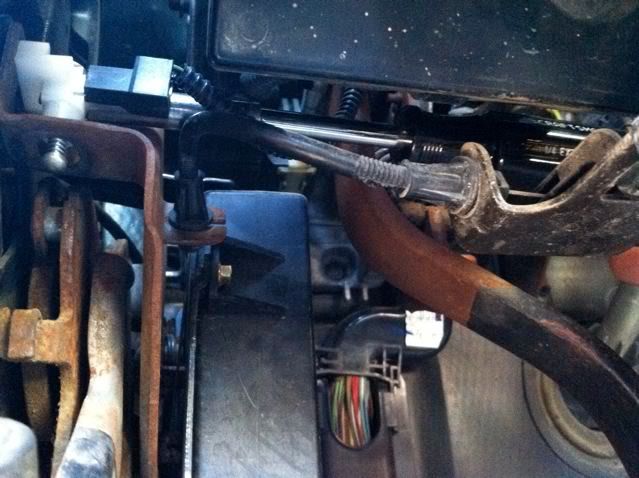
Here's a closer view.
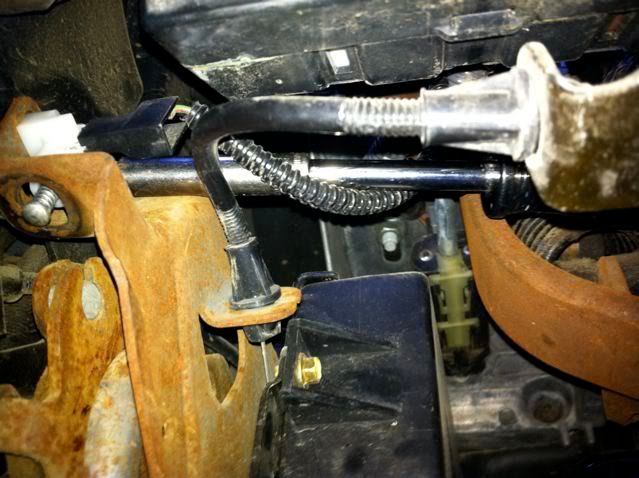
Here's the switch removed. It shows the placement of the connector and the mounting screw.
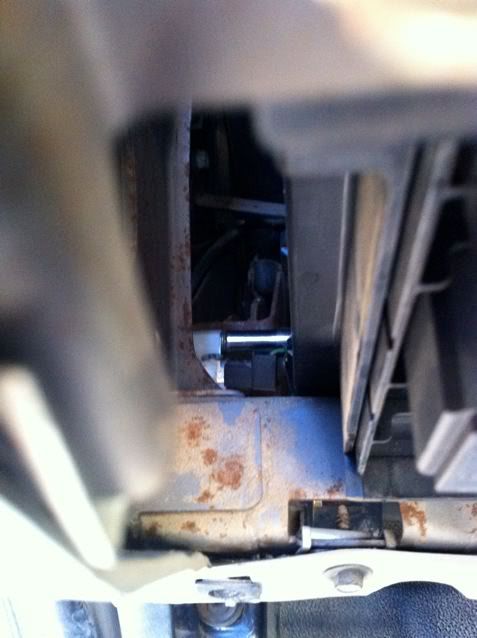
Here's a view from alongside and past the fusebox showing where the hidden fastener is.
Let's take a look at the switch again....
With the parking brake set, the spring extends the piston to the right bringing the metal disk across the two contacts. One contact goes to the terminal spade, the other contact goes to the screw mounting hole and the mounting screw in turn grounds that contact to the chassis through the metal of the parking brake bracket. Looking at mine, there was a build up of gook/corrosion on the underside of the disk and on the contacts. It could have been easily cleaned with a bit of sandpaper, a small file, or even the blade of a screwdriver. I imagine that it is rare that someone actually needs a new switch. The switch itself is so simple that it should be easily fixed. Replacement would only be necessary if the plastic cracked or the spring lost it's tension to close the contacts.
So, with this, hopefully I can save some of you $8.54 plus shipping.
Happy repairs and upgrades.
Thor
Partsguy ed came through of course! The switch is cheap at $8.54. It is a really simple switch, so actually really easy to fix up if you want to go that route rather than buy a new one. I was already putting in an order for some more expensive parts so threw one in. I also wasn't sure if I was going to break it removing it to clean the contacts.
Looking at the switch (this is the old one) it became obvious that there is a hidden screw/bolt that attaches through the most forward portion of the switch. There is also a locating tang on the switch that goes into a hole in the parking brake bracket that helps locate it. (right above my middle finger in this picture)
The bolt is easily accessible. It is actually a 7mm self tapping screw. I used a socket and a straight 1/4" drive handle. It could just as easily be accessed with an extension and a ratchet, but it's really not that tight.
Here I accessed it from below the dash. I removed the panel that covers the fuse box to more easily see things but might not be necessary at all.
Here's a closer view.
Here's the switch removed. It shows the placement of the connector and the mounting screw.
Here's a view from alongside and past the fusebox showing where the hidden fastener is.
Let's take a look at the switch again....
With the parking brake set, the spring extends the piston to the right bringing the metal disk across the two contacts. One contact goes to the terminal spade, the other contact goes to the screw mounting hole and the mounting screw in turn grounds that contact to the chassis through the metal of the parking brake bracket. Looking at mine, there was a build up of gook/corrosion on the underside of the disk and on the contacts. It could have been easily cleaned with a bit of sandpaper, a small file, or even the blade of a screwdriver. I imagine that it is rare that someone actually needs a new switch. The switch itself is so simple that it should be easily fixed. Replacement would only be necessary if the plastic cracked or the spring lost it's tension to close the contacts.
So, with this, hopefully I can save some of you $8.54 plus shipping.
Happy repairs and upgrades.
Thor
#7
11-15-2010, 11:50 PM
Trending Topics
#8
11-16-2010, 12:02 AM
#9
11-16-2010, 12:17 AM
My parking brake parts have no paint at all on them, they're raw steel. Looking at it, it's just surface rust. I could remove and paint those parts but it's not at all visible unless you have your head upside down under the dash. This was a welders truck and yes the inside was dusty and muddy when I got it, but that's it. It's a California truck and there's no rust on the cab or under the rubber mat / carpet at all. I'm about to remove the bench seat, the rubber carpet, then scuff and spay lizardskin sound/heat over the floor and up the firewall.
#10
11-16-2010, 12:27 AM
My parking brake parts have no paint at all on them, they're raw steel. Looking at it, it's just surface rust. I could remove and paint those parts but it's not at all visible unless you have your head upside down under the dash. This was a welders truck and yes the inside was dusty and muddy when I got it, but that's it. It's a California truck and there's no rust on the cab or under the rubber mat / carpet at all. I'm about to remove the bench seat, the rubber carpet, then scuff and spay lizardskin sound/heat over the floor and up the firewall.

#11
11-16-2010, 12:55 AM
(I'll start a new thread documenting the interior removal and sound / heat insulation modifications.)


Thread
Thread Starter
Forum
Replies
Last Post
bryanmartin
1973 - 1979 F-100 & Larger F-Series Trucks
7
06-01-2016 08:54 PM
JPdiesel
Electrical Systems/Wiring
5
09-15-2011 11:06 PM