Ford F-150/F-250: How to Replace Idler and Tension Pulleys
Squeaky belts and pulleys are the bane of any person who has to deal with them. Swapping out those noisy pulleys and belts its actually a pretty simple task that doesn't require any special tools or skill. Put and end to the whining in your F-150 or F-250's front-end below.
A bad pulley can be very annoying and with quite a few on your motor, hard to diagnose. The symptoms will start with a squealing or chirping with the engine warming up and then eventually move to having that sound all the time. Luckily, the parts aren't too expensive and replacing them is relatively easy.
Pro-Tip
You'll want to diagnose the problem before throwing parts at it and wasting money. The first part to rule out is the serpentine belt, to do this apply some belt dressing and then start the truck. If the noise goes away then the belt is the problem not the pulleys.
If the sound still persists then you'll need to check the pulleys. One by one, apply WD-40 to each pulley and start the motor. If the sound goes away on that pulley, then that one is the problem pulley. Refer to the diagrams at the end for the pulley layout for your specific engine.
That being said, when one pulley wears out, the others won't be far behind. So if you have the extra money, it won't hurt to go ahead and replace them all at once.
Pulleys aren't terribly expensive. The tensioner will cost about $40 to $50 depending on where you buy it and shipping costs. The idler pulleys cost between $15 and $30. A serpentine belt can cost between $35 and $50 depending on the brand of belt you're buying. If you take it to shop, expect to pay another hundred dollars or so for installation.

Materials Needed
- 1/2" drive ratchet
- belt removal tool (dependent on motor)
- socket set
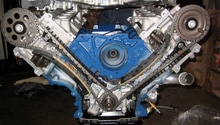
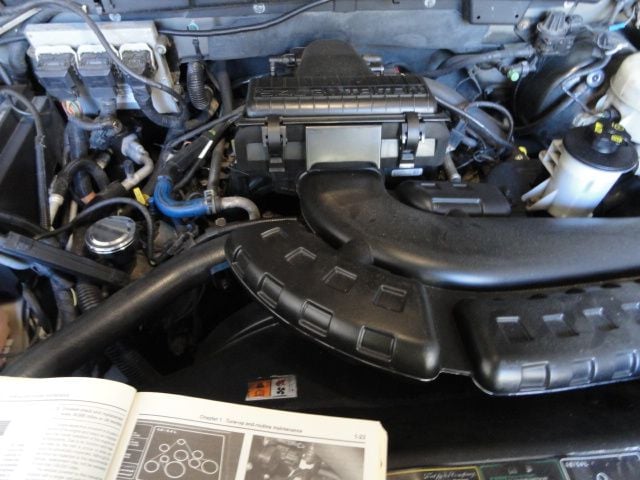
Step 1 - Gain access to the pulleys
Depending on your engine bay layout, you may find you'll need to remove some pieces to have enough room to get to the pulleys and belt. In most cases you'll only need to remove the air intake pipe running on top of the shroud. This is usually either held in place by 10mm bolts or by band clamps that can be loosened with a flat head.
Step 2 - Remove serpentine belt
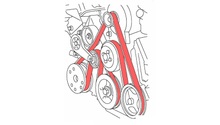
Both the F-150 and Super Duty have used the same type of tensioner for their engines for the last decade or so. Since there's a staggering number of engine configurations in both the F-150 and Super Duty, we've compiled the accessory belt diagrams at the bottom of the page. With these, you can identify the the belt's proper routing, the location of the tensioner, and the location of the idler pulley's and rollers.
Pro Tip
The one exception is if you have a 2009 and later F-150 with a 3.5L EcoBoost or 3.7L V6. Those engines have a non-adjustable tensioner. To remove the belt, you will need a stretchy belt installer/remover.
- Insert your 1/2" drive ratchet or belt removal tool into the hole on the tensioner.
- Rotate it clockwise towards the driver side to release tension.
- While holding the tool, unhook the belt from a pulley
- You can now release the tool and use both hands to remove the rest of the belt
(Related: How to Change your Serpentine Belt - Ford-Trucks.com)
Step 3 - Tensioner removal/install
- To remove the tensioner arm, you'll need to remove the three 10mm bolts on the arm
- You'll then be able to remove it, be sure to save your hardware in case the new one didn't come with it
- Install is the reverse of removing it, remember to torque to 18 ft/lbs.
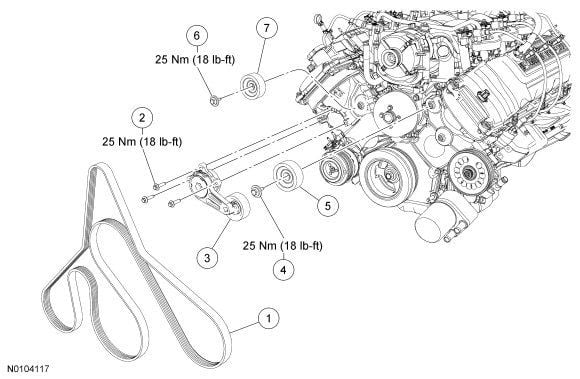
Figure 3. Remove the three bolts (labeled #2 in the diagram above) to remove the tensioner. 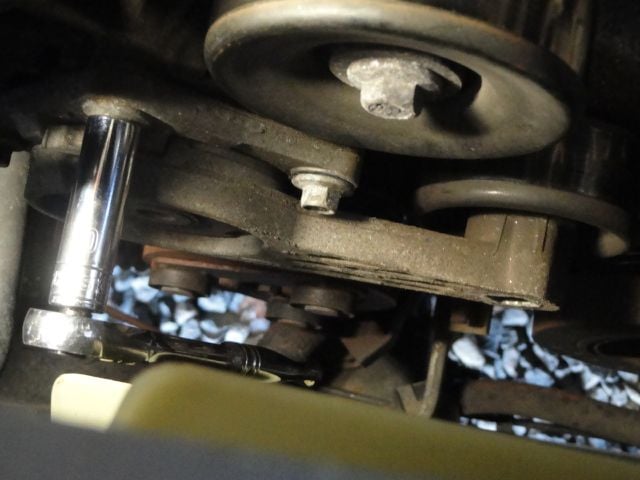
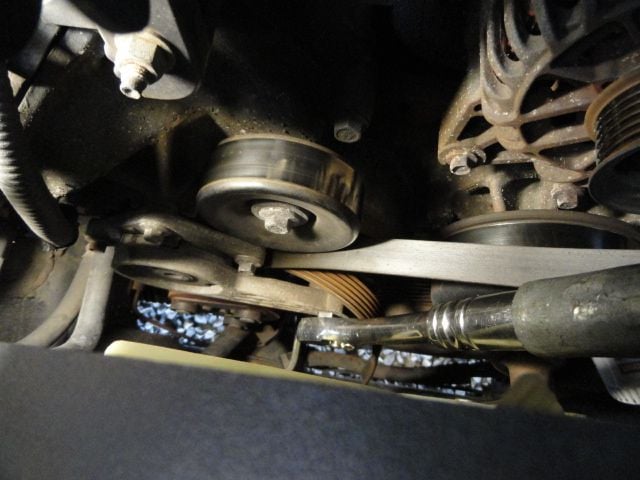
Figure 4. A ratcheting wrench is extremely useful here.
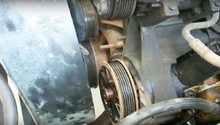
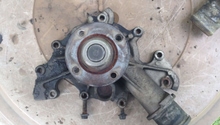
Step 4 - Pulley removal
- Holding the pulley with one hand, use a 13mm socket to remove the bolt in the center
- Install is the reverse, make sure it's seated properly and torque to 18 ft/lbs.
- Repeat for all idler pulleys
Step 5 - Re-install serpentine belt
This is probably the most challenging process in all of this and a second set of hands will definitely help. Be sure to study your belt layout diagram to make sure you loop the belt onto the pulleys in the correct positions.
- Loop the belt onto all but one pulley (I prefer to leave the last one as one of the closest to the tensioner if your working by yourself)
- Using your 1/2" drive ratchet or belt removal tool, release the tension
- While holding the tool in place, use your free hand to loop the belt onto the last pulley
- You can now remove the tool
- Do a final inspection to make sure the belt is both properly seated on all pulleys and that it is installed correctly
- Start the motor, and if it runs you have successfully installed it correctly
Engine Belt and Pulley Diagrams
For the F-150
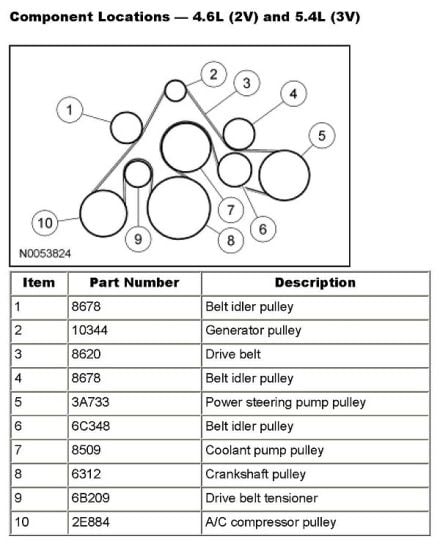
4.6L, 5.4L "Modular" V8 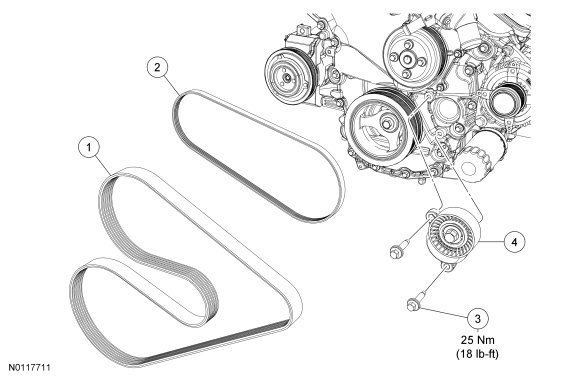
3.5L Ecoboost, 3.7L V6 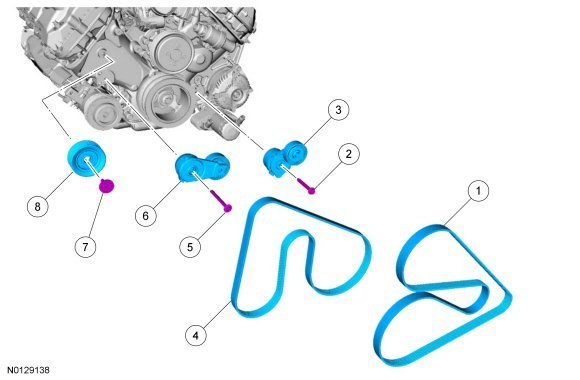
5.0L "Coyote" V8 6.2L "Boss" V8
For the F-250, F-350, and Super Duty trucks
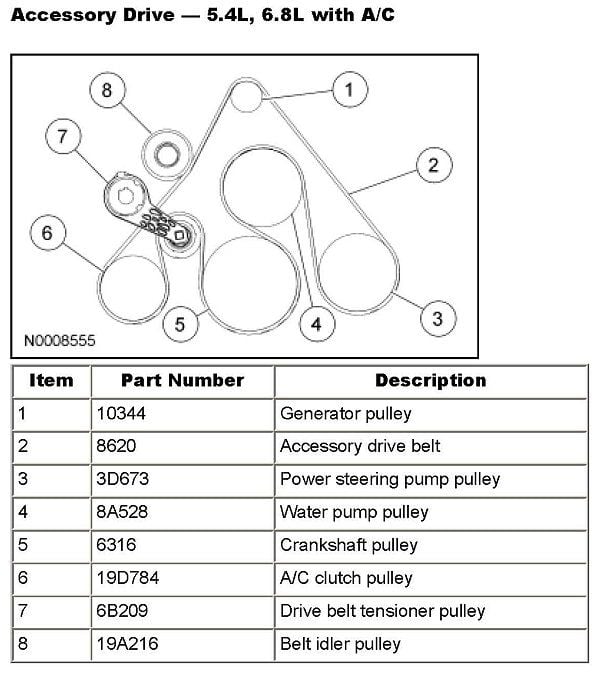
4.6L, 5.4L V8 "Modular" V8 and 6.8L Triton V10 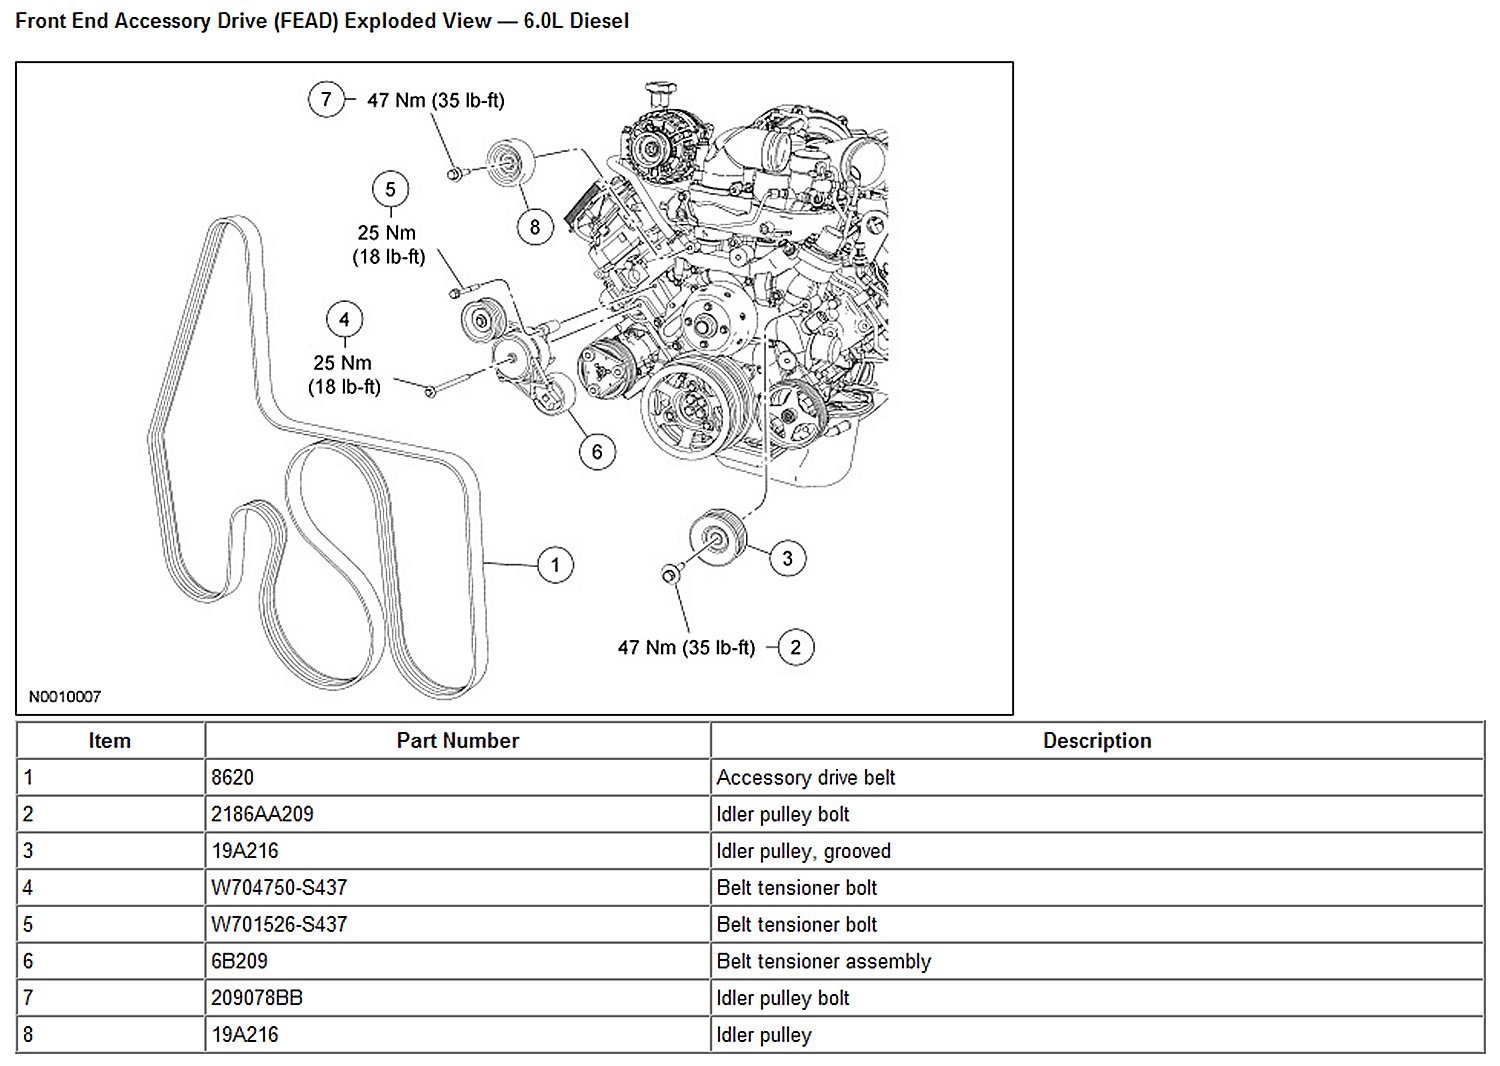
6.0L Power Stroke Diesel V8 
6.4L Power Stroke Diesel V8 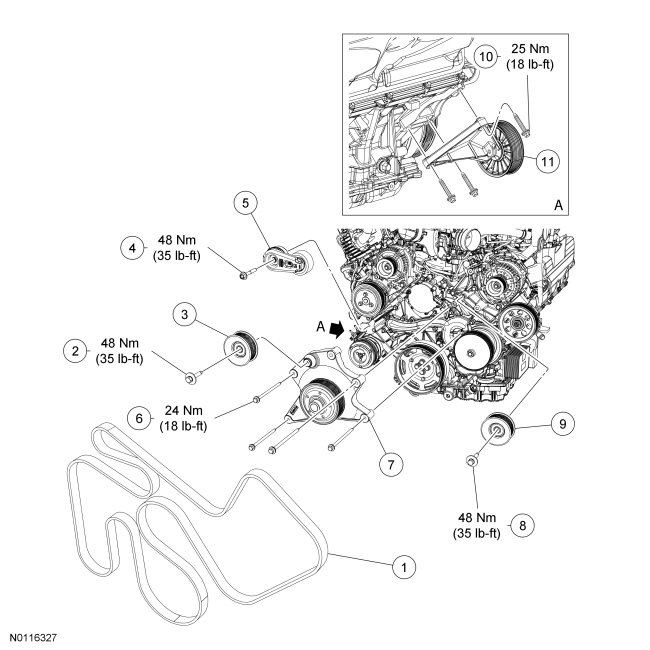
6.7L "Scorpion" Power Stroke Diesel V8
Featured Video: How to Replace Idler and Tensioner Pulleys
Related Discussion
How to Change Serpentine Belt Tensioner and Idler Pullies - F150online.com