Ford F-150/F-250: How to Replace Transfer Case
A transfer case going dead is a like losing a part of your transmission. It can be a big, expensive fix if you take it to the shop. Doing it at home can save you up $800 in labor costs. Learn how now.
This article applies to the Ford F-150 (2004-2014) and Ford F-250, F-350, and Super Duty trucks (2005-2014).
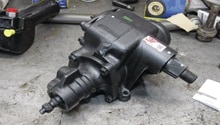
The transfer case on your Ford is a heavy piece of equipment your transmission uses to send power to the front and rear wheels. It is located behind the transmission and is not too difficult to remove, but care must be taken to avoid injury when removing this heavy piece of equipment. Aside from weight, it is also located near the exhaust and catalytic converter, so be sure your truck is sufficiently cooled before taking on this task.
Both the Ford F-150 and F-250's engines have similar transfer case setups even though their transmissions are different. The process for removal and installation is the same, however.

Materials Needed
- Tool 1 - 2 Floor jacks and / or jack stands
- Tool 2 - 1/2" ratchet
- Tool 3 - 3/8" ratchet
- Tool 4 - Deep-well sockets, 10-18mm and extensions
- WD-40
- Pry bar
- Buckets for fluids
- New transfer case fluid
- Torque wrench
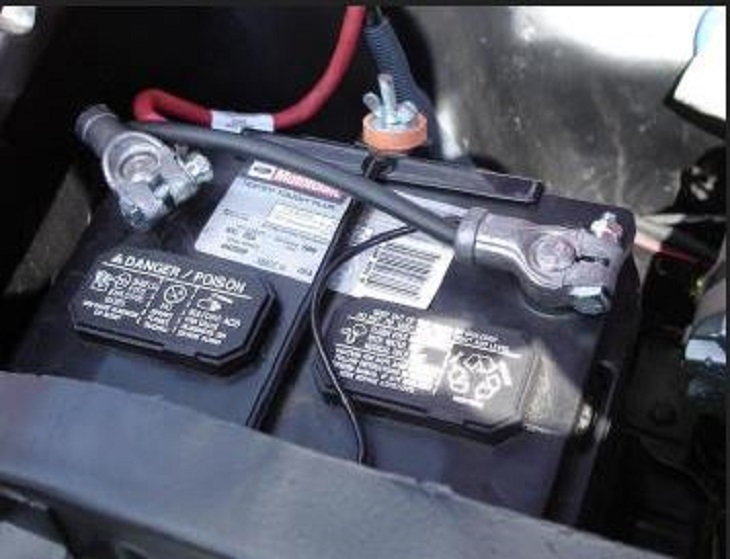
Step 1 - Remove the battery terminals
Always remove the battery terminals before starting any work. There is a wiring harness attached to the transfer case shift motor that must be disconnected before you remove the transfer case.
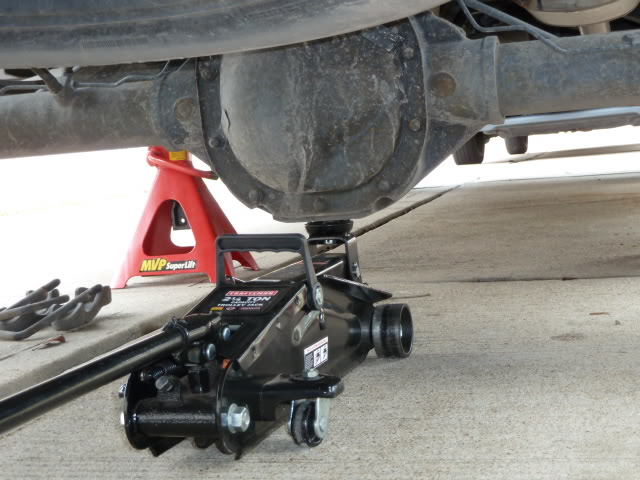
Step 2 - Jack up the rear end or use a truck lift
If you are using a floor jack, make sure you block all four tires. Use jack stands to support and stabilize the truck. Use an additional jack or extra jack stands to support the transfer case when you are ready to remove it from the back of the transmission.
Step 3 - Drain your transfer case fluid
Use a 3/8" ratchet to loosen the drain plug. The drain plug is located on the bottom left. The top plug is used for filling. Remove the top plug and then remove the bottom. This will help to drain faster.
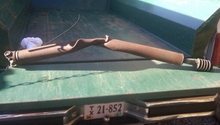
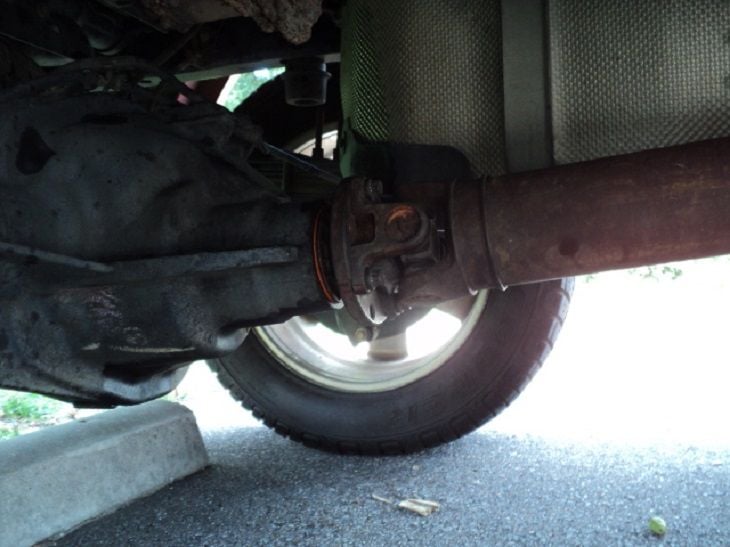
Step 4 - Remove the drive shafts
Unbolt the rear drive shaft from the transfer case. There are four 12mm bolts holding this in place. Once the bolts are removed, pull it from the back so you can pull it free of the transfer case. You might need some additional help doing this procedure. Repeat this process with the front drive shaft.
Pro Tip
The drive shaft slip yoke should only go back in two different ways; however, you may want to mark the relationship of the drive shaft to the rear differential plate. When removing the drive shaft, be sure to not damage the splines on the inside of the drive shaft housing.
Step 5 - Remove the skid plate (if you have one)
If you have a skid plate under your transfer case, you will need to remove it for easy access. There are only four 10mm bolts, two on each side connecting the skid plate to the frame.
Step 6 - Remove the transfer case
There is a transfer case wire harness that needs to be unhooked. It is a push-pull type of connector and should be easy to disengage. The transfer case is mounted on the back of the transmission with six 13mm bolts. The top two on each side are the most difficult to remove and you will do yourself a big favor by using a swivel extension type of ratchet to remove them.
Once you get all 6 bolts out, you will notice a steel dowel at the top left which helps align the transmission and transfer case. Since the transfer case mounts flush to the transmission, you should not need any additional alignment.
Pro Tip
The transfer case is heavy. After removing the bolts set it on an extra floor jack if you have one and wheel it out. Set the new transfer case and wheel it back under and jack it back up into place.
Step 7 - Clean the metal mating surfaces
Use a metal cleaner to clean the mating surfaces between the truck and the new transfer case. It is probably a good idea to use new gaskets, but if your old gaskets are still in good condition, you may opt to re-use them. Carefully clean the old and make note of the gasket surface. Any nicks or gouges will cause fluid leakage.
Step 8 - Raise the transfer case into position
Use the floor jack to raise the new transfer case into position and re-install the six 13mm bolts to the transmission. Torque the bolts to 37 ft. lbs.
Step 9 - Replace the skid plate, drive shafts and fluid
Replace the skid plate and drive shafts back into place. If you marked the shafts, make sure to align them the same way that they were when you removed the old transfer case. Replace the transfer case fluid with an approved Ford transfer case fluid.
Related Discussions
- Transfer case removal - Ford-Trucks.com
- Transfer case repair guide - Autozone.com
- How to replace your transfer case shift motor - YouTube.com
- Transmission removal install notes - F150 Forum.com
- Removing your drive shaft - F150 Forum.com
- Changing Ford F150 drive shaft - YouTube.com