Ford F-150/F-250: How to Replace Transfer Case Motor
A transfer case that isn't engaging likely has a burnt out motor. Replacing that motor in an F-150 or an F-250 is a lot easier than exchanging the entire transfer case. Get your 4WD back in action with this how-to guide.
This article applies to the Ford F-150 (2004-2014), and the Ford F-250 Super Duty (2005-2014).
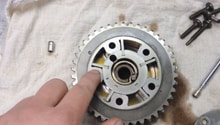
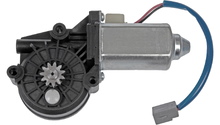
When F-150s have issues transferring into 4x4 mode, most of the time the culprit is the transfer case shift motor. This small motor looks similar to the wiper blade motor and is not too difficult to replace. Locating the motor might be the most difficult part of this task. It is located behind the transfer case, which is mounted behind the transmission.

Materials and Tools Needed
- 3/4" socket set with deep well sockets
- Floor jack or truck lift
- Flat head screwdriver
- Ball point pen or narrow-tip tap or punch
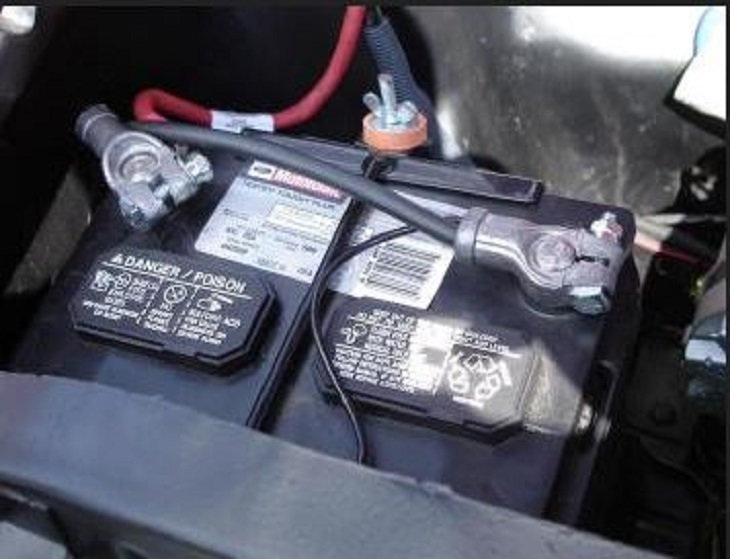
Step 1 - Disconnect battery
Disconnect the battery to prevent an accidental short when removing the wiring harness from the transfer case motor.
Related Article:
- How to Replace a Battery - Ford-Trucks.com
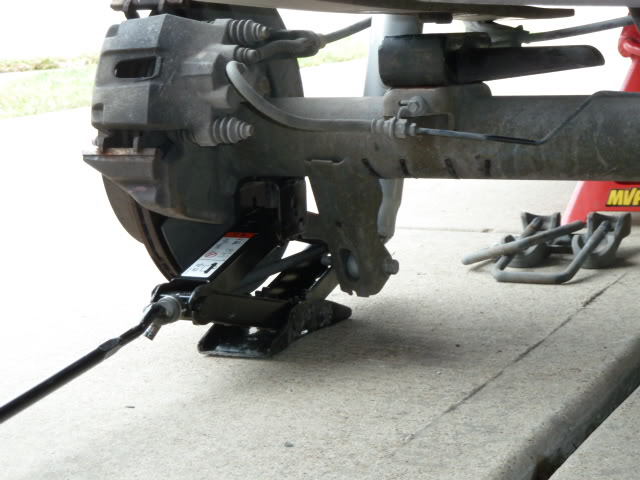
Step 2 - Lift the truck using a floor jack or truck lift
Lifting the truck to make space for removing the transfer case motor beforehand will make this job easier. The transfer case motor is located behind the transfer case, which is at the rear of the transmission.
Pro Tip
If using a jack, then make sure the truck is on level ground and block all four tires.
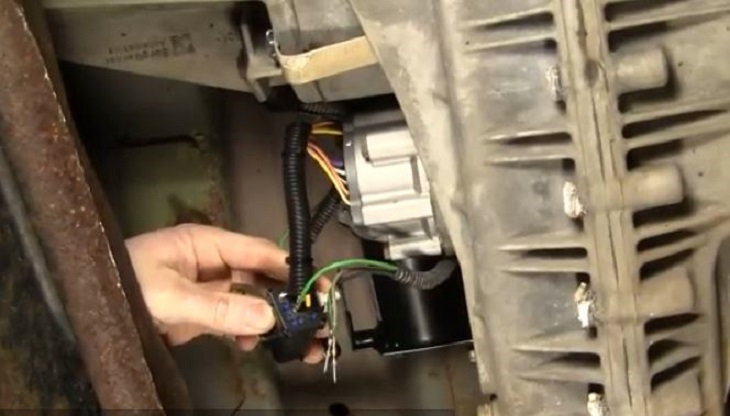
Step 3 - Disconnect wire harness from the motor
The wire harness must be removed from the motor before it can be unbolted and removed from the transfer case. There may be other components wired into the same harness. If so, they will also need to be removed from the harness. Be sure to note the colors and locations of these other wires. The main harness is connected via a clip. Push the clip in to disengage and disconnect. A ball point pen or a narrow-tip punch can be used to disconnect the other wires that are connected to this harness.

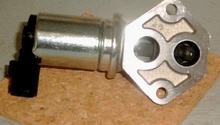
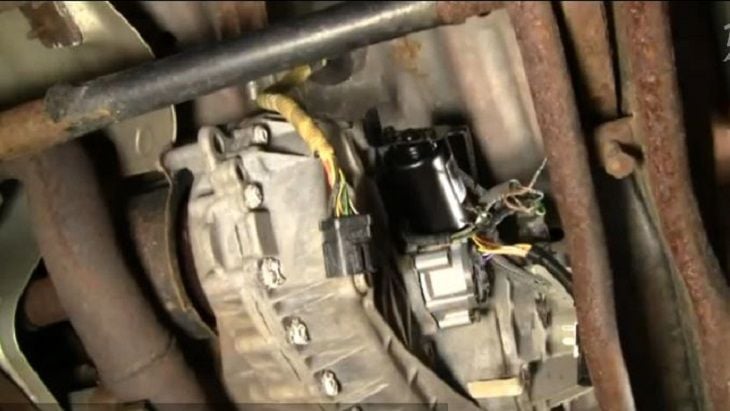
Step 4 - Remove the bolts from the motor
There are four to eight 10mm bolts that hold the shift motor to the transfer case. Using a ratchet with extension is the easiest way to remove these bolts. Remove each bolt and pull the motor from the transfer case. Use a flat head screw driver to pry the motor off; if there is any corrosion, then the transfer case motor can really stick to the transfer case.

Figure 4. Transfer case motor bolts. 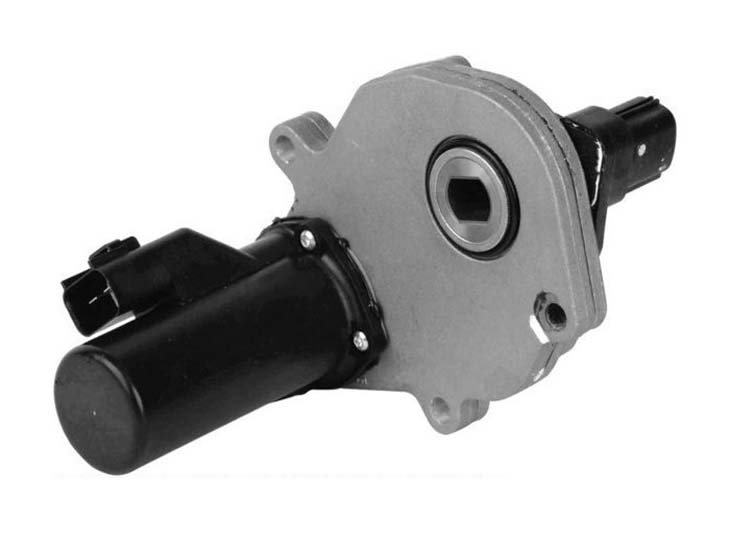
Figure 5. The transfer case motor from a Ford F-250.
Pro Tip
In many cases, the culprit of a bad motor is simply a $0.25 plastic bushing inside the motor that has been worn down or deformed that causes the internal gears to not engage. If you are skilled enough, you can take apart the motor and replace this bushing, saving you the cost of replacing the entire motor.

Step 5 - Install the new shift motor
Install the new replacement motor onto the transfer case. Make sure that all the mounting points match up to the holes for the 10mm bolts. Use the ratchet to secure the bolts back onto the transfer case. Make sure not to over-tighten the bolts or pinch any of the wires that need to be placed back into the wiring harness.
Pro Tip
The transfer case is aluminum, and over-tightening the bolts can easily strip the threads. A 1/2 turn past tight is all that is needed to properly secure the motor to the transfer case.
Step 6 - Replace the wiring harness
Replace the wiring harness. If you had to remove extra wires from other components, be sure to replace them in the same positions they were in prior to removal.
Step 7 - Reconnect the battery terminals
Reconnect the battery terminals, lower the truck, and check your 4x4 function. If it is not engaging, recheck your work, paying particular attention to the wiring and harness. Make sure that it is completely seated and recheck.
Related Discussions and Sites
- How to Diagnose Your 4x4 System - Ford-Trucks.com
- How to Remove Your Transfer Case Shift Motor - YouTube.com
- How to Rebuild a 4x4 Shift Motor - Explorer Forum.com