


Dennis Carpenter cab to frame mounting kit

Thread Starter
|
Freshman User
Joined: Aug 2010
Posts: 26
Likes: 0
Dennis Carpenter cab to frame mounting kit
Got the kit today, but have questions about the parts. If any of you have received the kit C7TZ-5400-S from Dennis Carpenter, can you help me out? The bushings were marked with the serial number that coincides with the instructions, but the all the numbers on the bushings were not clearly marked. The washers were all different sizes, and I only received 2 nuts instead of 4. Here are my questions...
1) There were 4 different washer sizes. The smallest one's were easy to figure out where they go, but the other 3 I am unsure of.
a) 2 large washers
b) 2 a little smaller than A above
c) 4 a little smaller than B above
2) Also, There were 2 sizes of sleeves. I assume one size goes on the front and the other on the back, but which is which? Cannot tell from the instructions.
3) I only received 2 nuts. Shouldn't there be 4?
4) One last thing on the bushings themselves. I can easily differentiate between the front and back top bushings as they are different shapes, but want to verify on the front and rear bottom bushings. Do the smaller one's go on the front or the back.
Hey Bill, my kit did not come with those special top hat looking washers? I wonder if they have discontinued using those in their kits? Do you happen to know?
Thank you in advance,
Steven
Senior User
Joined: Mar 2004
Posts: 117
Likes: 0
From: Portland, OR
Steven,
I just purchased those from Dennis Carpenter about a month ago. I was a little disappointed to see that they are not an exact replacement. The originals had the special washer/sleeve/bushings that were pressed together. I suppose that would have been harder to make and install so they went with just regular (large) washers and separate sleeve pieces.
They short-changed me two nuts as well. They are the oval locking type so they are harder to find. I just went with a regular nut and lock washer.
The largest rubber pucks go on top of the frame. Then the largest washers (A) go on top of the pucks. The smallest washer (C) would end up inside the cab below the bolt head. The medium washers (B) go on the bottom of the other puck that goes below the frame. Another small washer (C) between (B) and the bottom nut.
Out of the four largest rubber pucks the largest go in the rear of the cab.
I think all of my sleeves were the same size.
I'm not sure if that all made sense or helped.
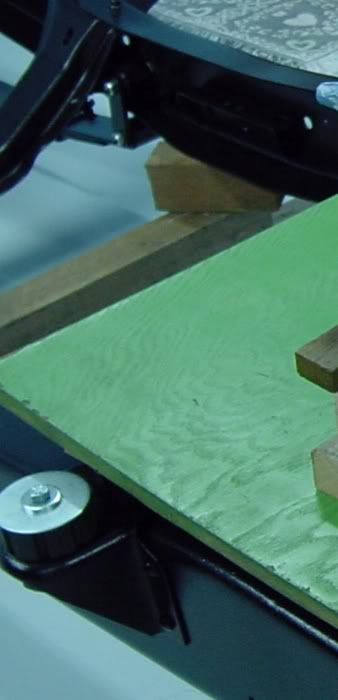
Here is a few pics of mine. I don't have the cab installed yet so they are just sitting in the frame.


I can take some close-ups when I get home tonight if needed.
Cheers!
I just purchased those from Dennis Carpenter about a month ago. I was a little disappointed to see that they are not an exact replacement. The originals had the special washer/sleeve/bushings that were pressed together. I suppose that would have been harder to make and install so they went with just regular (large) washers and separate sleeve pieces.
They short-changed me two nuts as well. They are the oval locking type so they are harder to find. I just went with a regular nut and lock washer.
The largest rubber pucks go on top of the frame. Then the largest washers (A) go on top of the pucks. The smallest washer (C) would end up inside the cab below the bolt head. The medium washers (B) go on the bottom of the other puck that goes below the frame. Another small washer (C) between (B) and the bottom nut.
Out of the four largest rubber pucks the largest go in the rear of the cab.
I think all of my sleeves were the same size.
I'm not sure if that all made sense or helped.
Here is a few pics of mine. I don't have the cab installed yet so they are just sitting in the frame.
I can take some close-ups when I get home tonight if needed.
Cheers!
Thread Starter
|
Freshman User
Joined: Aug 2010
Posts: 26
Likes: 0
Steven,
I just purchased those from Dennis Carpenter about a month ago. I was a little disappointed to see that they are not an exact replacement. The originals had the special washer/sleeve/bushings that were pressed together. I suppose that would have been harder to make and install so they went with just regular (large) washers and separate sleeve pieces.
They short-changed me two nuts as well. They are the oval locking type so they are harder to find. I just went with a regular nut and lock washer.
The largest rubber pucks go on top of the frame. Then the largest washers (A) go on top of the pucks. The smallest washer (C) would end up inside the cab below the bolt head. The medium washers (B) go on the bottom of the other puck that goes below the frame. Another small washer (C) between (B) and the bottom nut.
Out of the four largest rubber pucks the largest go in the rear of the cab.
I think all of my sleeves were the same size.
I'm not sure if that all made sense or helped.
Here is a few pics of mine. I don't have the cab installed yet so they are just sitting in the frame.
I can take some close-ups when I get home tonight if needed.
Cheers!
Hey Bill, can you give me some feedback on this kit you recommended to me from DC?
Thread Starter
|
Freshman User
Joined: Aug 2010
Posts: 26
Likes: 0
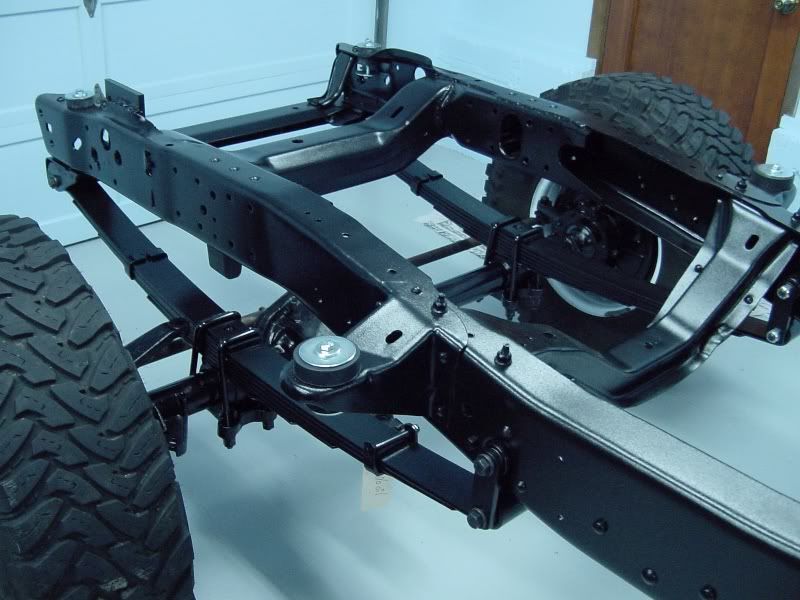
Jack, awesome looking frame... Wish I could do a frame off restoration. Also looks like you have a great working area in your garage. My F100 is parked in the driveway, as my wife's pathfinder takes preference. Is that PRO-15 you have on the frame?
Senior User
Joined: Mar 2004
Posts: 117
Likes: 0
From: Portland, OR
Thanks Steven.
Did you get your cab mounts sorted out? Are you just replacing the mounts or do you have rotted sheet metal in the area too?
Looking back on this thread I can see I got a little carried away with the pictures - I should have at least posted smaller pics - next time.
The frame was blasted and powder coated by Portland Powder Coaters. They did a good job and they say I could hit it with a hammer and it won't chip! It wasn't that expensive and was way easier than having to deal with cleaning, priming, and painting myself.
The garage was last years project.
Hey, at least your wife has vehicle in the garage (rather than storage)!
Thread Starter
|
Freshman User
Joined: Aug 2010
Posts: 26
Likes: 0
Thanks Steven.
Did you get your cab mounts sorted out? Are you just replacing the mounts or do you have rotted sheet metal in the area too?
Looking back on this thread I can see I got a little carried away with the pictures - I should have at least posted smaller pics - next time.
The frame was blasted and powder coated by Portland Powder Coaters. They did a good job and they say I could hit it with a hammer and it won't chip! It wasn't that expensive and was way easier than having to deal with cleaning, priming, and painting myself.
The garage was last years project.
Hey, at least your wife has vehicle in the garage (rather than storage)!
Did you get your cab mounts sorted out? Are you just replacing the mounts or do you have rotted sheet metal in the area too?
Looking back on this thread I can see I got a little carried away with the pictures - I should have at least posted smaller pics - next time.
The frame was blasted and powder coated by Portland Powder Coaters. They did a good job and they say I could hit it with a hammer and it won't chip! It wasn't that expensive and was way easier than having to deal with cleaning, priming, and painting myself.
The garage was last years project.
Hey, at least your wife has vehicle in the garage (rather than storage)!
Cargo Master


Joined: Dec 2006
Posts: 2,511
Likes: 8
From: hinckley ohio
I used the same kit from D.C. and was disapointed with it and the instruction sheet was very poor I compeared the old cab mounts to the new ones along with the instruction sheet and got it done.I had 4 nuts. But thought the bolts are to long for the core support I bought new bolts shorters them the ones in the kit
Trending Topics
Freshman User
Joined: Jun 2009
Posts: 42
Likes: 0
From: HOUSTON TEXAS
DC MOUNTS
I am currently doing a frame off job myself. My question is has anyone purchased the cab mounts from LMC. I am shopping for them now and so I'm wondering if LMC would be less of a hassel. By the way that frame does look good. I did mine with the POR-15 two coats and it's strong and shinny, but not Hammer proof.
FTE Stories
Ford Trucks for Ford Truck Enthusiasts

10 Best Ford Truck Engines We Miss the Most!
Joe Kucinski
2026 Shelby F-150 Off-Road: Better Than a Raptor R?
Brett Foote
2027 Super Duty Carhartt Package First Look: 12 Things You NEED to Know!
Michael S. Palmer
10 Most Surprising 2026 Ford Truck Features!
Joe Kucinski
Top 10 Ford Trucks Coming to Mecum Indy 2026
Brett Foote
5 Best / 5 Worst Ford Truck Wheels of All Time
Joe Kucinski
Ford Super Duty: 5 Things Owners LOVE, 5 Things They LOATHE!
Joe Kucinski
Every 2026 Ford Truck Engine RANKED from WORST to FIRST!
Michael S. Palmer
The Best F-150 Deal of Every Trim Level (XL through Raptor)
Joe Kucinski
Thread Starter
|
Freshman User
Joined: Aug 2010
Posts: 26
Likes: 0
I am currently doing a frame off job myself. My question is has anyone purchased the cab mounts from LMC. I am shopping for them now and so I'm wondering if LMC would be less of a hassel. By the way that frame does look good. I did mine with the POR-15 two coats and it's strong and shinny, but not Hammer proof.
Freshman User
Joined: Jun 2009
Posts: 42
Likes: 0
From: HOUSTON TEXAS
LMC MOUNTS
I did purchase the coil support mounts from LMC and they are almost exactly like the stock ones. I'll probably get the cab mounts from LMC and see what happens. I'll keep y'all posted
Logistics Pro
Joined: Nov 2003
Posts: 4,371
Likes: 6
From: PA
has anyone got the LMC rubber cab mount kit from LMC part # 40-0126 LMC Truck Parts - Page 24 i just got it and it don't have any instructions with it can anyone help me figure out how they go?

Thread
Thread Starter
Forum
Replies
Last Post
slashfan7964
1980 - 1986 Bullnose F100, F150 & Larger F-Series Trucks
166
Aug 16, 2020 11:08 AM
Mattyhawk
Excursion - King of SUVs
21
Aug 5, 2018 10:47 AM
annaleigh
1968-Present E-Series Van/Cutaway/Chassis
8
Jun 14, 2016 02:00 PM
DJF10065
1961 - 1966 F-100 & Larger F-Series Trucks
14
Aug 13, 2008 06:29 PM
bigslurrp
Excursion - King of SUVs
10
Mar 22, 2004 11:26 PM