
How to drop a ZF


Thread Starter
|
Junior User
Joined: Apr 2010
Posts: 56
Likes: 0
From: Anchorage Alaska
How to drop a ZF
So here is the writeup.
I did it in a DIY shop that is open for us on base and has the special tools and very experienced techs.
This took me 4 days, because I could only wrench on the truck after work, and I made plenty of mistakes.
Hopefully this writeup will help you avoid a few of my mistakes.
First, disconnect the negative terminal on the battery.
Second, drain the transmission and transfer case.
Though the Haynes manual says draining the transfer case is not necessary, you might as well do it so you know you have fresh fluid in both the trans and transfer case when you're all done.
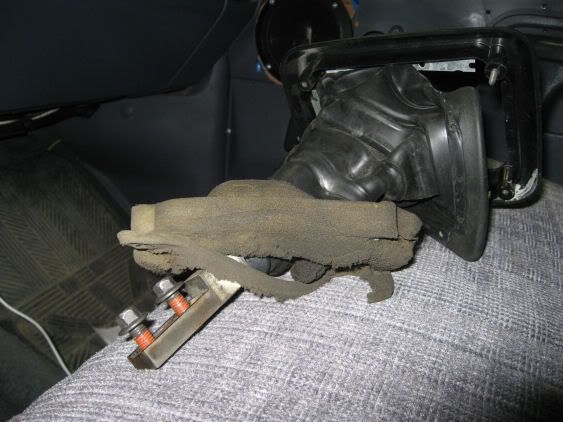
I pulled the rubber boot inside out and pulled these 2 bolts. On mine, they were 10mm.
Here was my first mistake, I didn't pull the lower lever assembly right away. I had to climb a ladder and inch my way into my truck while it was on a lift to get back to those allen/hex screws.
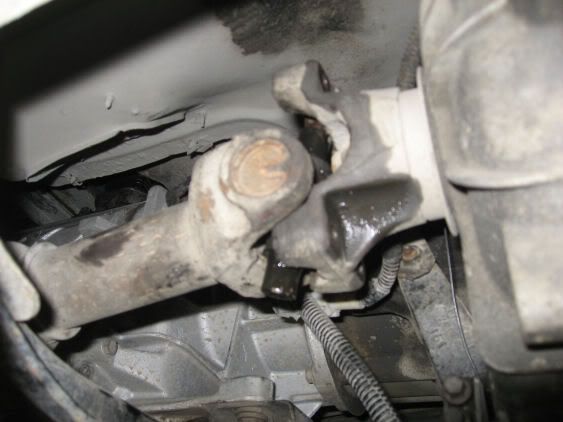
This is my mechanical speedo and electronic cruise control combo.
I pulled this out (also a 10mm) as one unit, and wire tied it out of the way to the driver's side frame rail.
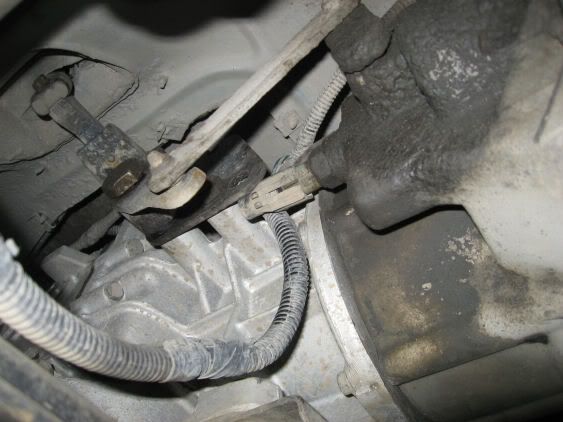
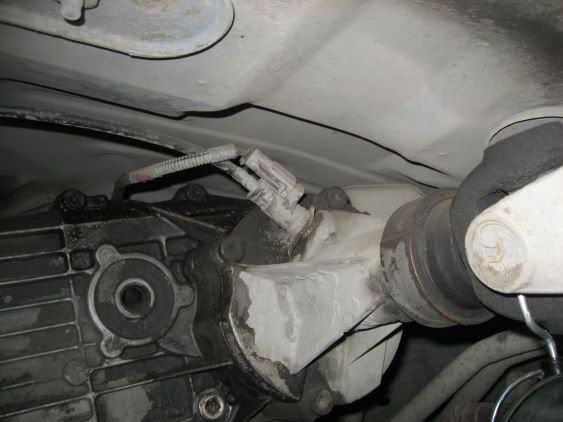
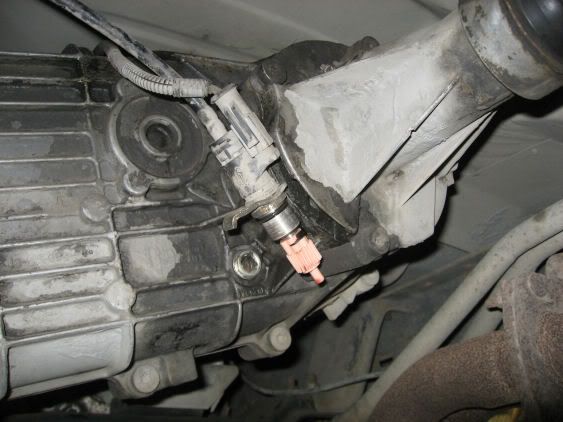
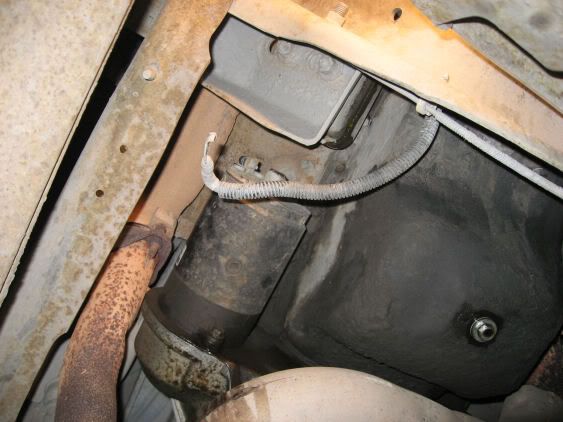
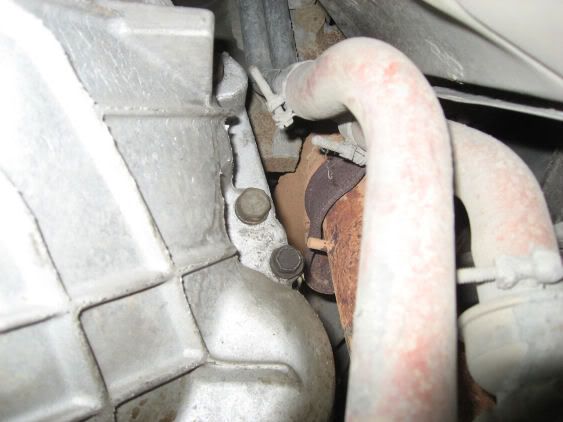
Pull the 4x4 sensor connector (turns on the 4x4 and 4x4 LOW light in the cab) behind the transfer case shift linkage.
Pull the reverse light sensor connector, those are my fuel lines.
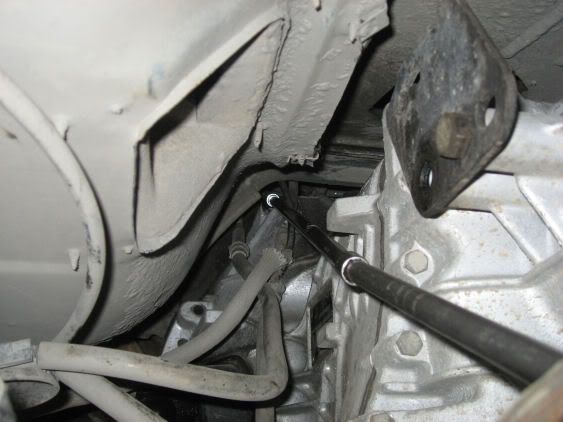
This is one of the things I'm not extremely comfortable with, the slave cylinder just slides off of that little ear on the trans. Eye protection is reccomended at this point, if you're not already wearing it while working under a truck - when the rod comes out of the dent in the shift fork dirt can fly off at you. Pry it off with a screwdriver, it comes off easily.
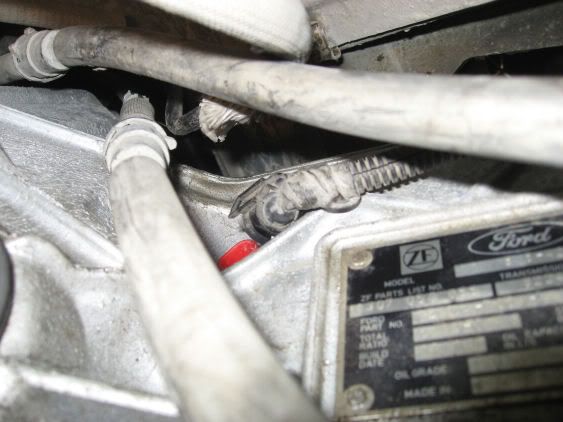
DO NOT disconnect the hydraulic line!
I wire tied this to the fram too, to keep it out of the way.
Again, DO NOT disconnect the hydrailic line.
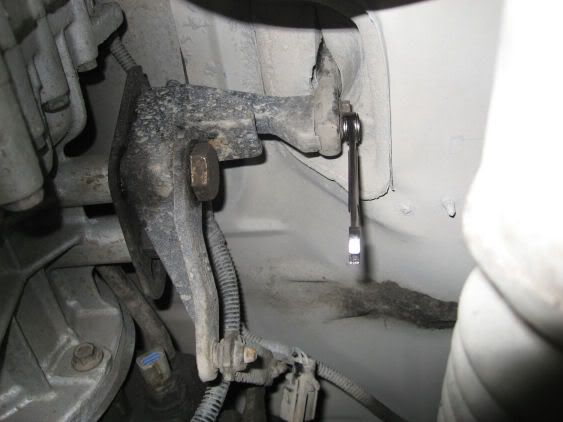
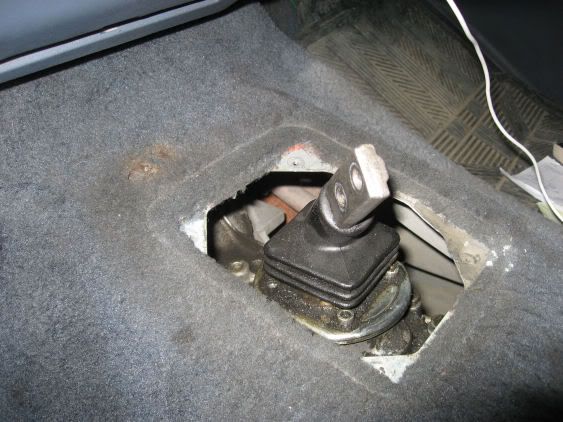
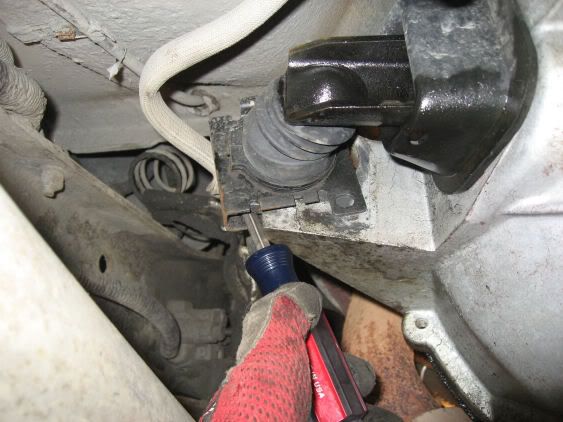
Next I pulled the two bolts out of the transfer case shift lever. Mine wer 8mm. Just push it up through the floor.
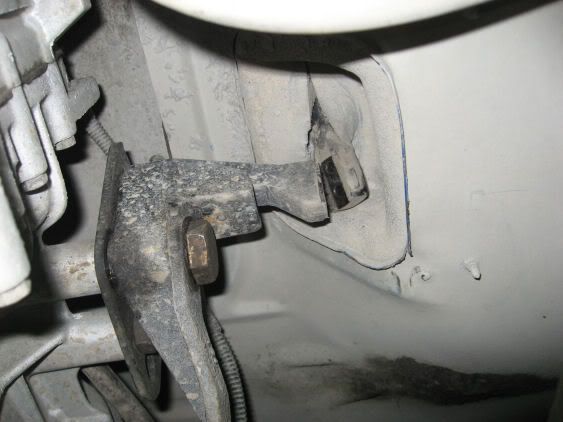
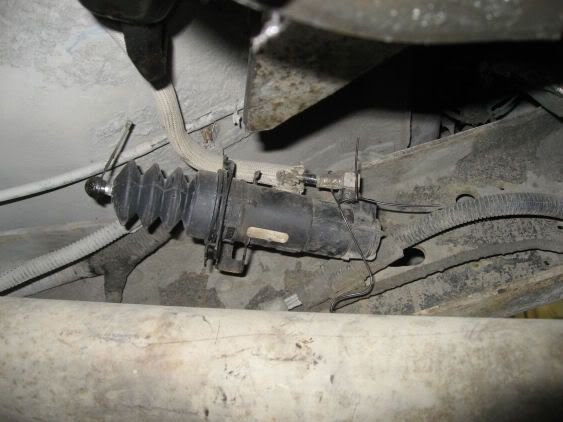
Next, pull that fat bolt out, mine was a 29mm. I did not take the plate off of the trans.
I wire tied the linkage to the transfer case.
Next, pull the wire off of the starter. Mine was on the passenger side of the oil pan. That bolt was a 10mm on the old starter, the new one I got was a 3/8. I had to replace the starter because the teeth were worn and would spin in place without engaging the flywheel about every 20 starts.
My starter has 2 bolts, one that feeds from each side. It actually took me 10 minuted to find this. The top bolt secures the trans to the engine, and the bottom is for the starter.
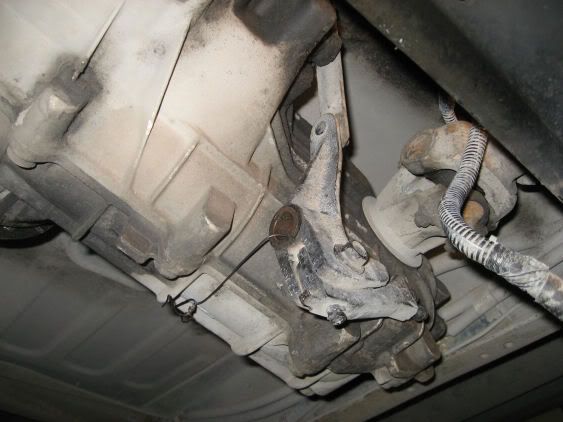
Next separate the front driveshaft from the front of the transfer case.
The nuts for the universal joint U-straps were 13mm.
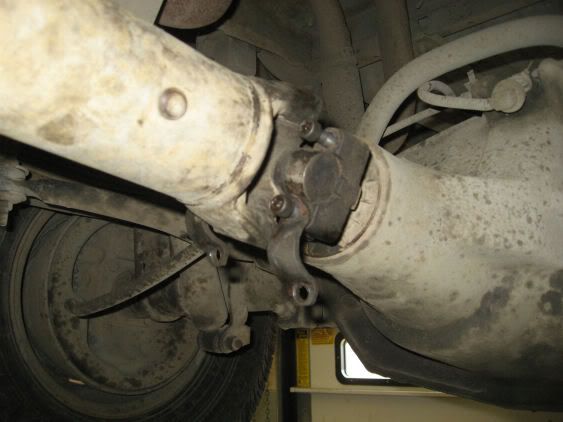
Because my rear shaft did not flex enough to pull the slip yolk out of the rear of the transfer case, I had to remove the rear driveshaft. I could not get a socket into the screw heads at the right angle, so I took a T-45 bit and put a 8mm wrench around it.
Next, pull the 8 bolts securing the transfer case to the rear of the transmission, mine were 13mm. Have a trans jack, wood block, or a buddy catch the transfer case. Its only about 40 pounds empty.
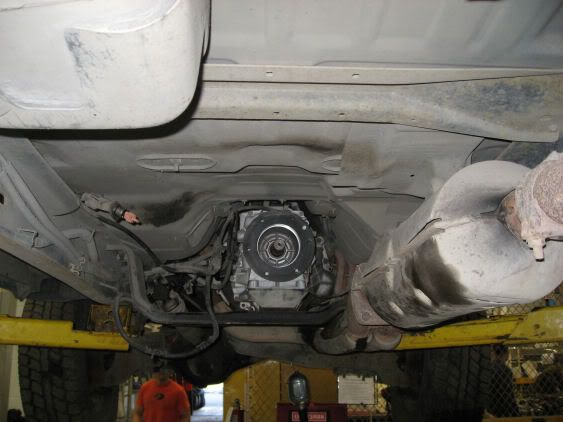
No more transfer case.
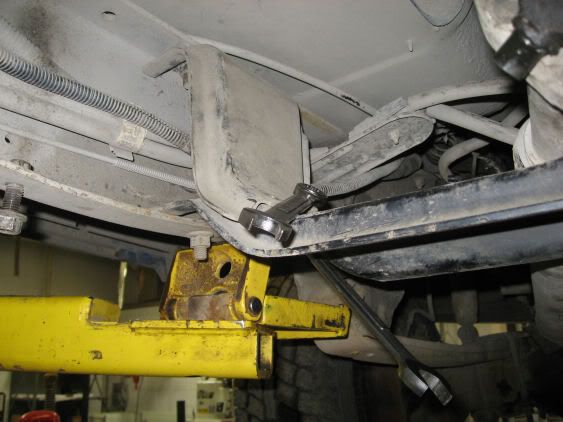
Next, take the gussets out. They pinch the trans mount down on the frame. I beleive mine were 15mm on one side, and 18mm on the other.
Put a trans jack or equivalent under the trans before loosening the trans to engine bolts.
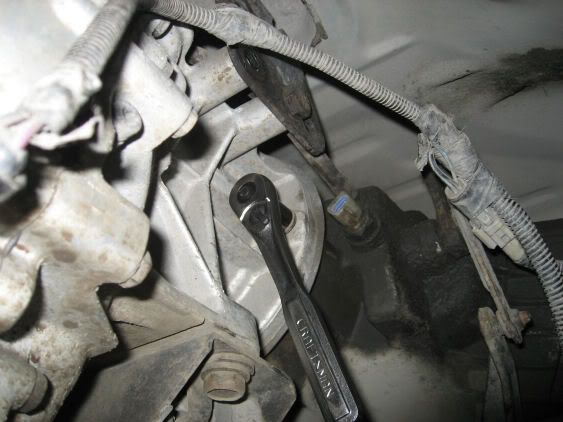
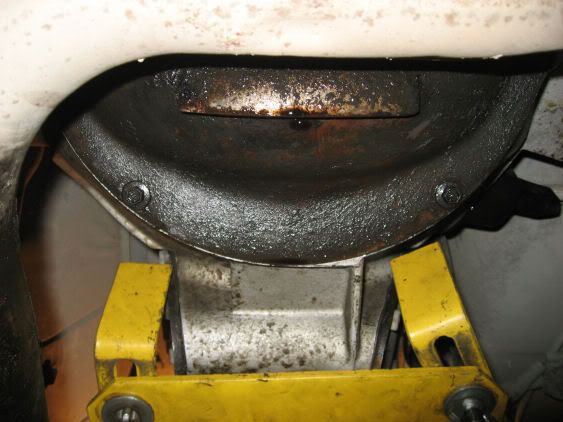
The two bolts on the very top of the bell really suck. I used 4 1 foot extensions, a snap-on swivel socket, and an impact gun to get those out. The bolts were 16mm.
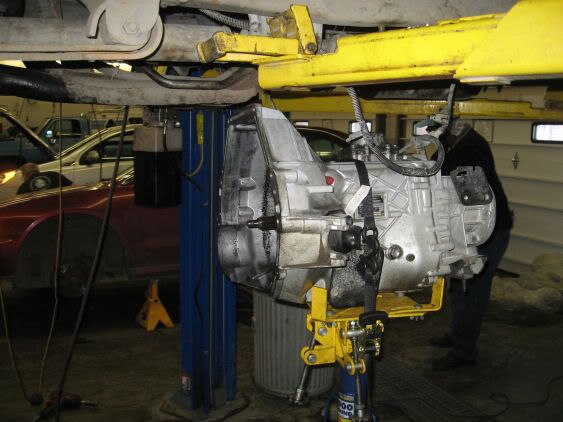
I had to climb a ladder and remove the lower lever assembly because it was hooking on the cab floor when I tried to wiggle the trans back.
When everything is clear, pull the trans strait back with a few wiggles, and mind the exhaust, fuel lines, and all the other junk in the close vicinity.
I put the trans on its rear end on a big washer-like spacer so it could sit upright without the output shaft bumping into anything. The lower lever housing comes off with the 13mm bolts removed.
Then there is a little spring and lever to come out.
Then the detents need to be punched out.
Then the bolts that hold the font and rear case together.
You can pull the front case off without disturbing the trans guts.
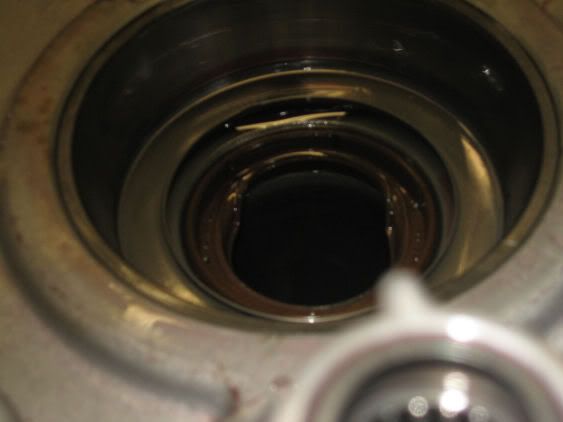
Here is the blown input shaft seal.
The spring ring was left on the input shaft.
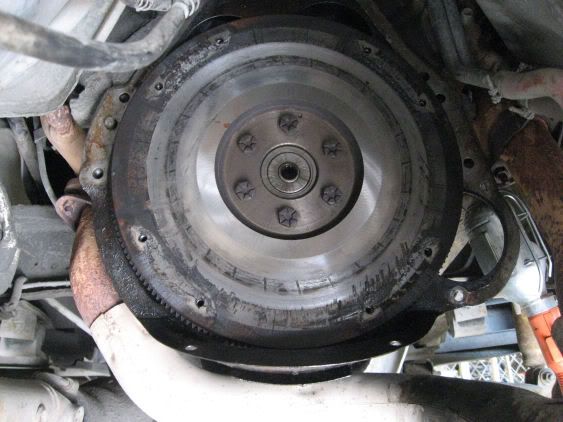
Here's my nasty flywheel with ATF all over it.

Here's my pilot bearing that I pulled out with a hammer puller.
I worked on the pilot bearing for 2 HOURS, until I turned my brain on, and screwed out the little screws on the end of the fingers.
Before I turned the screws out, I was just carving journals into the bearing.
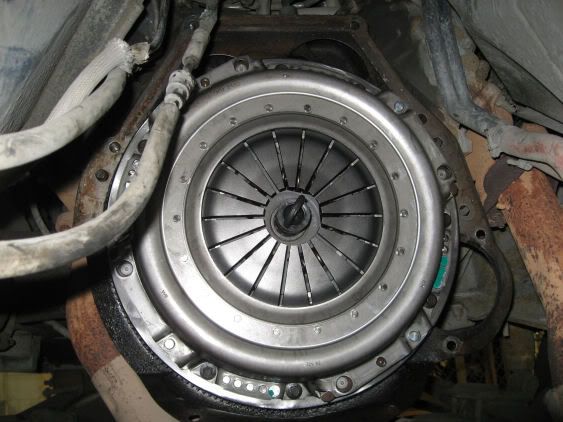
Here's the new clutch kit installed. That little plastic thing goes into the pilot bearing and holds the friction plate on and centered so you can get the pressure plate on.
Installation is the reverse of removal as Haynes likes to say.
Magic tricks I learned:
If the inside of a hex head is stripped out, put a vicegrips around the head of the screw, then take another vicegrips and turn the tightening screw on the first set until it won't let go, then turn.
The 10mm screws on my inspection plate were stripped, and a 9mm was too small. So a tech told me to hammer a 3/8 socket onto the stripped bolt until it mashes on, then turn it out.
I'm not exactly sure if this was what you guys were expecting or needed, but feel free to ask for more details and whatnot.
-Steve
ZF S5-42 - ZF5 - how do I drop my transmission - transmission drop
I did it in a DIY shop that is open for us on base and has the special tools and very experienced techs.
This took me 4 days, because I could only wrench on the truck after work, and I made plenty of mistakes.
Hopefully this writeup will help you avoid a few of my mistakes.
First, disconnect the negative terminal on the battery.
Second, drain the transmission and transfer case.
Though the Haynes manual says draining the transfer case is not necessary, you might as well do it so you know you have fresh fluid in both the trans and transfer case when you're all done.
I pulled the rubber boot inside out and pulled these 2 bolts. On mine, they were 10mm.
Here was my first mistake, I didn't pull the lower lever assembly right away. I had to climb a ladder and inch my way into my truck while it was on a lift to get back to those allen/hex screws.
This is my mechanical speedo and electronic cruise control combo.
I pulled this out (also a 10mm) as one unit, and wire tied it out of the way to the driver's side frame rail.
Pull the 4x4 sensor connector (turns on the 4x4 and 4x4 LOW light in the cab) behind the transfer case shift linkage.
Pull the reverse light sensor connector, those are my fuel lines.
This is one of the things I'm not extremely comfortable with, the slave cylinder just slides off of that little ear on the trans. Eye protection is reccomended at this point, if you're not already wearing it while working under a truck - when the rod comes out of the dent in the shift fork dirt can fly off at you. Pry it off with a screwdriver, it comes off easily.
DO NOT disconnect the hydraulic line!
I wire tied this to the fram too, to keep it out of the way.
Again, DO NOT disconnect the hydrailic line.
Next I pulled the two bolts out of the transfer case shift lever. Mine wer 8mm. Just push it up through the floor.
Next, pull that fat bolt out, mine was a 29mm. I did not take the plate off of the trans.
I wire tied the linkage to the transfer case.
Next, pull the wire off of the starter. Mine was on the passenger side of the oil pan. That bolt was a 10mm on the old starter, the new one I got was a 3/8. I had to replace the starter because the teeth were worn and would spin in place without engaging the flywheel about every 20 starts.
My starter has 2 bolts, one that feeds from each side. It actually took me 10 minuted to find this. The top bolt secures the trans to the engine, and the bottom is for the starter.
Next separate the front driveshaft from the front of the transfer case.
The nuts for the universal joint U-straps were 13mm.
Because my rear shaft did not flex enough to pull the slip yolk out of the rear of the transfer case, I had to remove the rear driveshaft. I could not get a socket into the screw heads at the right angle, so I took a T-45 bit and put a 8mm wrench around it.
Next, pull the 8 bolts securing the transfer case to the rear of the transmission, mine were 13mm. Have a trans jack, wood block, or a buddy catch the transfer case. Its only about 40 pounds empty.
No more transfer case.
Next, take the gussets out. They pinch the trans mount down on the frame. I beleive mine were 15mm on one side, and 18mm on the other.
Put a trans jack or equivalent under the trans before loosening the trans to engine bolts.
The two bolts on the very top of the bell really suck. I used 4 1 foot extensions, a snap-on swivel socket, and an impact gun to get those out. The bolts were 16mm.
I had to climb a ladder and remove the lower lever assembly because it was hooking on the cab floor when I tried to wiggle the trans back.
When everything is clear, pull the trans strait back with a few wiggles, and mind the exhaust, fuel lines, and all the other junk in the close vicinity.
I put the trans on its rear end on a big washer-like spacer so it could sit upright without the output shaft bumping into anything. The lower lever housing comes off with the 13mm bolts removed.
Then there is a little spring and lever to come out.
Then the detents need to be punched out.
Then the bolts that hold the font and rear case together.
You can pull the front case off without disturbing the trans guts.
Here is the blown input shaft seal.
The spring ring was left on the input shaft.
Here's my nasty flywheel with ATF all over it.
Here's my pilot bearing that I pulled out with a hammer puller.
I worked on the pilot bearing for 2 HOURS, until I turned my brain on, and screwed out the little screws on the end of the fingers.
Before I turned the screws out, I was just carving journals into the bearing.
Here's the new clutch kit installed. That little plastic thing goes into the pilot bearing and holds the friction plate on and centered so you can get the pressure plate on.
Installation is the reverse of removal as Haynes likes to say.
Magic tricks I learned:
If the inside of a hex head is stripped out, put a vicegrips around the head of the screw, then take another vicegrips and turn the tightening screw on the first set until it won't let go, then turn.
The 10mm screws on my inspection plate were stripped, and a 9mm was too small. So a tech told me to hammer a 3/8 socket onto the stripped bolt until it mashes on, then turn it out.
I'm not exactly sure if this was what you guys were expecting or needed, but feel free to ask for more details and whatnot.
-Steve
ZF S5-42 - ZF5 - how do I drop my transmission - transmission drop


Lead Driver

Joined: Feb 2002
Posts: 7,960
Likes: 594
From: Greater Austin, Texas

I see you have a 460 same as me. My 460 has only been in my truck about 2 months and I have already done this procedure 3 times due to clutch issues. 2 things I would add: 1) take the nuts off the exhaust manifolds so the exhaust will swing down to the right - this gives you about another 1/2" of clearance between the exhaust and trans and really comes in handy when going back in. 2) use a large crescent wrench to bend the rib on the underside of the trans tunnel to to the rear of the truck as far as you can - this will give you a little more clearance on the top of the trans when you are putting it back in.

Thread
Thread Starter
Forum
Replies
Last Post
78_f800crewcab4x4
1973 - 1979 F-100 & Larger F-Series Trucks
343
Dec 17, 2022 04:39 PM
Lrgfather
1961 - 1966 F-100 & Larger F-Series Trucks
24
Mar 8, 2010 07:20 AM
masterbeavis
1973 - 1979 F-100 & Larger F-Series Trucks
30
Nov 17, 2008 04:58 PM


