


my intercooler install pt.1
Thread Starter
|
Posting Guru
Joined: Mar 2009
Posts: 1,799
Likes: 0
my intercooler install pt.1
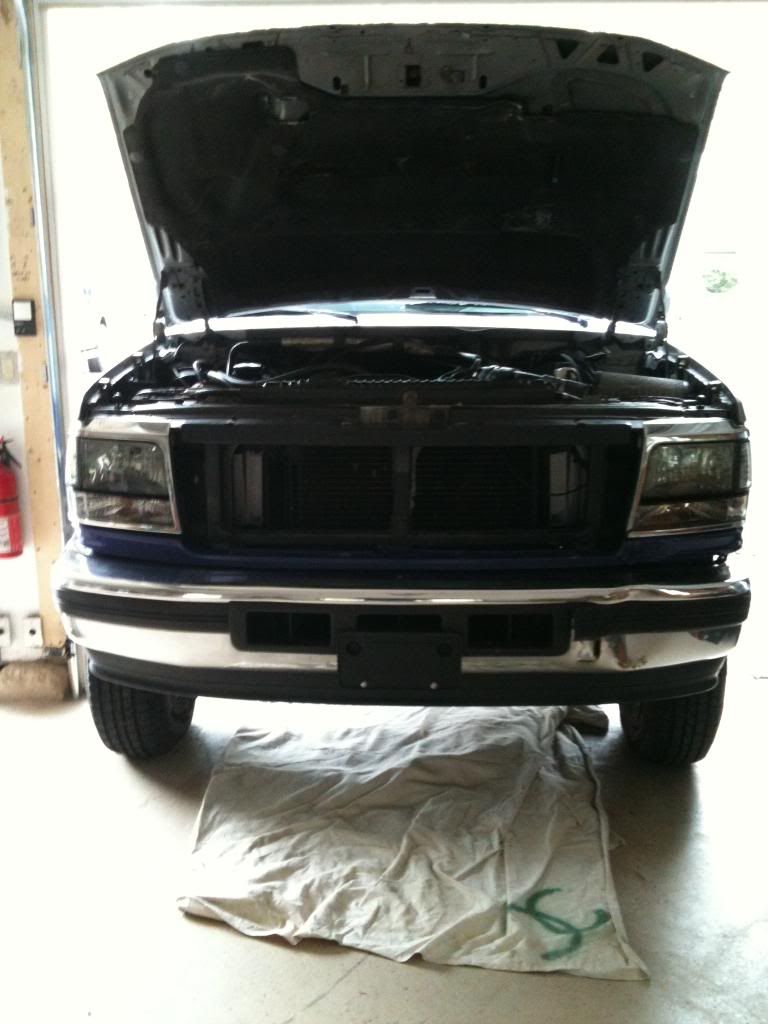
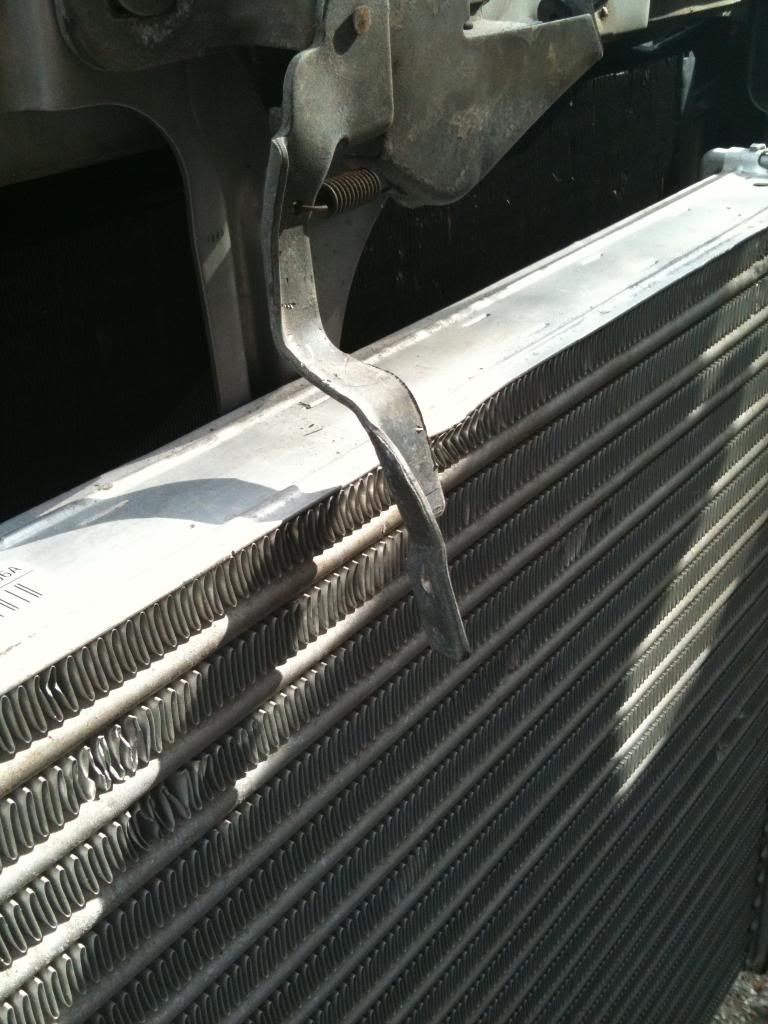
figured id share a few pics with you guys of my last 10 hours. yes 10 hours unfortunatly lol. we ended up punching a nice whole in my radiator with the long blade on the sawzall while opening up the cold side of the intercooler threw the rad core support. i was suposed to get more pictures while putting it back together but i was excited taht everything went so smooth that i forgot too! lol the intercooler boots and clamps will be here thursday as well as my long awaited injector orings to do my 2s all this weekend!! woot.

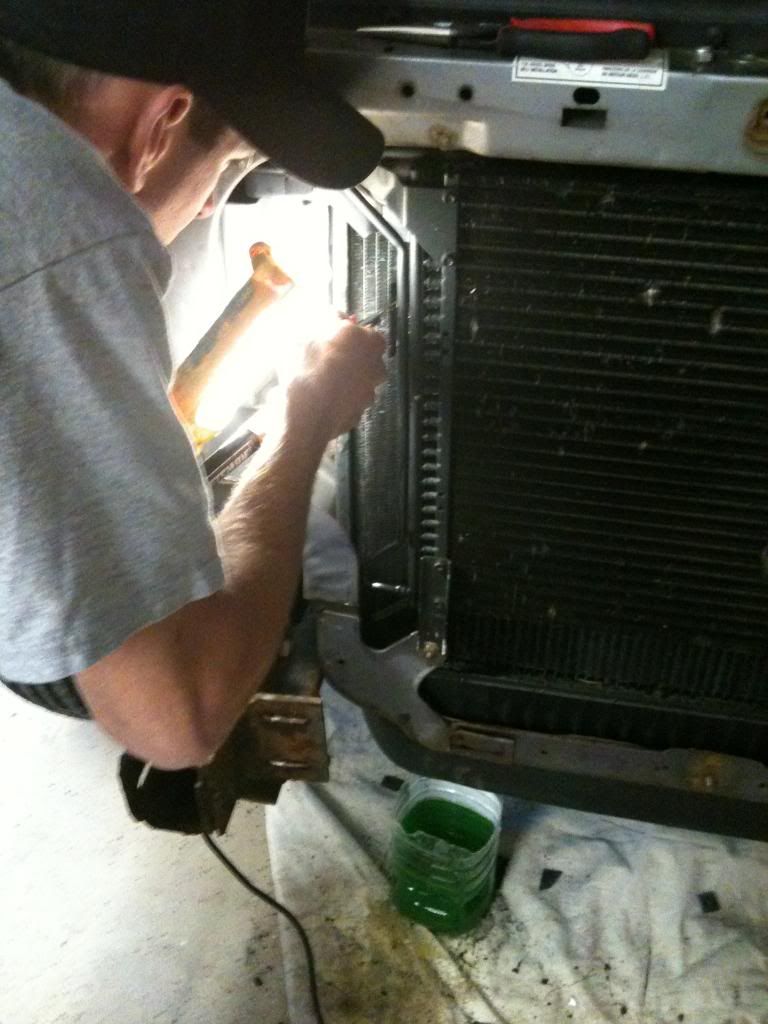
a busted radiators best friend lol, shaun trying to fix that
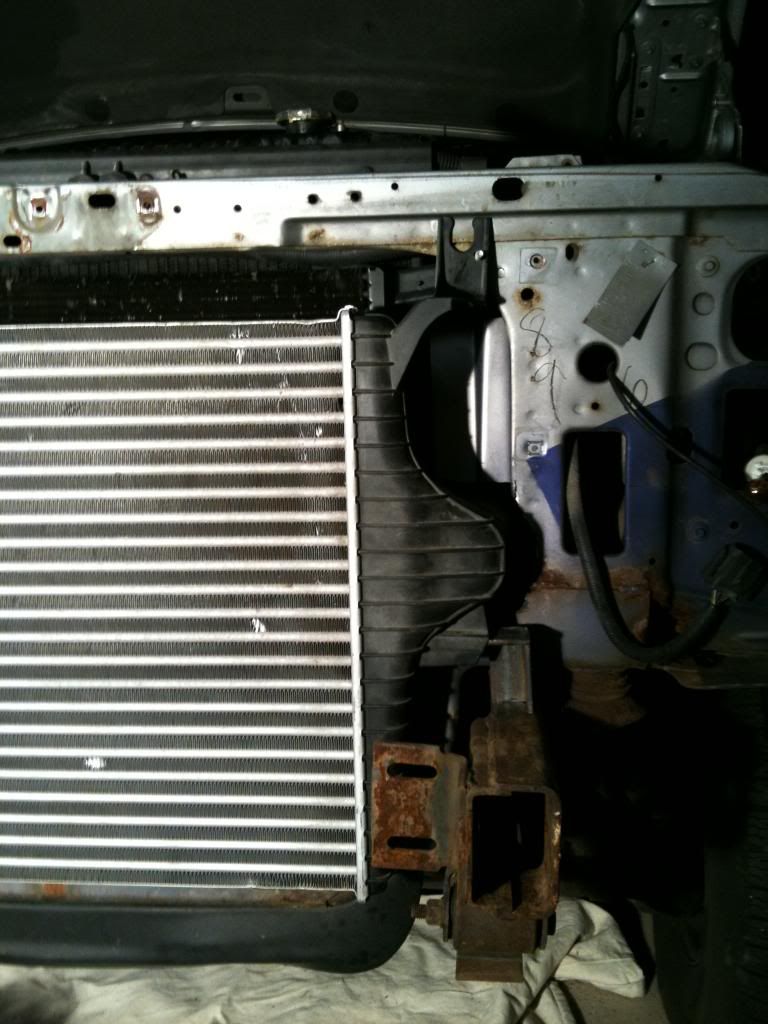
 the way i mounted mine, i didnt like how thin the core support was, and the frame rails were perfect to mount too.
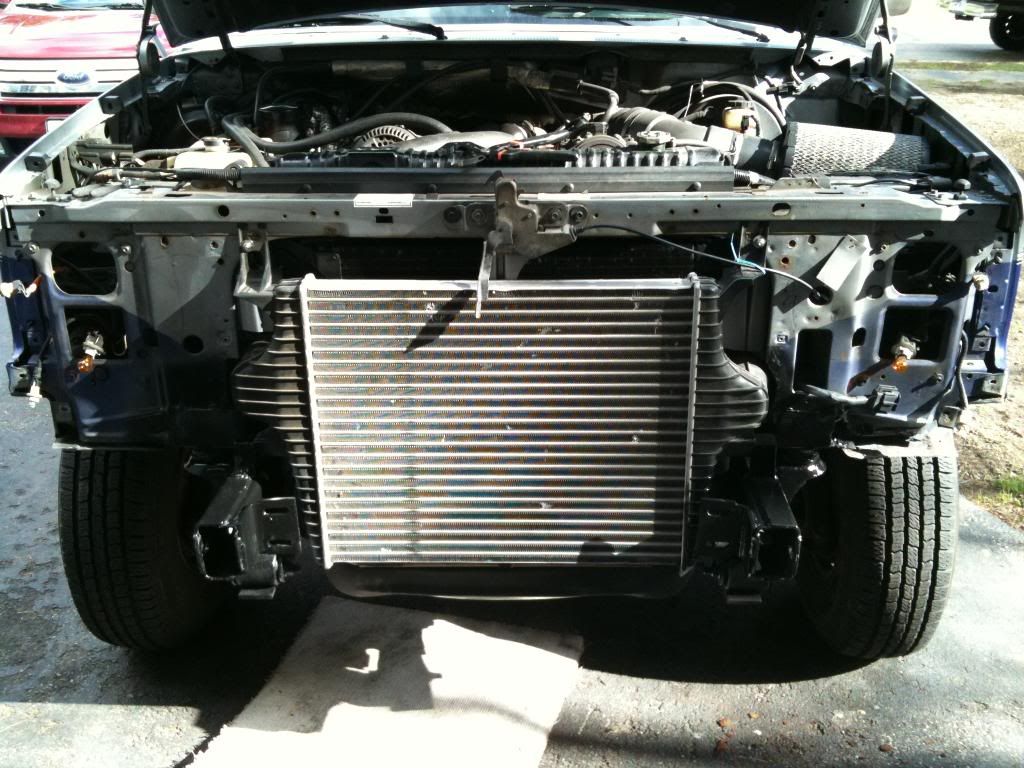
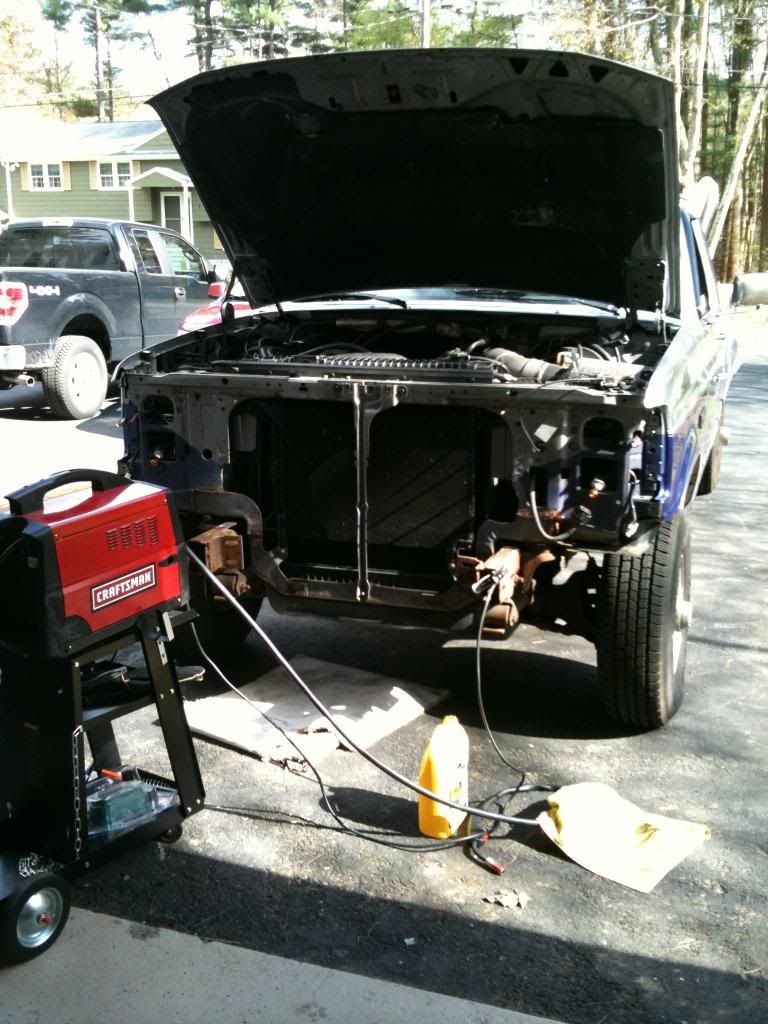
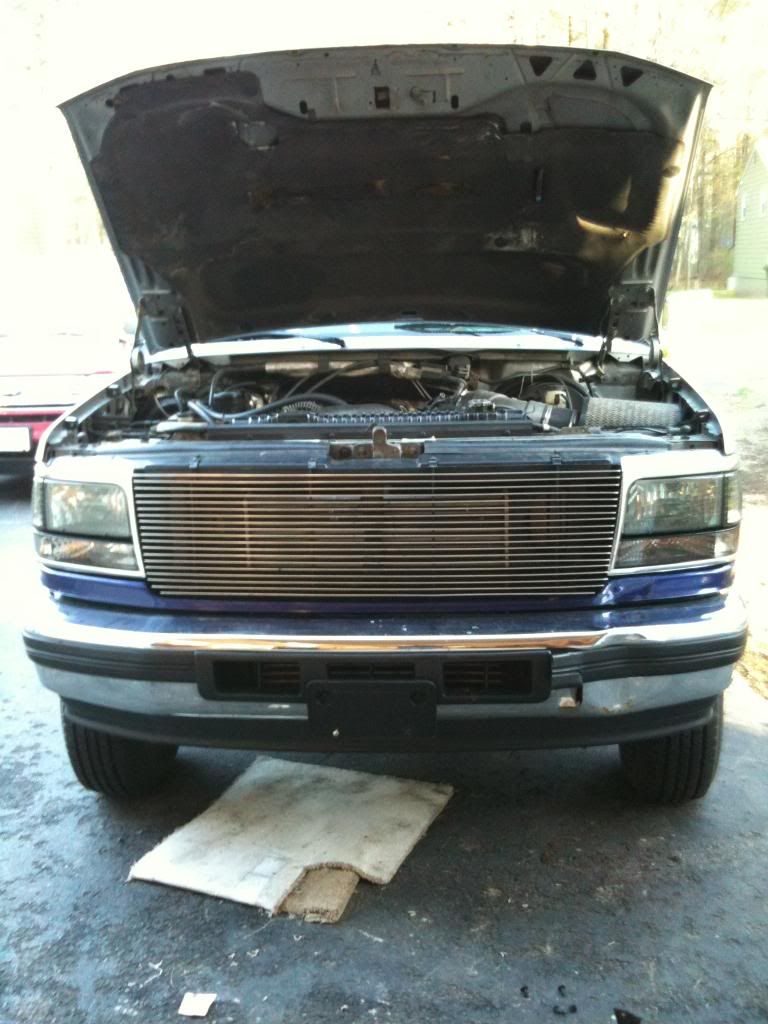 finally! half way done! haha cant wait to start the intercooler pipes. ill start mocking them up later this week.
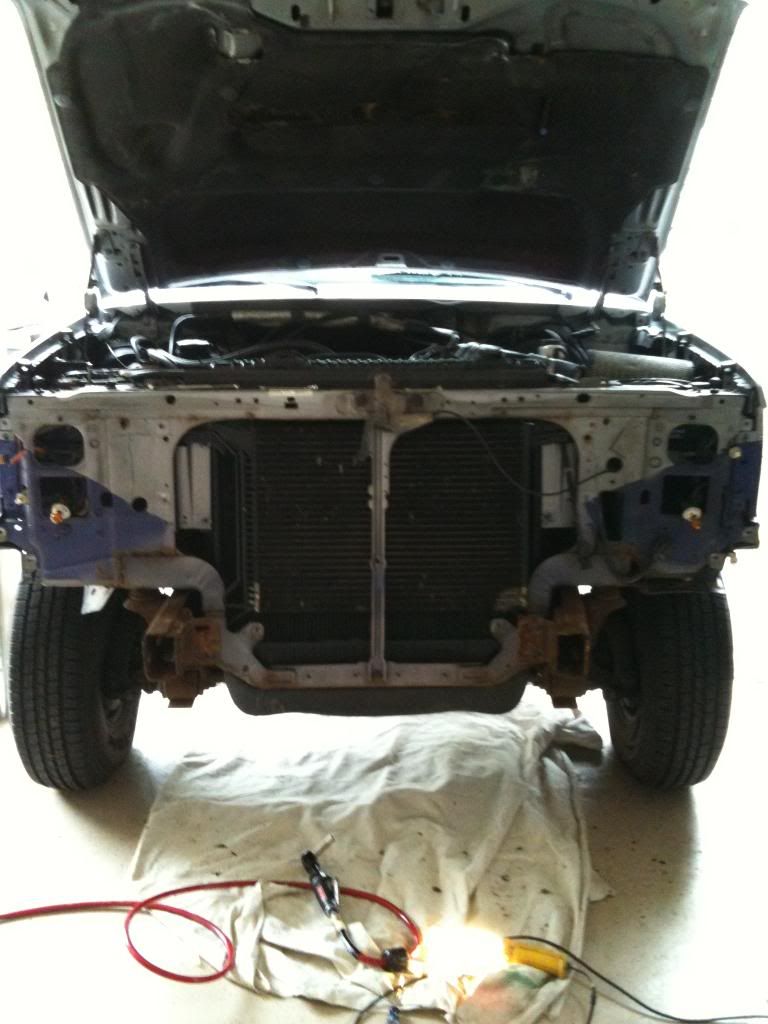
not sure if youcan spot it, but the first picture of it naked, the driverside frame rail is bent something feirce pointing in! nothing a porterpower cant solve(thanks rich),
all in all, so far i recomment this to anyone, its simple, straight forward and actually alot of fun to do. not looking forward to making my own spider pipe thoe.
a busted radiators best friend lol, shaun trying to fix that
the way i mounted mine, i didnt like how thin the core support was, and the frame rails were perfect to mount too. finally! half way done! haha cant wait to start the intercooler pipes. ill start mocking them up later this week.not sure if youcan spot it, but the first picture of it naked, the driverside frame rail is bent something feirce pointing in! nothing a porterpower cant solve(thanks rich),
all in all, so far i recomment this to anyone, its simple, straight forward and actually alot of fun to do. not looking forward to making my own spider pipe thoe.
Hotshot


Joined: Feb 2009
Posts: 10,408
Likes: 75
From: Plankinton, SD
Looks good. I had mine mounted on the frame to start with and talked myself into thinking that if something flexed b/w the body and frame, ie rubber mounts, the plastic mounts on the ic could break. I changed mine so its all hanging off of the front support. Don't plan on no 4 wheelin to make it flex like that but I get paranoid on some of those things.
Thread Starter
|
Posting Guru
Joined: Mar 2009
Posts: 1,799
Likes: 0
well my mounts arent fully 100% tight into the intercooler, about a half inch out so it can flex a tid bit but i dont 4 wheel anyhow, just a road queen over here but well see when it gets buttoned up for good this week.
FOREIGN GURU
Joined: Jul 2006
Posts: 7,655
Likes: 7
From: Celaya, Gto. MX

Congrats with your work in progress. I have read a lot of posts about the IC install, and nobody mention any mod of the upper supports of the AC condenser, only in the supports on the bottom, did you modified them or not, and why not? why only those in the bottom?  . My logic tells me that the modification is to get more space for the IC core, but why only down, is the condenser inclined in some way?
And I saw in your pics that the upper supports of the IC are directly fixed to the core, its that right? did you put any grummets or any alike rubber there?
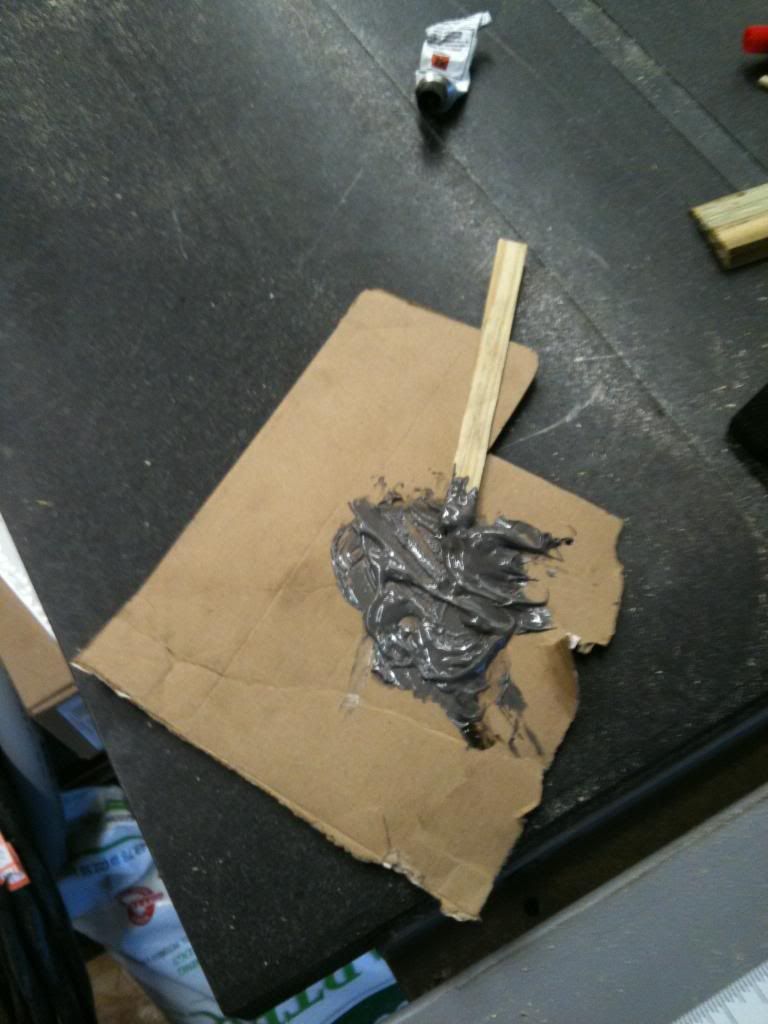
How did you make the hole in the radiator and how is the name of that paste you put in the pic, that I suppose is to fix it, isnt it? Im asking because Im planning to install my IC and dont want to screw anything
. My logic tells me that the modification is to get more space for the IC core, but why only down, is the condenser inclined in some way?And I saw in your pics that the upper supports of the IC are directly fixed to the core, its that right? did you put any grummets or any alike rubber there?
How did you make the hole in the radiator and how is the name of that paste you put in the pic, that I suppose is to fix it, isnt it? Im asking because Im planning to install my IC and dont want to screw anything
Postmaster
Joined: Jan 2004
Posts: 3,207
Likes: 0
From: Kearney, Nebr
Instead of using a saw-zall to cut the opens, I recommend using a plasma torch to cut the metal out. It's a lot safer and you don't have to worry about the radiator. The metal is thin and will only take a couple seconds to cut.
Setup looks good man.
Setup looks good man.
Thread Starter
|
Posting Guru
Joined: Mar 2009
Posts: 1,799
Likes: 0
Rog the sawzal popped out by accident an he was a little too loose on the grip, that's just my crap luck, as for the ac condenser the top mounts are already mounted to the condensor is an inch away from the too of the radiator. You only cut and bend the bottom because it is flaired out a good couple inches and you need all the room you can. If you take your time it comes out nice, almost like it was mention to be an intercooler in there lol as for theflue I used that was jb weld to seal he outside of the radiator. Works like a charm and rated for like 50,000 psi I think? I've sealed up my old 460 block with it, awaome stuff just take your time applying it and use heat lamps. As for the rubber grommets I didn't have any in the garage, I wish I knew I needed them before hand but I picked up the if 10 mins before I started. If you look at the ic installed pic where my bolts are drilled threw, that u shape at the top is for a rubber grommet. I just lightley bolted the. So it can twist with the chassis
I would have used a plasma torch I I had one, sawzal is all I had to readily use at the Moment but I was pretty happy how it came out
I would have used a plasma torch I I had one, sawzal is all I had to readily use at the Moment but I was pretty happy how it came out
Hotshot
Joined: Jun 2007
Posts: 10,008
Likes: 7
From: Austin, TX
Congrats with your work in progress. I have read a lot of posts about the IC install, and nobody mention any mod of the upper supports of the AC condenser, only in the supports on the bottom, did you modified them or not, and why not? why only those in the bottom? . My logic tells me that the modification is to get more space for the IC core, but why only down, is the condenser inclined in some way?
And I saw in your pics that the upper supports of the IC are directly fixed to the core, its that right? did you put any grummets or any alike rubber there?
How did you make the hole in the radiator and how is the name of that paste you put in the pic, that I suppose is to fix it, isnt it? Im asking because Im planning to install my IC and dont want to screw anything
. My logic tells me that the modification is to get more space for the IC core, but why only down, is the condenser inclined in some way?And I saw in your pics that the upper supports of the IC are directly fixed to the core, its that right? did you put any grummets or any alike rubber there?
How did you make the hole in the radiator and how is the name of that paste you put in the pic, that I suppose is to fix it, isnt it? Im asking because Im planning to install my IC and dont want to screw anything
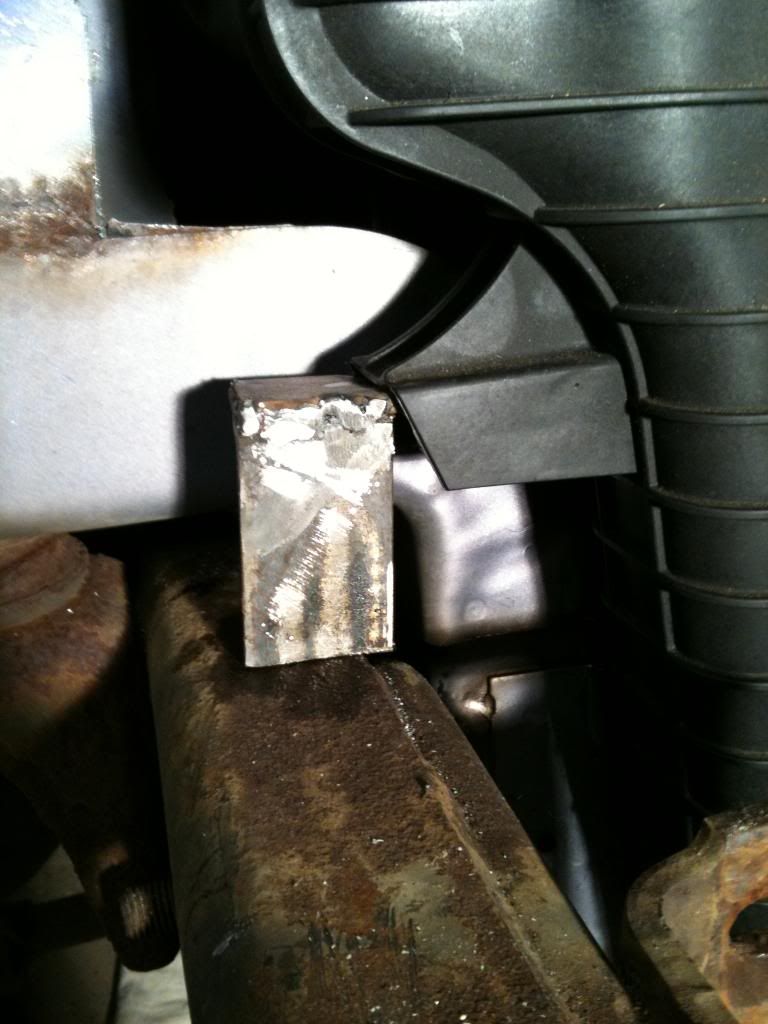
look at this pic buddy. it's the lower A/C bracket. all you gotta do is beat it down flat right there where the paint is chipped off... it is because it sticks out too far for the IC and you need all the room you can get for these things to push the ends as far to the engine compartment as possible..
Also, Steve... did you cut the hood latch support(the part that runs down to the bottom of the core support) to get the IC pushed in that much closer???? i know i had to cut mine to get it in closer, but i can't tell if you did or not.
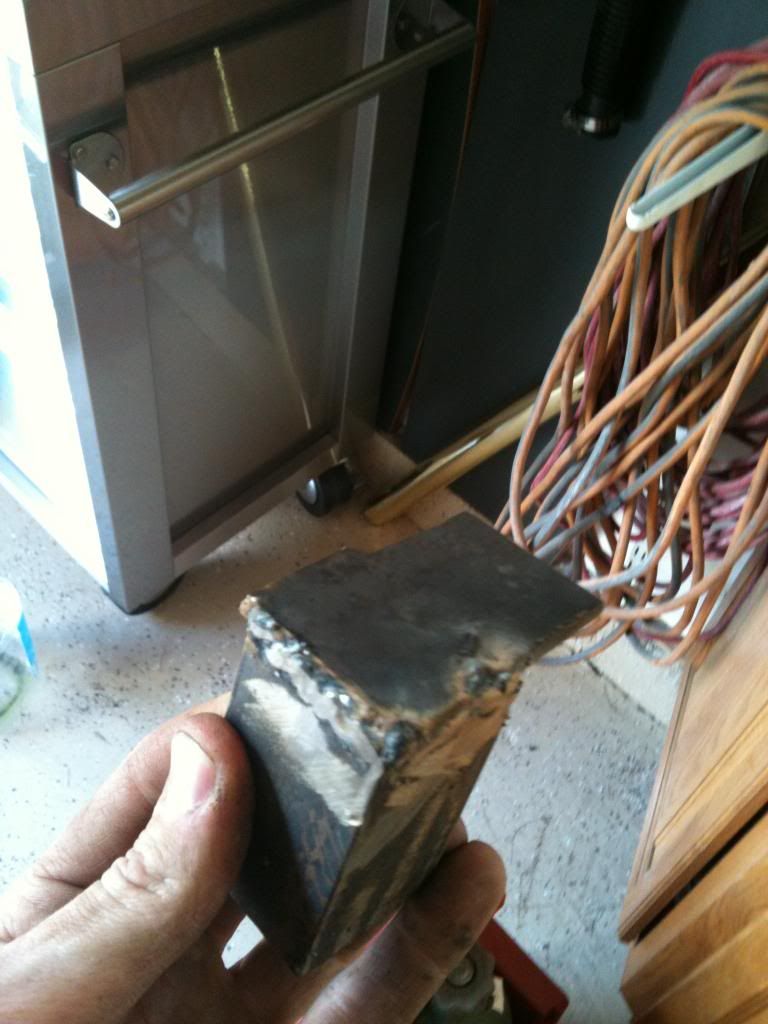
This is the driver side bracket. it used to be in an L shape, but you can cut it and clock it over to mount like this.
Trending Topics
Hotshot
Joined: Feb 2009
Posts: 10,408
Likes: 75
From: Plankinton, SD
FYI I didn't mess with my ac mounts at all, didn't know about it at the time. Mine fits, it's tight of course, but it fits. I have a trucool sandwiched b/w the ic and ac too. 1/4" b/w the coolers. Maybe if I would have known about the ac condensor brackets I wouldn't have to shim my bumper out a half inch. Oh well, it works and fits.
I don't know if you need to worry about those mounts on the frame or not. Like I said, I just get paranoid thinking of things that can go wrong and I just wanted that out of my mind so I changed it.
I don't know if you need to worry about those mounts on the frame or not. Like I said, I just get paranoid thinking of things that can go wrong and I just wanted that out of my mind so I changed it.
FTE Stories
Ford Trucks for Ford Truck Enthusiasts

Top 10 Most Expensive Ford Trucks Ever Sold on Bring a Trailer
Joe Kucinski
2027 Ford Super Duty Buyer's Guide (Every Model, Engine, & Package)
Brett Foote
Top 10 Ford Truck Tragedies
Joe Kucinski
AEV FXL Super Duty - the Super Duty Raptor Ford Doesn't Make
Brett Foote
Lobo Vs Lobo: Proof the F-150 Lobo Should Be Even Lower!
Michael S. Palmer
Ford's 2001 Explorer Sportsman Concept Looks For a New Home
Verdad Gallardo
10 Best Ford Truck Engines We Miss the Most!
Joe Kucinski
2026 Shelby F-150 Off-Road: Better Than a Raptor R?
Brett Foote
2027 Super Duty Carhartt Package First Look: 12 Things You NEED to Know!
Michael S. Palmer
FOREIGN GURU
Joined: Jul 2006
Posts: 7,655
Likes: 7
From: Celaya, Gto. MX
Rog the sawzal popped out by accident an he was a little too loose on the grip, that's just my crap luck, as for the ac condenser the top mounts are already mounted to the condensor is an inch away from the too of the radiator. You only cut and bend the bottom because it is flaired out a good couple inches and you need all the room you can. If you take your time it comes out nice, almost like it was mention to be an intercooler in there lol as for theflue I used that was jb weld to seal he outside of the radiator. Works like a charm and rated for like 50,000 psi I think? I've sealed up my old 460 block with it, awaome stuff just take your time applying it and use heat lamps. As for the rubber grommets I didn't have any in the garage, I wish I knew I needed them before hand but I picked up the if 10 mins before I started. If you look at the ic installed pic where my bolts are drilled threw, that u shape at the top is for a rubber grommet. I just lightley bolted the. So it can twist with the chassis
I would have used a plasma torch I I had one, sawzal is all I had to readily use at the Moment but I was pretty happy how it came out
I would have used a plasma torch I I had one, sawzal is all I had to readily use at the Moment but I was pretty happy how it came out
. Also, I would like to have a plasma torch to do the work, but I dont.Sorry to hear about your radiator leak, maybe the weld needed more time to cure? IDK.
here are some pics for you. Thanks to Cody(Rubberduck) for the pics of these brackets!!! i can't find the pics i took of mine right now, but i did them the same way as this shows.
look at this pic buddy. it's the lower A/C bracket. all you gotta do is beat it down flat right there where the paint is chipped off... it is because it sticks out too far for the IC and you need all the room you can get for these things to push the ends as far to the engine compartment as possible..
Also, Steve... did you cut the hood latch support(the part that runs down to the bottom of the core support) to get the IC pushed in that much closer???? i know i had to cut mine to get it in closer, but i can't tell if you did or not.

Thread Starter
|
Posting Guru
Joined: Mar 2009
Posts: 1,799
Likes: 0
depending on how big your cooler is, theres probably 2 inches in between the cooler and the condesor, you may be able to sandwhich it in there but hte thread i got on the 4doorbronco site he fabbed up a quick bracket for his and shoved it infront of the IC. no big dealaslong as you have a good secotion of angle iron. tahts alli used, awsome stuff if you have a good grinder and a few hours to have fun and drink a few beers
FOREIGN GURU
Joined: Jul 2006
Posts: 7,655
Likes: 7
From: Celaya, Gto. MX
Thread Starter
|
Posting Guru
Joined: Mar 2009
Posts: 1,799
Likes: 0
didnt see the end of your post there travis lol nope! i just put it int he vice and bent it in just a bit, bolted it back in then gave it a good boot and it worked like a charm! nice snug fit about 3/4" of room id say, no rubbing will accure. although i went ona drive today and on the way to school with the windows down i heard a slight creak whe goign around a good bumpy hill. so ill probly head down and grab some rubber gromments and drill another hole on the very top mounts to be assure myself.