
Dash and Monster Tach build
#1
 03-25-2010, 09:51 AM

Dash and Monster Tach build
This is to follow up from another thread. Below is a pictorial of how I put together my latest dash and tach housing.
This style is not for everyone but ideas are ideas and sometimes it gives a spark to something completely different.
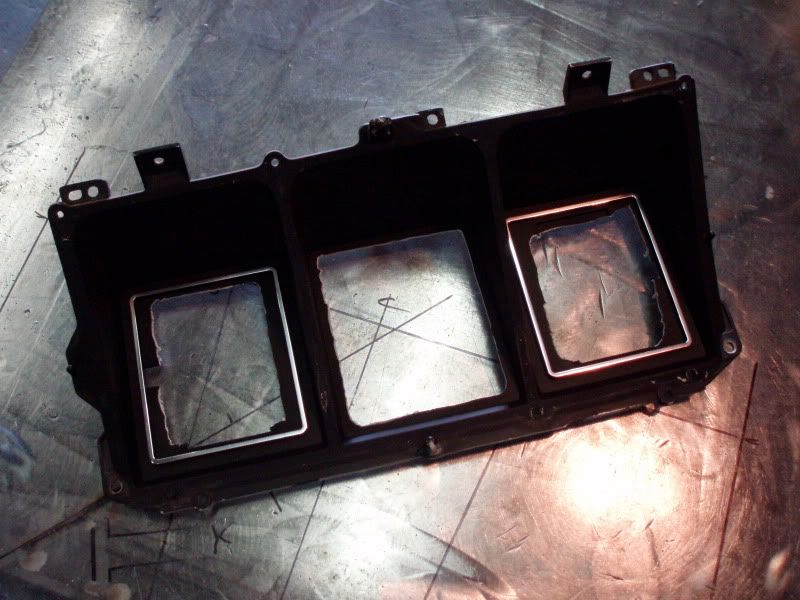
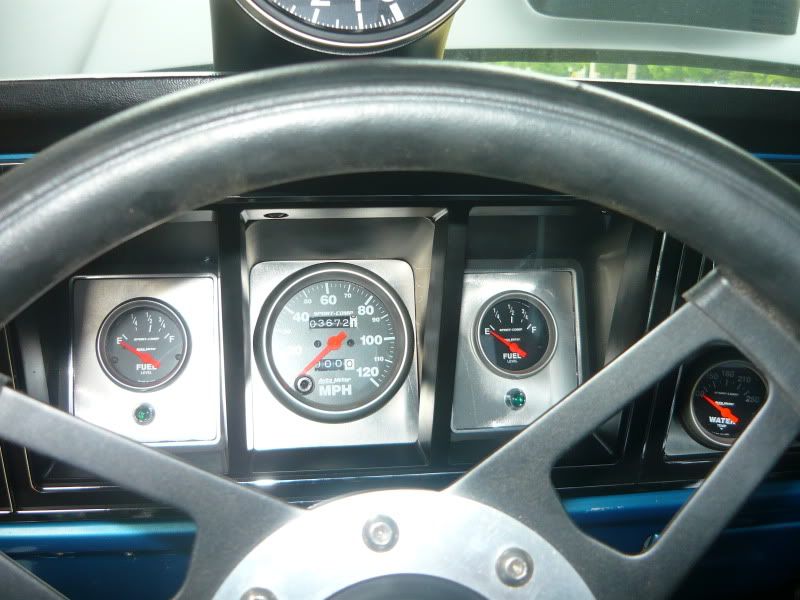
First was to get a junkyard dash pod, a few minutes of disassemly will get you to the basic housing. Now you have the choice of keeping the ribs and working with three areas or opening it up completely. I opted for the ribs and with my locations sorted out I clearanced the empty housing for the gauges, in this case Autometer 3 3/8" speedo and two 2 1/16" fuel level gauges (one for fuel and one for the water/methanol tank).

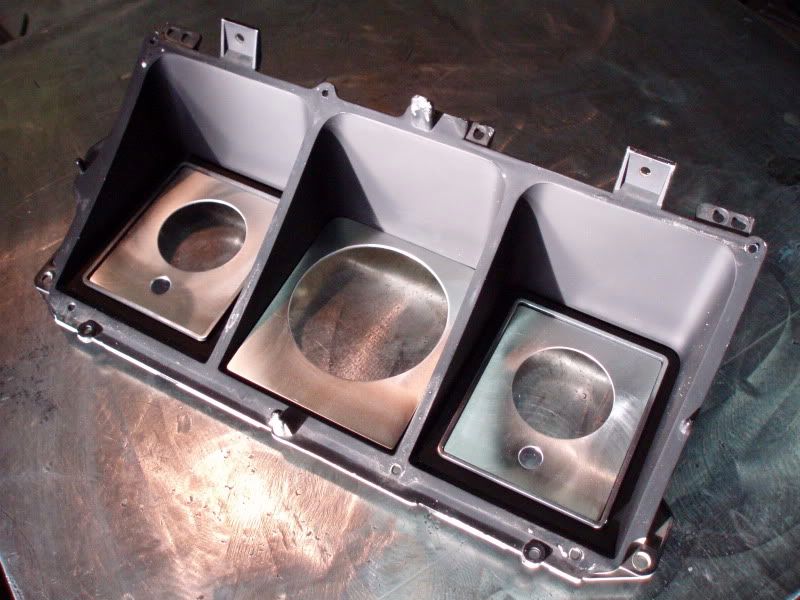
Now to fit them out comes the dremel again and the center section was cutout completely and the two sides just inside the trim ring.
Next was to cut the aluminum plates to fit in the dash, I had another one for fitting puposes so as not to scape the paint up.
Since the truck did not have AC I was able to use the side portion for switches and the stereo delete gave me room for more gauges. Once again aluminum plate was used and epoxied into place.
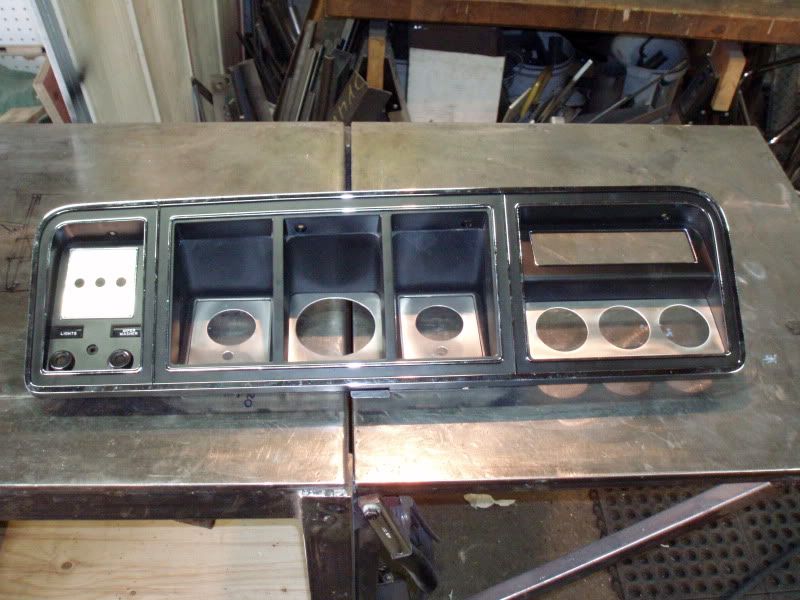
A little test fitting to check for clearances, LEDs are used for blinkers. There is no high beam light, I use 55/100 watt halogen bulbs so I know when they are on .
.
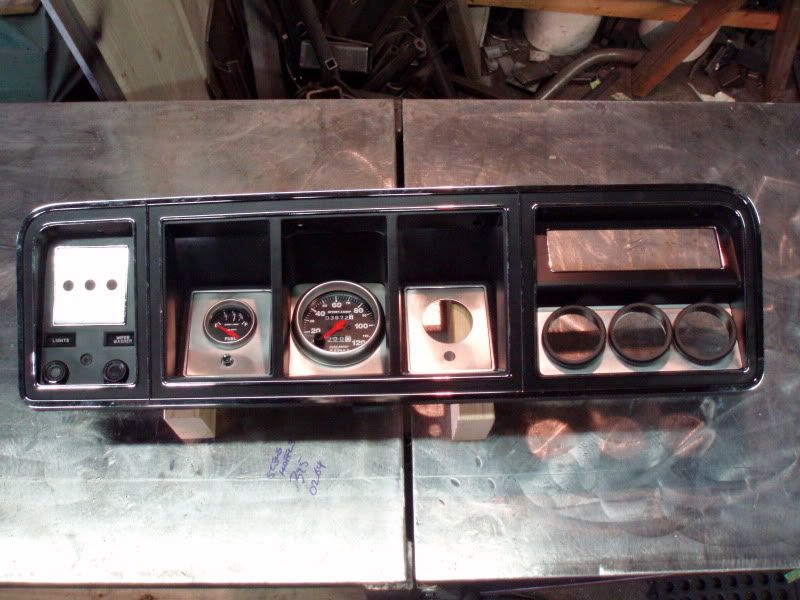
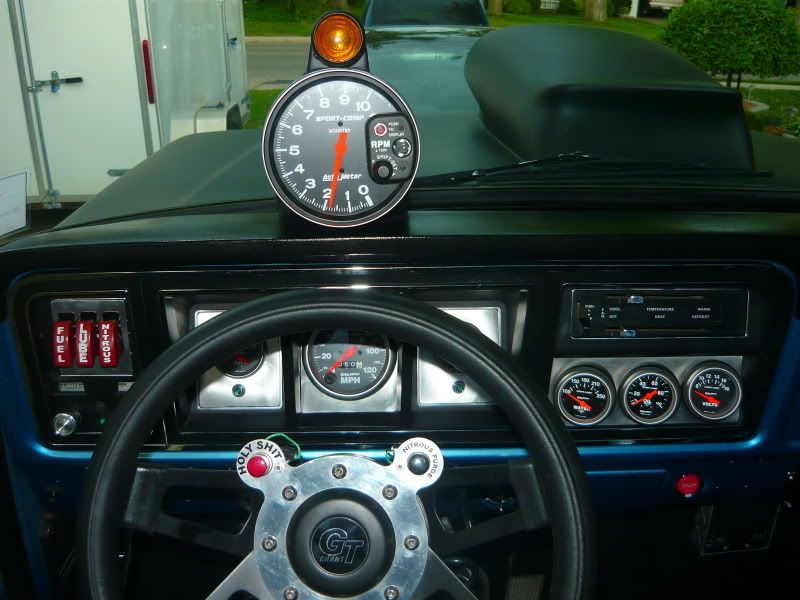
Finally the assembley;
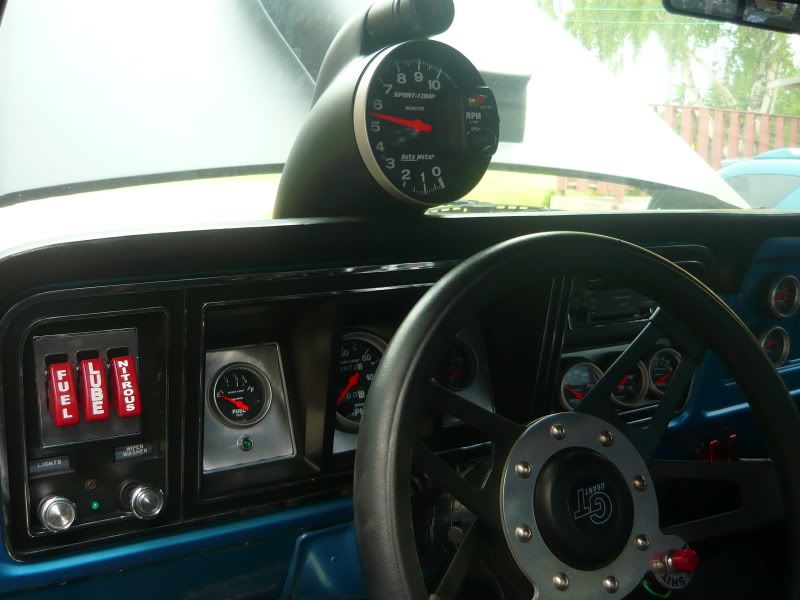
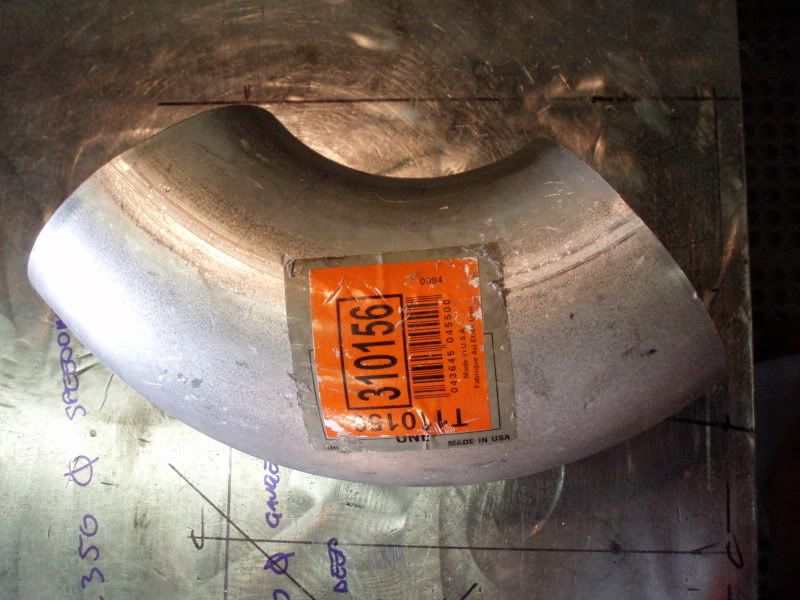
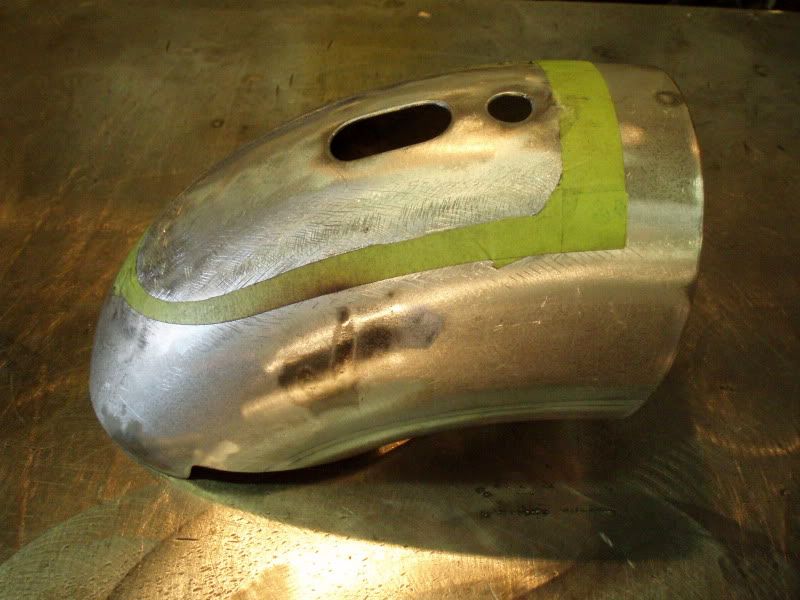
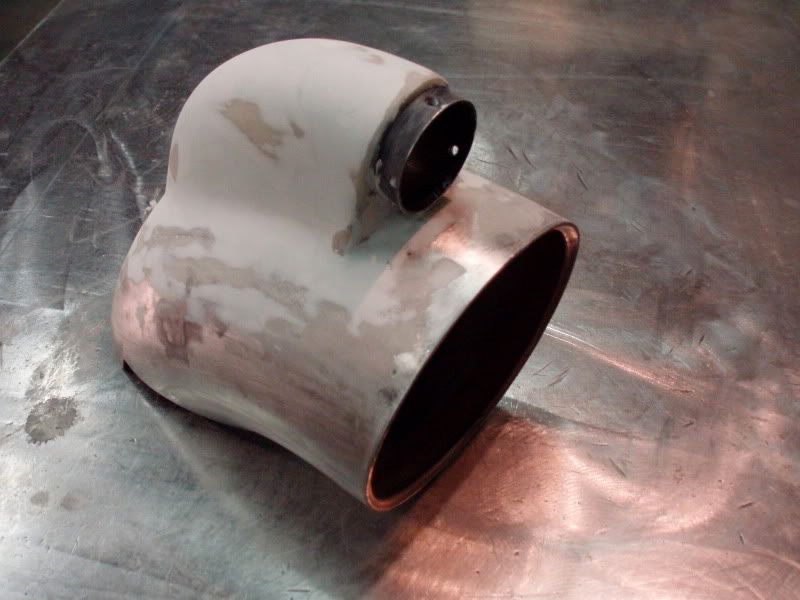
So with that done I wanted something for the monster tach. I saw an episode of Muscle Car when Lou was on and he mentioned using a piece of exhaust pipe as a housing. Well try to find a tight radius 5" exhaust pipe, I finally got one;
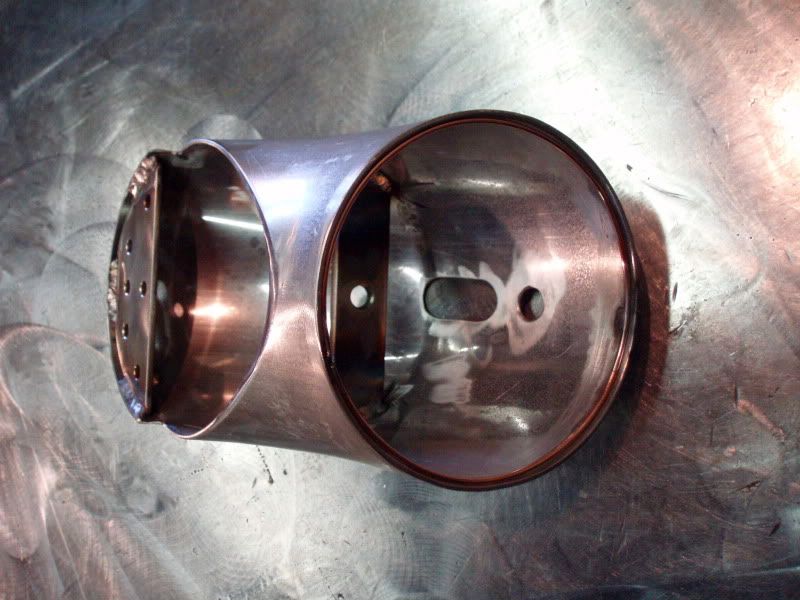
Then a template of how it would need to be cut was taken from the truck with cardboard, the base was trimmed and the front to ensure it didn't overhang the dash pad. The shift light was taken apart to see what was in the big tube, guess what....just a bulb as everything else is in the tach housing. Some holes were cut to allow access for wiring.
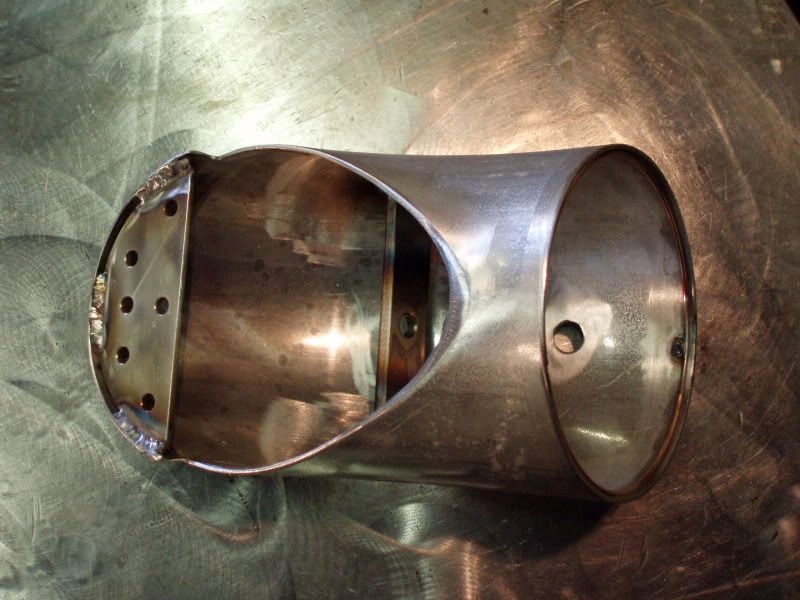
Brackets were welded inside to support the tach and allow mounting. The monster tach is back heavy so the case was removed and a bolt welded on to allow support in the rear.
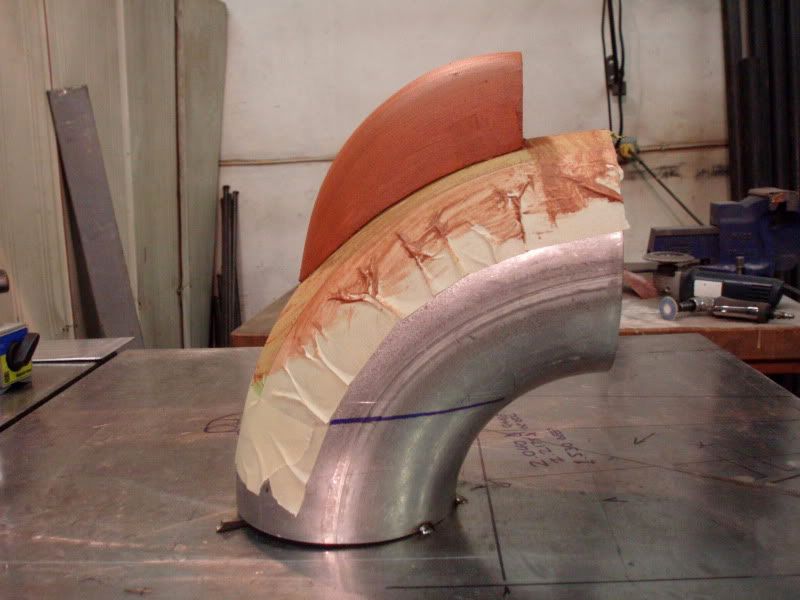
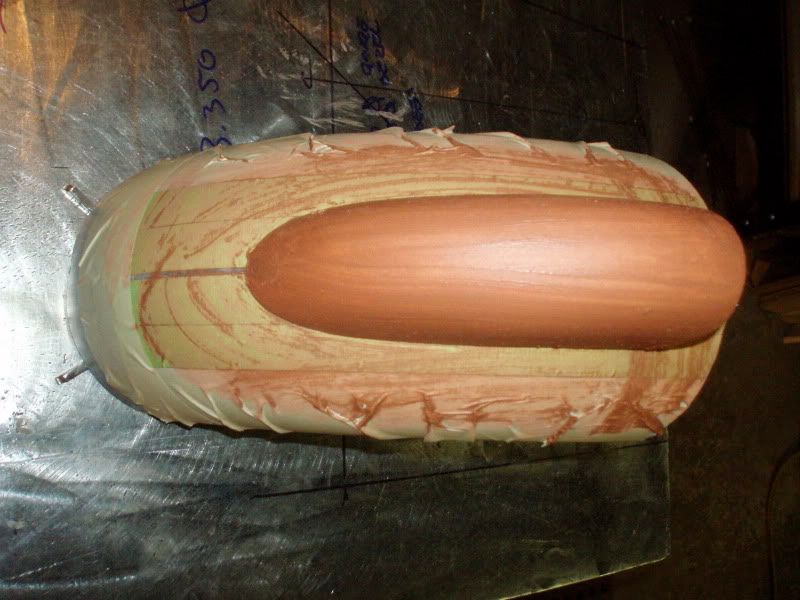
So how to work in the shift light, I knew the shape I wanted but after several failed attempts with metal I tried fiberglass. Sign foam was used for the core shape and then waxed and fiberglassed. The front of the shift light housing was used to allow access to the bulb;
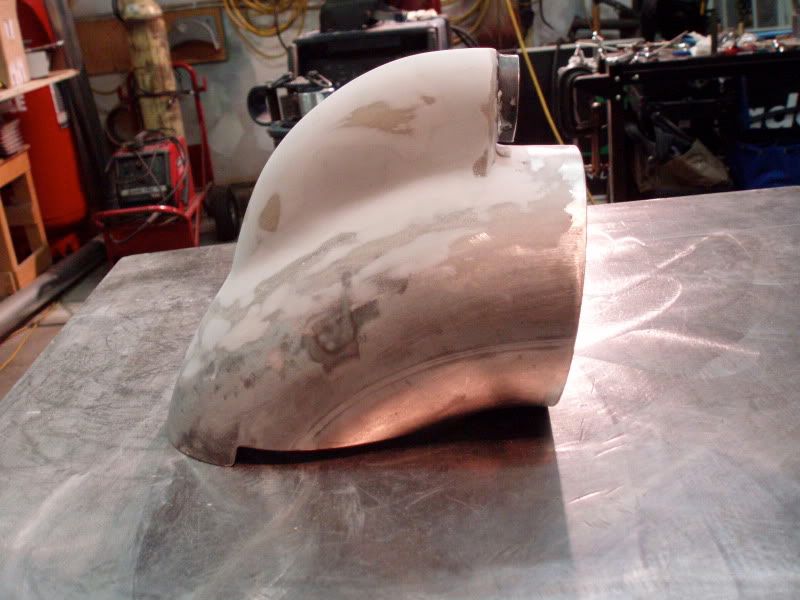
I took the housing to a painter friend who gave it a skim of body fill to ensure smooth and then shot it in a matte black;

And finally mounted to the dash. It's secure and even though it's very "in your face" you look past it when driving but you sure know when you bang off the shift limiter, retina burn when the light cover is off

Hope that helps get someone else motivated to try something soon.
This style is not for everyone but ideas are ideas and sometimes it gives a spark to something completely different.
First was to get a junkyard dash pod, a few minutes of disassemly will get you to the basic housing. Now you have the choice of keeping the ribs and working with three areas or opening it up completely. I opted for the ribs and with my locations sorted out I clearanced the empty housing for the gauges, in this case Autometer 3 3/8" speedo and two 2 1/16" fuel level gauges (one for fuel and one for the water/methanol tank).

Now to fit them out comes the dremel again and the center section was cutout completely and the two sides just inside the trim ring.

Next was to cut the aluminum plates to fit in the dash, I had another one for fitting puposes so as not to scape the paint up.

Since the truck did not have AC I was able to use the side portion for switches and the stereo delete gave me room for more gauges. Once again aluminum plate was used and epoxied into place.

A little test fitting to check for clearances, LEDs are used for blinkers. There is no high beam light, I use 55/100 watt halogen bulbs so I know when they are on
.
Finally the assembley;


So with that done I wanted something for the monster tach. I saw an episode of Muscle Car when Lou was on and he mentioned using a piece of exhaust pipe as a housing. Well try to find a tight radius 5" exhaust pipe, I finally got one;

Then a template of how it would need to be cut was taken from the truck with cardboard, the base was trimmed and the front to ensure it didn't overhang the dash pad. The shift light was taken apart to see what was in the big tube, guess what....just a bulb as everything else is in the tach housing. Some holes were cut to allow access for wiring.

Brackets were welded inside to support the tach and allow mounting. The monster tach is back heavy so the case was removed and a bolt welded on to allow support in the rear.


So how to work in the shift light, I knew the shape I wanted but after several failed attempts with metal I tried fiberglass. Sign foam was used for the core shape and then waxed and fiberglassed. The front of the shift light housing was used to allow access to the bulb;


I took the housing to a painter friend who gave it a skim of body fill to ensure smooth and then shot it in a matte black;

And finally mounted to the dash. It's secure and even though it's very "in your face" you look past it when driving but you sure know when you bang off the shift limiter, retina burn when the light cover is off

Hope that helps get someone else motivated to try something soon.

#3
03-25-2010, 01:25 PM
Junior User
Join Date: Oct 2009
Location: Fargo North Dakota
Posts: 95
Likes: 0
Received 0 Likes
on
0 Posts
#4
03-25-2010, 03:07 PM

Senior User
Join Date: Jan 2004
Location: Carmichael, ca
Posts: 156
Likes: 0
Received 0 Likes
on
0 Posts
#5
03-25-2010, 03:15 PM
#6
03-25-2010, 05:49 PM
Senior User
Join Date: Jul 2009
Location: Bangor, WA
Posts: 141
Likes: 0
Received 0 Likes
on
0 Posts
#7
03-25-2010, 05:59 PM
Trending Topics
#8
03-25-2010, 06:03 PM

#9
03-25-2010, 06:04 PM
#10
03-25-2010, 06:15 PM
I had all kinds of ideas for mounting the gauge plate, each one more complicated then the last. I thought I would try epoxy as a KISS principle test run and to my surprise it held great.
berry1234, I understand it's a love it or hate thing. When it's being driven hard it helps out but for a daily driver I wouldn't recommend it. Kinda like putting lambo door hinges on, unless that's your thing
berry1234, I understand it's a love it or hate thing. When it's being driven hard it helps out but for a daily driver I wouldn't recommend it. Kinda like putting lambo door hinges on, unless that's your thing

 .
.
 Isn't that the truth
#15
03-25-2010, 06:56 PM

Elder User
Join Date: Aug 2007
Location: LaGrande,Ore
Posts: 537
Likes: 0
Received 0 Likes
on
0 Posts